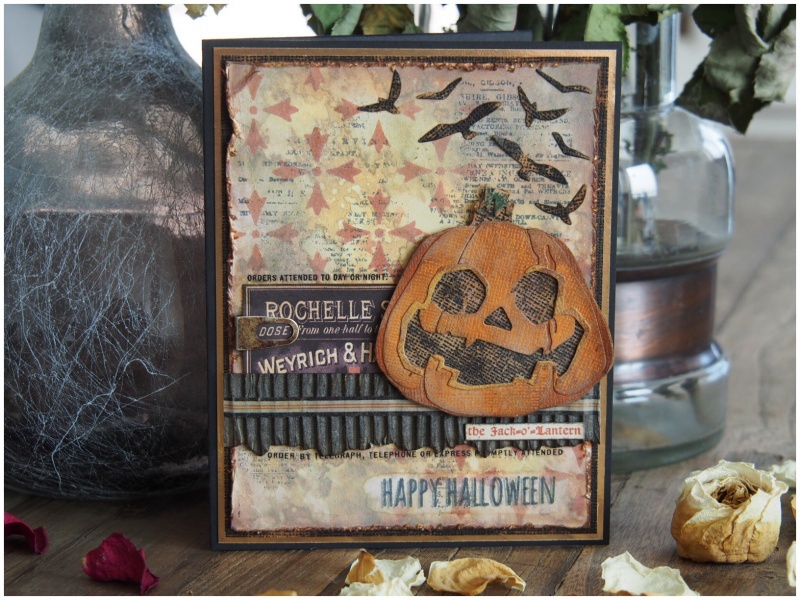
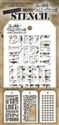
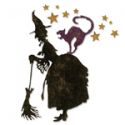
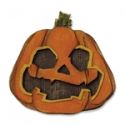
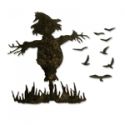
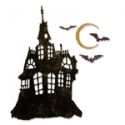
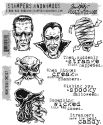
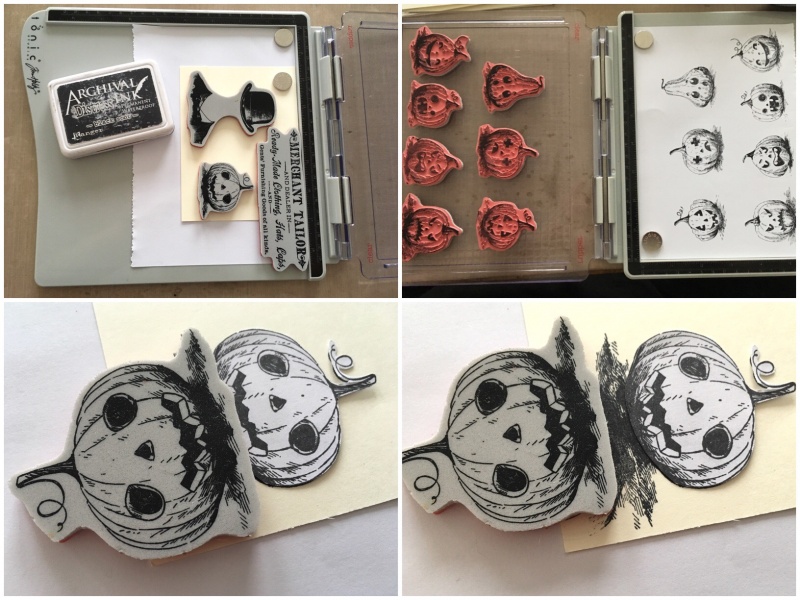
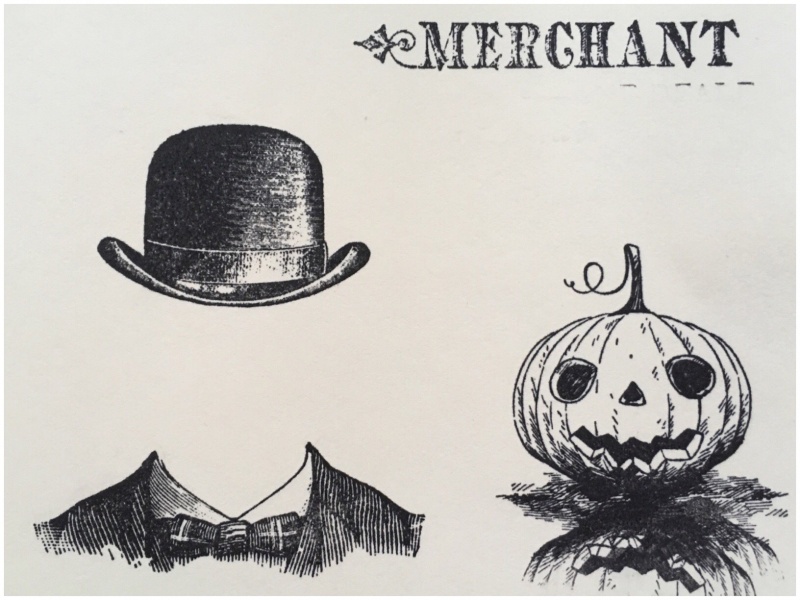
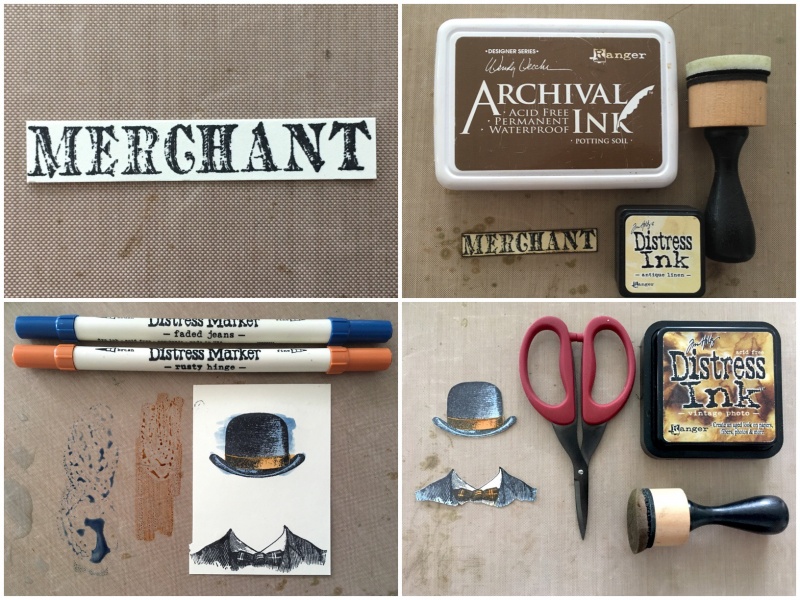
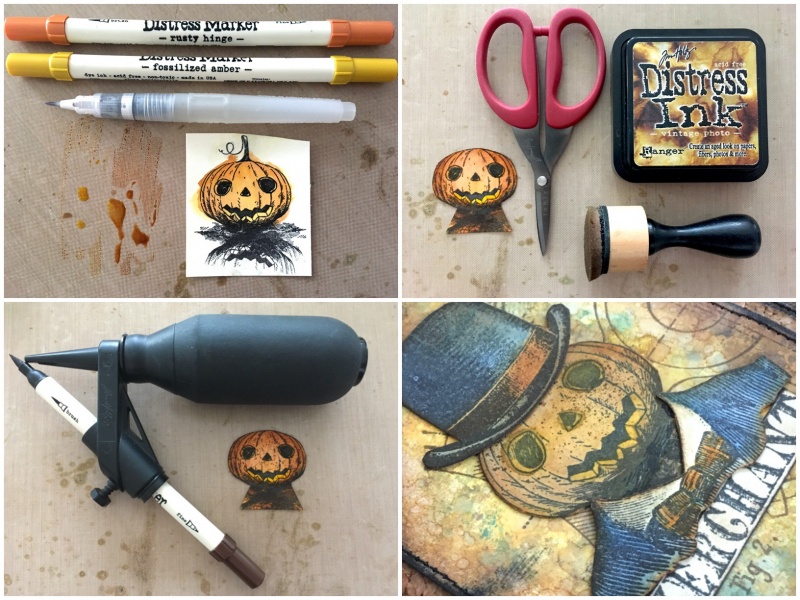
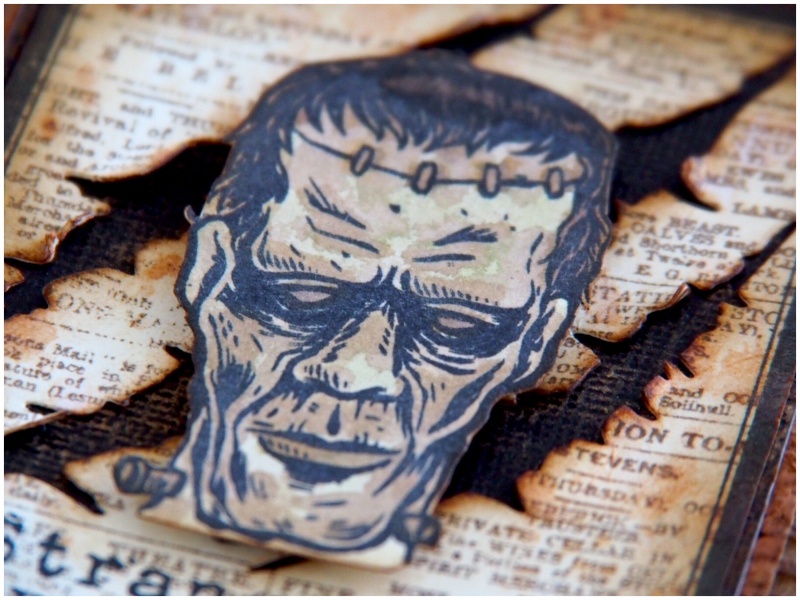
‘Halloween’ Category

  1. The Witches Boutique

    31st October, 2018 by iGirlZoe

    Happy Halloween

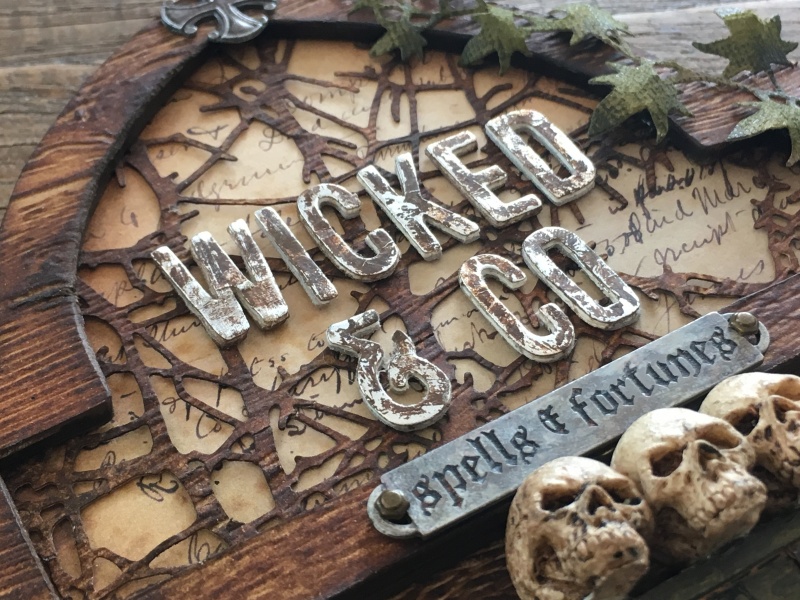
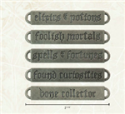
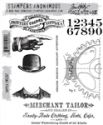
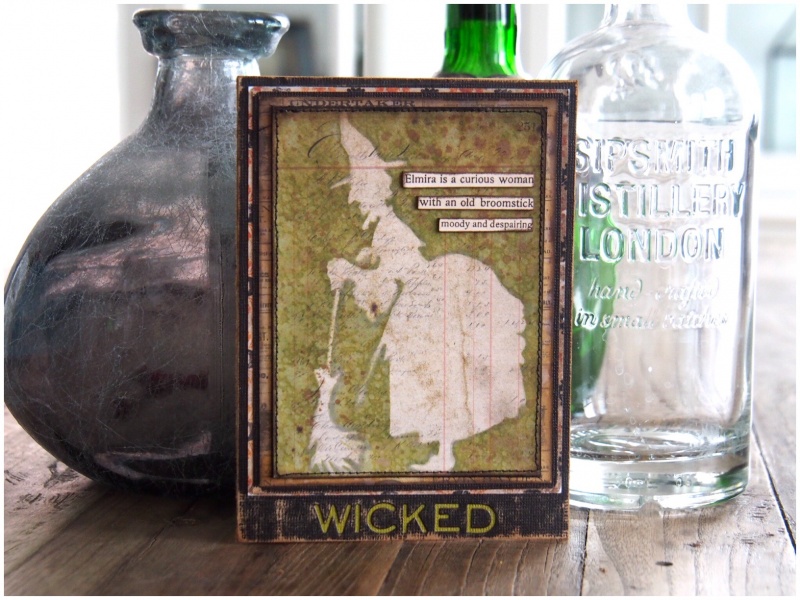
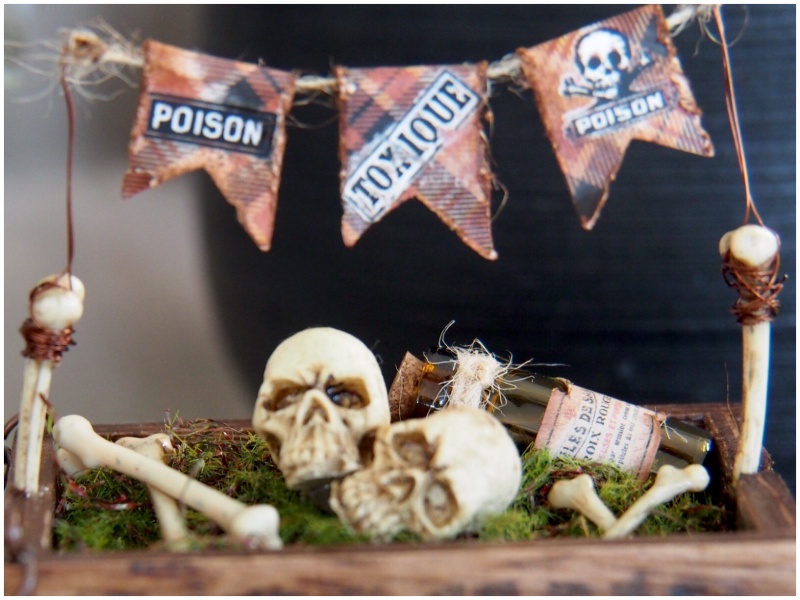
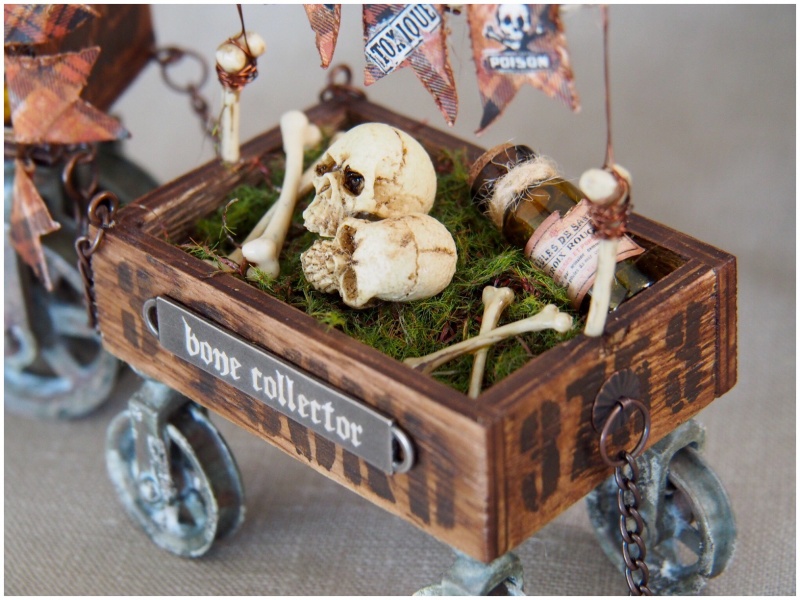
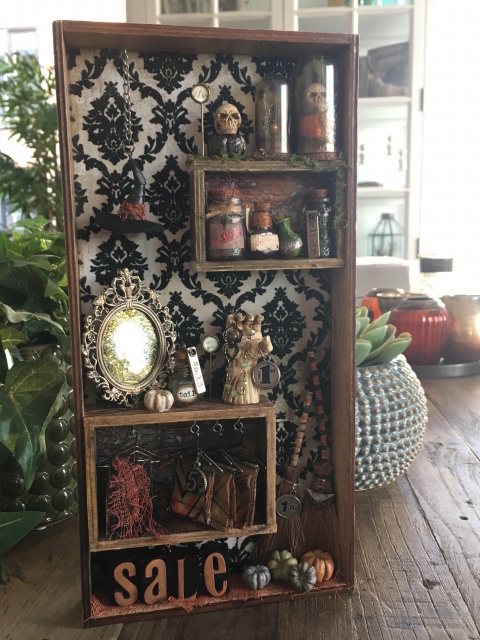
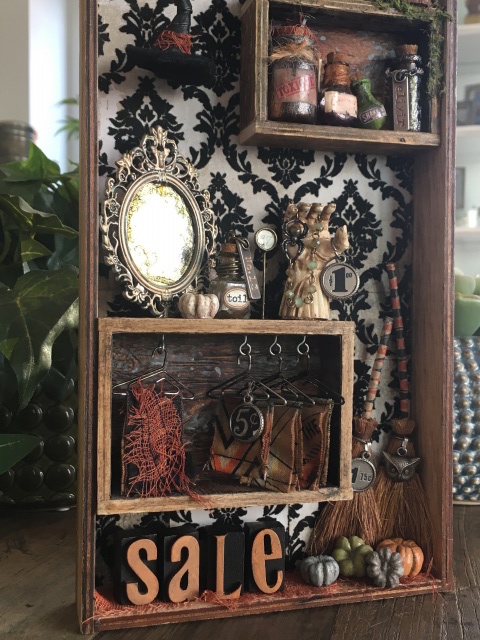
    The doors of the Wicked Witches Boutique creak open for business… step inside and behold the poisonous potions, pickled pumpkins, fine fashions, gorgeous gems, bedazzled broomsticks and haunted hats.

    iGirlZoe: Tim Holtz, idea-ology, distress ink, mixed media, halloween, witches boutique

    iGirlZoe: Tim Holtz, idea-ology, distress ink, mixed media, halloween, witches boutique

    iGirlZoe: Tim Holtz, idea-ology, distress ink, mixed media, halloween, witches boutique
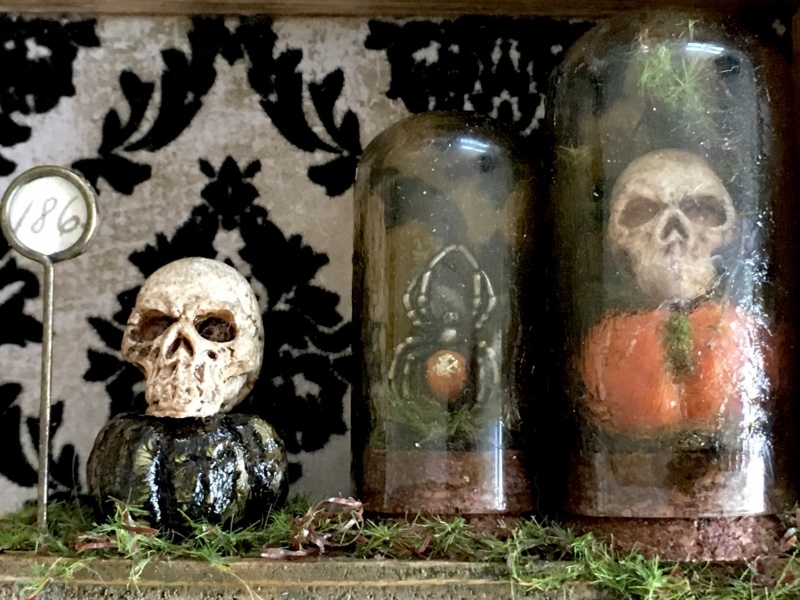
    These idea-ology corked domes have been long time favourites of mine. I added a pumpkin and skull inside one and a spider from the adornment halloween set to the other. These spiders are so creepy I can barely hold them. The trinket pin on the end makes the perfect price stick.

    iGirlZoe: Tim Holtz, idea-ology, distress ink, mixed media, halloween, witches boutique
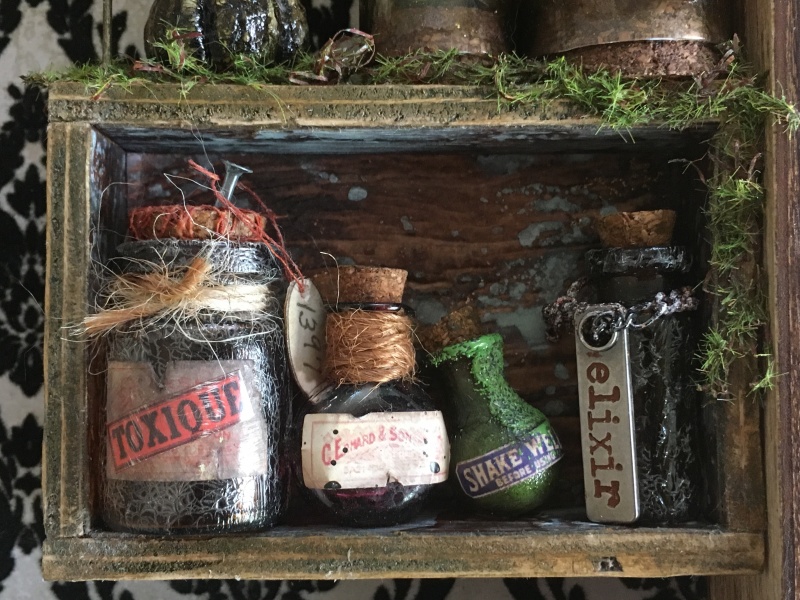
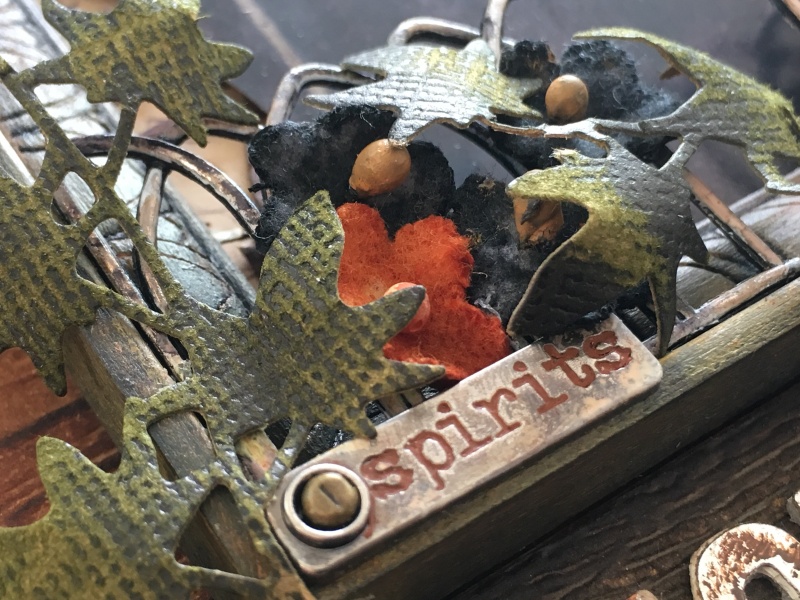
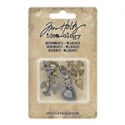
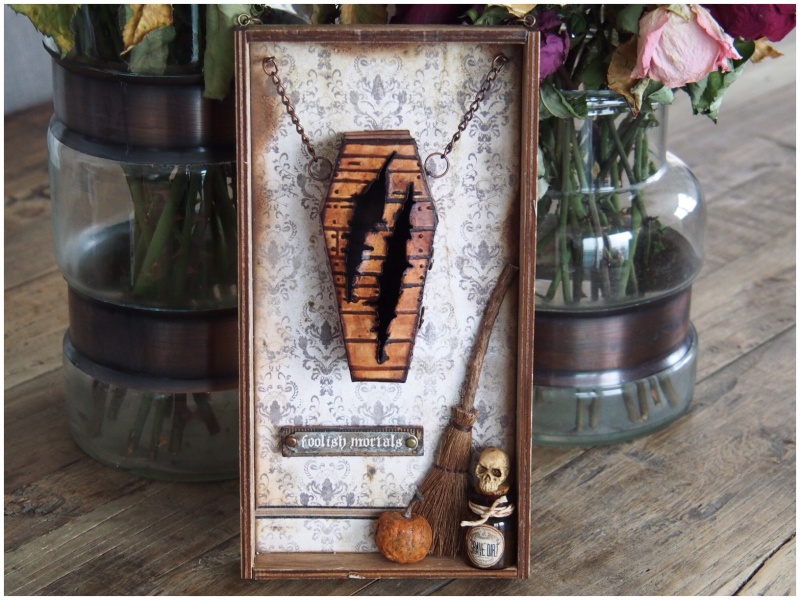
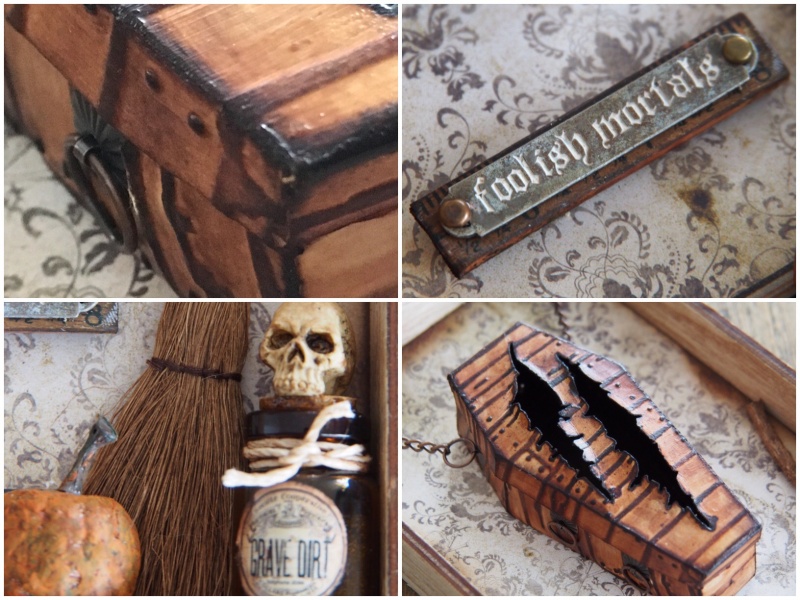
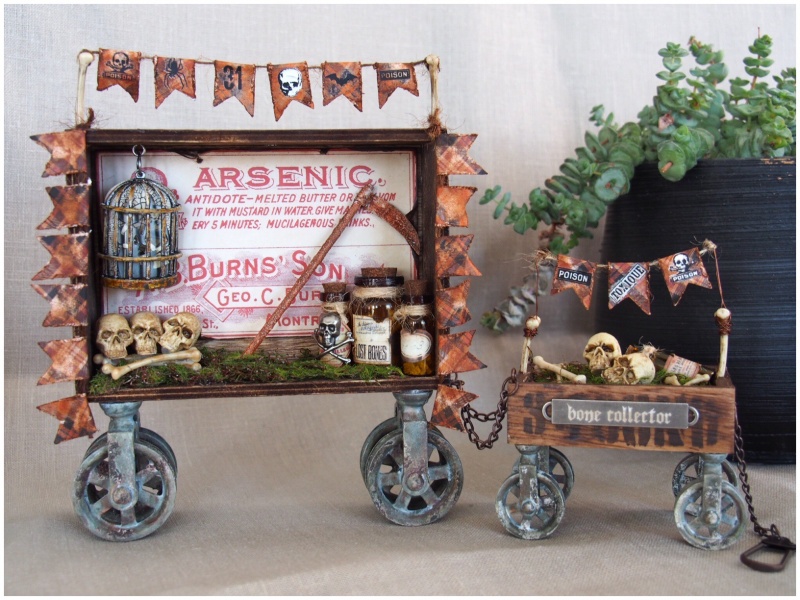
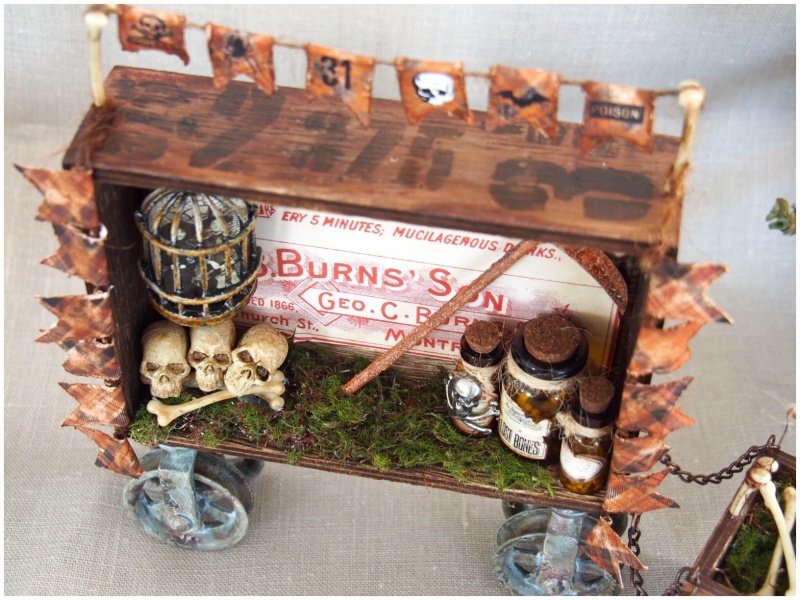
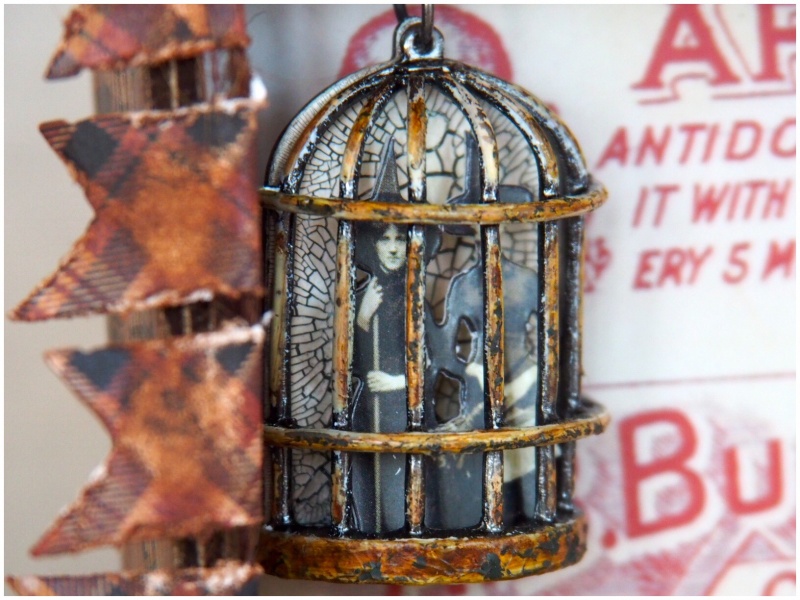
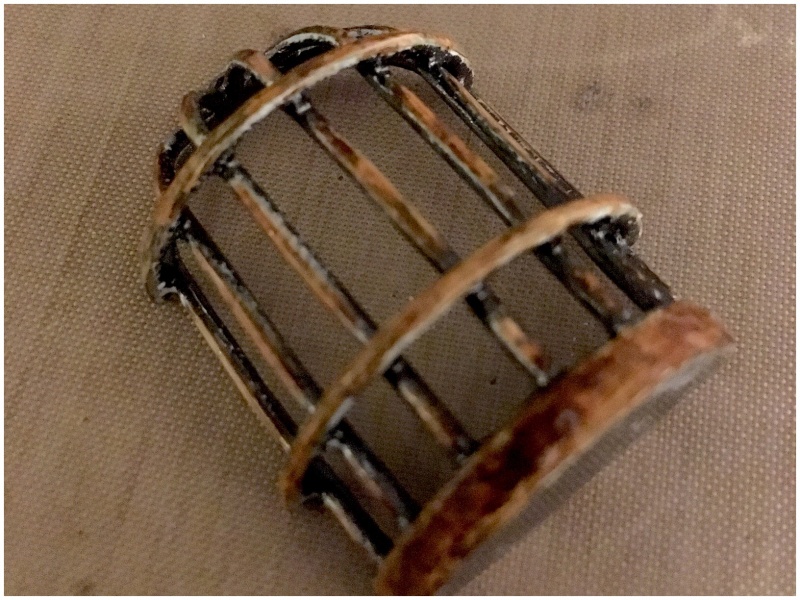
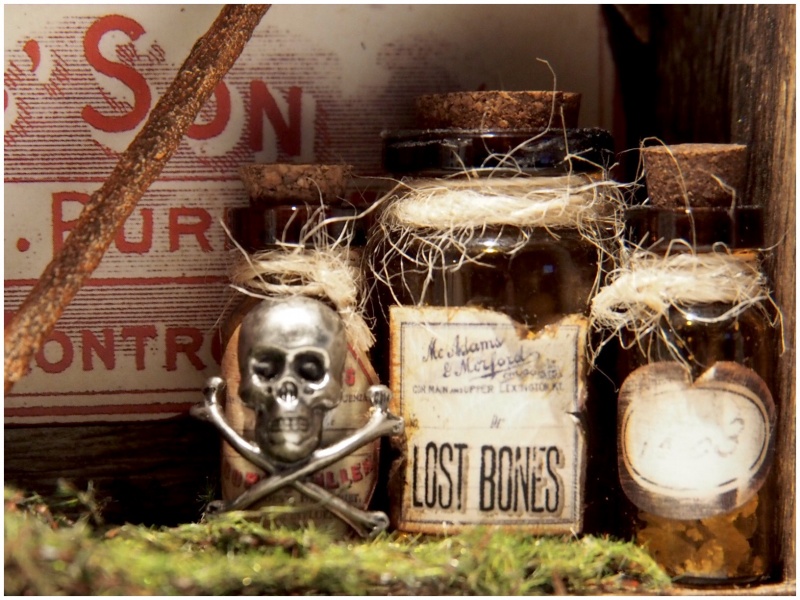
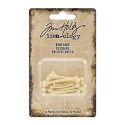
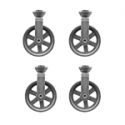
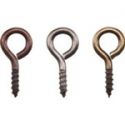
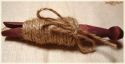
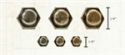
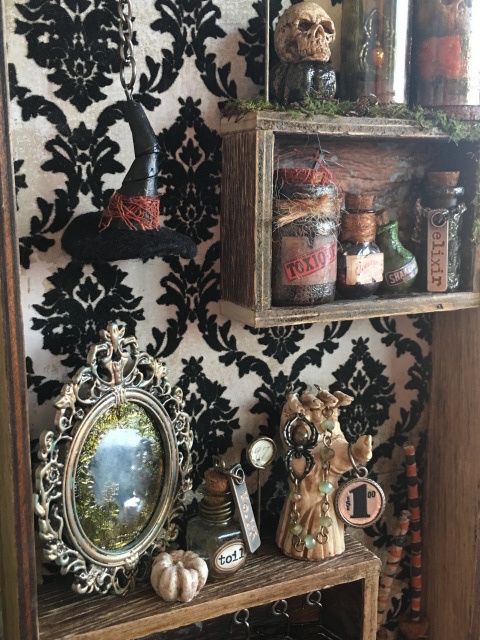
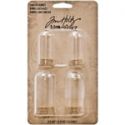
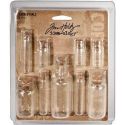
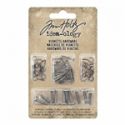
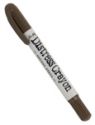
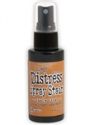
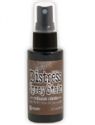
    Altering bottles is another favourite when it comes to the idea-ology range. I love love love the assortment of bottles available. I used bottles from the apothecary vials, tiny vials and corked vials sets. I added crackle glaze, ephemera and melted embossing powder on them to alter them. I chained a story stick around one. I pushed a nail from the vintage hardware pack into cork stopper of one bottle. I love the pieces in the vintage hardware pack and used them throughout this project.

    iGirlZoe: Tim Holtz, idea-ology, distress ink, mixed media, halloween, witches boutique
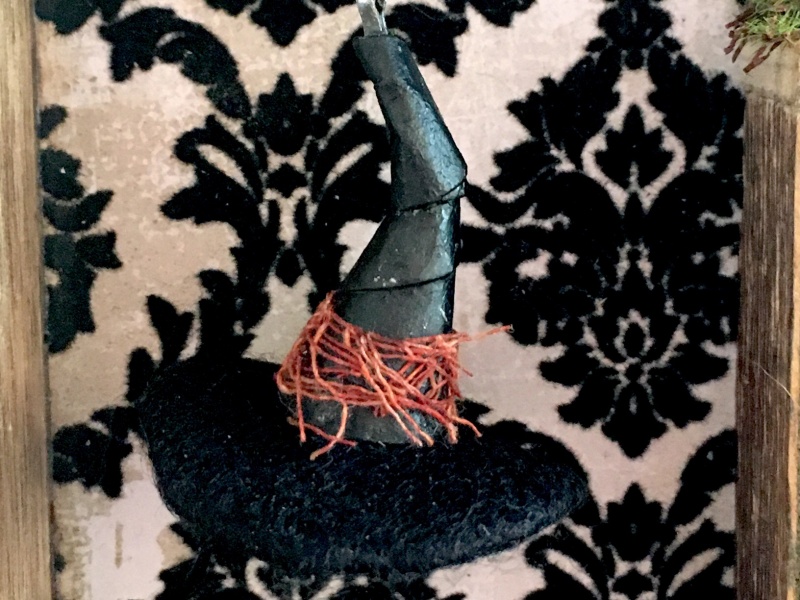
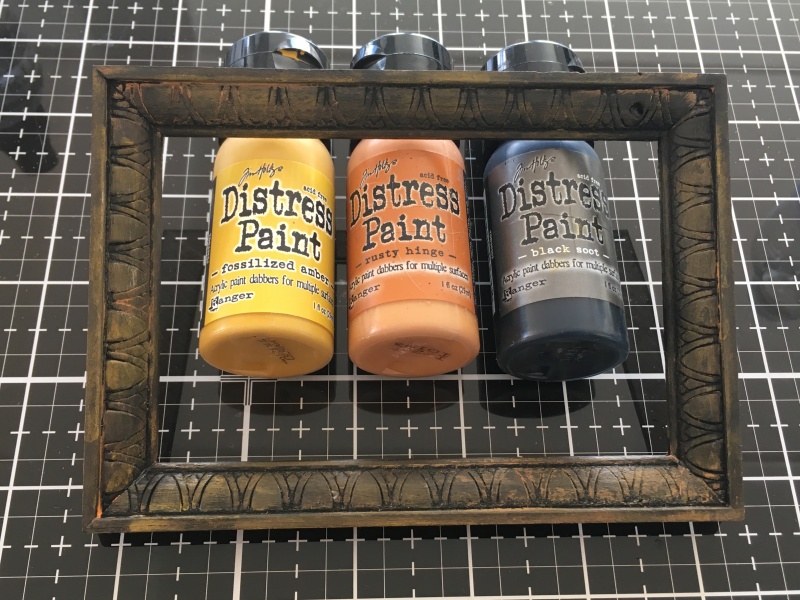
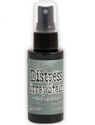
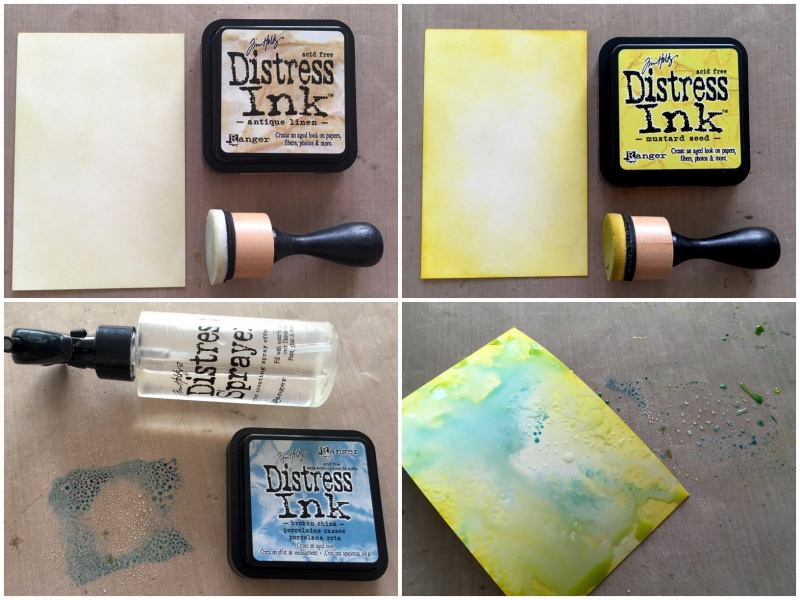
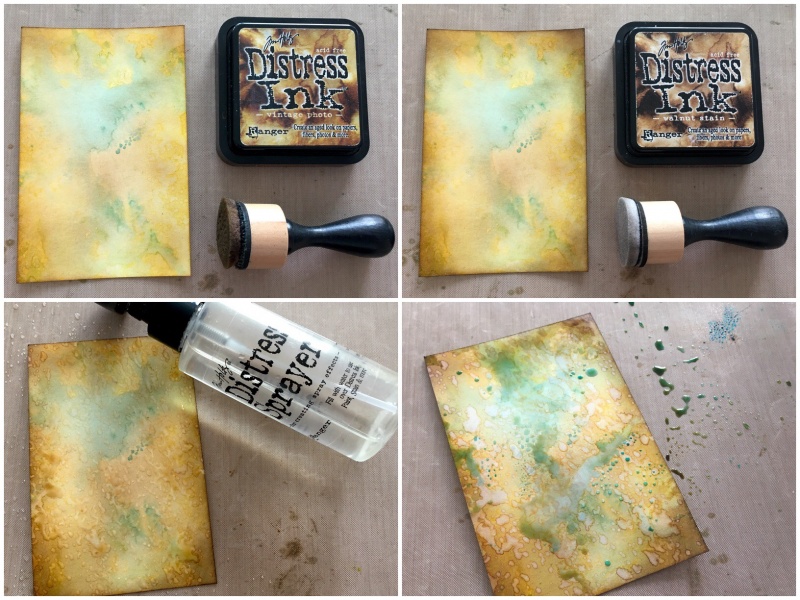
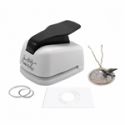
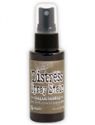
    This witches hat evolved through experimentation and a crazy idea. I used the tag press to create a hat base. It provided something to wrap the felt around and could be bent to give that unique curve to the brim. The peak is made from paper circles, cut with the paper punch that matches the tag press set and stacked on top of each other. Painted with a layer of distress collage medium and covered in black soot distress paint. A scrap piece of idea-ology mummy cloth sprayed with rusty hinge distress spray gives it a little flair. I’ve posted a short step by step HERE. It’s really easy and I have another idea for an extra home decor piece. It’s okay to continue to make halloween stuff into November, right?!

    iGirlZoe: Tim Holtz, idea-ology, distress ink, mixed media, halloween, witches boutique
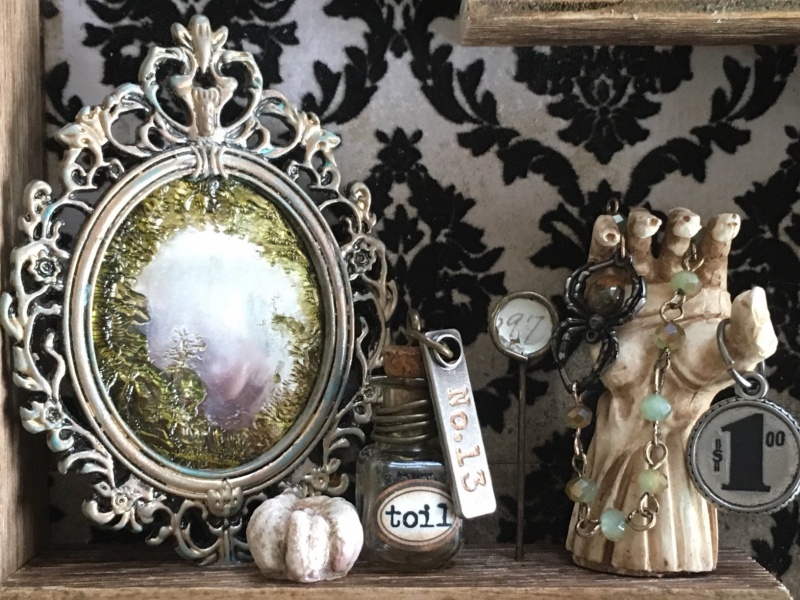
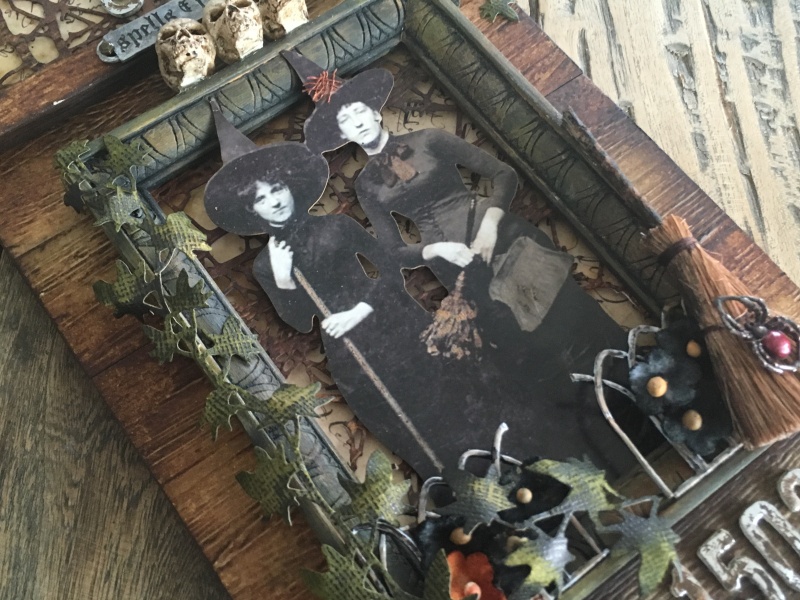
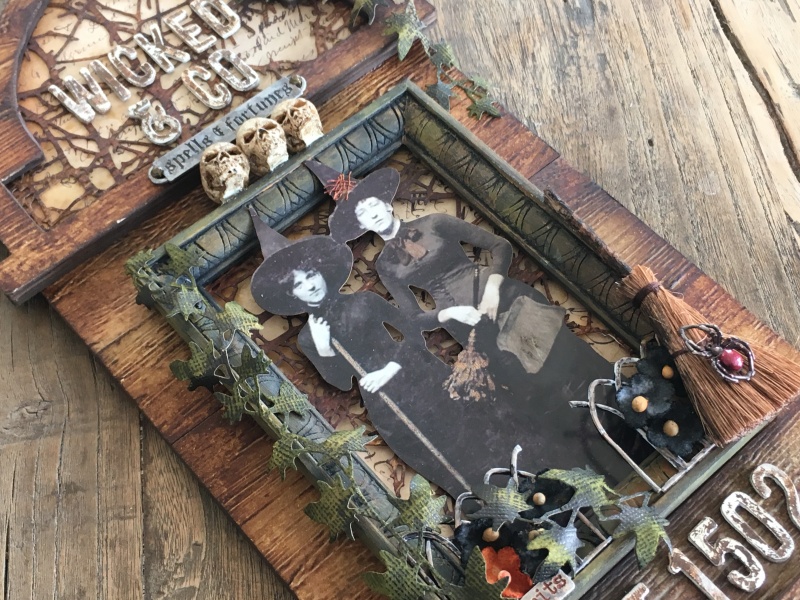
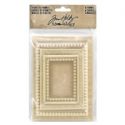
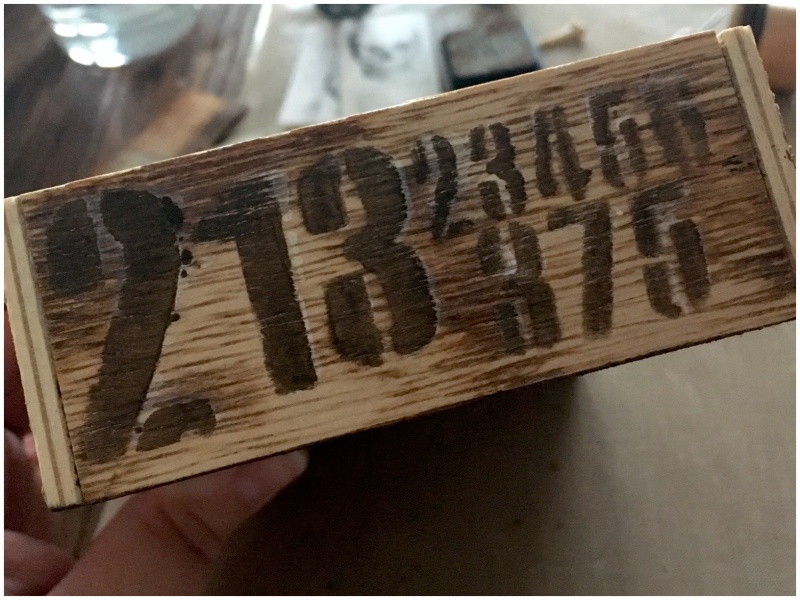
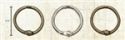
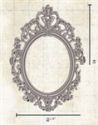
    This aged mirror using the idea-ology baroque frame will surely tell you who the fairest of them all is. Pickled pumpkins and bottles, this time pungent perfume “toil number 13” …a witches favourite.

    iGirlZoe: Tim Holtz, idea-ology, distress ink, mixed media, halloween, witches boutique
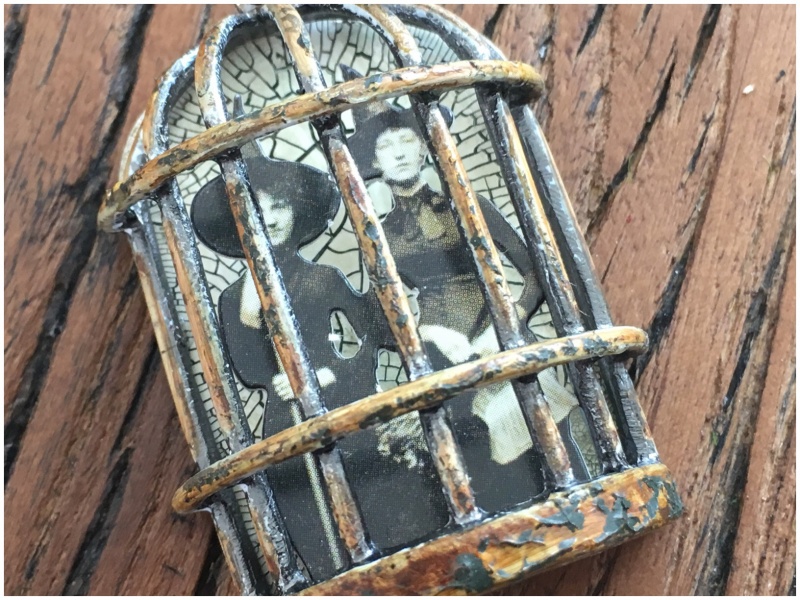
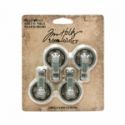
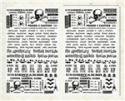
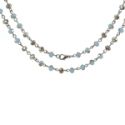
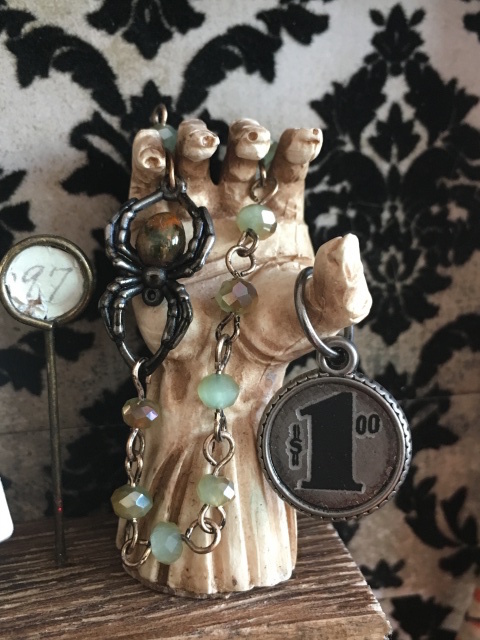
For just $1 pick up this frightfully fanciful chocker, it’s sure to take your breath away…

    iGirlZoe: Tim Holtz, idea-ology, distress ink, mixed media, halloween, witches boutique
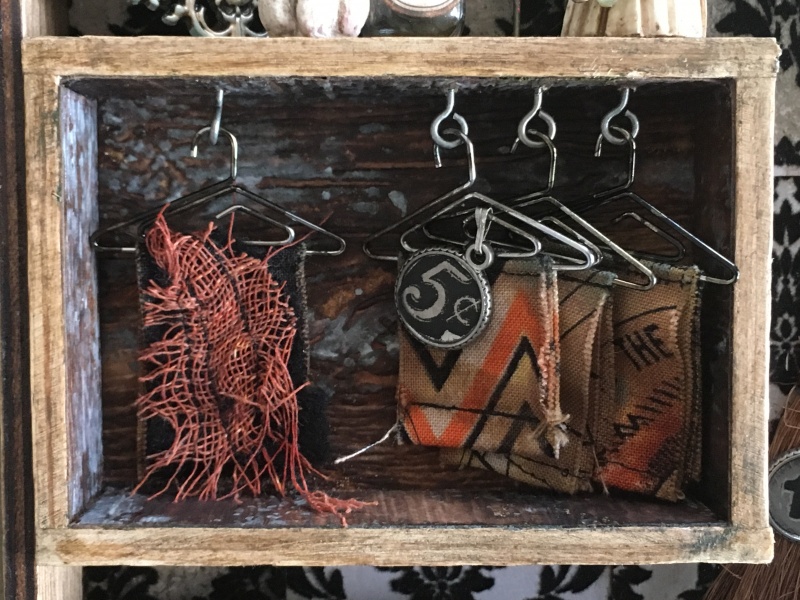
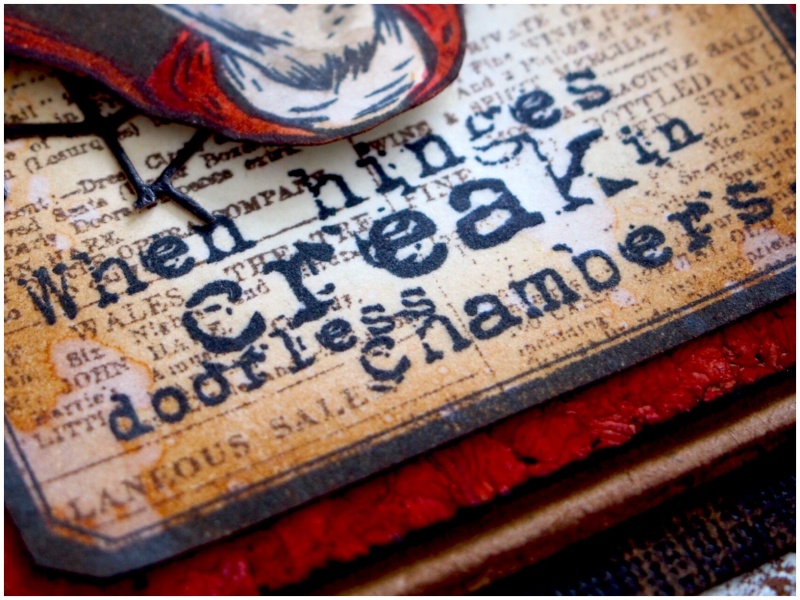
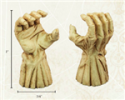
    Cloak Couture! made to measure for the discerning witch…

    iGirlZoe: Tim Holtz, idea-ology, distress ink, mixed media, halloween, witches boutique
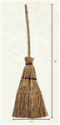
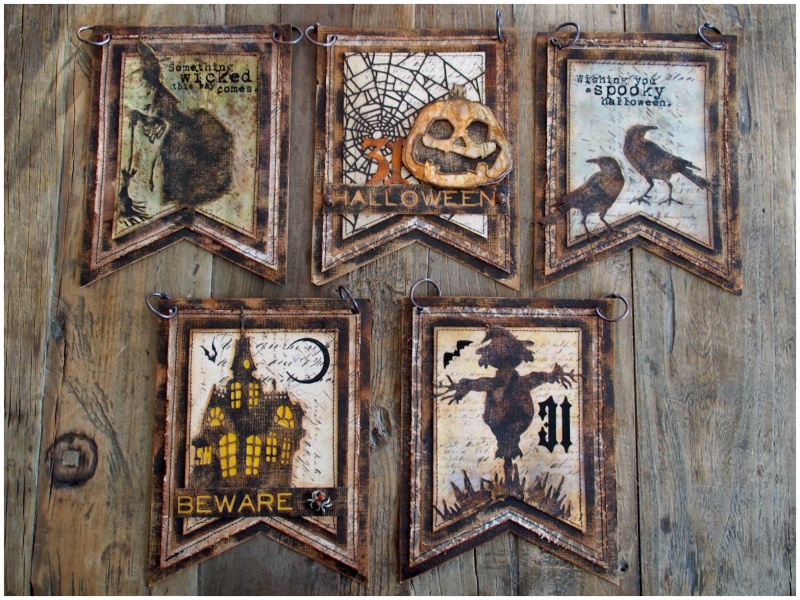
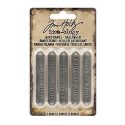
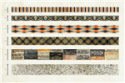
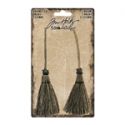
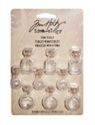
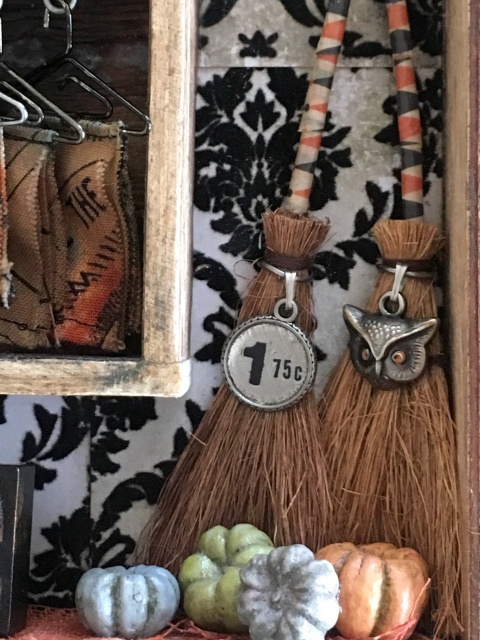
Bedazzled brooms in a variety of broomstick lengths, ask about our exciting new broom accessories…

    iGirlZoe: Tim Holtz, idea-ology, distress ink, mixed media, halloween, witches boutique
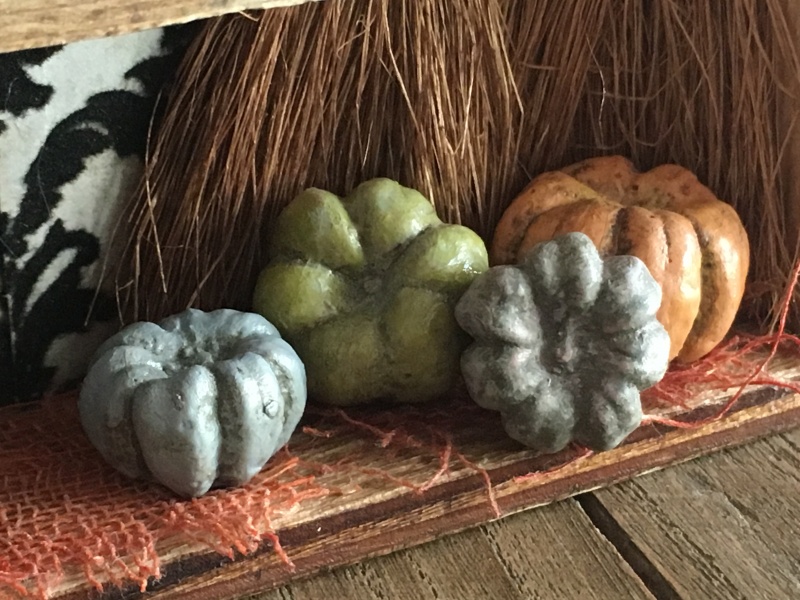
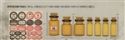
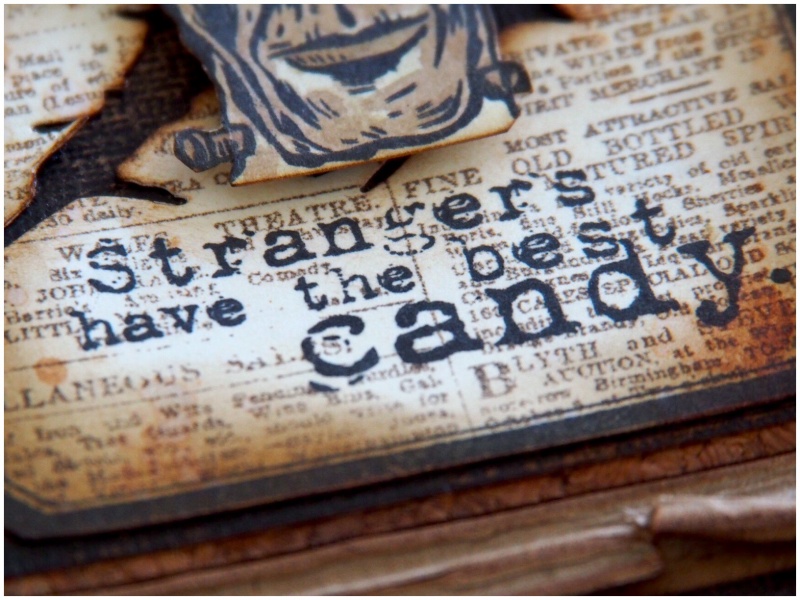
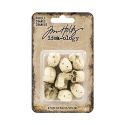
    Pickled pumpkins, blended by head witch and cauldron specialist, Paula Cheney, (check out her Fall Pumpkin blog post).

    iGirlZoe: Tim Holtz, idea-ology, distress ink, mixed media, halloween, witches boutique
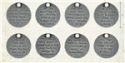
    Don’t forget your coupons. Sale ends Friday!

    iGirlZoe: Tim Holtz, idea-ology, distress ink, mixed media, halloween, witches boutique
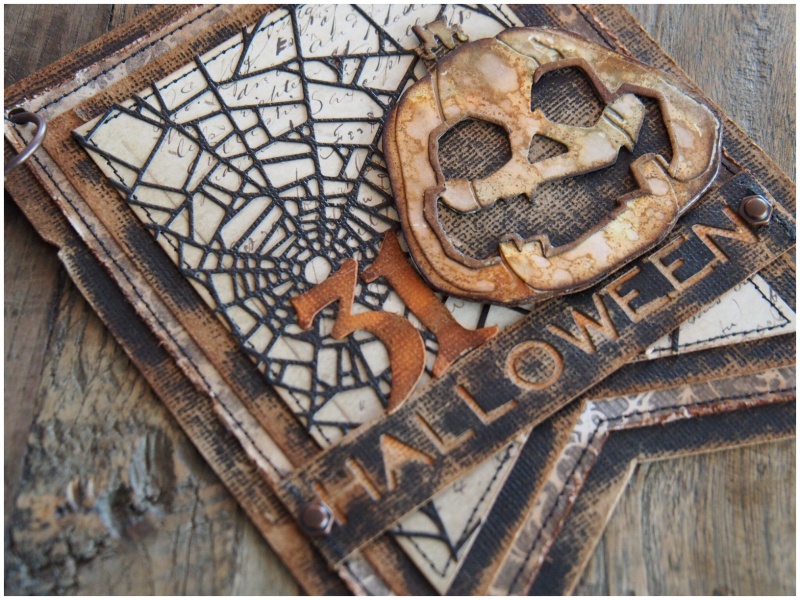
I really hope you’ve enjoyed this post. It was so much fun to make, I might have to make a series of Halloween boutiques to hang for halloween…

    A big thank you to Tim Holtz, Mario Rossi and Paula Cheney for including me in the seasonal sample fun. I have loved (and am hoarding) the Halloween idea-ology and have some lovely home deco pieces to add to my Halloween decorations.

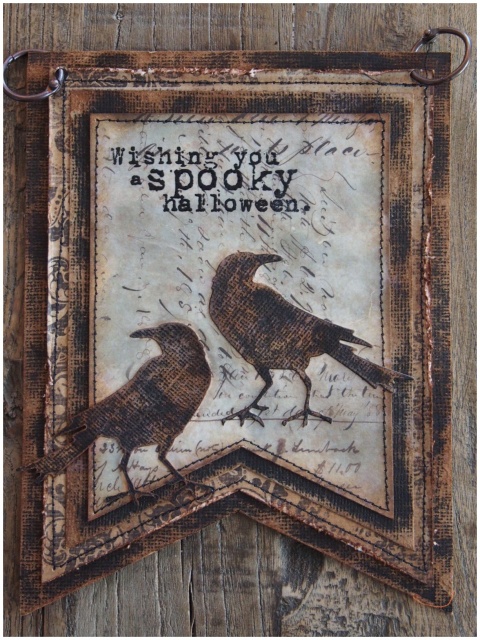
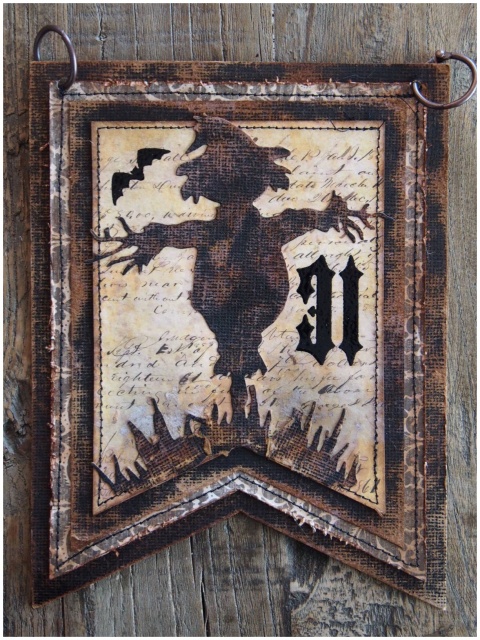
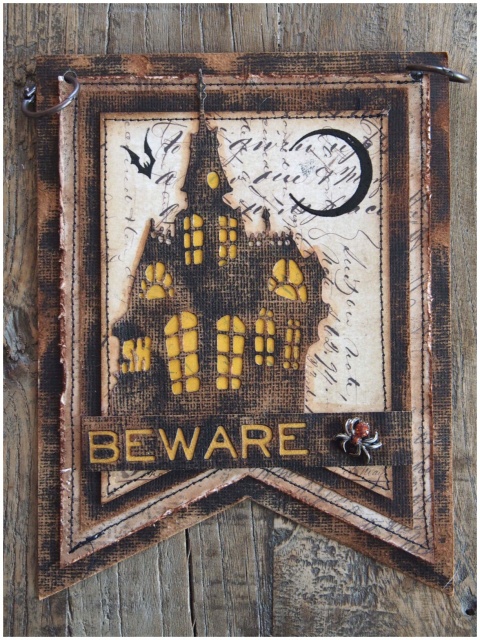
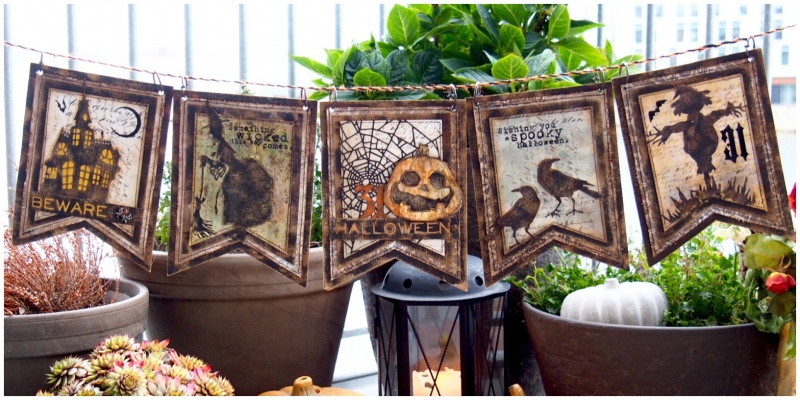
    I will be back later with my completed Halloween banner, which is up, but may have to photograph when the sun scares all the vampires into their coffins and the halloween hangover sets in.

    Have a safe and happy halloween.
    Zoe


  2. Wicked and Co

    9th October, 2018 by iGirlZoe

    Hello everyone. I hope you are enjoying October and all the wonderful things it brings. This is my favourite time of year and love decorating my home for Autumn and Halloween. This year I am trying to make Halloween decorations to match my home decor and I wanted to share a piece I made using the new Tim Holtz Halloween idea-ology and etcetera tag with tombstone overlay.

    iGirlZoe: Tim Holtz, etcetera tombstone overlay, 3D lumber texture fades, idea-ology, sizzix, stampers anonymous, ranger ink, mixed media, halloween, witches, skulls, paper dollsI was inspired by a new gothic and gripping British TV series, “A Discovery of witches,” which I believe is going to air in the US in January. Much of the series so far has been set at Oxford University and specifically in the library. With lots of wood and old style architecture, it was perfect inspiration to match my craft living room, which has lots of dark wood and an old library feel.

    iGirlZoe: Tim Holtz, etcetera tombstone overlay, 3D lumber texture fades, idea-ology, sizzix, stampers anonymous, ranger ink, mixed media, halloween, witches, skulls, paper dolls
    If you have used an etcetera tag before, you will recognise the tag, (on the left) and the tombstone overlays are on the right. Having them in pieces makes life so much easier when covering with paper or decorating. I marked where the overlays would sit with a pencil. *the torn parts are where I used double sided tape to plan my tag.

    iGirlZoe: Tim Holtz, etcetera tombstone overlay, 3D lumber texture fades, idea-ology, sizzix, stampers anonymous, ranger ink, mixed media, halloween, witches, skulls, paper dolls
    Emboss 3 pieces of distress mixed media heavystock using the Tim Holtz 3D lumber texture fades folder. Spray distress spray onto a glass media mat and drag the heavystock through. Once dry, blend in vintage photo and walnut stain distress ink. Next, trace around the overlay on the back of the heavystock. Use the inside of the overlay as a template to trace onto paper from the halloween paper stash. Cut out and adhere onto the overlays using distress collage medium. Cut heavystock with the tangled twigs thinlits die, emboss with the 3D lumber texture fades folder and blend in vintage photo and walnut stain distress ink. Trim to fit the overlay and adhere just at the edges so the tangled twigs float slightly above the background paper from the halloween paper stash.

    iGirlZoe: Tim Holtz, etcetera tombstone overlay, 3D lumber texture fades, idea-ology, sizzix, stampers anonymous, ranger ink, mixed media, halloween, witches, skulls, paper dolls
    Adhere the overlay over the top with distress collage medium and place under something heavy to press, like a pupmkin casserole dish… lol

    iGirlZoe: Tim Holtz, etcetera tombstone overlay, 3D lumber texture fades, idea-ology, sizzix, stampers anonymous, ranger ink, mixed media, halloween, witches, skulls, paper dolls
    Adhere the lumber embossed heavystock to the tag just overlapping the pencil lines marked out earlier, trimming to fit. Adhere the tombstone overlays to the tag with distress collage medium. Once completely dry, blend in walnut stain distress ink around the edges of the tag and overlay, using a mini blending tool.

    iGirlZoe: Tim Holtz, etcetera tombstone overlay, 3D lumber texture fades, idea-ology, sizzix, stampers anonymous, ranger ink, mixed media, halloween, witches, skulls, paper dolls
    Decorate the tombstone with idea-ology. Add an adornment from the milagros set to the top of the overlay and a halloween word band, altered with picket fence distress paint and mushroom alcohol ink. Adhere heavystock to adhesive foam and die cut using the alphanumeric thinlits die. Add distress paint and when almost dry, rub with a dry cloth to give a weathered look. Add idea-ology skulls to the top of the vignette frame (detailed below)…

    iGirlZoe: Tim Holtz, etcetera tombstone overlay, 3D lumber texture fades, idea-ology, sizzix, stampers anonymous, ranger ink, mixed media, halloween, witches, skulls, paper dolls
    Cover an idea-ology vignette frame with rusty hinge distress paint and set aside to dry. Repeat using black soot distress paint, allowing to almost dry and rubbing gently with a dry cloth to expose tiny portions of the rusty hinge layer. Once completely dry, dry brush fossilized amber distress paint over parts of the frame.

    iGirlZoe: Tim Holtz, etcetera tombstone overlay, 3D lumber texture fades, idea-ology, sizzix, stampers anonymous, ranger ink, mixed media, halloween, witches, skulls, paper dolls
    Create the same underlay, of tangled twigs die cut and halloween paper stash, to create a base for the frame. Tuck in witches from the paper dolls ancestors, (so pleased the witches are back again). Use distress markers to colour parts of the paper dolls and allow to air dry before lightly rubbing with a cotton bud. Add a little flair to the hat with dyed mummy cloth, ribbon or twine. Using wire cutters, cut an idea-ology metal gate in half. I freaking love these metal gates and bought up quite a few to hoard and use throughout the year. Alter with picket fence distress paint and mushroom alcohol ink and adhere with distress collage medium to the inside edges of the vignette frame. Add idea-ology bouquet findings flowers, dyed with distress markers and stems painted with distress paint. Add an idea-ology adornment halloween spider to a broomstick and adhere to the frame. These spiders are so creepy I can barely touch them, (tweezers)!

    iGirlZoe: Tim Holtz, etcetera tombstone overlay, 3D lumber texture fades, idea-ology, sizzix, stampers anonymous, ranger ink, mixed media, halloween, witches, skulls, paper dolls
    Alter an idea-ology story stick with mushroom alcohol ink and rusty hinge distress paint and add to the frame. Die cut ivy from classic kraft stock using the garden greens thinlits die and adhere around the frame and to the top overlay. This is an older Tim Holtz die, but I just love how the older products work so brilliantly with the new ones.

    iGirlZoe: Tim Holtz, etcetera tombstone overlay, 3D lumber texture fades, idea-ology, sizzix, stampers anonymous, ranger ink, mixed media, halloween, witches, skulls, paper dolls
    Add the more of the die cut letters to the bottom portion of the overlay. I used “Est 1502” in place of where a death date would go to show when these naughty witches established their “Wicked & Co” boutique. If you would like to see what they’re selling in there, keep an eye on my blog…

    iGirlZoe: Tim Holtz, etcetera tombstone overlay, 3D lumber texture fades, idea-ology, sizzix, stampers anonymous, ranger ink, mixed media, halloween, witches, skulls, paper dolls
    I hope you have enjoyed this idea-ology and etcetera tombstone overlay tag tutorial and it has inspired you to get creative. These products are seasonal and available in limited quantities, (one and done), so don’t delay in picking them up from your local or online retailer.

    The 2018 Tim Holtz Halloween release is a gothic wonder, so a huge shout out and thank you to Tim Holtz, Mario Rossi and Paula Cheney who collaborate to bring us these amazing products to craft with.

    Thanks for stopping by.

    Zoe


  3. Sinister

    2nd October, 2018 by iGirlZoe

    Hello friends. It’s a couple of weeks since my last post and I’ve been busy cooking up some things in my cauldron. While waiting for a project to dry, I made this quick card to send to a friend for Halloween.

    iGirlZoe: Tim Holtz, funky foliage thinlit dies, sinister bigz die, idea-ology, design tape, sizzix, stampers anonymous, ranger ink, mixed media, ornate and lace, halloween, skull, fall, leaves
    I LOVE the new Sizzix Sinister Bigz die by Tim Holtz! I was a smitten kitten when it was launched on Tim Holtz’s facebook live, and it does not disappoint.

    iGirlZoe: Tim Holtz, funky foliage thinlit dies, sinister bigz die, idea-ology, design tape, sizzix, stampers anonymous, ranger ink, mixed media, ornate and lace, halloween, skull, fall, leaves
    I dragged distress mixed media heavystock through hickory smoke and frayed burlap distress spray. Die cut with the sinister bigz die and blended in walnut stain distress ink to the edges of the die cut. The die cut was mounted onto the card backing with 3D adhesive foam to give some dimension.

    iGirlZoe: Tim Holtz, funky foliage thinlit dies, sinister bigz die, idea-ology, design tape, sizzix, stampers anonymous, ranger ink, mixed media, ornate and lace, halloween, skull, fall, leaves
    The backing mounts are Kraft card, black classic kraft stock sanded with the sanding grip and blended with vintage photo distress ink, scrap paper covered with halloween design tape. The background under the skull is heavystock stamped with the lace stamp from the Tim Holtz ornate and lace set with a frame embossed with the 3D lumber texture fades, adhered over the top.

    iGirlZoe: Tim Holtz, funky foliage thinlit dies, sinister bigz die, idea-ology, design tape, sizzix, stampers anonymous, ranger ink, mixed media, ornate and lace, halloween, skull, fall, leaves
    I loved his gold tooth on the packaging image, so had to include one myself. I covered with a dab of distress collage medium and dipped into gold embossing powder and melted.

    iGirlZoe: Tim Holtz, funky foliage thinlit dies, sinister bigz die, idea-ology, design tape, sizzix, stampers anonymous, ranger ink, mixed media, ornate and lace, halloween, skull, fall, leaves
    I die cut several pieces of foliage from the funky foliage thinlits set. Including some teeny wood grain leaves from a piece of 3D lumber embossed heavystock. I added a piece of mummy cloth, sprayed with rusty hinge distress spray. I covered an idea-ology halloween quote token with picket fence distress crayon.

    iGirlZoe: Tim Holtz, funky foliage thinlit dies, sinister bigz die, idea-ology, design tape, sizzix, stampers anonymous, ranger ink, mixed media, ornate and lace, halloween, skull, fall, leaves
    Thanks for stopping. I will be back this week with my first idea-ology seasonal project and it’s quite wicked…
    Zoe


  4. Tim Holtz Halloween

    16th September, 2018 by iGirlZoe

    Hello friends. I hope you’re having a nice weekend and finding some time to create. I’ve got a SATURDAY SHOWCASE (on a Sunday) over at Frilly and Funky, showcasing some of the new Tim Holtz Halloween products.

    iGirlZoe: Tim Holtz, tangled twigs thinlits die, idea-ology, sizzix, stampers anonymous, ranger ink, mixed media, inventor, halloween, pumpkins, dapper

    iGirlZoe: Tim Holtz, tangled twigs thinlits die, idea-ology, sizzix, stampers anonymous, ranger ink, mixed media, inventor, halloween, pumpkins, dapper

    iGirlZoe: Tim Holtz, tangled twigs thinlits die, idea-ology, sizzix, stampers anonymous, ranger ink, mixed media, inventor, halloween, pumpkins, dapper
    If you would like to see more details, pop over to Frilly & Funkie.

    Have a great Sunday.
    Zoe


  5. Halloween 2017

    31st October, 2017 by iGirlZoe

    Happy Halloween friends! I’m popping back up, like a scene from a hitchcock movie, to bring you the full line up of projects I made for the Tim Holtz halloween inspiration series. Check out the other designers cool and creepy creations in week 1, week 2 and week 3 recaps on Tim’s blog.

    iGirlZoe: Mr Pumpkinhead
    Mr Pumpkinhead

    iGirlZoe: Monster Mash
    Monster Mash

    iGirlZoe: Monster Mash
    Monster Mash

    iGirlZoe: Sizzix Jack-O-Lantern
    Jack-O-Lantern

    iGirlZoe: Pumpkin Patch
    Pumpkin Patch

    iGirlZoe: The Masked Witch
    The Masked Witch

    iGirlZoe: Haunted Banner
    Haunter Banner

    iGirlZoe: Claw Mark Coffin
    Claw Mark Coffin

    iGirlZoe: Claw Mark Coffin
    Claw Mark Coffin (close up)

    iGirlZoe: The Bone Collector Caravan
    The Bone Collector Caravan

    iGirlZoe: The Undertaker & Embalmer
    The Undertaker and Embalmer

    iGirlZoe: Ravens in Flight
    Then suddenly something strange happened…

    A big thank you to Tim Holtz, Mario Rossi and Paula Cheney. And a big thank you for the lovely comments you have left over the past few weeks, here and on social media. Hope you all have a safe and happy halloween.

    Cheers
    Zoe x


  6. The Bone Collector Caravan

    by iGirlZoe

    Happy Halloween! The Tim Holtz Halloween inspiration series on facebook and instagram has wrapped up, but if you missed anything there are recaps for week 1, week 2 and week 3 on Tim’s blog.

    iGirlZoe: The Bone Collector Caravan
    I wanted to share this bone collector caravan before it heads to Halloween town. I didn’t do a step by step for this project, but I’ll walk you through it and share the few photos I took during the process, for those interested.

    iGirlZoe: The Bone Collector Caravan
    I sanded the outer panels of a vignette box with a sanding grip. Painted through a stencil with ground espresso distress paint. Once dry, stained the panels with walnut stain distress stain.

    iGirlZoe: The Bone Collector Caravan
    Added an idea-ology Halloween baseboard to the inside back of the vignette box. All it needed was a little light distressing to the edges and adhered with collage medium matte.

    iGirlZoe: The Bone Collector Caravan
    As soon as I saw the paper doll witches, I knew they were going inside this idea-ology bird cage!

    iGirlZoe: The Bone Collector Caravan
    I covered the birdcage with a coat of distress grit paste and allowed to dry. Then rubbed various distress crayons over the top.

    iGirlZoe: The Bone Collector Caravan
    The background was created using (discontinued) picket fence distress crackle paint. Sorry to be a tease, it’s my reward for hoarding it. The witches were trimmed and mounted into the cage.

    iGirlZoe: The Bone Collector Caravan
    The banner was made punching paper from the mini halloween paper stash with the Tim Holtz banner paper punch.

    iGirlZoe: The Bone Collector Caravan
    I used white gel pen to colour the underside of the remnant rubs and letting dry before rubbing them onto the banner. Distressed the edges with a sanding grip.

    iGirlZoe: The Bone Collector Caravan
    Blended a little vintage photo distress ink into the edges of the banner.

    iGirlZoe: The Bone Collector Caravan
    I rolled the banner over twine, securing with distress collage medium. Drilled holes into the top of the vignette box and pushed the bones into the holes, again, securing with distress collage medium. Wrapped wire around the top of the bones and attached the twine to each side to hang the banner.

    iGirlZoe: The Bone Collector Caravan
    I just love these apothecary vials. I used the labels that come with them, sanded with a sanding grip and adding remnant rubs. I bent an adornment skull around a bottle and secured with distress collage medium. Finally added twine to the neck of the vials.

    iGirlZoe: The Bone Collector Caravan
    I altered the pulley wheels by adding grit paste allowing to dry, then dabbing on evergreen bough distress paint with a cotton bud and once dry, mushroom alcohol ink, also applied using a cotton bud. The bone collector word band had picket fence distress crayon added to highlight the text. I used a ring fastener and swivel clasp as the trailer tow. All adhered using distress collage medium, (I’m a total adhesive convert since creating this piece)! I even used it to adhere those skulls!

    iGirlZoe: The Bone Collector Caravan
    I have to make a special mention of the idea-ology skulls that I used in this project! The detail on them is incredible and yes, I admit it… I hoarded!!

    I hope you enjoyed the walk through my bone collector caravan and it’s been “all the fun of the fair!”
    Cheers
    Zoe x


  7. The Masked Witch

    24th October, 2017 by iGirlZoe

    The Tim Holtz Halloween inspiration series on facebook and instagram has just wrapped up it’s final week. Hopefully you’ve been following, but if you missed anything, you can see the recaps for week 1, week 2 and week 3 on Tim’s blog.

    iGirlZoe: The Masked Witch
    I wanted to share this masked witch card that I made for the inspiration series. This was such a simple card to make, just using the witchcraft die cut as a mask. I die cut one from black classic kraft stock then used this for my Haunted Banner project.

    iGirlZoe: The Masked Witch
    I placed the mask over paper from the halloween mini stash and blending peeled paint distress ink over the top with a mini blending tool. Removed the mask, spritzed with water and added halloween clippings stickers.

    iGirlZoe: The Masked Witch
    Mounted the masked witch onto layers from the halloween mini stash. From the halloween words thinlits die set, cut “wicked” from a longer piece of black classic kraft stock and mounted over green classic kraft stock. Sanded the edges of each layer with a sanding grip, blended in vintage photo distress ink and stitched to finish.

    I will be back soon sharing a walk through of the bone collector caravan I made for the Halloween inspiration series.

    Cheers
    Zoe x


  8. Haunted Banner

    21st October, 2017 by iGirlZoe

    With All Hallows’ Eve drawing near, I’m sharing this haunted banner that I made for the Tim Holtz Halloween inspiration series. You can follow along on Tim’s facebook and instagram with a weekly recap on Saturday on his blog.

    iGirlZoe: Haunted Banner
    iGirlZoe: Haunted Banner
    Here’s how I made the jack-o-lantern banner…

    iGirlZoe: Haunted Banner
    Step 1: Cut a piece of black classic kraft stock 5 x 7 inches.
    Step 2: Cut a piece of paper from the Halloween mini stash 4.5 x 6.5 inches.
    Step 3: Cut a second piece of black classic kraft stock 4 x 6 inches.
    Step 4: Cut a piece of mixed media heavystock 3.5 x 5.5 inches.

    iGirlZoe: Haunted Banner
    Step 5: Using the WRMK banner punch board, cut the ends to create a banner.
    Step 6: Sand the edges of the large black classic kraft stock banner with a sanding grip and blend in vintage photo distress ink.
    Step 7: Distress the edge of the halloween mini stash paper banner and blend in vintage photo distress ink.
    Step 8: Sand the edges of the small black classic kraft stock banner with a sanding grip and blend in vintage photo distress ink.

    iGirlZoe: Haunted Banner
    Step 9: Ink up the ledger script stamp with hickory smoke distress archival ink. Stamp onto the heavystock banner using the stamp platform. Stamp a second time using a very light layer of vintage photo distress archival ink.
    Step 10: Blend in antique linen distress ink.
    Step 11: Blend in pumice stone distress ink.
    Step 12: Blend vintage photo distress ink into the edges.

    iGirlZoe: Haunted Banner
    Step 13: Sew the edges of the mini stash and heavystock banners with black thread.
    Step 14: Gather the banner pieces ready to assemble.
    Step 15: Adhere using distress collage medium matte.
    Step 16: Punch 2 holes in the top of the assembled banner.

    iGirlZoe: Haunted Banner
    Step 17: Die cut the jack-0-lantern thinlits die from a heavystock tag.
    Step 18: Blend tea dye, forest moss and brushed corduroy distress ink and splatter with a distress sprayer.
    Step 19: Once dry, spritz rusty hinge distress marker over the die cut with a distress marker spritzer.

    iGirlZoe: Haunted Banner
    Step 20: Die cut Halloween, jack-o-lantern base and a cobweb from black classic kraft stock. Sand and blend in vintage photo distress ink.
    Step 21: Place the cobweb die cut over the banner and trim any overlap with mini scissors.
    Step 22: Adhere the cobweb with distress collage medium matte.
    Step 23: Add the halloween die cut with hex fasteners. Adhere the 31 die cut and add mini book rings to the holes at the top of the banner.

    iGirlZoe: Haunted Banner
    Step 24: Add the jack-o-lantern die cut with adhesive black foam.

    iGirlZoe: Haunted Banner
    Step 25: Die cut the witchcraft die from black classic kraft stock, sand with a sanding grip and blend in vintage photo distress ink with a mini blending tool. Blend peeled paint distress ink onto the heavystock banner (top one), stamp a sentiment from the monstrous set and adhere the witch with distress collage medium matte.

    iGirlZoe: Haunted Banner
    Step 26: Die cut the feather and raven die from black classic kraft stock, sand with a sanding grip and blend in vintage photo distress ink with a mini blending tool. Blend weathered wood distress ink onto the heavystock banner (top one), stamp a sentiment from the monstrous set and adhere the ravens with distress collage medium matte.

    iGirlZoe: Haunted Banner
    Step 27: Die cut the scarecrow die from black classic kraft stock, sand with a sanding grip and blend in vintage photo distress ink with a mini blending tool. Blend wild honey distress ink onto the heavystock banner (top one), stamp a bat and 31 using the idea-ology cling foam stamps and adhere the scarecrow with distress collage medium matte, bending the base of the scarecrow to mirror the curve of the banner.

    iGirlZoe: Haunted Banner
    Step 28: Die cut the haunted house and halloween word die from black classic kraft stock, sand with a sanding grip and blend in vintage photo distress ink with a mini blending tool. Blend tea dye distress ink lightly onto the heavystock banner (top one), stamp a bat and the crescent moon from the haunted house set and adhere the haunted house and beware banner, plus an adornment spider with distress collage medium matte. Paint fossilized amber distress paint inside the haunted house’s windows.

    iGirlZoe: Haunted Banner
    Run string, twine, burlap, ribbon or chain through the mini book rings attached to the top of the banner and hang. Why not make one each year and write the year on the back or make a feature of it on your banner. A great way to practice techniques and track your creative progression.

    I hope you enjoyed this step by step and have been enjoying the inspiration series so far. Don’t forget to check out the other designers projects from the series. I will be back next week sharing some walk throughs and close ups of the other projects I have made for the inspiration series.
    Cheers
    Zoe x


  9. Mr Pumpkinhead

    16th October, 2017 by iGirlZoe

    Have you met Mr Pumpkinhead? He’s a bit of a merchant… of what though, we don’t know ….and don’t dare to ask!!

    iGirlZoe: Mr Pumpkinhead
    Thank you so much for your kind comments about this card I made for the Tim Holtz Halloween inspiration series. Here’s a step by step to show you how he was made…

    iGirlZoe: Mr Pumpkinhead
    Step 1: Cut a piece of distress mixed media heavystock 3.25 x 5 inches. Cover with antique linen distress ink using a blending tool.
    Step 2: Blend in a little mustard seed distress ink.
    Step 3: Squish broken china distress ink onto a non stick craft sheet and spritz with water using a distress sprayer.
    Step 4: Tap the heavystock into the ink. Dry with a heat tool.

    iGirlZoe: Mr Pumpkinhead
    Step 5: Blend a little vintage photo distress ink lightly over the background.
    Step 6: Edge with walnut stain distress ink.
    Step 7: Spray big water droplets over the background. Dry with a heat tool.
    Step 8: Tap the heavystock into the broken china droplets again if required.

    iGirlZoe: Mr Pumpkinhead
    Step 9: Blend more vintage photo distress ink over the background.
    Step 10: Edge with more walnut stain distress ink, this time blending a little further into the center.
    Step 11: Spritz with water and immediately pat dry with kitchen roll (paper towel) to lift the ink and leave a bleached spots.
    Step 12: Stitch around the edges with a sewing machine.

    iGirlZoe: Mr Pumpkinhead
    Step 13: Using the Tim Holtz stamp platform for exact placement, stamp the gear stamp from the dapper stamp set in potting soil archival ink.

    iGirlZoe: Mr Pumpkinhead

    iGirlZoe: Mr Pumpkinhead
    Step 14: Lightly swipe the edges with a black soot distress archival ink pad to give the background a kind of vignette.

    iGirlZoe: Mr Pumpkinhead
    Step15: Stamp the hat/suit and merchant stamps from the dapper and pumpkinhead stamp sets using the Tim Holtz stamp platform, with black soot distress archival ink on mixed media heavystock.
    Step 16: Make masks for the pumpkinhead stamps by stamping onto a sheet of plain paper and fussy cutting.
    Step 17: Cover the pumpkinhead stamped image with the corresponding mask. Turn the stamp upside down overlapping the bottom of the stamp and stamp again.*
    Step 18: Move the stamp down and stamp a third time.*

    iGirlZoe: Mr Pumpkinhead
    *The additional stamping under the pumpkinhead creates a shadow that will create a neck to sit under his suit.

    iGirlZoe: Mr Pumpkinhead
    Step 19: Fussy cut the merchant stamped image with tonic mini scissors.
    Step 20: Blend a little antique linen distress ink over the top. Edge with potting soil archival ink.
    Step 21: Watercolour the hat and suit with faded jeans and rusty hinge distress markers using a water brush.
    Step 22: Fussy cut and edge with vintage photo distress ink.

    iGirlZoe: Mr Pumpkinhead
    Step 23: Watercolour the pupkinhead with rusty hinge and fossilized amber distress markers.
    Step 24: Fussy cut, creating a neck to slip under the shirt and edge with vintage photo distress ink.
    Step 25: Using a distress spritzer tool, spritz gathered twigs distress marker over the pumpkinhead.
    Step 26: Adhere the pumpkinhead onto the card and mount the hat and shirt over the top and the merchant sign underneath.

    iGirlZoe: Mr Pumpkinhead
    Step 27:  Blend vintage photo distress oxide ink into the edge of a kraft card, spritz with water to oxidize the ink and dry with a heat tool.
    Step 28: Using a sanding grip, sand metallic kraft stock and blend in vintage photo distress ink.
    Step 29: Sand the edges of classic kraft stock and blend in vintage photo distress ink.
    Step 30: Blend vintage photo distress ink into the edges of the cork.

    iGirlZoe: Mr Pumpkinhead
    I hope you enjoyed this step by step and have been enjoying the inspiration series you can follow along on Tim’s facebook and instagram with a weekly recap on Saturday on his blog. Thank you so much for the lovely comments you’ve been leaving here and on social media on my inspiration series projects.

    Cheers
    Zoe x


  10. Monster Mash

    13th October, 2017 by iGirlZoe

    I am back with a couple more samples that I made for the Tim Holtz inspiration series. If you follow Tim on facebook and instagram you may have seen the inspiration series with seasonal projects by lots of talented designers. There’s a recap each Saturday on Tim’s blog.

    Today I’m sharing a monster mash of cards made with the incredible new Stampers Anonymous Monstrous stamp set for the inspiration series. To see the rest of this monstrous conga line, check out the Monstrous Makes post on Kath Stewart’s blog.

    iGirlZoe: Monster Mash
    iGirlZoe: Monster Mash
    I used the Tim Holtz stamp platform to ensure a nice bold image. Using the label frame stamps as a base, stamp with black soot distress archival ink and fussy cut. Stamp the newsprint background stamp over the top. Blend Vintage photo distress ink into the label and spritz with water to get the distress ink to react.

    iGirlZoe: Monster Mash
    iGirlZoe: Monster Mash
    Stamp the monstrous heads with black soot distress archival ink and watercolour with distress markers. Fussy cut with tonic mini scissors and adhere with 3D foam.

    iGirlZoe: Monster Mash
    iGirlZoe: Monster Mash
    Stamp the monstrous sayings onto the bottom in black soot distress archival ink.

    iGirlZoe: Monster Mash
    iGirlZoe: Monster Mash
    For the Frankenstein card, die cut claw marks into the label, lift and ink the edges with vintage photo distress ink. For the Dracula card, die cut a cobweb and adhere over the top of the stamped label. Both using dies from the new sizzix thinlits dies by Tim Holtz.

    iGirlZoe: Monster Mash
    The card mounts are some of my usual favourties, kraft card base, metallic kraft stock, classic kraft stock, corregated card and cork from the idea-ology surfaces pack. All sanded with a sanding grip and blended with vintage photo distress ink. The Dracula card cork was washed with candied apple distress marker using a water brush.

    iGirlZoe: Monster Mash
    iGirlZoe: Monster Mash
    I hope you enjoyed the walk through and have been enjoying the inspiration series so far, don’t forget to check out the other designers projects and cards from the series. Thanks to Tim, Paula and Mario for inviting me to be part of this amazing experience and to you for stopping by.

    Cheers
    Zoe x