‘Halloween’ Category

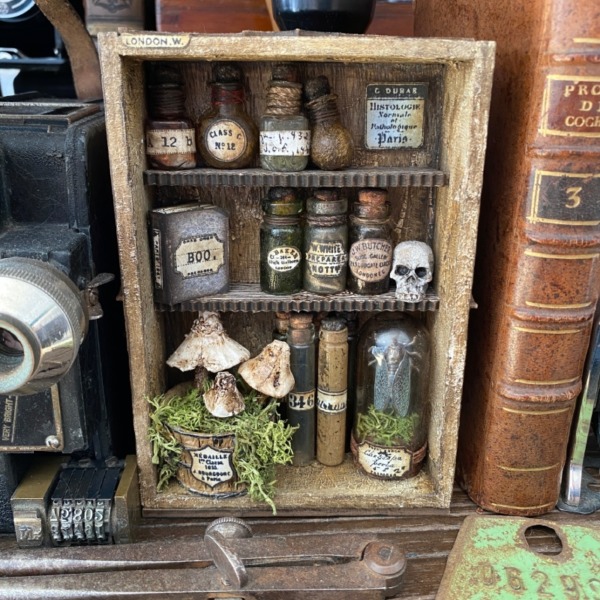
  1. Tim Holtz 2023 Halloween Banner

    6th September, 2023 by iGirlZoe

    igirlzoe: tim holtz stampers anonymous 2023 halloween obscure

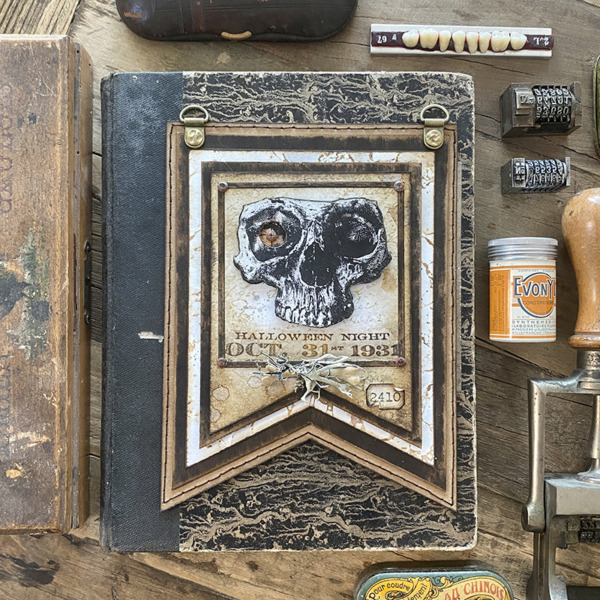
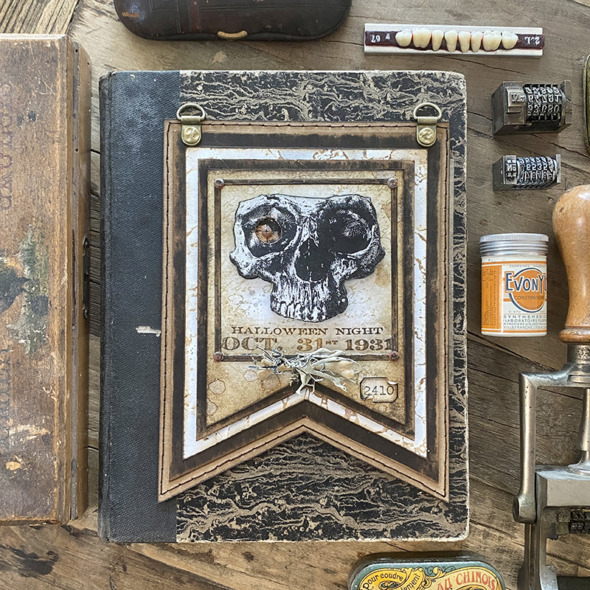
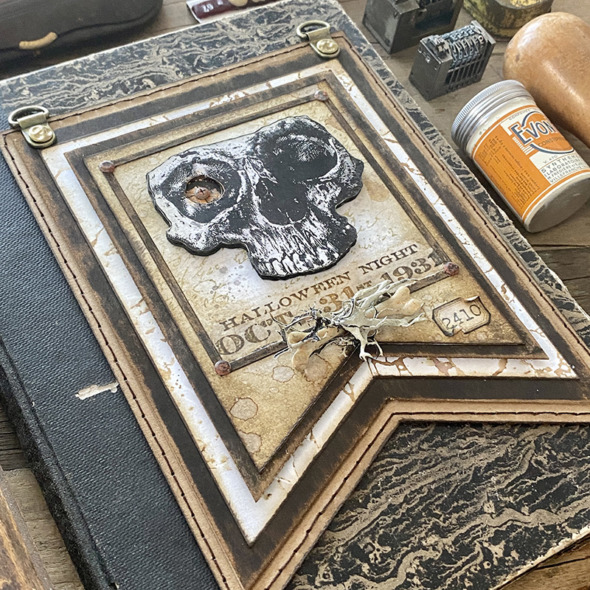
    Hello friends. I’m back today sharing some more details of the Banner that I made for the Tim Holtz Halloween 2023 Stampers Anonymous LIVE launch. You can see the replay and all the maker inspiration over on Tim’s blog.

    igirlzoe: tim holtz stampers anonymous 2023 halloween obscure
    I’ve made a few banners in the past and up until the pandemic I made one every Halloween, so it’s been a few years and I’m excited to be making one again this year. Let’s get into the details…

    igirlzoe: tim holtz stampers anonymous 2023 halloween obscure
    Ok let’s talk banners… I have a retired Sizzix Banner die (561152) and a retired banner punch board which I use to create my banners. There are banner dies and templates out there and you could also cut your own. I didn’t measure this banner as I was making for a deadline, but I do have some measurements for another banner HERE. Decide what size works best for your design and space.

    igirlzoe: tim holtz stampers anonymous 2023 halloween obscure
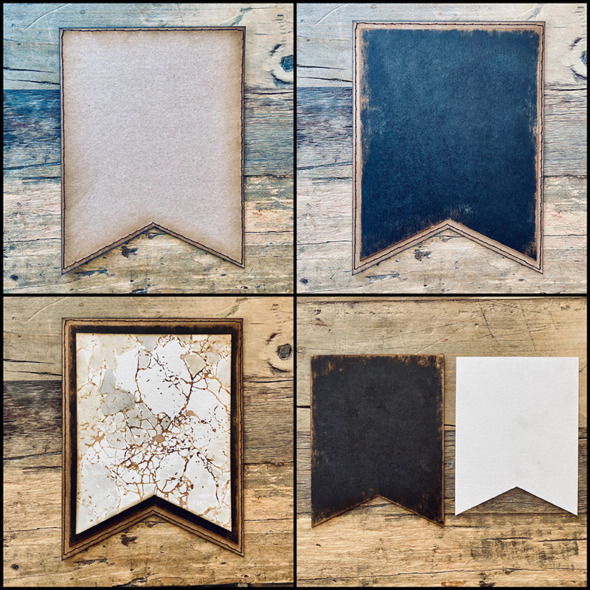
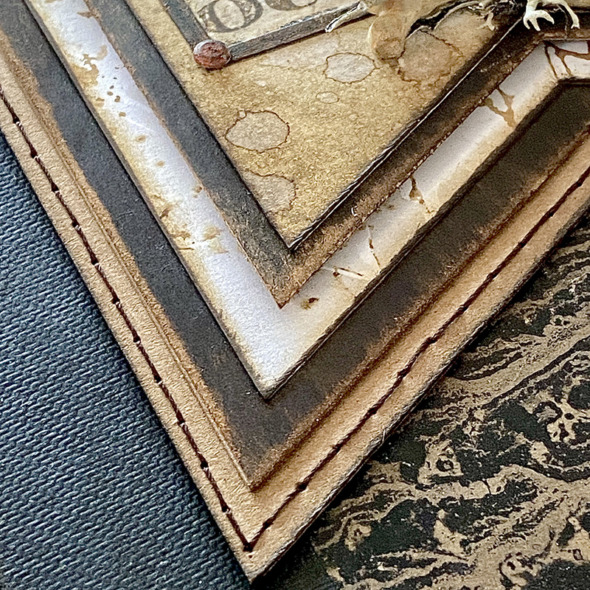
    You want to start with a good weight cardstock for the base so it doesn’t bow over time. I used Distress Kraft Heavystock and backed with idea-ology Black Kraft Stock (kraft side facing in), so the back looks finished and the stitching is hidden.

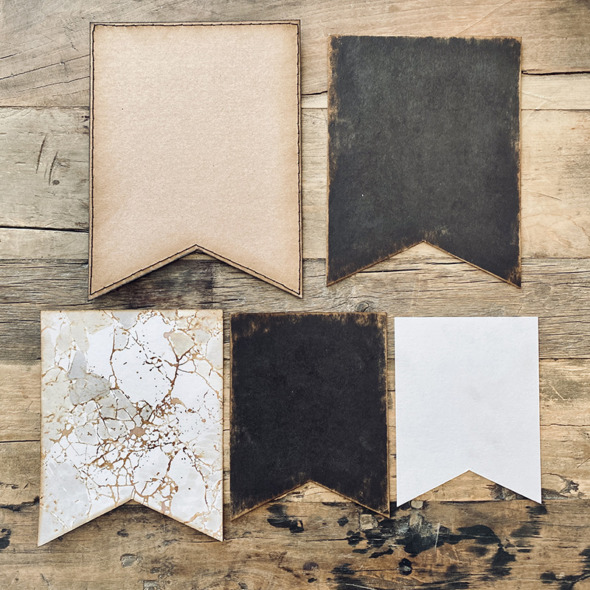
    I’ll call out the layers I used from top to bottom, left to right…

    -Distress Kraft Heavystock (machine stitched edges) (backed with idea-ology Black Kraft Stock)
    -idea-ology Black Kraft Stock
    -Distress Watercolor Cardstock with background stamped using the Shattered stamp set
    -FOAM MOUNTED idea-ology Black Kraft Stock + Distress Watercolor Cardstock

    igirlzoe: tim holtz stampers anonymous 2023 halloween obscure
    This is how the layers look assembled. The top 2 layers are mounted onto foam so they’re raised slightly. I like this dimensional look and you could have something creepy sticking out from under that layer.

    igirlzoe: tim holtz stampers anonymous 2023 halloween obscure
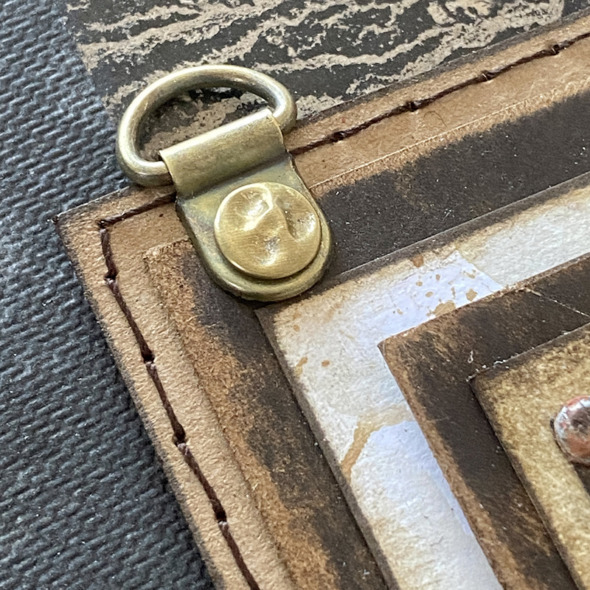
    I used boot lace hooks to add clips to hang the banner from and used an idea-ology tiny hammer to ding it up. You can get the boot lace hooks HERE.

    igirlzoe: tim holtz stampers anonymous 2023 halloween obscure
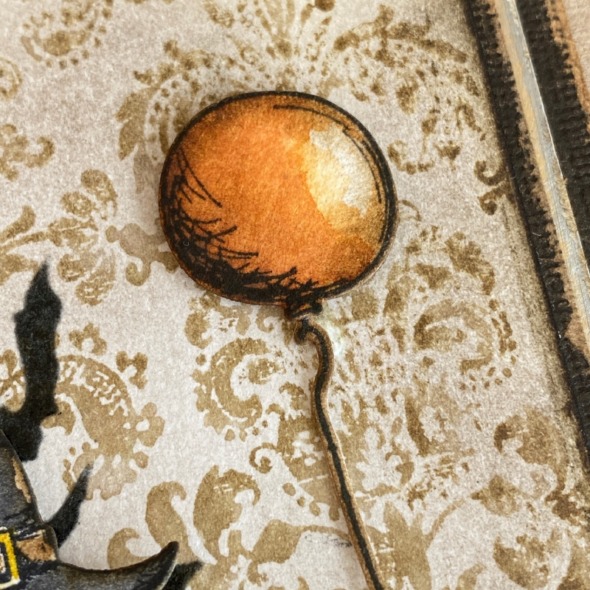
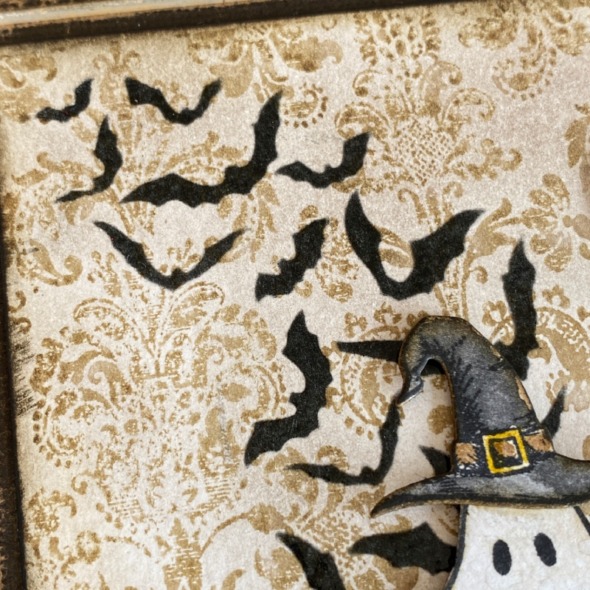
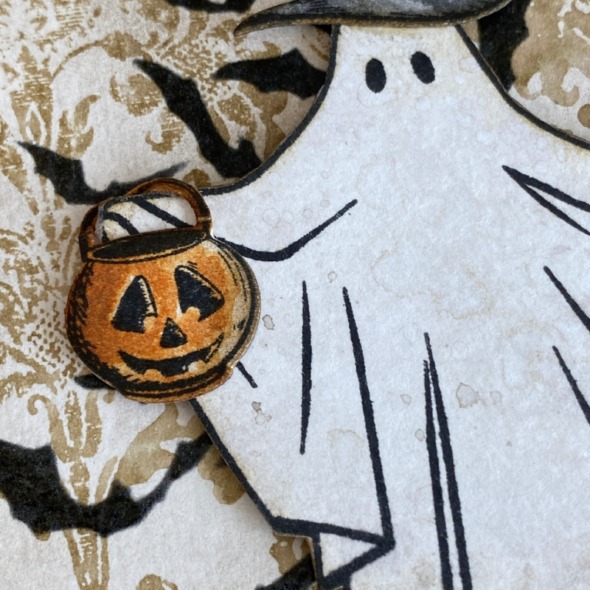
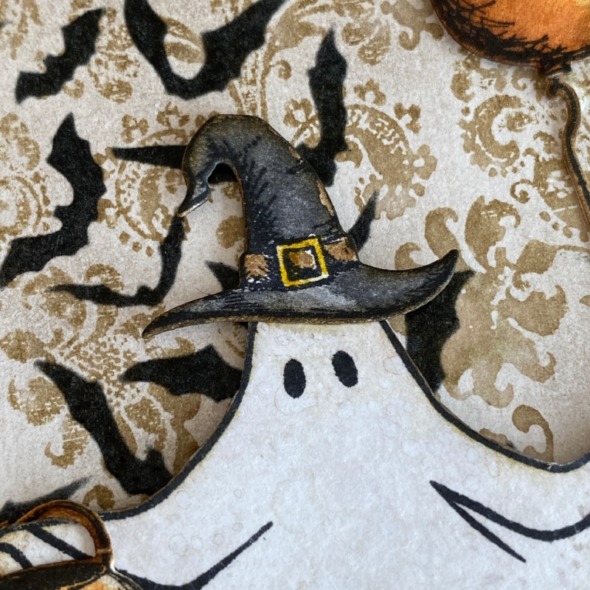
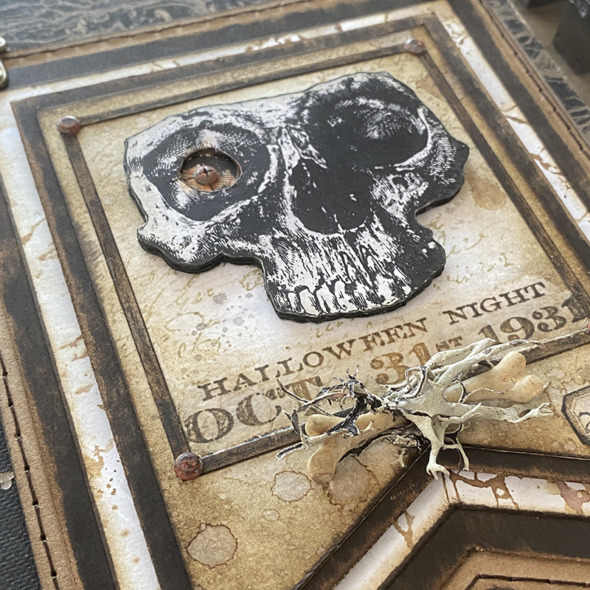
    The background banner panel is inked with distress and stamped with the script background stamp from The Obscure set. Being a smaller stamp, it’s perfect to add a little stamp detail to portions of the background. I added the Halloween Night stamp from The Obscure stamp set, it’s so vintage! LOVE! Both stamped in distress archival ink.

    igirlzoe: tim holtz stampers anonymous 2023 halloween obscure
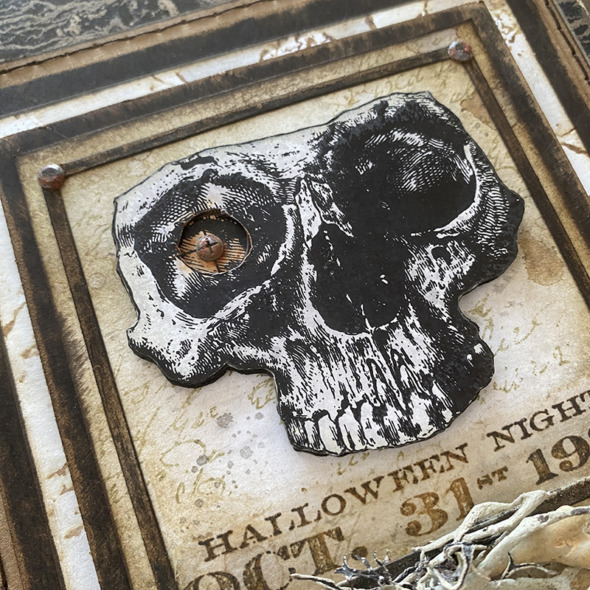
    The skull from The Obscure set is creepy AF and had to take center stage of my first banner piece for this years Halloween Banner! I stamped and fussy cut the skull several times to create a dimensional piece and cut out the eye on the top layers.

    igirlzoe: tim holtz stampers anonymous 2023 halloween obscure
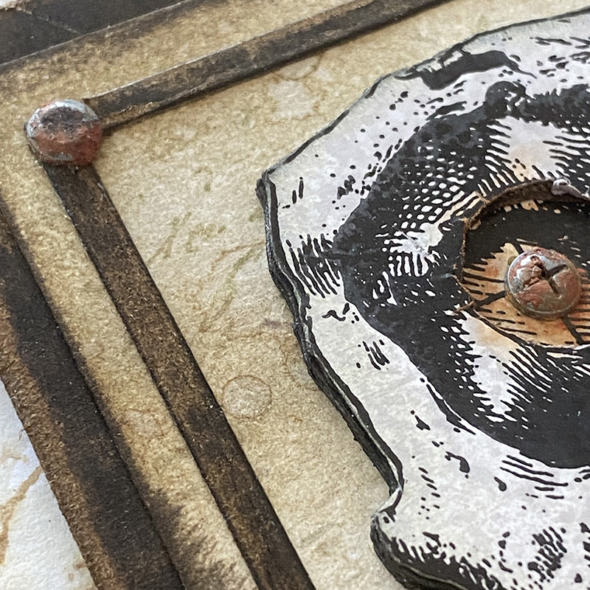
    I added an idea-ology hardware head to the skull’s eye. It lines up perfectly!

    igirlzoe: tim holtz stampers anonymous 2023 halloween obscure
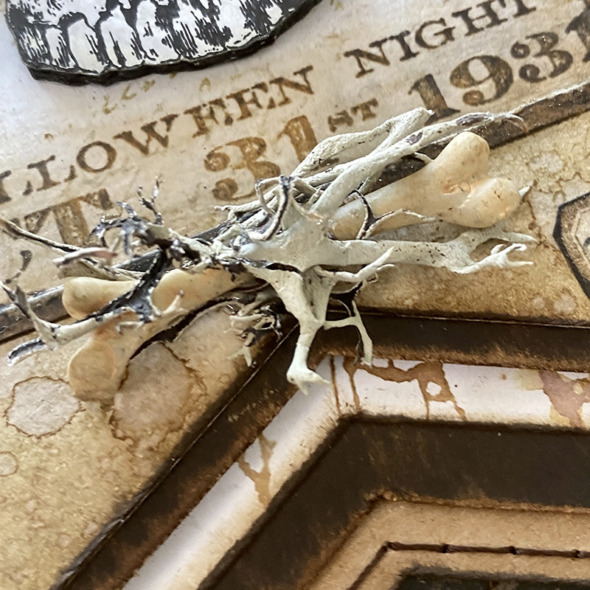
    I wired a bone from this years idea-ology skulls and bones set and added with some creepy moss. I love that Shattered stamp peeping out! It’s such an awesome stamp!

    igirlzoe: tim holtz stampers anonymous 2023 halloween obscure
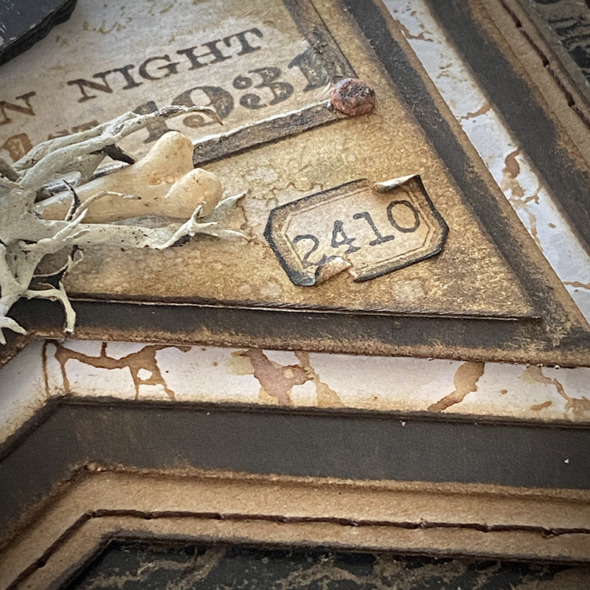
    This tiny label from Mini Halloween 3 stamp set is one of my most used stamps! Stampers Anonymous never retire Tim’s CMS numbered stamps so you can still get this set and it’s a great one for Halloween, it’s linked below.

    igirlzoe: tim holtz stampers anonymous 2023 halloween obscure
    I added a die cut square frame with idea-ology hardware heads added to the corners to complete the look.

    I hope this has encouraged you to make a banner, either for Halloween, Christmas or any other banner worthy day. I’ll be back throughout the next couple of months with more pieces of my banner. Let me know if you have any questions and happy banner making.
    Zoe


    affiliate links used at no cost to you


  2. Bats Hit Crazy Arcade

    5th September, 2023 by iGirlZoe

    igirlzoe: tim holtz stampers anonymous 2023 halloween obscure

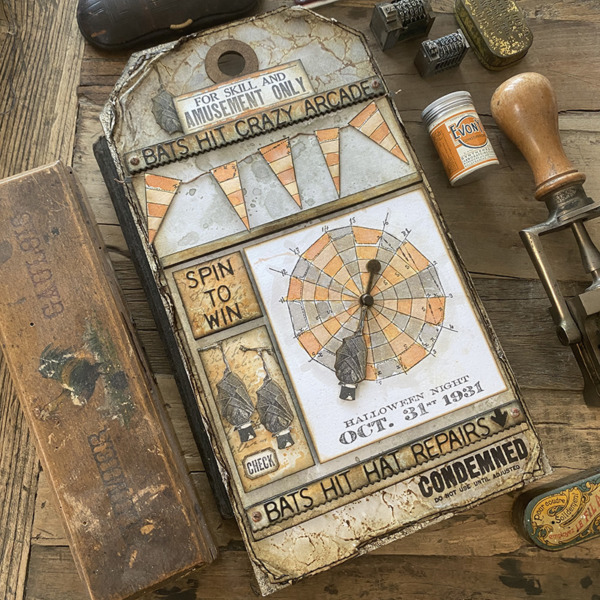
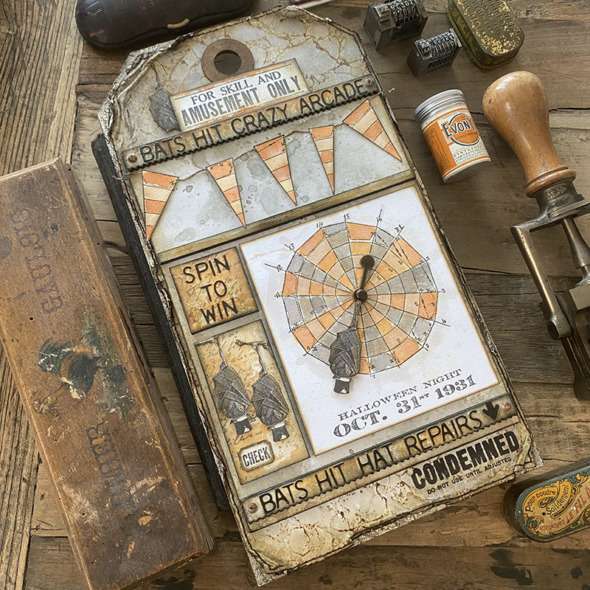
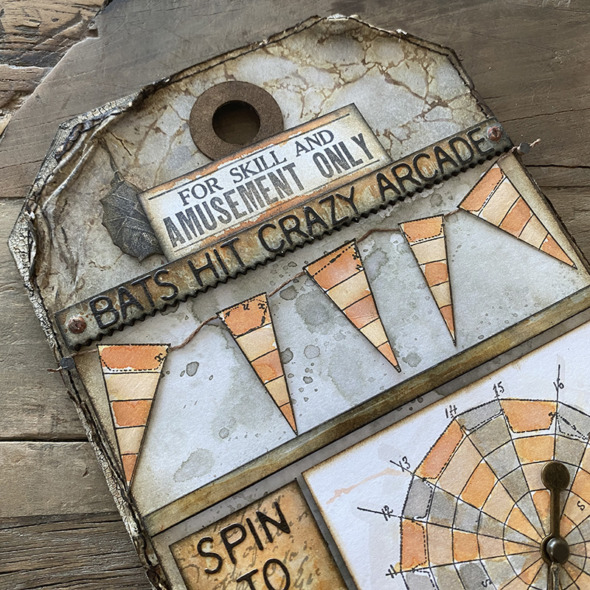
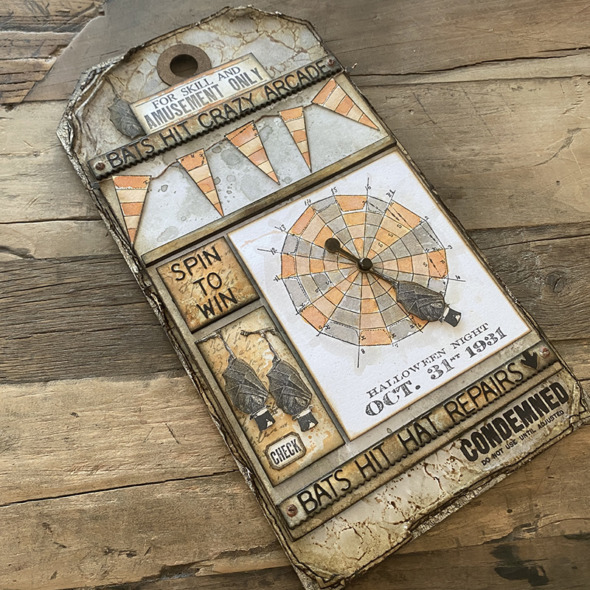
    Happy September friends and welcome to the Bats Hit Crazy Arcade. Say that 3 times quickly! Summer has made a comeback this week in Copenhagen and I’m posting Halloween makes while making for Christmas! The seasonal confusion is real!

    Anyway, back to Halloween (lol) and if you saw the Tim Holtz 2023 Halloween Stampers Anonymous LIVE launch you will have seen these crazy bats from the Bats Hit Crazy Arcade. If you missed it or want a replay and a little more “pre-Halloween” Halloween, head over to Tim’s blog.

    igirlzoe: tim holtz stampers anonymous 2023 halloween obscure
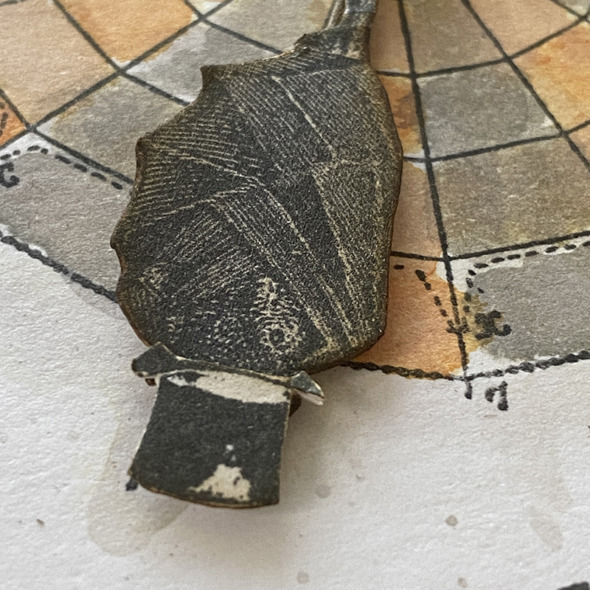
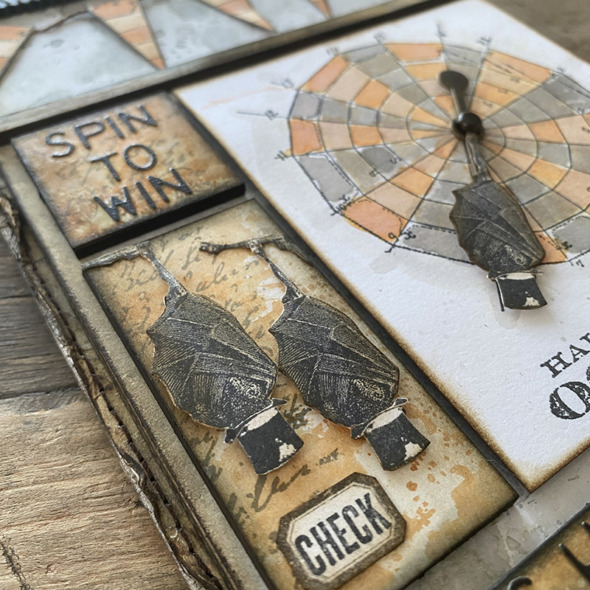
    The Obscure stamp set from Tim Holtz 2023 Halloween stamps was my favorite and that little bat was part of the reason why! The detail on the bat is incredible and I love that it’s just hanging out, or spinning.

    igirlzoe: tim holtz stampers anonymous 2023 halloween obscure
    See what I mean about the bats just hanging out?! Welcome to Bats Hit Crazy Arcade! Let’s get into some of the details…

    igirlzoe: tim holtz stampers anonymous 2023 halloween obscure
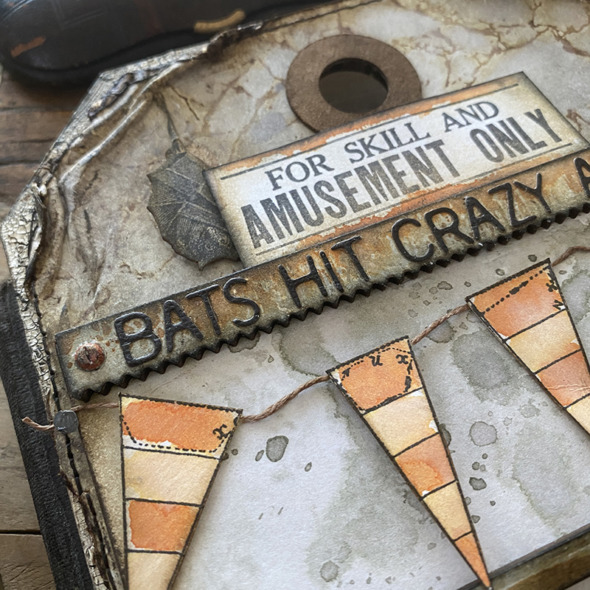
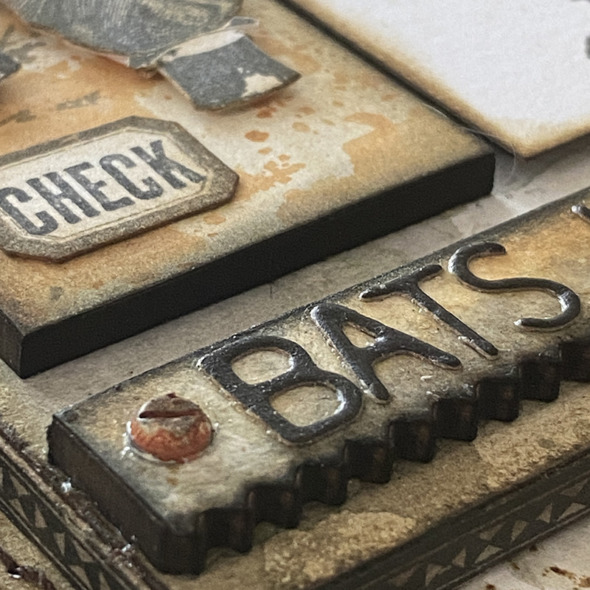
    The base of this make is an Etcetera Thickboard Tag in the Mini size. Covered with distress watercolor cardstock and stamped with the new Shattered stamp. To make bunting, stamp the circle from The Obscure stamp set and watercolor with distress ink. Fussy cut and glue to a piece of string using distress collage medium. The Bats Hit Crazy Arcade is die cut from Alphanumeric Label thinlits dies and glued to an Etcetera Pinked Trim with the background die cut with the Decorative Trims thinlits dies.

    igirlzoe: tim holtz stampers anonymous 2023 halloween obscure
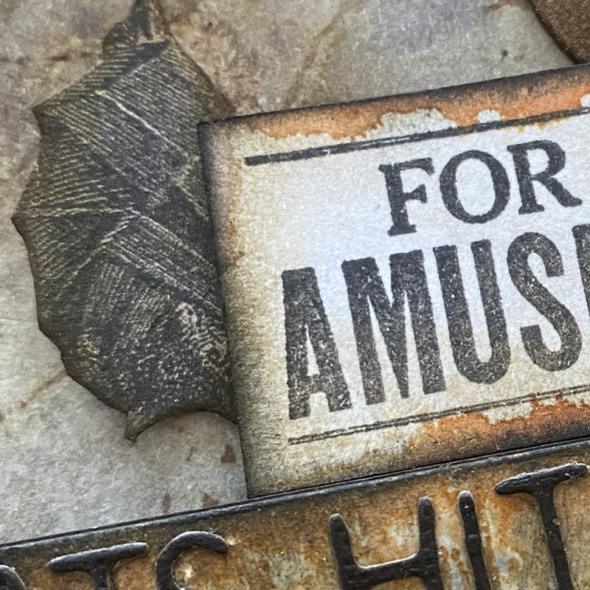
    The “For Skill and Amusement Only” stamp from Eccentric stamp set was the perfect addition. I love that Tim’s stamps mix and match so well. It’s such great fun mixing up the new stamps with the old as you get them. As Stampers Anonymous never retire Tim’s CMS numbered stamps, there’s always chance to add to your collection.

    igirlzoe: tim holtz stampers anonymous 2023 halloween obscure
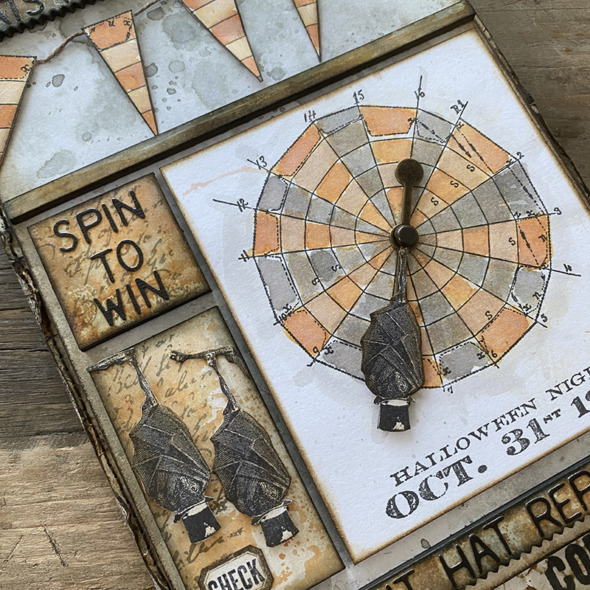
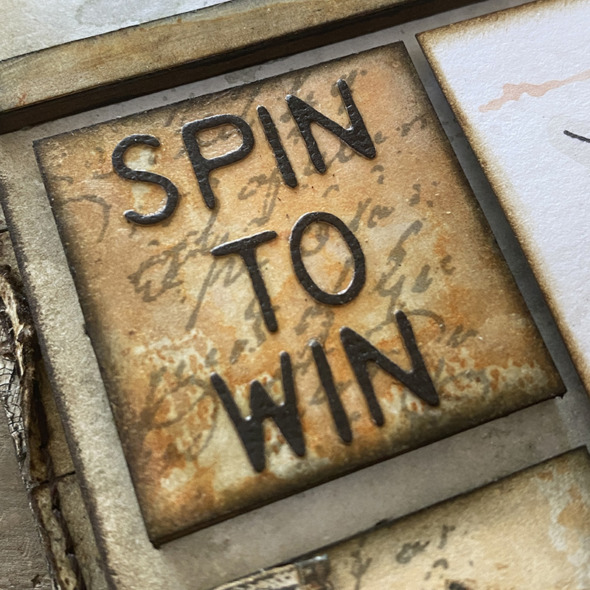
    Are you ready to SPIN TO WIN???

    igirlzoe: tim holtz stampers anonymous 2023 halloween obscure
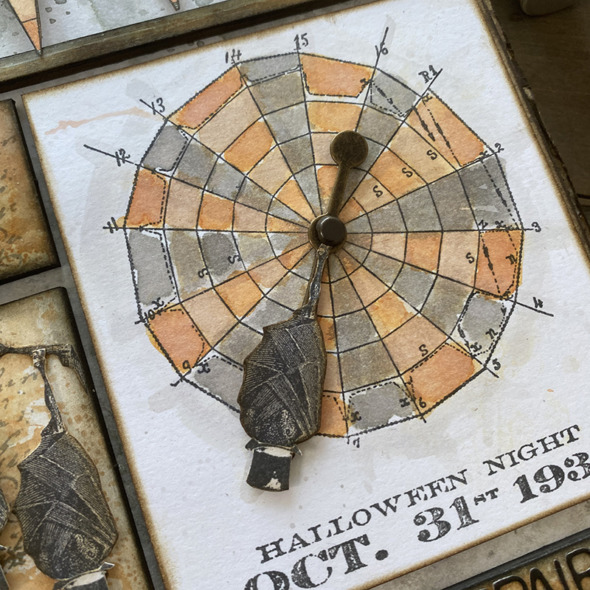
    Stamping the circle from The Obscure stamp set and watercolor with distress ink. Stamp a bat from the same set and glue to an idea-ology game spinner. Use an idea-ology long fastener to attach to the center of the circle. Don’t tighten the fastener too much at the back as you want the spinner to spin. Adjust before adding the card panel to the Etcetera Tag.

    igirlzoe: tim holtz stampers anonymous 2023 halloween obscure
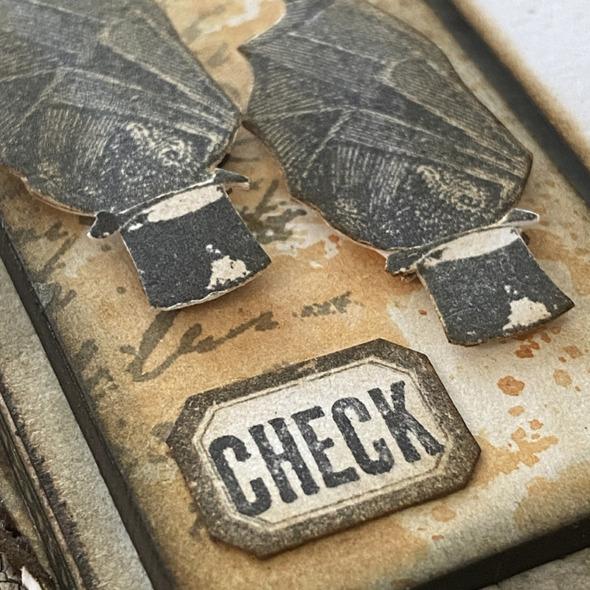
    Of course my bats had to have hats and the hat from the Paris to London stamp set was made to measure! I added a strip of card stock to the back of the bat to give something to stick the hat to.

    igirlzoe: tim holtz stampers anonymous 2023 halloween obscure
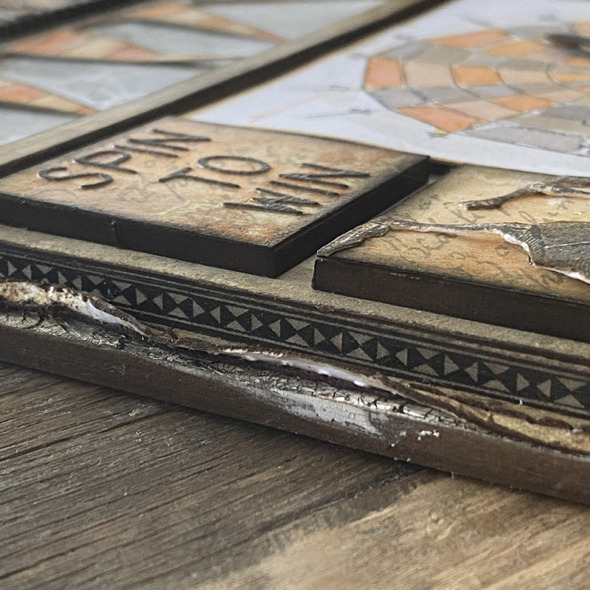
    Spin to Win is die cut from the same Alphanumeric Label thinlits dies as used for the Bats Hit Crazy Arcade and added to an Etcetera mosaic tile. The background stamped with The Obscure stamp set in distress archival ink.

    igirlzoe: tim holtz stampers anonymous 2023 halloween obscure
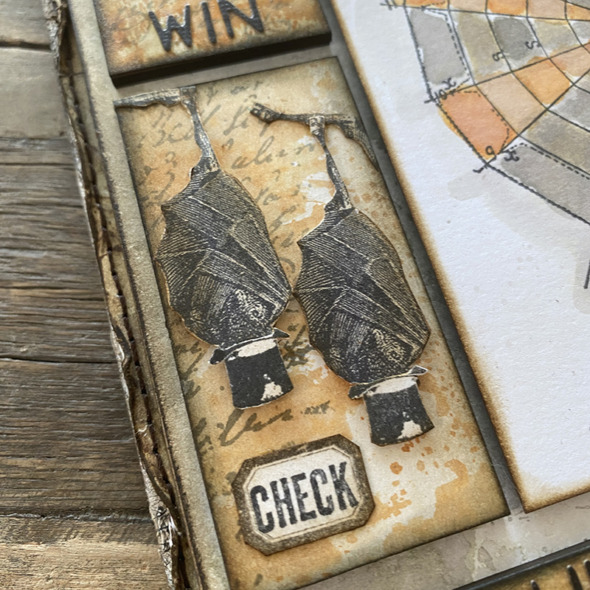
    I used bat legs which I stamped and fussy cut to create faux branches for the bats to hang from in their “Hat Check” area.

    igirlzoe: tim holtz stampers anonymous 2023 halloween obscure
    That tiny label stamp is one of the most used in my collection and one I never put away. It’s from the Mini Halloween 3 stamp set. The “CHECK” was from a portion of a stamp from the Eccentric stamp set.

    igirlzoe: tim holtz stampers anonymous 2023 halloween obscure
    You can see how the new Etcetera Tiles give depth to a make and it’s easier to work on a tile and then add it to a larger background.

    igirlzoe: tim holtz stampers anonymous 2023 halloween obscure
    I added idea-ology design tape to the edges of the larger Etcetera Panel I used. I love the layers the Etcetera range allows you to create.

    igirlzoe: tim holtz stampers anonymous 2023 halloween obscure
    I’m obsessed with the idea-ology Hardware Heads. They are perfect to add to the end of Etcetera Trims.

    igirlzoe: tim holtz stampers anonymous 2023 halloween obscure
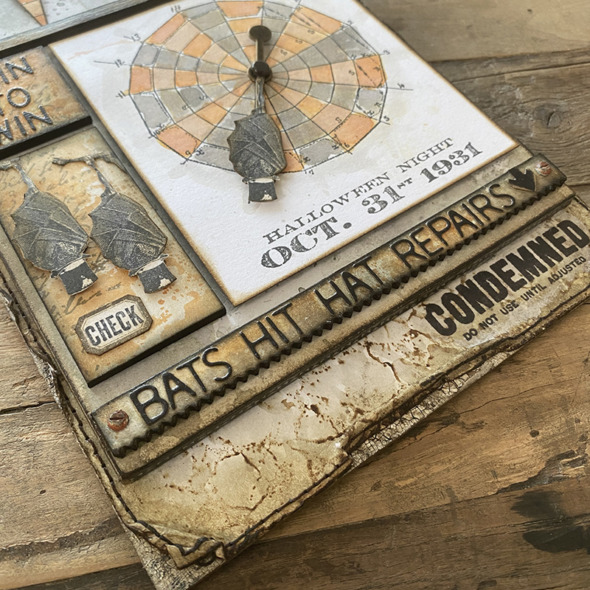
    Downstairs for the Bat Hat Repair Workshop and Condemned Bat Storage!

    DO NOT GO DOWN THERE!!!

    igirlzoe: tim holtz stampers anonymous 2023 halloween obscure
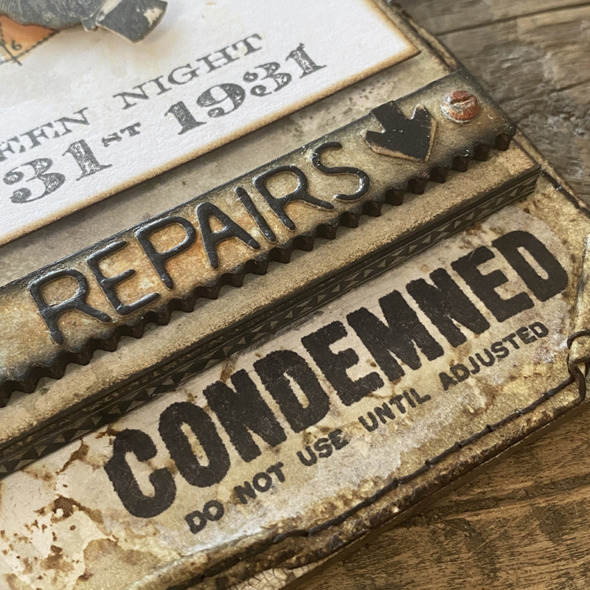
    The title is die cut from the Alphanumeric Label thinlits set again and that perfect little arrow is from the Chapter 3 Postale thinlits die set.  One of my favorite stamps from the Eccentric stamp set in distress archival ink was perfect to finish this story.

    igirlzoe: tim holtz stampers anonymous 2023 halloween obscure
    Thanks for stopping by and let me know if you have any questions.
    Zoe


    affiliate links used at no cost to you


  3. Tim Holtz Sizzix Halloween 2023

    12th August, 2023 by iGirlZoe

    igirlzoe: tim holtz sizzix 2023 halloween

    Happy Holtzaween friends! Tim Holtz’s Halloween Saturday LIVES began last week with the awesome new Distress Mica Stains and Distress Pastes from Ranger Ink! If you haven’t seen that LIVE with cool demo’s by Tim, be sure to check it out. Today Tim showcased his Sizzix Halloween 2023 collection. To see the replay and all the incredible inspiration from the makers, head over to Tim’s blog.

    igirlzoe: tim holtz sizzix 2023 halloween
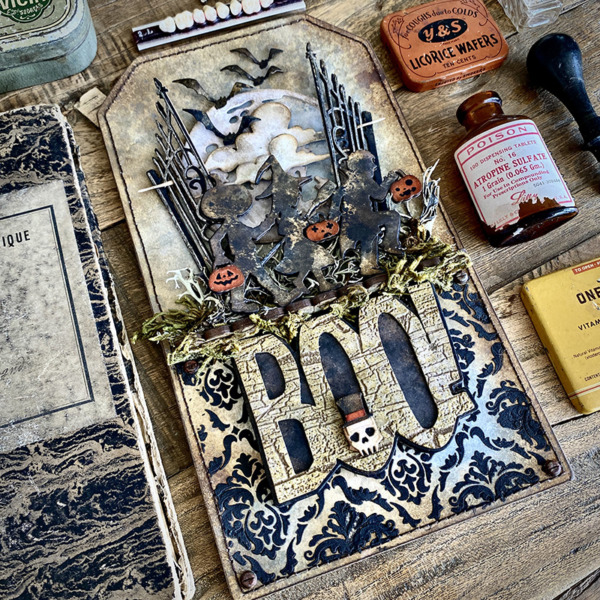
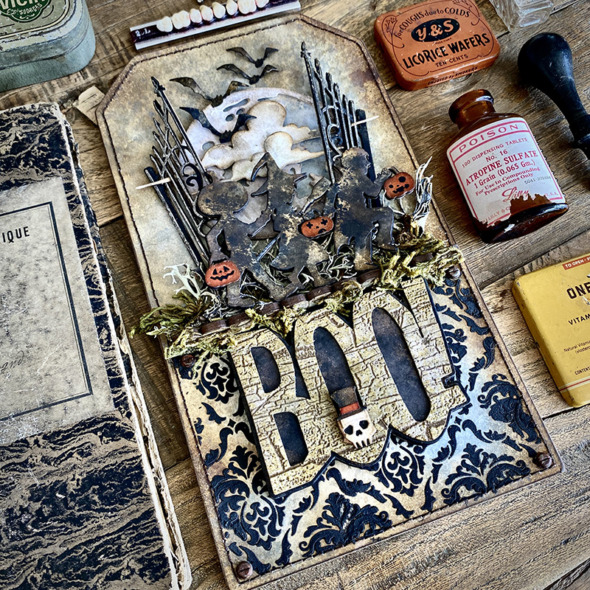
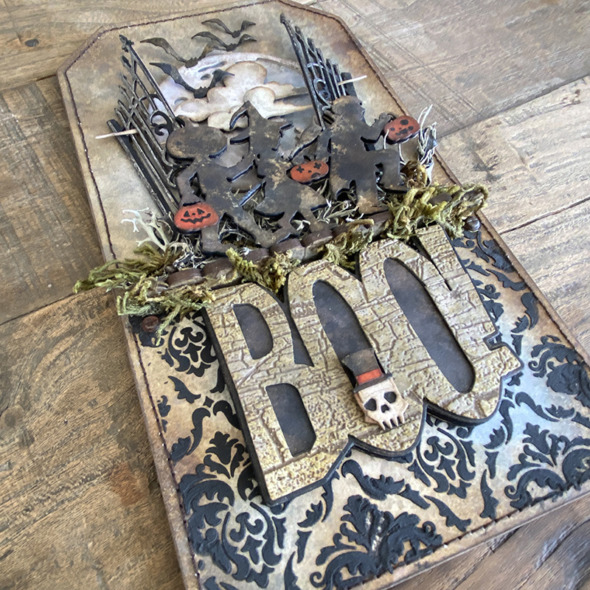
    I absolutely love how Tim’s collections work so beautifully together and this 2023 Halloween collection is no exception. I used dies from several of the sets to create this Halloween Home Decor piece.

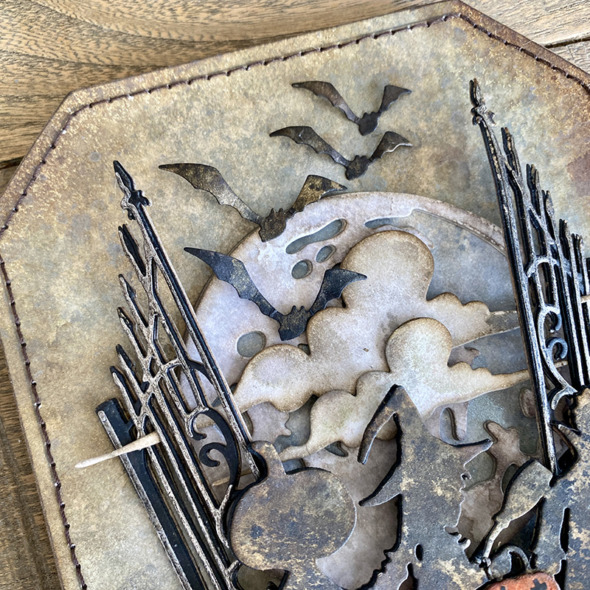
    The Moonlight die set is one of my faves and mixed with the bats and those eerie clouds from Edison, it sets the scene for the perfect Halloween moon. *insert howling wolves…

    igirlzoe: tim holtz sizzix 2023 halloween
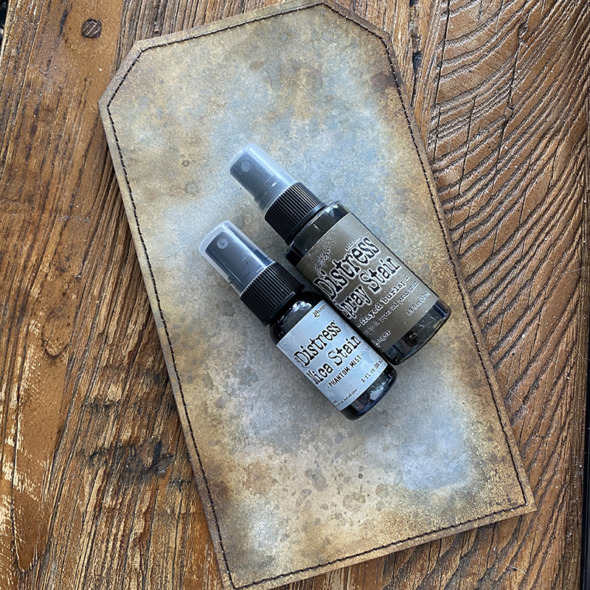
    I used the newly released Phantom Mist Distress Mica Spray with old faithful, Frayed Burlap Distress Spray stain onto Distress Watercolor Cardstock and stitched before mounting onto an Etcetera tag with Distress Collage Medium and edging with Walnut Stain Distress ink.

    igirlzoe: tim holtz sizzix 2023 halloween
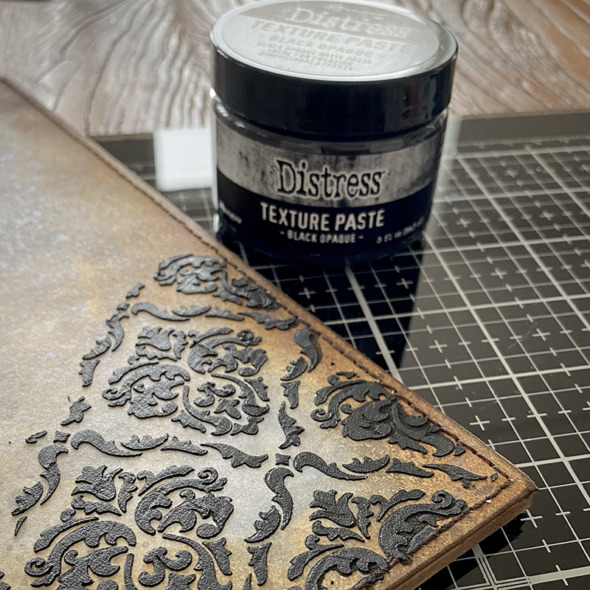
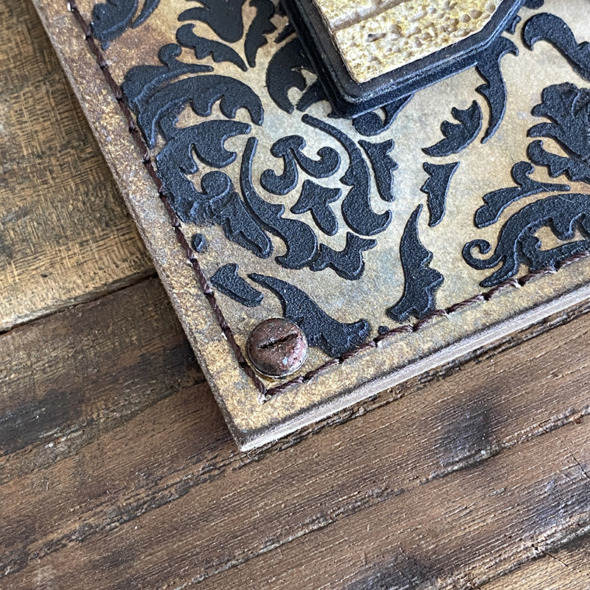
    Tape off the edges of the tag and spread the new Black Opaque Distress Texture Paste through the Gothic stencil with a palette knife and set aside to dry.

    igirlzoe: tim holtz sizzix 2023 halloween
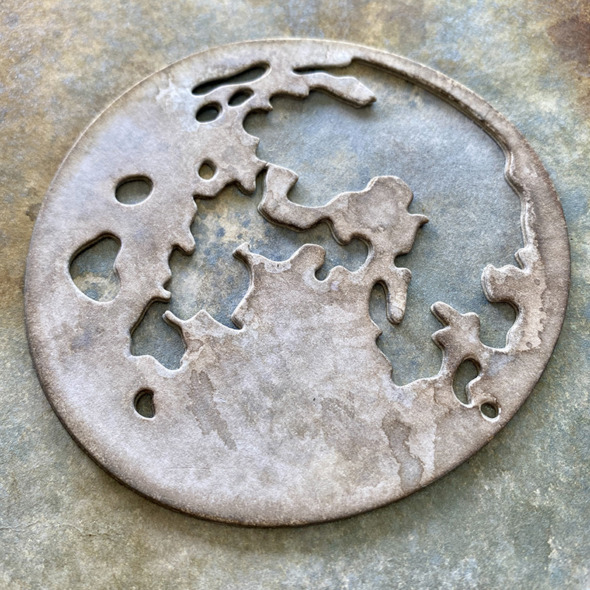
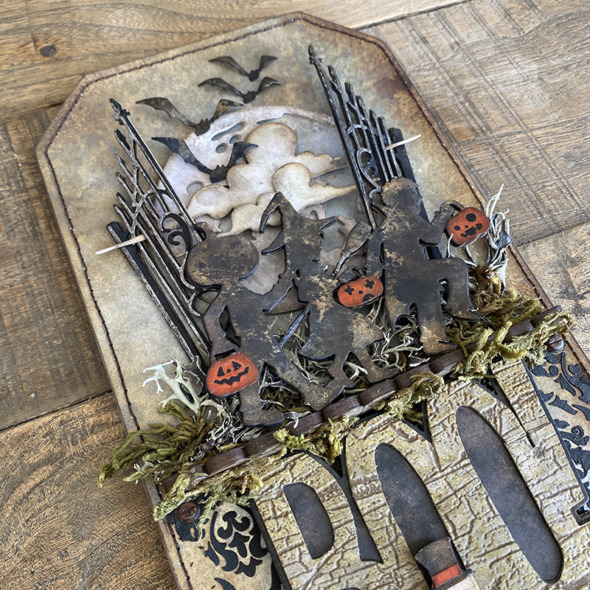
    Cut the moon from the Moonlight die several times to build a deeper top layer. Cover the moon with Hickory Smoke Distress ink and the background moon piece with Phantom Mist Distress Mica spray. Assemble and glue to the tag background.

    igirlzoe: tim holtz sizzix 2023 halloween
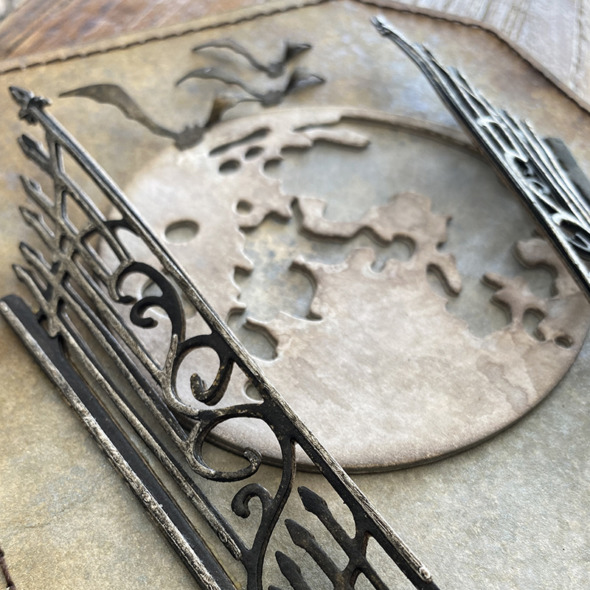
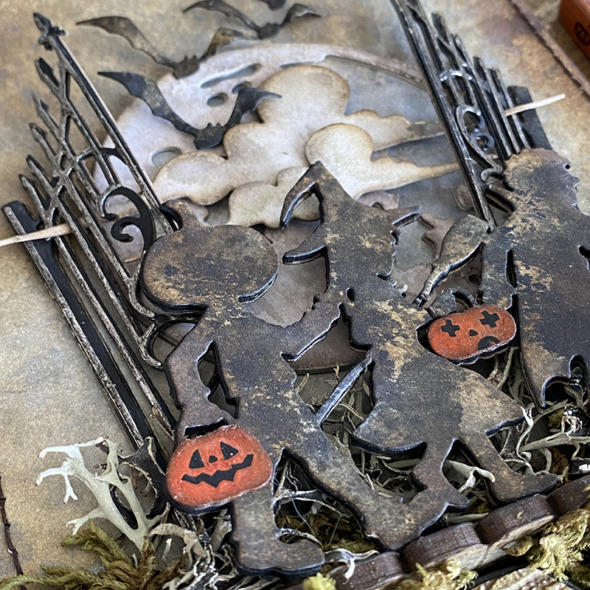
    Add Gothic gates. The base layer is cut from Distress Watercolor Cardstock inked with Black Soot Distress Spray stain. The top layer is cut from idea-ology Metallic Kraftstock with a little Black Soot Distress Paint added. Glue them by the edge gate post and allow the rest to stand slightly to give dimension.

    igirlzoe: tim holtz sizzix 2023 halloween
    The clouds from Edison die set are so eerie, die cut from Distress Watercolor Cardstock and inked with Distress ink. The 3D foam adhesive squares from Simon Says Stamp are perfect to layer them and the smaller squares can be cut down to fit behind the bats  (linked below).

    igirlzoe: tim holtz sizzix 2023 halloween
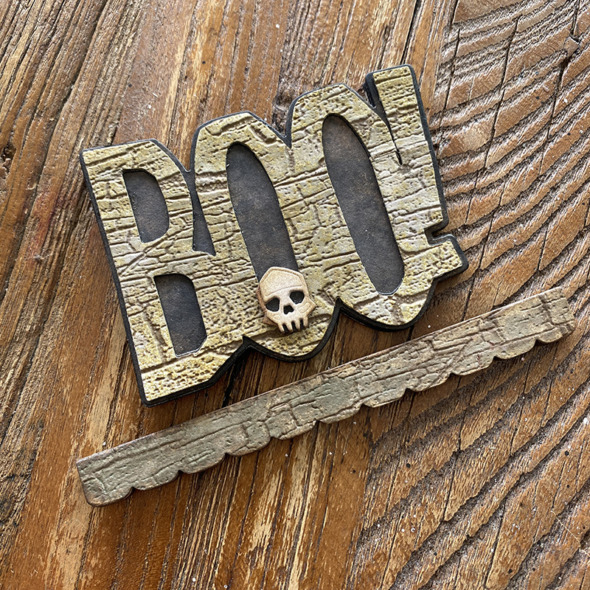
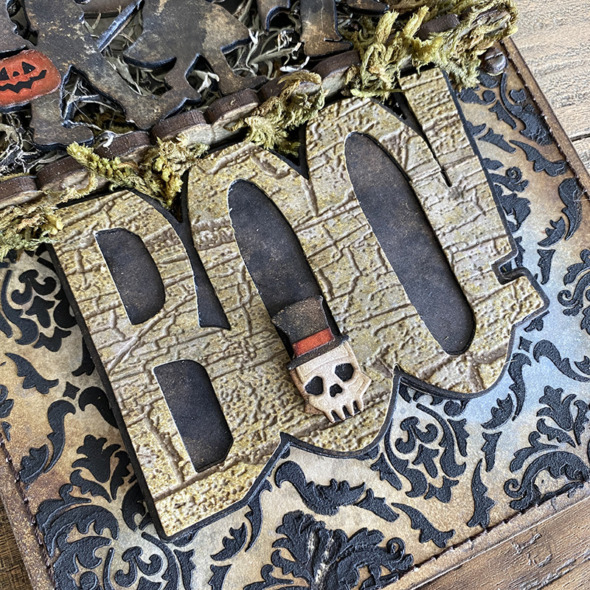
    Die cut Boo from the Big Frights die set and emboss with the Cracked 3D folder. Repeating with the Decorative Trims die cut and gluing to an Ectcetera trim.

    igirlzoe: tim holtz sizzix 2023 halloween
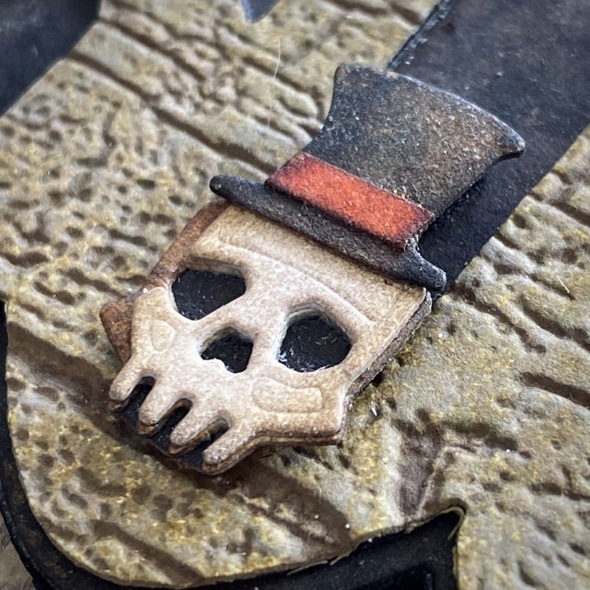
    Add a skull from the Graveyard Colorize set to the Boo die cut. The hat on the caroler die from the Christmas Vault Series die set (linked below) was the perfect match! Cut a strip with your scissors and color with Distress Mica Spray to create the hat band.

    igirlzoe: tim holtz sizzix 2023 halloween
    BOO!

    igirlzoe: tim holtz sizzix 2023 halloween
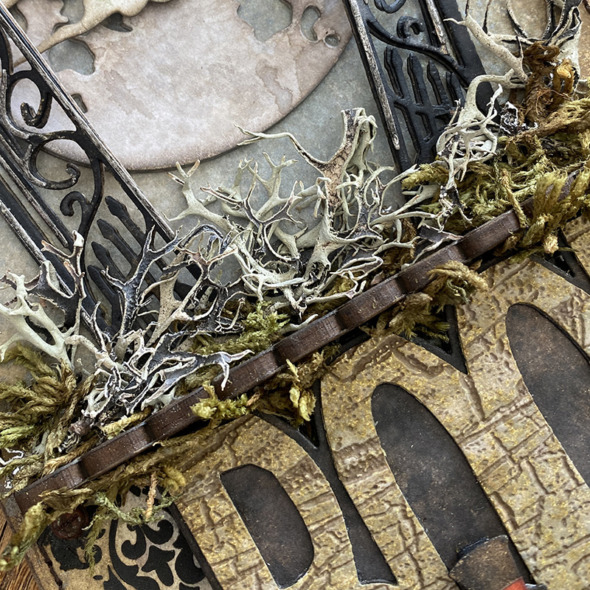
    Add the Decorative Trim as a shelf above the BOO die cut and cover with moss.

    igirlzoe: tim holtz sizzix 2023 halloween
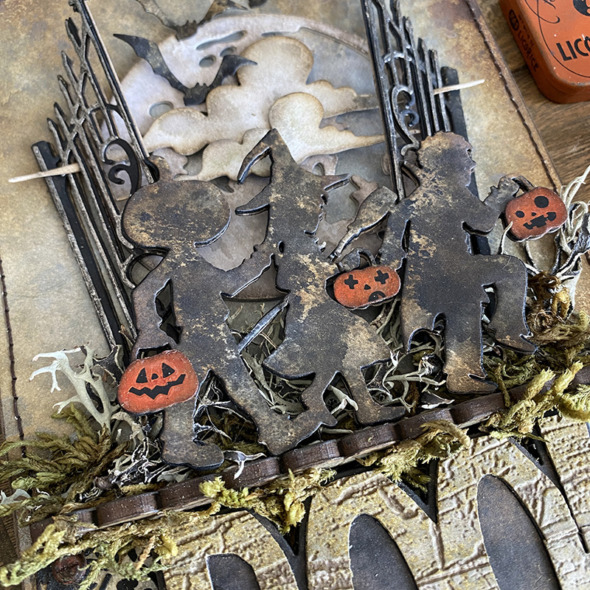
    Now you have a shelf for these naughty trick or treaters from the Halloween Night set. Die cut from Distress Watercolor Cardstock and inked with Distress.

    igirlzoe: tim holtz sizzix 2023 halloween
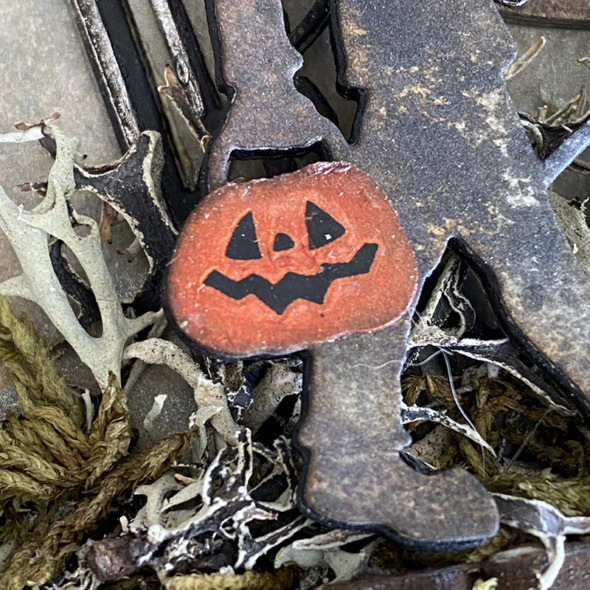
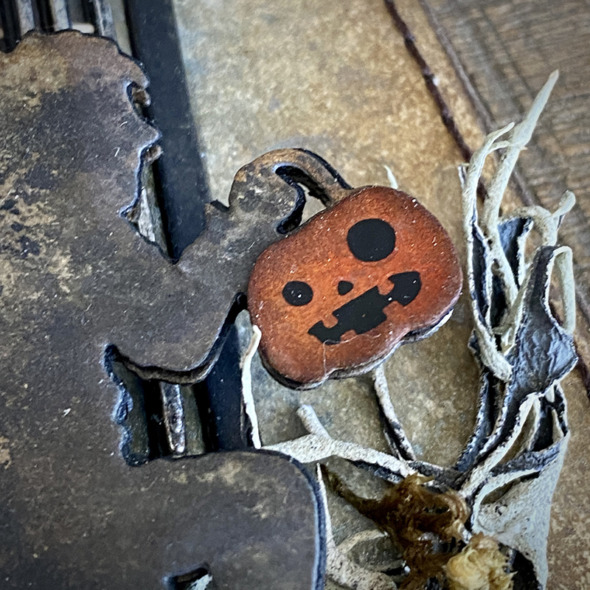
    The jack-o-lanters were colored with Distress Mica spray dry. Next, cover with a layer of Distress Collage Medium allowing to dry before adding the idea-ology Remnant Rubs faces over the top.

    igirlzoe: tim holtz sizzix 2023 halloween
    These were from a set of Tim’s idea-ology Halloween Remnant Rubs from a few years back, maybe you have a set in your stash or can find them at your local or online craft store…

    igirlzoe: tim holtz sizzix 2023 halloween

    igirlzoe: tim holtz sizzix 2023 halloween
    Add idea-ology Hardware Heads to the lower part of the tag.

    igirlzoe: tim holtz sizzix 2023 halloween

    igirlzoe: tim holtz sizzix 2023 halloween
    Thanks for stopping by and let me know if you have any questions.
    Zoe


    affiliate links used at no cost to you


  4. Witches Potting Shed Part 4

    13th December, 2022 by iGirlZoe

    igirlzoe: tim holtz idea-ology halloween witches

    Hello friends. I’m back with the final part of my witches potting shed! Thanks for flying your broomsticks with me witches! If you’ve just arrived, you can grab your broomsticks HERE!

    Remember that the Halloween products are one and done for the season so grab anything you need to last you. To see all the incredible makes, head over to Tim’s blog for the LIVE replay.

    igirlzoe: tim holtz idea-ology halloween witches
    Today I’m sharing part 4 of the witches potting shed made for the LIVE launch. You can see the introduction and close ups in my first post. Let’s get into the details…

    BACK GARDEN, BAT TREE, TOMBSTONE + BROOM

    igirlzoe: tim holtz idea-ology halloween witches
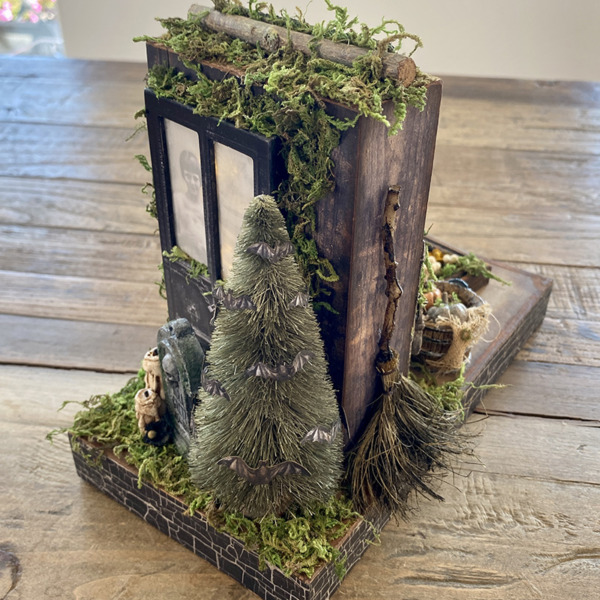
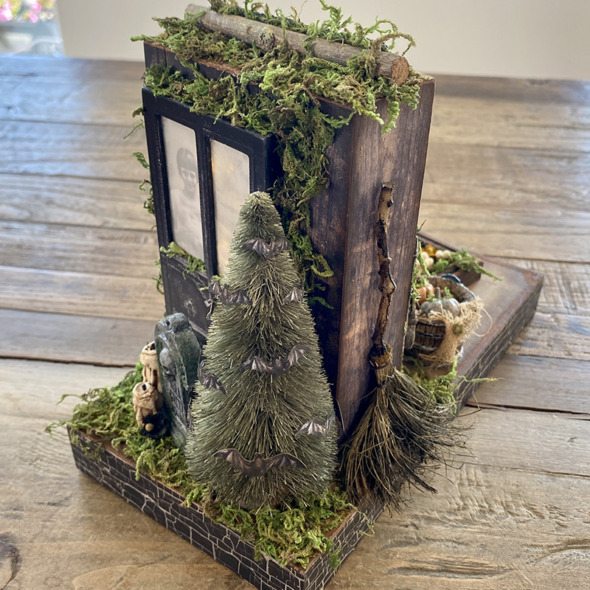
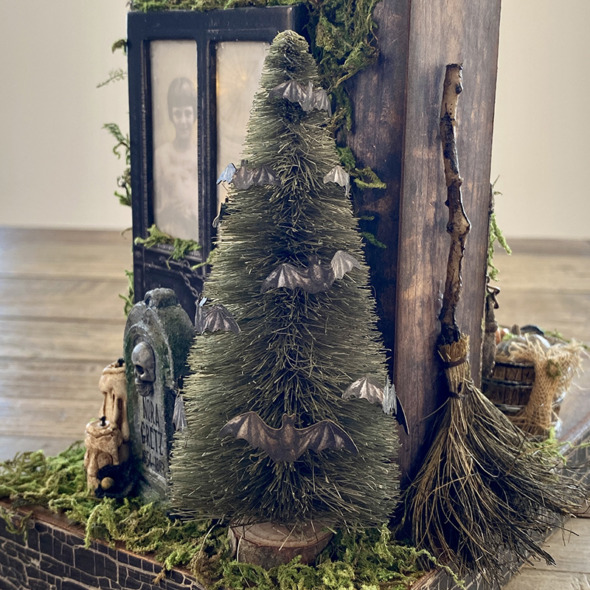
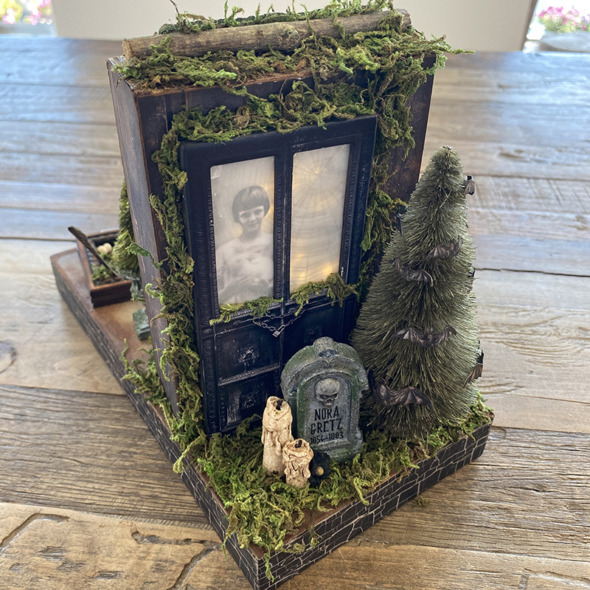
    The idea-ology woodland trees are good for all seasons so I make sure to stock up on these each year. They take distress ink like a dream, I added iced spruce and rustic wilderness distress ink sprays and allowed to air dry. There are so many of the cool bats in the halloween ephemera pack, so perfect to add lots to the tree. I replaced the tree’s wood base with a wood slice.

    igirlzoe: tim holtz idea-ology halloween witches
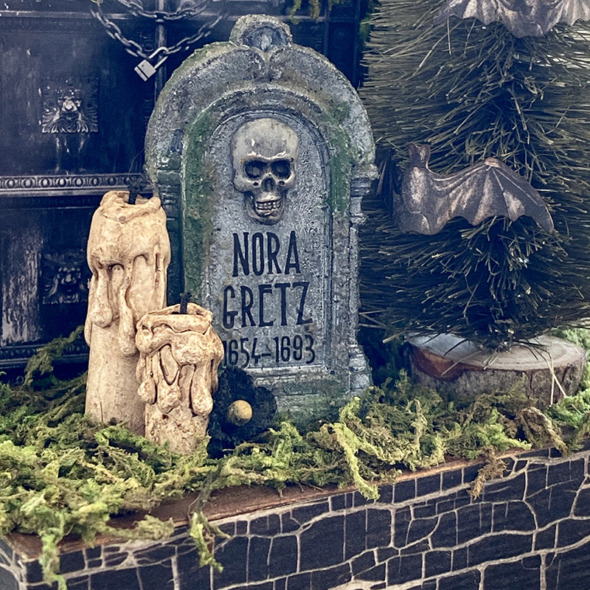
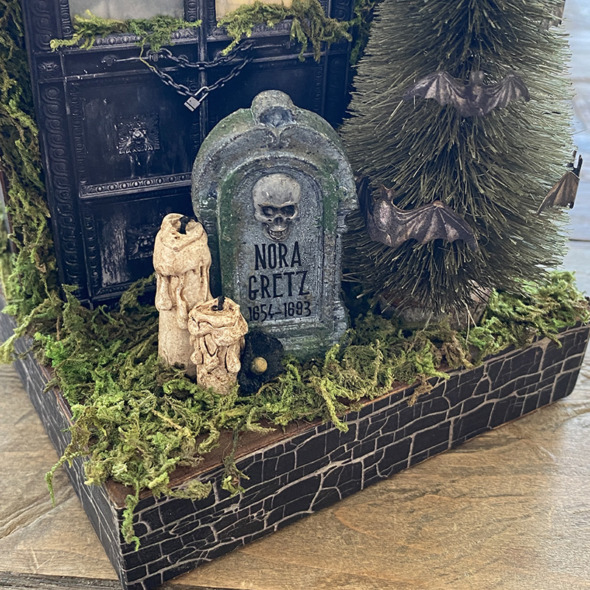
    I added distress crypt-paste to an idea-ology tombstone and once dry, added distress crayon and paint. I love the fun “tombstone toppers” from the halloween remnant rubs and used “Nora Gretz” on the front. I removed the crossbones from the skulls and spiders adornment set, covered the skull head with distress crypt paste, dry brushed with black soot distress paint and glued to the tombstone above the remnant rubs.

    igirlzoe: tim holtz idea-ology halloween witches
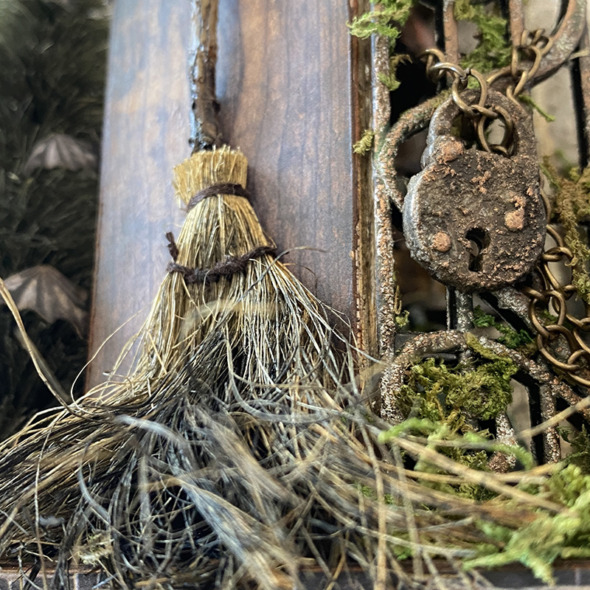
    I love the new idea-ology broomsticks, the handles are so gnarly and needed no additional grunge and a little distress paint and collage medium over the brush makes it look witchy and weathered.

    igirlzoe: tim holtz idea-ology halloween witches
    Finally, I added the idea-ology drippy candles and a flower from the idea-ology bouquet pack dyed with black soot distress ink spray. This photo gives you a good view of the idea-ology halloween design tape I covered the vignette tray sides with.

    igirlzoe: tim holtz idea-ology halloween witches
    Thanks for stopping by, I hope you have enjoyed the witches potting shed series and it inspires you to make. I really appreciate the kind and funny comments you’ve left and a big thanks for being patient. Let me know if you have any questions.

    Zoe


    affiliate links used at no cost to you


  5. Witches Potting Shed Part 3

    12th December, 2022 by iGirlZoe

    igirlzoe: tim holtz idea-ology halloween witches

    Hello friends. Without delay, I’m back with part 3 of my witches potting shed! Halloween products are one and done each season, so grab what you need to last you and check out incredible makes over on Tim’s blog.

    igirlzoe: tim holtz idea-ology halloween witches
    Today I’m sharing part 3 of the witches potting shed made for the LIVE launch. You can see the introduction and close ups in my first post. Let’s get into the details…

    BONE GARDEN, BARREL + URNS

    igirlzoe: tim holtz idea-ology halloween witches
    In Part 1 I talked through preparing the vignette tray.

    igirlzoe: tim holtz idea-ology halloween witches
    I adorned the front of the vignette tray with a bat from the halloween adornments set.

    igirlzoe: tim holtz idea-ology halloween witches
    Time to assemble the individual pieces for your garden, starting with the bone garden…

    igirlzoe: tim holtz idea-ology halloween witches
    Tape off the area where the vignette frame will sit to keep the paste and moss off.

    igirlzoe: tim holtz idea-ology halloween witches
    Add distress grit-paste to the piece of cardstock and once dry remove tape. Paint the surface with distress paint to simulate soil and once dry, add moss with distress collage medium.

    igirlzoe: tim holtz idea-ology halloween witches
    Add etcetera trims from the halloween set to the underside of the vignette frame to make it deeper. Glue to the cardstock base with distress collage medium.

    igirlzoe: tim holtz idea-ology halloween witches
    Grunge up a fork from the idea-ology silverware set and glue into the plant bed with distress collage medium.

    igirlzoe: tim holtz idea-ology halloween witches
    Add bones from the boneyard pack, skulls and bouquet flowers to the plant bed with extra moss. Using nails from the vignette hardware set to add a halloween word plaque covered with picket fence distress crayon.

    igirlzoe: tim holtz idea-ology halloween witches
    Spray a medium idea-ology woodland tree with distress spray and once dry, add to an idea-0logy urn grunged up with distress paint and distress crypt-paste. I added a spider from the halloween adornments set to the tree.

    igirlzoe: tim holtz idea-ology halloween witches
    One of my urns arrived broken so I went with it and used the broken one on it’s side with moss and a flower from idea-ology glued in.

    igirlzoe: tim holtz idea-ology halloween witches
    I have been obsessed with these idea-ology barrels since Tim showed a ruler with barrels with different things in them. I added mummy cloth that I dyed with distress spray and idea-ology pumpkins.

    igirlzoe: tim holtz idea-ology halloween witches
    The pumpkins were painted with distress paint, with distress crayon painted down the creases and moss and a stick hot glued into the center of the pumpkin. Stacy Hutchinson shared a tutorial on her instagram stories a few years ago. For extra creep I added a hand from the milagros adornments set. I painted it with antique linen distress paint and glued it into the barrel.

    igirlzoe: tim holtz idea-ology halloween witches
    They’re prize winning pumpkins so I added a prize ribbon, covered with distress paint with a piece of ephemera cut to size and added to the center.

    igirlzoe: tim holtz idea-ology halloween witches
    Thanks for stopping by, I hope you found this post helpful and it has inspired you to make. Let me know if you have any questions.

    Back soon with the final installment in the witches potting shed…
    Part 4 – Back Garden, Bat Tree, Tombstone + Broomstick

    Zoe


    affiliate links used at no cost to you


  6. Witches Potting Shed Part 2

    9th December, 2022 by iGirlZoe

    igirlzoe: tim holtz idea-ology halloween witches

    Hello friends, hope you’re doing well! I had the best of intentions to get these posts finished before Halloween, but alas, December arrived! I make for the dark side all year though and there’s nothing to stop you adapting any of the things I share to any season, so grab your broomsticks witches and let’s continue this flight…

    Remember that the seasonal products are one and done for the season so grab anything you need to last you. To see all the incredible makes, head over to Tim’s blog for the LIVE replay.

    igirlzoe: tim holtz idea-ology halloween witches
    Today I’m sharing part 2 of the witches potting shed made for the LIVE launch. You can see the introduction and close ups in my first post. Let’s get into the details…

    POTTING SHED, CAULDRON + GATES

    igirlzoe: tim holtz idea-ology halloween witches
    In Part 1 I talked through preparing the vignette box.

    igirlzoe: tim holtz idea-ology halloween witches
    To create the shelves for the potting shed, cut pieces from the idea-ology Halloween backdrops with the decorative trims thinlits die. These dies perfectly fit the etcetera thickboard trims, I used scalloped edged with the corresponding dies. Use distress collage medium to glue the die cuts to the thickboard trims.

    igirlzoe: tim holtz idea-ology halloween witches
    Thread tiny lights into the vignette box through holes drilled in Part 1. I simply glued the lights behind where the bottle would sit so it lit up the bottle, (see next photo).

    igirlzoe: tim holtz idea-ology halloween witches
    Cover an idea-ology tiny vial with alcohol ink, I added a spider from the idea-ology Halloween Adornments pack. Cover the spiders back with a drop of envy alcohol pearls ink and tie it to the bottle with twine. The tiny lights glued behind the bottle give it a creepy glow. I added a little moss with distress collage medium to hide the wires.

    igirlzoe: tim holtz idea-ology halloween witches
    Using meadow alcohol ink to dye the idea-ology bubbles, I swirled them in a cup and used the packaging they came in as a “bubble drying station!”

    igirlzoe: tim holtz idea-ology halloween witches
    Thread a set of Halloween tiny lights in green up into the vignette box and through the back of the cauldron. I use a Dremel Micro tool to make the holes and don’t forget to wear your safety glasses for drilling. Glue the tiny lights into the bottom of the cauldron and add one large bubbles and then begin adding more bubbles. I use glossy accents to attach them as it dries clear. You need a little patience with this as the glossy accents take a little while to dry, but worth it.

    igirlzoe: tim holtz idea-ology halloween witches
    Add distress crypt-paste to the edges of the cauldron. Once dry I painted with black soot and then added peeled paint distress paint to highlight, allowing it to dry between layers. I added a sticker from the idea-ology curiosities sticker book.

    igirlzoe: tim holtz idea-ology halloween witches
    I added another sticker from the curiosities sticker book under the shelf above the cauldron. These curiosities stickers help tell the story.

    igirlzoe: tim holtz idea-ology halloween witches
    I love having new larger skulls in the idea-ology Halloween line. I wanted to show the size comparison so used this years and last years together. I LOVE how creepy and dark the 2022 skulls are!

    igirlzoe: tim holtz idea-ology halloween witches
    Every potting shed needs pots, so I added a couple of tiny terracotta pots. They are real terracotta, I bought them from Switzerland 10 years ago. I’m sure you can get similar from hobby stores and if not, maybe we could ask Tim, “wouldn’t it be cool if…” 😉

    igirlzoe: tim holtz idea-ology halloween witches
    On another shelf I added a couple of books made using the book covers from the Halloween ephemera pack. I added another bottle, this time dyed brown, with a label from the same ephemera pack. The drippy candle is back lit by a clear tiny light from the same set as the onea sitting behind the green spider bottle.

    igirlzoe: tim holtz idea-ology halloween witches
    Using a piece from the vignette hardware pack, I hung a birdcage. I used pliers to bend the cage bars and added a piece of mummy cloth to the bottom and a crow made using the Halloween ephemera. Glue 2 crows either side of a piece of fun foam and fussy cut.

    igirlzoe: tim holtz idea-ology halloween witches
    I added gates to either side of the potting shed using distress collage medium to attach to the edges of the vignette box. Adding distress grit paste to the gates with my finger and once dry, dry brushed black soot distress paint over the top. Once dry, I used bronze Gilders Wax to highlight.

    igirlzoe: tim holtz idea-ology halloween witches
    Finally I wrapped a chain around the gates and added a lock from the locks and keys set. I rubbed distress collage medium onto the gates with my fingers and then added moss and left to dry.

    igirlzoe: tim holtz idea-ology halloween witches
    Thanks for stopping by, I hope you found this post helpful and it has inspired you to make. Let me know if you have any questions.

    Back soon with the next installment in the witches potting shed…
    Part 3 – Bone Garden, Barrel + Urns

    Zoe


    affiliate links used at no cost to you


  7. Witches Potting Shed Part 1

    4th October, 2022 by iGirlZoe

    igirlzoe: tim holtz idea-ology halloween witches

    Hello friends. With Halloween on the horizon, have you stocked up on your Tim Holtz Halloween idea-ology? I like to make for the dark side all year round, so I’ve stocked up on seasonal products to last me… Some people collect purses and shoes, others collect cauldrons, skulls and pumpkins! 😉

    To see all the Halloween idea-ology products and incredible makes, head over to Tim’s blog for the LIVE replay.

    igirlzoe: tim holtz idea-ology halloween witches
    Today I’m sharing part 1 of the witches potting shed made for the LIVE launch. You can see the introduction and close ups in my first post. Let’s get into the details…

    BASES + BACK DOOR

    igirlzoe: tim holtz idea-ology halloween witches
    To start with I covered the smaller vignette tray from the idea-ology vignette tray set with paper from halloween backdrops. I used the halloween design tape to cover 3 sides of the vignette and used the halloween backdrop paper to cover the front.

    igirlzoe: tim holtz idea-ology halloween witches
    I sanded and inked parts of the background for extra grunge and decided on the placement of potting shed and drilled 2 holes in the base with my Dremel micro. You can use a hand drill or any drill with a small drill bit or an awl to do this. I like using a Dremel micro as it’s small and light weight.

    PLEASE WEAR PROTECTIVE EYEWEAR WHEN USING POWER TOOLS!

    igirlzoe: tim holtz idea-ology halloween witches
    Cover the back of the largest vignette from the vignette box set with idea-ology halloween worn wallpaper. Adding distress opaque crackle paste to the inside sides. I covered the inside top of the vignette with a generous layer of distress collage medium and pushed moss into place and allowed to dry. Some of the moss will fall off but you can add more if you need to. Remember, perfect doesn’t look natural, moss in nature is a hot mess.

    igirlzoe: tim holtz idea-ology halloween witches
    Line up your vignette box over the vignette tray base and use a marker or pokey tool up through the holes in the vignette tray to mark the underside of the vignette box. If you don’t care about the exact placement of the holes you can eyeball it.

    igirlzoe: tim holtz idea-ology halloween witches
    The placement of the holes in the back of the vignette box are more important as they need to sit underneath where the door frame is going to be. I used chalk to mark out where the door would be.

    igirlzoe: tim holtz idea-ology halloween witches
    I used 2 sets of tiny lights, a set of everyday tiny lights (white) and a set of Halloween tiny lights (green), thread up through the underside of the vignette tray. The battery packs are stuck to the underside of the vignette tray out of sight. I work with the tiny lights on as it’s easier to see positioning.

    igirlzoe: tim holtz idea-ology halloween witches
    I cut a piece of paper from the backdrops halloween collection into strips and covered the back and sides of the vignette box. You can see here where I marked a chalk line of where the windows were going to be versus the base of the door. The tiny lights have wire in them so it’s easy to bunch them together and they hold their place. I added a tiny dot of hot glue at the top and bottoms to hold them in place. DO NOT get hot glue on the bulbs as it can short the lights out.

    igirlzoe: tim holtz idea-ology halloween witches
    Taking the door from the baseboards halloween set (pictured above)…

    igirlzoe: tim holtz idea-ology halloween witches
    I flipped it over and added a piece of vellum, a paper doll and a sheet of transparency (in that order) over the window. I built a frame using the straight trims from the etcetera bat and cobweb trims from stampers anonymous. It needs to be deep enough for the lights to sit behind the door and back light the cobweb transparency.

    igirlzoe: tim holtz idea-ology halloween witches
    I glued the door to the back of the vignette box with distress collage medium and added moss around the edges.

    igirlzoe: tim holtz idea-ology halloween witches
    So creepy right?! Trapped in the doorway forever…

    igirlzoe: tim holtz idea-ology halloween witches
    Thanks for stopping by, I hope you found this post helpful and it has inspired you to make. Let me know if you have any questions.

    Back as soon as I can with the next installment in the witches potting shed…
    Part 2 – Potting Shed, Cauldron + Gates

    Zoe


    affiliate links used at no cost to you

  8. Thankful

    3rd October, 2022 by iGirlZoe

    igirlzoe: tim holtz sizzix halloween pumpkin duo colorize feathery acorns 3D

    Hello friends, hope you’re doing well and enjoyed Tim Holtz’s Sizzix Christmas LIVE launch at the weekend. All of the makes were incredible and it got me excited to make for Christmas, wait… it’s October!

    igirlzoe: tim holtz sizzix halloween pumpkin duo colorize feathery acorns 3D
    As a maker I live in a constant state of seasonal confusion but with the cooler weather arriving here in Denmark and pumpkins on my mind I thought I would share some extra photos and a mini blog post for a make I did for the Tim Holtz Sizzix Halloween LIVE.

    igirlzoe: tim holtz sizzix halloween pumpkin duo colorize feathery acorns 3D
    I love love love the new Pumpkin Duo Colorize dies, they are so easy to put together. I went for a more fall themed tag as I know not everyone loves Halloween or the dark side as much as I do!

    igirlzoe: tim holtz sizzix halloween pumpkin duo colorize feathery acorns 3D
    I started with an Etcetera Thickboard Tag in the mini size. Covered with a piece of idea-ology Halloween Worn Wallpaper. You can see the index tab and numbers from the Chapter 3 sets tucked under the background which I embossed with the new Acorns 3D embossing folder. I covered with a wash of distress ink, dried, covered with collage medium and set aside to air dry. I used distress crayons to color the leaves. I added a final wash of watered down white gesso to the spaces between the acorns and leaves.

    igirlzoe: tim holtz sizzix halloween pumpkin duo colorize feathery acorns 3D
    I wanted to add a word across the pumpkins without obscuring them too much because they’re so lovely. I didn’t have a suitable sentiment so I crafted one! I used sentiments Thanks + Beautiful from (retired) Handwritten Celebrate and Handwritten Love sets. I cut and spliced them together. Hopefully many of you will have these sets in your stash or something like them.

    igirlzoe: tim holtz sizzix halloween pumpkin duo colorize feathery acorns 3D
    I couldn’t have it too pretty pretty, so I added a crow which I die cut from last years Vault Series Halloween dies from idea-ology black kraft stock and sanded it back a little at the edges. I tucked in a little idea-ology mummy cloth.

    igirlzoe: tim holtz sizzix halloween pumpkin duo colorize feathery acorns 3D
    Finally I added a feather for it to sit on, die cut from idea-ology black kraft stock. The Feathery die set is going to be one for all year use so I’m very thankful to have this set too.

    Thanks for stopping by and let me know if you have any questions.
    Zoe


    affiliate links used at no cost to you


  9. Witches Potting Shed

    17th September, 2022 by iGirlZoe

    igirlzoe: tim holtz idea-ology halloween witches

    Hello friends, hope you’re doing well! If you caught the Tim Holtz idea-ology Halloween LIVE launch party a few weeks ago, you may have caught sight of my witches potting shed and the other makers mind blowing makes! You can replay the launch to your halloween hearts content over on Tim’s blog.

    igirlzoe: tim holtz idea-ology halloween witches
    This Witches Potting Shed is a larger make, so today I’m going to share some close ups and then break each section into bite size pieces with step outs in separate posts. I’m sorry it’s taken longer than I had hoped to write these posts, I’ve been busy making for the next season. It’s still July, right?! LOL

    igirlzoe: tim holtz idea-ology halloween witches
    Part 1 – Bases + Back Door

    igirlzoe: tim holtz idea-ology halloween witches
    Part 2 – Potting Shed, Cauldron + Gates

    igirlzoe: tim holtz idea-ology halloween witches
    Part 3 – Bone Garden, Barrel + Urns

    igirlzoe: tim holtz idea-ology halloween witches
    Part 4 – Back Garden, Bat Tree, Tombstone + Broomstick

    Thanks for stopping by and let me know if you have any questions.
    Zoe


    affiliate links used at no cost to you


  10. Costumes and Millinery

    1st September, 2022 by iGirlZoe

    igirlzoe: tim holtz stampers anonymous exquisite stamp crest stencil sizzix masquerade

    Hello Friends, I hope you’re having a great week! Did you see the awesome Tim Holtz Halloween Stamp launch on Saturday? Oh my pumpkins it was so much fun and the maker inspiration was incredible! Tim did an awesome demo using the moon masks and mica sprays and watch to the end to see Mario’s costume! Replay and maker inspiration over on Tim’s blog.

    igirlzoe: tim holtz stampers anonymous exquisite stamp crest stencil sizzix masquerade
    Speaking of costumes… I loved one of the stamps so much that I created one of my makes around it. The “Costumes and Millinery” signage stamp from the aptly named Exquisite CMS453 stamp set was where I began…

    igirlzoe: tim holtz stampers anonymous exquisite stamp crest stencil sizzix masquerade
    I stamped onto the smooth side of a piece of distress watercolor cardstock with black soot archival ink and blended in gathered twigs distress ink. I used a white posca pen to highlight the center of the letters. I didn’t stamp a second time over the top as I like the look of the pen slightly bleeding over the black in. You could leave the stamp on your stamp platform and stamp a second time over the top.

    igirlzoe: tim holtz stampers anonymous exquisite stamp crest stencil sizzix masquerade
    I needed to find myself a Milliner and this gentleman from the new Halloween paper dolls pack with his mask from the new curiosities sticker book was the perfect fit. Something about that mustache says “get your costumes here!” 😉

    For the background I cut a piece of distress mixed media heavystock the same size of an etcetera thickboard mini tag. Sprayed with distress sprays and mica sprays from the new Halloween Mica sets. I stamped some of the background stamps from Exquisite CMS453 stamp set in vintage photo and ground espresso distress archival ink. Adding the larger bat stamp from the Unraveled CMS452 stamp set.

    igirlzoe: tim holtz stampers anonymous exquisite stamp crest stencil sizzix masquerade
    I was instantly smitten with the new Crest stencil and applied distress opaque crackle paste with a palette knife through the stencil onto the background. I added a little rusty hinge oxide ink between the stenciled paste and walnut stain distress crayon. I stitched the edges of my background with my sewing machine and then glued it to the etcetera tag with distress collage medium.

    igirlzoe: tim holtz stampers anonymous exquisite stamp crest stencil sizzix masquerade
    I used a very retired (I’m sorry) idea-ology hanger clip! I removed the inside clippy bit with my dremel and added white gesso and alcohol ink. I carefully made a hole in the paper dolls hand to slide the hanger through. I have 13 left, unlucky for some… but lucky for me. If you haven’t hoarded some of the idea-ology hanger clips, you could use a wire jig, which is a metal or plastic base with holes in and comes with pegs that you place into the holes to create the shape and then you pull your wire around it. Heavy gauge wire would work best for this.
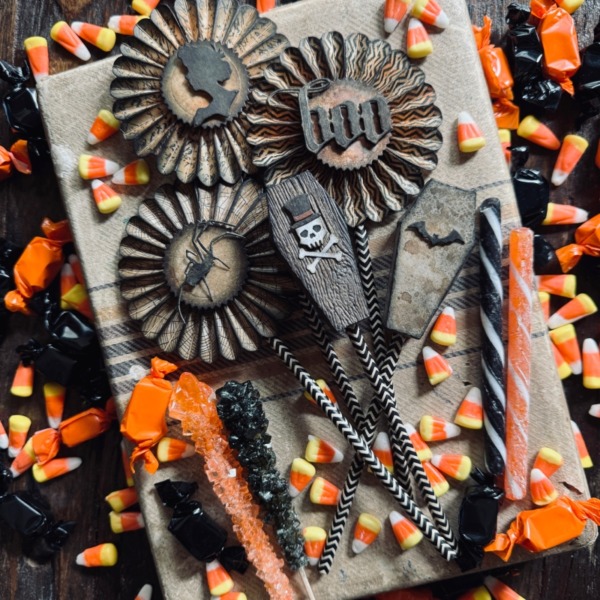
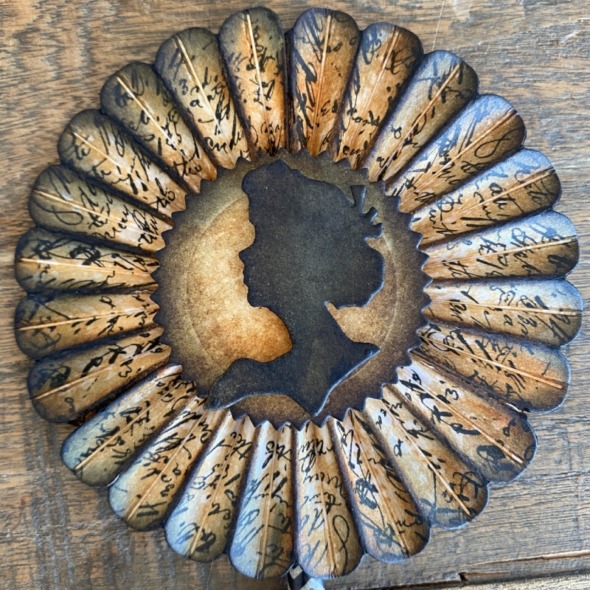
    I used the smaller bat stamp from The Scarecrow CMS451 stamp set to stamp onto a piece of linen fabric with black soot distress archival ink. I used sticky grid to hold the fabric in place on my stamp platform and stamped several times. The fabric will absorb some of the ink initially so keep stamping until you have a bold image.
    The mask was cut from the (retired) Masquerade thinlits die set from idea-ology halloween deco sheet. I pierced a hole into each side with a pokey tool (retractable craft pick), added black thread and strung it from the hanger.

    igirlzoe: tim holtz stampers anonymous exquisite stamp crest stencil sizzix masquerade
    While I had my dremel out… I removed the back of smaller skull from previous idea-ology halloween release years. I have quite the collection. Read out of context, that sounded terrifying! LOL

    I used the new idea-ology halloween deco sheets and cut another mask to fit from the (retired) Masquerade thinlits die set. Again, sorry if my use of retired items causes frustration, hopefully you have something in your stash you can use.
    igirlzoe: tim holtz stampers anonymous exquisite stamp crest stencil sizzix masquerade
    I used the Markings stencil to add a couple of X’s using white gesso. I added another mask cut from the halloween deco sheets to the end of the sign.

    igirlzoe: tim holtz stampers anonymous exquisite stamp crest stencil sizzix masquerade
    I mounted the signage onto 2 Etcetera pinked trims glued together in the middle at the straight edge so the pinked edges peek out at the top and bottom of the sign. I covered the pinked edges with distress foundry wax. I wasn’t kidding about it being all about this signage stamp! I also used the background script stamped with vintage photo distress archival ink. I will use these background stamps all year so I’m very happy to have them in my collection.

    igirlzoe: tim holtz stampers anonymous exquisite stamp crest stencil sizzix masquerade
    I cut one larger mask from the black halloween deco sheet with the (it’s still retired) Masquerade thinlits die set for staging. I love how all of Tim’s brands mix and match together.

    Thanks for stopping by and let me know if you have any questions.
    Zoe


    affiliate links used at no cost to you