‘Halloween’ Category

  1. Stargazer

    6th September, 2019 by iGirlZoe

    iGirlZoe: Tim Holtz Stargazer stampers anonymous Halloween stamps

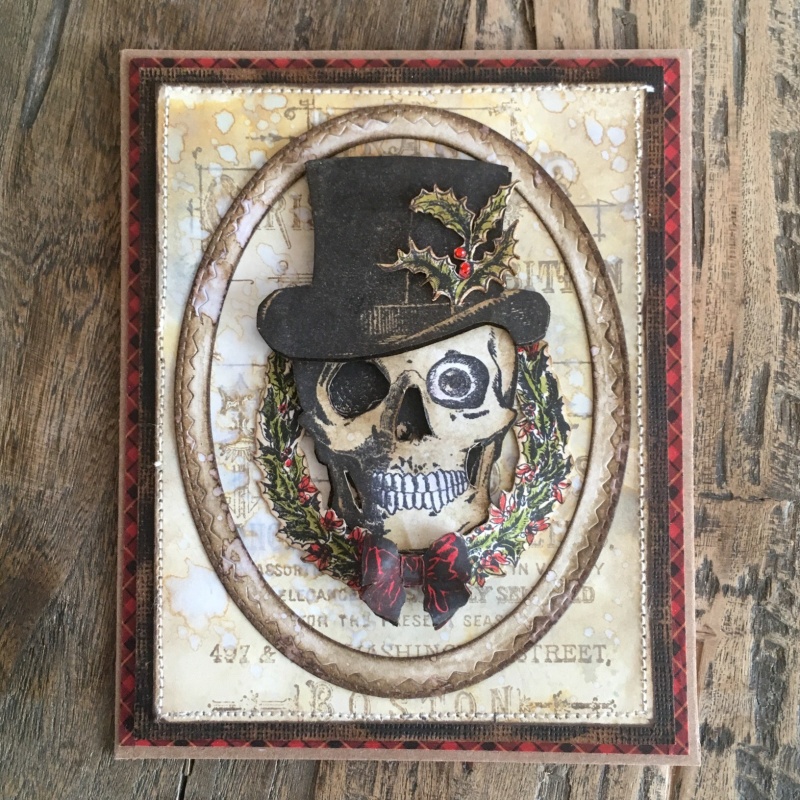
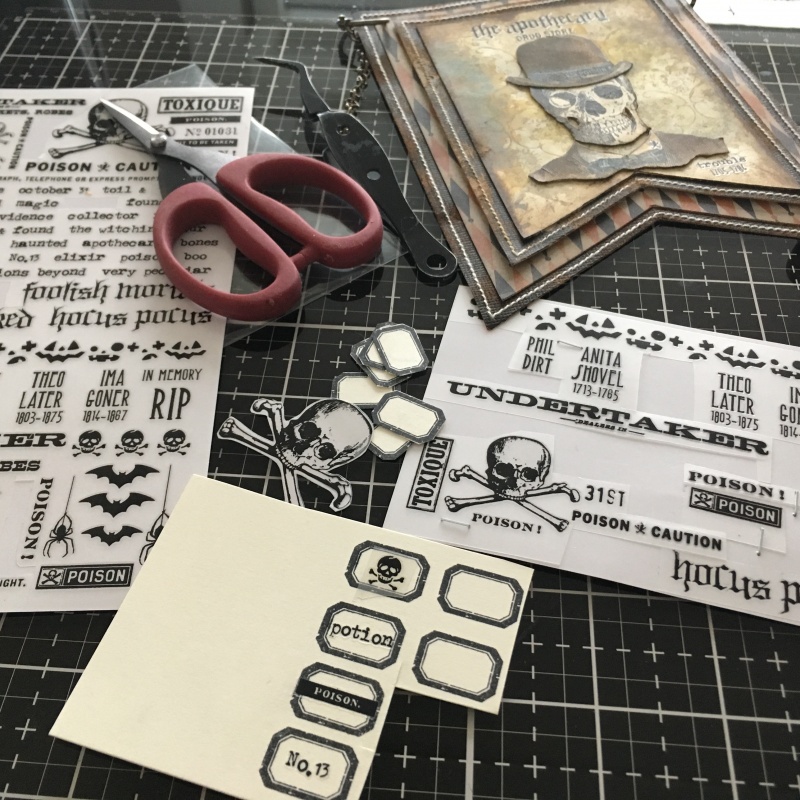
    Hello friends and happy friyay! I’m so looking forward to the weekend, I have a date with some new distress oxide sprays. But first I want to share a card that I made using the new Tim Holtz Stampers Anonymous stamps.

    iGirlZoe: Tim Holtz Stargazer stampers anonymous Halloween stamps
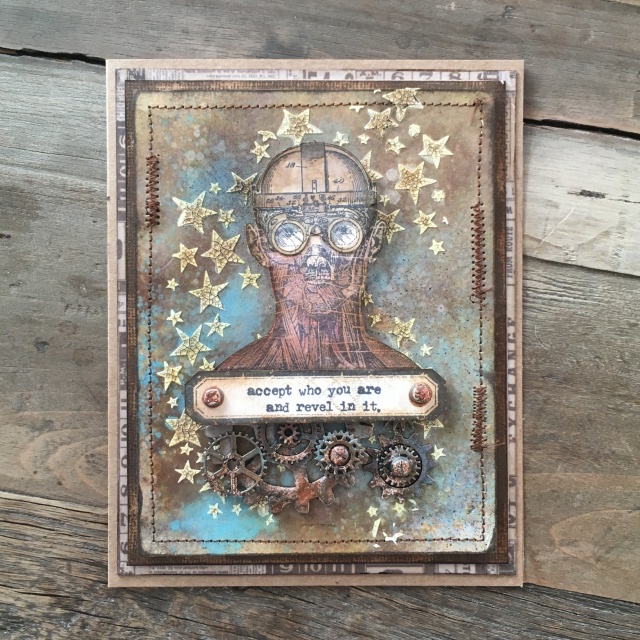
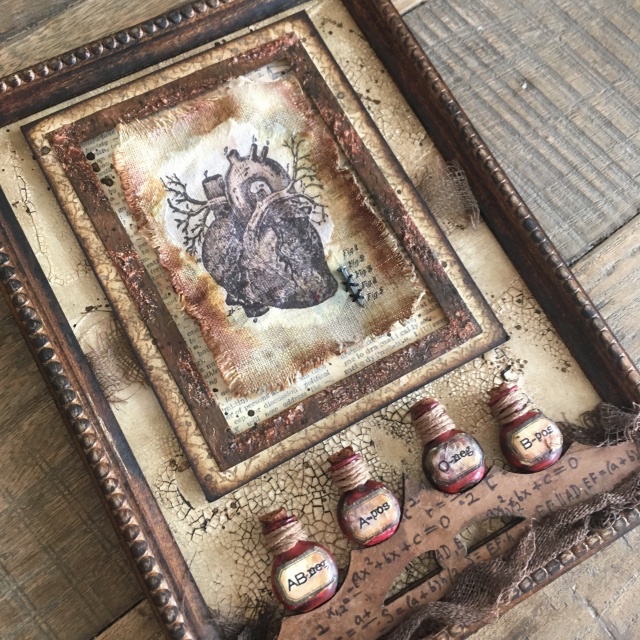
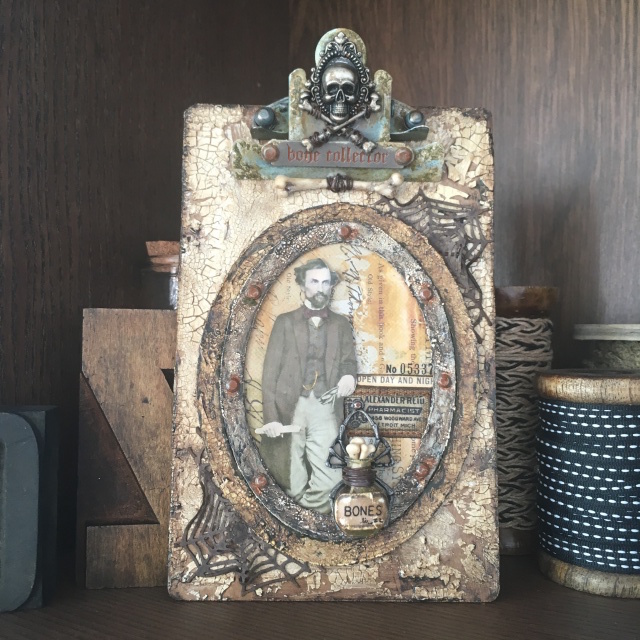
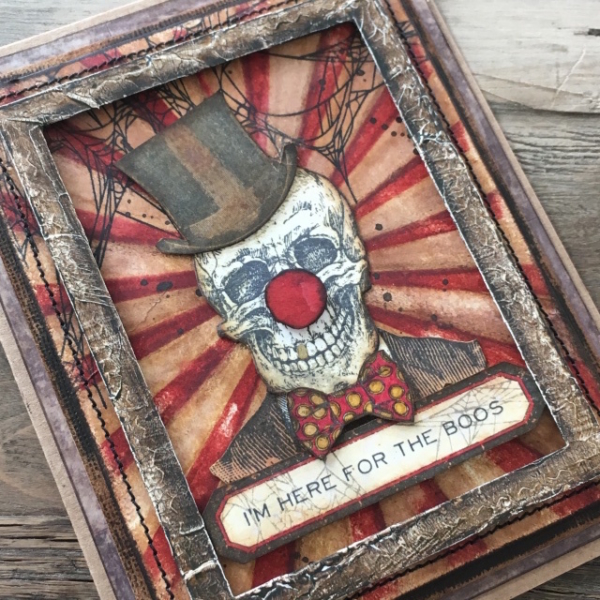
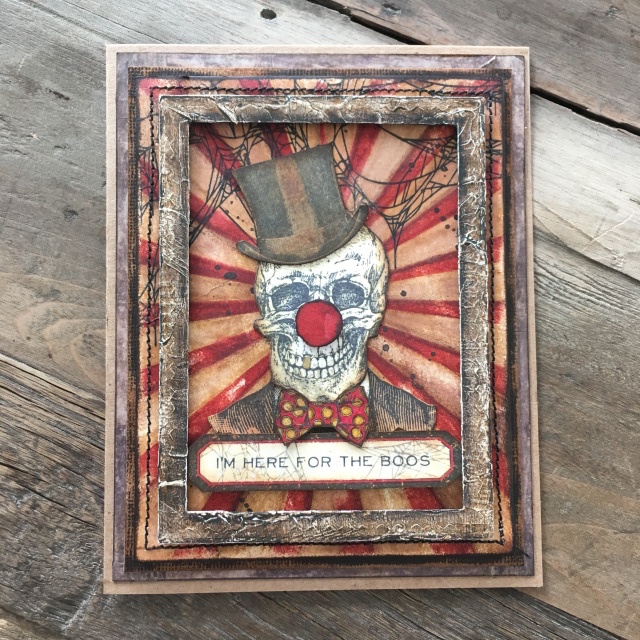
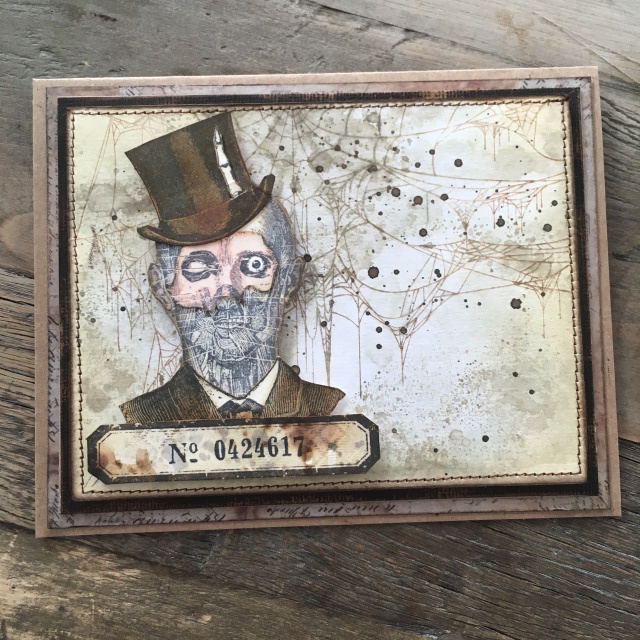
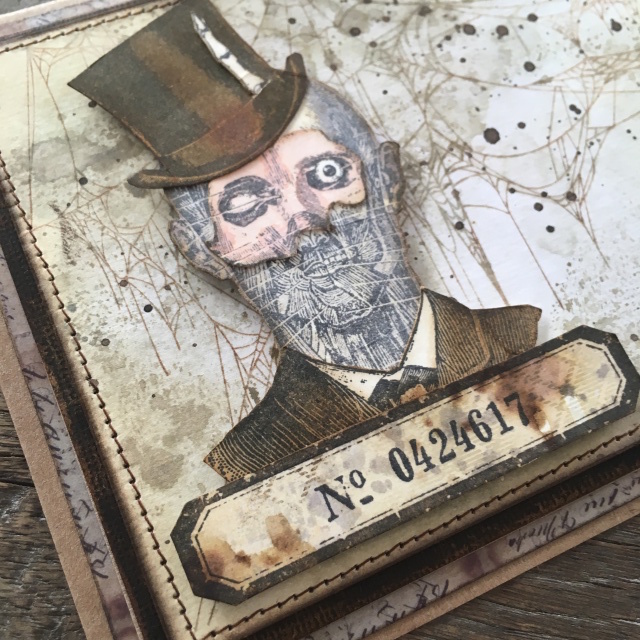
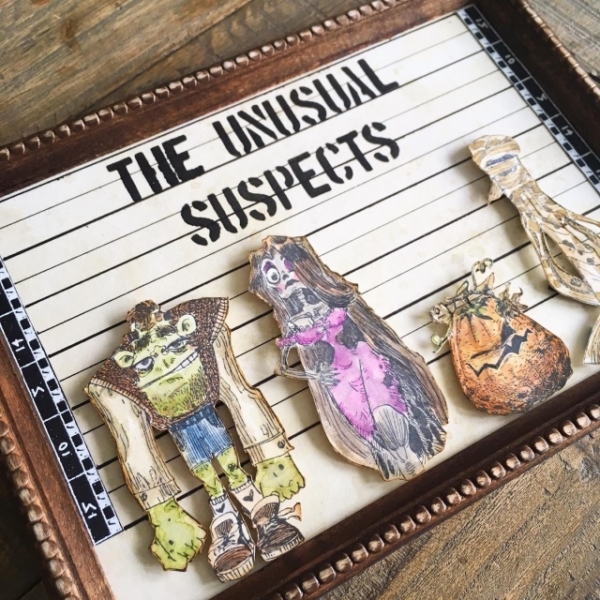
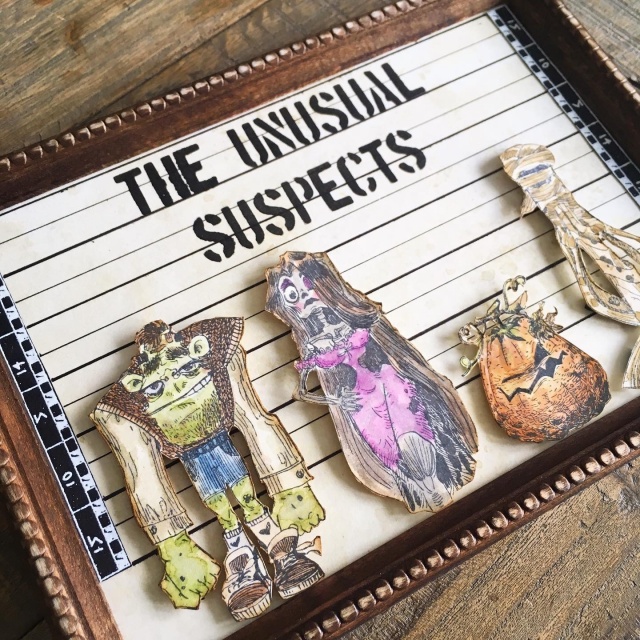
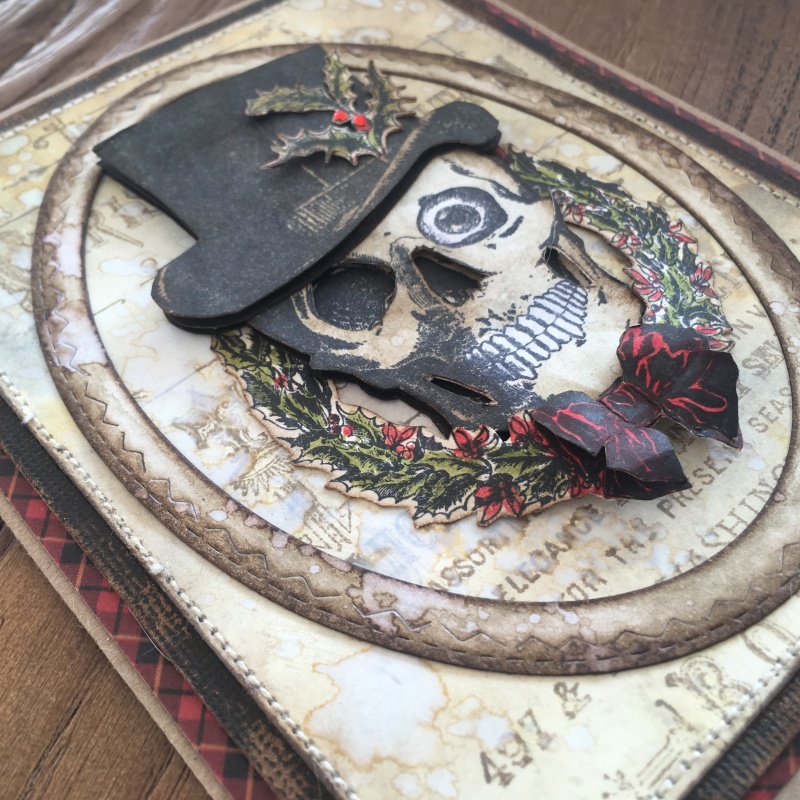
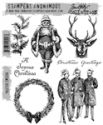
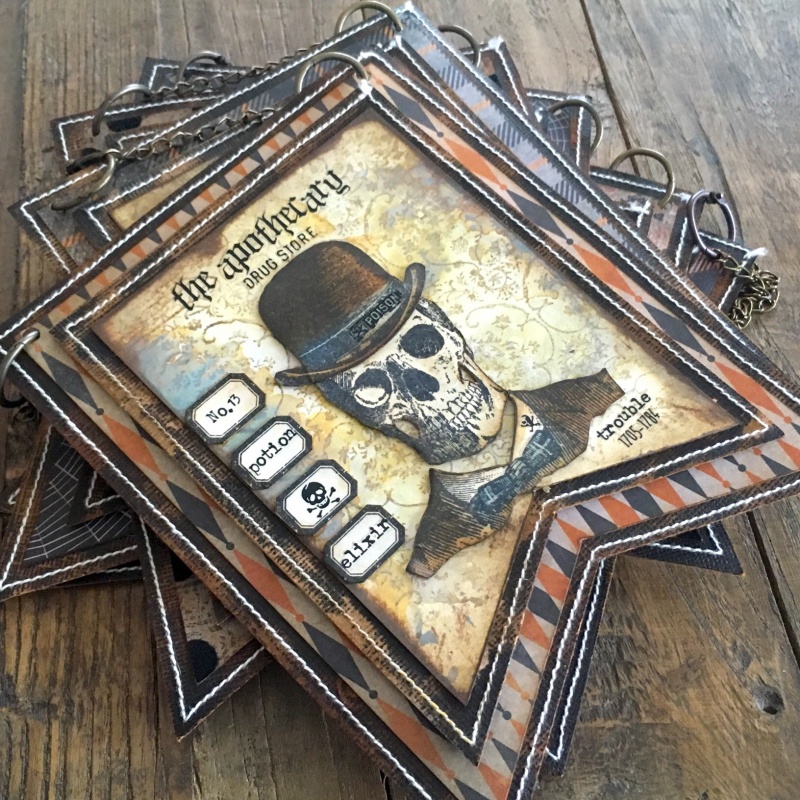
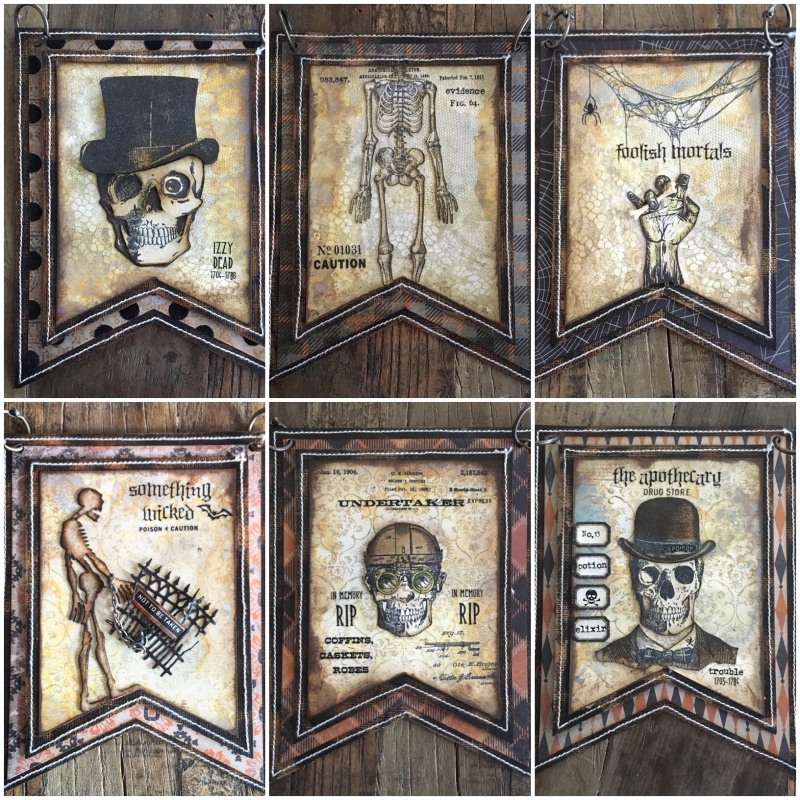
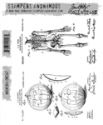
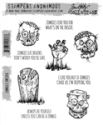
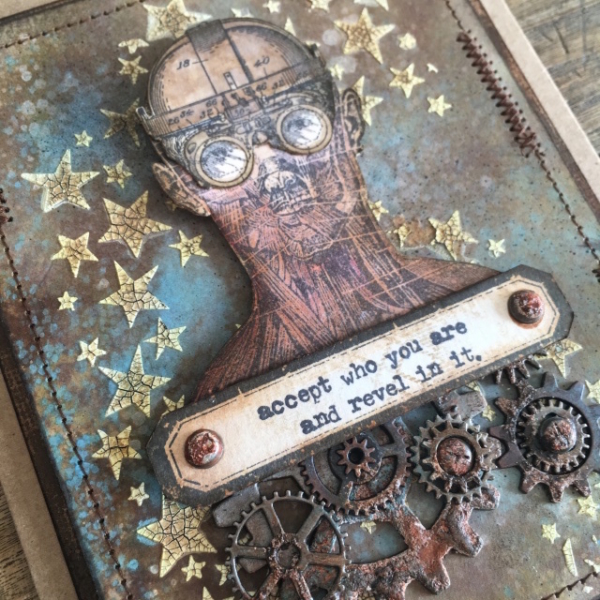
    Mixing old and new stamp sets is my favourite thing to do. With so many stamps packed onto a sheet, sometimes you don’t get to use them all the first round. I definitely have favourites though and the inventor 2 (CMS41) is one of them. I LOVE that the inventor 2 traveler helmet perfectly fits the cadaverous (CMS378) stamp set and it wasn’t even an on purpose!! It was written in the stars…

    iGirlZoe: Tim Holtz Stargazer stampers anonymous Halloween stamps
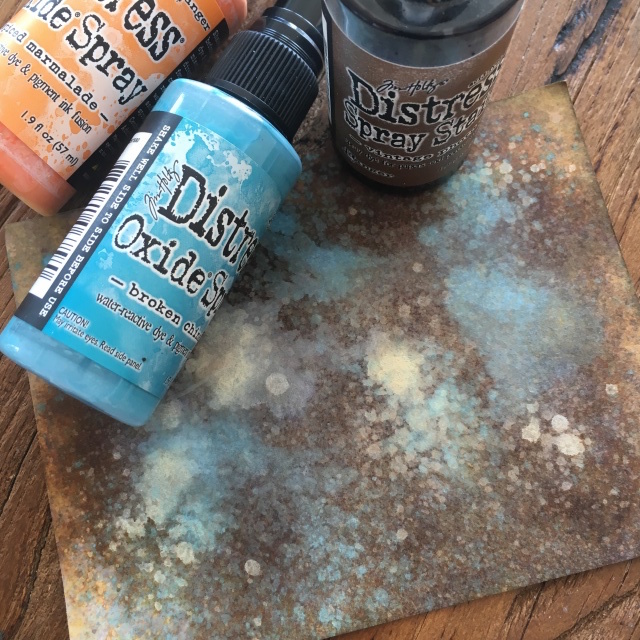
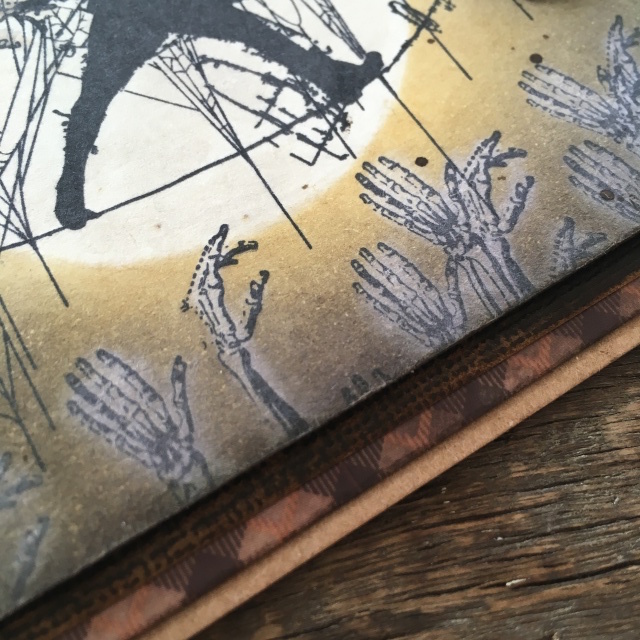
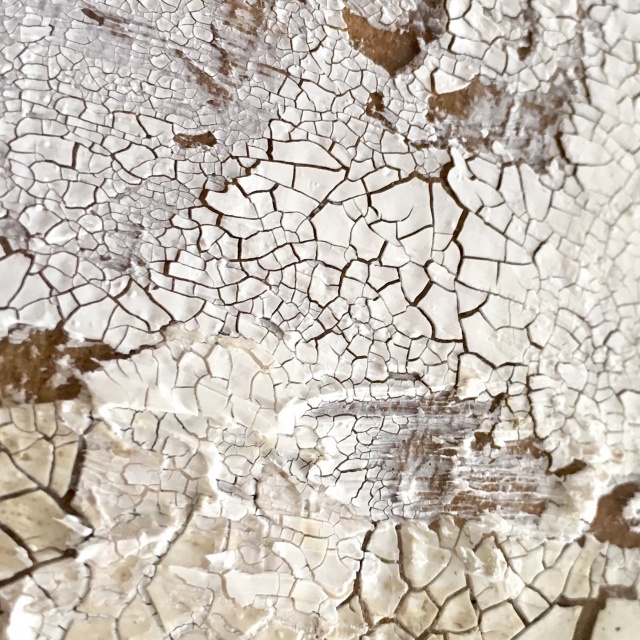
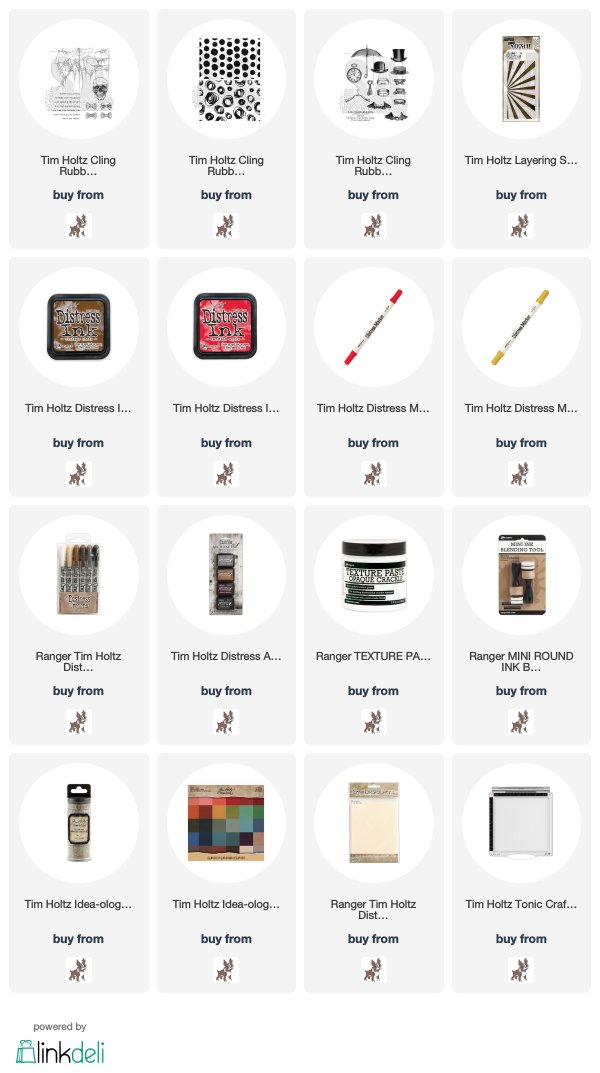
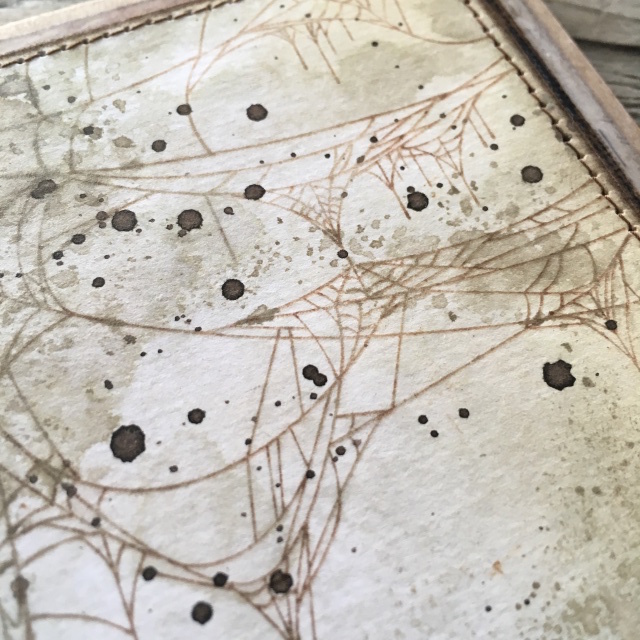
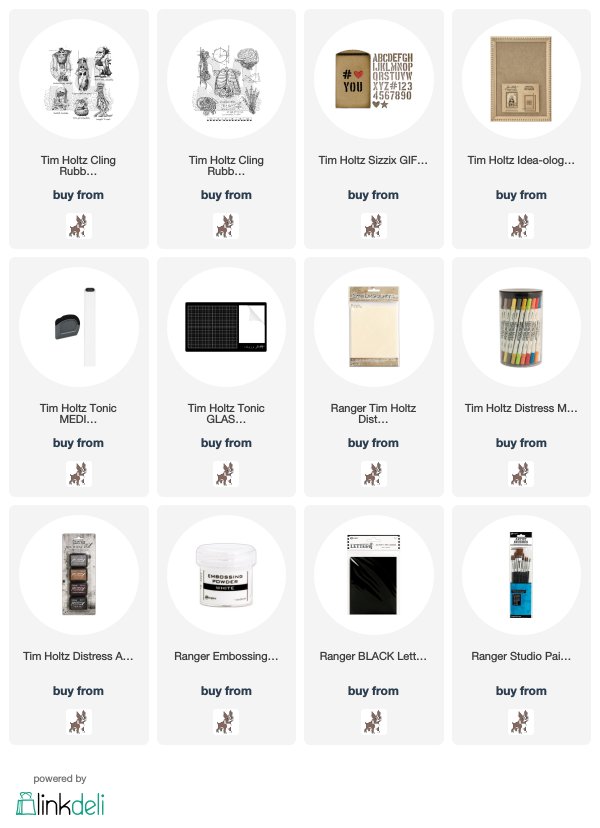
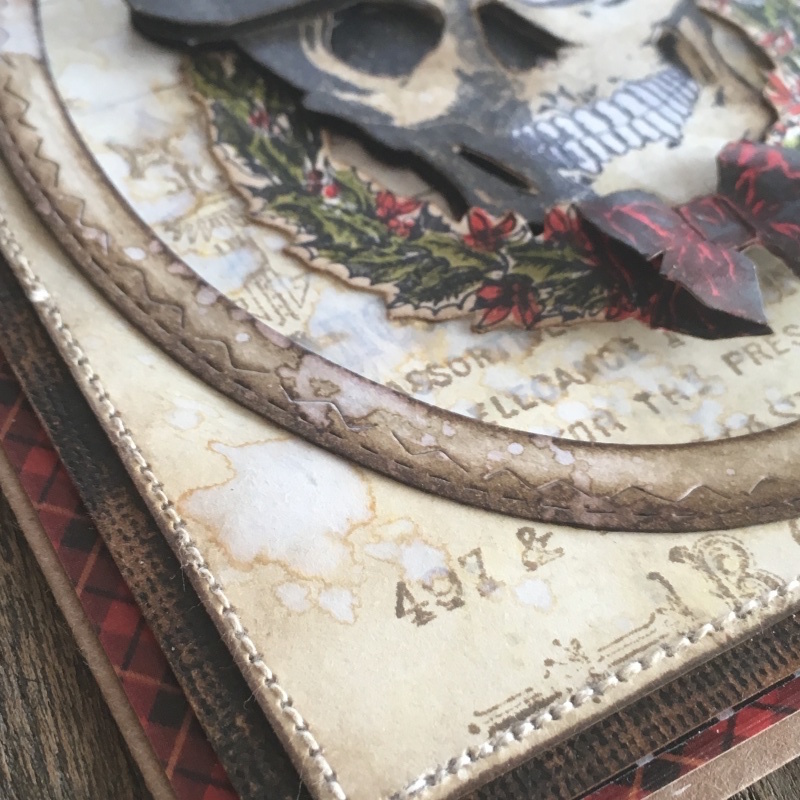
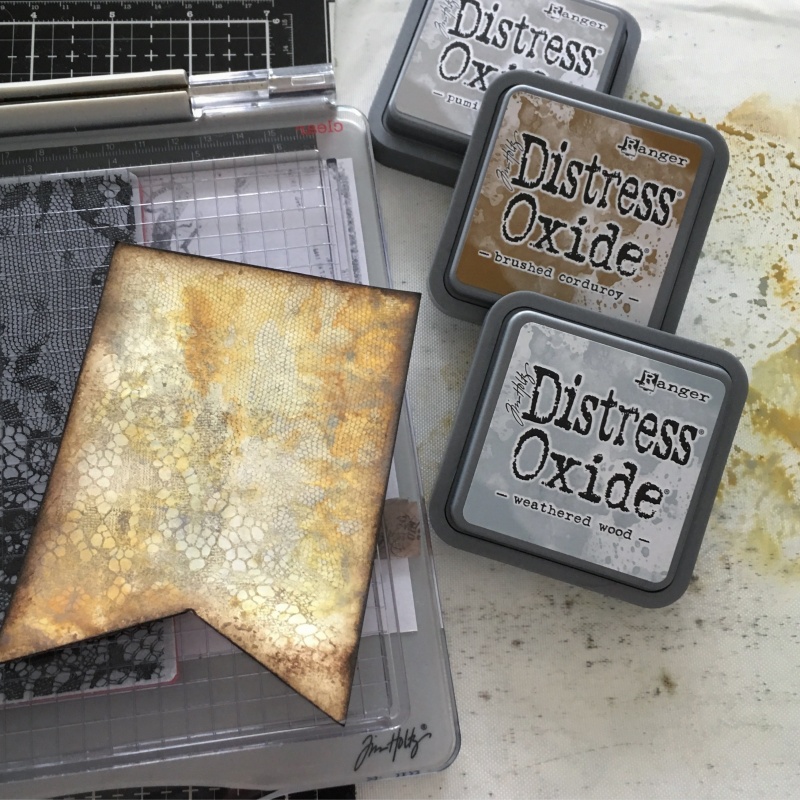
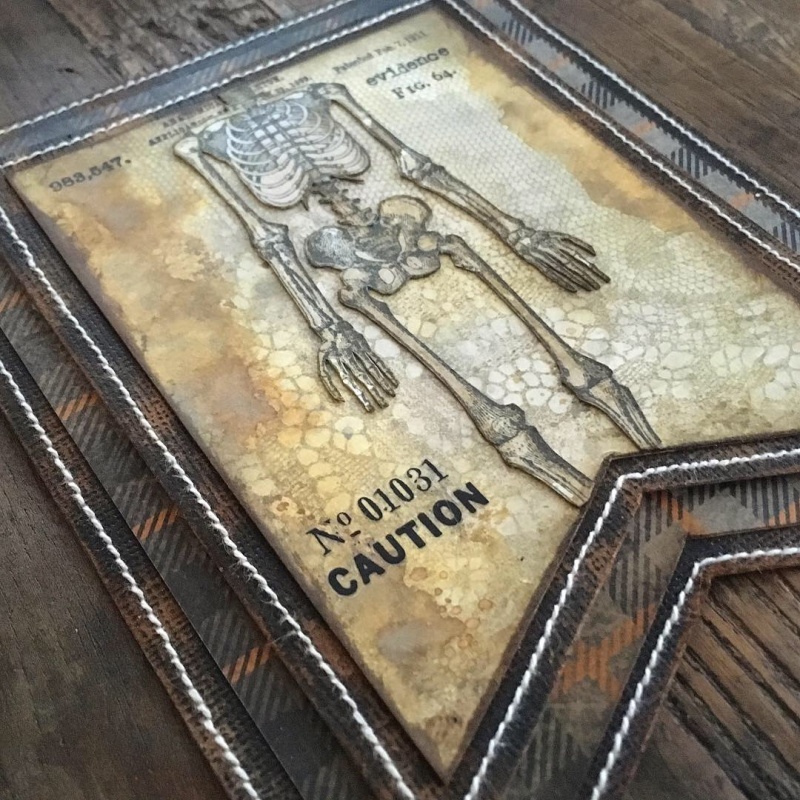
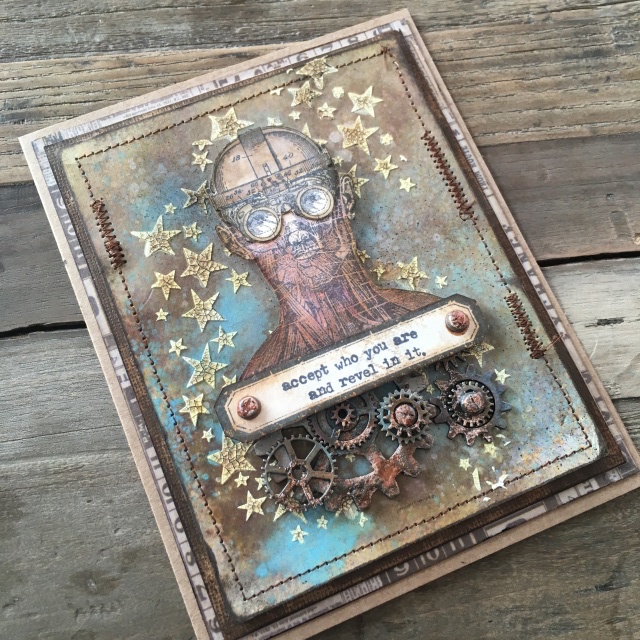
    To create my galactic background, I sprayed distress watercolor cardstock with vintage distress spray stain, spiced marmalade and broken china distress oxide spray.

    iGirlZoe: Tim Holtz Stargazer stampers anonymous Halloween stamps
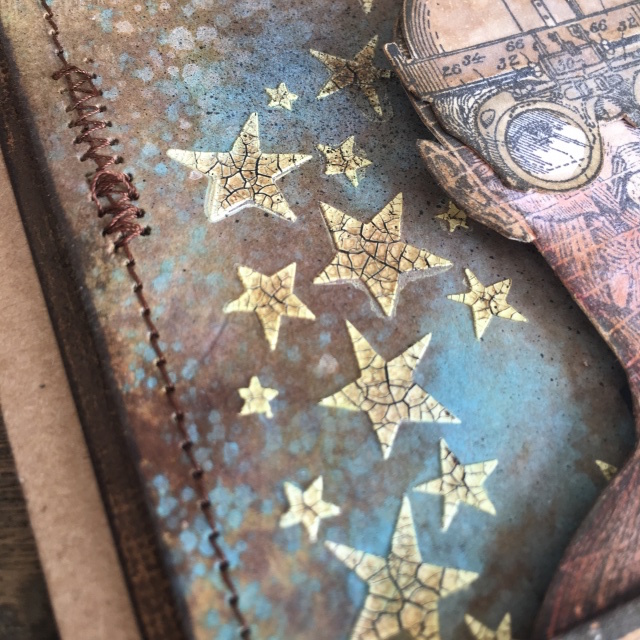
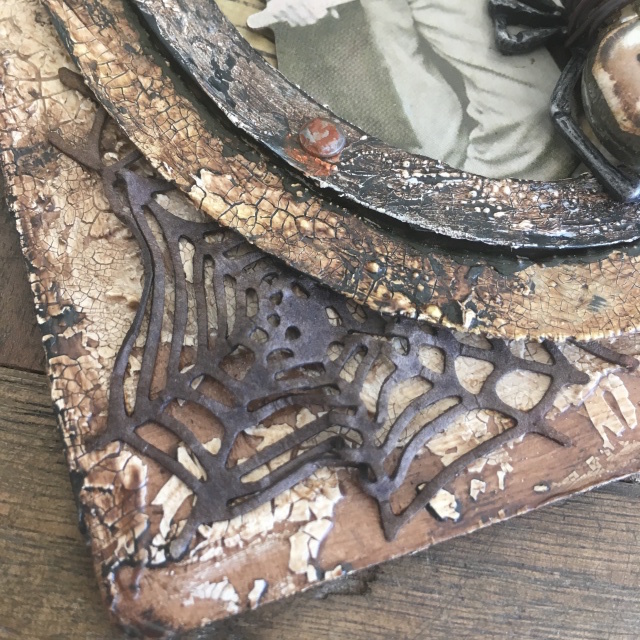
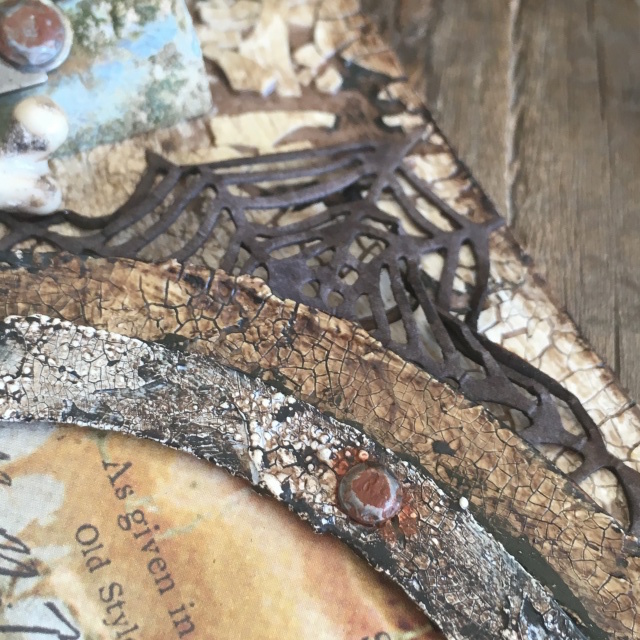
    Using a palette knife, I spread opaque crackle texture paste through the new hocus pocus (THS131) stencil. Once dry, I rubbed distress crayon into the cracks.

    iGirlZoe: Tim Holtz Stargazer stampers anonymous Halloween stamps
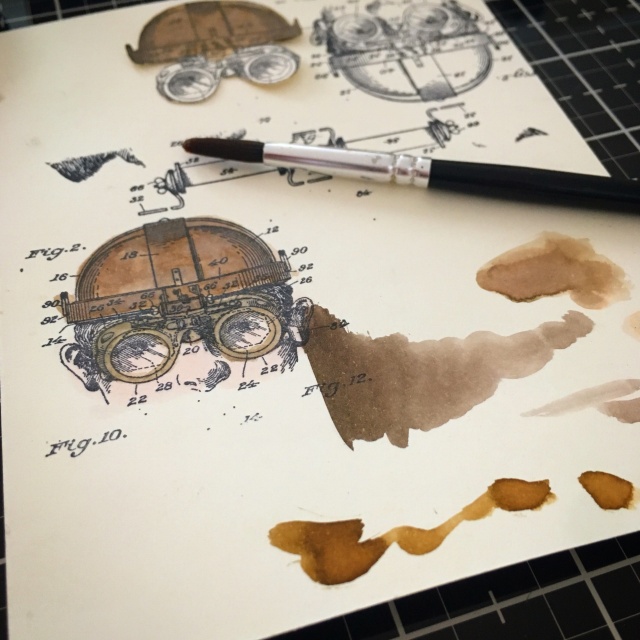
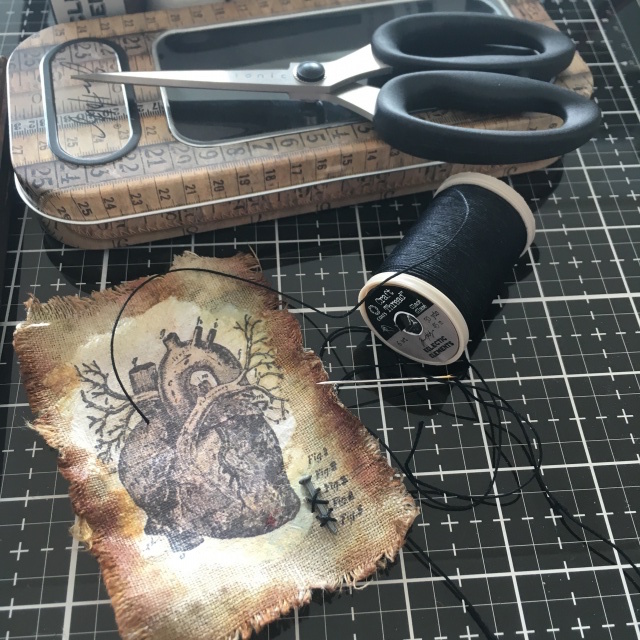
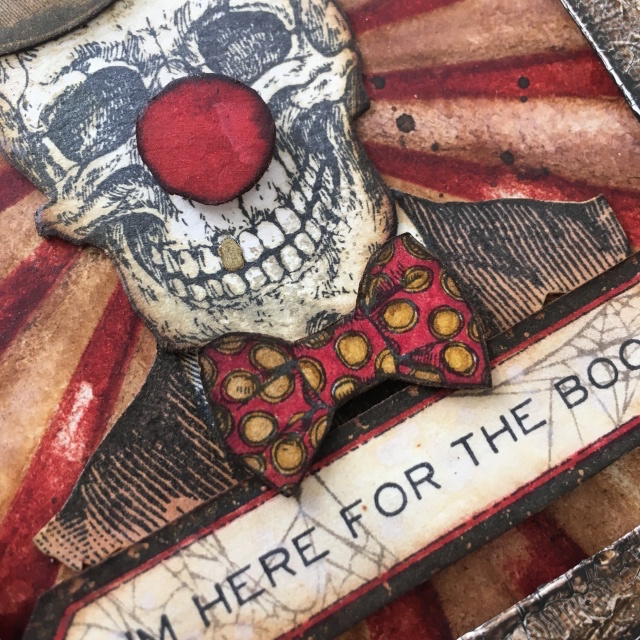
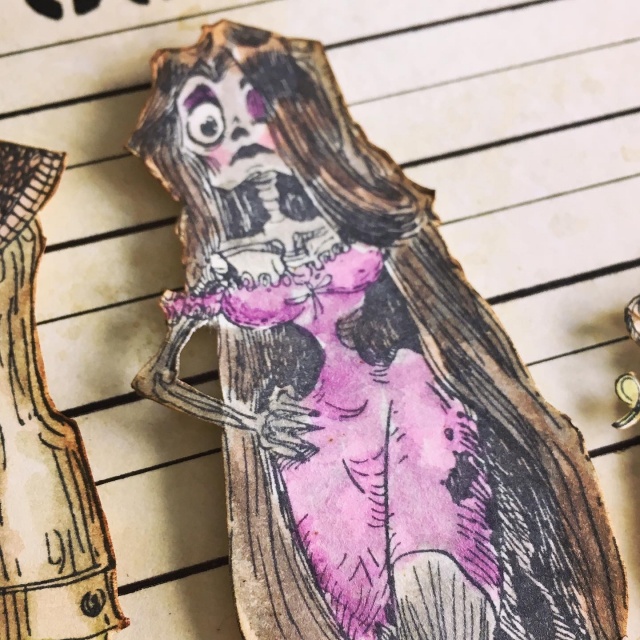
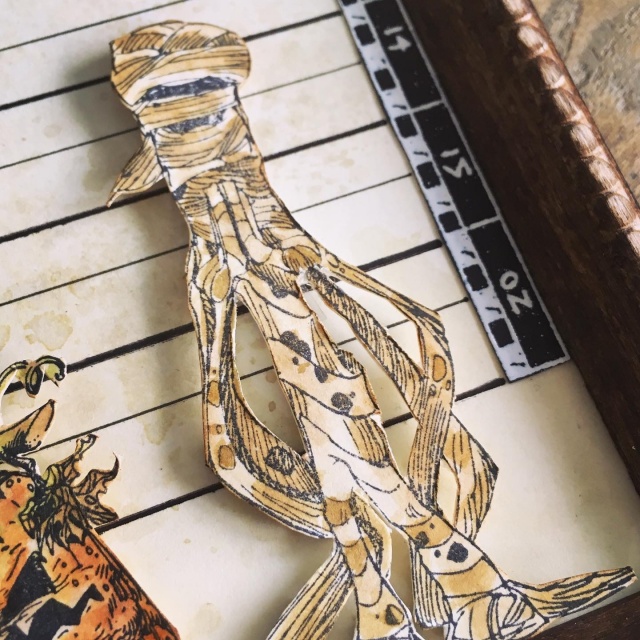
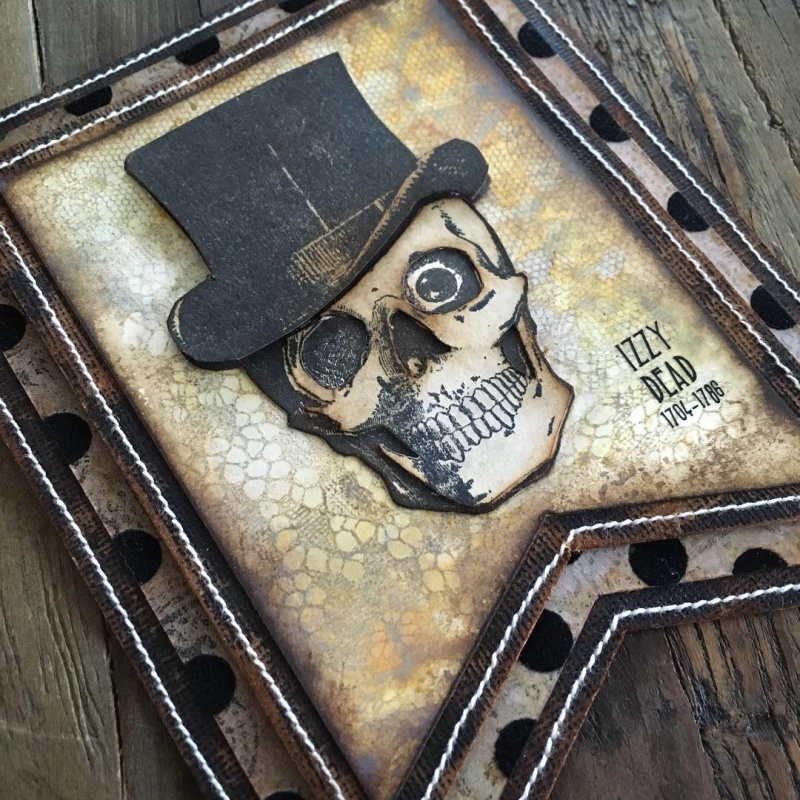
    The traveler from the inventor 2 (CMS341) stamp set, stamped with black soot distress archival ink and watercoloured with distress inks.

    iGirlZoe: Tim Holtz Stargazer stampers anonymous Halloween stamps
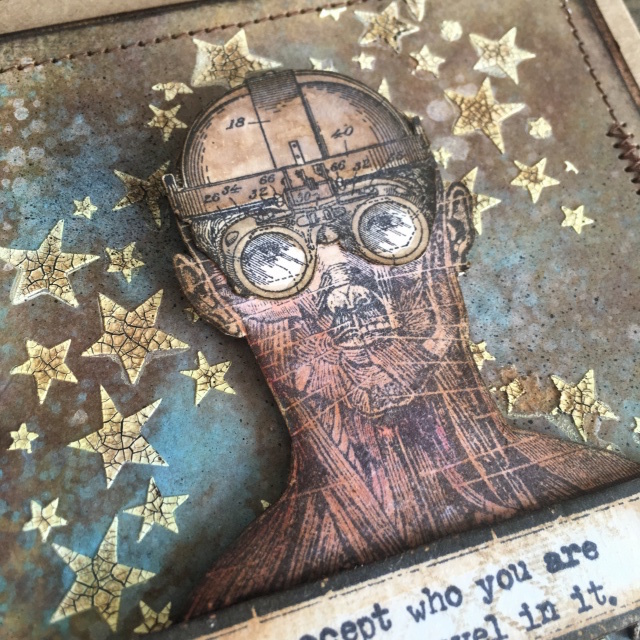
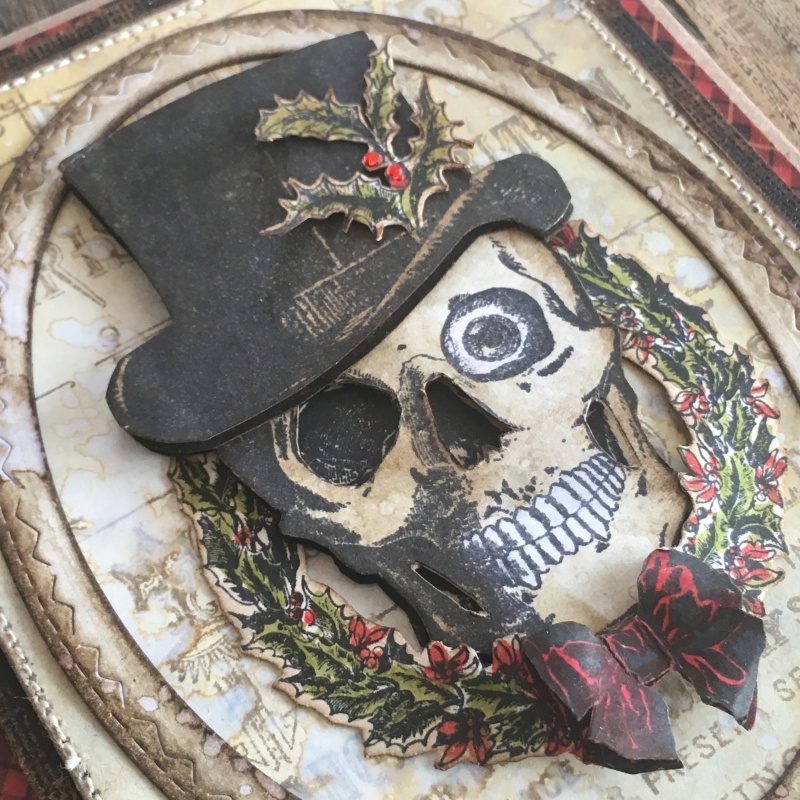
    Fussy cutting is something else I love to do, I find it so relaxing. I fussy cut the helmet with glasses and adhered over the body from the cadaverous (CMS378) stamp set.

    iGirlZoe: Tim Holtz Stargazer stampers anonymous Halloween stamps
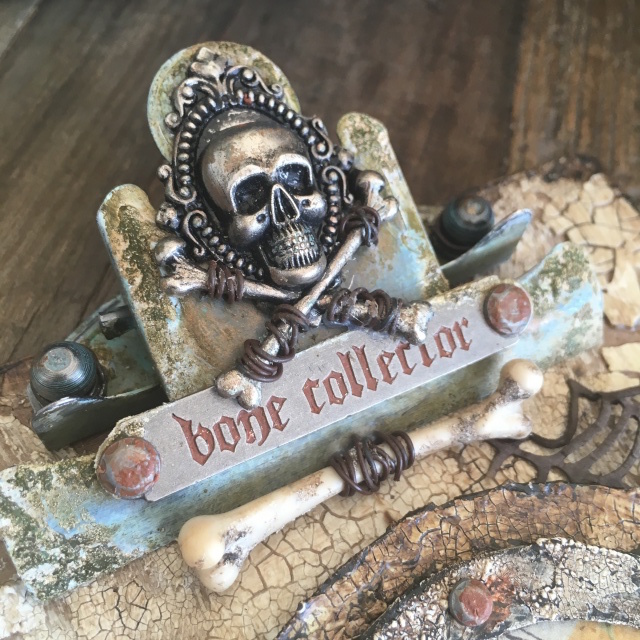
    I added idea-ology gears covered in distress grit-paste and distress crayons. The idea-ology gears are one of my favourites in the line and I love that the different sets have different sizes. I often add some of the gears from the assemblage line too as they’re smaller. Stacked and adhered with distress collage medium.

    iGirlZoe: Tim Holtz Stargazer stampers anonymous Halloween stamps
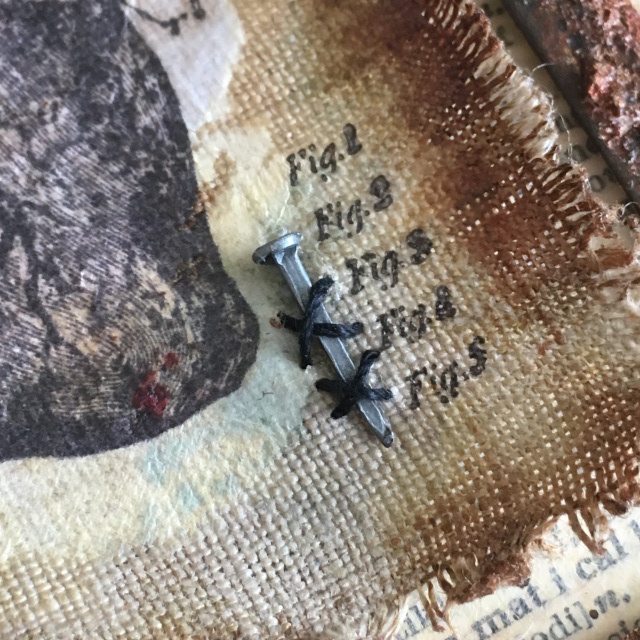
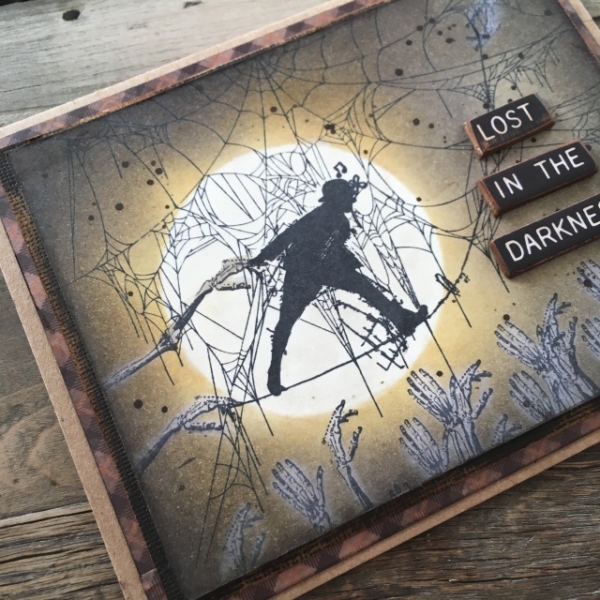
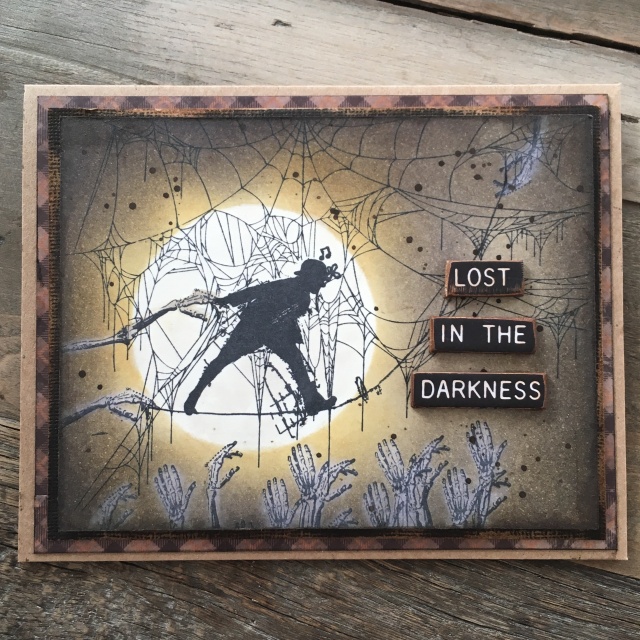
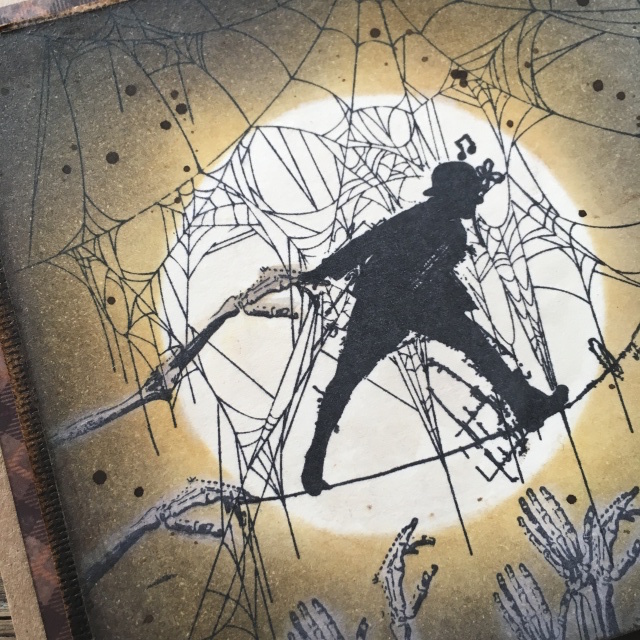
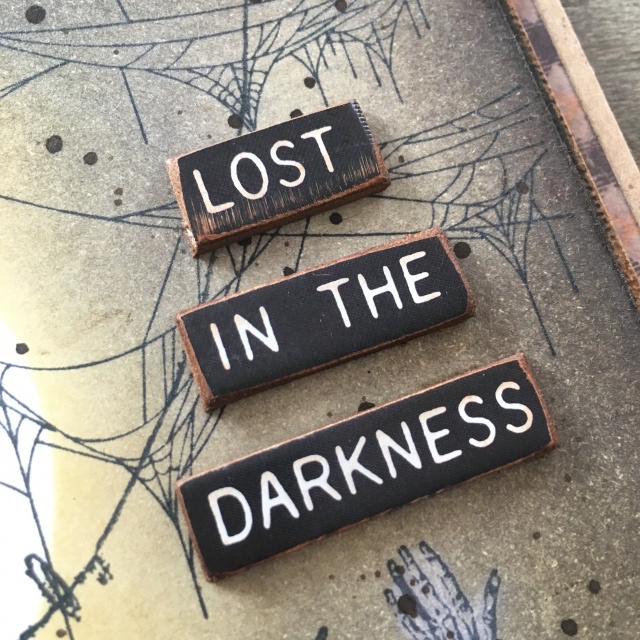
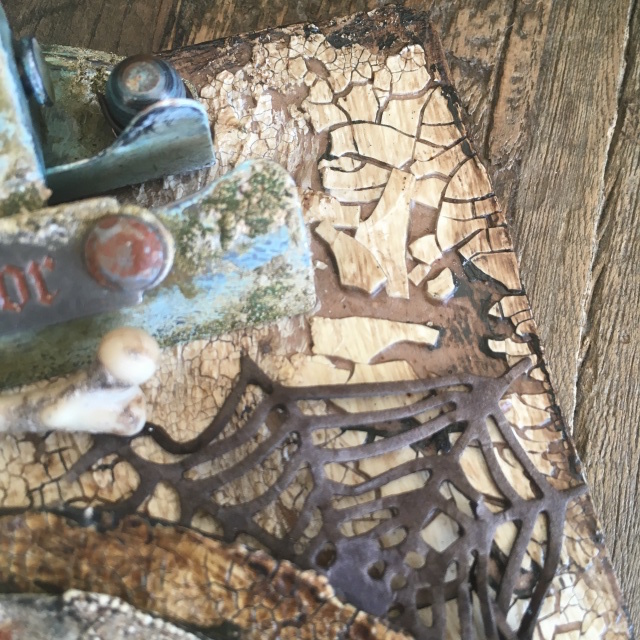
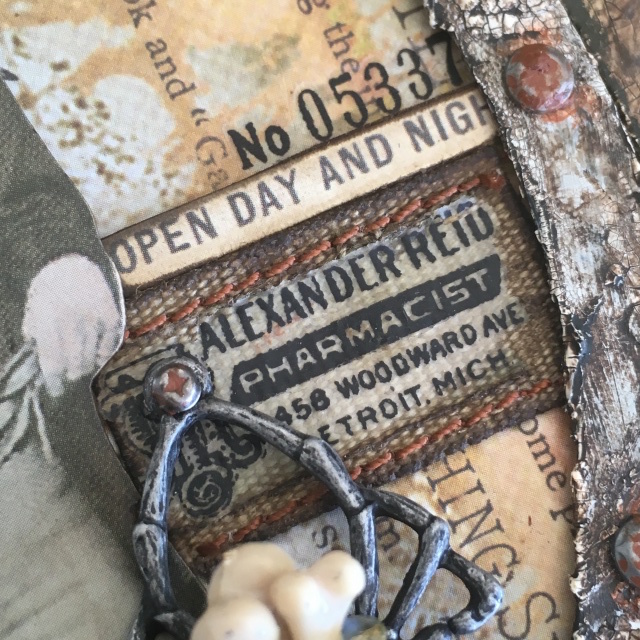
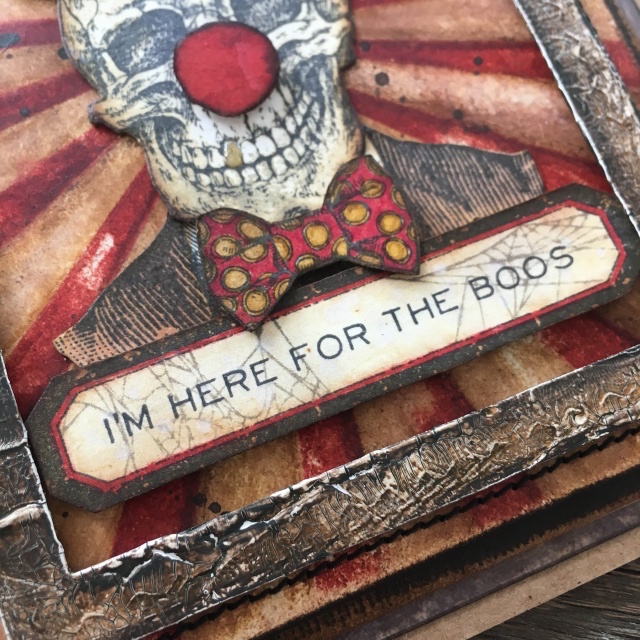
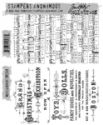
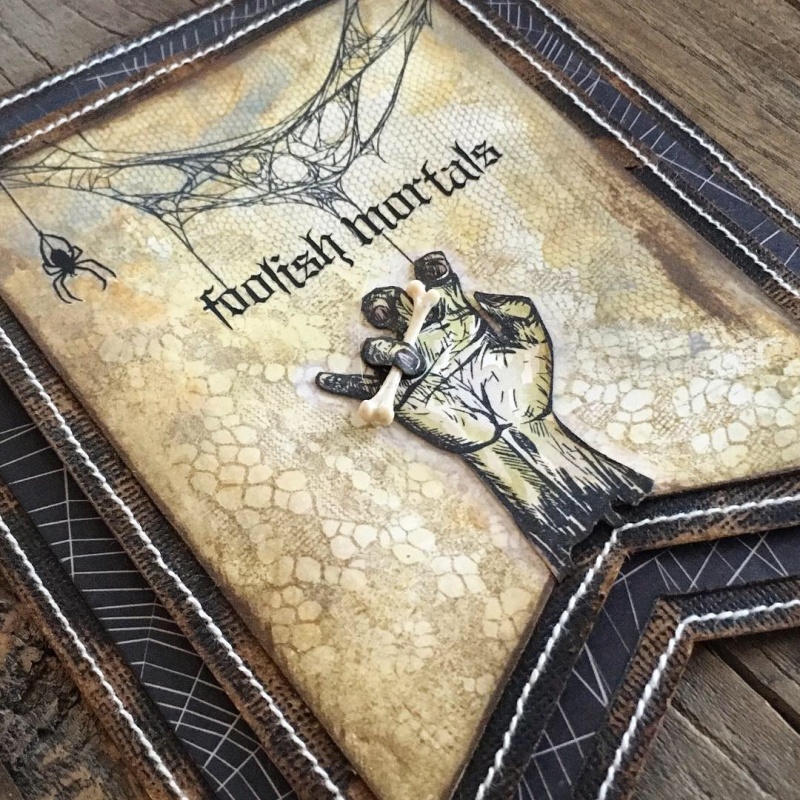
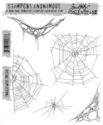
    I had the theories (CMS329) stamp set out from making my ‘lost in the darkness’ card and used this sentiment, which I love and was perfect for this card. I added idea-ology hardware heads, covered in distress crayon.

    iGirlZoe: Tim Holtz Stargazer stampers anonymous Halloween stamps
    Thanks for stopping by. Hope you make some time to make…

    Zoe


  2. The Blood Bank

    5th September, 2019 by iGirlZoe

    iGirlZoe: Tim Holtz Blood Bank Halloween idea-ology

    Hello friends. I am back today to share a halloween wall hanging I made with the new Tim Holtz Stampers Anonymous halloween stamps and bat web trims.

    iGirlZoe: Tim Holtz Blood Bank Halloween idea-ology
    Using a retired idea-ology framed panel (I cried a little too), I covered the chipboard panel with opaque crackle texture paste and set aside to dry. Adding a layer of vintage distress collage medium and once dry, rubbing distress crayon into the cracks.

    iGirlZoe: Tim Holtz Blood Bank Halloween idea-ology
    Stamping the heart from the cadaverous (CMS378) stamp set onto plain collage paper in black soot distress archival ink and brushing onto a piece of linen with distress collage medium. I dyed the edges with distress inks. I hand stitched a nail from the idea-ology vignette hardware set onto the linen. The scissors and that beautiful tin in the background are Tim Holtz haberdashery scissors from Tonic Studios.

    iGirlZoe: Tim Holtz Blood Bank Halloween idea-ology
    The fig stamp from tiny toadstools (CMS377) stamp set was a perfect fit.

    iGirlZoe: Tim Holtz Blood Bank Halloween idea-ology
    Adding two frames cut from the stitched rectangles thinlits die set. The outer frame I stamped with the arterial branches of the heart stamp. The inner frame I covered with distress grit-paste and distress crayon.

    iGirlZoe: Tim Holtz Blood Bank Halloween idea-ology
    I adhered the linen over a piece of vintage dictionary paper splashed with distress paint.

    iGirlZoe: Tim Holtz Blood Bank Halloween idea-ology
    Using the new bat web trims, I created a dimensional shelf for the blood vials to sit on by turning the bat trim upside down. I stamped it with the cool scientific stamp from weird science (CMS379) stamp set in black soot distress archival ink and covered in vintage distress collage medium. I added mummy cloth dyed with distress spray stain.

    iGirlZoe: Tim Holtz Blood Bank Halloween idea-ology
    To raise the trim and create a stand for the tiny vials, I added one of the straight trims that comes with the set, along the bottom and the off cuts I attached to the back of the bat trim. These trims are perfect for building up the decorative trims to create shelves etc.

    iGirlZoe: Tim Holtz Blood Bank Halloween idea-ology
    Finally, to create the blood vials I poured distress paint and a spritz of water into the idea-ology tiny vials, shook, poured out the excess and allowed to dry. I added labels stamped from mini halloween (CMS140) stamp set. In truth I had to look up the stamp set as the stamp never makes it back onto the sheet. I use it a lot… I added twine and remnant rubs, which I hacked up until I had the letters I needed.

    Thanks for stopping by and let me know if you have any questions. Hope you get some time to make and take time to give blood if you can.

    Zoe


  3. Lost in the Darkness

    3rd September, 2019 by iGirlZoe

    iGirlZoe: Tim Holtz Lost in the Darkness Halloween Card

    Hello friends. I’m back today with a really simple card using the new Tim Holtz Stampers Anonymous Halloween stamps and a little water brush trick to give you a ghostly effect…

    iGirlZoe: Tim Holtz Lost in the Darkness Halloween Card
    I absolutely love this Halloween stamp release from Tim Holtz. Every year you don’t think it can get any better, and every year it does!! I love the way Tim’s stamps work so well together and one of my favourite things is to mix the old with the new. Stampers Anonymous never retire their stamp sets, so I am continually adding to my collection.

    iGirlZoe: Tim Holtz Lost in the Darkness Halloween Card
    With black soot distress archival ink, I stamped the tightrope walker from the theories (CMS329) stamp set and the cobwebs from the new life of the party (CMS380) stamp set. The stamp platform makes this easy peasy. Using  a circle die cut from the stitched circles thinlits die set, to mask the tightrope walker, I blended wild honey and black soot distress ink over the background.

    iGirlZoe: Tim Holtz Lost in the Darkness Halloween Card
    I stamped skeleton arms and hands from the cadaverous (CMS378) stamp set. Using a water brush, I carefully painted the hands and arms with water and dabbed with a paper towel, picking up the distress ink and leaving a ghostly effect.

    iGirlZoe: Tim Holtz Lost in the Darkness Halloween Card
    I added some of the halloween quote chips which I cut, lightly sanded and inked.

    iGirlZoe: Tim Holtz Lost in the Darkness Halloween Card
    Thanks for stopping by. Hope you make some time to make…

    Zoe


  4. Creepy Clipboard

    2nd September, 2019 by iGirlZoe

    iGirlZoe: Tim Holtz Creepy Clipbpard

    Hello friends. Things are about to get really freaky around here with Halloween making full steam ahead. Meet the bone collector… no you really wouldn’t want to!

    iGirlZoe: Tim Holtz Creepy Clipbpard
    Using the new Tim Holtz halloween idea-ology, I created this creepy altered clipboard.

    iGirlZoe: Tim Holtz Creepy Clipbpard
    I love crackle anything and use opaque crackle texture paste from Ranger a lot. As you will see from the photo above, the issue I have had in the past is the paste flakes off once it dries and cracks.

    iGirlZoe: Tim Holtz Creepy Clipbpard
    This time I added a layer of vintage distress collage medium over the top. Some of the crackle paste flaked off and moved as I painted on the vintage medium, but I just pushed it into place with my finger. What I was left with was a really organic looking cracked background. Once dry, I rubbed distress crayons into the cracks with my finger.

    iGirlZoe: Tim Holtz Creepy Clipbpard
    I grunged up the clipboard clip with distress grit-paste, distress paint and distress crayons. Added the cool skull and crossbones which has been resized this year and comes as part of the adornments halloween accents. As well as a word band from the adornements halloween words set and hardware heads covered with distress crayon, I wrapped wire around the skull and crossbones, boneyard bone and hitch fasteners that I used to attach the clip.

    iGirlZoe: Tim Holtz Creepy Clipbpard
    I am a bit obsessed with the new cobweb dies from the Sizzix frightful things thinlits die set. I ran it through my sidekick with distress mixed media heavystock, sprayed with ground espresso distress spray and once dry, shaped with my fingers to give it some dimension and glued the edges allowing the center to still be popped up.

    iGirlZoe: Tim Holtz Creepy Clipbpard
    The stitched thinlits dies make the best frames. I used 2 sized ovals die cut from heavystock, covered with opaque crackle texture paste. I’m pretty impatient so I used my heat tool to speed up the drying and allowed the heat to sit over parts of the paste so it bubbled. You get a really nice gnarly effect which I covered with distress crayons.

    iGirlZoe: Tim Holtz Creepy Clipbpard
    I had a tiny piece of leftover idea-ology ruler ribbon which I added remnant rubs to the back of, inked, covered with a layer of vintage distress collage medium and stitched with orange thread. That gorgeous background paper is from the utterly amazing abandoned paper stash! Stock up!

    iGirlZoe: Tim Holtz Creepy Clipbpard
    The new idea-ology adornment spider reminded me of the face huggers from the Alien movies. I removed the pearl and wired an idea-ology tiny vial to it. I glued some idea-0logy boneyard bones inside the vial and a label from the ephemera pack with remnant rubs added.

    iGirlZoe: Tim Holtz Creepy Clipbpard
    Thanks for stopping by. Hope you find time to get your creep on…

    If you would like to see a step out of the crackle paste technique, head over to Tami B – playswellwithpaper blog. And while you’re there, do yourself a favour and check out her most incredible candle tutorial. Trust me, you don’t want to miss them.

    Zoe


  5. Send in the Clowns

    25th August, 2019 by iGirlZoe

    iGirlZoe: Tim Holtz, stampers anonymous, distinguished stamps, life of the party stamps, shifter rays stencil, stitched rectangle thinlits die

    Hello friends! I’m back with another card that I made using the new Halloween stamps from Tim Holtz and Stampers Anonymous.

    iGirlZoe: Tim Holtz, stampers anonymous, distinguished stamps, life of the party stamps, shifter rays stencil, stitched rectangle thinlits die
    The card was inspired by the new shifters ray stencil. It just whispered circus to me. The skull from the life of the party stamp set (CMS380) matched perfectly with the distinguished (CMS371) stamp set.

    iGirlZoe: Tim Holtz, stampers anonymous, distinguished stamps, life of the party stamps, shifter rays stencil, stitched rectangle thinlits die
    I love this sentiment, also from the life of the party stamp set (CMS380). I used the label stamp from another set but I’m not sure which, it’s one I have kicking around my desk all the time.

    iGirlZoe: Tim Holtz, stampers anonymous, distinguished stamps, life of the party stamps, shifter rays stencil, stitched rectangle thinlits die
    The nose I made fussy cutting a circle from the dots and circles stamp set (CMS382) stamped in distress archival ink. I am seriously in love with the bow tie stamps from the life of the party (CMS380) stamp set. Little bit of colouring heaven for me.

    iGirlZoe: Tim Holtz, stampers anonymous, distinguished stamps, life of the party stamps, shifter rays stencil, stitched rectangle thinlits die
    The frame is die cut from the stitched rectangle thinlits die set, covered in texture opaque crackle paste and covered in vintage collage medium and once dry, distress crayon. It looks really complicated but the paste and crayons do all the work for you. Rub the distress crayon onto your finger and rub it onto the frame for the best results.

    iGirlZoe: Tim Holtz, stampers anonymous, distinguished stamps, life of the party stamps, shifter rays stencil, stitched rectangle thinlits die
    Thanks for stopping by and have a great Sunday.
    Zoe


  6. He Was Dead Dapper

    24th August, 2019 by iGirlZoe

    iGirlZoe: Tim Holtz, stampers anonymous, cadaverous stamps, distinguished stamps, life of the party stamps

    Hello friends! I wanted to share this super simple card that I made and shared on instagram using some the new Halloween stamps from Tim Holtz and Stampers Anonymous.

    iGirlZoe: Tim Holtz, stampers anonymous, cadaverous stamps, distinguished stamps, life of the party stamps
    It’s no secret that I’m a fan of hats and the distinguished stamp set (CMS371) has been one of my favourites. The moment I saw the cadaverous stamp set (CMS378) I knew I was going to put a hat on him…

    iGirlZoe: Tim Holtz, stampers anonymous, cadaverous stamps, distinguished stamps, life of the party stamps
    I slid one of the bony fingers (also from the cadaverous set) into a slit I cut into the hat. His face reminds me of a creepy phantom of the opera. For anyone who knows about my ongoing fear of/battle with my sewing machine, you may notice my stitching is looking a little better. I wanted to share a couple of tips in case it helps those new or struggling stitchers. I now use a test piece of card first (thanks Paula Cheney for the tip). I also lightly score a line around the card where I’m going to stitch so I have a straight line to follow. This might not be the best way to do it and if you have any stitching tips, please share them.

    iGirlZoe: Tim Holtz, stampers anonymous, cadaverous stamps, distinguished stamps, life of the party stamps
    The background was a print using the alcohol lift ink (see pic below). These awesome cobwebs are from the life of the party stamp set (CMS380). I pulled the background through a distress ink wash and flicked with distress paint.

    iGirlZoe: Tim Holtz, stampers anonymous, distinguished stamps, life of the party stamps, shifter rays stencil, stitched rectangle thinlits die
    This is where I lifted the print from. The background was a little busy for the cobwebs, but I stashed this in my bits bag it’s a good reminder to use the alcohol lift ink technique.

    Thanks for stopping by.
    Zoe


  7. The Unusual Suspects

    14th August, 2019 by iGirlZoe

    iGirlZoe: Tim Holtz, stampers anonymous, monster reunion stamps, weird science stamps

    Hello again! Nothing for months, then 2 posts in one day! #fairweatherblogger
    I had to share this super simple project that I made for the Tim Holtz Stampers Anonymous Halloween facebook LIVE. If you missed the LIVE you can see it on Tim’s blog along with the designers samples.

    iGirlZoe: Tim Holtz, stampers anonymous, monster reunion stamps, weird science stamps
    The moment I saw the monster reunion stamps (CMS381), I immediately thought of that famous scene from the movie ‘The Usual Suspects’… Clearly this lot were anything but ‘usual’ though! I die cut a stencil using the stencil alphabet from the gift card bag thinlits die to stencil “The Unusual Suspects!” I created this all using the sidekick, this tiny machine really has been a game changer for me, I use my dies so much more. #everyoneneedsasidekick

    iGirlZoe: Tim Holtz, stampers anonymous, monster reunion stamps, weird science stamps
    The scientific ruler from the weird science stamp set (CMS379) made the perfect border to begin my backdrop. I stamped it with picket fence distress ink onto black cardstock, embossed with white powder and fussy cut.

    iGirlZoe: Tim Holtz, stampers anonymous, monster reunion stamps, weird science stamps
    Using the media tool set and glass media mat, I drew lines across my distress mixed media heavystock background with a permanent black marker pen. Did you know that there are 2 little screws on the media tools ruler so you can adjust your ruler to line up perfectly with the grid on the glass media mat? Smart right?!

    iGirlZoe: Tim Holtz, stampers anonymous, monster reunion stamps, weird science stamps
    I am pretty sure this guy is the guilty party…

    iGirlZoe: Tim Holtz, stampers anonymous, monster reunion stamps, weird science stamps
    The monster reunion stamps were stamped with distress archival ink and watercolored with distress markers.

    Thanks for stopping by and please let me know if you have any questions.
    Zoe


  8. Ebenezer Bones

    8th November, 2018 by iGirlZoe

    Meet Ebenezer Bones, with a hat straight off the pages of Dickens ‘A Christmas Carol’… it had to be done!

    iGirlZoe: Tim Holtz, stampers anonymous, idea-ology, distress oxide, mr bones, yuletide. christmas
    I’m slowly weaning myself off halloween and finding my Christmas spirit. Made easier with the new Tim Holtz Stampers Anonymous holiday stamps… yuletide (cms356), music & advert (cms358) and mr bones (cms345).

    iGirlZoe: Tim Holtz, stampers anonymous, idea-ology, distress oxide, mr bones, yuletide. christmas
    Mr Bones fit perfectly into the wreath from the yuletide set. His teeth and eye were a little stained so I painted a layer of clean water over both, left for a few seconds and patted with a cloth to lift the distress ink.

    iGirlZoe: Tim Holtz, stampers anonymous, idea-ology, distress oxide, mr bones, yuletide. christmas
    I love the new Christmas design tape and used it around the edges of the bottom layer of the mount to give a pop of colour amidst the various shades of brown! This is one of my favourite ways to use design tape and you can edge a failed background and no one will ever know. 😉

    iGirlZoe: Tim Holtz, stampers anonymous, idea-ology, distress oxide, mr bones, yuletide. christmas
    Phew, first Christmas card done…

    Thanks for stopping by.
    Zoe


  9. Tim Holtz Tag Press Witches Hat

    4th November, 2018 by iGirlZoe

    Hello friends. I am back with a Sunday step by step for the witches hat that is hanging in The Witches Boutique, using the Tim Holtz idea-ology tag press.

    iGirlZoe: Tim Holtz, idea-ology, tag press, mummy cloth, distress spray, mixed media, halloween, witches hat, felt

    iGirlZoe: Tim Holtz, idea-ology, tag press, mummy cloth, distress spray, mixed media, halloween, witches hat, felt
    Gather these supplies, all are listed at the bottom of the post and the black felt is from my own stash. I WISH I had some deep purple felt, I’ll have to order some witchy colours and make some more. I already have an idea for a home decor project for next year. But for now, here’s how…

    iGirlZoe: Tim Holtz, idea-ology, tag press, mummy cloth, distress spray, mixed media, halloween, witches hat, felt
    1. Spray mummy cloth with distress spray stain and set aside to dry.
    2. Using the Tim Holtz large circle paper punch, punch 4 circles out of distress mixed media heavystock.
    3. Place one of the heavystock circles into the tag press frame and press.
    4. Use the second circle as a guide by placing it onto a piece of felt and cutting around the circle, leaving a half inch border, (t0 fold over the frame).

    iGirlZoe: Tim Holtz, idea-ology, tag press, mummy cloth, distress spray, mixed media, halloween, witches hat, felt
    5. Place the pressed tag onto the felt you just cut and snip lines all the way around from the edge of the felt to the circle frame. Cover with distress collage medium and start to fold the felt over the frame.
    6. Continue to fold the felt over the frame and press down into the collage medium and set aside to dry.
    7. Cut another piece of felt using the heavystock circle as a template, (this time don’t leave a border).
    8. Adhere the felt circle over the back of the circle frame to hide the gathered material.

    iGirlZoe: Tim Holtz, idea-ology, tag press, mummy cloth, distress spray, mixed media, halloween, witches hat, felt
    9. Take the 3 remaining heavystock circles and cut a line across the middle leaving a quarter uncut.
    10. Roll each of the circles into cones and stack them on top of each other, covering in a layer of collage medium to hold in place.
    11. Once the glue is dry, cover in a layer of distress paint that best matches the felt and allow to air dry.
    12. Assemble the hat with collage medium. Once completely dry, gently bend the frame of the pressed circle tag to create the signature witch hat curve.

    iGirlZoe: Tim Holtz, idea-ology, tag press, mummy cloth, distress spray, mixed media, halloween, witches hat, felt
    Use a smaller circle tag and punch for different size hats and mix your distress paints to colour match to your felt. The possibilities are endless, I hope you give it a go.

    Thanks for stopping by.
    Zoe


  10. Mr Bones Halloween Banner 2018

    3rd November, 2018 by iGirlZoe

    Hello friends. Hope you had a happy halloween with lots of treats. Today I’m sharing the halloween banner I made using some of Tim Holtz Halloween 2018 products. I loved this years Halloween release, but my heart was stolen by Mr Bones from the Mr Bones stamp set (cms345).

    iGirlZoe: Tim Holtz, stampers anonymous. idea-ology, distress oxide, mixed media, halloween, skull, banner

    iGirlZoe: Tim Holtz, stampers anonymous. idea-ology, distress oxide, mixed media, halloween, skull, banner

    iGirlZoe: Tim Holtz, stampers anonymous. idea-ology, distress oxide, mixed media, halloween, skull, banner
    Using 3 of my favourite distress oxide inks from the final colour release, I created a base for the top layer of the banner. Stamp the lace stamp from ornate and lace stamp set (cms348) with frayed burlap distress ink. Edged with ground espresso distress archival ink.

    iGirlZoe: Tim Holtz, stampers anonymous. idea-ology, distress oxide, mixed media, halloween, skull, banner
    All of the background banner panels are Tim Holtz halloween paper stash and classic kraft stock, sanded and blended with vintage photo distress ink and stitched. You can see the banner dimensions HERE.

    iGirlZoe: Tim Holtz, stampers anonymous. idea-ology, distress oxide, mixed media, halloween, skull, banner
    The Halloween remnant rubs were perfect for adding accents and I used them throughout the banner. How cute is this tiny vial label stamp from stamp set mini halloween 3 (cms140). I used the skull head from the same set in 2 of the banners further down.

    iGirlZoe: Tim Holtz, stampers anonymous. idea-ology, distress oxide, mixed media, halloween, skull, banner
    But back to Mr Bones, who was the beginnings of this banner and my favourite stamp of the season. I will let you into a little secret, he’s sticking around for Christmas… with that hat straight out of Dickens, A Christmas Carol!

    iGirlZoe: Tim Holtz, stampers anonymous. idea-ology, distress oxide, mixed media, halloween, skull, banner
    Anyone else signed up to the inventor stamp club?! I did fussy cut this, I find it relaxing, but for those who don’t, stamp directly onto the banner. I’ve just ordered the inventor Christmas stamps and can’t wait to play with them.

    iGirlZoe: Tim Holtz, stampers anonymous. idea-ology, distress oxide, mixed media, halloween, skull, banner
    Another of my favourite stamps from this season was this one from the tangled webs set (cms346). This is another stamp I am going to use beyond halloween. I’ve seen some fantastic things done using this and the theories stamp set (cms329) in the Tim Holtz Addicts facebook group. If you’re an addict, come and join in the fun. I tucked a bone from the idea-ology boneyard set by stamping an extra finger and gluing it over the bone. Thanks Tami Bastiaans for the zombie finger inspiration.

    iGirlZoe: Tim Holtz, stampers anonymous. idea-ology, distress oxide, mixed media, halloween, skull, banner
    I used the ornate stamp from the ornate and lace set (cms348) for the background on the next 3 banner panels. I cut a skeleton from heavystock with the ghoulish thinlits die set and a fence from the village graveyard thinlits set. I covered the fence with black soot distress paint and chained it to the skeleton. I just love how well the old and new products in Tim’s line work together. It makes adding to your collection each year so much fun.

    iGirlZoe: Tim Holtz, stampers anonymous. idea-ology, distress oxide, mixed media, halloween, skull, banner
    This was a “huh, what if…” idea that became a “YES” moment. I combined the top of a stamp from the inventor 2 stamp set (cms342) and bottom of the skull head from mini halloween 3 stamp set (cms140). Stamp, fussy cut and glue one over the other and watercolour with distress inks.

    iGirlZoe: Tim Holtz, stampers anonymous. idea-ology, distress oxide, mixed media, halloween, skull, banner
    I posted the uncanny resemblance that my husband’s 2016 halloween costume has to this stamping monster mash up, on my instagram.

    iGirlZoe: Tim Holtz, stampers anonymous. idea-ology, distress oxide, mixed media, halloween, skull, banner
    There had to be a dapper skull head including in this banner. I used some of the remnant rubs on the shirt collar and hat, as well as on some stamped tiny vial labels. There is a little extra chain (used to connect the banner) left at each end ready to add a couple more panels next year…

    iGirlZoe: Tim Holtz, stampers anonymous. idea-ology, distress oxide, mixed media, halloween, skull, banner
    Thanks for stopping by. I hope you like the banner and it’s inspired you to make your own.

    Have a great Saturday.
    Zoe