‘Simon Says Stamp’ Category

  1. Simon Says Stamp Halloween Blog Hop

    20th August, 2025 by iGirlZoe

    igirlzoe: tim holtz simon says stamp halloween coordinating dies

    igirlzoe: tim holtz simon says stamp halloween coordinating dies
    Hello friends. Today I’m participating in the Simon Says Stamp Halloween Blog Hop featuring the newly released Simon Says Stamp exclusive coordinating dies to match Tim Holtz stamps. If you’d like to see and buy the Halloween coordinating dies, they are here HERE.

    I’m honored to be joining so many talented makers as one of the stops on this hop, you can see the list of hop participants at the end of this blog. You may have arrived from Sandi MacIver’s blog, but if not, you can start the hop on Simon Says Stamp blog.

    igirlzoe: tim holtz simon says stamp halloween coordinating dies
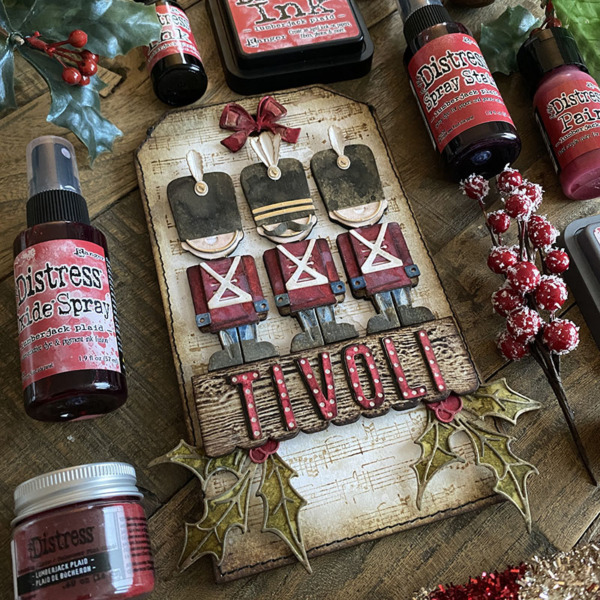
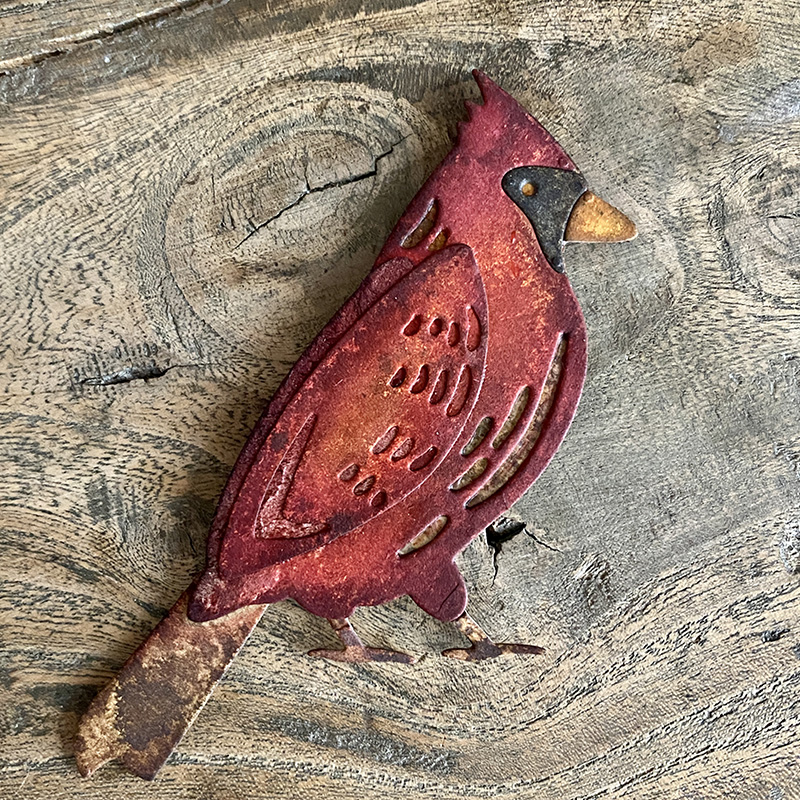
    I am utterly OBSESSED with the coordinating die set to Tim’s Sketch Manor stamp set CMS408. Firstly, a confession, when I received this die set from Simon Says Stamp and pulled the coordinating stamp set out, it had never been inked!!! I’m proud to say that every stamp has now been used and I will be using it a lot going forward. So a BIG THANK YOU to Simon Says Stamp for inspiring me to use the toys in my toy box with this awesome new die set. Let’s get into the details…

    igirlzoe: tim holtz simon says stamp halloween coordinating dies
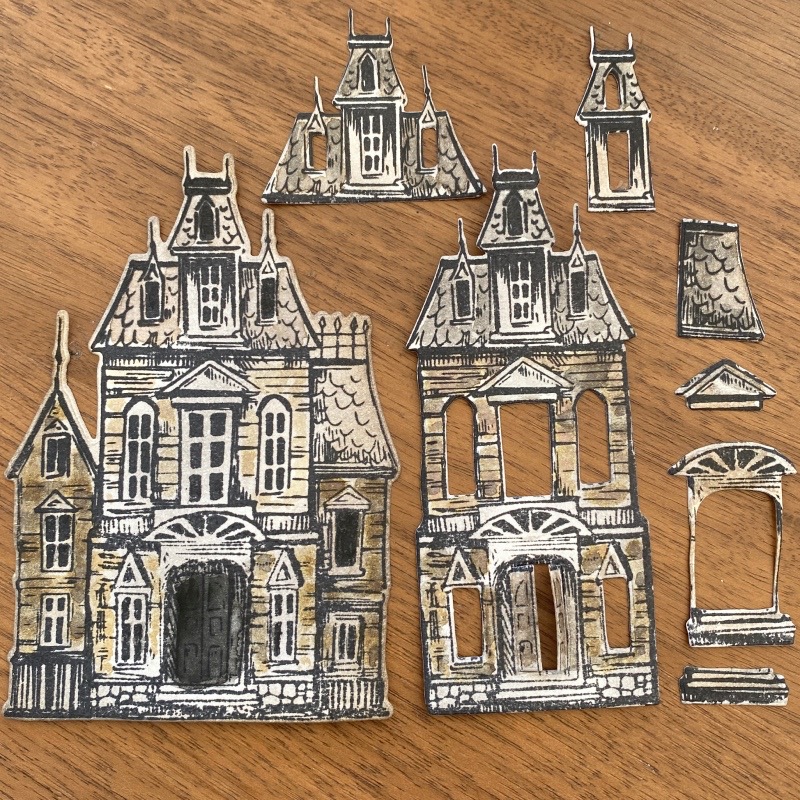
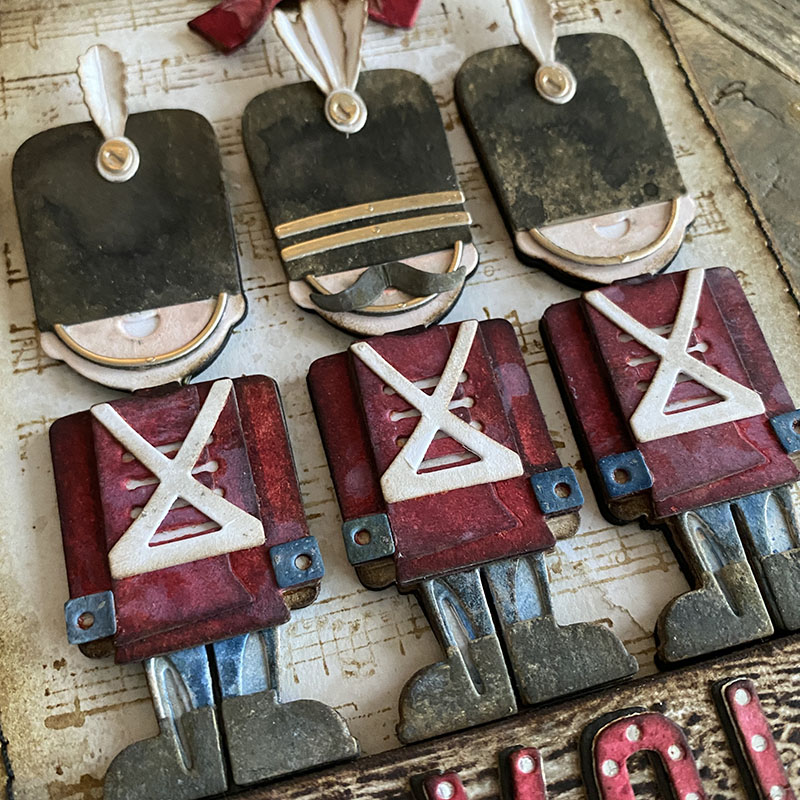
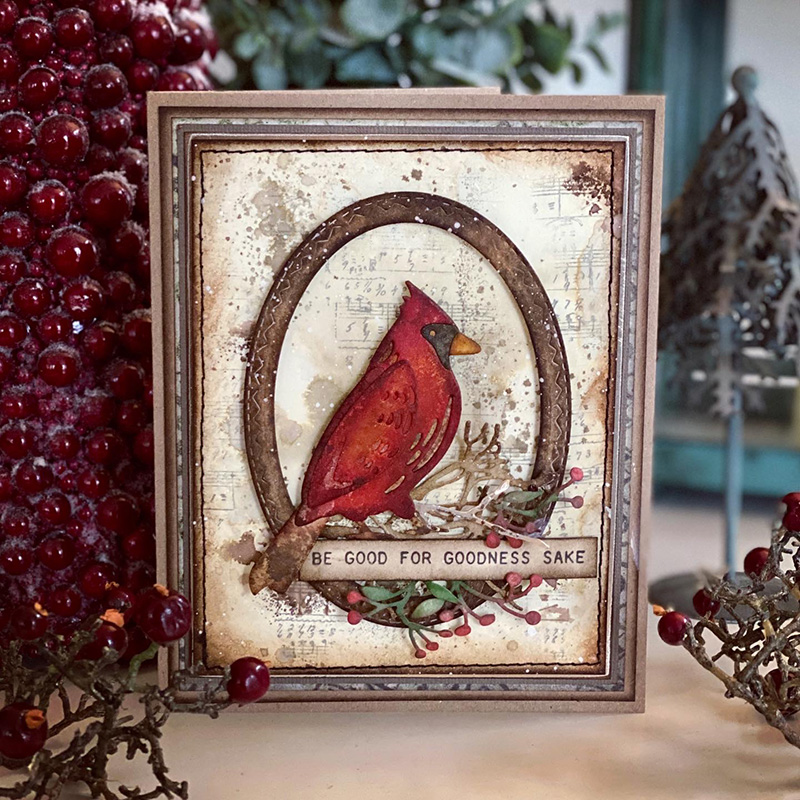
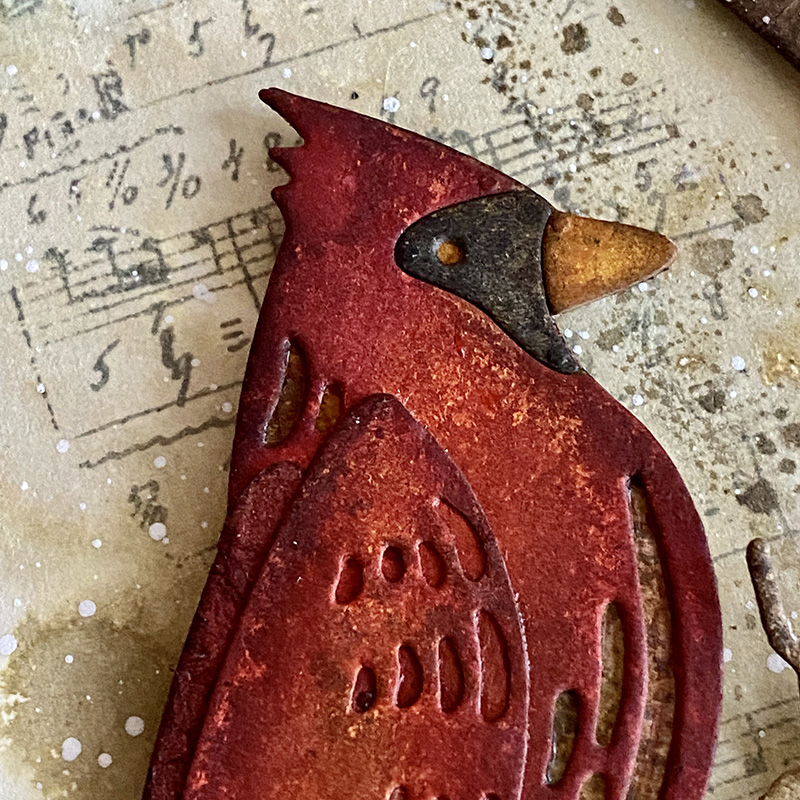
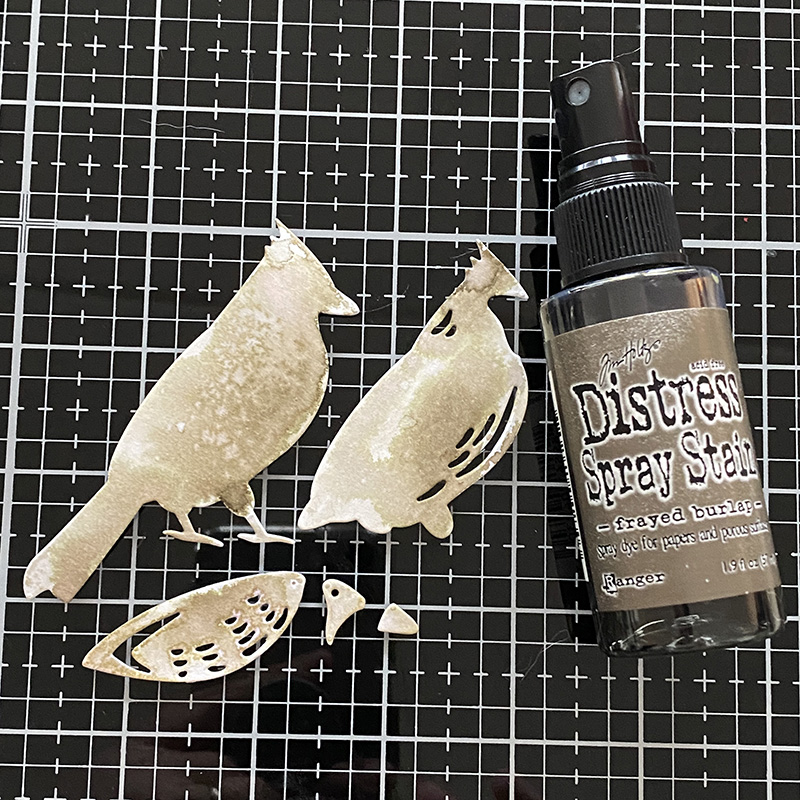
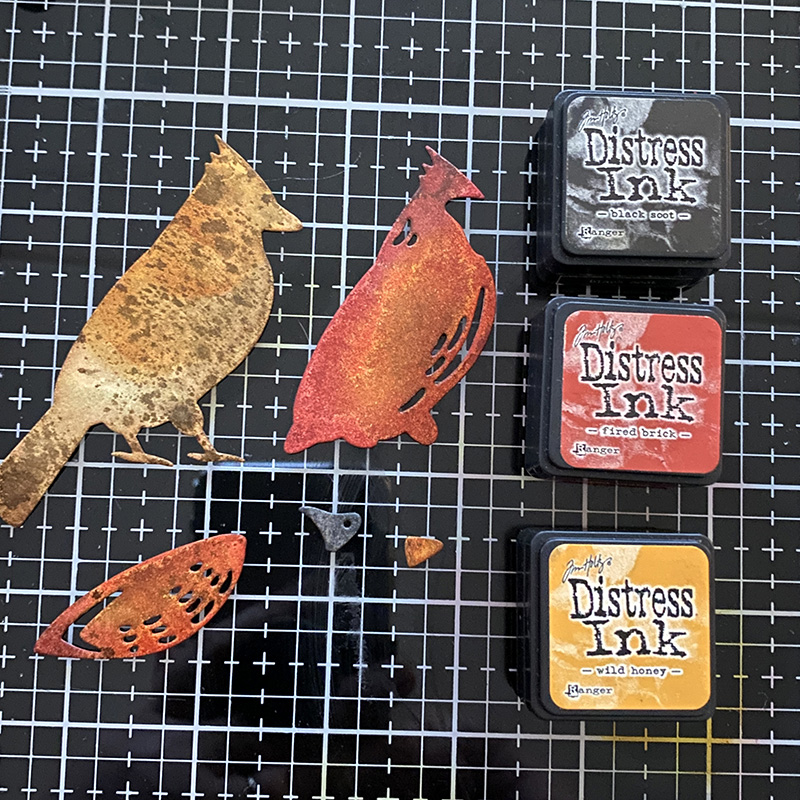
    I absolutely love the way the dies allow you to build layers on this haunted manor! I stamped the manor several times and then die cut using the different dies and watercolored using Distress ink ready to assemble. It’s not necessary to watecolor the parts that are going to be hidden by the next layer, but it was a good practice run to see that I liked the colours I had chosen. No surprise that it was browns! lol

    igirlzoe: tim holtz simon says stamp halloween coordinating dies
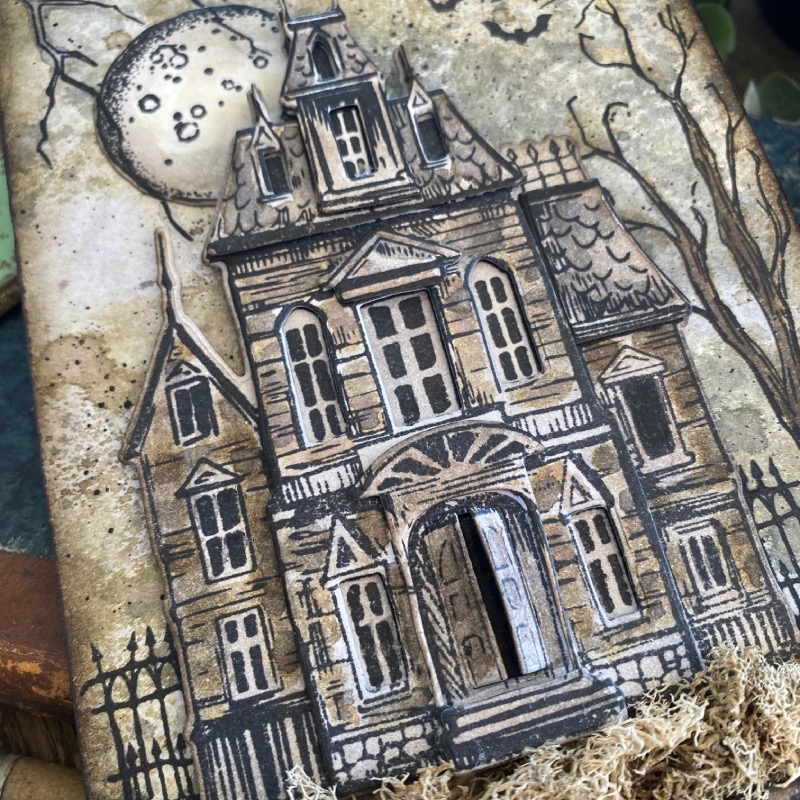
    The Simon Says Stamp 3D foam adhesive squares are a must for this. I have a nice stock pile of the black as they are my favourite of all 3D foam squares. The multi pack comes in small and large foam squares and in 2 different depths. For the layers I used the shallower of the squares with the deeper ones on the base of the manor to raise it up off the tag.

    igirlzoe: tim holtz simon says stamp halloween coordinating dies
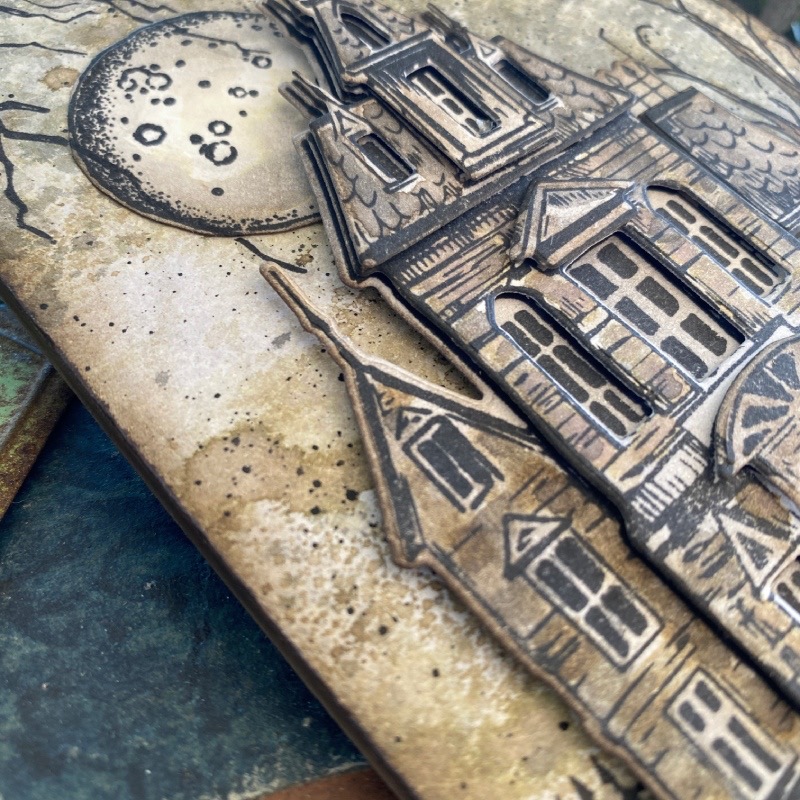
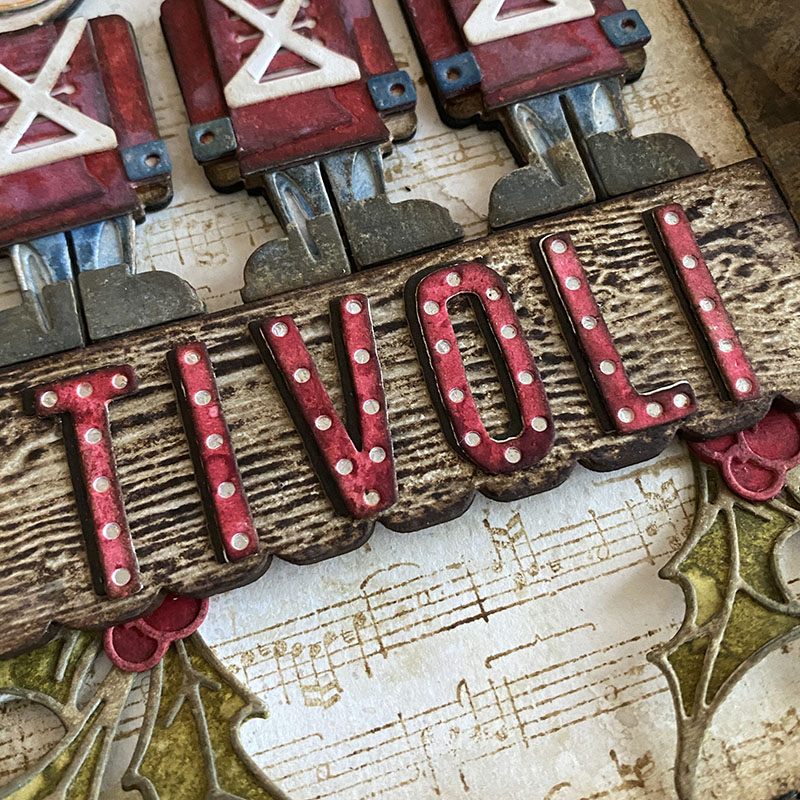
    You can see here how much depth the die cut layers give! And the dies take all the work out of this for you. Cool right?!

    igirlzoe: tim holtz simon says stamp halloween coordinating dies
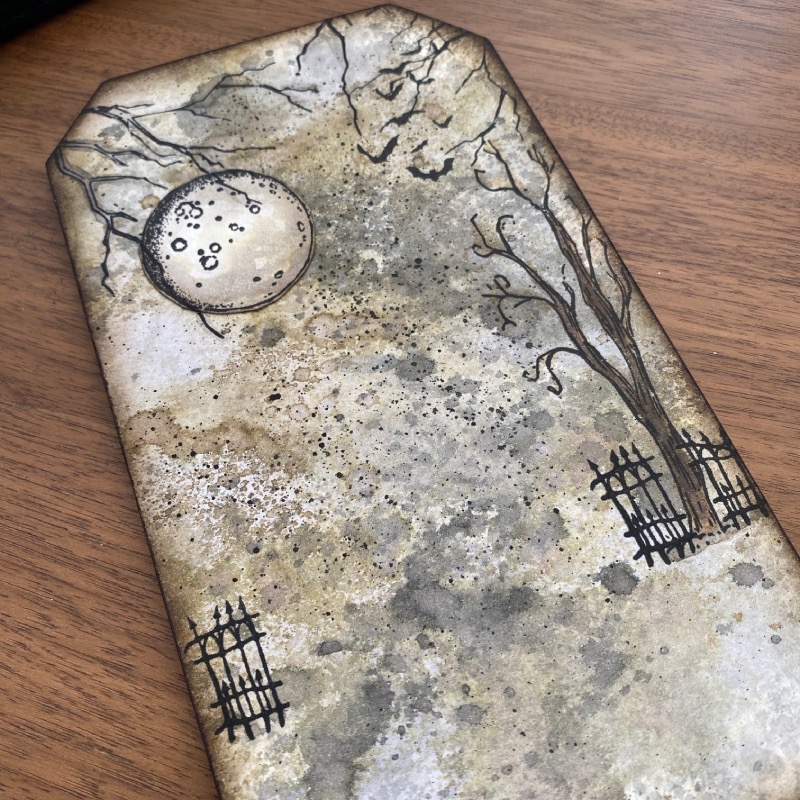
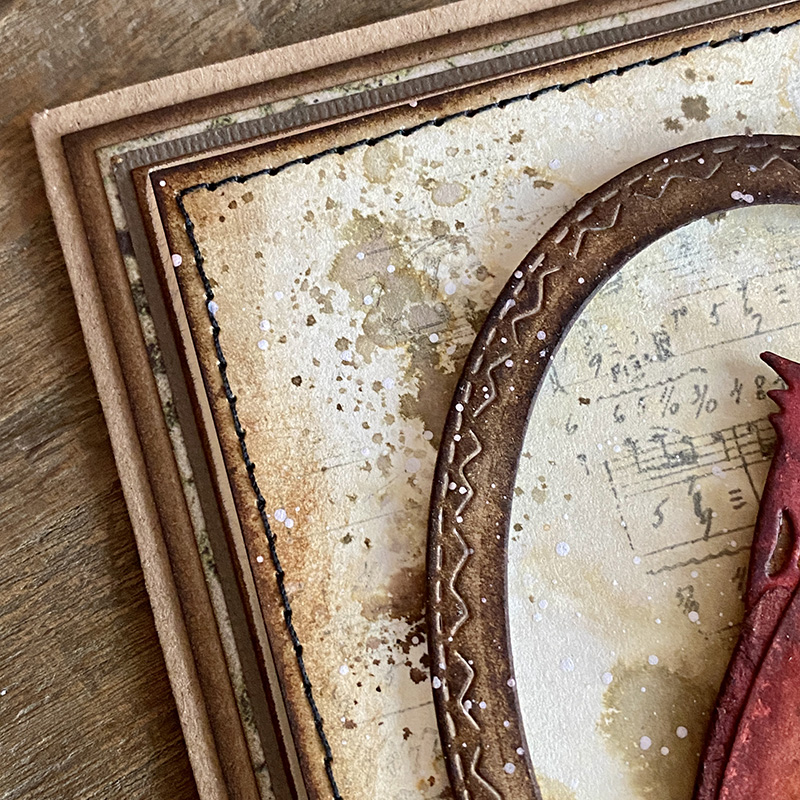
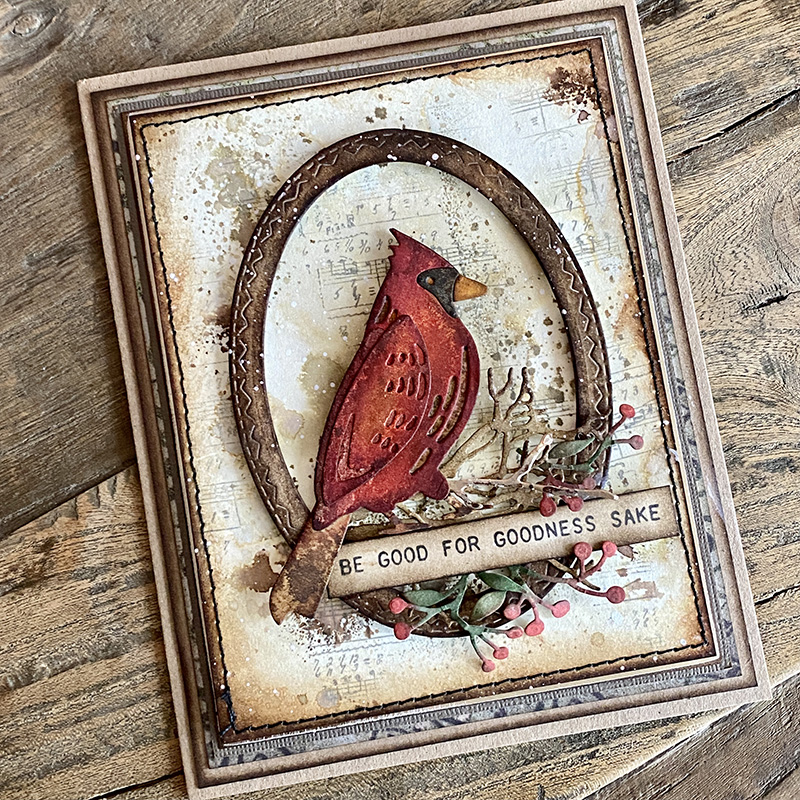
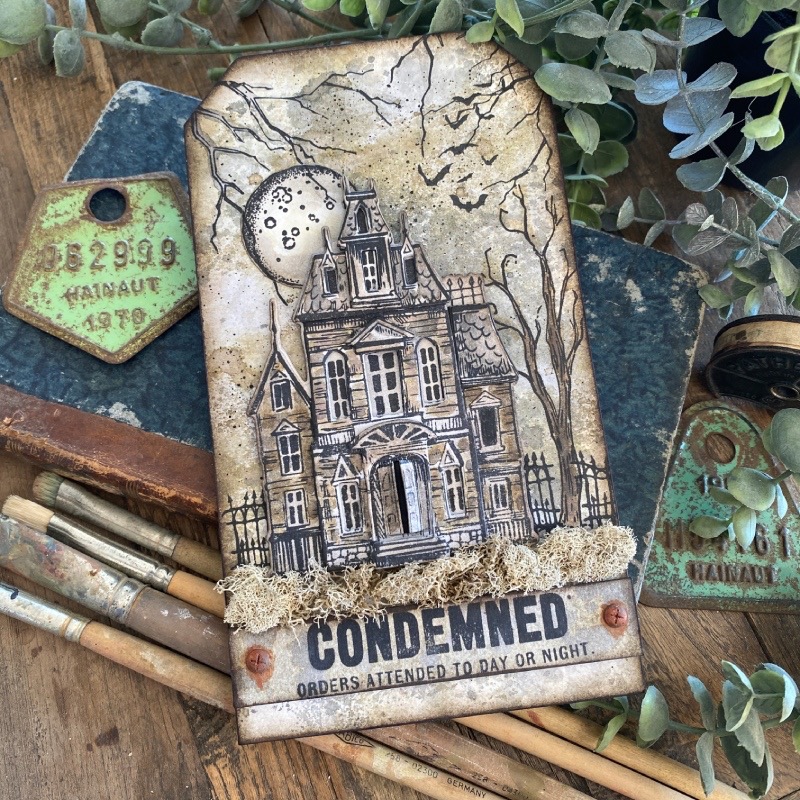
    I really did use all the stamps in this set. Starting with an Etcetera Tag in the Mini size, I added Distress watercolor cardstock, which I inked with various Distress inks (listed at the end of the post). Once dry, I stamped directly onto the tag and watercolored, also with Distress inks. I stamped and die cut the moon with the new coordinating dies and added this to my tag.

    igirlzoe: tim holtz simon says stamp halloween coordinating dies
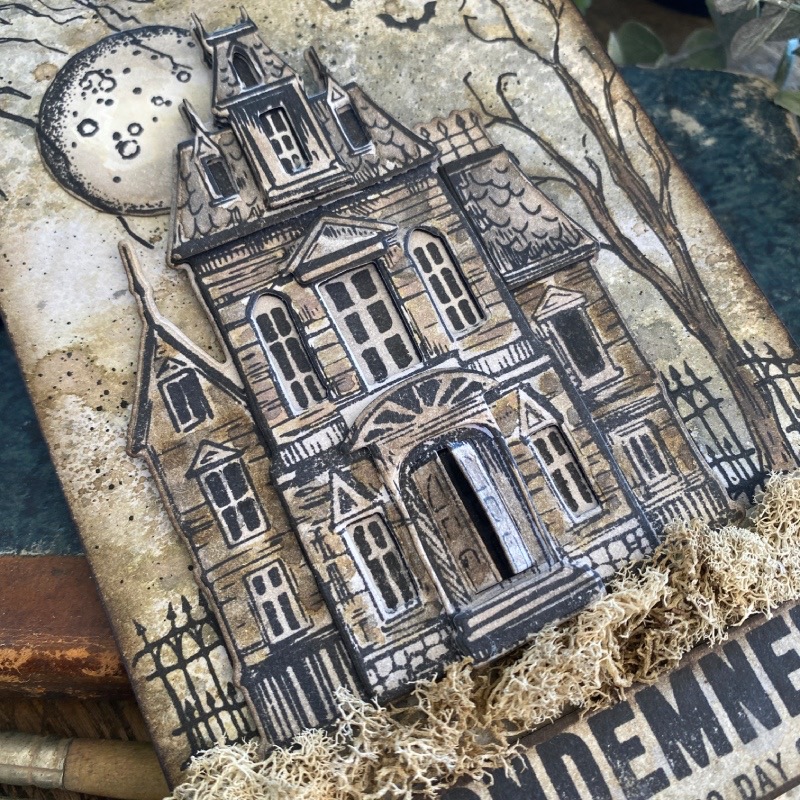
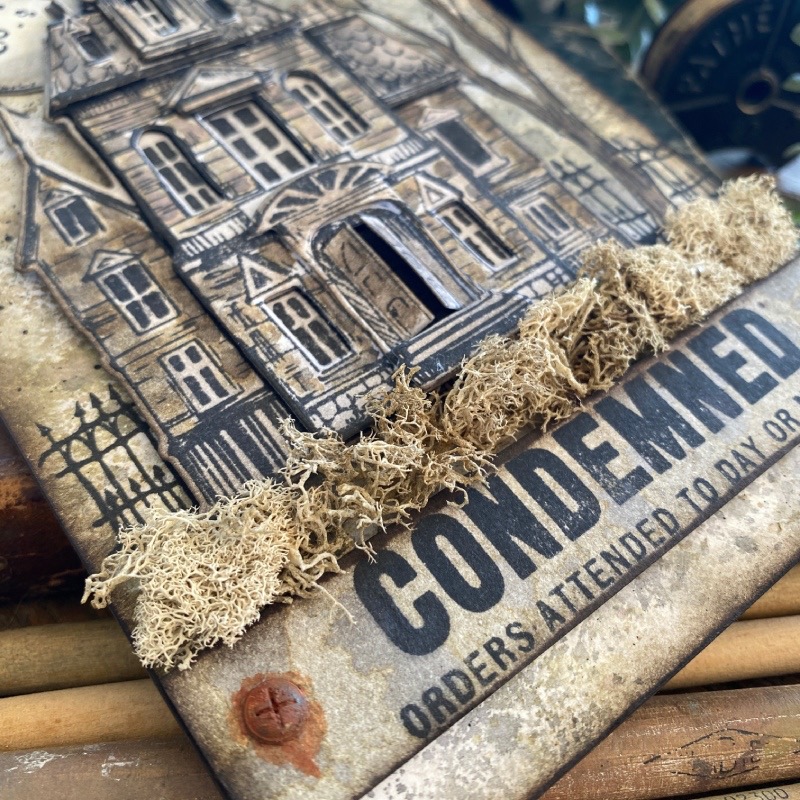
    I then added the Manor to the tag and squealed a little with delight! I LOVE THIS DIE SET!!

    igirlzoe: tim holtz simon says stamp halloween coordinating dies
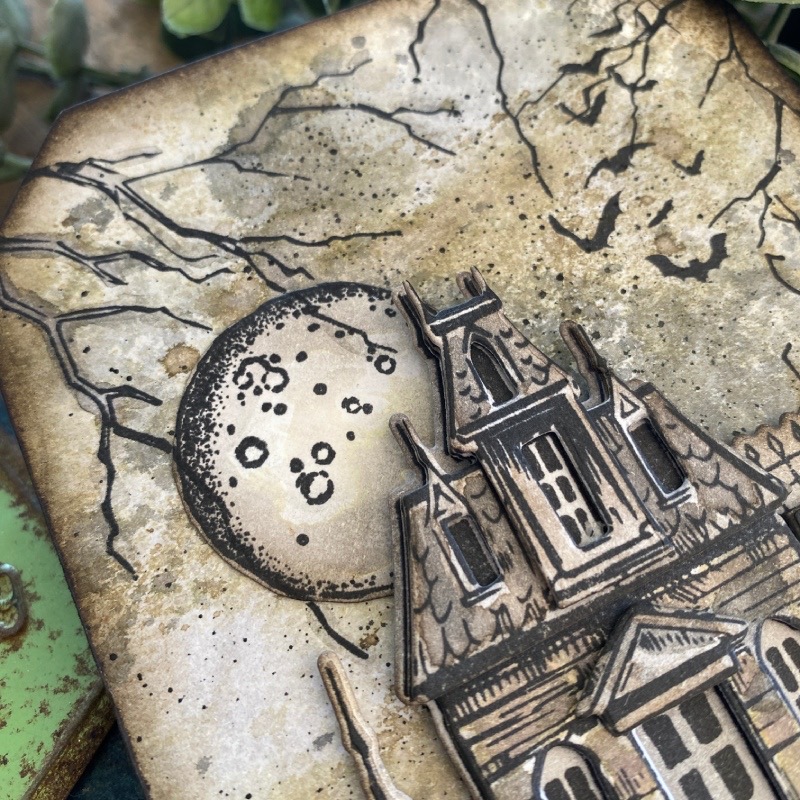
    I love how atmospheric the background stamps make this scene.

    igirlzoe: tim holtz simon says stamp halloween coordinating dies
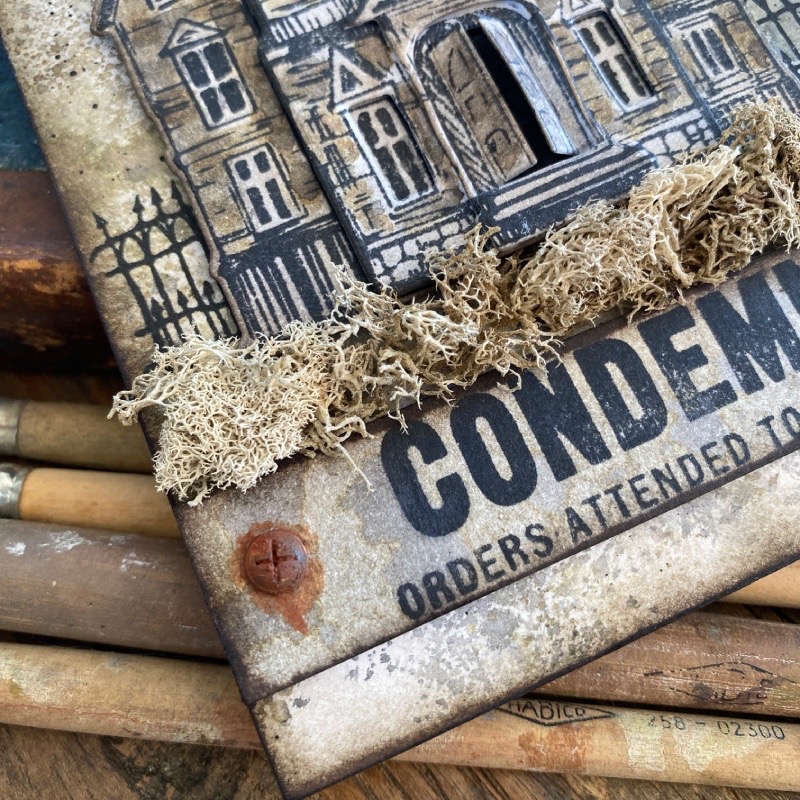
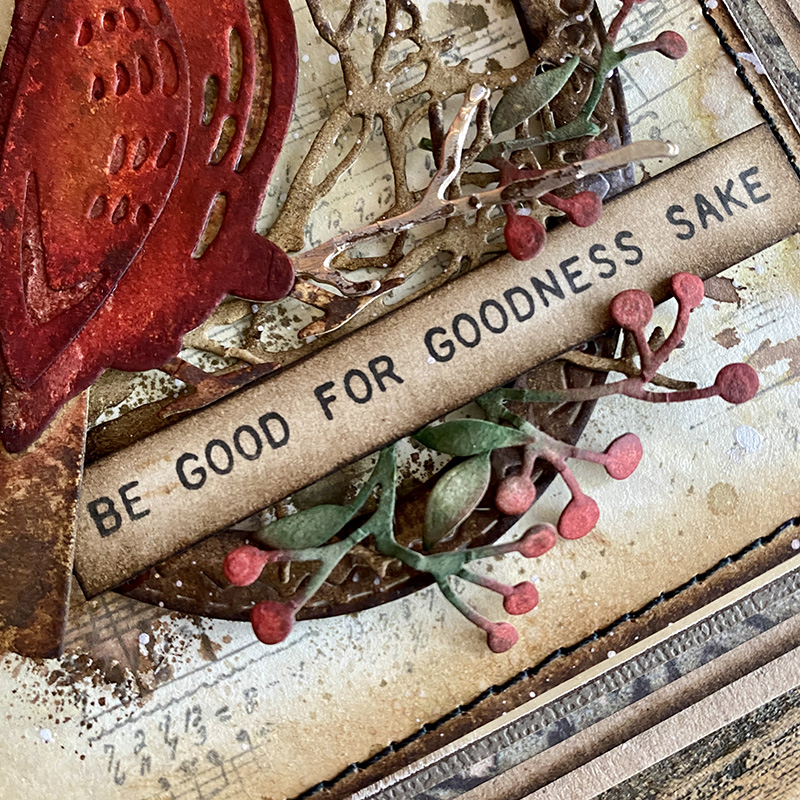
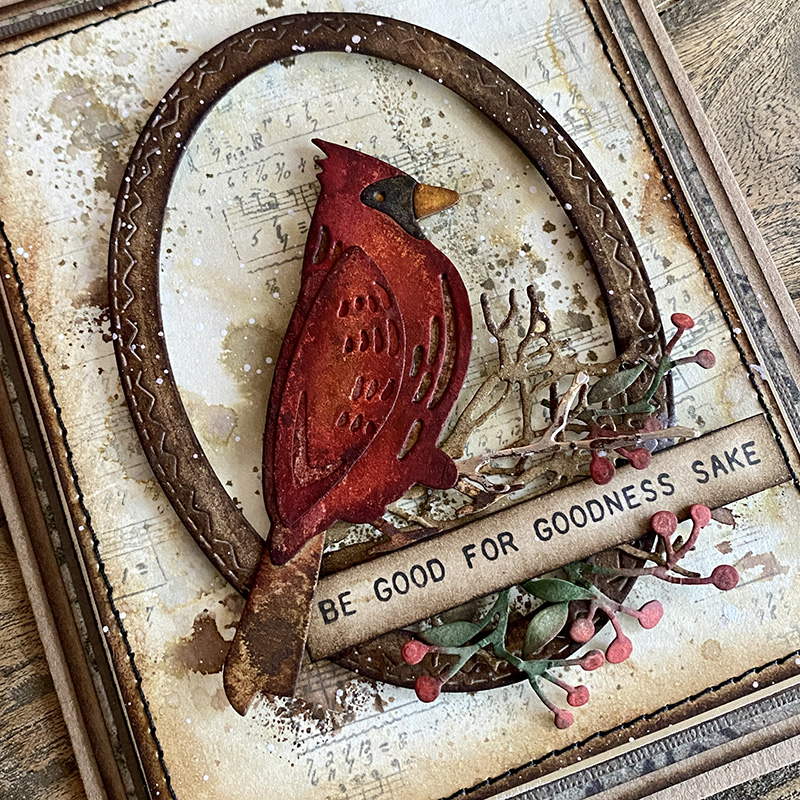
    I used a couple of stamps from the Field Notes stamp set CMS396 to create a banner. Adding a couple of idea-ology Hardware Heads with a little rust paste. I picked up this moss from Simon Says Stamp and it was perfect to add texture to the tag, which I added with a little hot glue.

    igirlzoe: tim holtz simon says stamp halloween coordinating dies
    Thanks for stopping by, the next stop on the hop is the talented Tina Smith.

    Let me know if you have any questions.
    Zoe

    Blog Hop Order:
    Simon Says Stamp Blog
    Nina-Marie Trapani
    Caly Person
    Stacy Hutchinson
    Nichol Spohr
    Tami Bastiaans
    Sandi MacIver
    Zoe Hillman (YOU ARE HERE)
    Tina Smith
    Jean Doeringsfeld
    Barb Engler


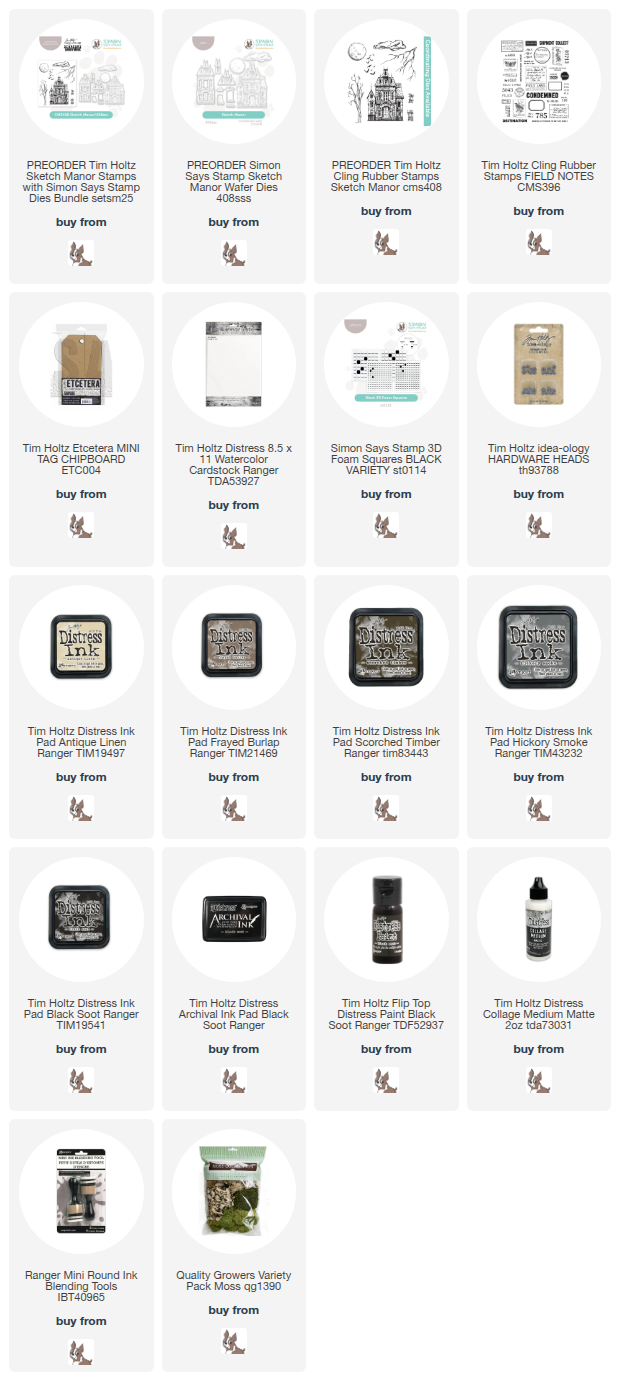
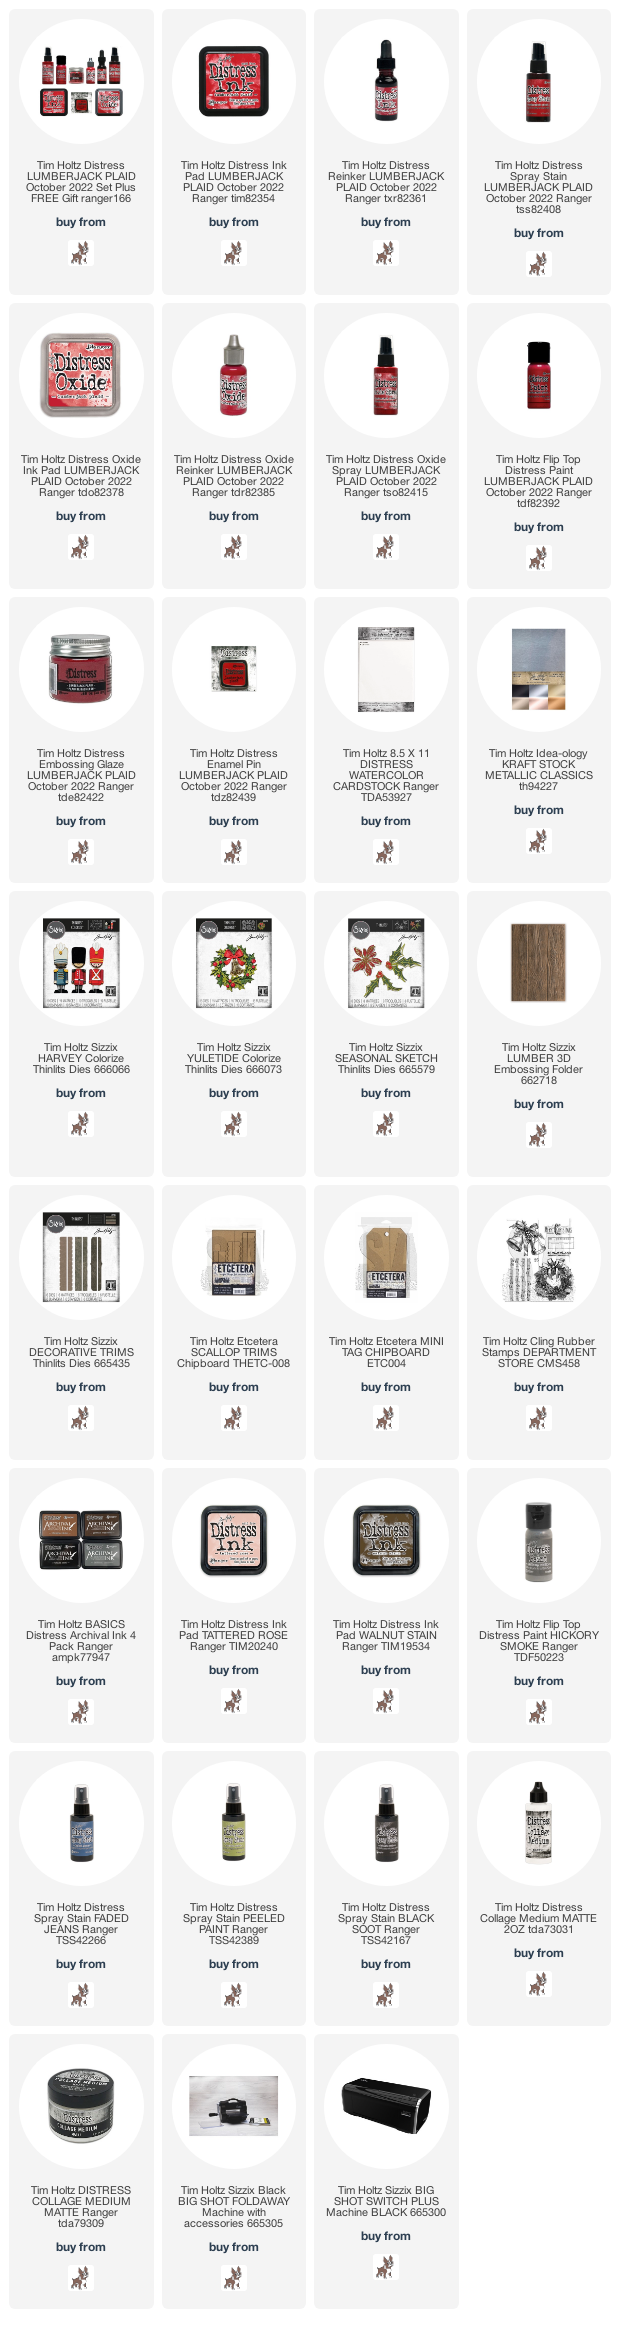
    The products used to create this project are listed below. Thank you for supporting me by using my affiliate links to shop, at no cost to you. I really appreciate it.


  2. Tivoli Guards

    4th November, 2022 by iGirlZoe

    igirlzoe: tim holtz lumberjack plaid distress ranger ink

    Hello friends and happy Friday! It’s been a long and busy week for me and I’m looking forward to a creative weekend of making. Hopefully you’re starting to receive your new distress color Lumberjack Plaid and are enjoying getting acquainted with the gorgeous rich red. If you want to watch the replay of the LIVE launch and the maker inspiration, head over to Tim’s blog.

    igirlzoe: tim holtz lumberjack plaid distress ranger ink
    I live pretty close to Tivoli Gardens, an amusement park in the center of Copenhagen city. I’ve been many times, we take out of town visitors there and have even had some special friends join us via facetime.

    igirlzoe: tim holtz lumberjack plaid distress ranger ink
    When Tim released the Harvey thinlits die set I immediately thought of the Tivoli Guards dressed as Nutcrackers. Little did I know that there was the perfect color coming to make them, so when I saw Lumberjack Plaid I knew that I wanted to make this piece.

    igirlzoe: tim holtz lumberjack plaid distress ranger ink
    The new colorize dies are so easy to build and there are resources online to show you how to put these together. I Love the depth of the Lumberjack Plaid on the guards overcoats. Of course I had to make them a little grungy, because that’s what I like, but you could easily block the color. I used idea-ology metallic kraftstock to cut the chin straps, feather medallions and the stripes on one of the guards hats. I decided to use a single feather on 2 of the guards, I love having lots of options with this die set.

    igirlzoe: tim holtz lumberjack plaid distress ranger ink
    I created a platform for the guards to stand on using the Etcetera Trims and the decorative trims die to cut a matching trim which I embossed with the Lumber 3D folder and inked. I added an extra piece of card to make the trim deeper to fit “Tivoli” which I cut using the (retired) Alphanumeric Marquee die and the Alphanumeric 1″ Tall die set. The base alphanumeric letters are cut from idea-ology metallic kraftstock and the marquee letters cut from distress watercolor cardstock and sprayed with Lumberjack Plaid distress spray stain. I love the way the metallic peeps through the holes in the marquee letters and makes the Lumberjack Plaid distress ink pop!

    igirlzoe: tim holtz lumberjack plaid distress ranger ink
    I tucked a couple of pieces of holly underneath the ledge by die cutting distress watercolor cardstock with the Seasonal Sketch thinlits dies. I used the Lumberjack Plaid ink for the base of the berries and the oxide ink for the top outline die cut. I love the contrast these 2 mediums of Lumberjack Plaid give and that it works so well with grungier colors of the Distress palette.

    igirlzoe: tim holtz lumberjack plaid distress ranger ink
    The background is a piece of distress watercolor cardstock, cut to fit the mini etcetera tag. I used the sheet music stamp from the Department Store stamp set to stamp several times in distress archival ink. I stitched the outside of the tag with my sewing machine and glued to the tag using distress collage medium.

    igirlzoe: tim holtz lumberjack plaid distress ranger ink
    Finally, I added the bow from the new Yuletide Colorize thinlits die set which was stained in Lumberjack Plaid distress OG and oxide inks. By adding a little light colored distress paint to the die cut first, it creates a resist for a nice grungy look. I blended in a little walnut stain distress ink on top.

    igirlzoe: tim holtz lumberjack plaid distress ranger ink
    This would be easily adaptable to make a card, gift card or gift box topper and of course you could change the theme to Disney, London or anything you can dream up… I hope this has inspired you to create.

    Thanks for stopping by and let me know if you have any questions.

    Zoe


    affiliate links used at no cost to you


  3. Tim Holtz Feathered Cardinal

    4th December, 2020 by iGirlZoe

    igirlzoe: tim holtz sizzix feathered cardinal thinlits simon says stamp diecember

    Hello friends. I’ve got some super exciting news. As part of the DieCember celebrations over at Simon Says Stamp, they are giving away this beautiful Tim Holtz feathered cardinal thinlits die with any Tim Holtz brand purchase! I know! I squealed too!

    igirlzoe: tim holtz sizzix feathered cardinal thinlits simon says stamp diecember
    igirlzoe: tim holtz sizzix feathered cardinal thinlits simon says stamp diecember
    This beautiful Tim Holtz feathered cardinal thinlits die is free with any Tim Holtz brand purchase from Simon Says Stamp, while supplies last. If you wish to add one to your collection, please do not delay.

    Please note that when you add a Tim Holtz product to your shopping basket, the die will automatically be added, (while supplies last).

    igirlzoe: tim holtz sizzix feathered cardinal thinlits simon says stamp diecember
    Let’s get into how I made this guy, his name is Cecil and is it just me, or does he look like a troublemaker? Have you noticed that Tim designs his birds, owls, animals with a look in their eyes? …just sayin! #troublemaker 😉

    igirlzoe: tim holtz sizzix feathered cardinal thinlits simon says stamp diecember
    I die cut the feathered cardinal from distress watercolor cardstock and pulled the pieces through an ink wash on my glass media mat. Simply spray distress ink onto the glass media mat (2 sprays and 1 of water) and then dragged the cardstock through the inky wash and dried with a heat tool.

    igirlzoe: tim holtz sizzix feathered cardinal thinlits simon says stamp diecember
    Next I blended in distress inks using a mini blending tool.

    igirlzoe: tim holtz sizzix feathered cardinal thinlits simon says stamp diecember
    This is a very easy build, just 5 pieces and a little distress collage medium.

    igirlzoe: tim holtz sizzix feathered cardinal thinlits simon says stamp diecember
    For the background, I dragged a piece of mixed media heavystock through the same ink wash and dried with a heat tool. I added some droplets that I picked up from the non stick mat portion of my glass media mat, the non stick mat makes the best ink droplets ever!! I added a background stamp from the music and advert CMS358 stamp set, stamped in distress archival ink.

    igirlzoe: tim holtz sizzix feathered cardinal thinlits simon says stamp diecember
    I die cut a frame from the stitched ovals die set (661188) and some branches from the ghost town die set (664194) which I blended with distress ink. These are definitely my favourite of the small branches, they’re really twiggy. The dies are still available online, I’ve seen them on Amazon if anyone is looking for them. I also die cut some foliage from the mini holiday greens die set (661597).

    igirlzoe: tim holtz sizzix feathered cardinal thinlits simon says stamp diecember
    I mounted the cardinal inside the frame on adhesive foam and added a sentiment from the tiny text christmas CMS424 stamp set.

    igirlzoe: tim holtz sizzix feathered cardinal thinlits simon says stamp diecember
    Finally I mounted the card onto idea-ology metallic kraft-stock and used distress kraft heavystock for my card base, at 130gsm, it’s a really sturdy card base.

    igirlzoe: tim holtz sizzix feathered cardinal thinlits simon says stamp diecember
    I seriously love this die and it’s going to make an appearance on my Christmas cards, tags and gift wrap this year. I hope you’ll celebrate DieCember over at Simon Says Stamp and grab yourself a feathered cardinal die, before they fly away!

    Zoe