1. 14th July, 2021

    Tim Holtz Brickwork

    Hello Friends! I’ve finally got myself organized and have a walk through of the brickwork backgrounds I’ve been using for my makes recently.

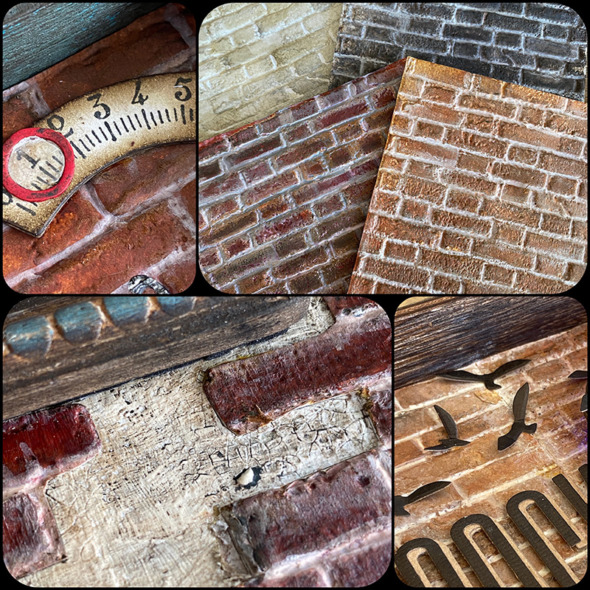
    The Tim Holtz Sizzix Brickwork 3D embossing folder is incredibly detailed and does all of the heavy lifting when creating brickwork from paper. It’s the brick pitting detail that makes it look like it should be rough to the touch when it’s not.
    igirlzoe: tim holtz sizzix brickwork 3D embossing folder 664259
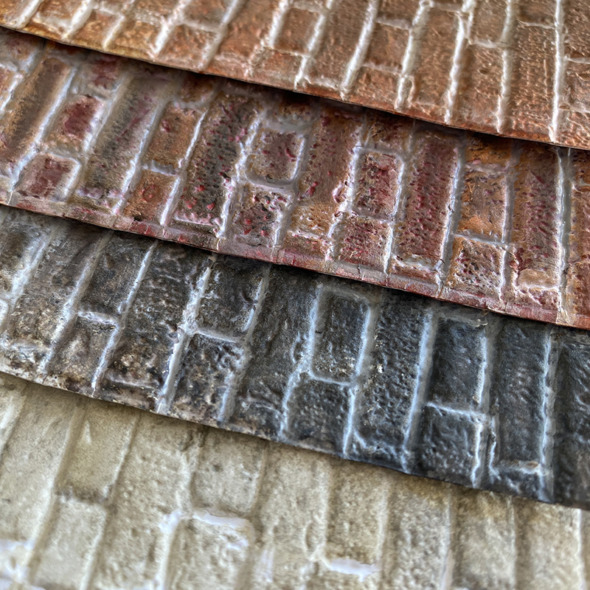
    Above are a few examples of brickwork used in my makes. For the walk through I haven’t listed specific colours, but if you scroll down there are some different brickwork combinations with colours listed to get you started, but first, let’s get into how to make your own…
    igirlzoe: tim holtz sizzix brickwork 3D embossing folder 664259
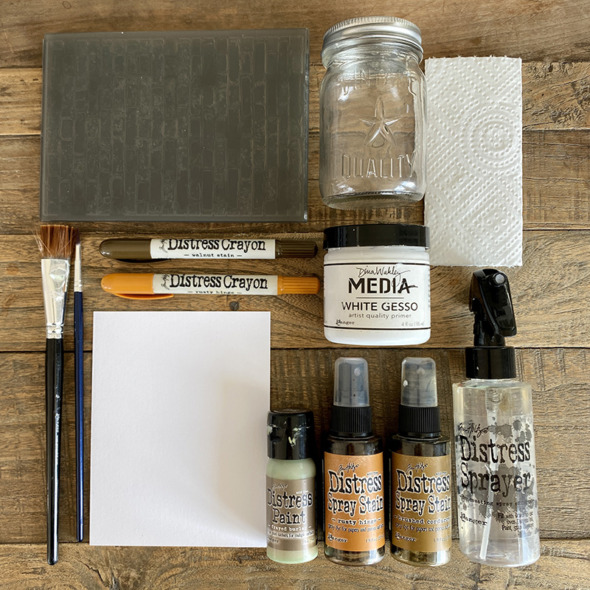
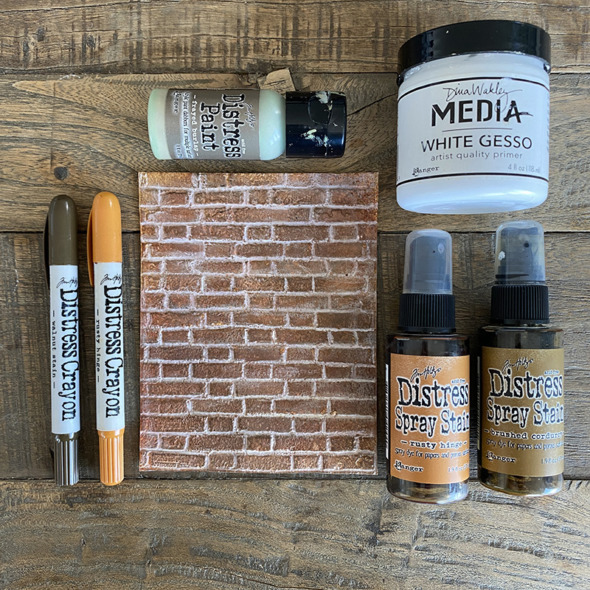
    Gather these supplies: distress watercolor cardstock, brickwork 3D embossing folder, jar of water, paper towel, white gesso, distress water sprayer bottle, large and detail paint brushes, distress crayons, distress paint and distress sprays.
    igirlzoe: tim holtz sizzix brickwork 3D embossing folder 664259
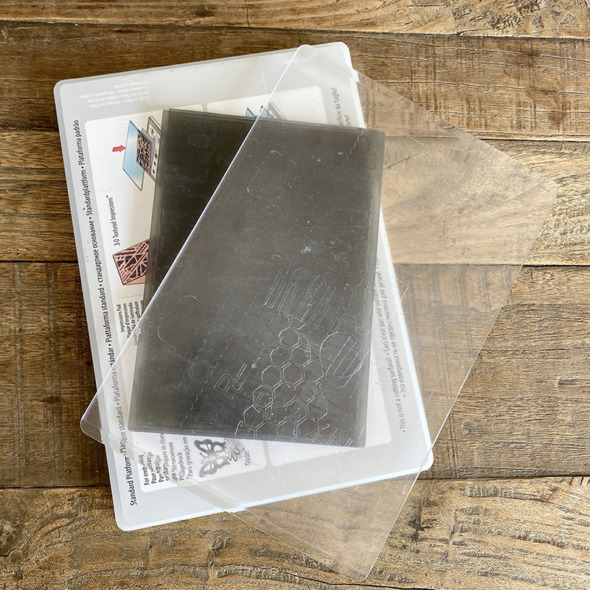
    Emboss distress watercolor cardstock with the 3D brickwork embossing folder. You only need your base platform and one cutting plate when running 3D embossing folders through your Sizzix machine. Lightly mist your cardstock and then roll your embossing folder through 3 times. Remember 3D – 3 passes.
    igirlzoe: tim holtz sizzix brickwork 3D embossing folder 664259
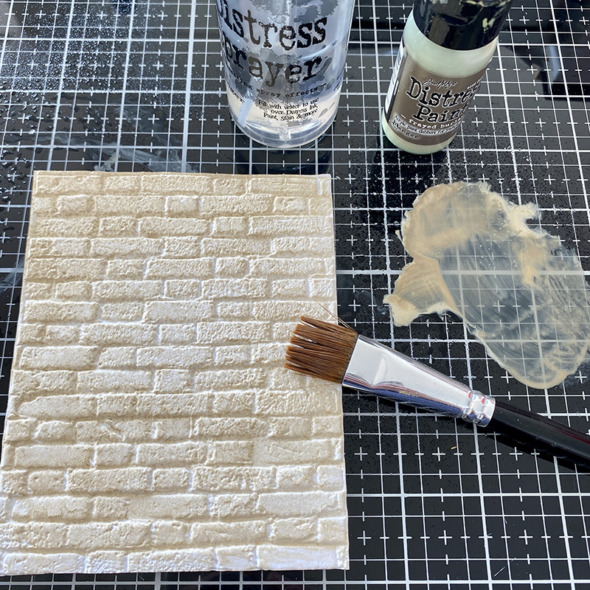
    Make a paint wash with distress paint and water and paint over the embossed brickwork background and set aside to dry.
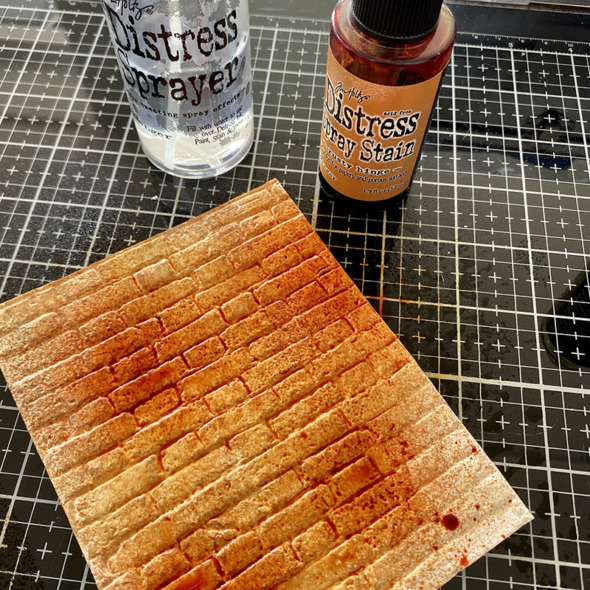
    igirlzoe: tim holtz sizzix brickwork 3D embossing folder 664259
    Give the background a light mist and spray with distress spray and dry with a heat tool.
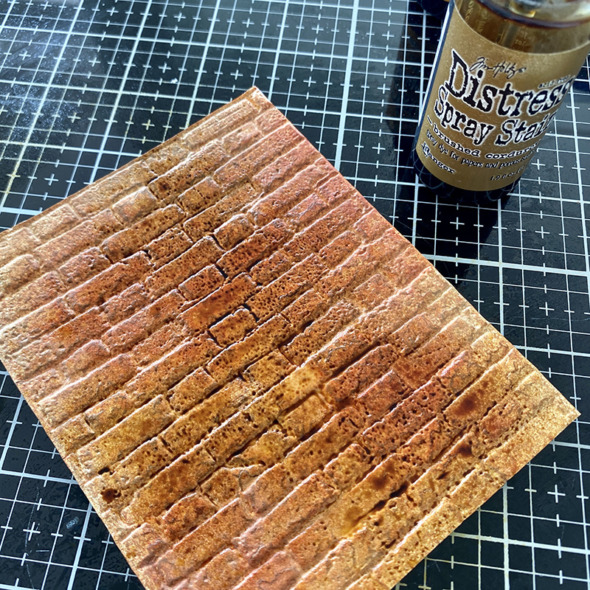
    igirlzoe: tim holtz sizzix brickwork 3D embossing folder 664259
    Give the background a light mist and spray with another distress spray and dry with a heat tool.
    igirlzoe: tim holtz sizzix brickwork 3D embossing folder 664259
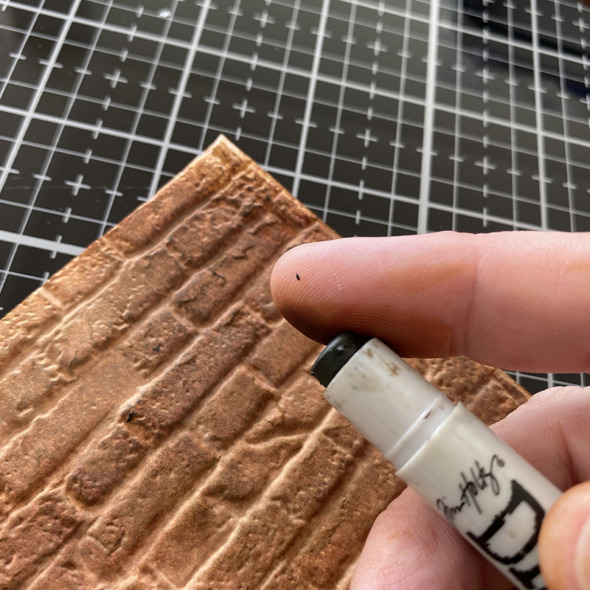
    Rub distress crayon onto your finger and rub over portions of the brickwork. Dry with a heat tool.
    igirlzoe: tim holtz sizzix brickwork 3D embossing folder 664259
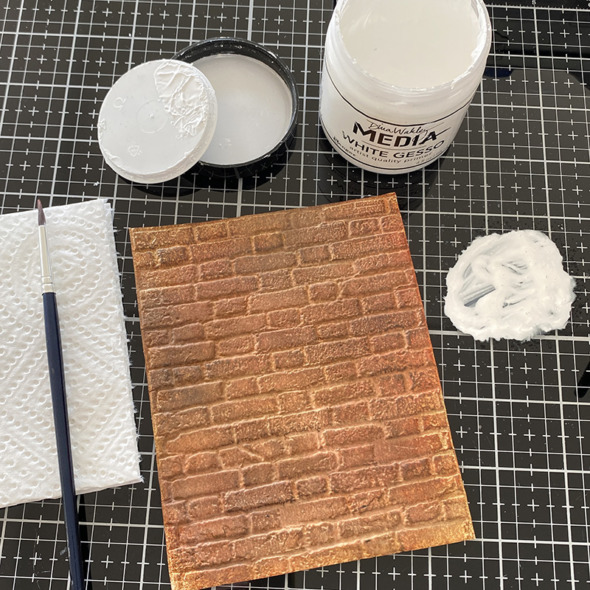
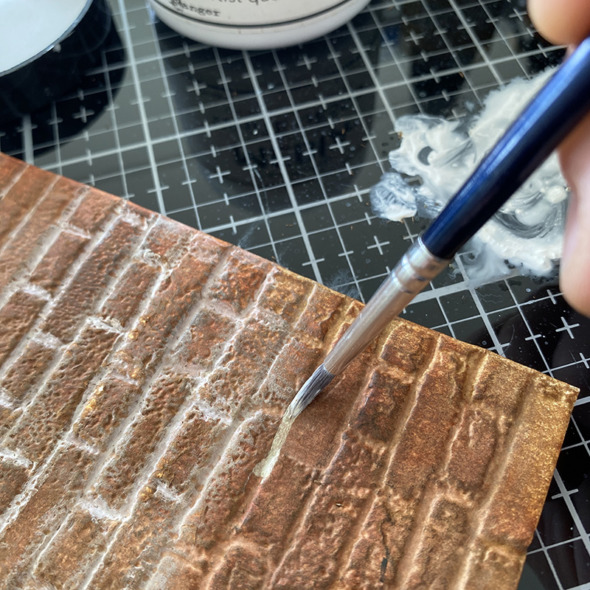
    Once the background is dry, really dry. Go ahead and dry it once more just to be sure and gather white gesso, water spray bottle, detail paint brush and paper towel. Put a little gesso onto your glass media mat or non stick craft mat and add a little water and mix.
    igirlzoe: tim holtz sizzix brickwork 3D embossing folder 664259
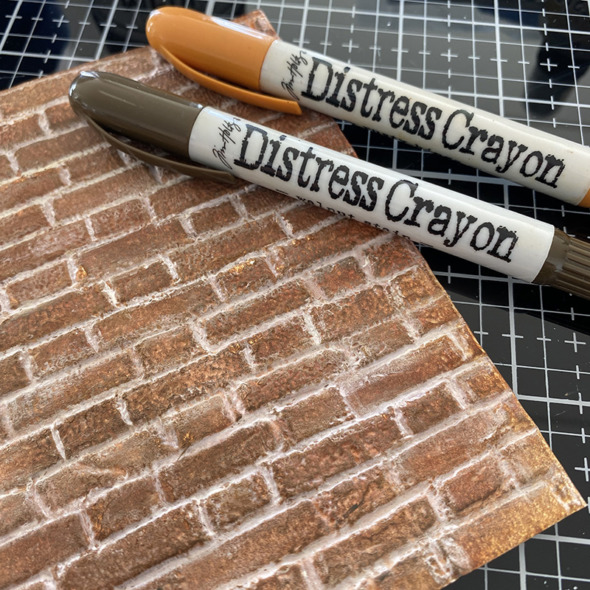
    Paint lines of gesso into the grooves of the brickwork and then gently rub with your finger. Between each line dip your brush in water to clean and dry with the paper towel. You are getting rid of any crayon or ink your brush picks up before dipping it back into your gesso puddle. If you don’t do this, you will end up with orange gesso. Dry the brush between each line so the gesso is not too wet as it will reduce the amount of ink and crayon you pick up. Don’t worry about going over the lines, it works for you here. Have a second pass if you need to, but dry first. A little practice goes a long way.
    igirlzoe: tim holtz sizzix brickwork 3D embossing folder 664259
    Once finished, dry dry dry and the use a finger to add distress crayon to random bricks to create the imperfection of real bricks.
    igirlzoe: tim holtz sizzix brickwork 3D embossing folder 664259

    igirlzoe: tim holtz sizzix brickwork 3D embossing folder 664259
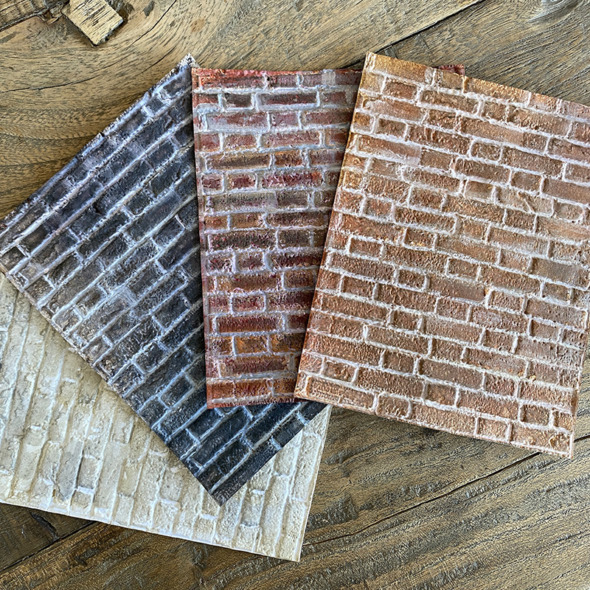
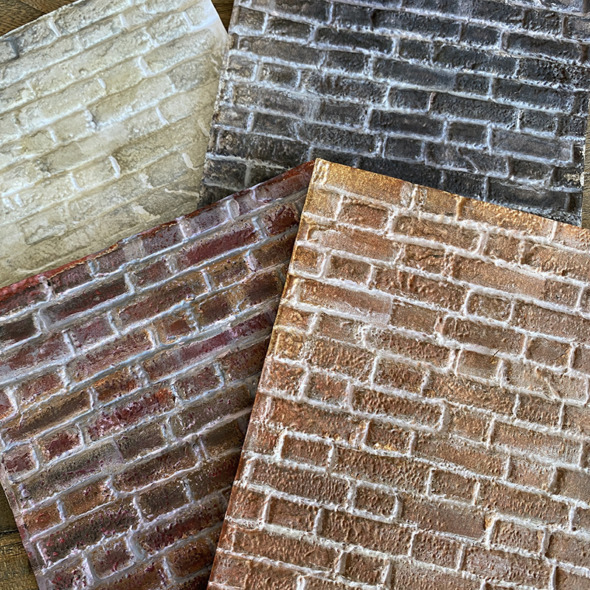
    Here are some other combinations for different brickwork…
    igirlzoe: tim holtz sizzix brickwork 3D embossing folder 664259
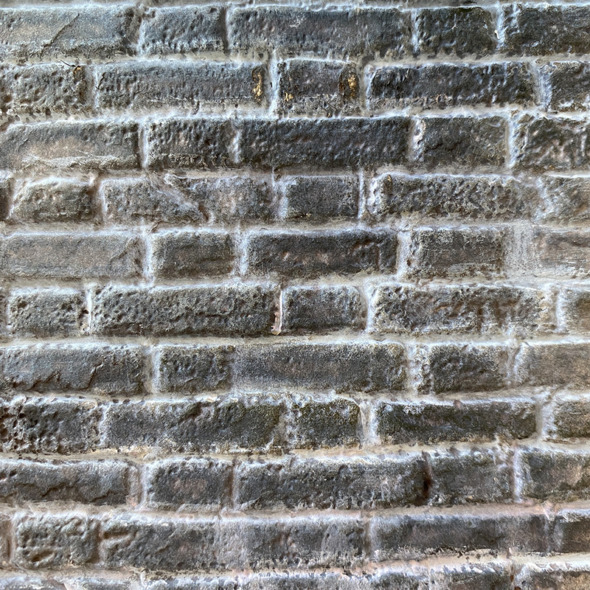
    COMBINATION #1: frayed burlap distress paint, rusty hinge + brushed corduroy distress spray stains, rusty hinge + walnut stain distress crayon, white gesso
    igirlzoe: tim holtz sizzix brickwork 3D embossing folder 664259
    COMBINATION #1

    igirlzoe: tim holtz sizzix brickwork 3D embossing folder 664259
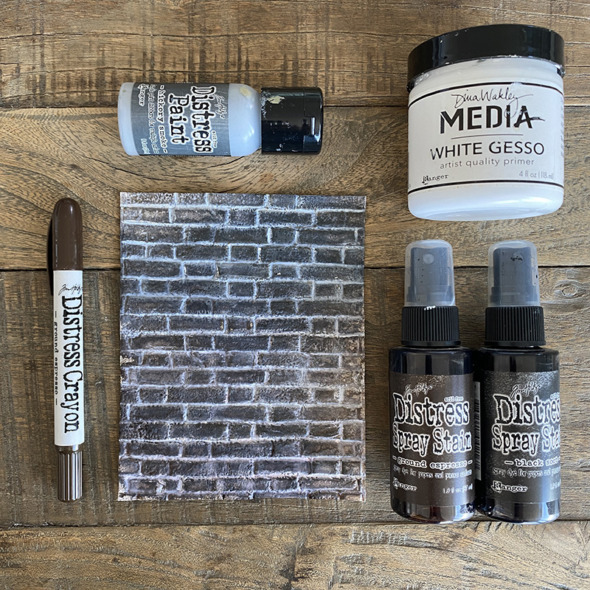
    COMBINATION #2: hickory smoke distress paint, ground espresso + black soot distress spray stains, ground espresso distress crayon, white gesso
    igirlzoe: tim holtz sizzix brickwork 3D embossing folder 664259
    COMBINATION #2

    igirlzoe: tim holtz sizzix brickwork 3D embossing folder 664259
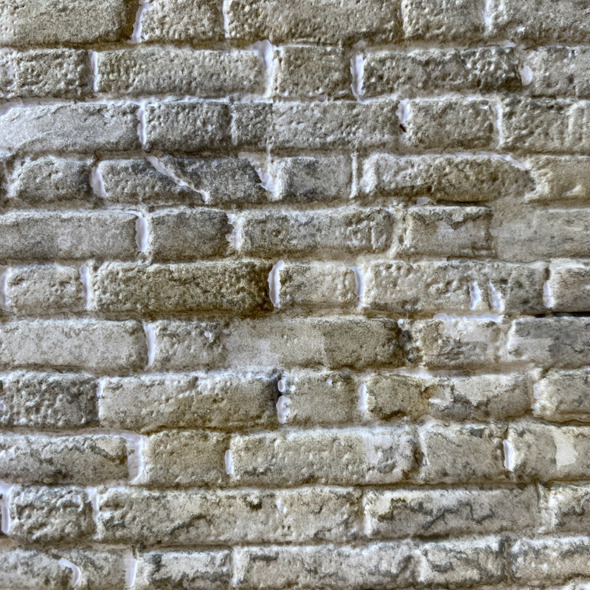
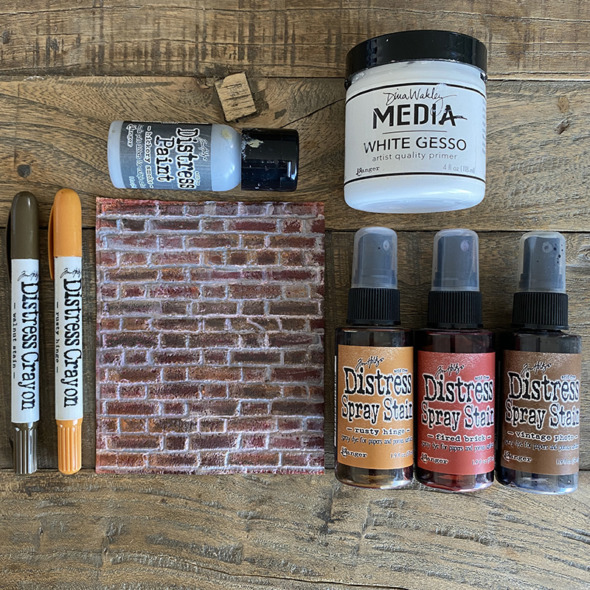
    COMBINATION #3: hickory smoke distress paint, rusty hinge + fired brick + vintage photo distress spray stains, rusty hinge + walnut stain distress crayons, white gesso
    igirlzoe: tim holtz sizzix brickwork 3D embossing folder 664259
    COMBINATION #3

    igirlzoe: tim holtz sizzix brickwork 3D embossing folder 664259
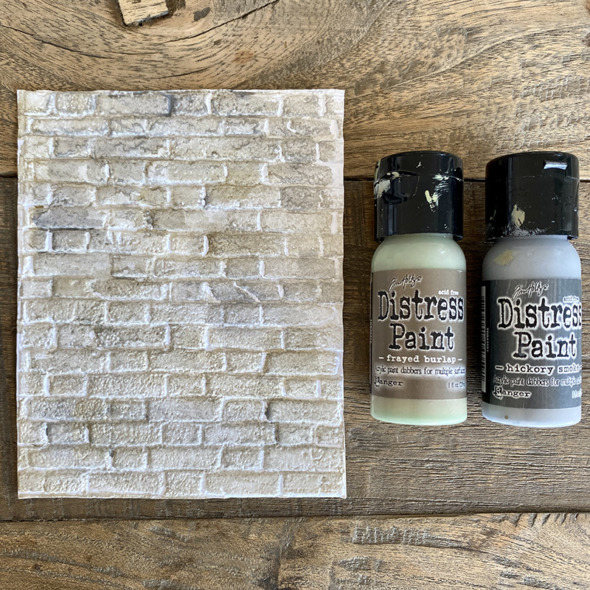
    COMBINATION #4: frayed burlap + hickory smoke distress paint
    This is the easiest combination and does not require gesso and works great behind flowers as a garden wall.
    igirlzoe: tim holtz sizzix brickwork 3D embossing folder 664259
    COMBINATION #4

    igirlzoe: tim holtz sizzix brickwork 3D embossing folder 664259
    Thanks for stopping by. I’ll be back soon to share a couple of makes using this brickwork. I encourage you to experiment with other combinations. Try embossing small strips of cardstock to make brickwork swatches…

    Zoe

  2. 27th October, 2021

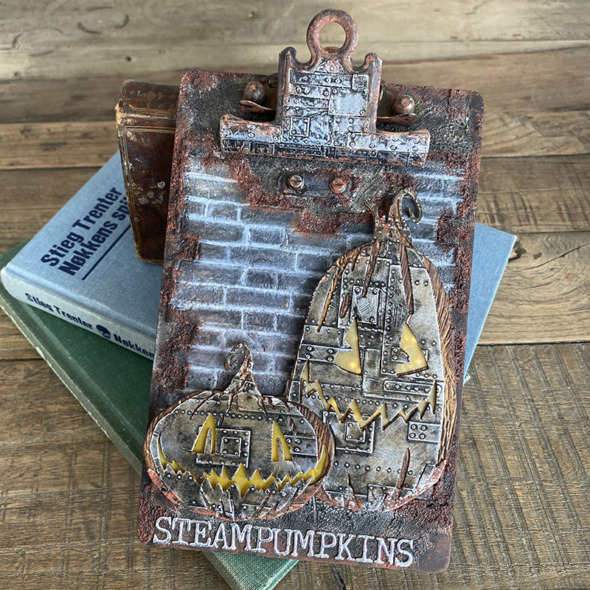
    Steampumpkins

    Hello friends! I’m back today with more pumpkins. These I made for the Tim Holtz Sizzix Halloween LIVE Launch.

    igirlzoe: tim holtz sizzix halloween pumpkin patch
    The pumpkin patch colorize die was another knock out for me. Tim really spoiled us with pumpkins this year and I’m one happy pumpkin farmer!

    igirlzoe: tim holtz sizzix halloween pumpkin patch
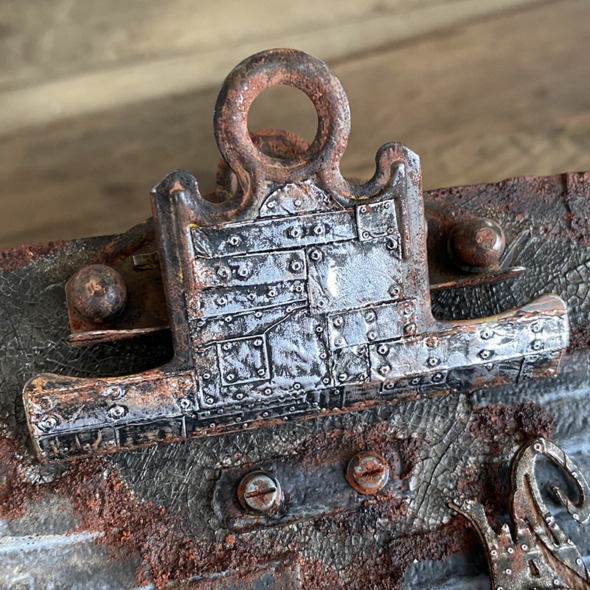
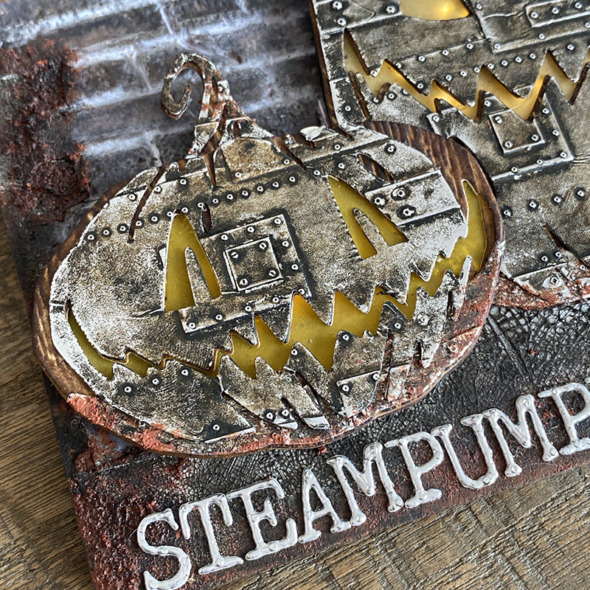
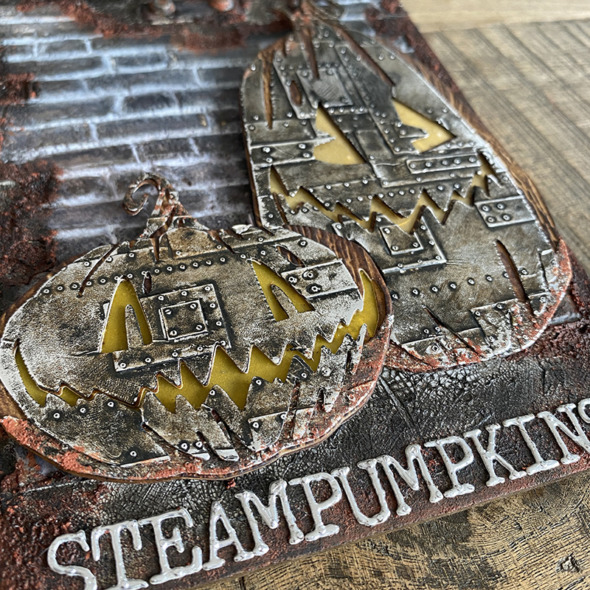
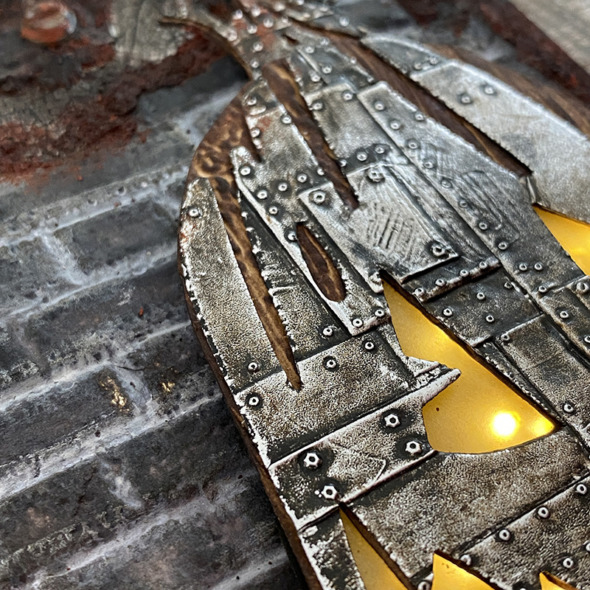
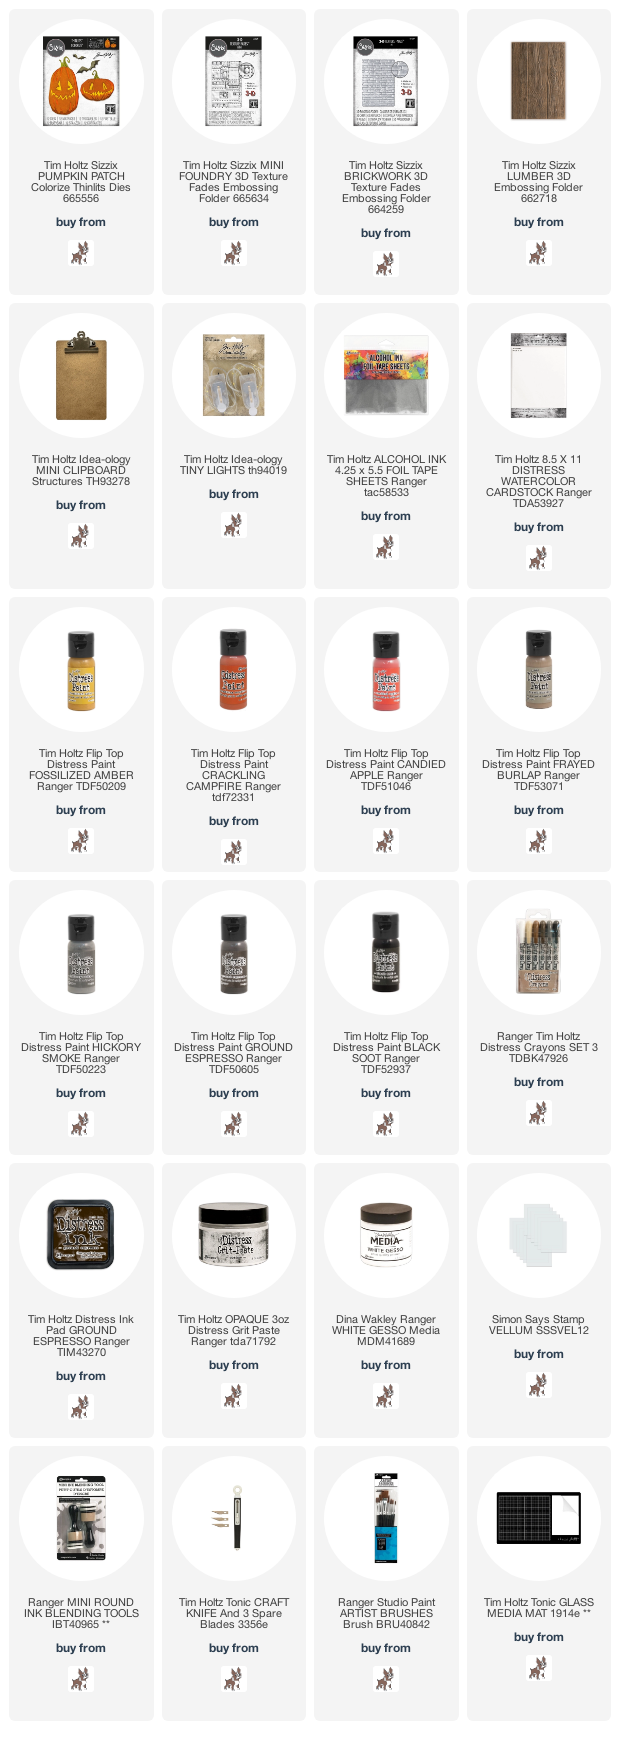
    I started by altering an idea-ology mini clipboard. Covered the background with brickwork (see step out here) and then added distress grit-paste. I used a mixture of crackling campfire, candied apple and ground espresso distress paints over the dried distress grit-paste to create a faux rust effect. I cut alcohol foil tape and embossed with the mini foundry 3D embossing folder and covered with black soot distress paint, wiping away the excess. I cut the foil and added pieces to the clipboard clip until it was covered. I also added a couple of idea-ology hardware heads.

    igirlzoe: tim holtz sizzix halloween pumpkin patch
    Using the lumber and mini foundry 3D embossing folders, I embossed the pumpkin patch colorize die cuts. If you haven’t tried colorize before, these are such a great introduction to it. There are only a few pieces and it’s not intricate or fiddly in the least and I think you’ll love the effects you can get with colorize.

    igirlzoe: tim holtz sizzix halloween pumpkin patch
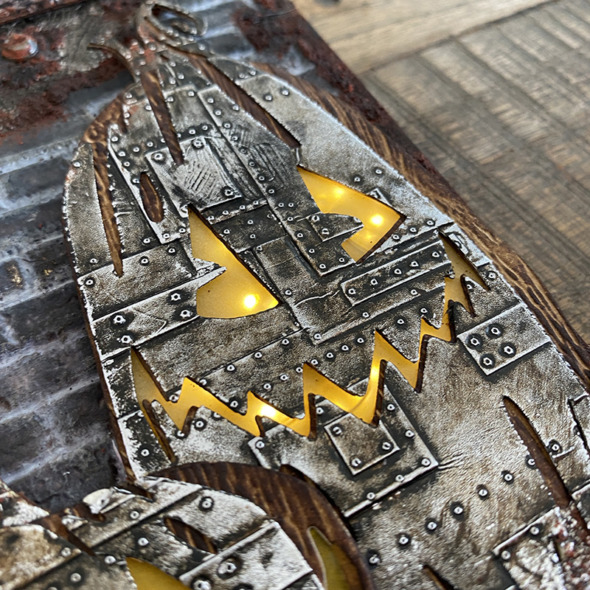
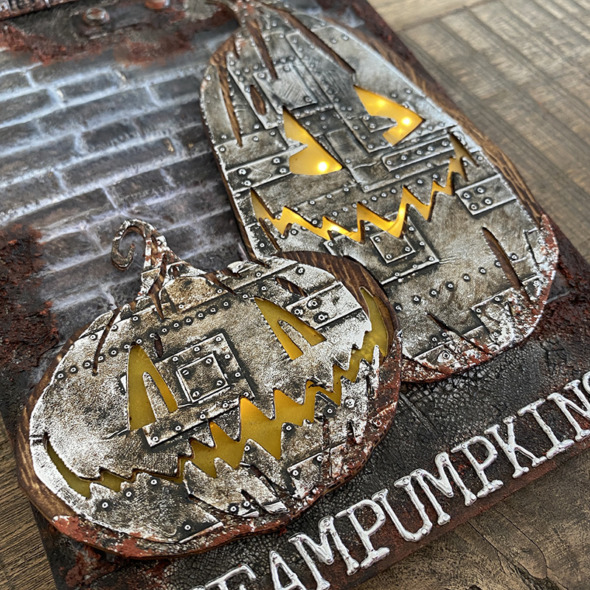
    In order to get the tiny lights to show through from under the vellum, I cut a section in the base die cut and mounted foam around the edges to creat a space for the tiny lights to sit inside. I added vellum painted with fossilized amber distress paint, under the top sections to hide, contain and diffuse the tiny lights. Here’s how…

    igirlzoe: tim holtz sizzix halloween pumpkin patch
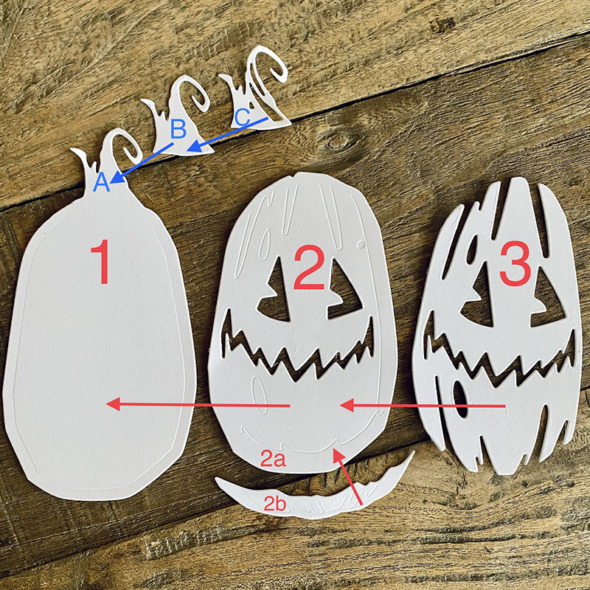
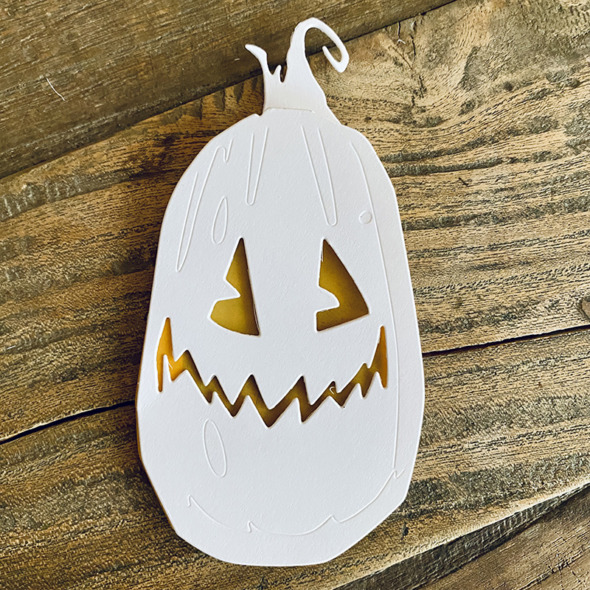
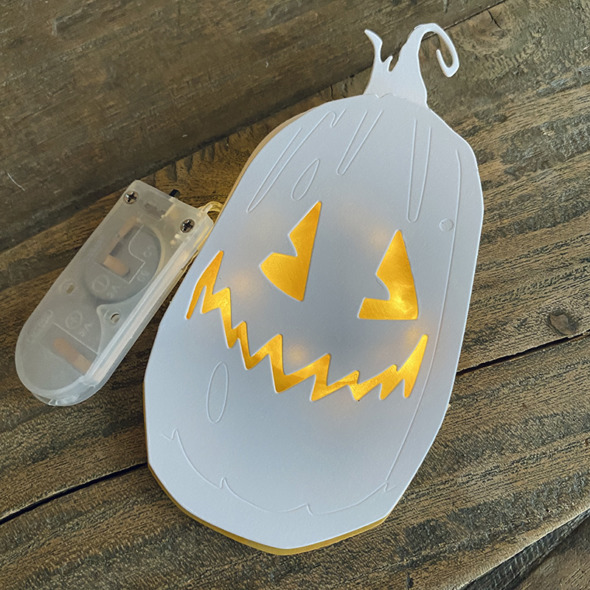
    For step out purposes I have die cut just the larger pumpkin from white cardstock. You will see there are de-bossed lines which show you where to place each piece. I’ve added numbers, letters and arrows to help. 1 is your base. 2 goes on top of 1. 3 goes on top of 2 etc.

    igirlzoe: tim holtz sizzix halloween pumpkin patch
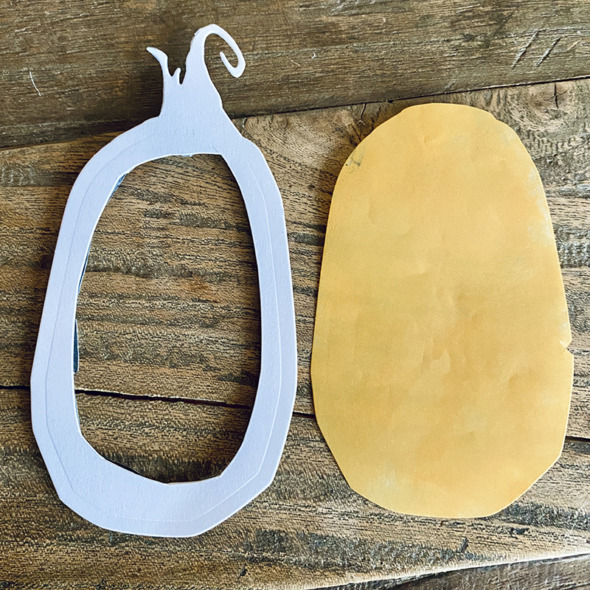
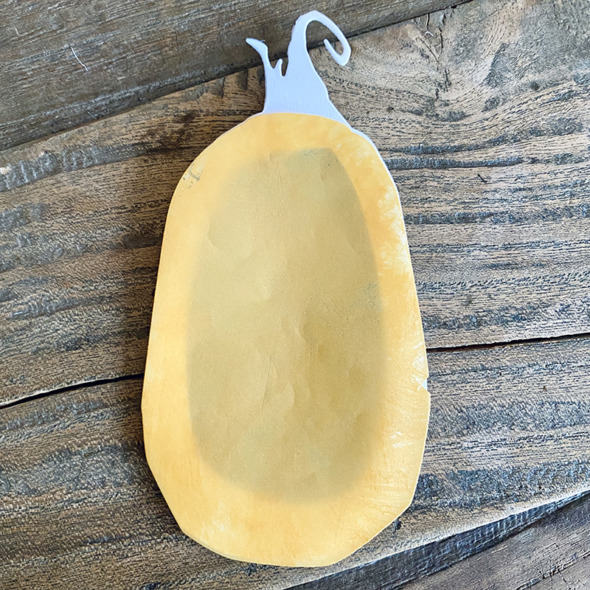
    Using a craft knife, cut a circle in the center of the base of the pumpkin die cut leaving enough around the edge to add adhesive foam. Cut a piece of vellum using the base pumpkin piece, cut off the stalk and paint with distress paint.

    igirlzoe: tim holtz sizzix halloween pumpkin patch
    Glue the vellum on top of the base piece.

    igirlzoe: tim holtz sizzix halloween pumpkin patch
    Add the next die cut piece over the top.

    igirlzoe: tim holtz sizzix halloween pumpkin patch
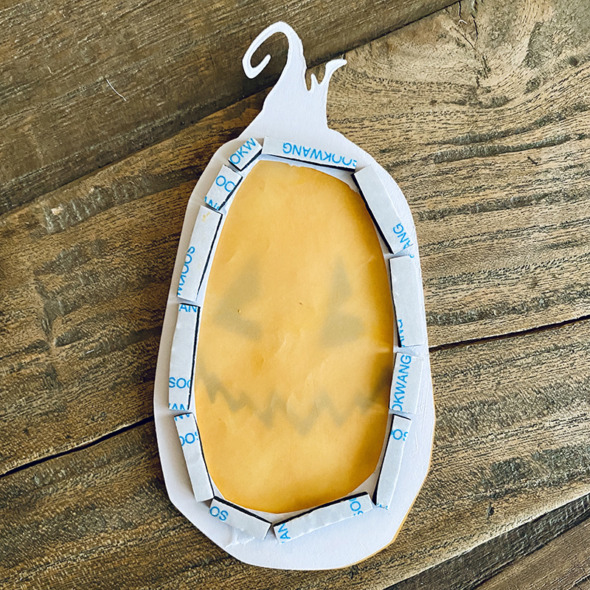
    I flipped the pumpkin over and ran adhesive foam around the underside edge of the base piece.

    igirlzoe: tim holtz sizzix halloween pumpkin patch
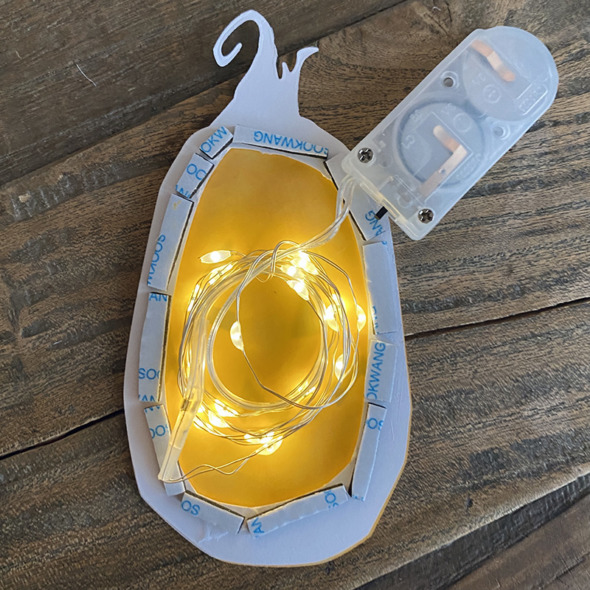
    Add idea-ology tiny lights into the back of the pumpkin and secure with glue, if you leave a gap in the adhesive foam you can run the lights behind the smaller pumpkin too, (not pictured).

    igirlzoe: tim holtz sizzix halloween pumpkin patch
    How the pumpkin looks with the lights behind it. On my project, I threaded the lights through the back of the idea-ology mini clipboard first and the switch was attached to the back of the clipboard.

    igirlzoe: tim holtz sizzix halloween pumpkin patch
    Tiny lights OFF.

    igirlzoe: tim holtz sizzix halloween pumpkin patch
    Tiny lights ON.

    igirlzoe: tim holtz sizzix halloween pumpkin patch
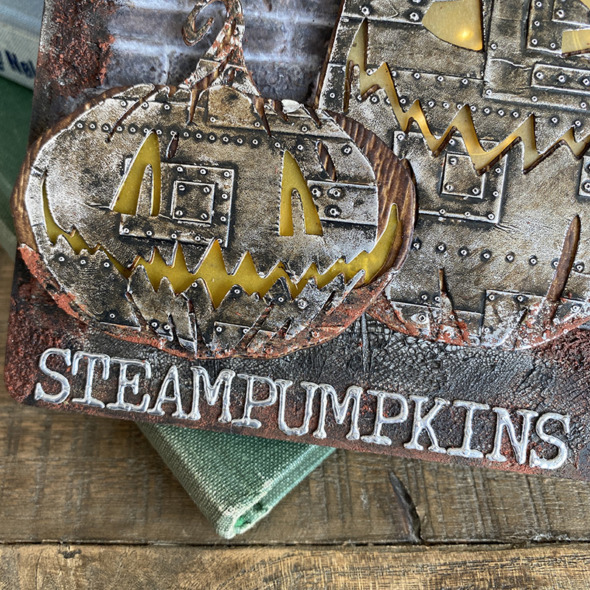
    Using some leftover alcohol foil tape I used the alphanumeric tiny upper dies to cut steampumpkins.

    igirlzoe: tim holtz sizzix halloween pumpkin patch
    Seriously! How cool is this pumpkin patch die? Tim rocked it!!

    My pumpkin making adventures continue through November, so there’s more pumpkins to come…

    Thanks for stopping by.

    Zoe

    affiliate links used at no cost to you


  3. 5th August, 2021

    The Birds!

    Hello friends. I hope you’re having a good week. I’m so excited for the Tim Holtz seasonal LIVE launches to get underway on Tim’s YouTube channel from Saturday! I thought it was probably a good idea to catch up and post my makes from the Tim Holtz Sizzix Chapter 2 LIVE launch! We’ll just call this Throwback Thursday and say no more about it. If you want to jump in your time machine and go way back, you can watch the Chapter 2 LIVE on Tim’s blog.

    igirlzoe: tim holtz sizzix retro tv alphanumeric stretch upper 3D brickwork
    The new retro TV die is seriously cool! It reminds me of a TV we had when I was a kid. There was no TV remote, you had to get up off your butt to change one of the 5 channels! When you turned it off there would be this line across the middle as the tube cooled down. Generation Netflix will have to google it. 😉

    igirlzoe: tim holtz sizzix retro tv alphanumeric stretch upper 3D brickwork
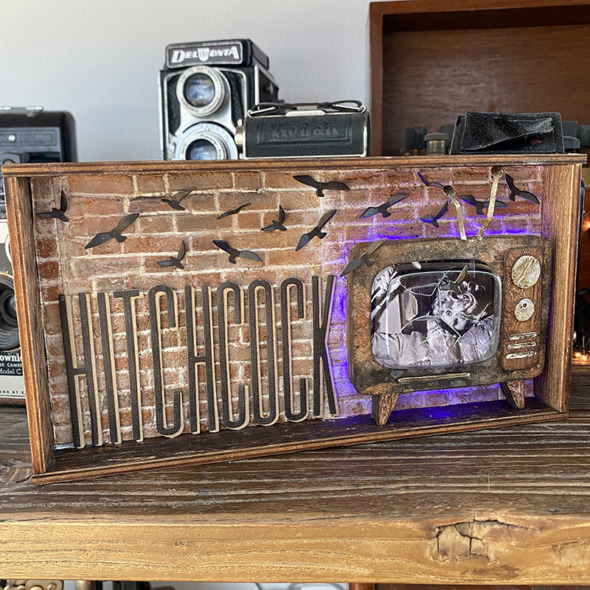
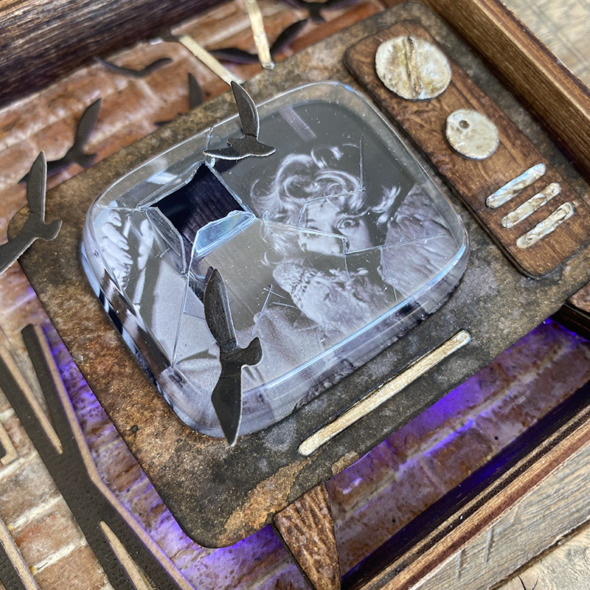
    The moment I saw the retro TV die came with a “pop out” I knew I wanted to smash it out and the rest came together as I went along (I’m not a planner), clearly based on how long it’s taken me to post this!

    igirlzoe: tim holtz sizzix retro tv alphanumeric stretch upper 3D brickwork
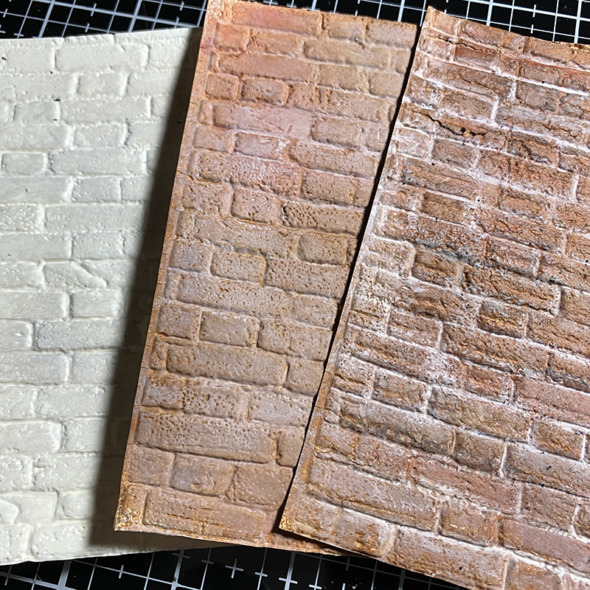
    Here are the brickwork panels in their various stages using the AMAZING Tim Holtz brickwork 3D embossing folder. I have a “how to” for this in a previous blog post.

    igirlzoe: tim holtz sizzix retro tv alphanumeric stretch upper 3D brickwork
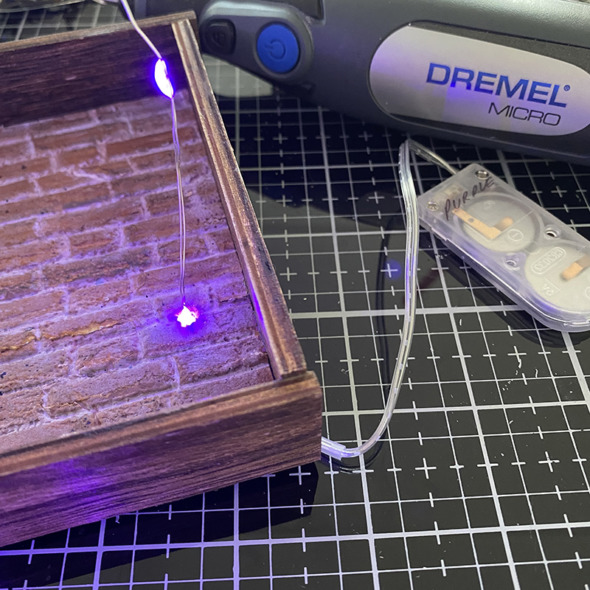
    I covered the base of a vignette tray with the brickwork panels. I took some build photos as I see quite a lot of questions about how to use idea-ology tiny lights with vignette boxes and trays. I use a dremel mirco with the drill bit accessory set and thread the lights through from the back.

    igirlzoe: tim holtz sizzix retro tv alphanumeric stretch upper 3D brickwork
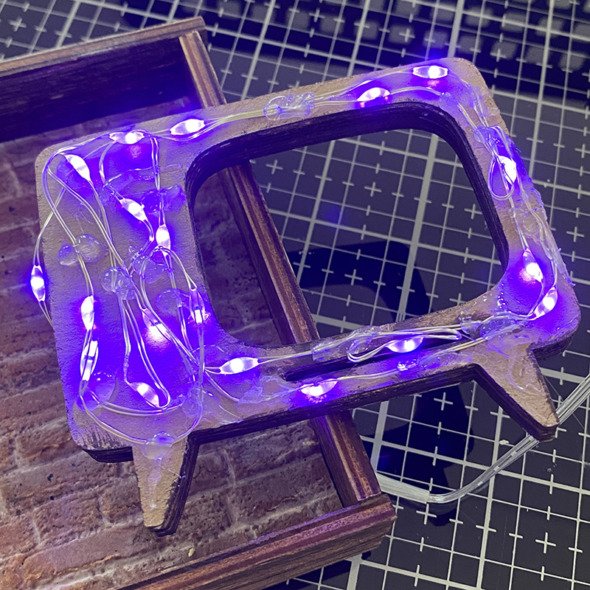
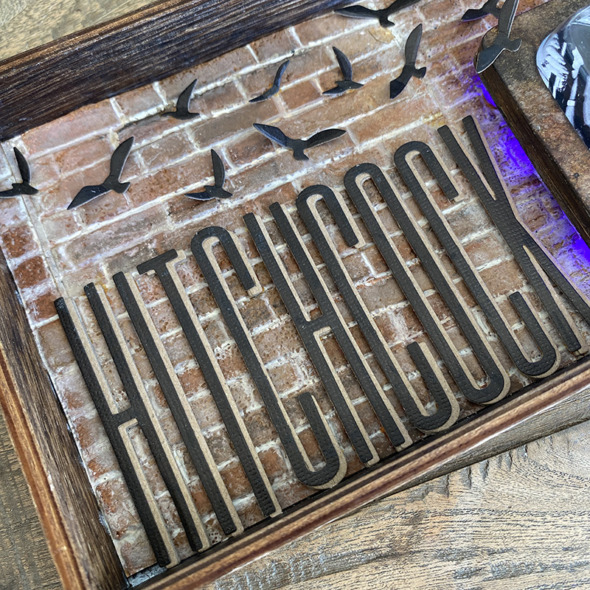
    I added a set of idea-ology tiny lights I hoarded from last Halloween. I LOVE the purple set because they look like black lights and was perfect for this project (see final photo). I wound them around the back of the TV die cut, securing in place with hot glue as I went. Being very careful not to touch the actual bulb with hot glue as this can short the lights. I added extra hot glue blobs to create space between the back so it would sit away from the brickwork and allow the light to escape.

    igirlzoe: tim holtz sizzix retro tv alphanumeric stretch upper 3D brickwork
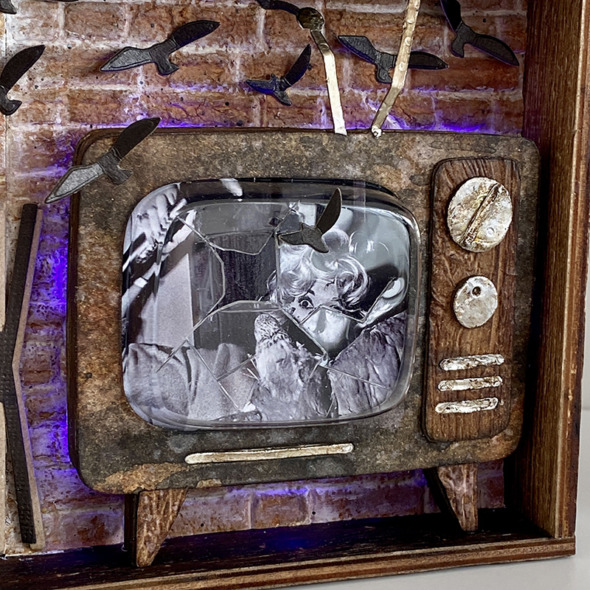
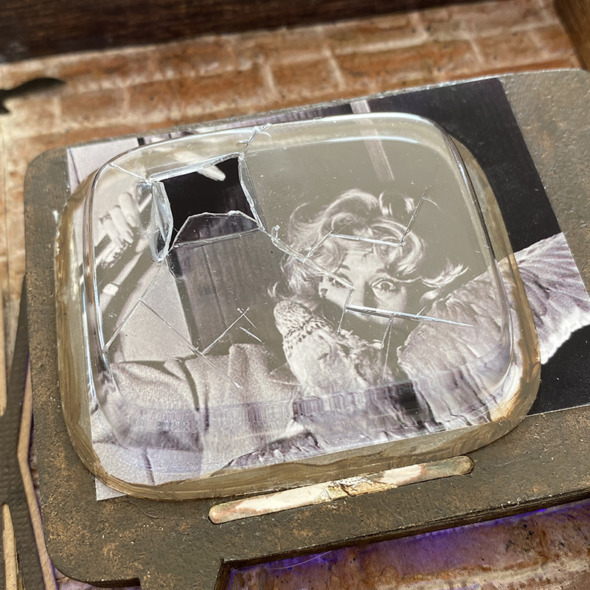
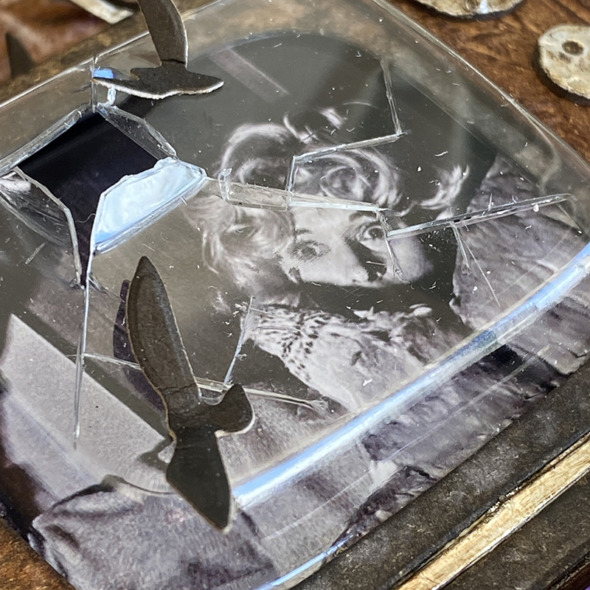
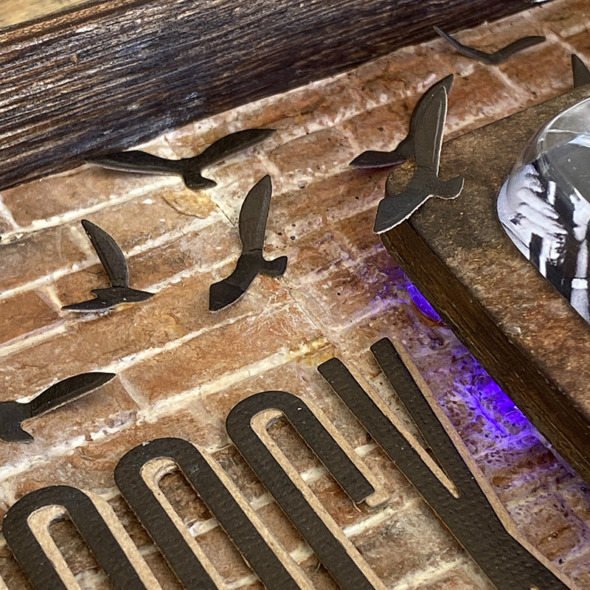
    I printed a photo from a famous scene from Hitchcock’s – The Birds movie. I painted a little ground espresso around the edges of the square dome before gluing into place ready to add the top piece.

    igirlzoe: tim holtz sizzix retro tv alphanumeric stretch upper 3D brickwork
    Using a craft knife, I cut cracks in the square dome and used pliers to bend back the opening where the birds broke through and escaped. Be careful not to scratch yourself on the sharp edges of the plastic. You could lightly sand if it worries you.

    igirlzoe: tim holtz sizzix retro tv alphanumeric stretch upper 3D brickwork
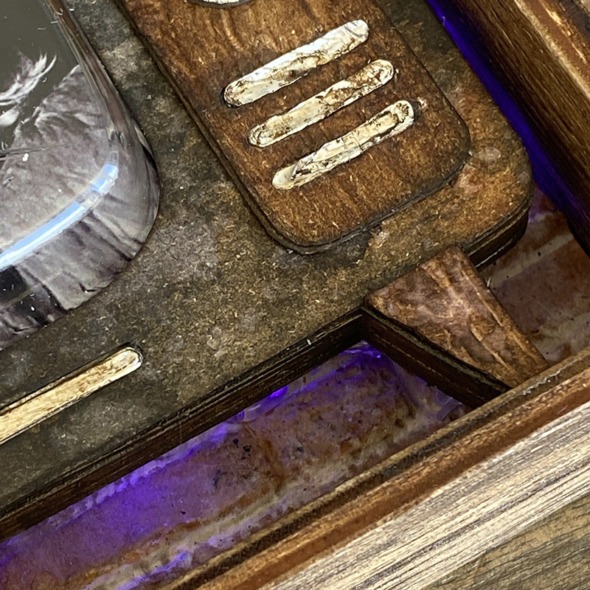
    The panel and feet are separate die cuts and I ran these through my machine with the lumber 3D embossing folder for a faux woodgrain effect. I love being able to emboss different pieces and then assemble after.

    igirlzoe: tim holtz sizzix retro tv alphanumeric stretch upper 3D brickwork
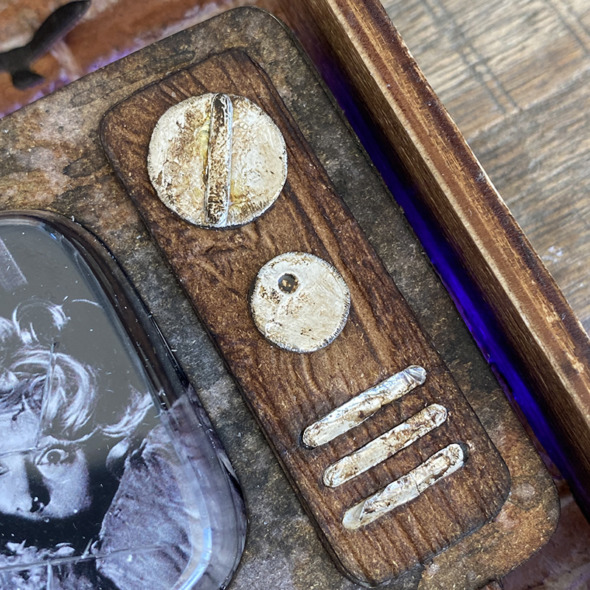
    I used alcohol ink foil tape covered with mushroom alcohol ink to create the dials and bars on the TV panel. I used the end of my paper shaping tool to emboss a circle into the smaller dial and added an extra bar I cut to the bigger dial.

    igirlzoe: tim holtz sizzix retro tv alphanumeric stretch upper 3D brickwork
    The birds were die cut using retired scarecrow thinlits die set (662382).

    igirlzoe: tim holtz sizzix retro tv alphanumeric stretch upper 3D brickwork
    They were cut from the new idea-ology kraft-stock, which I love. It’s non textured unlike the original kraft-stock. I folded the birds wings up slightly and attached with a dot of distress collage medium added to the body of the bird.

    igirlzoe: tim holtz sizzix retro tv alphanumeric stretch upper 3D brickwork
    Cutting Hitchcock twice using the alphanumeric stretch upper thinlits dies. Once from idea-ology kraft-stock and once from distress kraft heavystock. I mounted one over the other, slightly offset to make it pop.

    igirlzoe: tim holtz sizzix retro tv alphanumeric stretch upper 3D brickwork
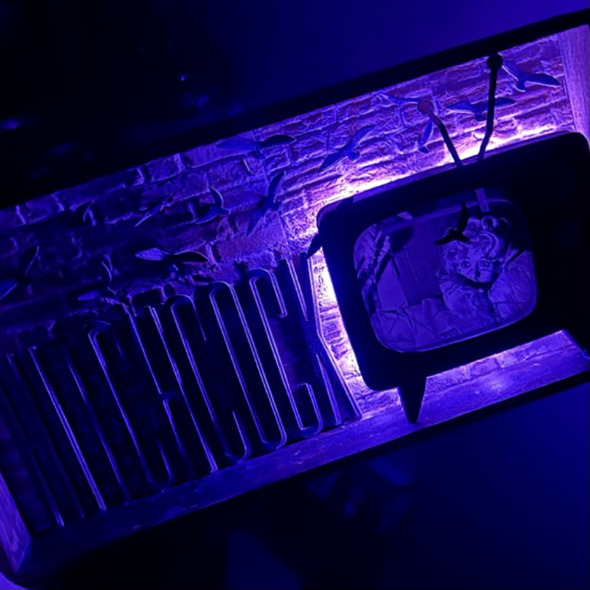
    Doesn’t it look cool lit up in the dark?! I hope there are idea-ology Halloween tiny lights this year! 😉 (photo credit Mario Rossi)…

    Thanks for stopping by.

    Zoe


    affiliate links used at no cost to you


  4. 30th July, 2021

    Varsity Moth

    Hello friends. I’m getting ready for a busy weekend of seasonal making. Before I head off into the inky wilderness, I thought I would stop by and share a tag I made for the Tim Holtz Sizzix Chapter 3 LIVE launch. You can check out all the launch details and inspirational makes over on Tim’s blog.

    igirlzoe: tim holtz sizzix perspective moth varsity alphanumeric
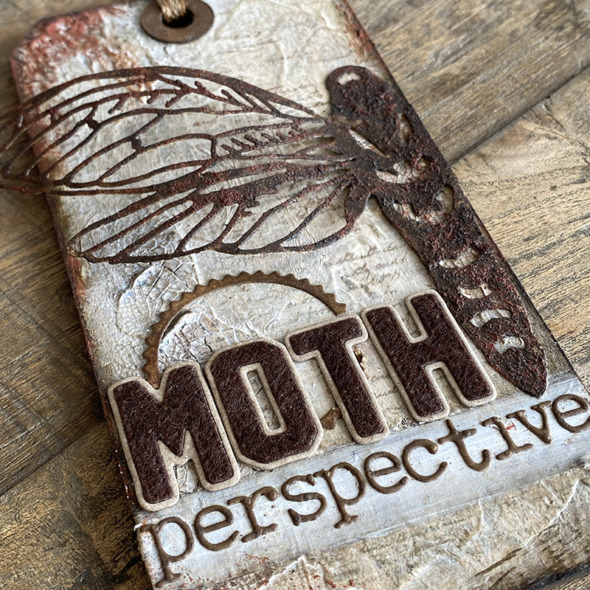
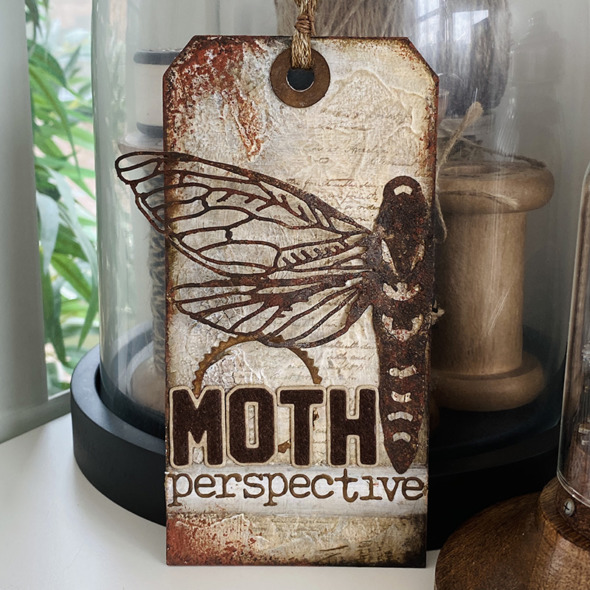
    This time I used half of the perspective moth die cut and took the varsity alphanumeric dies out for a test run and wow, it’s an alphanumeric must have set!

    igirlzoe: tim holtz sizzix perspective moth varsity alphanumeric
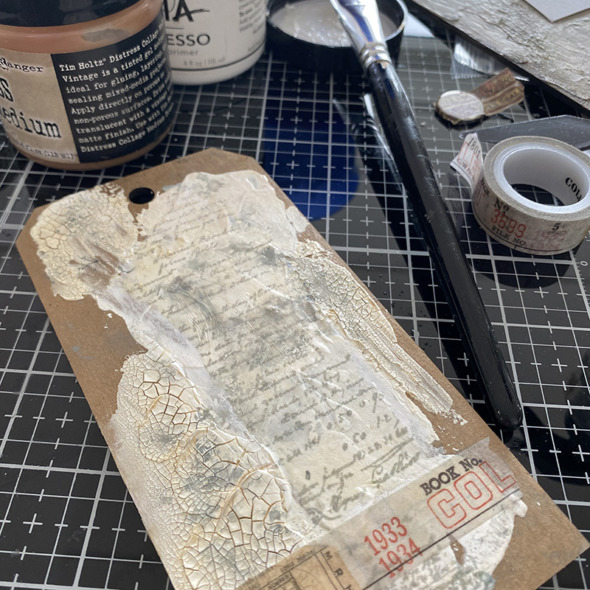
    I used a #8 etcetera tag as my base. I love these tags because they are made from thickboard and you can really load them up with paints, pastes and inks. Perfect for mixed media makes. I have a how to with tips for applying the paste on a previous blog post. For this one I added some plain collage paper which I had stamped with the ledger script stamp in hickory smoke distress archival ink. I added a piece of design tape to the bottom which eventually got covered up, but it still adds texture to the background. I added vintage collage medium to give tint before layering with gesso and distress grit-paste.

    igirlzoe: tim holtz sizzix perspective moth varsity alphanumeric
    I created the moth using the perspective moth thinlits die and rusted the same way as the brickwork moth in a previous blog post. The intricate detail of this wing is incredible. I use a foldaway to cut my intricate dies but if you find you’re having trouble cutting them and you’re not using a foldaway machine, I recommend using a Sizzix Chrome Plate. Details on how to use it and which machines it’s compatible with are on Sizzix website.

    igirlzoe: tim holtz sizzix perspective moth varsity alphanumeric
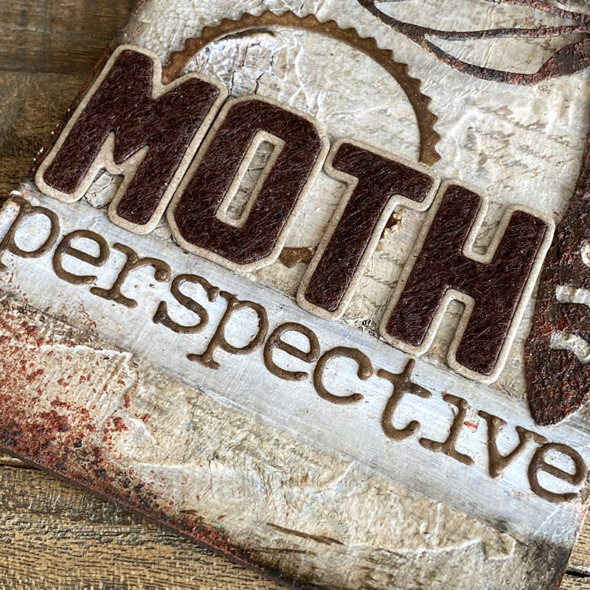
    Let’s talk about the new varsity alphanumeric thinlits dies! WOW! I LOVE THEM! They gently emboss this beautiful stitched detail around the inner die cut. You can’t see it as clearly here as I used felt for the inner piece, but trust me, it is actually there. I used some very stiff adhesive backed felt that Tim kindly sent me. It’s like jacket lettering. So so cool!

    igirlzoe: tim holtz sizzix perspective moth varsity alphanumeric
    I also used a seal outline from the thinlits set that comes with the new matchbox bigz die. I have to admit this die hasn’t been off my desk, love it. I used alphanumeric tiny type lower thinlits dies to spell out perspective.

    igirlzoe: tim holtz sizzix perspective moth varsity alphanumeric
    The perspective moth is a large die and still works perfectly on smaller surfaces by simply cutting it down. Thanks for stopping by.

    Zoe

    affiliate links used at no cost to you

  5. 16th July, 2021

    Perspective Moth

    Hello friends! Happy Friday! I’m back today with a sample that I made for the Tim Holtz Sizzix Chapter 3 LIVE launch. If you haven’t seen it yet, you can catch up on all the fun over on Tim’s blog.

    I want to say a big thank you for the amazing response and kind comments on my brickwork post. I hope you’ll try it out and I can’t wait to see all the different combinations you come up with.

    igirlzoe: tim holtz sizzix brickwork 3D embossing folder perspective moth switchlit seal
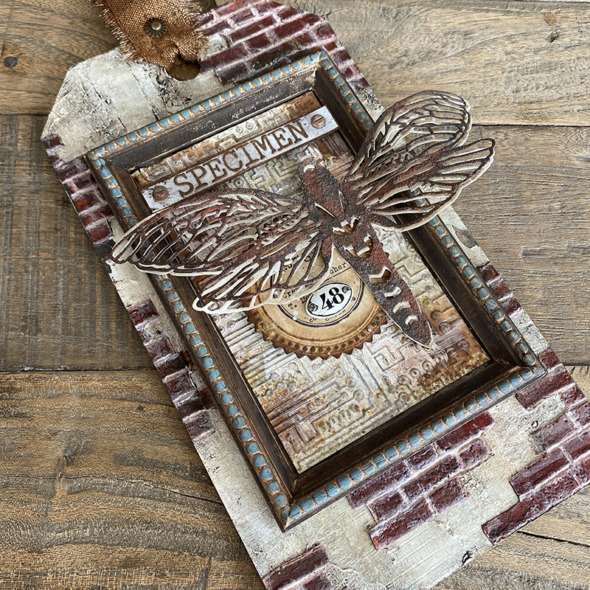
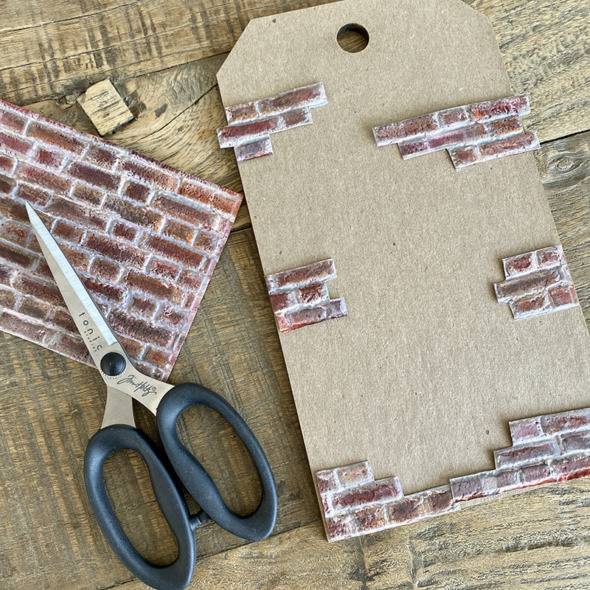
    I took a brickwork background and cut it to create this exposed brick effect. I love the industrial look of this. Let’s get into the how to…

    igirlzoe: tim holtz sizzix brickwork 3D embossing folder perspective moth switchlit seal
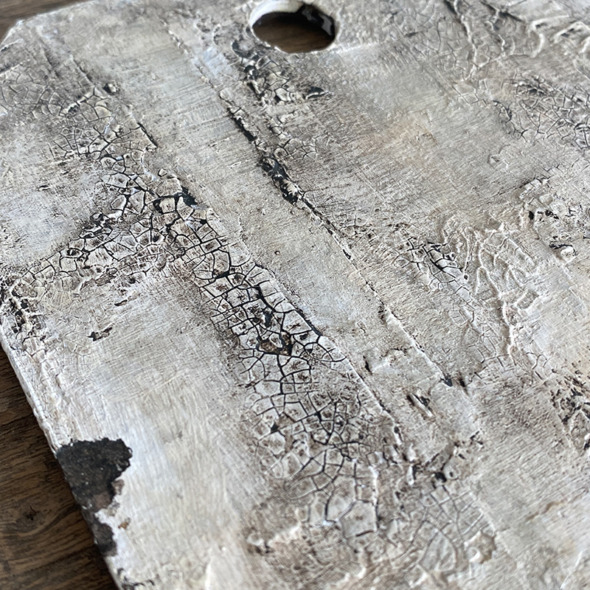
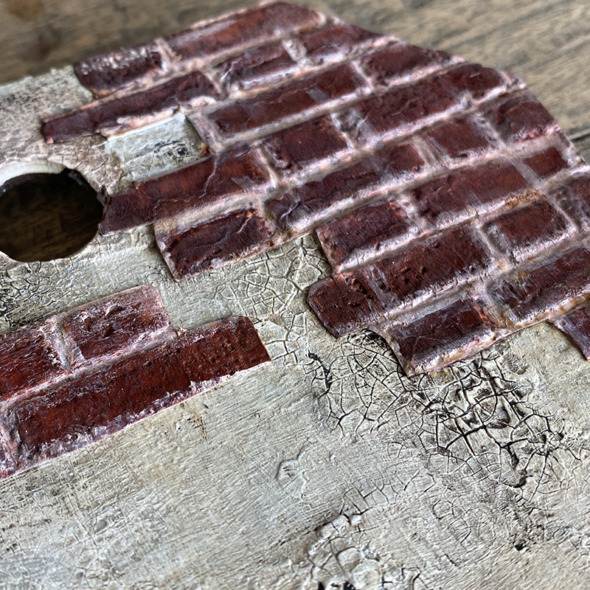
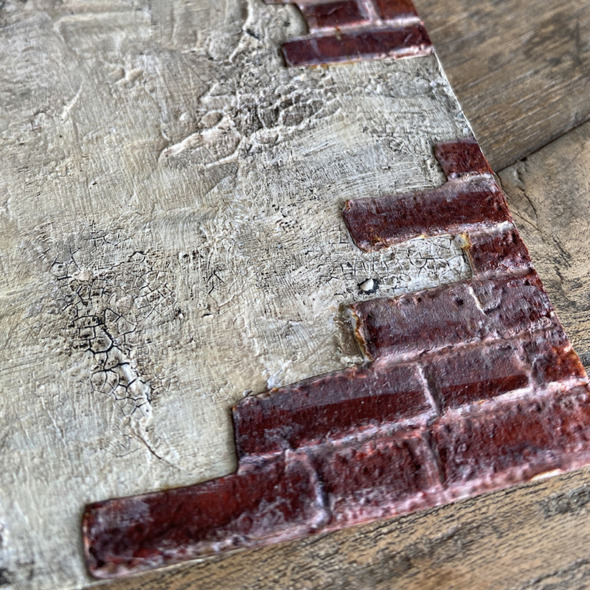
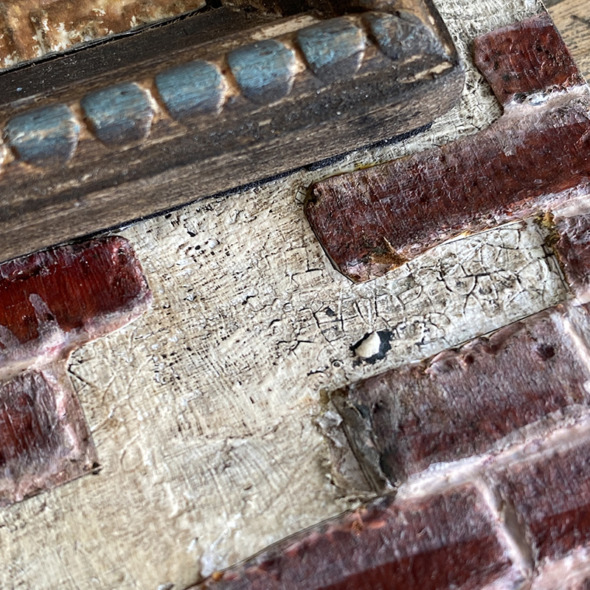
    Cover a small thickboard etcetera tag with gesso and distress crackle texture paste and set aside to dry. Sand the edges and rub walnut stain distress crayon into the cracks. I did a “how to” for this on a previous blog post.

    igirlzoe: tim holtz sizzix brickwork 3D embossing folder perspective moth switchlit seal
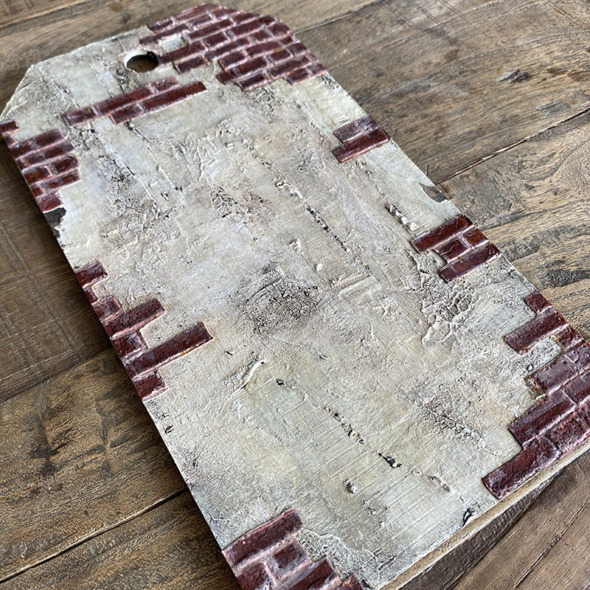
    Once you are happy with your grunged up background, it’s time to add the brickwork pieces. Tutorial below…

    igirlzoe: tim holtz sizzix brickwork 3D embossing folder perspective moth switchlit seal
    Follow the brickwork post to create a brickwork background. Cut pieces and strips with scissors and glue them onto your tag.

    This concludes the cut brickwork tutorial. 😉

    igirlzoe: tim holtz sizzix brickwork 3D embossing folder perspective moth switchlit seal
    igirlzoe: tim holtz sizzix brickwork 3D embossing folder perspective moth switchlit seal
    igirlzoe: tim holtz sizzix brickwork 3D embossing folder perspective moth switchlit seal
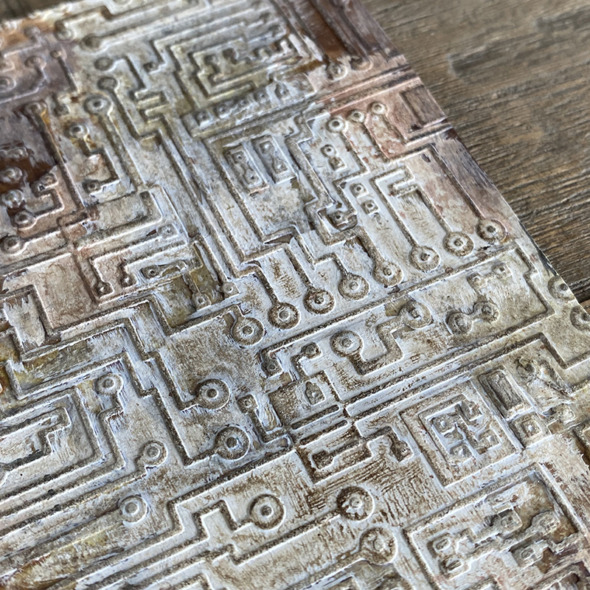
    Using the circuit 3D embossing folder I embossed distress watercolor cardstock and covered with a layer of watered down white gesso. I dry brushed ground espresso distress paint over the top and added some distress spray and let it wick through the embossed detail.

    igirlzoe: tim holtz sizzix brickwork 3D embossing folder perspective moth switchlit seal
    The new switchlits seal is AWESOME! I used it as an anchor point for my moth, to see how the new switchlits work, check out Tim’s LIVE launch.

    igirlzoe: tim holtz sizzix brickwork 3D embossing folder perspective moth switchlit seal
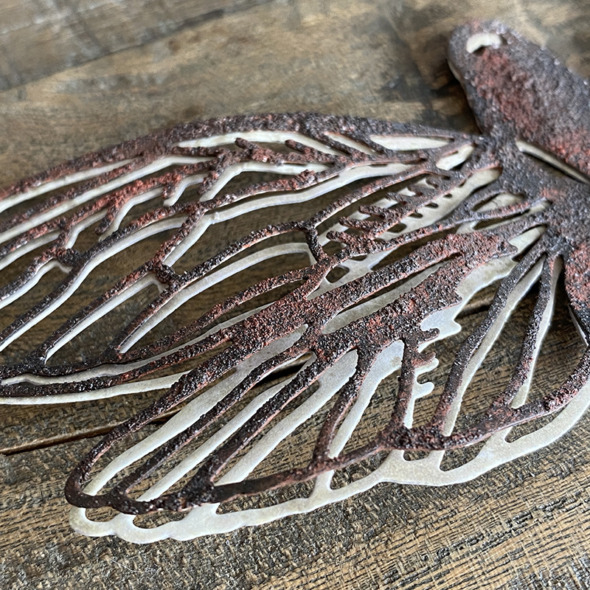
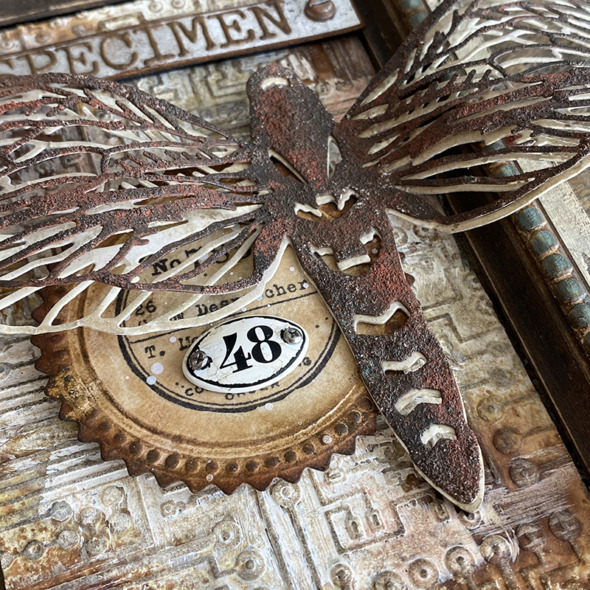
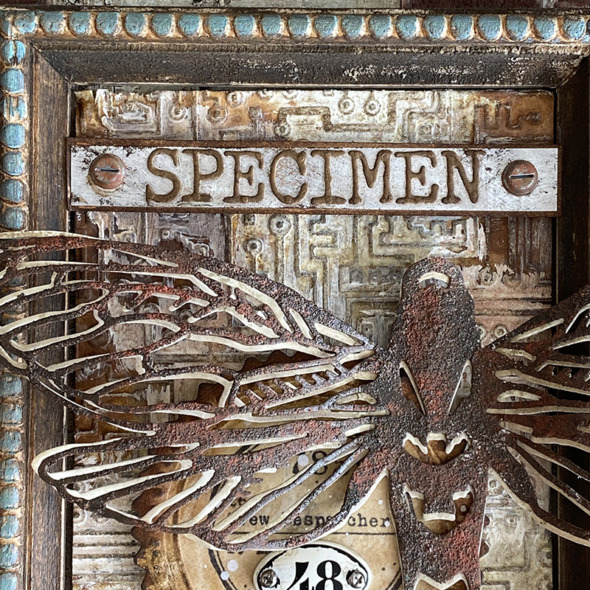
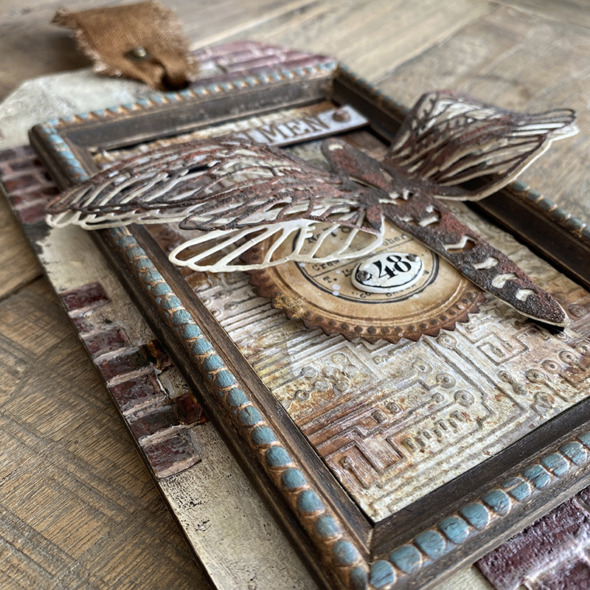
    The new perspective moth is stunning! When I received the die and cut it for the first time, I couldn’t believe how intricate the wings are. I cut it twice and covered the top layer with distress grit-paste and then painted with ground espresso distress paint and added rusty hinge distress crayon. The bottom layer I did nothing to and offset slightly from the top layer to create a drop shadow.

    igirlzoe: tim holtz sizzix brickwork 3D embossing folder perspective moth switchlit seal
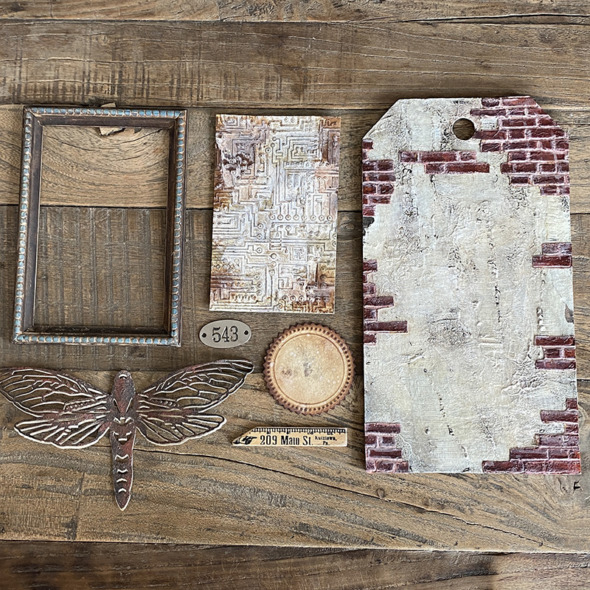
    Here is a quick run through of how I assembled the tag in case it’s helpful. The ruler didn’t make the final piece.

    igirlzoe: tim holtz sizzix brickwork 3D embossing folder perspective moth switchlit seal
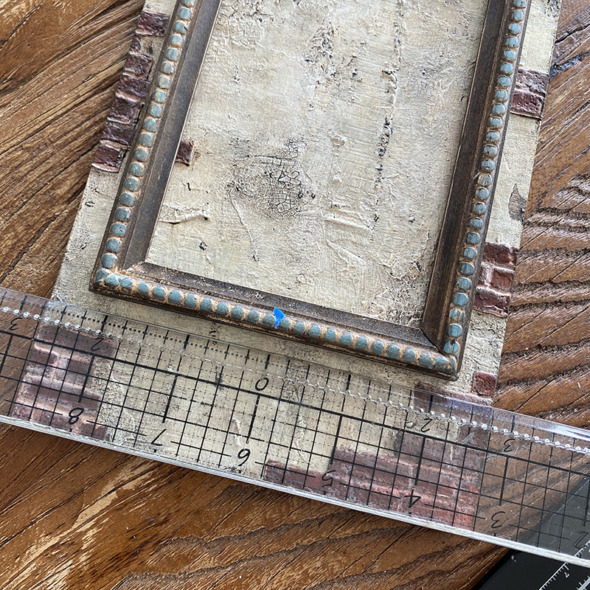
    I use Tim’s design ruler to find the center of my frame and mark with a tiny piece of tape and then again to find the center of the tag. Not at all necessary, but for me it’s all in the details.

    igirlzoe: tim holtz sizzix brickwork 3D embossing folder perspective moth switchlit seal
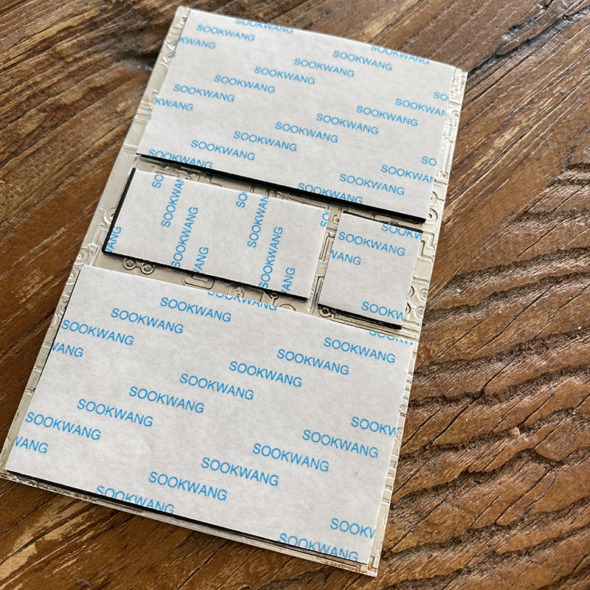
    I find adhesive backed foam really expensive and I like to customise the size so I make my own. I buy sheets of kids fun foam and cover each side in 2 inch scor-tape and then cut to size as I need it.

    igirlzoe: tim holtz sizzix brickwork 3D embossing folder perspective moth switchlit seal
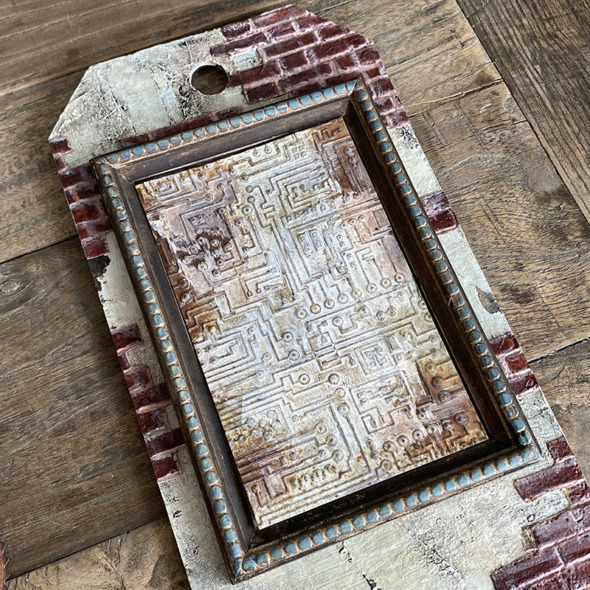
    Add the foam adhesive backed circuit background to the center of the frame.

    igirlzoe: tim holtz sizzix brickwork 3D embossing folder perspective moth switchlit seal
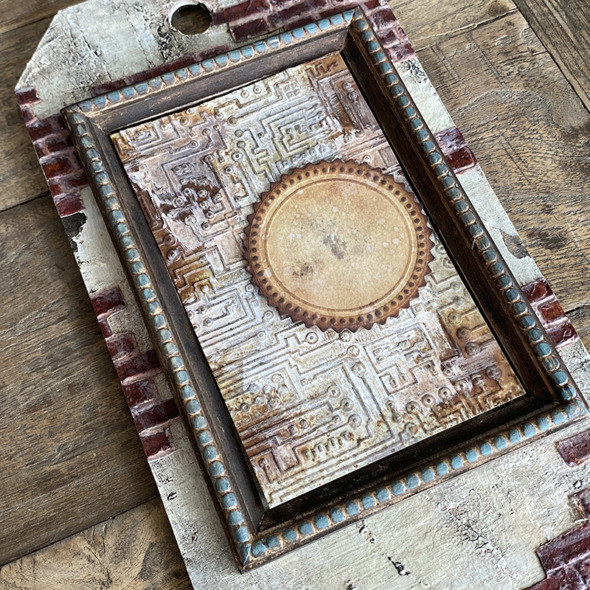
    Next add the switchlet seal. I used a little foam backed adhesive again to lift the layer.

    igirlzoe: tim holtz sizzix brickwork 3D embossing folder perspective moth switchlit seal
    After I had added the seal I wished I’d stamped it but knew if I tried to do it whilst the seal was on my tag it would go wrong, I would try and remove the seal, that would tare the background… house of cards! So I stamped the image onto a piece of plain collage tissue wrap, fussy cut and then glued it on with distress collage medium. The glue makes the collage tissue vanish. I then got a little extra with the paint brush and ripped the bottom piece of the stamp, so added an idea-ology plaquette to cover the mistake. Smoke and mirrors my friends. Nothing I do is ever planned, it’s usually just accidental damage control! LOL

    igirlzoe: tim holtz sizzix brickwork 3D embossing folder perspective moth switchlit seal
    I added the perspective moth, attaching the body but leaving the wings free and shaping them slightly with my fingers. I added a strip of idea-ology metallic kraftstock with alphanumeric tiny type letters and idea-ology hardware heads added. I rubbed my NEW FULL SIZE distress archival ink pad over the top. Sorry for the shouting, I’m still so happy that Tim and Ranger released the OG distress archival palette in full size ink pads.

    igirlzoe: tim holtz sizzix brickwork 3D embossing folder perspective moth switchlit seal
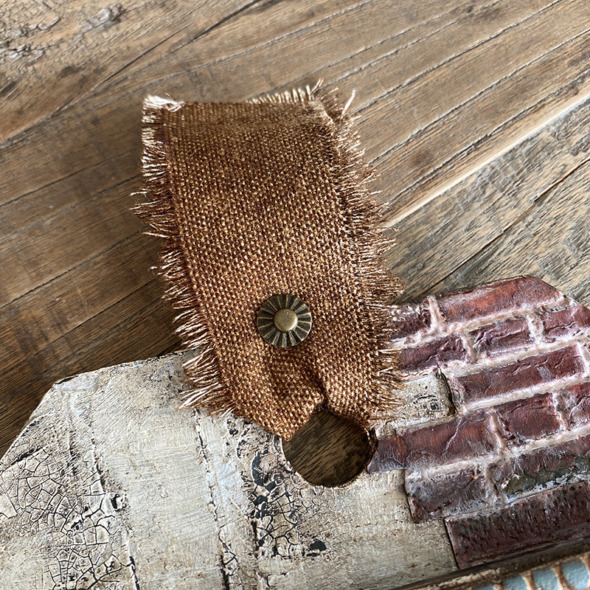
    I added a piece of linen that I dyed with distress spray stain and secured in place with an idea-ology fastener.

    igirlzoe: tim holtz sizzix brickwork 3D embossing folder perspective moth switchlit seal

    igirlzoe: tim holtz sizzix brickwork 3D embossing folder perspective moth switchlit seal
    Thanks for stopping by and let me know if you have any questions and set your alarms for tomorrows new distress color reveal. I’m so excited, you’re going to need snacks.

    Zoe


  6. 1st June, 2021

    Insect Charging Station

    Hello Friends. Hope you had a nice weekend. I wanted to share a sample that I made for the Tim Holtz Sizzix Chapter 2 launch. You can see all of the details on Tim’s blog.

    igirlzoe: tim holtz sizzix chapter 2 funky insects
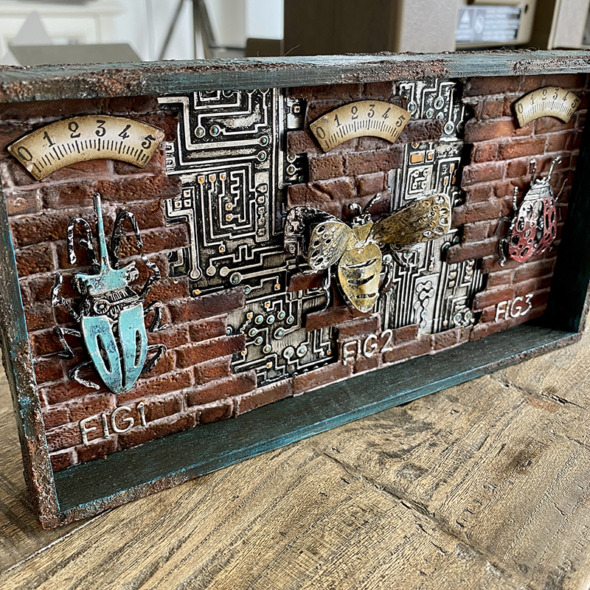
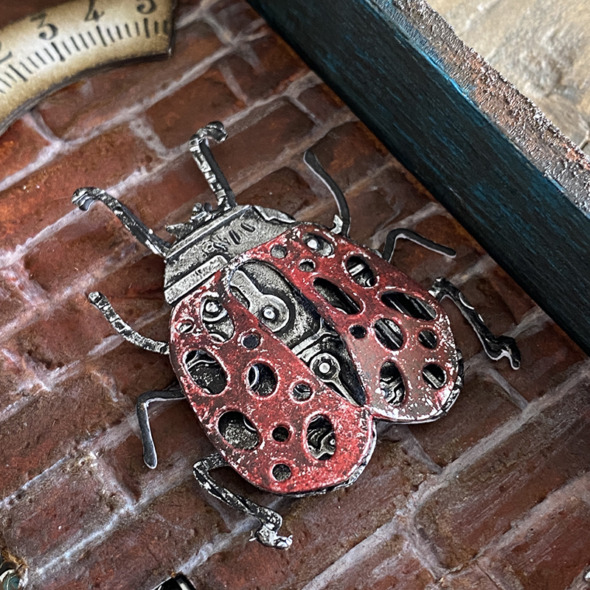
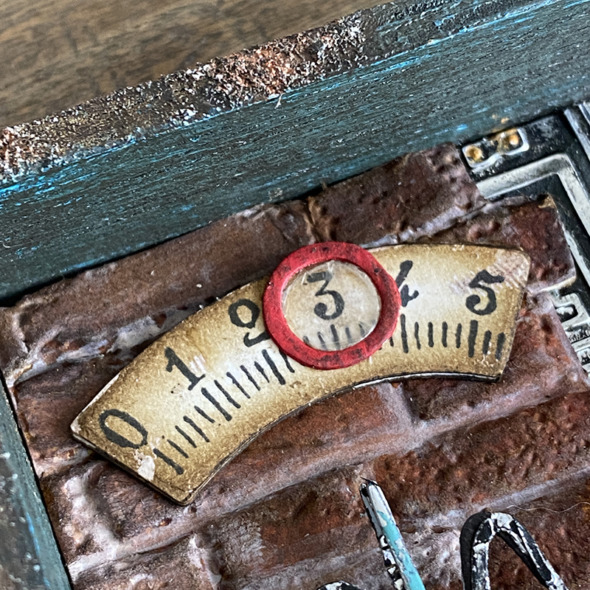
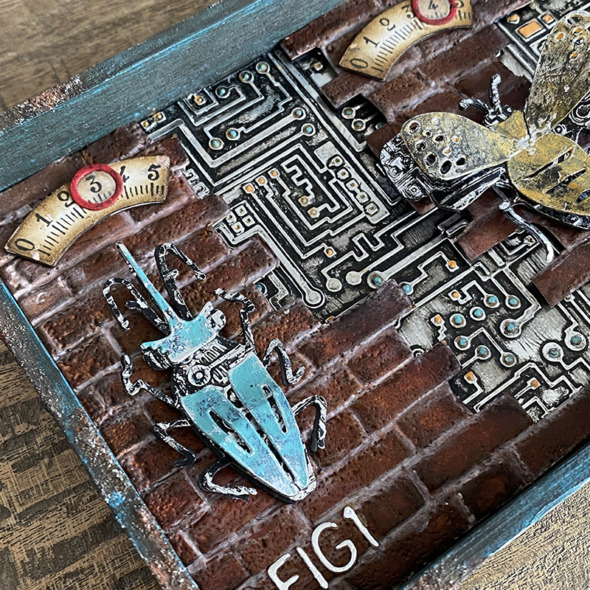
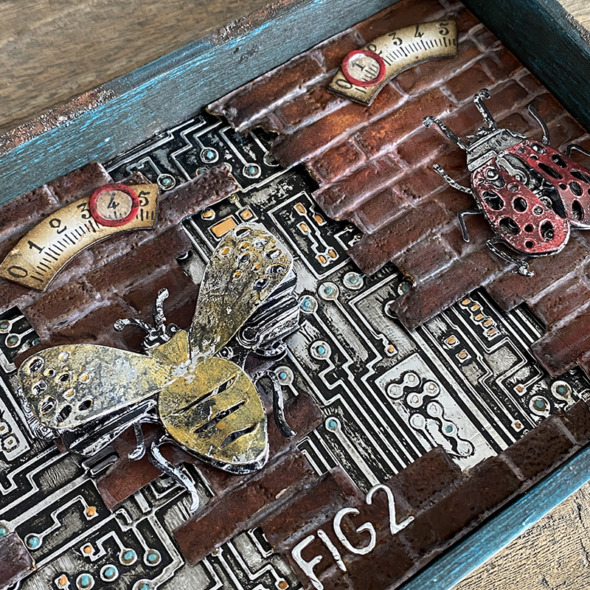
    Welcome to the funky insect charging station. This is a little tongue in cheek because to know me is to know that I never have a charged battery and often plug my charger in without it being connected to the wall outlet! I know I know… life on the edge LOL! A funny conversation I had in a group chat about my phone battery “sparked” the inspiration for this project (thanks me perps). Funnier still, I forgot to add the indicator circles on the gauges to show where the insects are at in their charging cycle, so you’ll see these red indicator circles appear in photos further down the post.

    igirlzoe: tim holtz sizzix chapter 2 funky insects
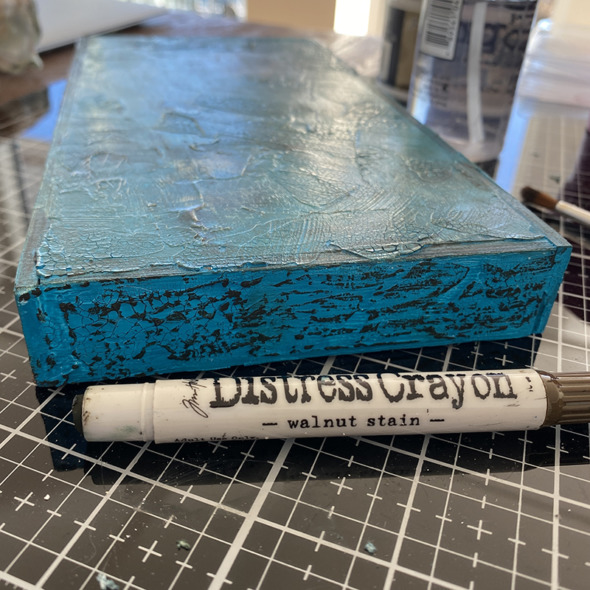
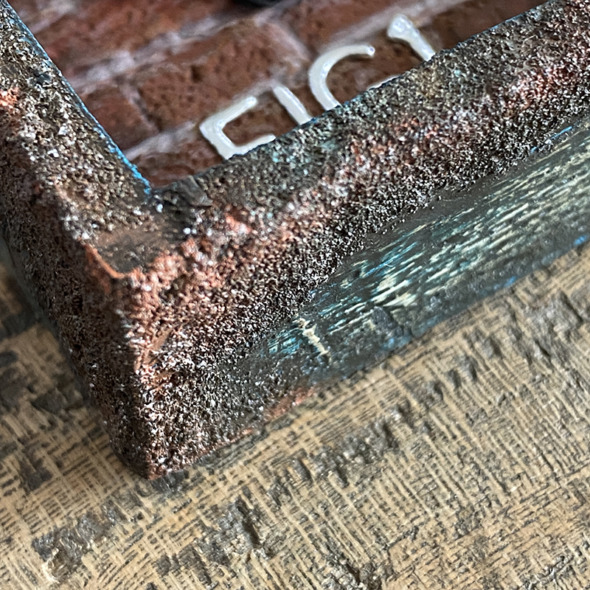
    Cover an idea-ology vignette tray in gesso and distress texture crackle paste and allow to dry. I covered in a layer of mermaid lagoon distress paint and once dry, scribbled walnut stain distress crayon over the top and blended in with my finger to highlight the texture.

    igirlzoe: tim holtz sizzix chapter 2 funky insects
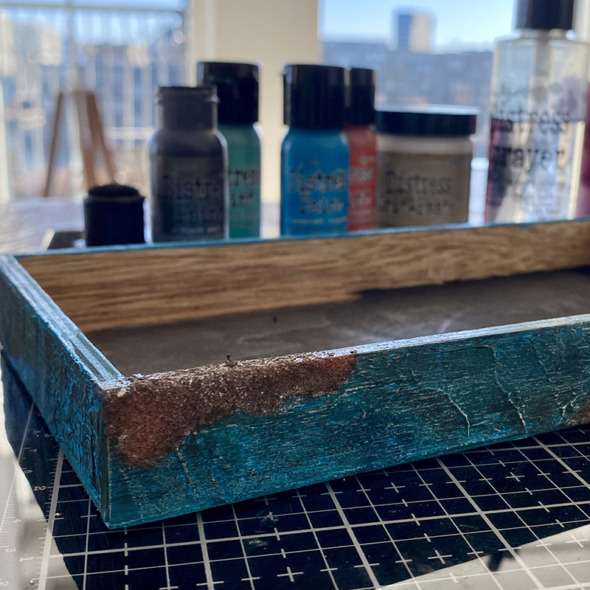
    I added distress opaque grit-pate and covered with distress paint to create rust. You don’t need to paint the base of the tray as it will be covered in brickwork. I painted it when it was going to be used for another project and I changed my mind last minute, I do that a lot, but it’s ok, it’s just craft, there are no rules! 😉

    igirlzoe: tim holtz sizzix chapter 2 funky insects
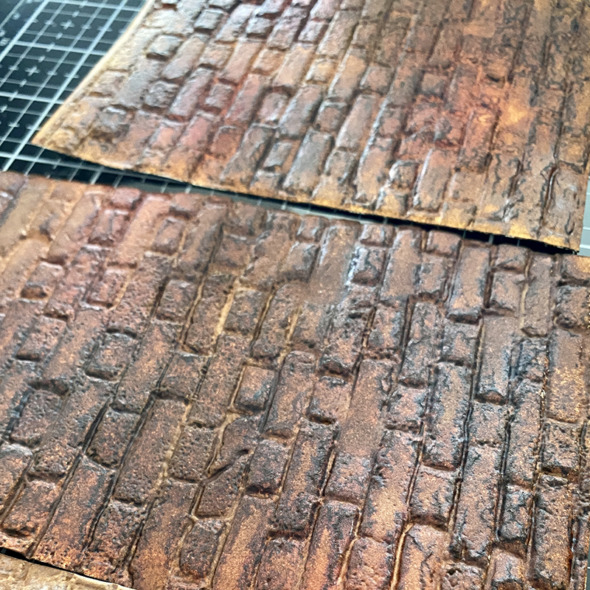
    Using the AWESOME brickwork 3D embossing folder and distress sprays to create the background. Check back this week for a tutorial on this, it’s so incredibly easy and the brickwork looks real because of the pitted detail that the folder creates. I can’t praise this enough, the 3D technology in embossing is just so cool. There’s also a brickwork tutorial on my friend Stacy’s blog Tattered Nest Designs, which is a different method and effect to mine, so definitely check that out.

    igirlzoe: tim holtz sizzix chapter 2 funky insects
    Speaking of 3D embossing folders, the circuit folder was a new edition in Chapter 2 and I am obsessed with it. I’m starting to wonder if I can make anything without using it, even a tiny (how tiny) bit! 😉

    igirlzoe: tim holtz sizzix chapter 2 funky insects
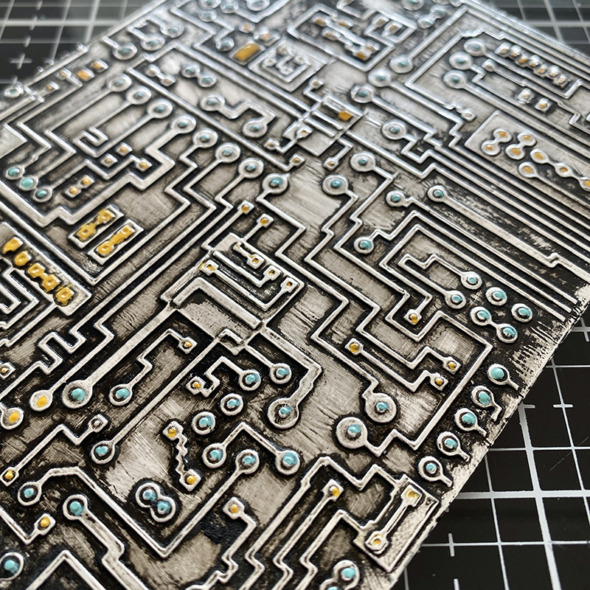
    The circuit folder looks fantastic when you emboss alcohol ink foil tape and cover with a layer of black soot distress paint and wipe away. I added paint dots with distress paint and a fine tip paintbrush. It takes a couple of minutes and is really relaxing.

    igirlzoe: tim holtz sizzix chapter 2 funky insects
    I love the funky insect thinlits dies. They are so simple to assemble, just 2 or 3 pieces and you’re done.

    igirlzoe: tim holtz sizzix chapter 2 funky insects
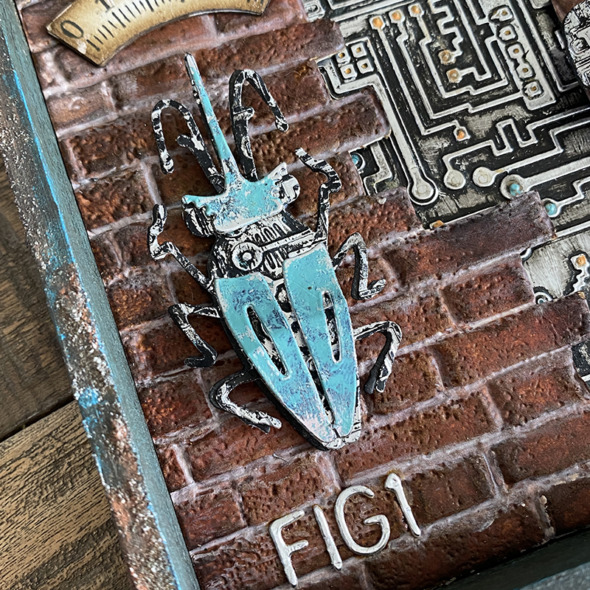
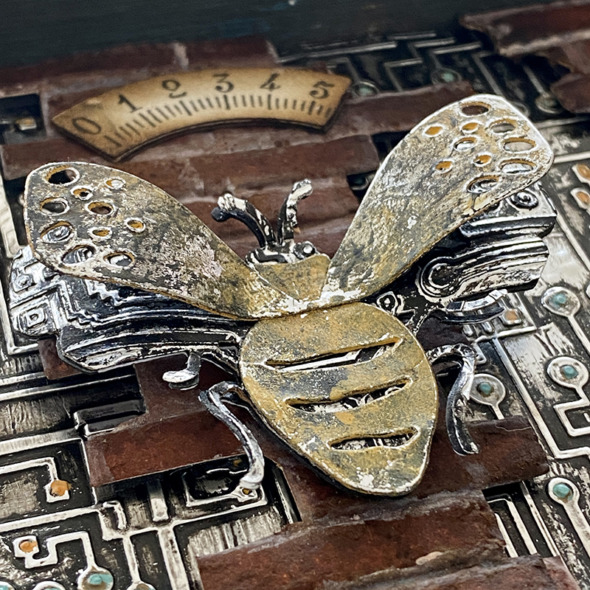
    I cut them from alcohol ink foil tape backed with cardstock to make them sturdy and painted with a layer of black soot distress paint, wiping away the excess and then painting the insect body with another colour of distress paint.

    igirlzoe: tim holtz sizzix chapter 2 funky insects
    The base layers were all embossed with the circuit 3D embossing folder and mounted on adhesive foam.

    igirlzoe: tim holtz sizzix chapter 2 funky insects
    I used the letter “O” from the alphanumeric thin thinlits dies (662226), cut from distress watercolor cardstock and covered with candied apple distress paint and a little walnut stain distress crayons to grunge. Using the same letter to die cut mica, I used the inner piece to give the appearance of glass. The gauge dial is cut from the Bigz voltage die and the numbers stamped with the professor 2 stamp set CMS373. You would think that Tim designed this stuff to go together or something. 😉

    igirlzoe: tim holtz sizzix chapter 2 funky insects
    I included this photo so you could see the texture that distress opaque grit-paste makes. You have to apply it with your finger to get the really crusty look, but don’t panic!! it comes off with water or a baby wipe.

    igirlzoe: tim holtz sizzix chapter 2 funky insects
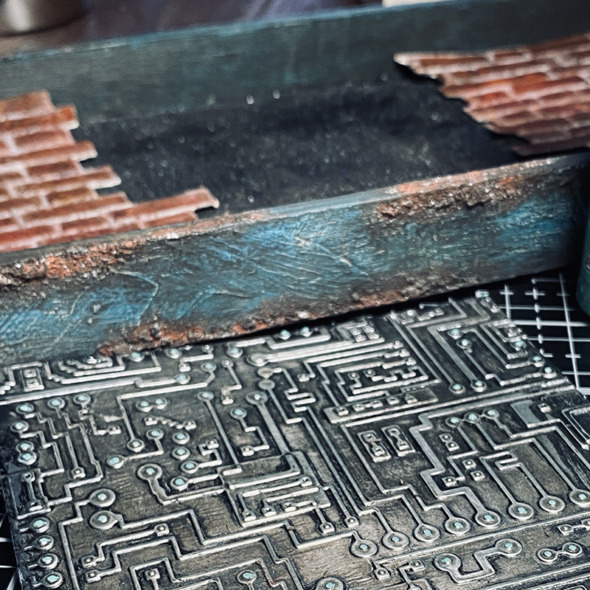
    I mounted the circuit background to the base of the vignette tray with distress collage medium. Cutting sections of the brickwork, I mounted them with adhesive foam to give a little dimension and show peeks of the circuit background. Adding the insects and gauges to indicate where they are in their charging cycle.

    igirlzoe: tim holtz sizzix chapter 2 funky insects
    Thanks for stopping by. I will be back with a step by step tutorial for this and some other styles of brickwork using the 3D brickwork embossing folder so clear some space on your desk ready to make bricks with me.

    Zoe


  7. 25th August, 2020

    The Crypt

    Hello friends. I’m back again with another Halloween sample that I made for the Tim Holtz Sizzix Chapter 3 Halloween release last month. If you missed it, you can catch up on all the fun on Tim’s blog.

    igirlzoe: tim holtz halloween sizzix chapter 3 gothic gates 2020
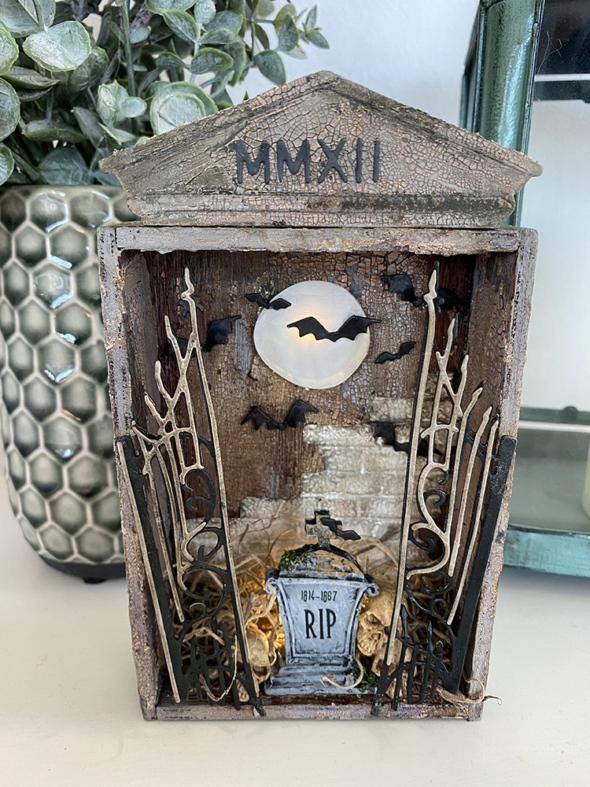
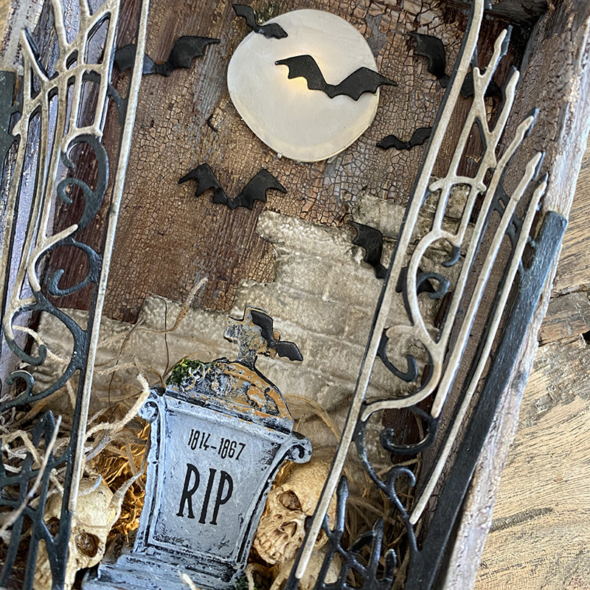
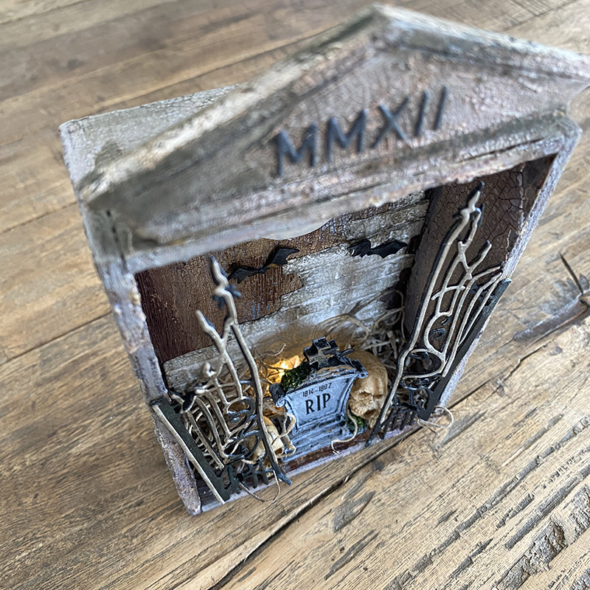
    I love the new Tim Holtz Sizzix gate keeper thinlits die set. I immediately fell for the grungy, twisted, gothic style gates, coupled with the moon and bats and knew I was going to make a crypt. They fit perfectly on the idea-ology vignette boxes. Here’s what I did…

    igirlzoe: tim holtz halloween sizzix chapter 3 gothic gates 2020
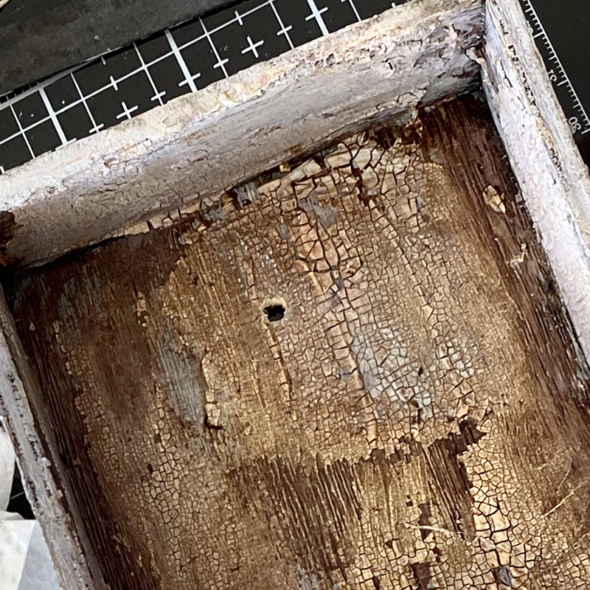
    Covered an idea-ology vignette box with distress texture crackle paste and sprayed with distress and oxide sprays.

    igirlzoe: tim holtz halloween sizzix chapter 3 gothic gates 2020
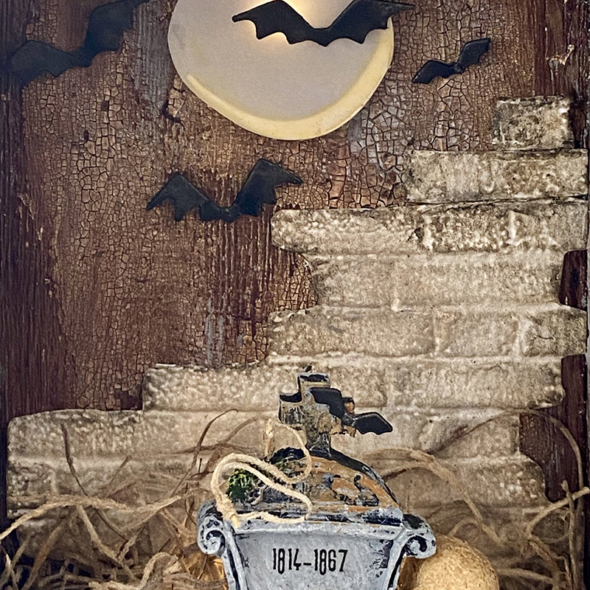
    Using the 3D brickwork texture fades embossing folder, I tore portions of the brickwork away to make it look like exposed wall, before gluing it to the back of the vignette box with distress collage medium and rubbing walnut stain distress crayon over the top to age.

    igirlzoe: tim holtz halloween sizzix chapter 3 gothic gates 2020
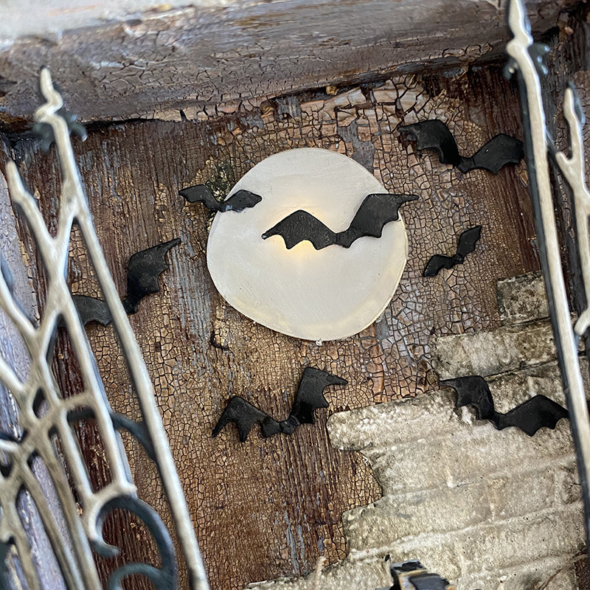
    The lit up moon was a bit of a triumph for me. I got a Dremel micro for my birthday, it’s an awesome tiny tool and makes short work of drilling through the back of vignette boxes, (please wear safety glasses). I die cut the moon twice from vellum and glued together with the moon slice between. I painted an antique linen distress paint wash over the top of the moon to diffuse the light (see next pic).

    igirlzoe: tim holtz halloween sizzix chapter 3 gothic gates 2020
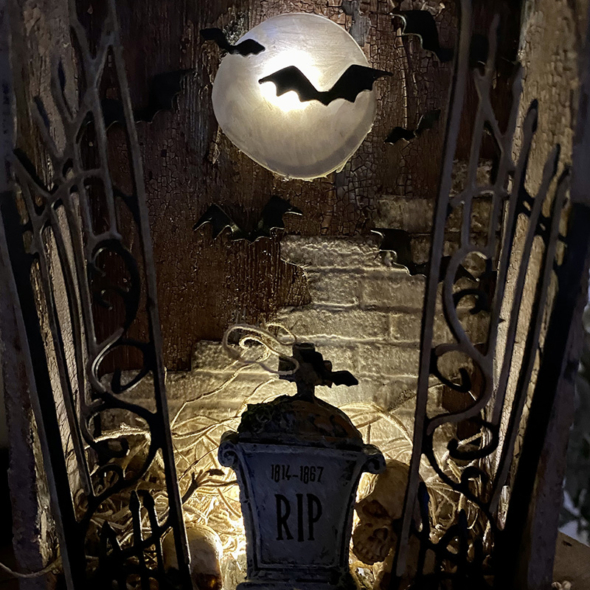
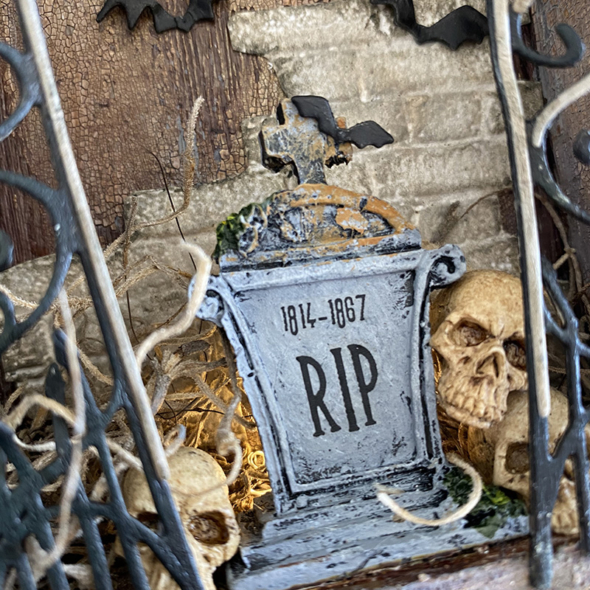
    Threading one tiny light in behind the moon, I added a thin layer of hot glue to the back edge of the moon which created an invisible lift. The rest of the tiny lights were threaded in through the second hole I drilled behind the idea-ology tombstone, (retired) (inserts sobbing).

    igirlzoe: tim holtz halloween sizzix chapter 3 gothic gates 2020
    I stacked idea-ology skulls either side and added some remnant rubs to the tombstone and some creepy moss. I cut bats from blackout kraft-stock from the gate keeper die set.  I shaped the wings slightly and glued in the center of the bat with distress collage medium.

    igirlzoe: tim holtz halloween sizzix chapter 3 gothic gates 2020
    The gates were die cut from blackout kraft-stock and the highlighted portions from distress watercolor cardstock with an antique linen distress paint wash added and walnut stain distress crayon rubbed over the top. The gates were glued together with distress collage medium. The precision tip bottle makes it really easy. I attached the gates to the edge of the vignette box and when dry, bent the gate prongs slightly.

    igirlzoe: tim holtz halloween sizzix chapter 3 gothic gates 2020
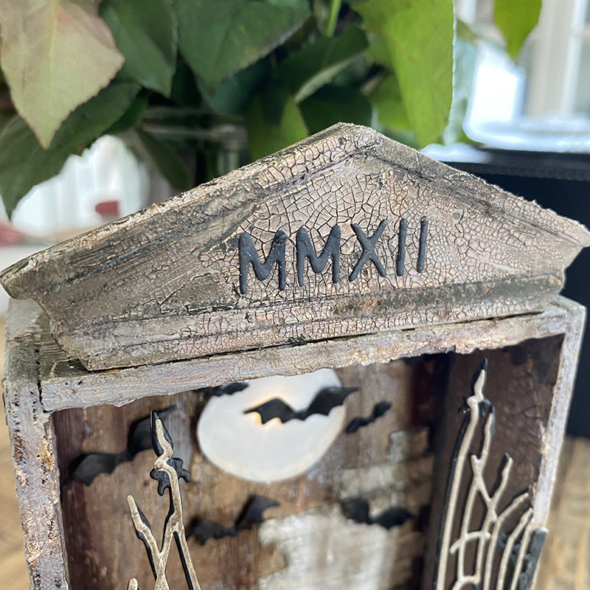
    I pulled out an older and retired die, Pediments (658557) to create the top of the crypt. I die cut it several times, glued it together and covered with distress texture crackle paste. I added letters from the alphanumeric labels die set, cut from blackout kraft-stock and added with distress collage medium.

    igirlzoe: tim holtz halloween sizzix chapter 3 gothic gates 2020
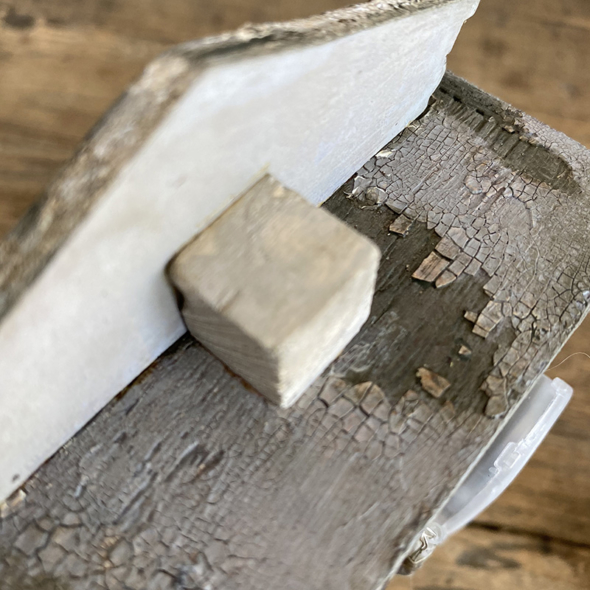
    Attaching a small wood block at the back to stabilize the die cut. This could be covered with some die cut foliage or even have a skull mounted to the top. I wish I had added some die cut ivy to the crypt. Tim Holtz Sizzix garden greens thinlits die set (661206) has the best ivy die and wouldn’t it look nice climbing the gates…

    That’s what I love about investing in craft tools, you can mix and match over the years as you build your collection. The seasonal dies are produced in limited numbers, so please pick up your must haves for your collection.

    igirlzoe: tim holtz halloween sizzix chapter 3 gothic gates 2020
    Thanks for stopping by, only 24 hours until the new Distress color is revealed and I can’t wait! See you there and don’t forget your snacks…

    Zoe