Hello friends! I’m back today with more pumpkins. These I made for the Tim Holtz Sizzix Halloween LIVE Launch.

The pumpkin patch colorize die was another knock out for me. Tim really spoiled us with pumpkins this year and I’m one happy pumpkin farmer!
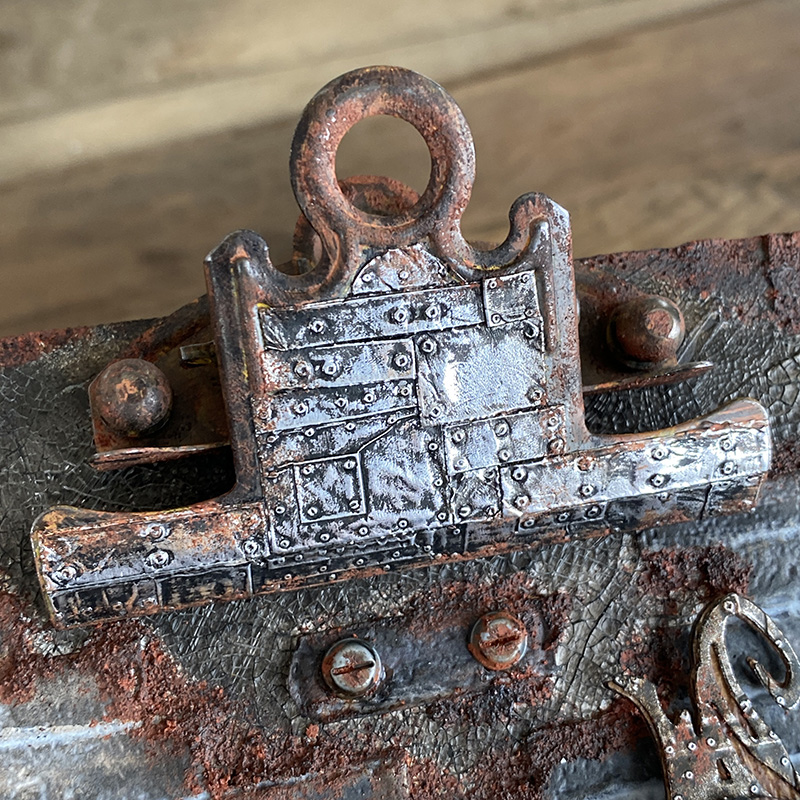
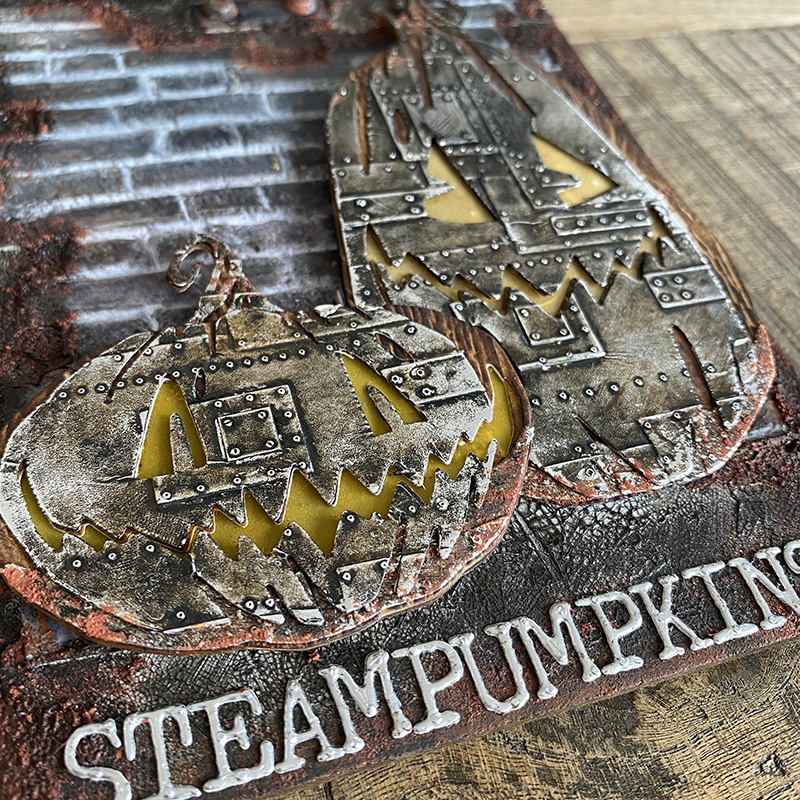
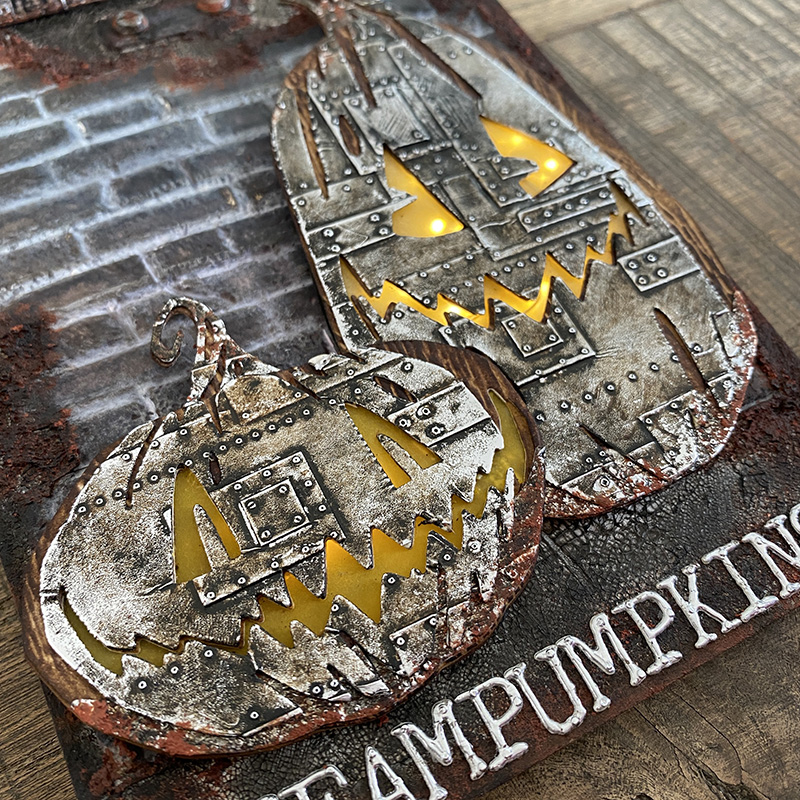
I started by altering an idea-ology mini clipboard. Covered the background with brickwork (see step out here) and then added distress grit-paste. I used a mixture of crackling campfire, candied apple and ground espresso distress paints over the dried distress grit-paste to create a faux rust effect. I cut alcohol foil tape and embossed with the mini foundry 3D embossing folder and covered with black soot distress paint, wiping away the excess. I cut the foil and added pieces to the clipboard clip until it was covered. I also added a couple of idea-ology hardware heads.
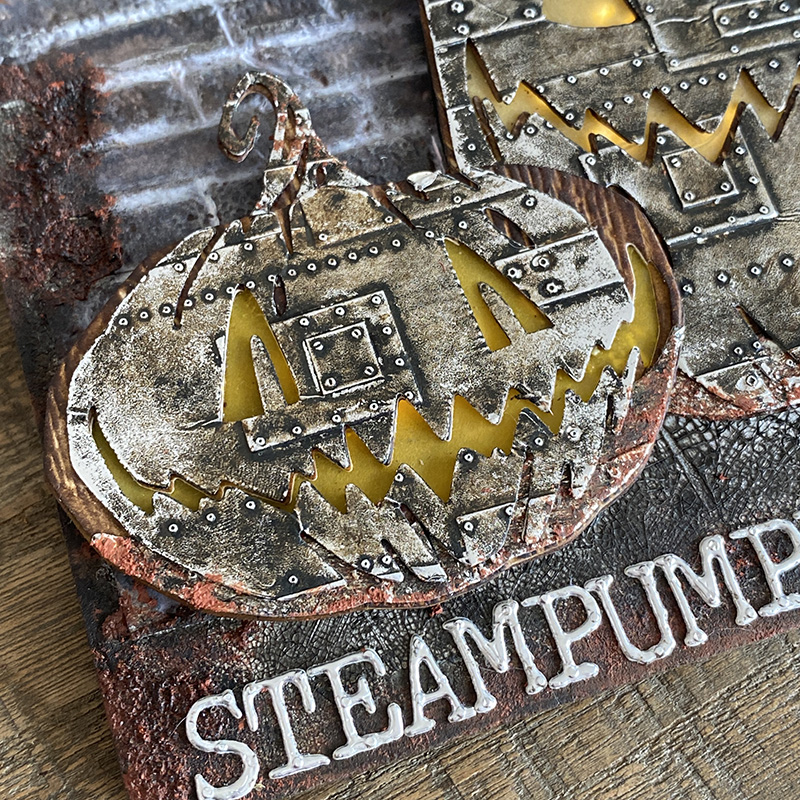
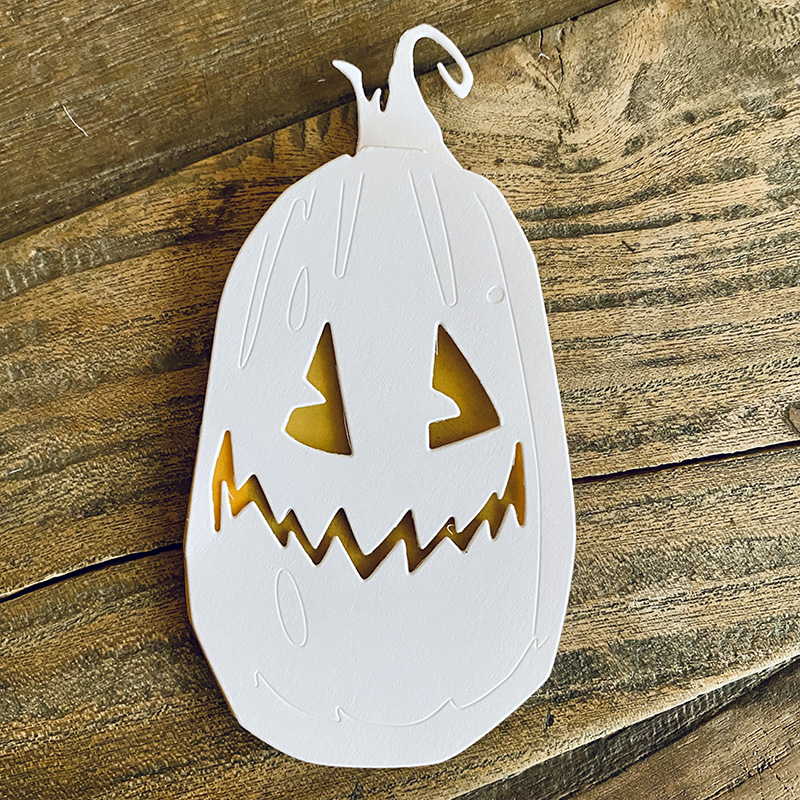
Using the lumber and mini foundry 3D embossing folders, I embossed the pumpkin patch colorize die cuts. If you haven’t tried colorize before, these are such a great introduction to it. There are only a few pieces and it’s not intricate or fiddly in the least and I think you’ll love the effects you can get with colorize.
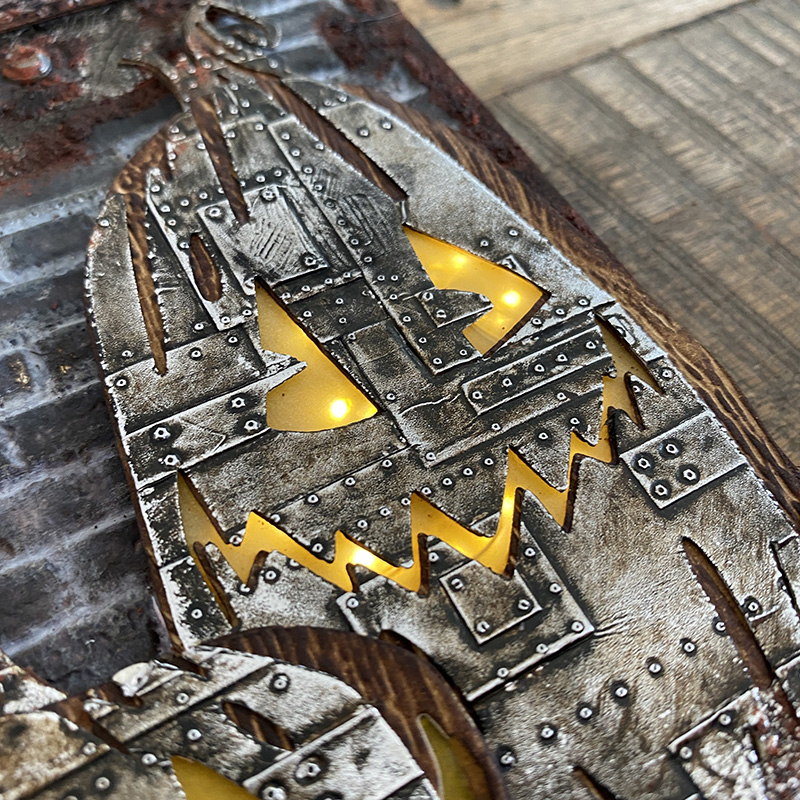
In order to get the tiny lights to show through from under the vellum, I cut a section in the base die cut and mounted foam around the edges to creat a space for the tiny lights to sit inside. I added vellum painted with fossilized amber distress paint, under the top sections to hide, contain and diffuse the tiny lights. Here’s how…
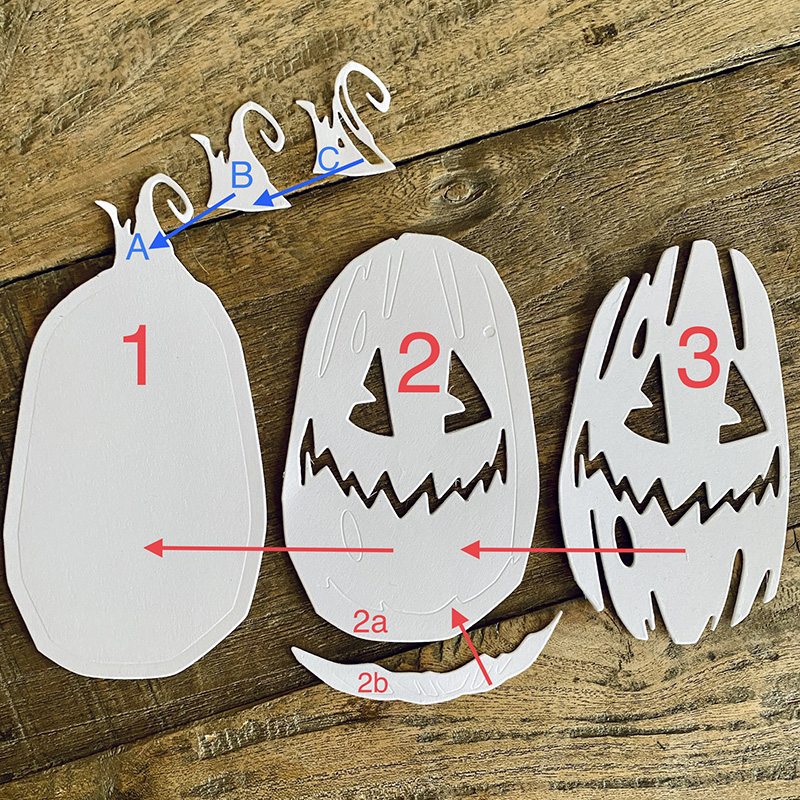
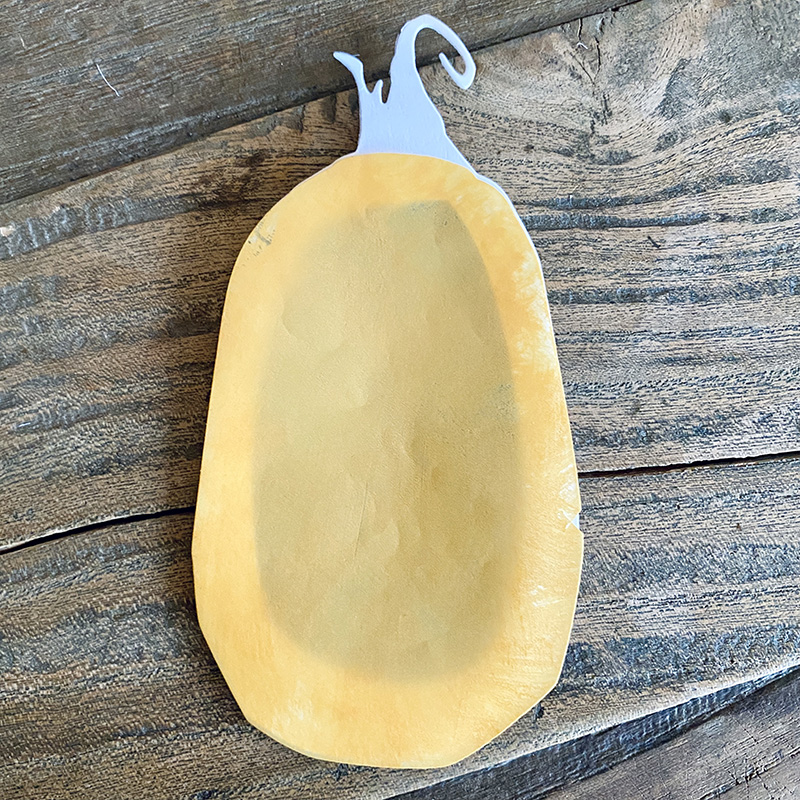
For step out purposes I have die cut just the larger pumpkin from white cardstock. You will see there are de-bossed lines which show you where to place each piece. I’ve added numbers, letters and arrows to help. 1 is your base. 2 goes on top of 1. 3 goes on top of 2 etc.

Using a craft knife, cut a circle in the center of the base of the pumpkin die cut leaving enough around the edge to add adhesive foam. Cut a piece of vellum using the base pumpkin piece, cut off the stalk and paint with distress paint.
Glue the vellum on top of the base piece.
Add the next die cut piece over the top.
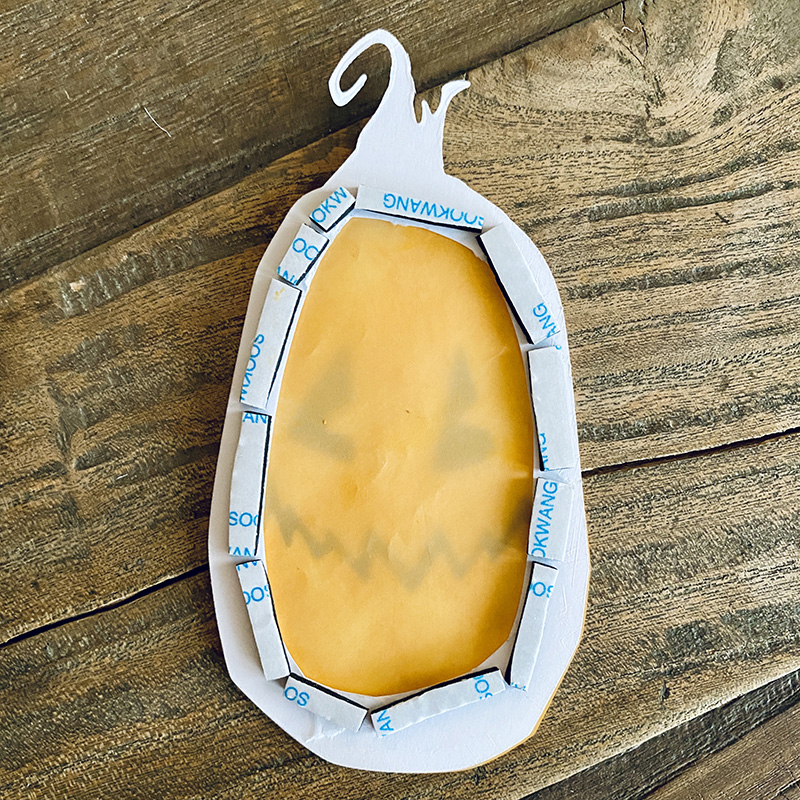
I flipped the pumpkin over and ran adhesive foam around the underside edge of the base piece.
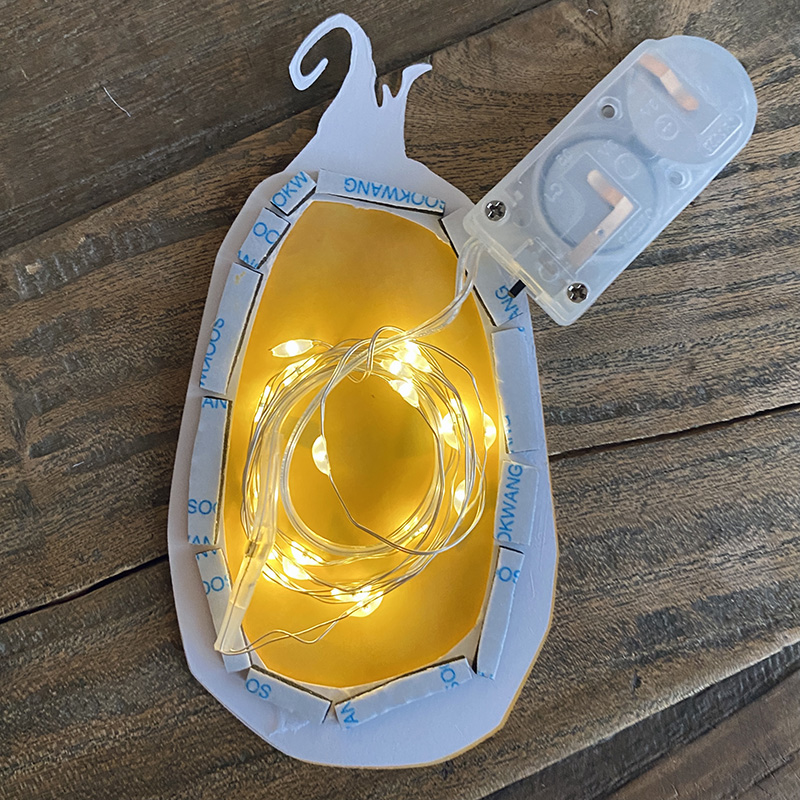
Add idea-ology tiny lights into the back of the pumpkin and secure with glue, if you leave a gap in the adhesive foam you can run the lights behind the smaller pumpkin too, (not pictured).
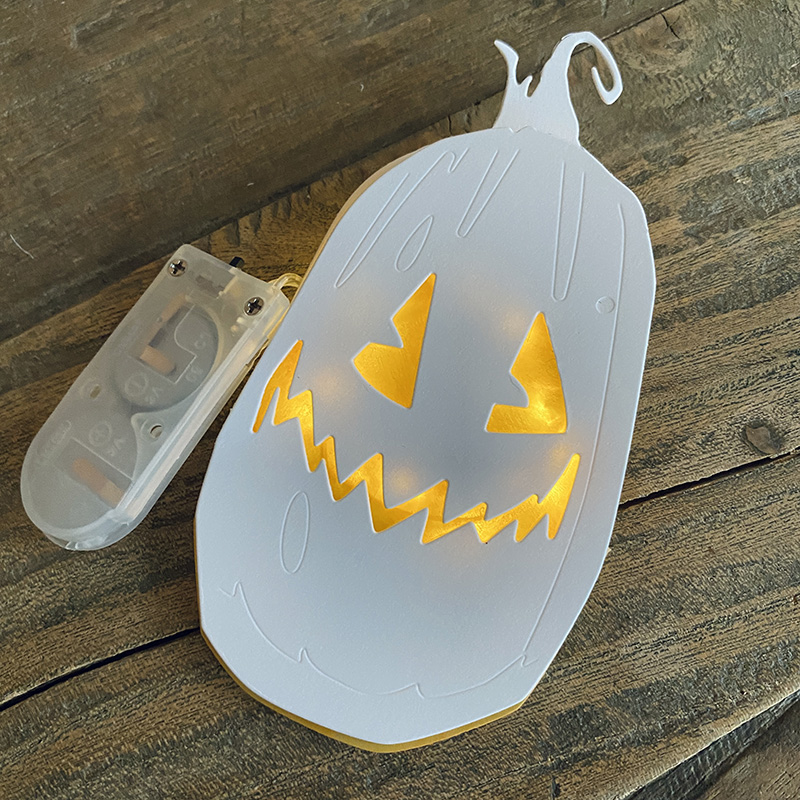
How the pumpkin looks with the lights behind it. On my project, I threaded the lights through the back of the idea-ology mini clipboard first and the switch was attached to the back of the clipboard.
Tiny lights OFF.
Tiny lights ON.
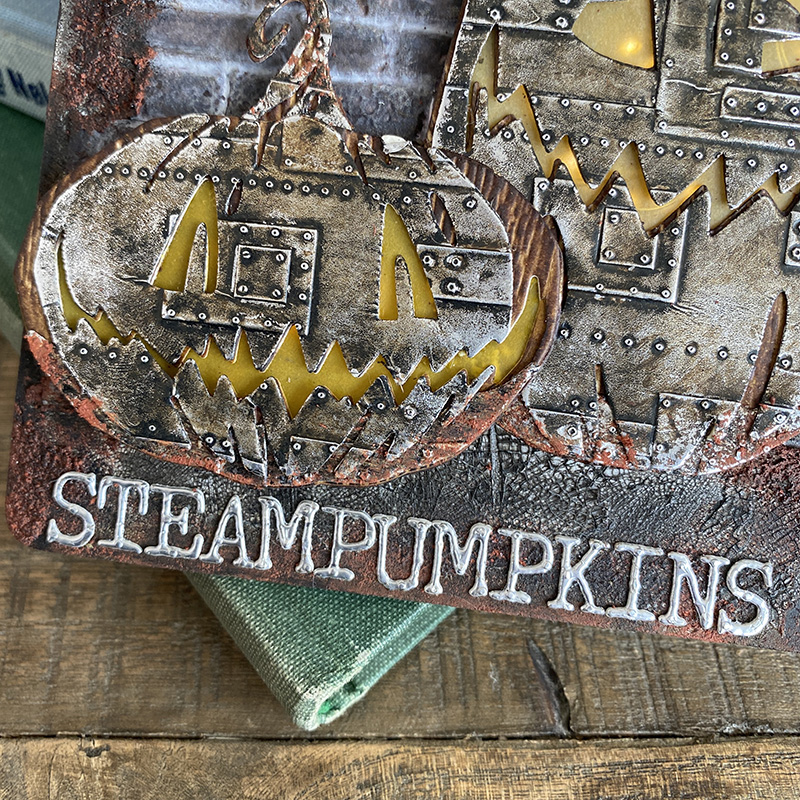
Using some leftover alcohol foil tape I used the alphanumeric tiny upper dies to cut steampumpkins.
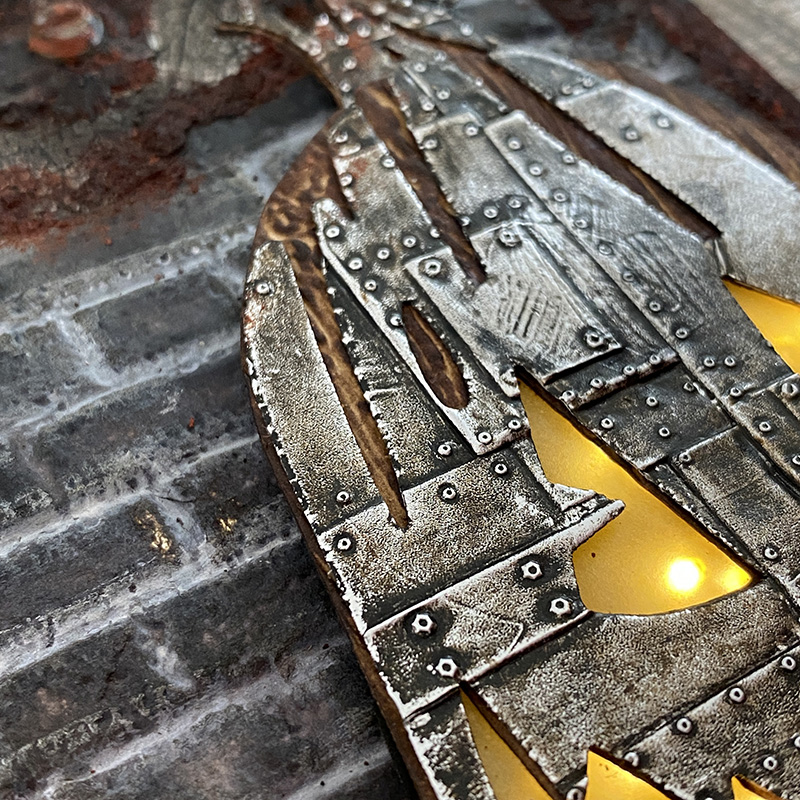
Seriously! How cool is this pumpkin patch die? Tim rocked it!!
My pumpkin making adventures continue through November, so there’s more pumpkins to come…
Thanks for stopping by.
Zoe
…
affiliate links used at no cost to you


these are amazing! that texture is so good and the fact that you lit them up is off the hook (do they say that anymore?) well, whatever – I love it!
Yes, we are definitely spoiled after the over-the-top releases this year….love the Steampumpkins…keep up coming, we will have Pumpkin Pie for Thanksgiving when you harvest all the pumpkins…LOL…yummy, love me a good pumpkin pie with lots of whipped creme…now I am hungry…LOL.
Wow! Amazing work of art. That rust looks so real. You are the queen of realistic textures,
Just love’em… and the rusted clipboard is a treat too.
Alison x
Love this, Zoe! Although I love any kind of punkins, Steampunkin’s are the best! Well done, you! Happy Halloween!
Oh these are most excellent. Very creative.
Awesome, I just love this so much. Thanks so much for the inspiration.
Soooo cool!
Fabulous steampunk pumpkins! Love them! TFI
I have always loved my pumpkins with attitude, but these guys are over the top! I love them!!
Thank you for sharing your skills.
Gobsmacked! Thanks for showing the behind the scene details!
The steampumpkins are fabulous and the rusting on the tag and clip is just incredible. Love this so much! xx