Hello Friends! I’ve finally got myself organized and have a walk through of the brickwork backgrounds I’ve been using for my makes recently.
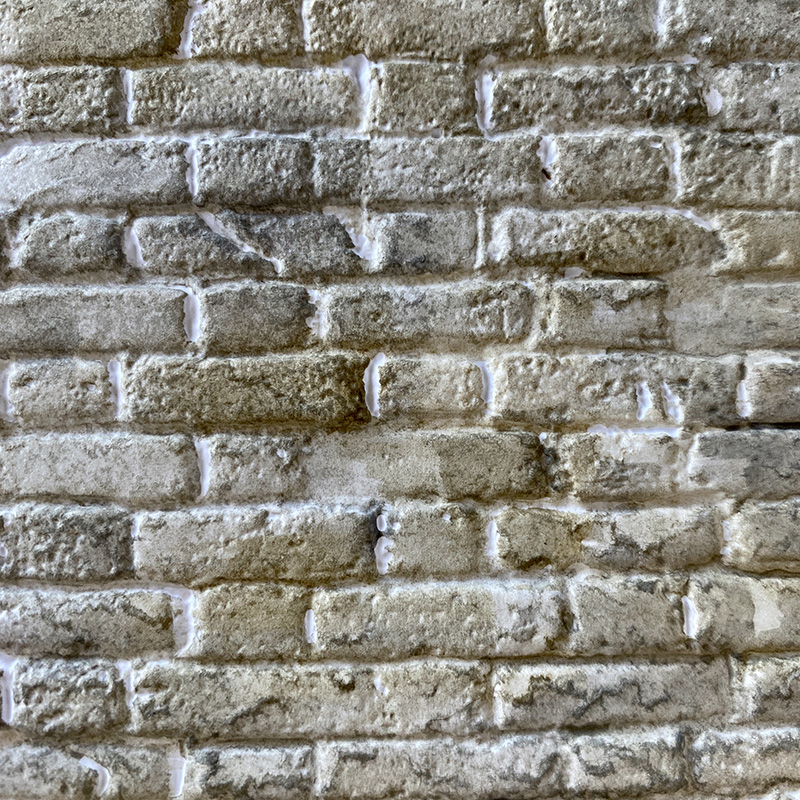
The Tim Holtz Sizzix Brickwork 3D embossing folder is incredibly detailed and does all of the heavy lifting when creating brickwork from paper. It’s the brick pitting detail that makes it look like it should be rough to the touch when it’s not.
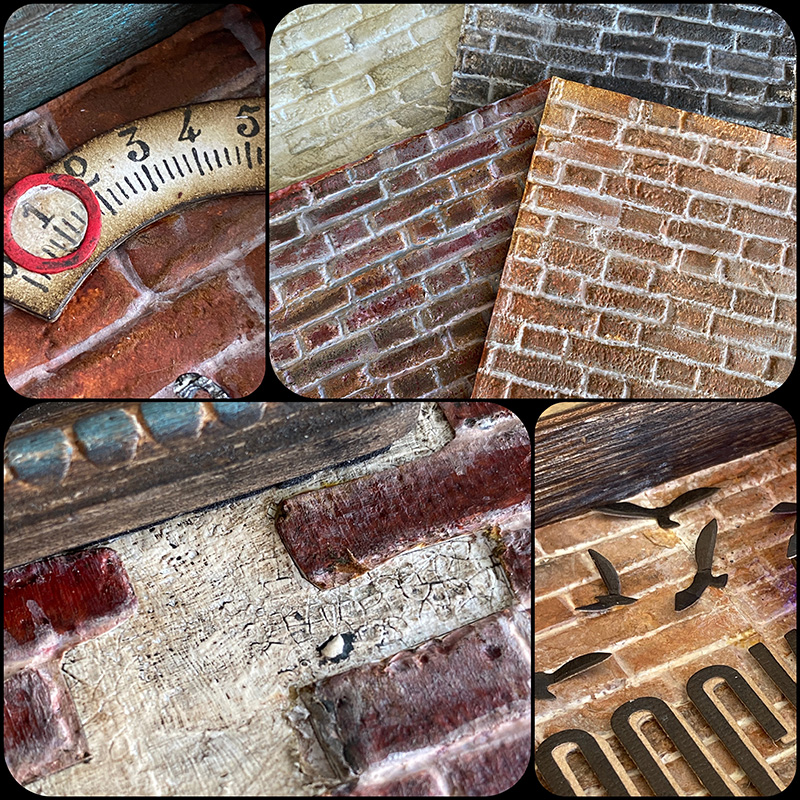
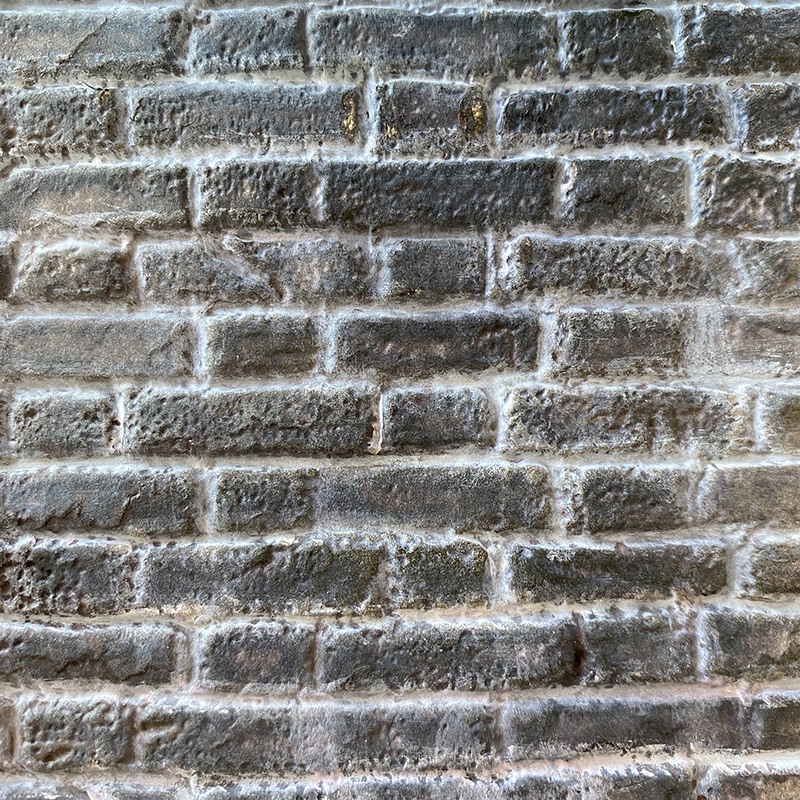
Above are a few examples of brickwork used in my makes. For the walk through I haven’t listed specific colours, but if you scroll down there are some different brickwork combinations with colours listed to get you started, but first, let’s get into how to make your own…
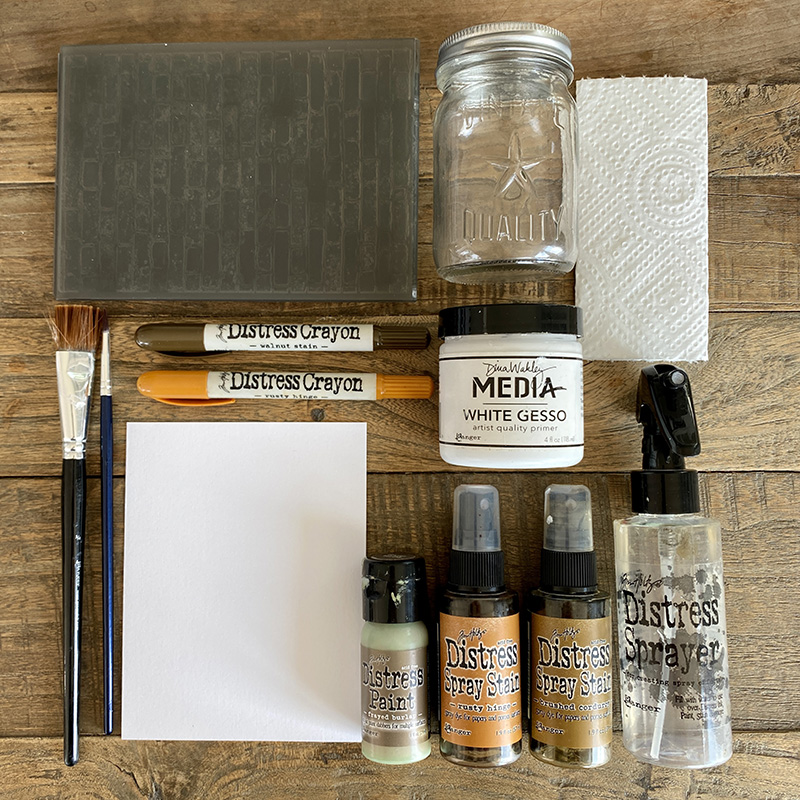
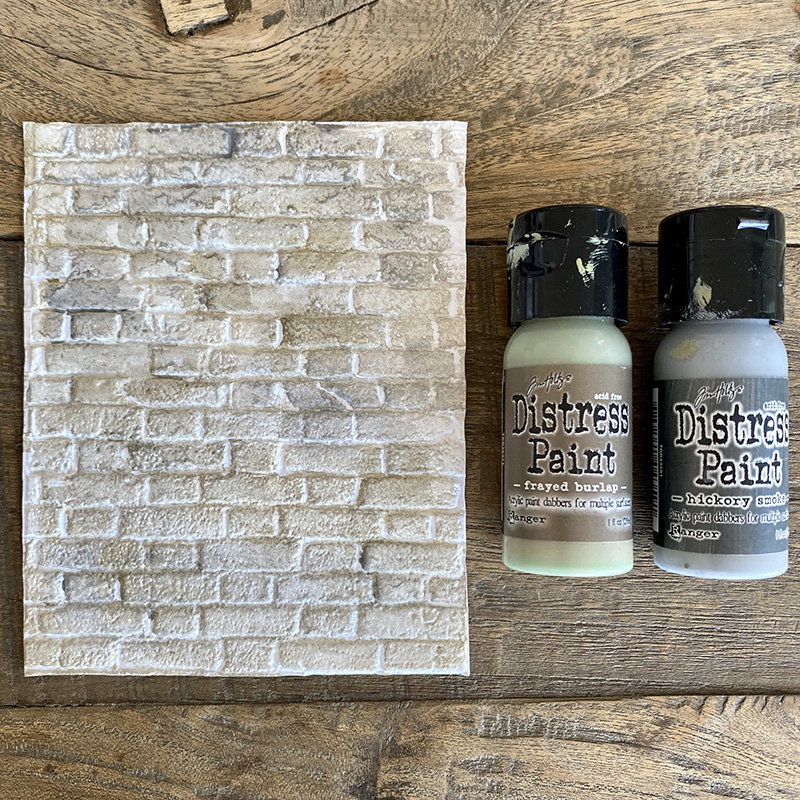
Gather these supplies: distress watercolor cardstock, brickwork 3D embossing folder, jar of water, paper towel, white gesso, distress water sprayer bottle, large and detail paint brushes, distress crayons, distress paint and distress sprays.
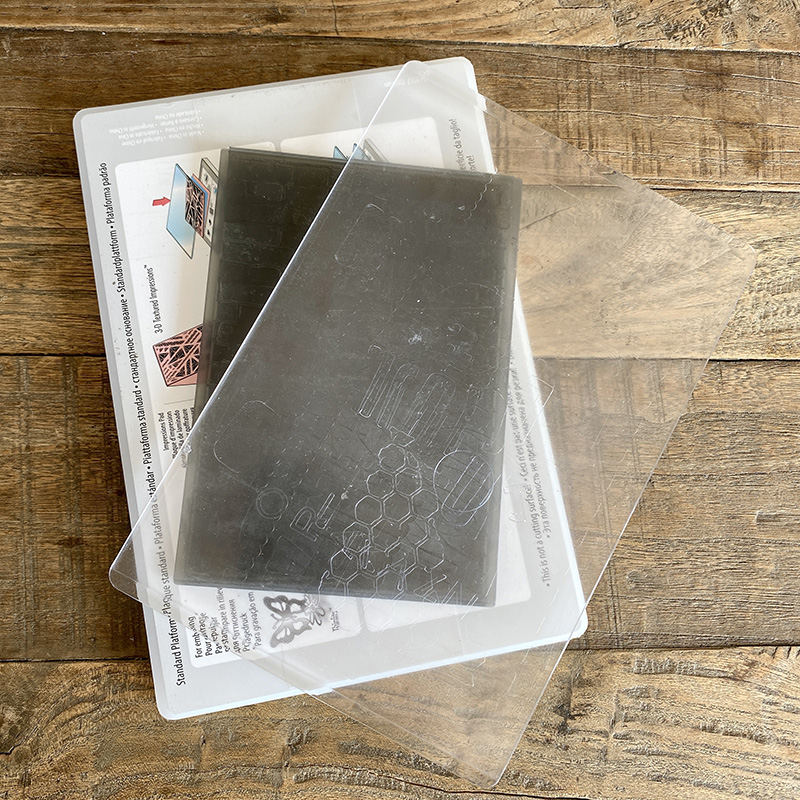
Emboss distress watercolor cardstock with the 3D brickwork embossing folder. You only need your base platform and one cutting plate when running 3D embossing folders through your Sizzix machine. Lightly mist your cardstock and then roll your embossing folder through 3 times. Remember 3D – 3 passes.
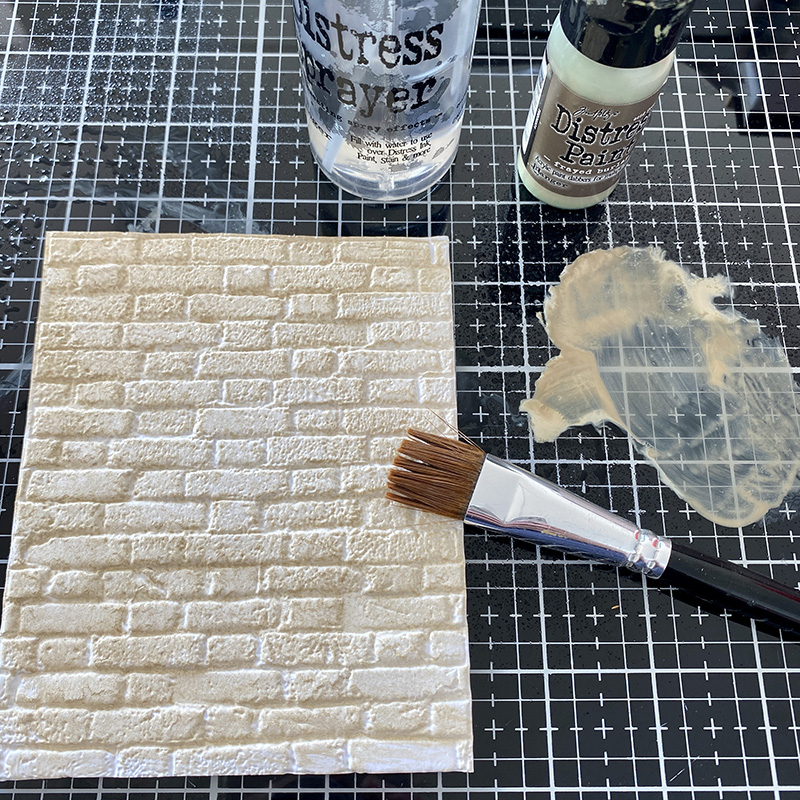
Make a paint wash with distress paint and water and paint over the embossed brickwork background and set aside to dry.
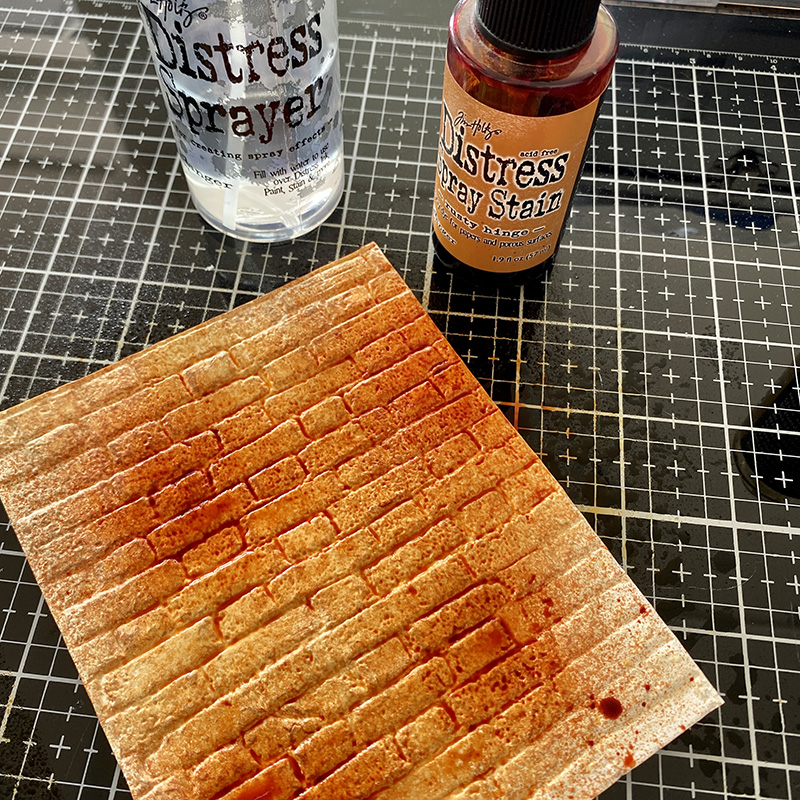
Give the background a light mist and spray with distress spray and dry with a heat tool.
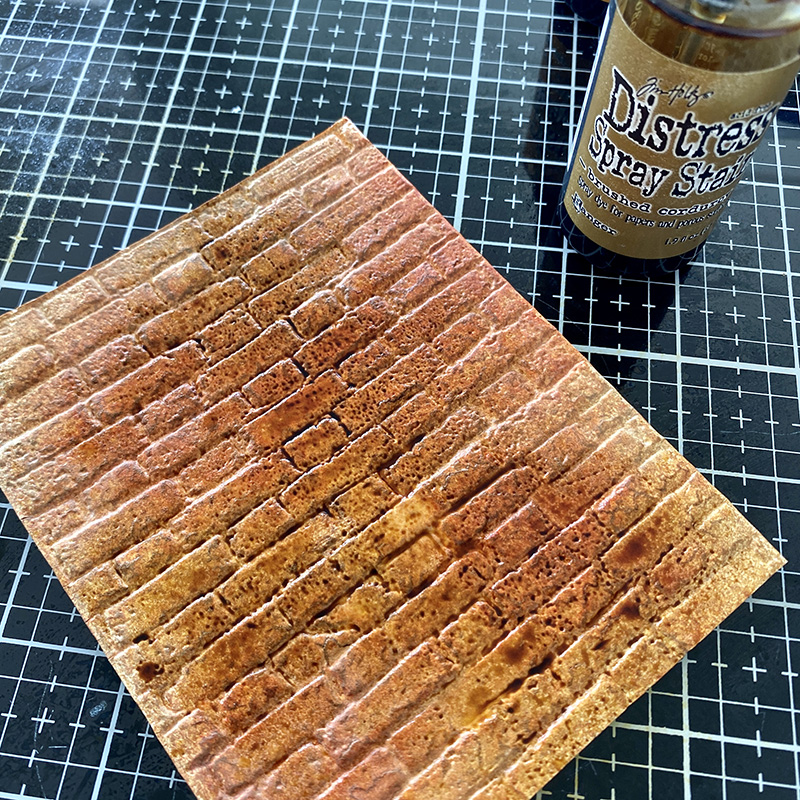
Give the background a light mist and spray with another distress spray and dry with a heat tool.
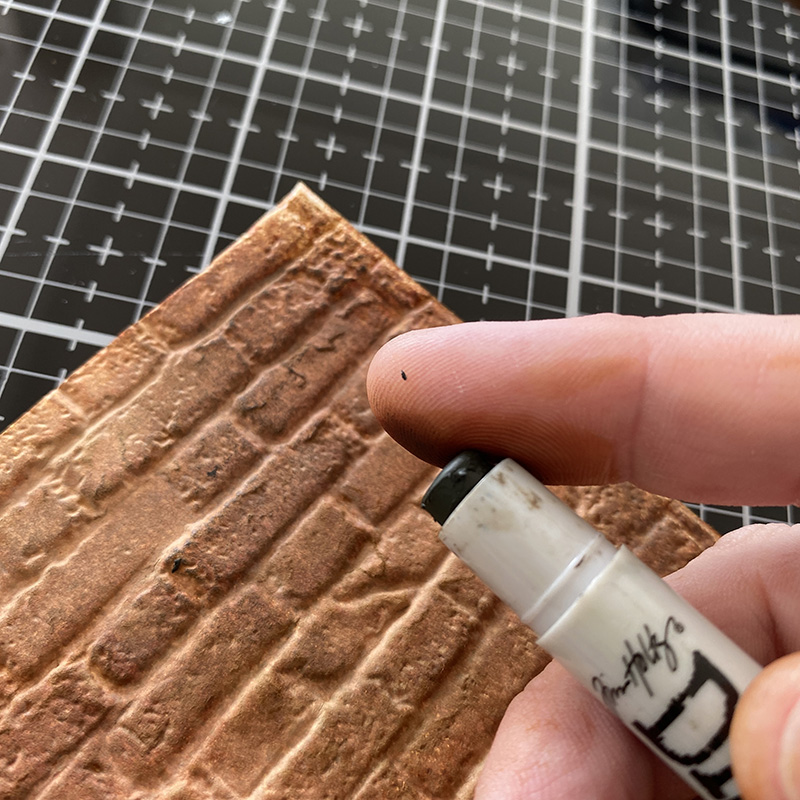
Rub distress crayon onto your finger and rub over portions of the brickwork. Dry with a heat tool.
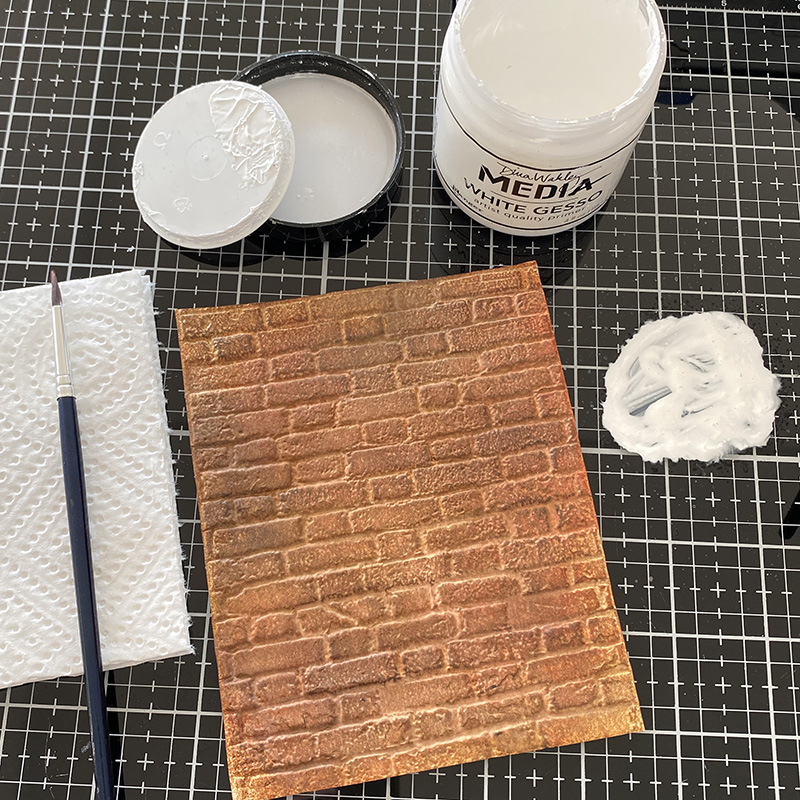
Once the background is dry, really dry. Go ahead and dry it once more just to be sure and gather white gesso, water spray bottle, detail paint brush and paper towel. Put a little gesso onto your glass media mat or non stick craft mat and add a little water and mix.
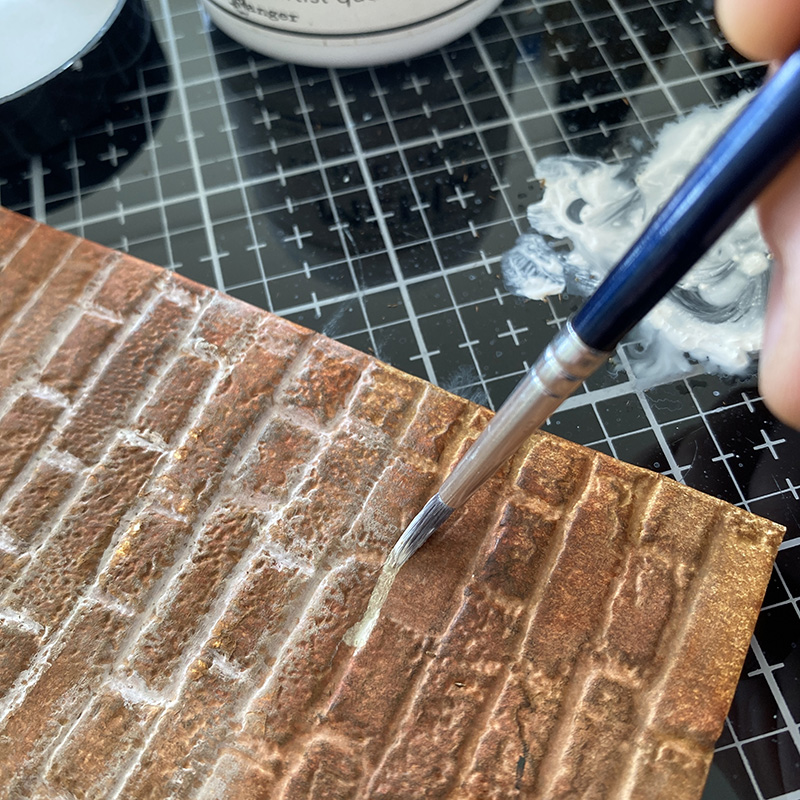
Paint lines of gesso into the grooves of the brickwork and then gently rub with your finger. Between each line dip your brush in water to clean and dry with the paper towel. You are getting rid of any crayon or ink your brush picks up before dipping it back into your gesso puddle. If you don’t do this, you will end up with orange gesso. Dry the brush between each line so the gesso is not too wet as it will reduce the amount of ink and crayon you pick up. Don’t worry about going over the lines, it works for you here. Have a second pass if you need to, but dry first. A little practice goes a long way.
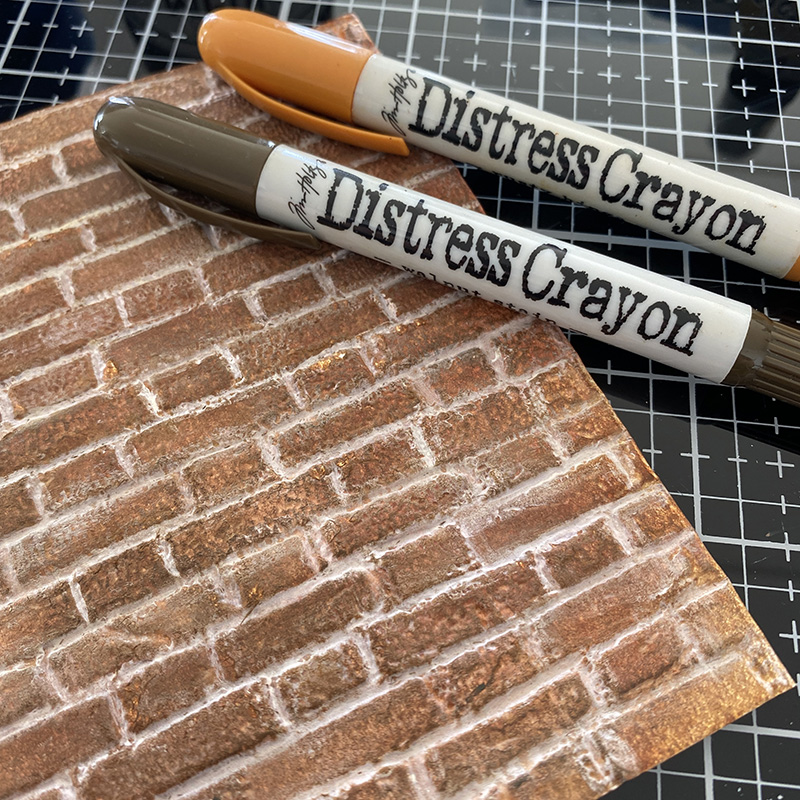
Once finished, dry dry dry and the use a finger to add distress crayon to random bricks to create the imperfection of real bricks.
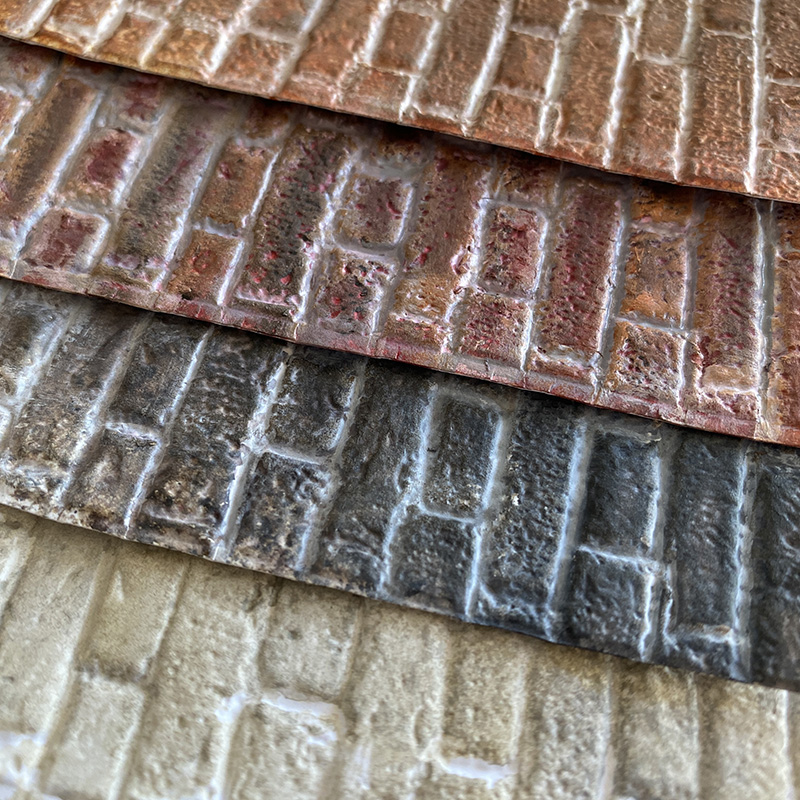
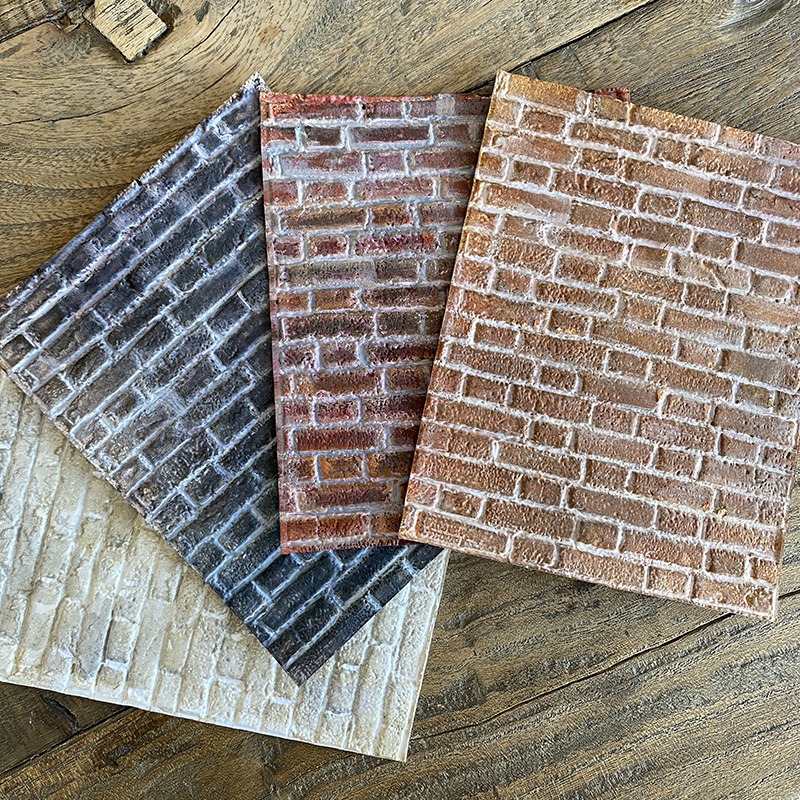
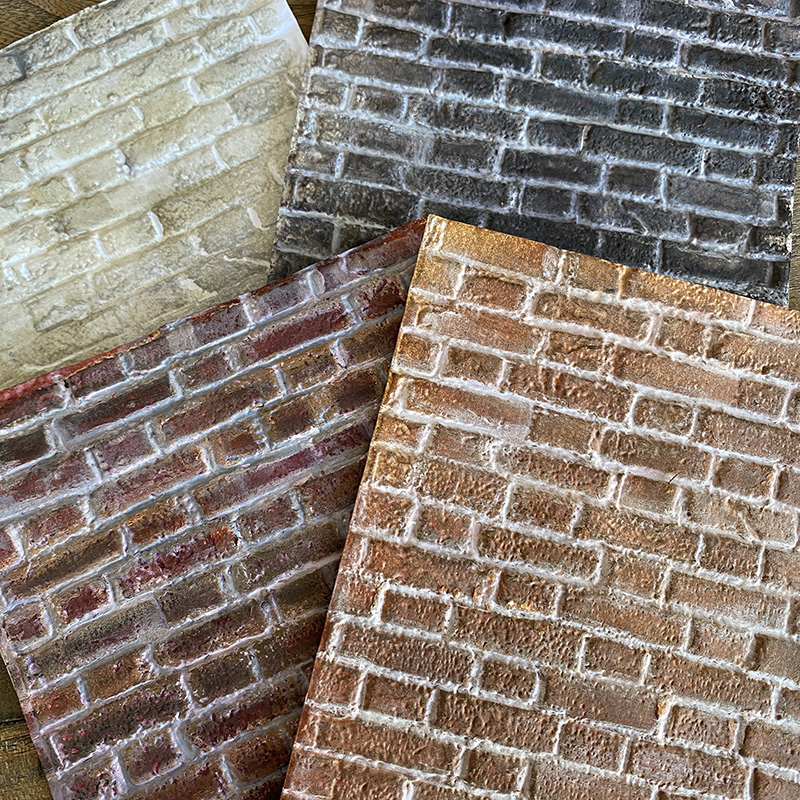
Here are some other combinations for different brickwork…
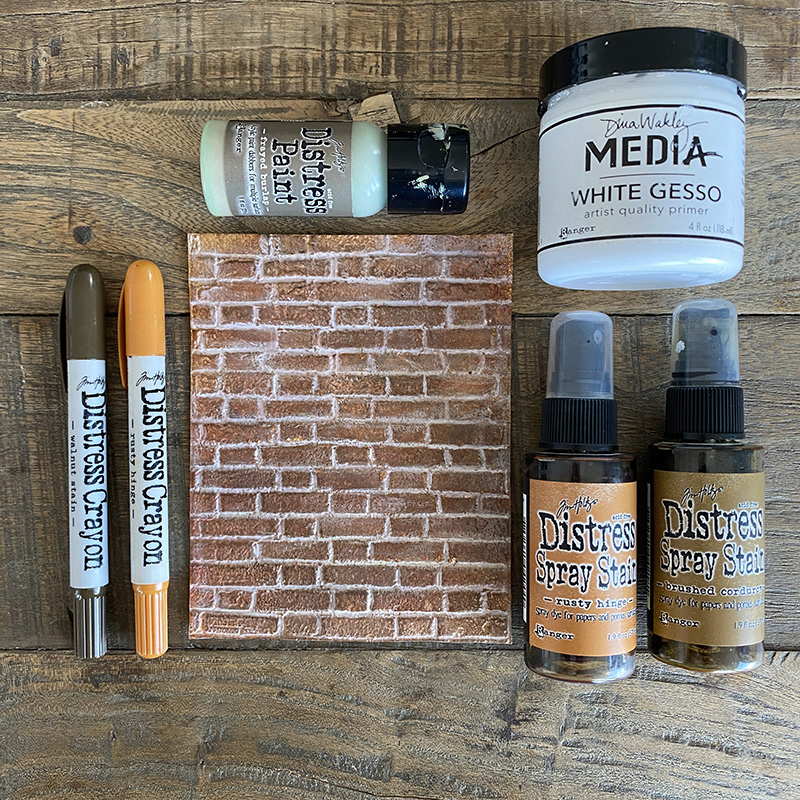
COMBINATION #1: frayed burlap distress paint, rusty hinge + brushed corduroy distress spray stains, rusty hinge + walnut stain distress crayon, white gesso

COMBINATION #1
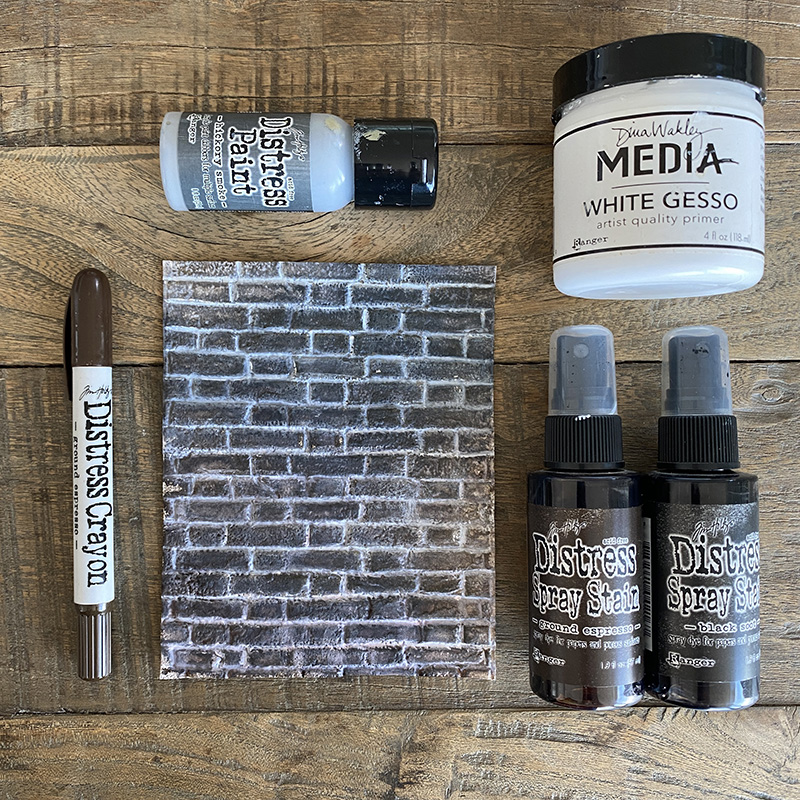
COMBINATION #2: hickory smoke distress paint, ground espresso + black soot distress spray stains, ground espresso distress crayon, white gesso
COMBINATION #2
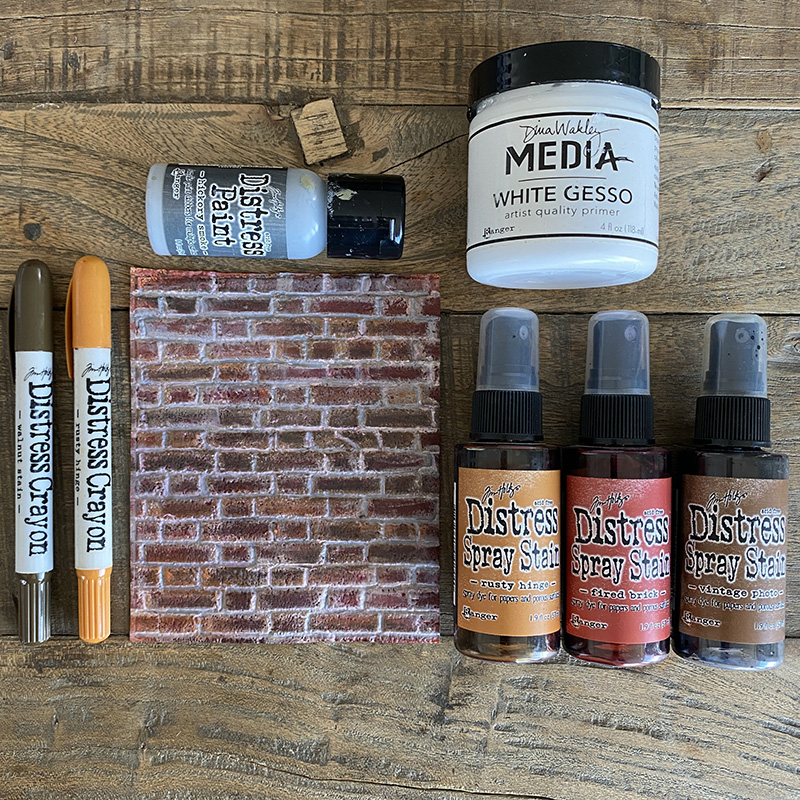
COMBINATION #3: hickory smoke distress paint, rusty hinge + fired brick + vintage photo distress spray stains, rusty hinge + walnut stain distress crayons, white gesso

COMBINATION #3
COMBINATION #4: frayed burlap + hickory smoke distress paint
This is the easiest combination and does not require gesso and works great behind flowers as a garden wall.
COMBINATION #4
Thanks for stopping by. I’ll be back soon to share a couple of makes using this brickwork. I encourage you to experiment with other combinations. Try embossing small strips of cardstock to make brickwork swatches…
Zoe
…
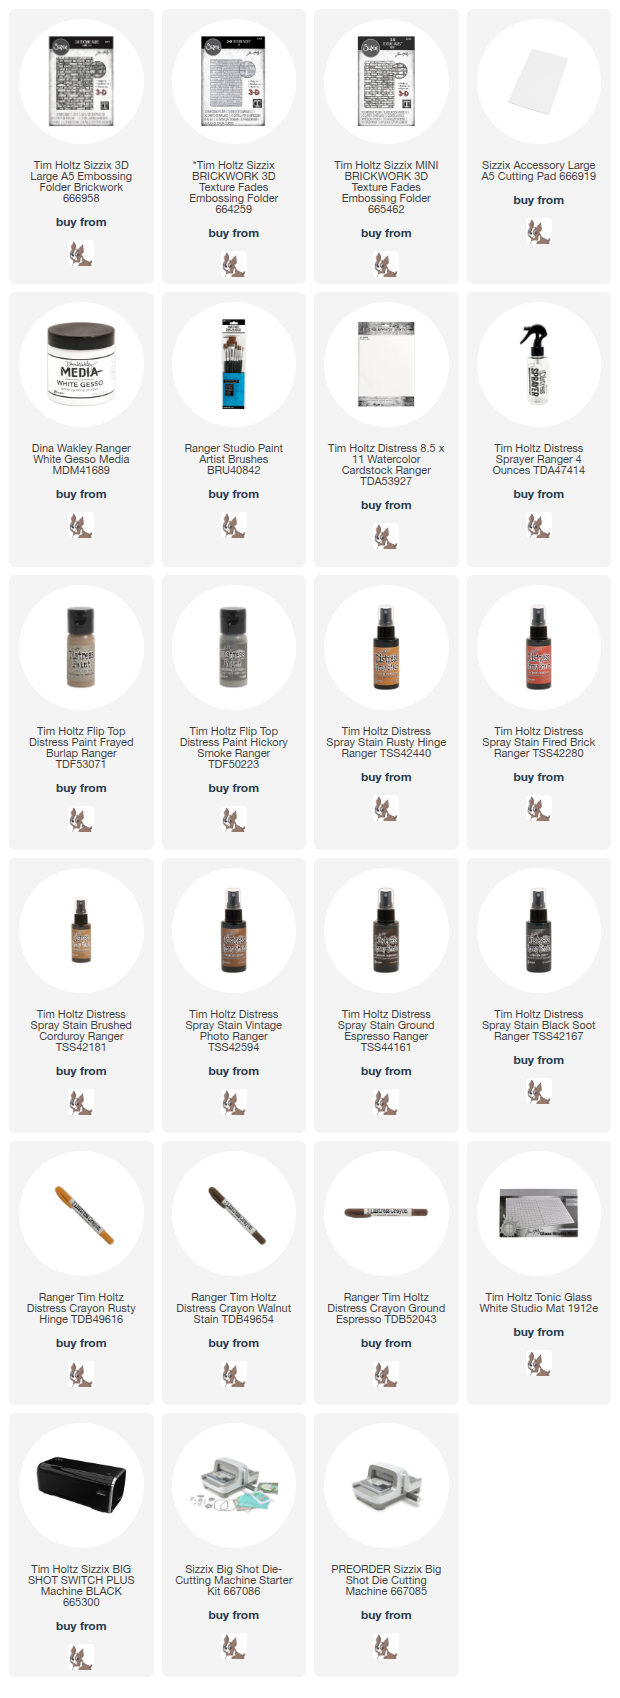
The products used to create this project are listed below. Thank you for supporting me by using my affiliate links to shop, at no cost to you. I really appreciate it.


Love, LOVE this!!! Thanks so much for creating a tutorial so we can try our hands at your amazing brick makes!!!
Fantastic Zoe!!
This is awesome! The brickwork is beautiful. Thanks for laying the steps out so clearly.
This is so amazing! I’m so thankful for generous people like you who share their techniques and kindness. I can’t wait to try this out!
Love this! Thank you so much for sharing and describing the process. Very inspiring.
Appreciate your work in prepping this tutorial for us! A lot of woman hours for sure. You’re the best!
Bettie Crawford
Yes, this is a great tutorial!! Thanks for being so generous!!
Great tutorial! TFS. Patience is key with this one.
Thank you for the tutorial. I just completed my first one that will be used on my grandson’s birthday card.
Zoe: thanks for the tutorial. I love making brick walls; however, yours are awesome . Love the white details. The color of bricks look so real. I’ll be practicing soon. Thanks again for this learning technique. Have a good day. It’s very hot n humid here in Riverton Illinois (central area). Corn is growing very high with the heat n rain
Wow Zoe, incredible great tutorial!
Your brickwork is stunning, all of them.
I don’t have the 3D folder but an older one from Tim and I will certainly try this with that folder.
Thank you so much for sharing, stay safe and have a wonderful day.
[…] Here are the brickwork panels in their various stages using the AMAZING Tim Holtz brickwork 3D embossing folder. I have a “how to” for this in a previous blog post. […]
these are so cool, thanks so much for sharing how you did it!
I am loving this tutorial and experimenting with different bases. Got the 3D folder today and can’t wait to try it!
Your work is stunning! Thank you so much for providing a tutorial!
Awesome! Thank you so much for sharing
As a beginner & new to your blog, your tutorial is amazing and gives me the confidence to try, try again! The results are so realistic. Thank you very much for sharing & I look forward to more tutorials.
Hi Zoe,
Thank you for this tutorial! When I put the gesso on it is white but after I leave it to dry, the distress spray bleeds into the gesso and turns it orange. Is there a way to avoid this? I cleaned the brush in between each line .
I’m having a problem with color bleeding through, not sure if I m not using the same gesso,or if I sprayed to much spray, that’s the only thing I notice,otherwise love it. Should I glaze it . Yours is beautiful.
Thanks, Zoe; just got my embossing folder yesterday. Still house/dog sitting and agonizing over the last week of baseball. Hope to start this next week
Thank you so much for this information! Us beginners need guidance on “how to”. So we don’t get totally lost! I love the bricks! Again Thank You!
Absolutely stunning. Such a clear and concise tutorial with such beautiful photos. Thanks so much for sharing.
These brick panels are super yummy!!! I am loving them. Thank you for sharing your technique!
Wow. These look fantastic, so realistic. Thanks for the tutorial.
Zoe! This is such a thorough tutorial. I just got the mini embossing folders for the new village set and can’t wait to try this. Thanks for sharing your talents!
Zoe’s brickwork for the win!!!! thanks, appreciate the time it took to make this tutorial….love it!
Wow!!! Thanks for the tutorial!! Great looking brickwork!!
Love this Zoe! I’m going to go for it!
Very clever and very creative….but that is your nature! Love the outcome even though it looks like a lot of work!
Amazing!! Thanks so much for the tutorial!!
Those are wonderful! Thanks for the step by step instructions.
Great results. Thank you for sharing your techniques.
Very cool! *Ü*
Wow! These are fantastic! Nicely done and Thank you for sharing
Fabulous tutorial! Many thanks for the detail info and wonderful pics!!! You have once again inspired me.
Awesome tutorial and product detail, thank you Zoe
Thanks for the fantastic tutorial!! Love your work!!
Caught Tim’s YouTube video today and he recommended for us to come check out your blog/ tutorial. Wow, what great makes with the brickwork folder. I just ordered them and appreciate you clear instructions to get the same look. Thank you for sharing your makes. Wonderful job.
Saw Tim’s video and came right over to check out how to do this amazing brickwork. Thank you for the detailed how to! Cannot wait to do this! Happy Halloween!
Amazing what you have created. Thank you for sharing your technique and “recipes” for creating the various effects. SO inspiring.