‘Tim Holtz’ Category

  1. Brushstroke Flowers Mini

    24th March, 2023 by iGirlZoe

    igirlzoe: tim holtz sizzix 2023 everyday collection tailored brushstroke flowers mini bunny stitch

    Hello friends, hope you’re doing well. I can’t believe it’s already been 3 months since Tim Holtz released his incredible 2023 Sizzix Everyday Collection, the year is flying past. I’m getting into some more Spring and Easter makes and wanted to share a tag I made using dies from the 2023 collection. You can see the Launch and inspiration makes, plus demo over on Tim’s blog.

    igirlzoe: tim holtz sizzix 2023 everyday collection tailored brushstroke flowers mini bunny stitch
    I’ve seen quite a few questions in the Tim Holtz Addicts group about the Brushtroke Flowers Mini thinlits dies, mostly how to assemble them. As I was starting to make some for upcoming makes, I thought I would do some assembly step outs in the hopes that it will help. They are really fun to make and really easy once you’ve had a run or 2 at them. Details later in the post…

    igirlzoe: tim holtz sizzix 2023 everyday collection tailored brushstroke flowers mini bunny stitch
    First I wanted to add bunny ears to a hat because Easter wouldn’t be Easter without bunny ears and a top hat! I die cut a bunny from the Bunny Stitch thinlits set and inked with distress and cut down, leaving enough to attach the ears to the hat. I used the Framed Tags thinlits die set to create my tag, stamped with the background from The Professor 2 stamp set, in distress archival ink.

    igirlzoe: tim holtz sizzix 2023 everyday collection tailored brushstroke flowers mini bunny stitch
    I cut a hat and jacket from the Tailored thinlits die set and inked with distress. I added “x’s” from the Bunny Stitch thinlits die set for a patched up look.

    igirlzoe: tim holtz sizzix 2023 everyday collection tailored brushstroke flowers mini bunny stitch
    I cut idea-ology black kraftstock with the Alphanumeric Thin thinlits die set and added it to the background using distress collage medium and the squeezers from Tim’s Sizzix Shaping Kit Making Tool set.

    igirlzoe: tim holtz sizzix 2023 everyday collection tailored brushstroke flowers mini bunny stitch
    I used the shaping tool from this set to shape the flowers and foliage. I LOVE this shaping tool, it’s so incredibly easy to use and the dimensional effect you get is awesome. Tim has a great demo using it on his blog.

    igirlzoe: tim holtz sizzix 2023 everyday collection tailored brushstroke flowers mini bunny stitch
    I used the Brushstroke Flowers Mini thinlits to create this gorgeous grungy bouquet. I was sent some 3D foam adhesive squares from Simon Says Stamp to use and I am sold! They come in large and small square foams, in 2 different depths and in black, white or a mixed pack. I used the small less deep squares under my hat and jacket and the deeper small squares under some of the flowers so they retained their shape.

    igirlzoe: tim holtz sizzix 2023 everyday collection tailored brushstroke flowers mini bunny stitch
    Now for the how to put them together part and it’s as easy as 1, 2, 3! You will see below each die has 3 photos, working from left to right.
    Die Cut (1), Ink (2), Assembled (3).

    igirlzoe: tim holtz sizzix 2023 everyday collection tailored brushstroke flowers mini bunny stitch
    igirlzoe: tim holtz sizzix 2023 everyday collection tailored brushstroke flowers mini bunny stitch
    igirlzoe: tim holtz sizzix 2023 everyday collection tailored brushstroke flowers mini bunny stitch
    igirlzoe: tim holtz sizzix 2023 everyday collection tailored brushstroke flowers mini bunny stitch
    igirlzoe: tim holtz sizzix 2023 everyday collection tailored brushstroke flowers mini bunny stitch
    I hope this helps make assembly easy for you and will encourage you to have a go if you haven’t already. And please remember, there are no hard and fast rules, so if you’re left with a piece and don’t care, toss it!

    igirlzoe: tim holtz sizzix 2023 everyday collection tailored brushstroke flowers mini bunny stitch
    Thanks for stopping by and let me know if you have any questions.
    Zoe


    affiliate links used at no cost to you


  2. Tim Holtz Rotary Media Trimmer

    23rd March, 2023 by iGirlZoe

    igirlzoe: tim holtz Tonic Rotary Media Trimmer idea-ology 2023

    Hello friends, hope you’re well, nearly weekend! I recently received a Tim Holtz Rotary Media Trimmer and I wanted to let you know what I thought. I’m not going to go through all of the features because I think Tim more than covered that during the LIVE, so I highly recommend you watch that as Tim shares a lot of education during his demos.

    igirlzoe: tim holtz Tonic Rotary Media Trimmer idea-ology 2023
    I have to be honest, I’ve never had much luck with rotary trimmers. They wouldn’t cut straight, but would always cut me when it came time to change the blade, which was expensive and often difficult to find. BUT… this being a Tim Holtz designed Rotary Trimmer, I knew it was going to knock my socks off, and of course it did and here’s why it did…

    igirlzoe: tim holtz Tonic Rotary Media Trimmer idea-ology 2023
    First and most importantly, it cuts straight, and I can spot a crooked line a mile away without my glasses. I am not a fan of crooked and I hate nothing more than a trimmer that won’t cut a straight line! Now don’t be fooled by the blade carriage wobble. I touched that thing and it wobbled and I wondered how I was going to politely tell Tim it sucked! LOL But you gently press that blade carriage and it engages and you will get the straightest cut even on the thinnest paper strips. Also you don’t have to change the blade but in case you feel compelled to, there is a replacement blade carriage and even comes with the tool you need to change it!

    igirlzoe: tim holtz Tonic Rotary Media Trimmer idea-ology 2023
    I need to trust that I’m going to get a straight cut because I almost always trim what I make at the end. Having put all the love and time into a make, you need to trust your tools. I didn’t even hold my breath, I cut with total confidence! If you have one, you’ll know. If you get one, you’ll see what I mean.

    igirlzoe: tim holtz Tonic Rotary Media Trimmer idea-ology 2023
    Look at the tiny paper strands it cut. It cut through 2 sheets of distress mixed media heavystock covered in idea-ology backdrop papers, collage paper, ephemera, glue, texture paste and remnant rubs. It glided through effortlessly.

    igirlzoe: tim holtz Tonic Rotary Media Trimmer idea-ology 2023
    I also wanted to see how it would trim some of the things I use in my makes that I would want a straight cut for, one of them being the idea-ology filmstrip.

    igirlzoe: tim holtz Tonic Rotary Media Trimmer idea-ology 2023
    Perfect cuts and easy like a hot knife through buttah! It cuts through idea-ology transparencies and other acetate easily too.

    igirlzoe: tim holtz Tonic Rotary Media Trimmer idea-ology 2023
    I’m a big fan of the Traveler’s Company, traveler’s notebooks and wanted to create a few inserts to add to my notebook. Creating a cover from the large sheets of distress mixed media heavystock, which easily fit in the generous sized 12.5 inch (31.5cm) trimmer.

    igirlzoe: tim holtz Tonic Rotary Media Trimmer idea-ology 2023
    I use copy paper for inside the notebook insert and easily trimmed 10 sheets at a time. It made it so quick and simple.

    igirlzoe: tim holtz Tonic Rotary Media Trimmer idea-ology 2023
    I was so happy adding it into my traveler’s notebook. I can’t wait to make more of these now.

    igirlzoe: tim holtz Tonic Rotary Media Trimmer idea-ology 2023
    I haven’t used another trimmer since I took this out of the box. It’s lightweight and strong, easy to carry, looks good and doesn’t take up a huge footprint on your desk. It glides when it cuts and makes this really cool swoosh swoosh sound! You can tell I LOVE it right?! I can’t recommend this enough, it ROCKS… but only until you engage the blade! 😉

    I’ve added a few more photos and details of the idea-ology I used on the traveler’s notebook insert below…

    igirlzoe: tim holtz Tonic Rotary Media Trimmer idea-ology 2023
    I cut distress mixed media cardstock to create the cover of my traveler’s notebook insert. Covering with the new idea-ology photographic collage paper and paper from the backdrops volume 4 and 5 packs. Adding some distress opaque crackle paste through a mini stencil and covering with distress collage medium and walnut stain distress crayon. I added one of the photomatic photos with the border removed. I LOVE these!

    igirlzoe: tim holtz Tonic Rotary Media Trimmer idea-ology 2023
    I added the idea-ology filmstrip with glossy accents over some palette collage paper.

    igirlzoe: tim holtz Tonic Rotary Media Trimmer idea-ology 2023
    Remnants rubs for the win! Adding the remnant rubs to my make is my favorite part. It brings it to life! I also added trims design tape and labels from the classic labels stickers, all from idea-ology.

    igirlzoe: tim holtz Tonic Rotary Media Trimmer idea-ology 2023
    I love this piece from the idea-ology 2023 ephemera pack. I added it to the bottom of my insert cover with distress collage medium and a piece on top from the collage strips pack cut with the trimmer.

    igirlzoe: tim holtz Tonic Rotary Media Trimmer idea-ology 2023
    Thanks for stopping by and let me know if you have any questions.
    Zoe


    affiliate links used at no cost to you


  3. idea-ology File Cards

    21st March, 2023 by iGirlZoe

    igirlzoe: tim holtz idea-ology 2023

    Hello friends, hope your week is off to a great start. In my last post I shared my science experiment tray and today I’m sharing the idea-ology file cards that were part of that make. You can see the idea-ology 2023 products, LIVE replay and inspiration makes over on Tim Holtz blog.

    igirlzoe: tim holtz idea-ology 2023
    I was inspired by all the incredible paper and ephemera that is part of this new idea-ology 2023 line and wanted to add a paper element to my science experiment tray.

    igirlzoe: tim holtz idea-ology 2023
    I created a compartment at the back of the vignette tray out of etcetera thickboard trims covered with backdrops volumes 4 and 5 papers for the file cards to sit in. You can see all the details of the science experiment tray on my other post.

    igirlzoe: tim holtz idea-ology 2023
    I love that idea-ology helps you tell a story and this was the perfect way to continue mine. Let’s get into details…

    igirlzoe: tim holtz idea-ology 2023
    Using idea-ology file cards I created scientist identification cards and experiment notes. I trimmed the index cards slightly to fit inside the pockets. The folded card in this pack perfectly fit onto the back of the pocket and I added some ephemera inside the pocket for visual interest when the index cards are out.

    igirlzoe: tim holtz idea-ology 2023
    Side view: pocket on top, folded card behind, index card inside the pocket with tab showing (all from idea-ology file cards pack).

    igirlzoe: tim holtz idea-ology 2023
    This is one of my favorite photos from the idea-ology snapshots volume 2 pack. I had already seen the “The Chemistry Club” sticker from the clippings stickers and this photo just perfectly matched the story. I covered a pocket from the file cards pack with palette collage paper. The photo covers the blocks of color on the collage paper but I love that you can see the numbers and writing peeking out around the edges. I wrapped a label from the ephemera set around the front with some remnant rubs added.

    igirlzoe: tim holtz idea-ology 2023
    I added a spoon from the idea-ology silverware pack to the front of the file cards. Covered it in foundry wax and once heated and COOLED, I rubbed distress crayon over the top and then dry brushed black soot paint over the top of that. I added a piece of ephemera and a little more distress crayon. I was really pleased with how this turned out.

    igirlzoe: tim holtz idea-ology 2023
    I absolutely love idea-ology photomatics and they were perfect for my scientist identification cards. I used the index cards from the idea-ology file cards pack, adding ephemera, design tape trims, remnant rubs and clippings stickers to tell the story of scientist Dr Schuyler.

    igirlzoe: tim holtz idea-ology 2023
    I used one of the cards from the idea-ology file cards pack to create the scientists notes. Gluing paper from the backdrops volume 4 paper pack and scored the center to break the paper so the booklet closed easily. I added pieces from the layers, transparencies and ephemera packs. I also added some more remnant rubs, design tape trims and clippings stickers.

    igirlzoe: tim holtz idea-ology 2023
    I glued scientists notes card to the back of the pocket and then decorated the back of the card with paper, ephemera and remnant rubs. I used the new distress sanding disks and mini round blending tool to sand the large numbers. I then used the blending tool with blending foam to blend in a little distress ink over the scuffed sections.

    igirlzoe: tim holtz idea-ology 2023
    I decorated the front of the second pocket. That gorgeous grunge is part of the backdrops volume 4 paper pack that I used to cover the front of the pocket. I love using ephemera to tell a story.

    igirlzoe: tim holtz idea-ology 2023
    I used the clippings stickers to name my scientists and the remnant rubs to continue the story. The tickets and postal stamps give an element of travel to the cards. Meet Dr Adeline, she is a founding member of The Chemistry Club.

    igirlzoe: tim holtz idea-ology 2023
    This was my favorite spread from my file cards. I love that pop of orange from the piece from the layers ephemera and that gorgeous transparency. I used distress collage medium underneath the butterfly to attach the transparency without the glue showing. I added remnant rubs, design tape trims and ephemera to build the story.

    igirlzoe: tim holtz idea-ology 2023
    I love this paper from the backdrops paper pack. I used tape from the trims design tape up the side which perfectly matched and some more ephemera and remnant rubs. I really love those larger number rubs and it’s worth picking up an idea-ology remnant rub tool, and some extra remnant rubs.

    igirlzoe: tim holtz idea-ology 2023
    On the back of the index cards I added paper from the backdrops volume 4 and 5 paper packs, ephemera, layers, design tape trims and remnant rubs over the top. I love the collage strips because you can trim them into individual strips and they make fantastic ephemera pieces and I love adding he remnant rubs last to bring it all together.

    igirlzoe: tim holtz idea-ology 2023
    The scientist identification cards, pockets and experiment notes were ready to be pulled together into a collection and that’s when I had an idea to make a strap. This was inspired by the very first ever craft class that I took in Coventry with Tim Holtz. We made an awesome tag booklet and were given these cool buckles and some measurement tape to make a strap and I wanted to recreate the look using ephemera.

    igirlzoe: tim holtz idea-ology 2023
    I glued on pieces of ephemera from the collage strips pack onto seam ribbon and added a good layer of distress collage medium over the entire strap, setting aside to dry overnight. I then stitched along the center of the strap and added an idea-ology buckle onto the end. These buckles were retired some time ago but are still available from retailers if you look for them.

    igirlzoe: tim holtz idea-ology 2023
    Thanks for stopping by and let me know if you have any questions.
    Zoe


    affiliate links used at no cost to you


  4. Tim Holtz idea-ology 2023

    16th March, 2023 by iGirlZoe

    igirlzoe: tim holtz idea-ology 2023

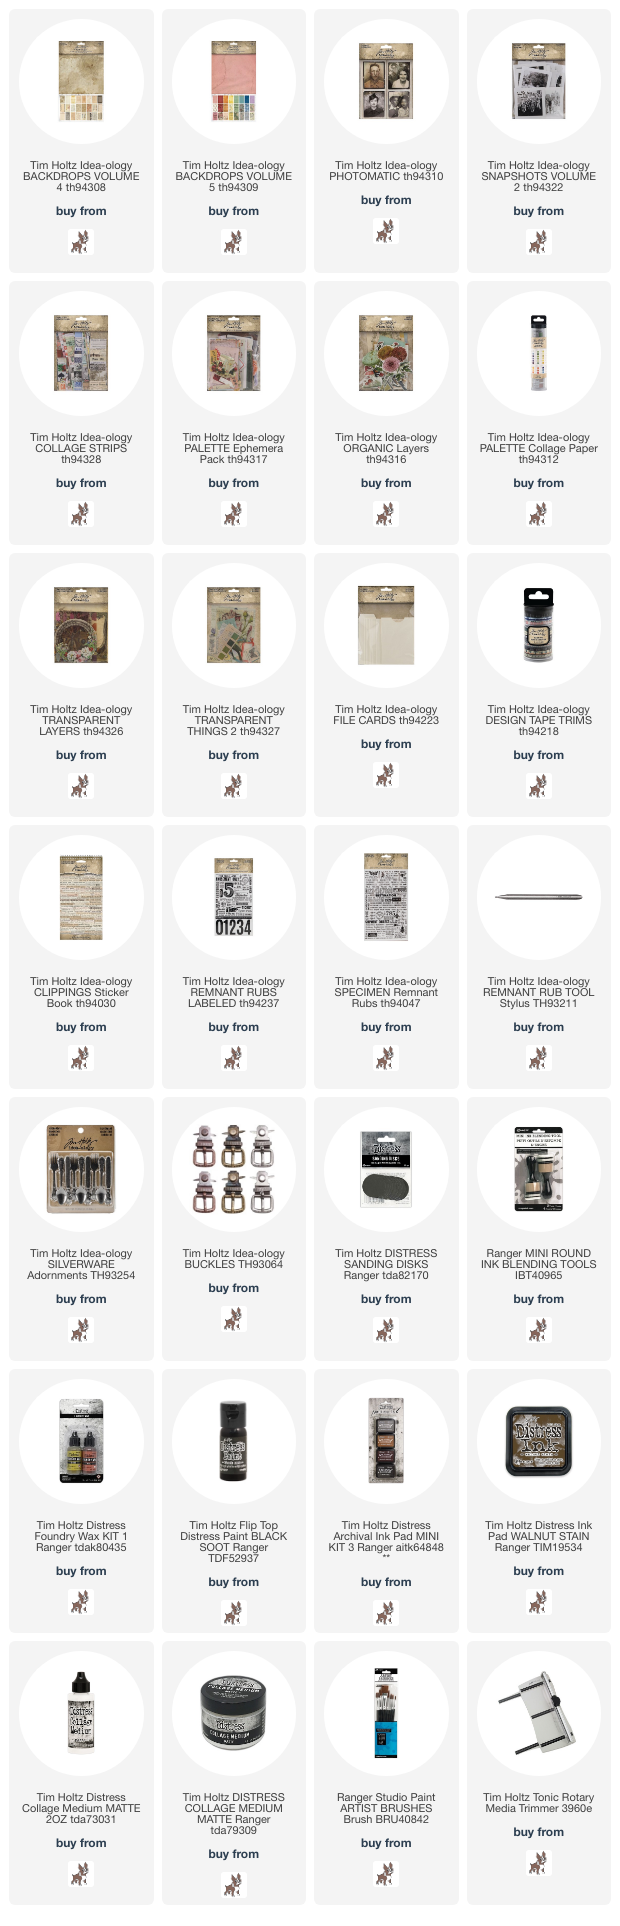
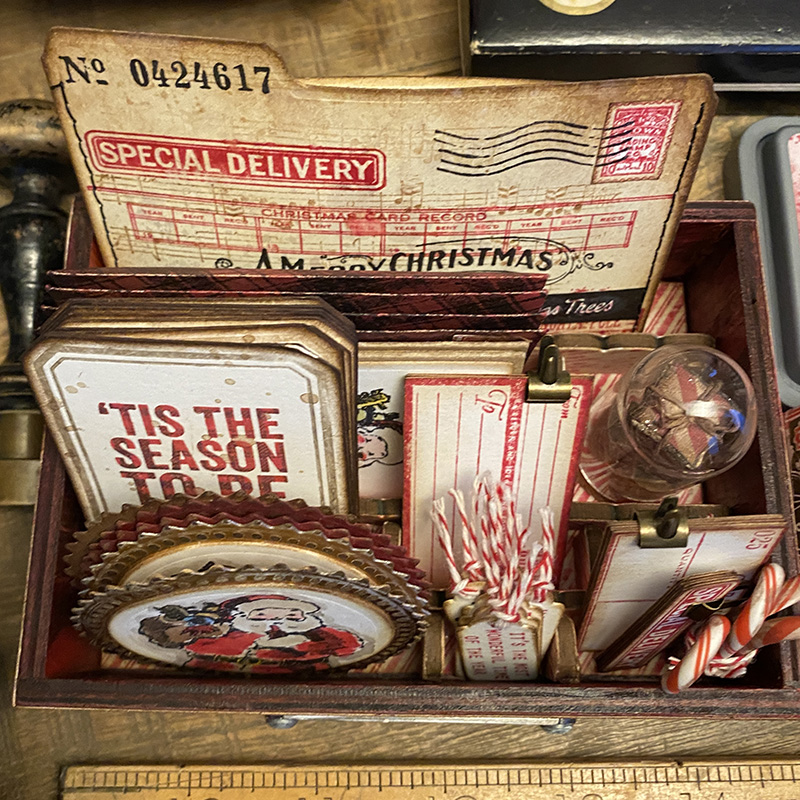
    Hello friends I hope you’re doing well and loving the new 2023 idea-ology products. Whether you’re a colorful rainbow lover, or grunge lover (like me), there’s something for you. You can watch the LIVE replay and see the full product range and inspiration makes over on Tim Holtz blog.

    igirlzoe: tim holtz idea-ology 2023
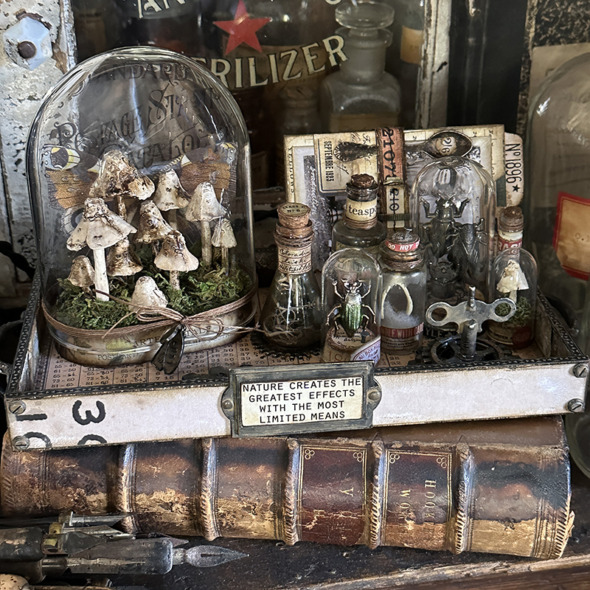
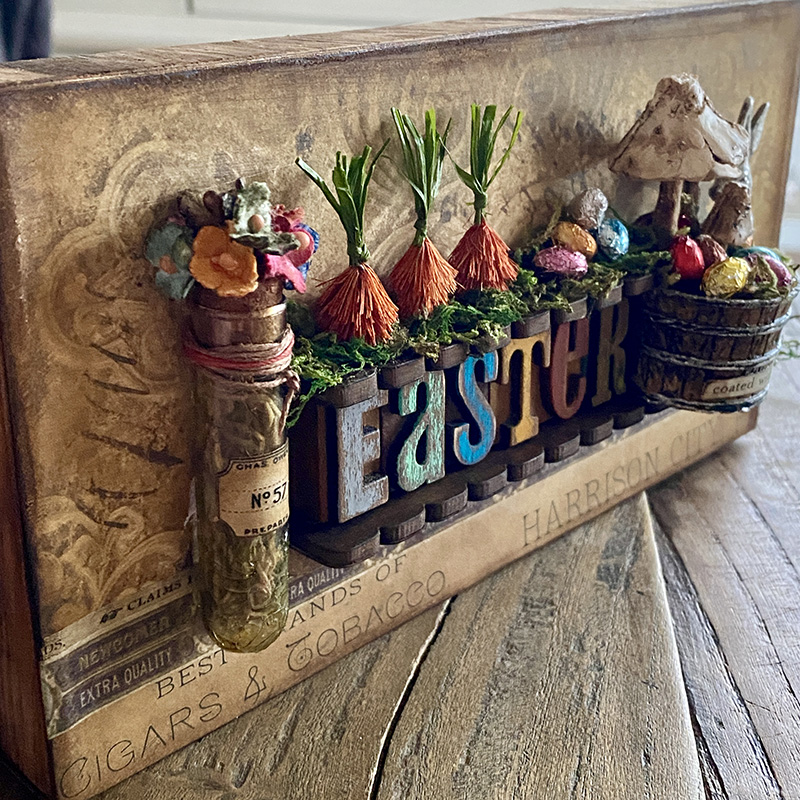
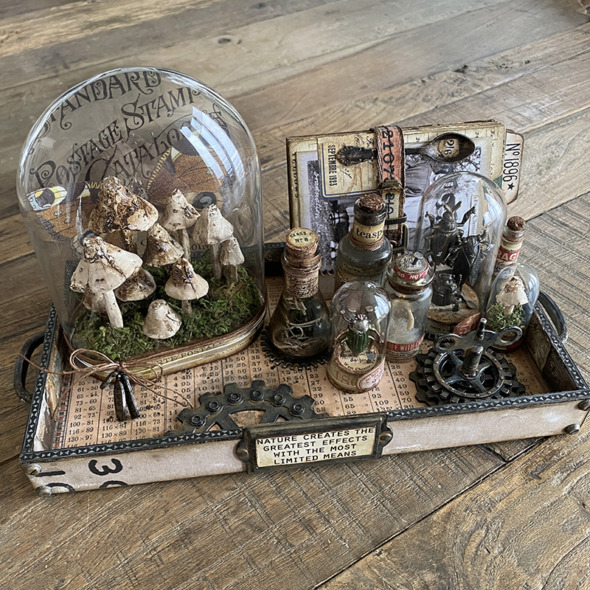
    I was inspired to make with the new idea-ology Reliquary Dome from the moment Tim showed it to us. I love a good dome and having another, larger and differently shaped dome… well yes please. I decided to make something for me, to put in my apartment that would fit the vintage aesthetic. Let’s get into some of the details…

    igirlzoe: tim holtz idea-ology 2023
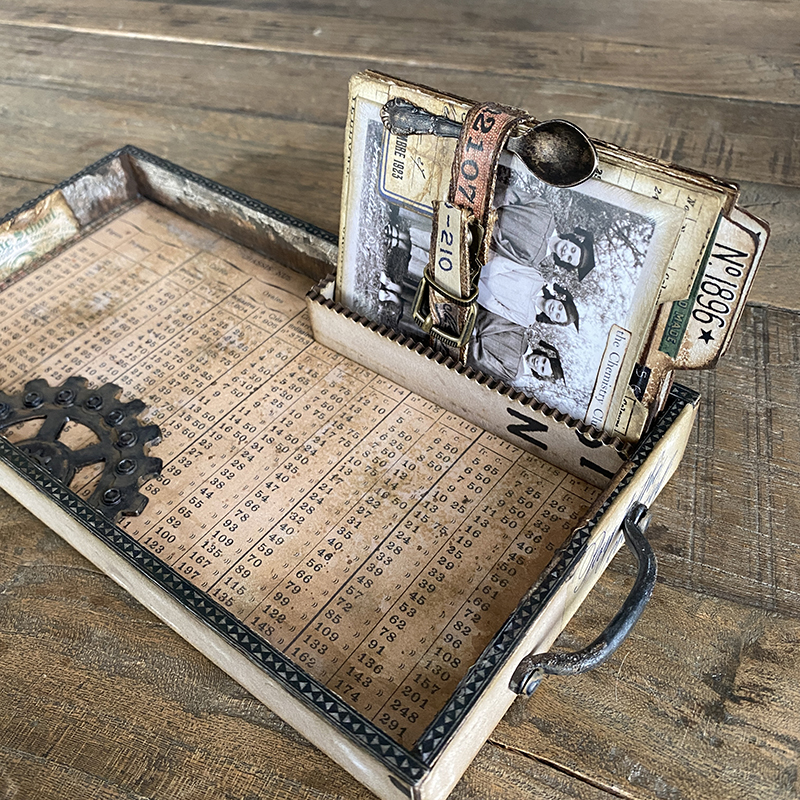
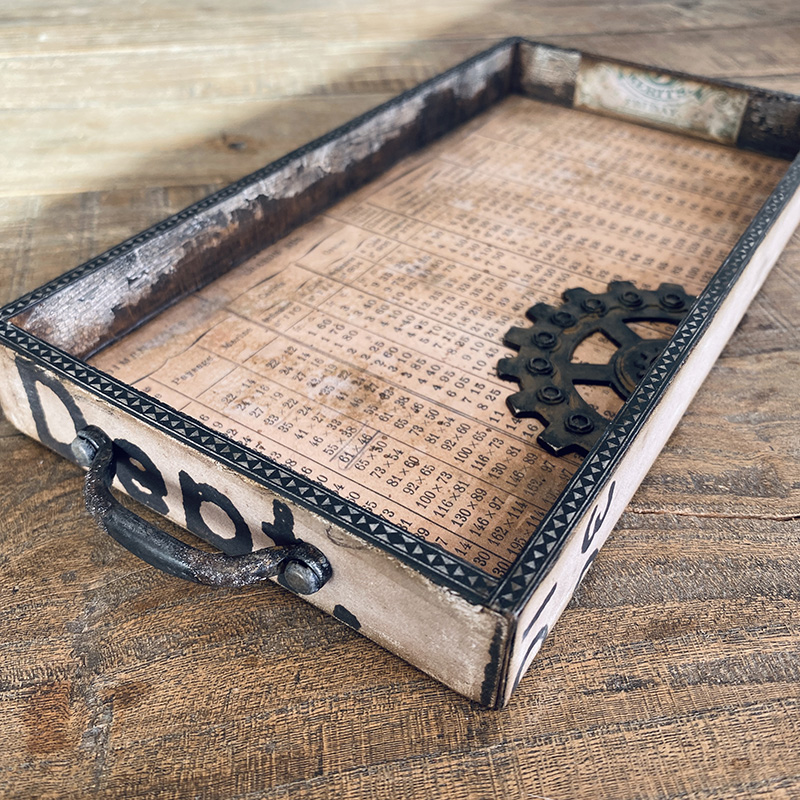
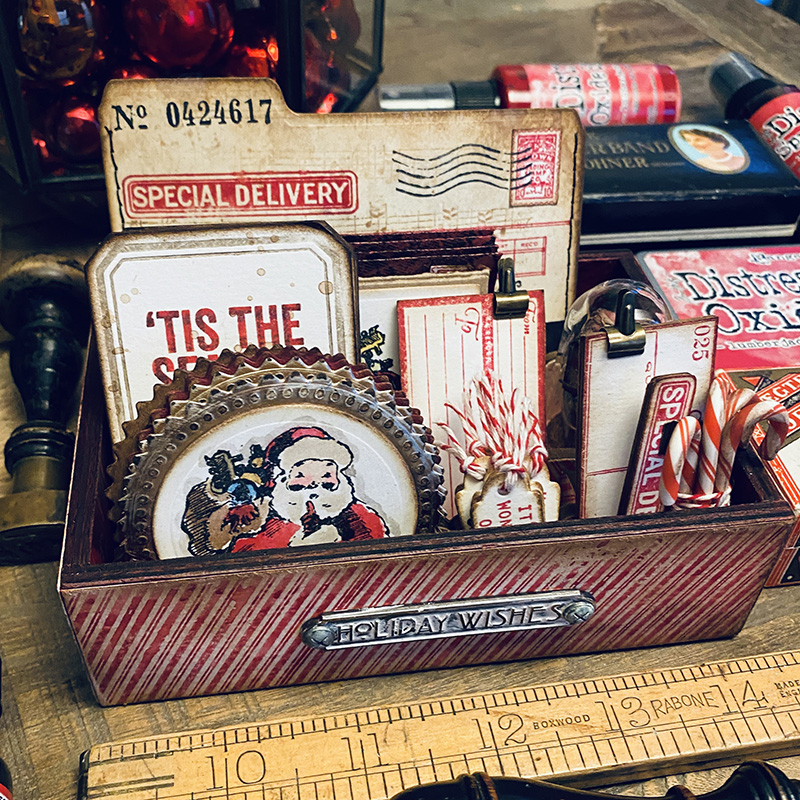
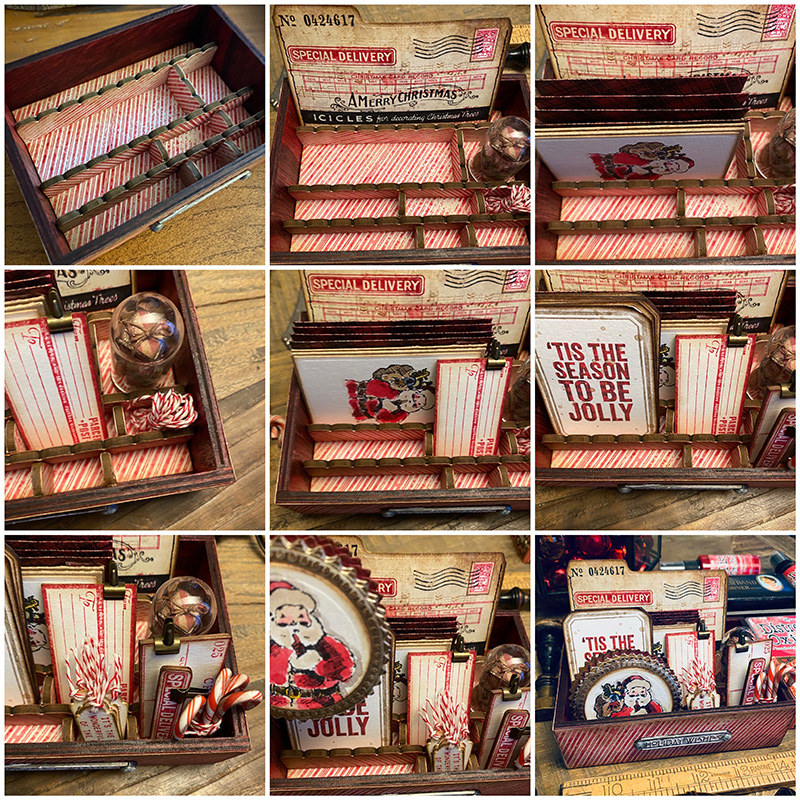
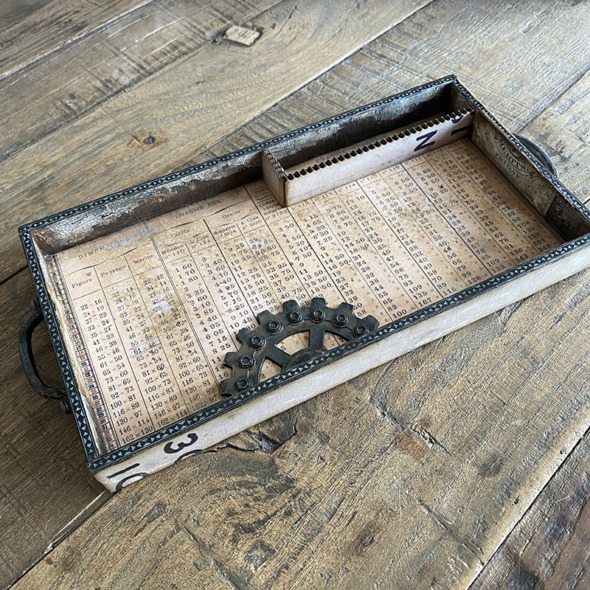
    Taking a small vignette tray and covering the inside base and sides with papers from the idea-ology backdrops Volumes 4 and 5 paper packs. I used the new large fasteners to attach handles from the mini hardware pulls set to the sides of the vignette tray! Thanks to Paula Cheney for her creative “what about” input on the handles and making it into an actual tray!

    igirlzoe: tim holtz idea-ology 2023
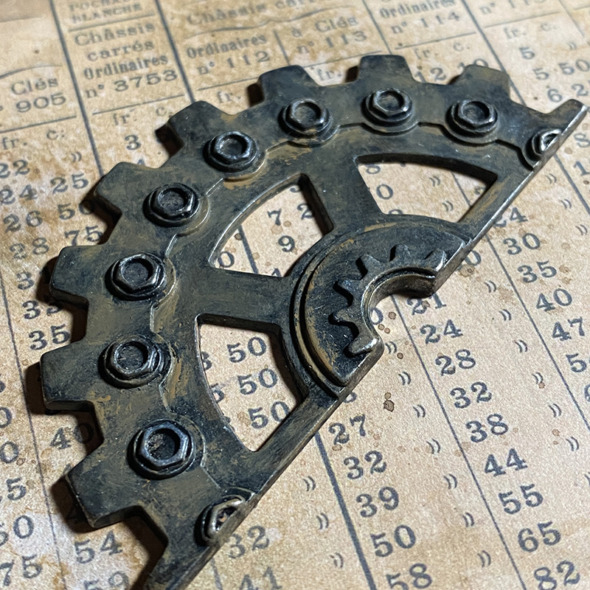
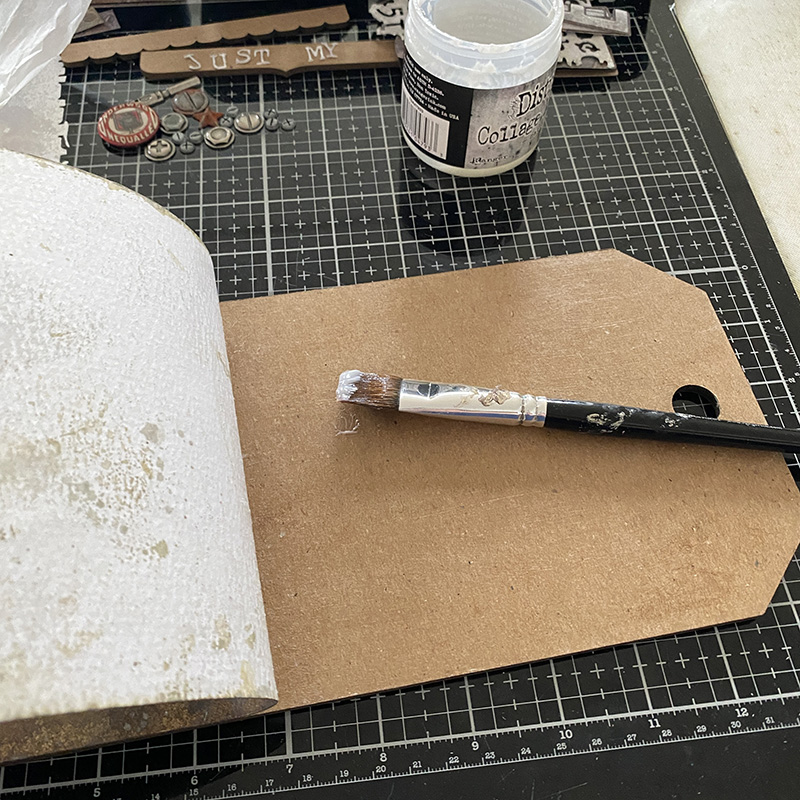
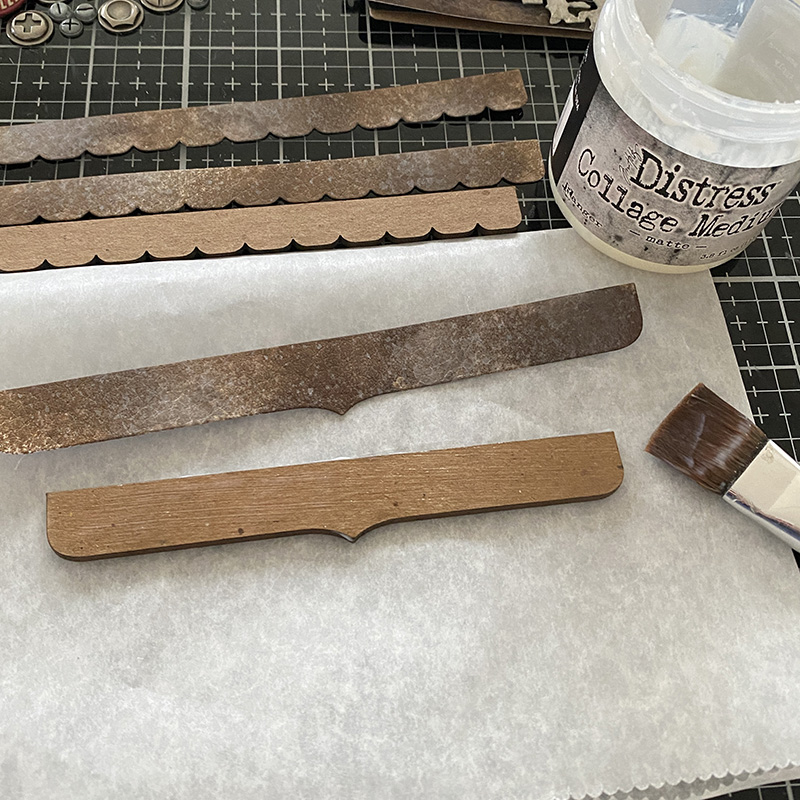
    I love how detailed the idea-ology industrial gears are. I covered with layers of black soot and vintage photo distress paints to create an aged rusty look before adding to the base of the tray with distress collage medium. This is my “go to” glue which I used throughout this make.

    igirlzoe: tim holtz idea-ology 2023
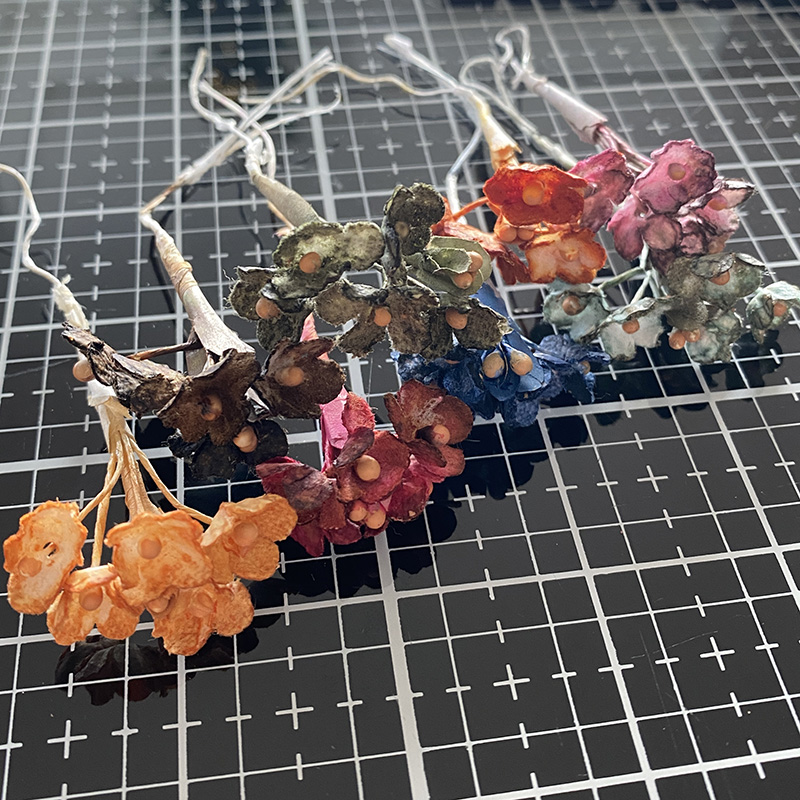
    Next I added pieces of ephemera from the palette ephemera pack to the inside sides of the vignette tray and added distress crayon over dried distress opaque crackle paste. I added idea-ology trim design tape around the top edge of the vignette tray. I love this trim tape and how narrow it is, making it really easy to add to vignette trays and boxes.

    igirlzoe: tim holtz idea-ology 2023
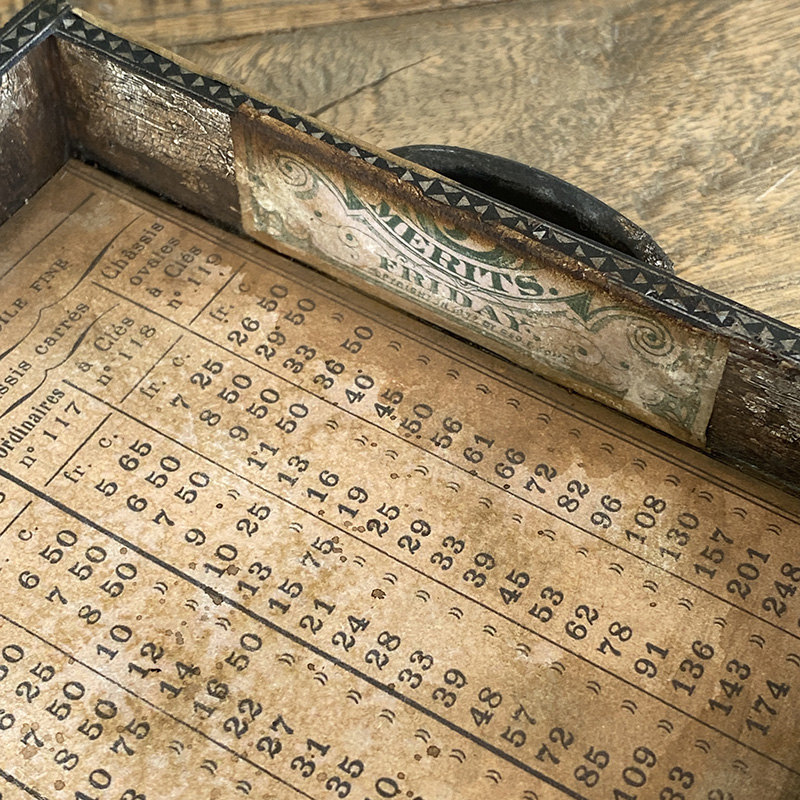
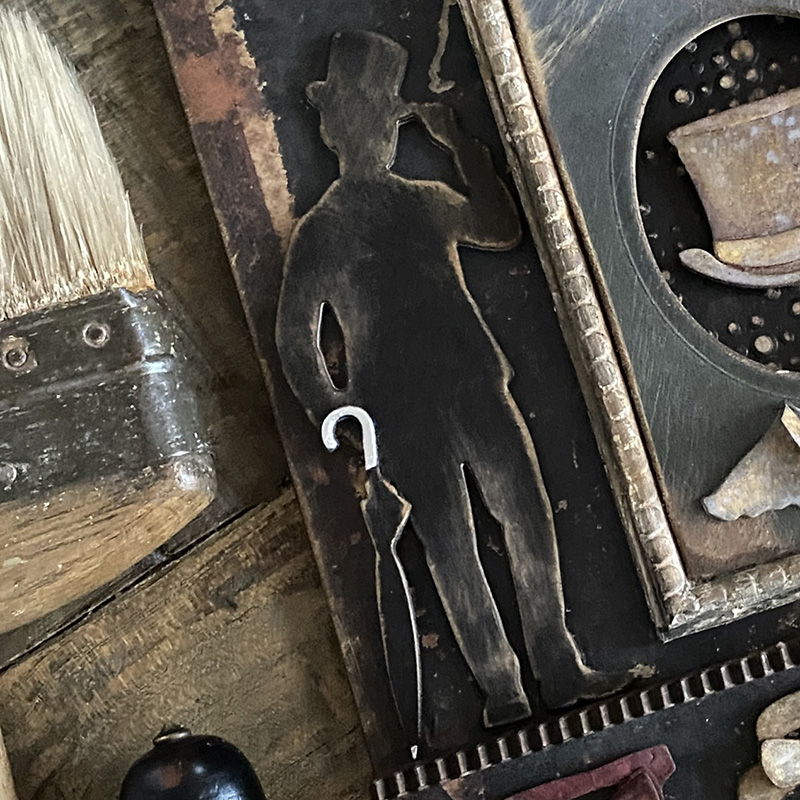
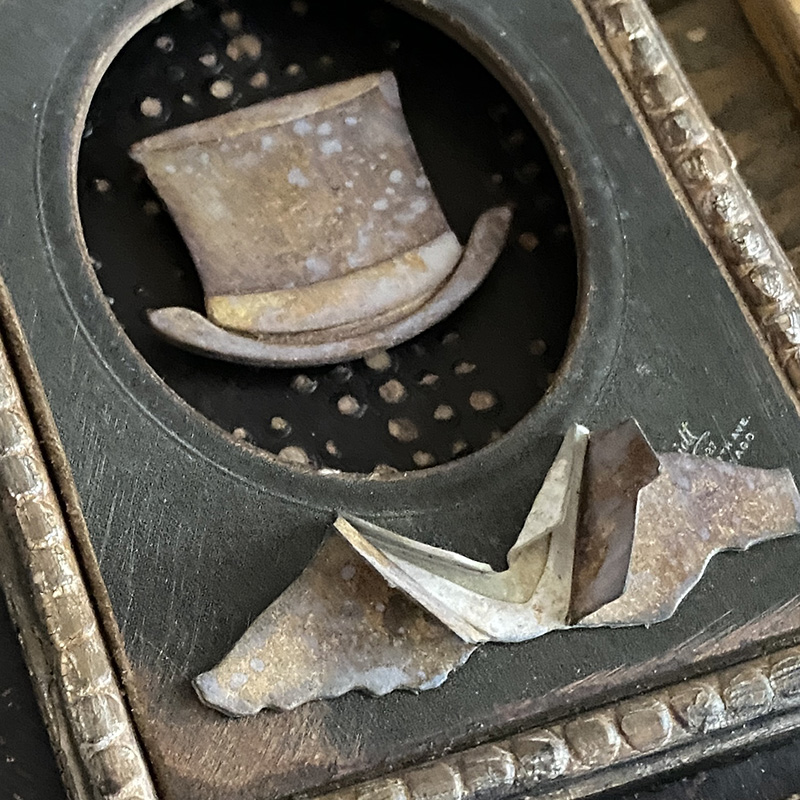
    The idea-ology line is perfect for telling a story and this piece of ephemera from the organic layers pack did just that. It’s on the back of the tray but I know it’s there and it makes me smile. If you know you know!

    igirlzoe: tim holtz idea-ology 2023
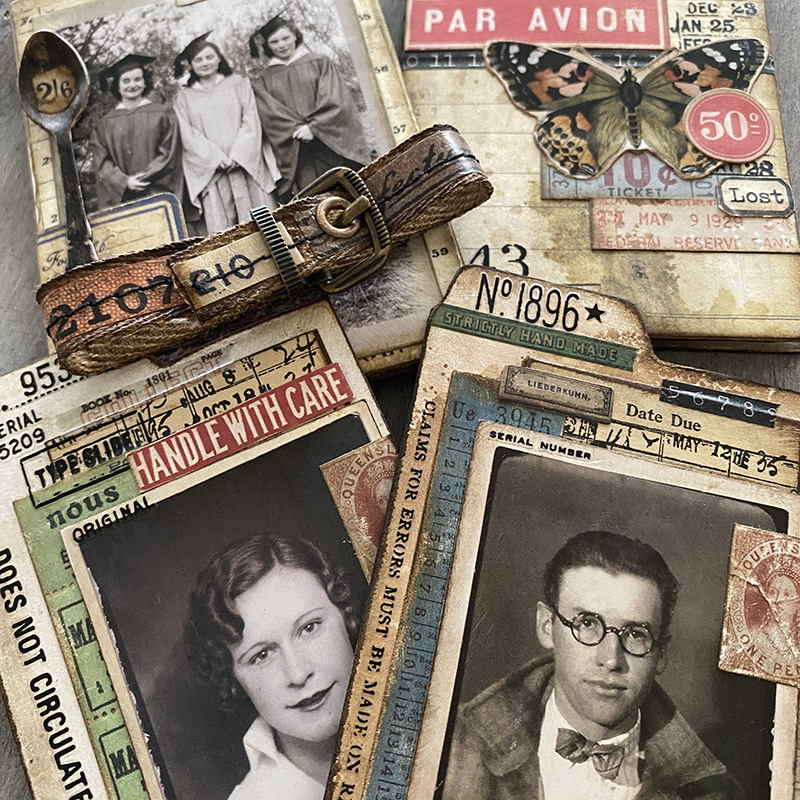
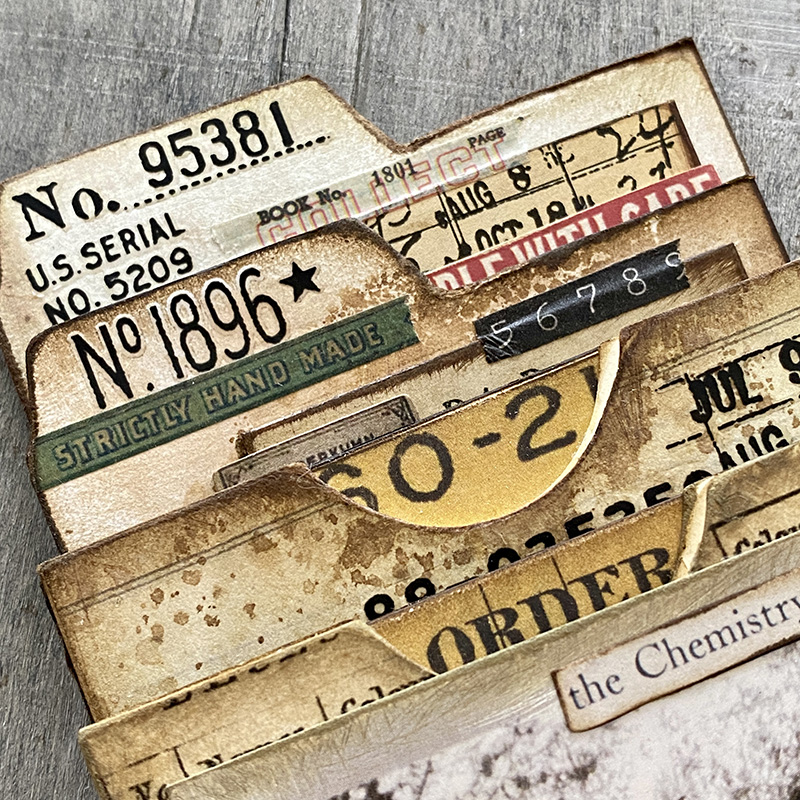
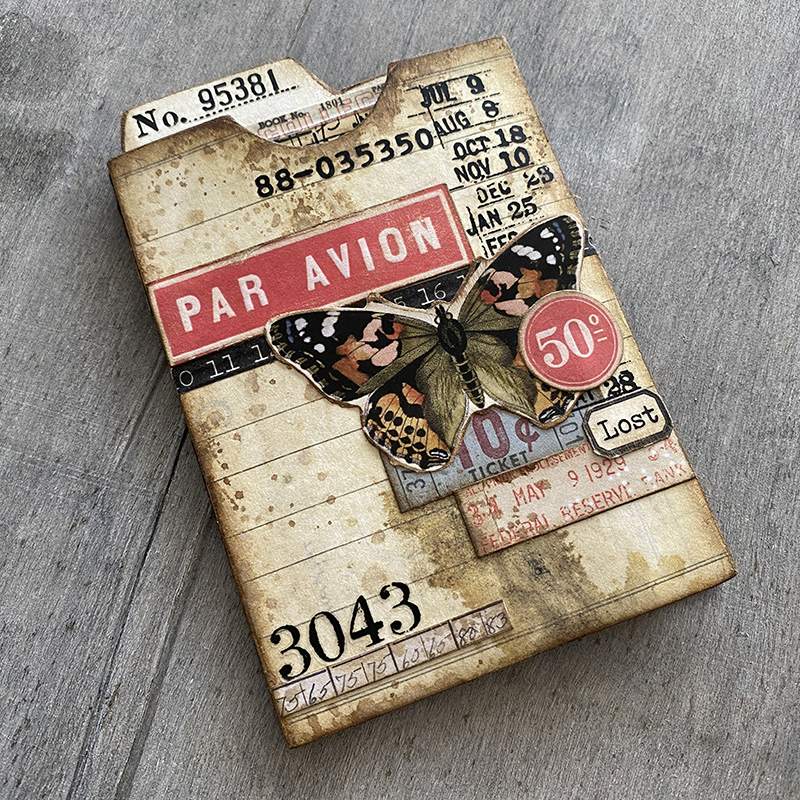
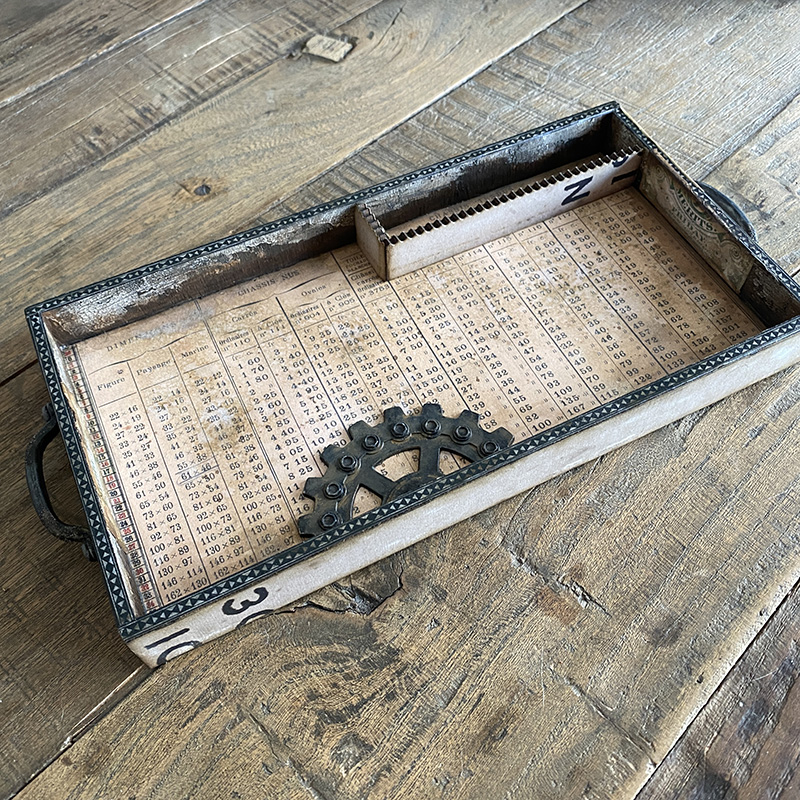
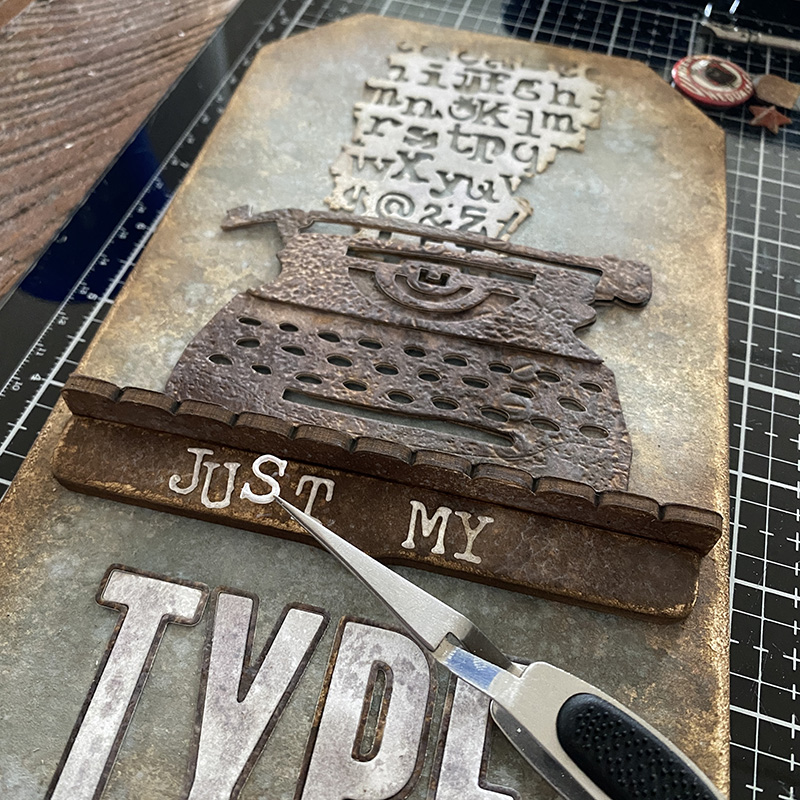
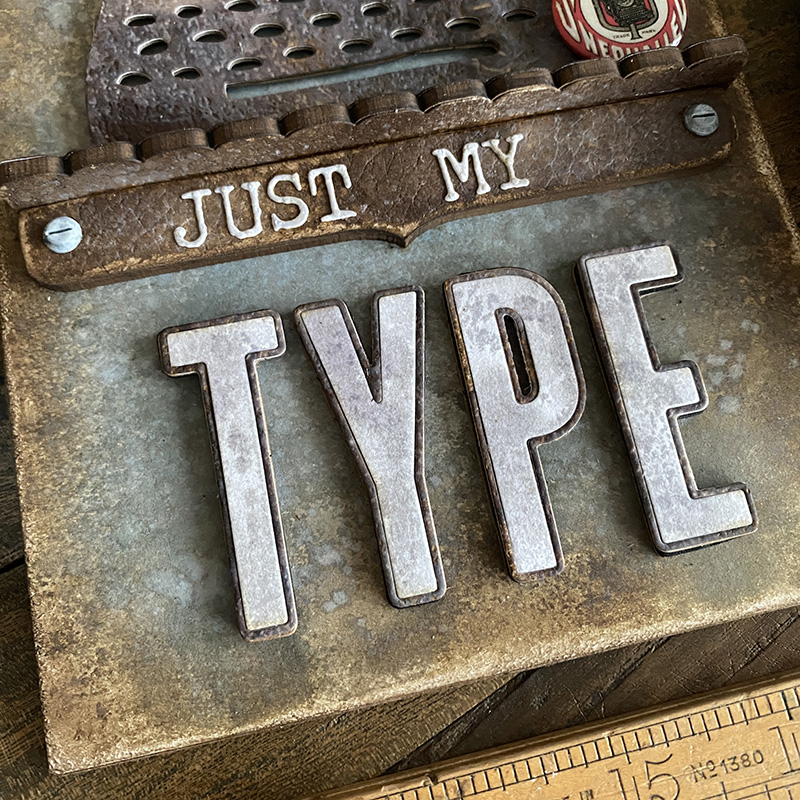
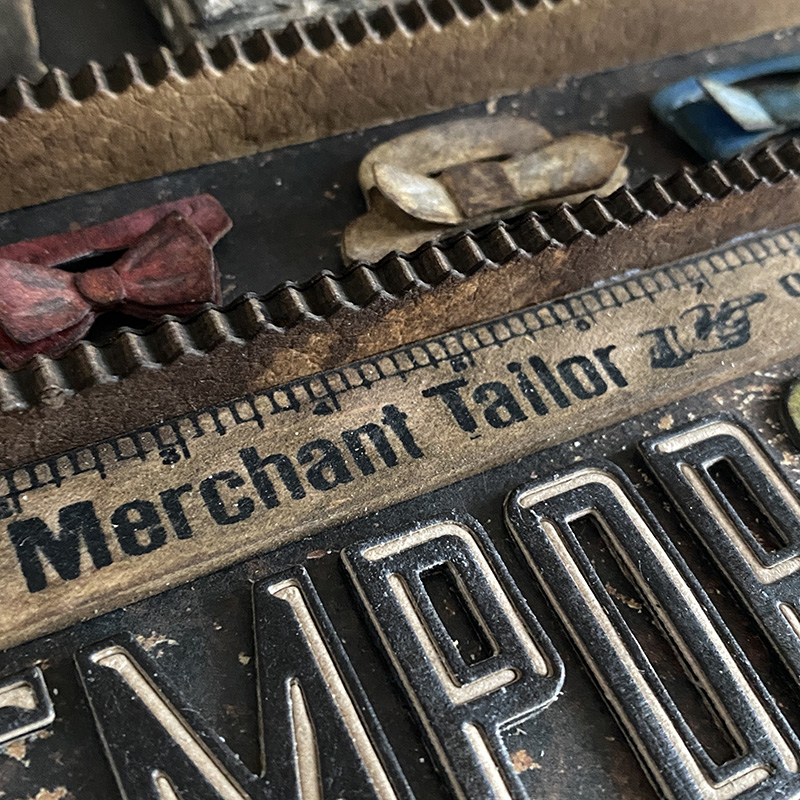
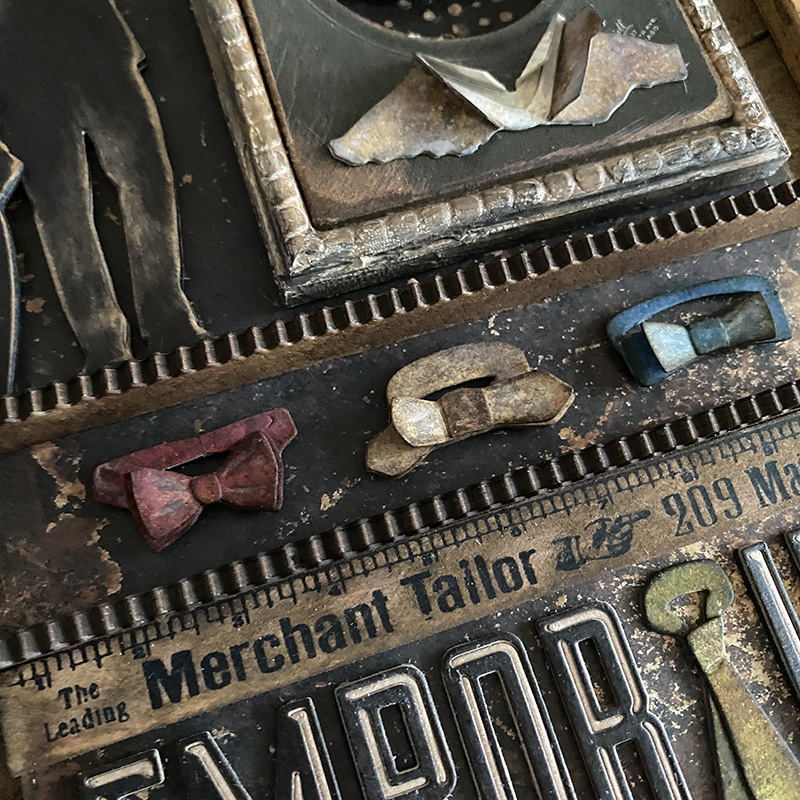
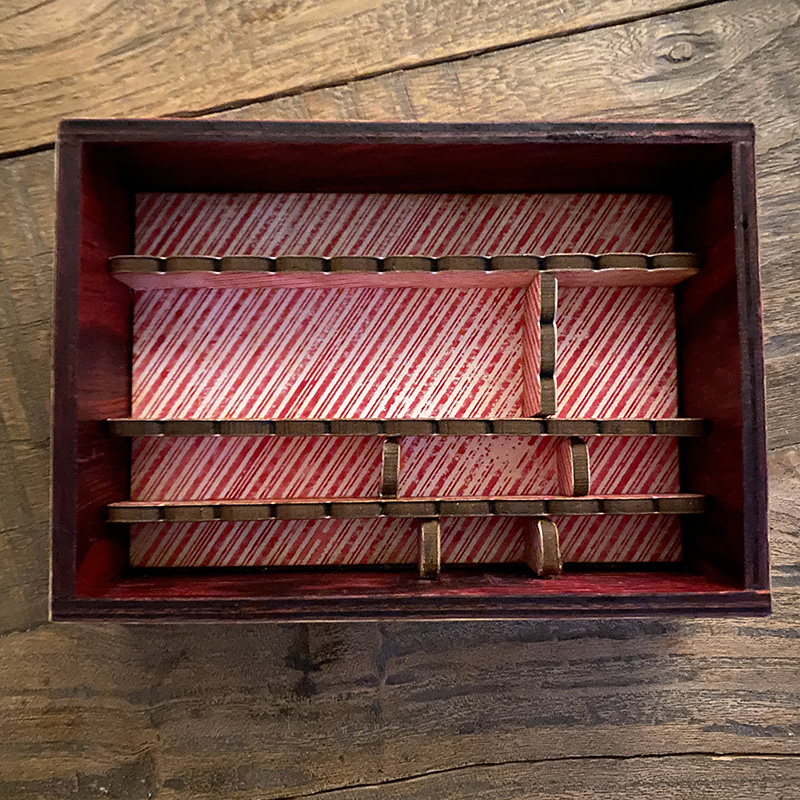
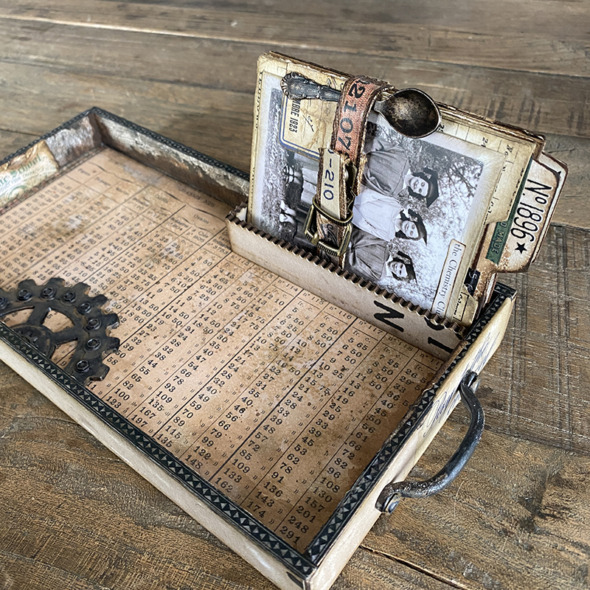
    I used the etcetera thickboard trims to create a compartment for my file cards and matching decorative trims thinlits dies to cut backdrops papers to match the outside of the tray. I use my Tim Holtz scissors to cut the thickboard trims to size and love having the dies to match as it makes it so quick and easy to decorate. I glued into place with distress collage medium.

    igirlzoe: tim holtz idea-ology 2023
    igirlzoe: tim holtz idea-ology 2023
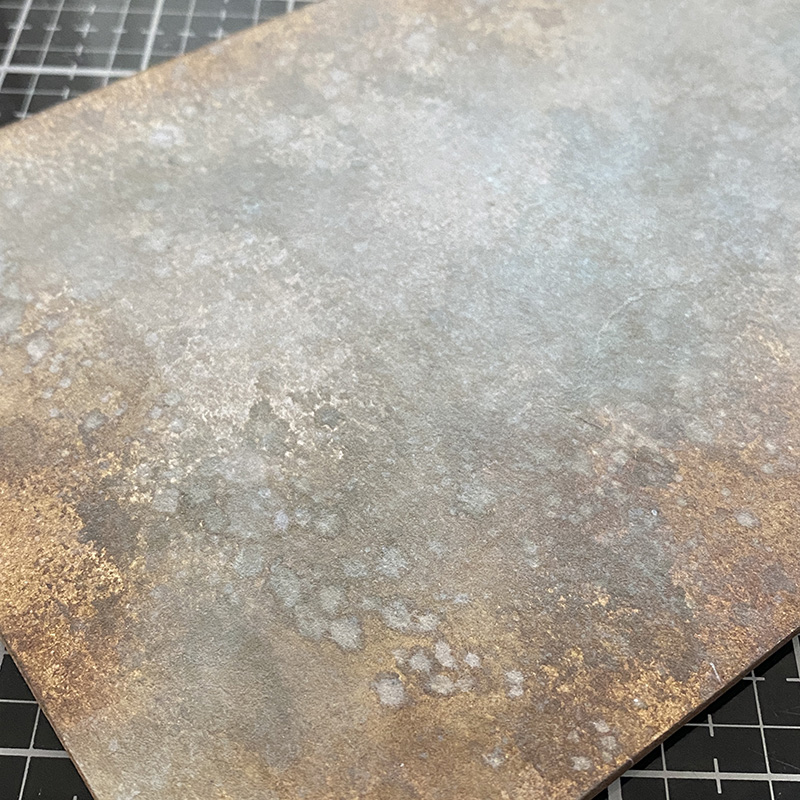
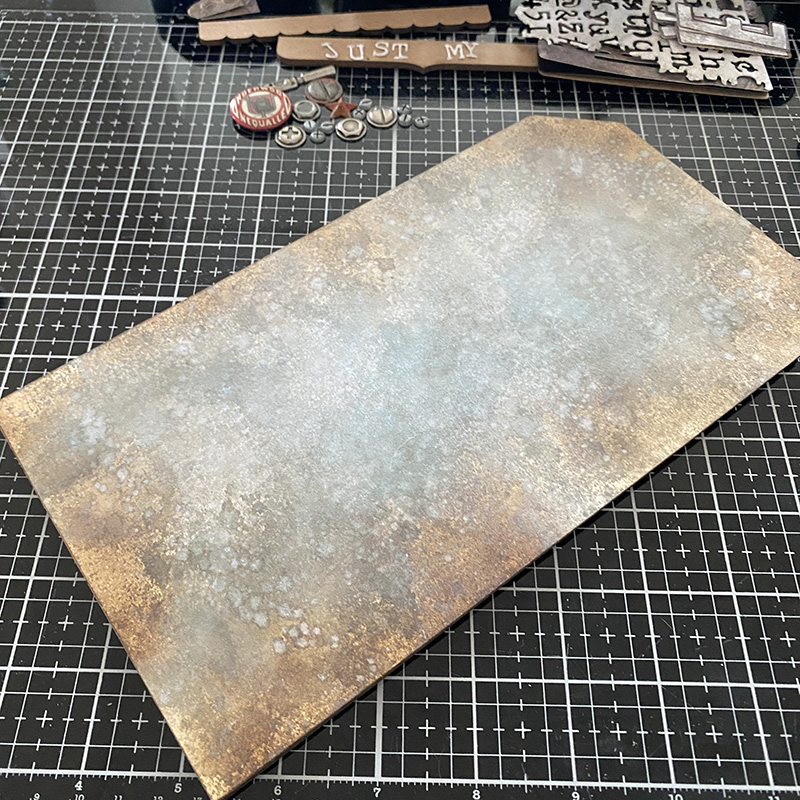
    Look at that gorgeous backdrop paper! I added a few drops of ink splatter to it, but it’s plenty grunge-alicious with nothing added.

    igirlzoe: tim holtz idea-ology 2023
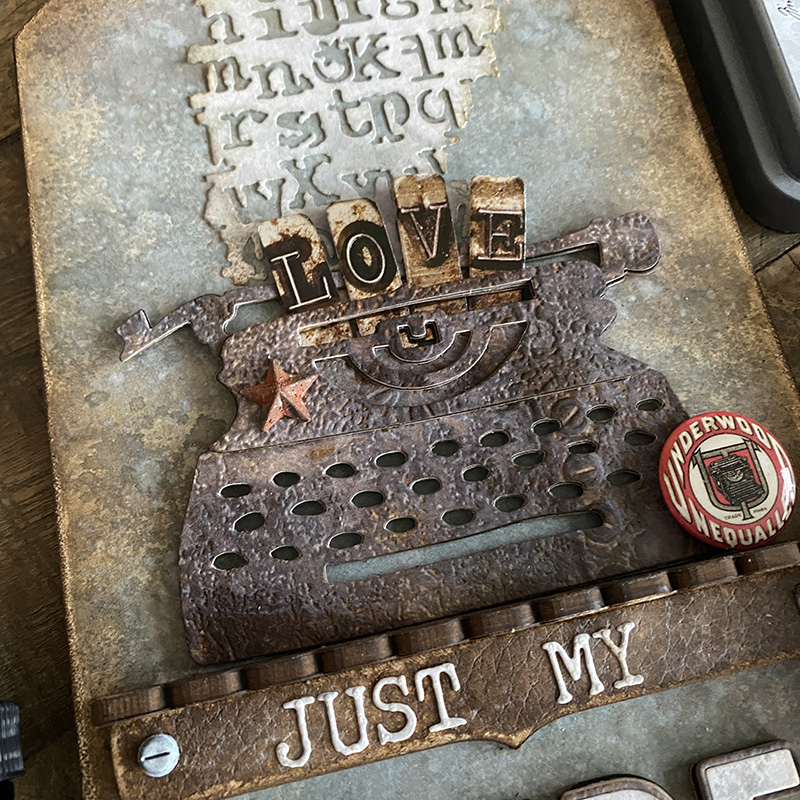
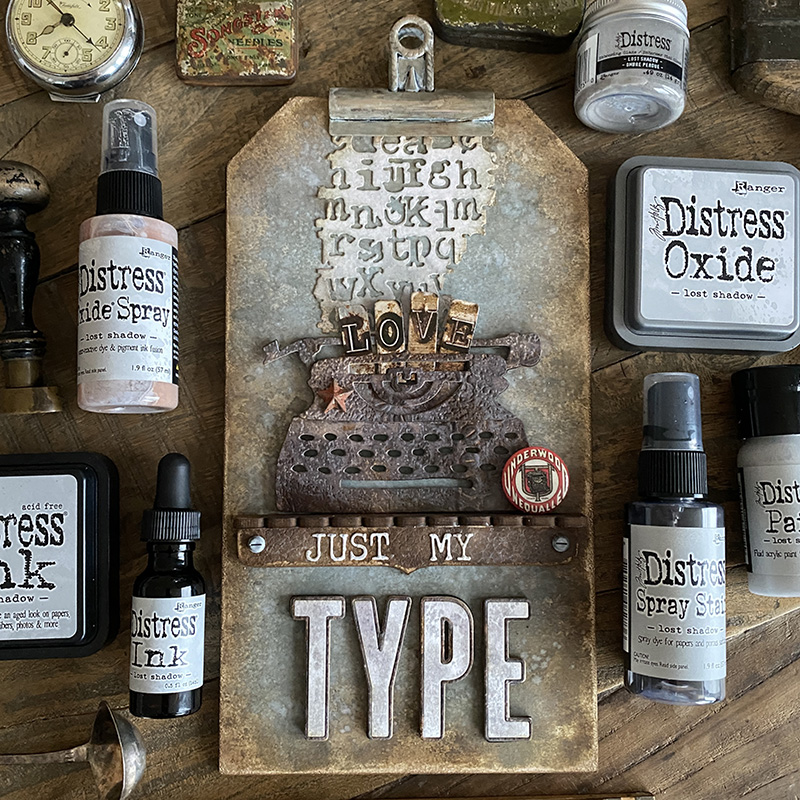
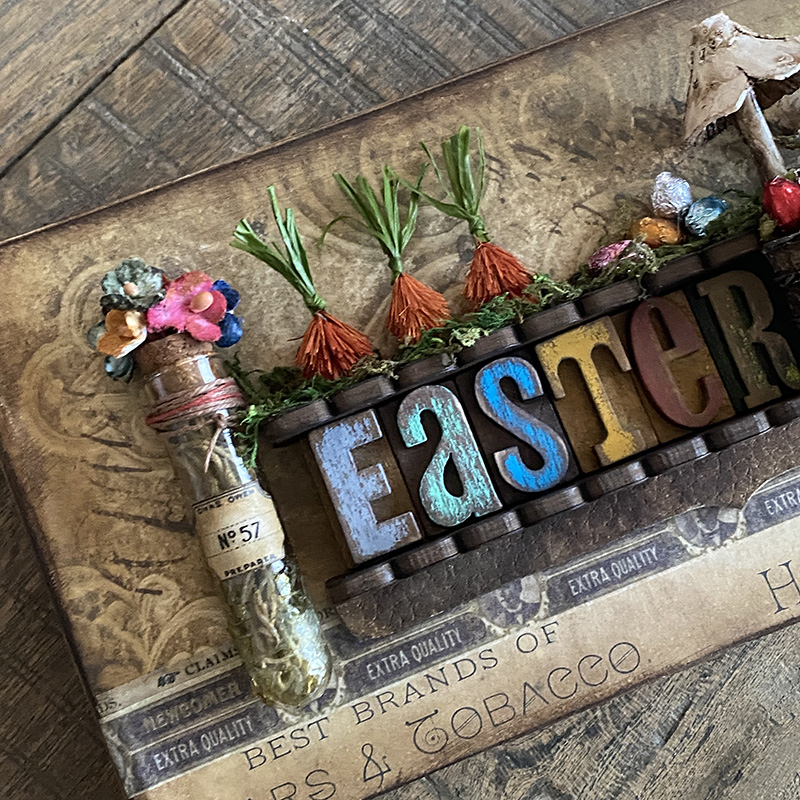
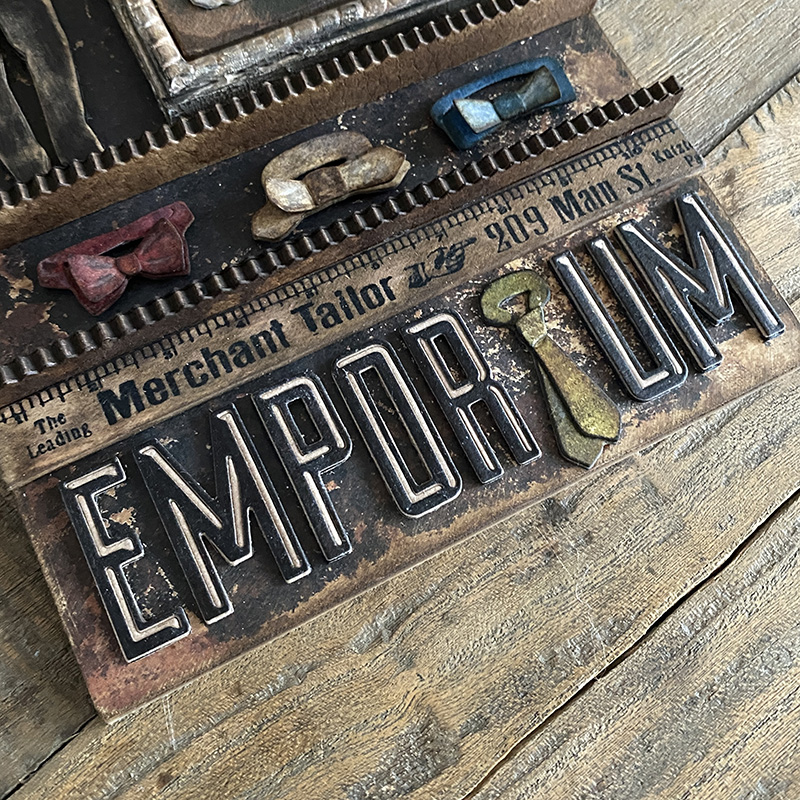
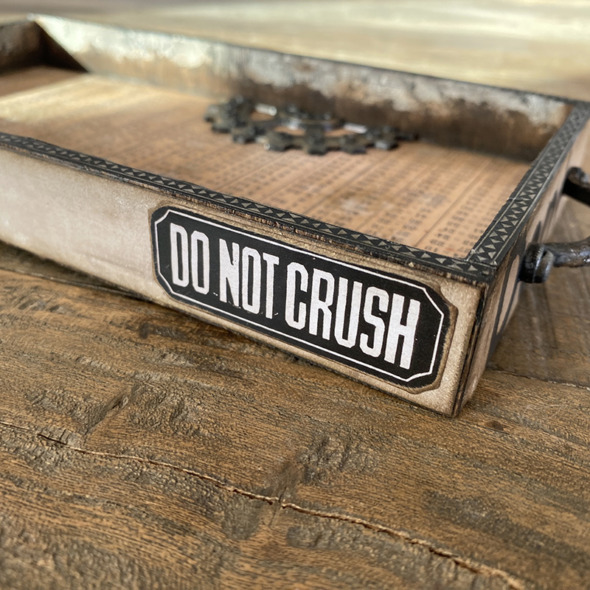
    I love love love the new idea-ology quote chip labels designed to match perfectly with the idea-ology label frames. I added a little black soot and vintage photo distress paint to the label frame and sanded the quote chip edges and inked before adding to the front of the vignette tray with distress collage medium.

    igirlzoe: tim holtz idea-ology 2023
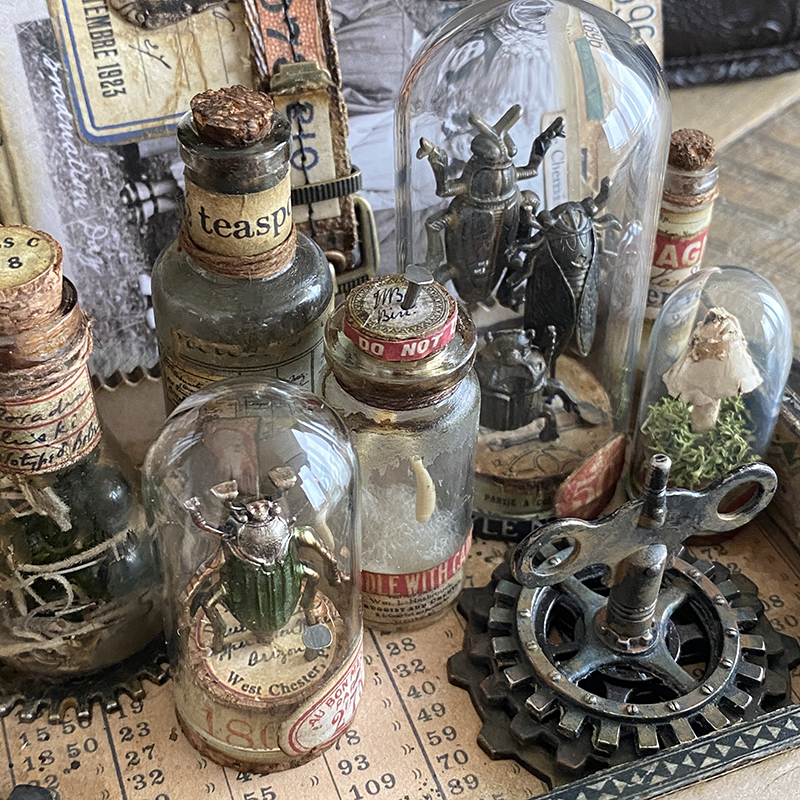
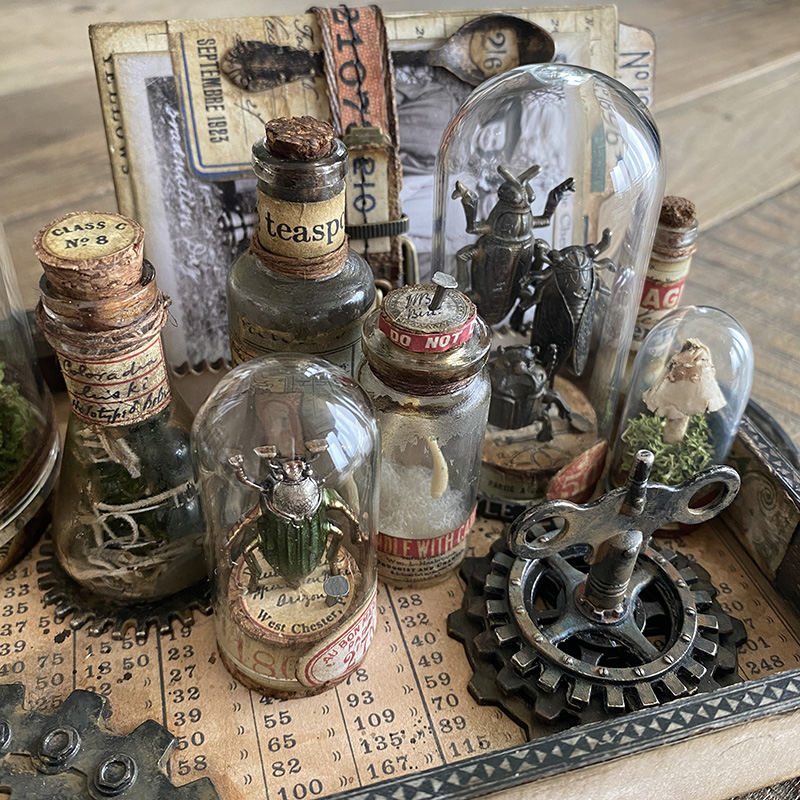
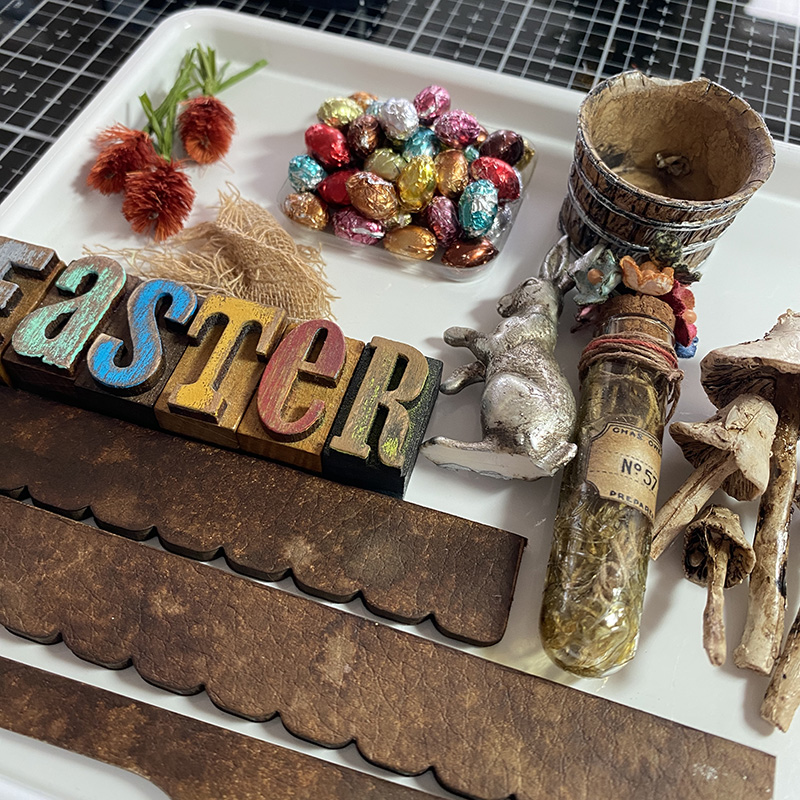
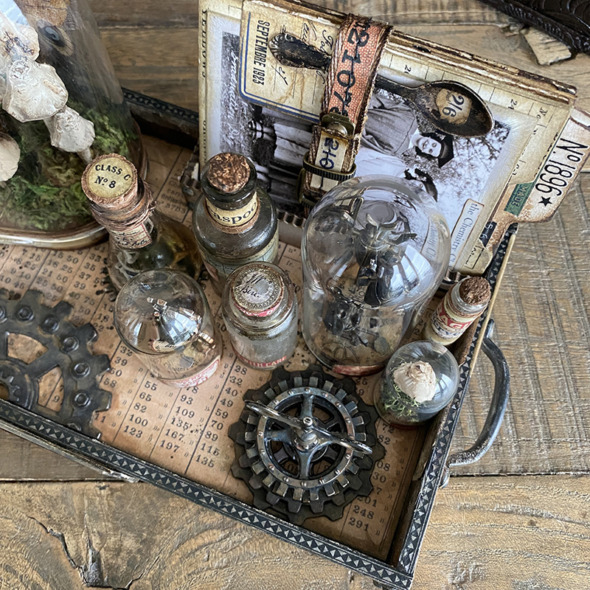
    Next I turned my attention to the pieces going inside the tray… This is where you get to go to town and find things that fit inside the domes, bottles and test tubes. I sometimes find making a larger project overwhelming, so breaking it down into small bite size pieces really suits my maker style and it’s fun tinkering with each piece.

    igirlzoe: tim holtz idea-ology 2023
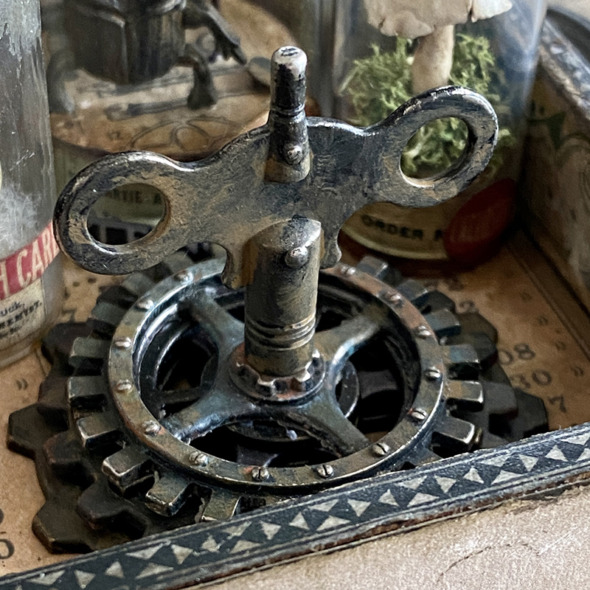
    Starting with a stack of gears with a clock key on the top, I used distress collage medium to glue the gear stack together and the clock key was added using the tiny screw in the base, thread through the top gear. Again I used black soot and vintage photo distress paints to create a rust effect.

    igirlzoe: tim holtz idea-ology 2023
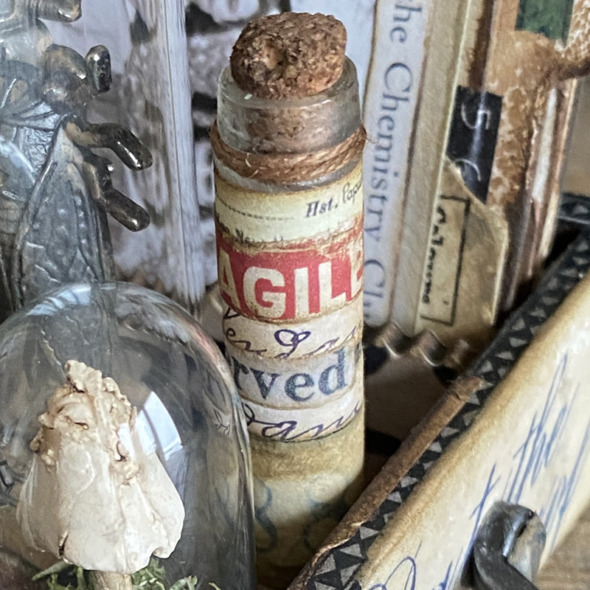
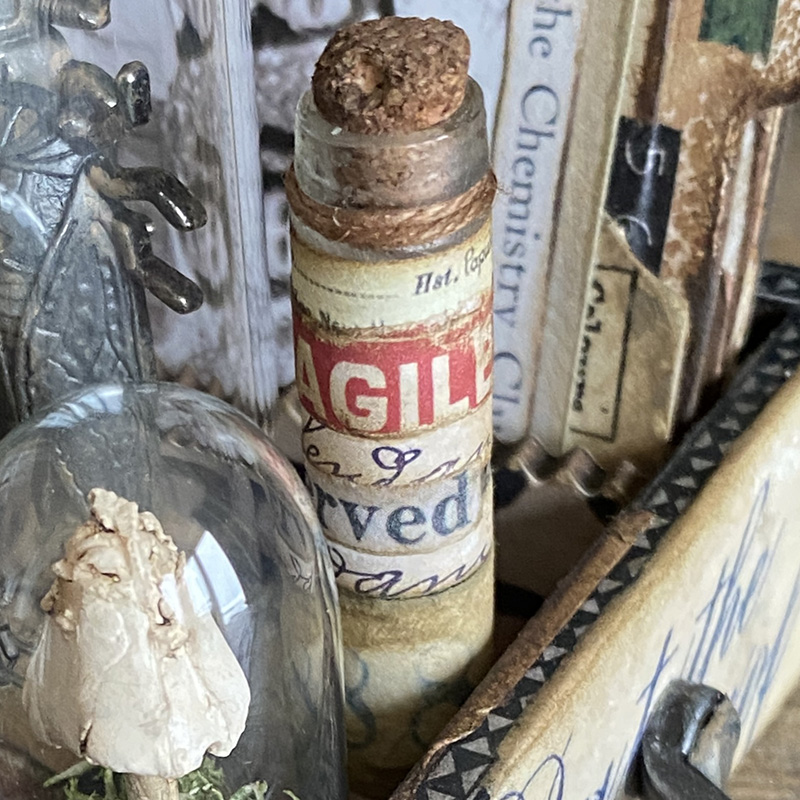
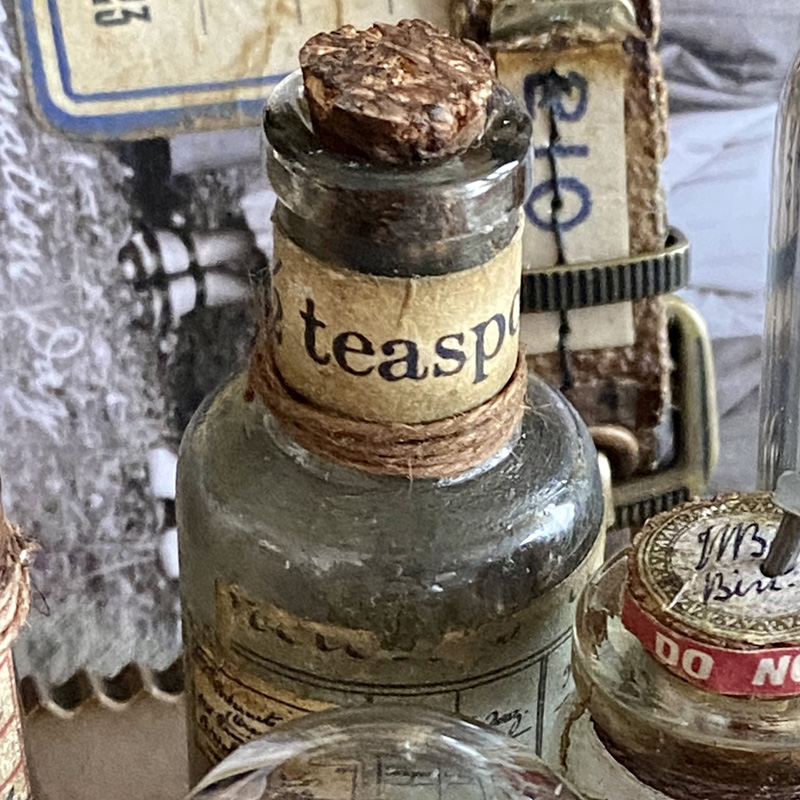
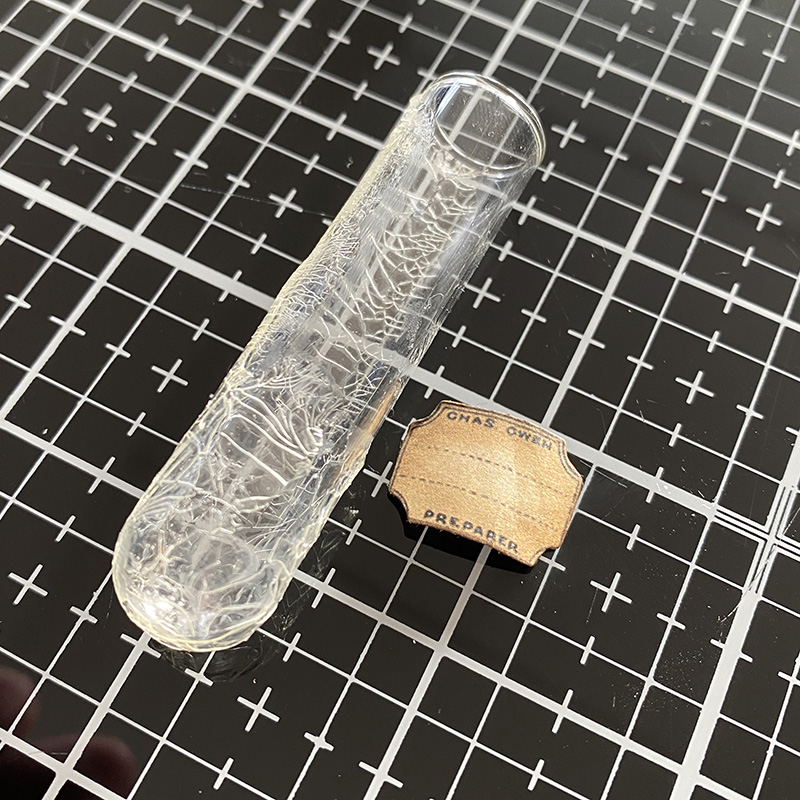
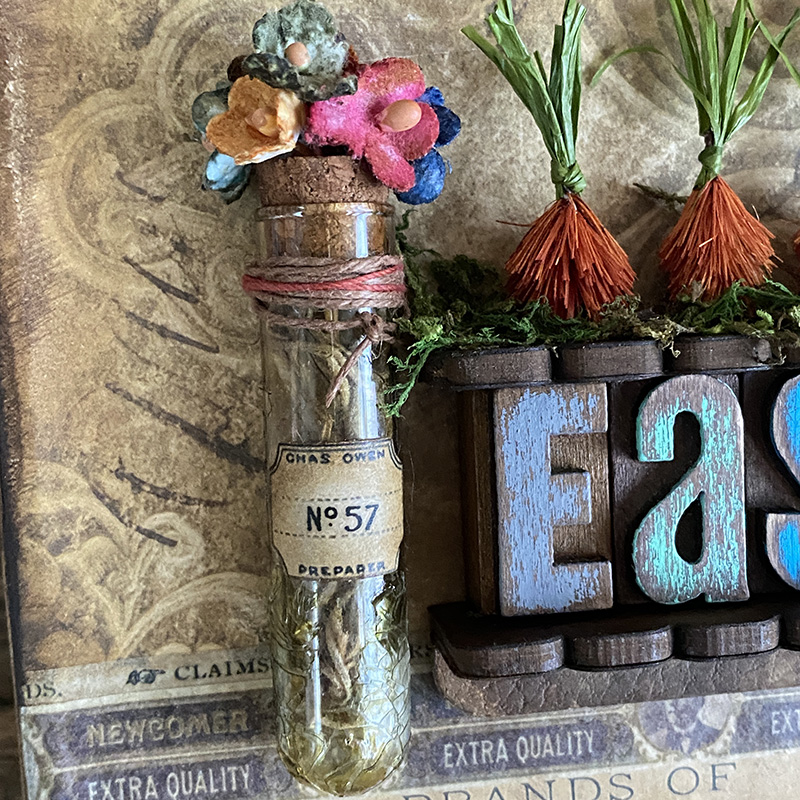
    I wanted to create a bottle that looked like labels had been added on the top of others over the years. To do this I cut strips from the collage strips pack to decorate the side of a bottle from the corked vials set. Using the mini round blending tool with the sanding disk attached, gently sanded the cork and labels and inked.

    igirlzoe: tim holtz idea-ology 2023
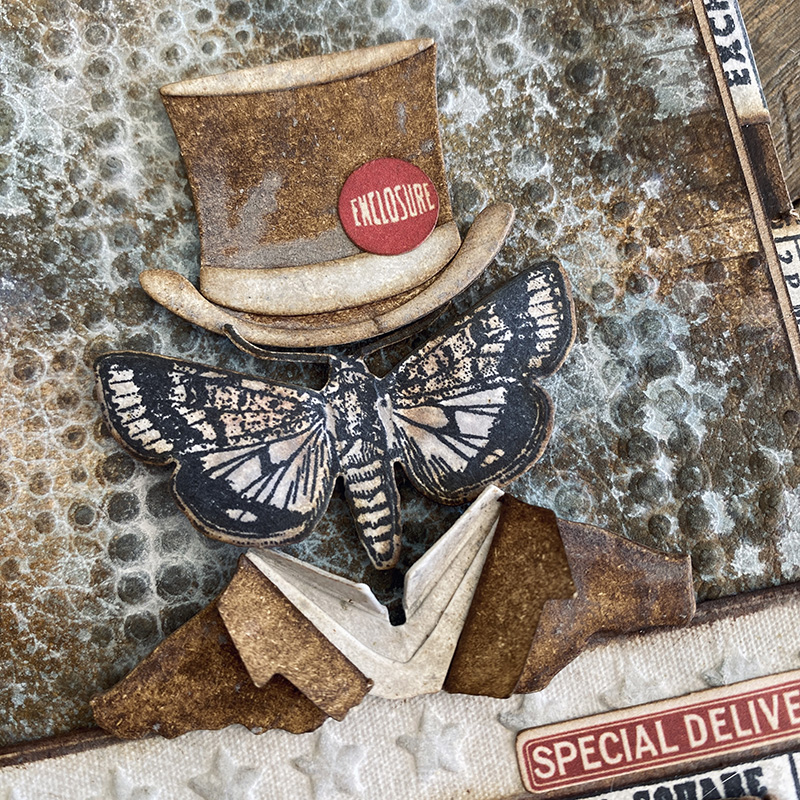
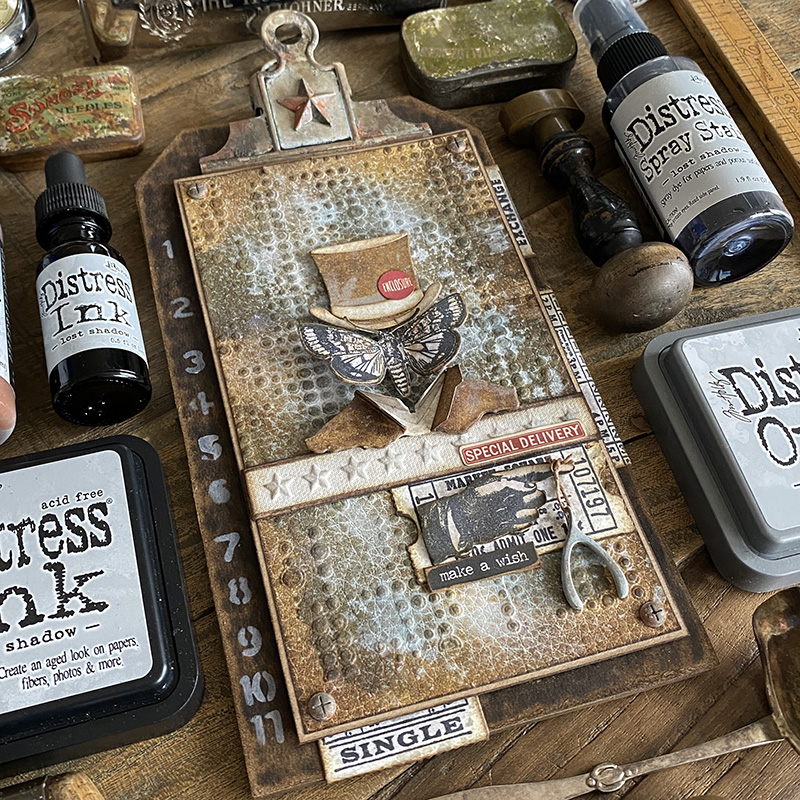
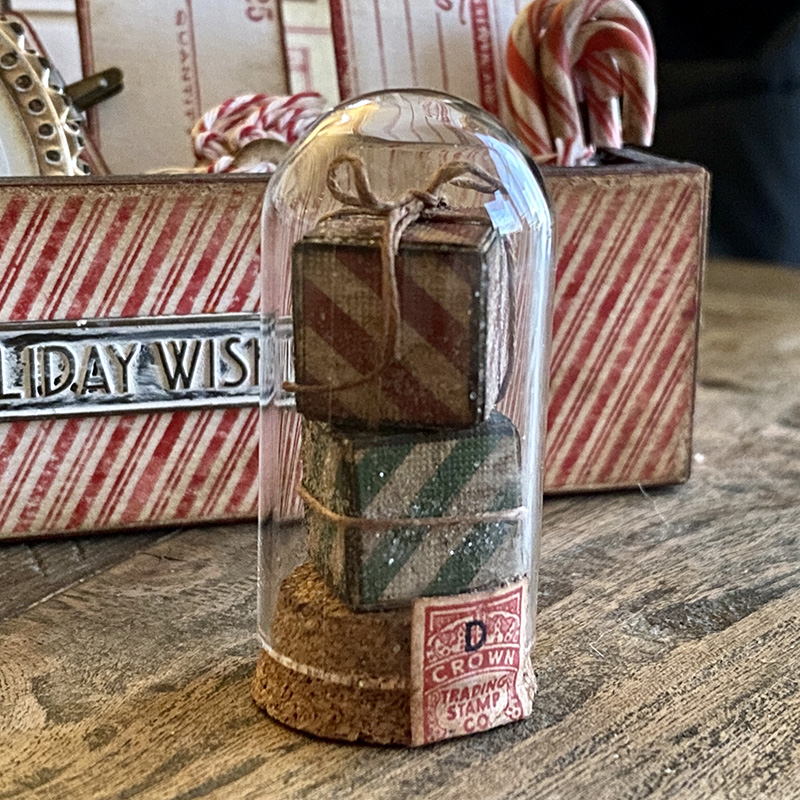
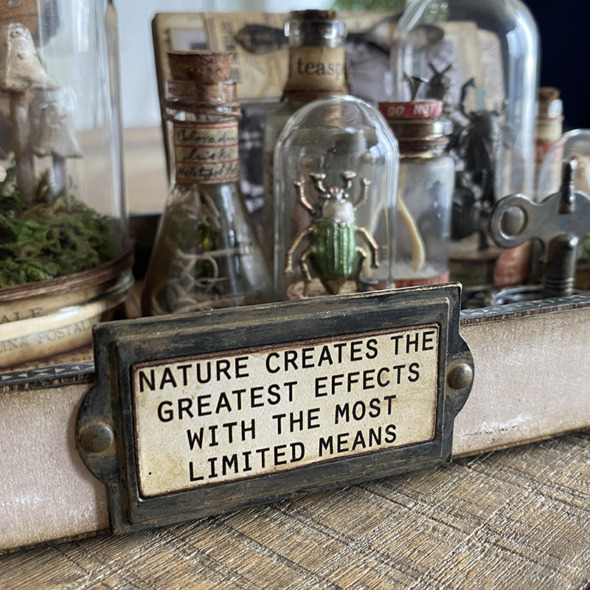
    I love using ephemera to cover the cork in the domes. I added a bug from the entomology adornments set, covered in alcohol pearls. The bug is pushed into the cork and secured with a little drop of distress collage medium and I added a tack nail. Glue the dome into place and then add any outside ephemera using collage medium.

    igirlzoe: tim holtz idea-ology 2023
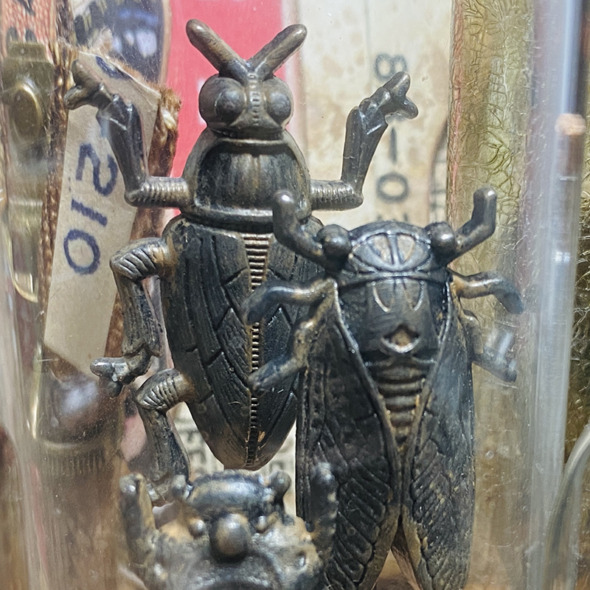
    I used more of the bugs from the entomology adornments set inside a small display dome. I covered each in black soot and vintage photo distress paint for a rust effect to match the gears. I used memo pins to stand the bugs into the cork at different heights. Use a pair of pliers (tool box pliers not jewelry pliers) to squish the memo pin top and hot glue into the recess behind the bugs.

    igirlzoe: tim holtz idea-ology 2023
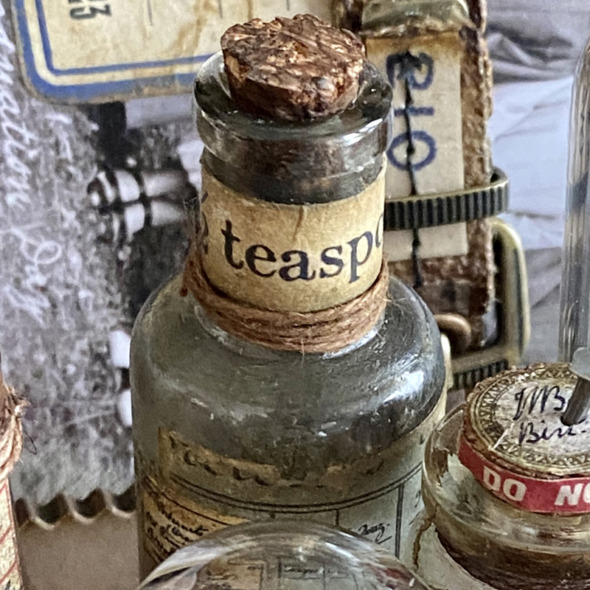
    I covered a laboratory bottle with distress collage medium using a paintbrush and once dry, dry brushed distress paint over the top, wiping parts to create a more natural worn look. Next added idea-ology bubbles covered in alcohol ink that I hoarded from Halloween, along with some creepy string. I added pieces of ephemera to the bottle and cork that I rubbed with walnut stain distress crayon for a little grunge.

    igirlzoe: tim holtz idea-ology 2023
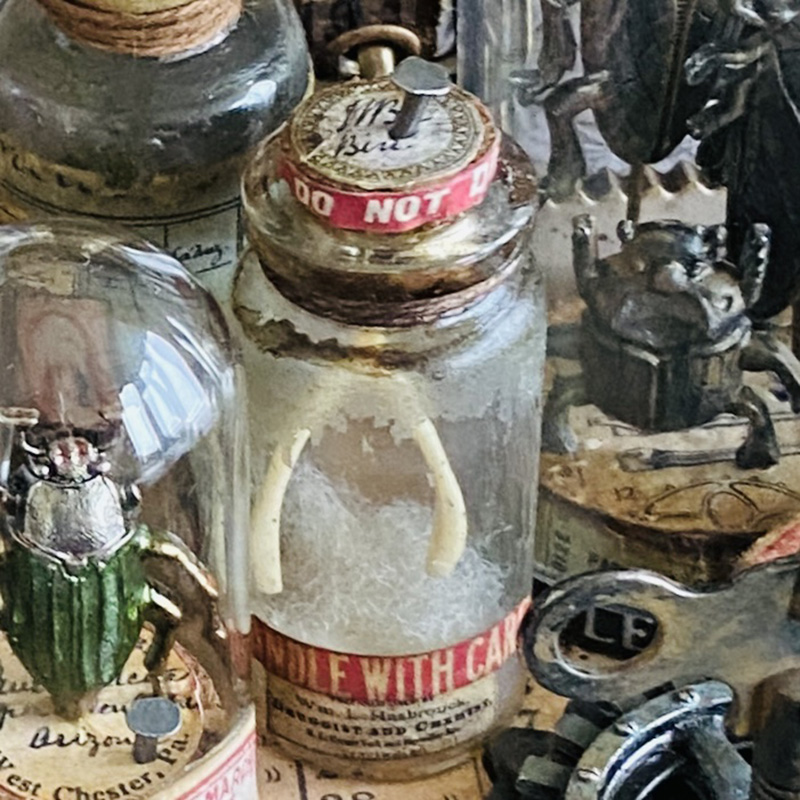
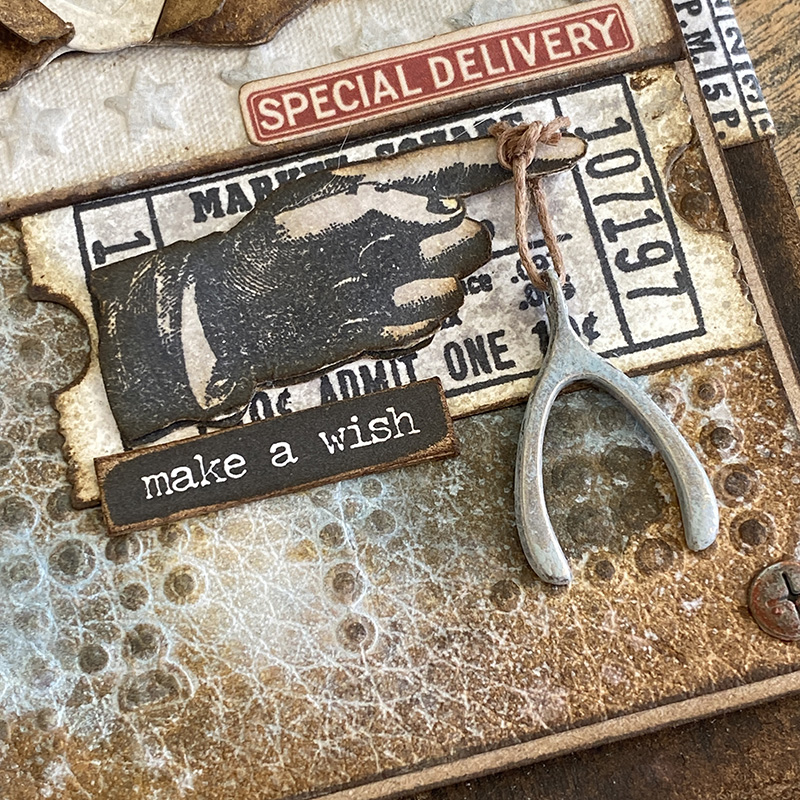
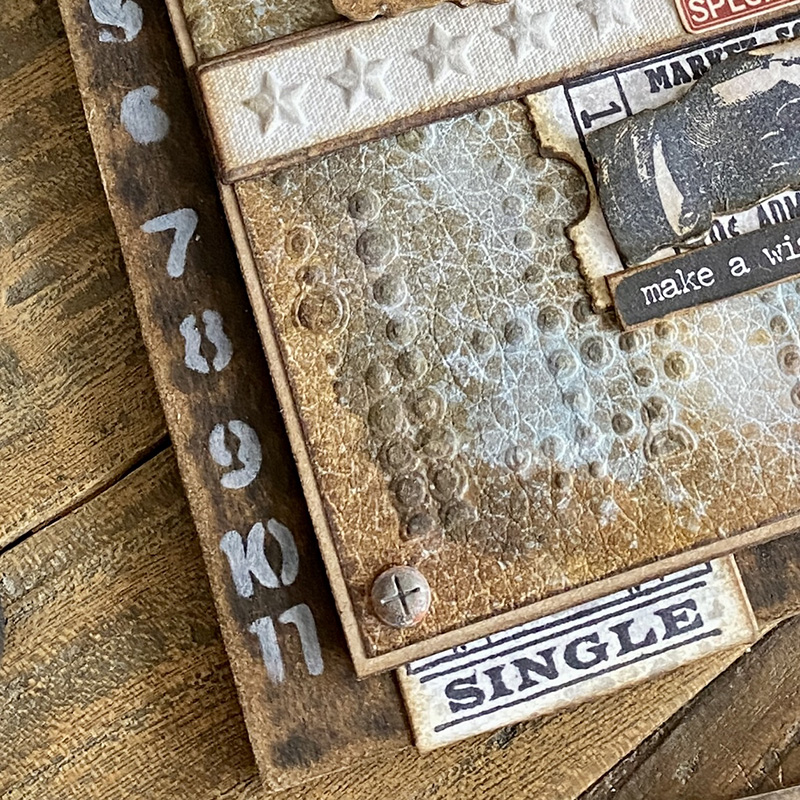
    I cut more of the idea-ology collage strips to cover the cork of one of the jars from the idea-ology corked vials set. Adding a little collage medium and mushroom alcohol ink to make it grungy. I put some wadding inside the jar and squeezed in a wishbone that was attached to fishing wire and thread up through the cork so the wishbone is suspended in the jar. Finally adding some ephemera and pieces cut from the collage strips to create a label at the base of the jar so it doesn’t cover the contents. I pushed a tack nail into the top of the cork which had a piece of ephemera from the curator pack on top.

    igirlzoe: tim holtz idea-ology 2023
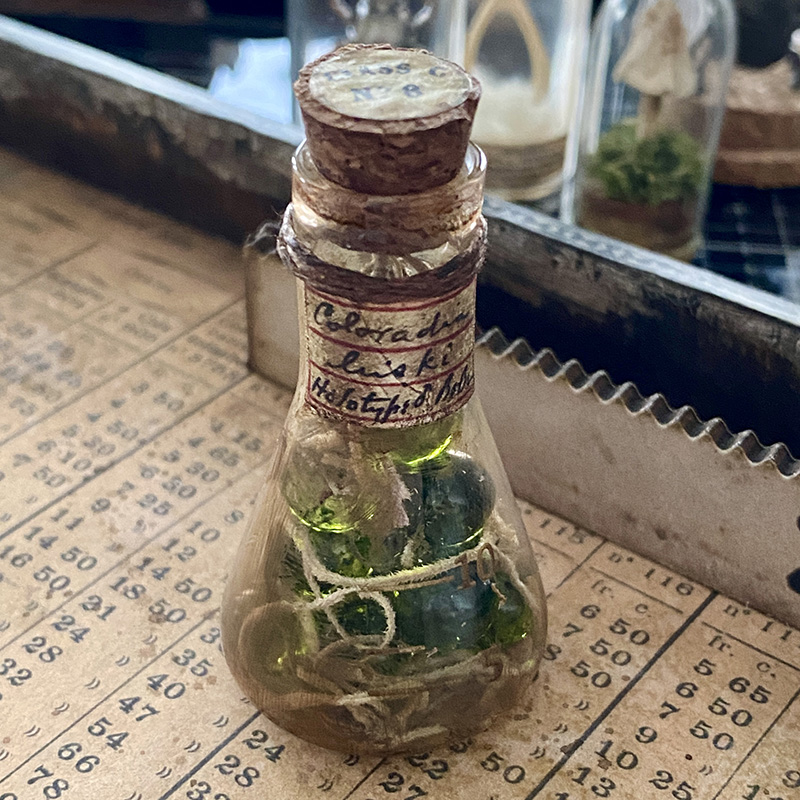
    I added one more bottle from the corked vials set. Love how there are so many different pieces in this idea-ology pack enabling you to create lots of individual pieces. I used more palette ephemera from the new idea-ology pack and a small piece from the palette collage paper. Simply add with distress collage medium using a paint brush. I love that it becomes quite translucent against the glass.

    igirlzoe: tim holtz idea-ology 2023
    Glue each piece onto the tray using distress collage medium and WALK AWAY! LOL Allow time to cure before touching… or shipping! 😉

    igirlzoe: tim holtz idea-ology 2023
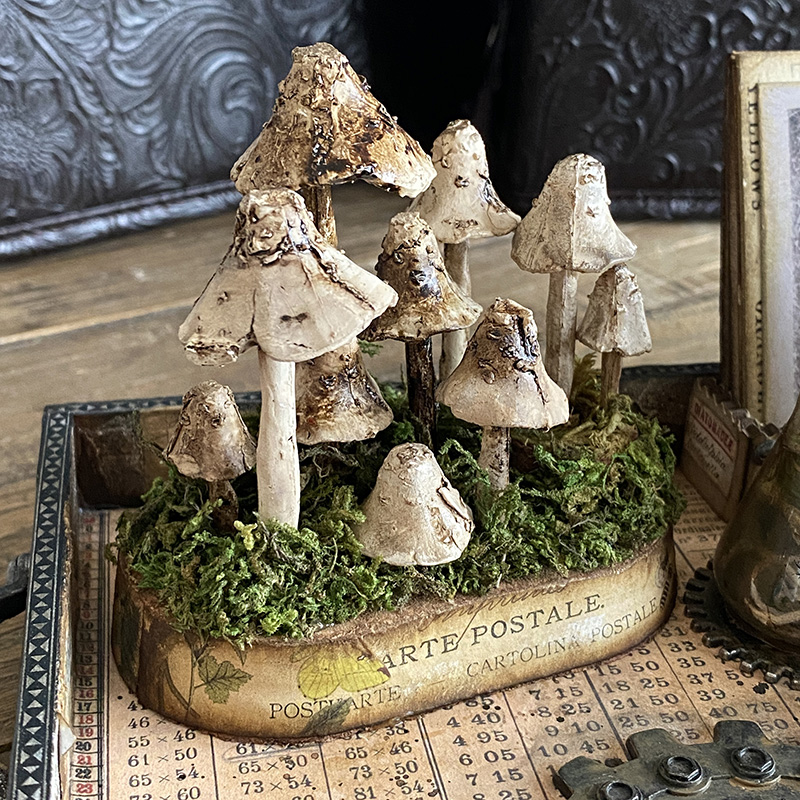
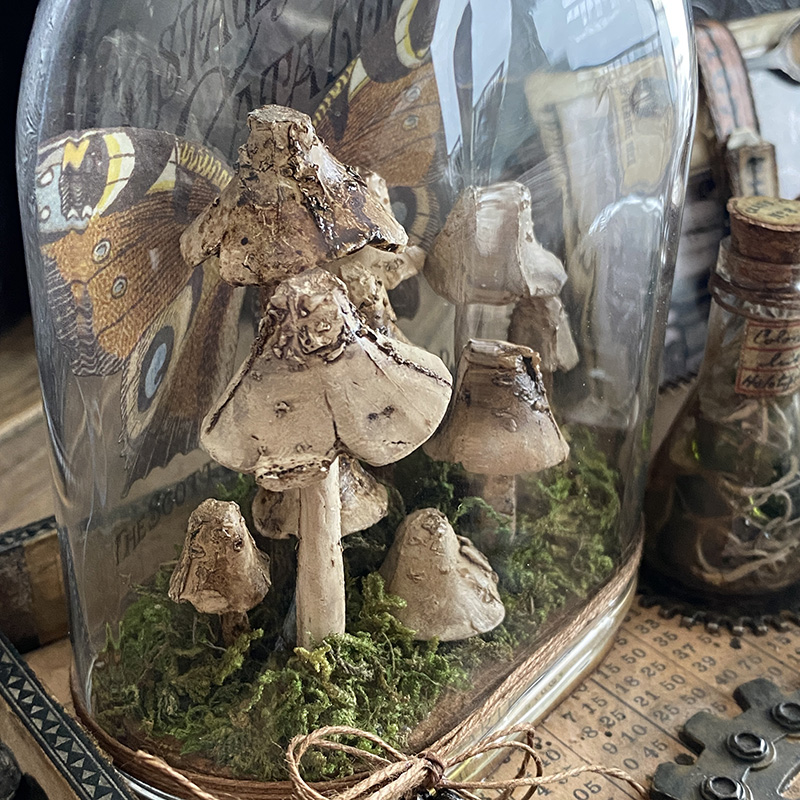
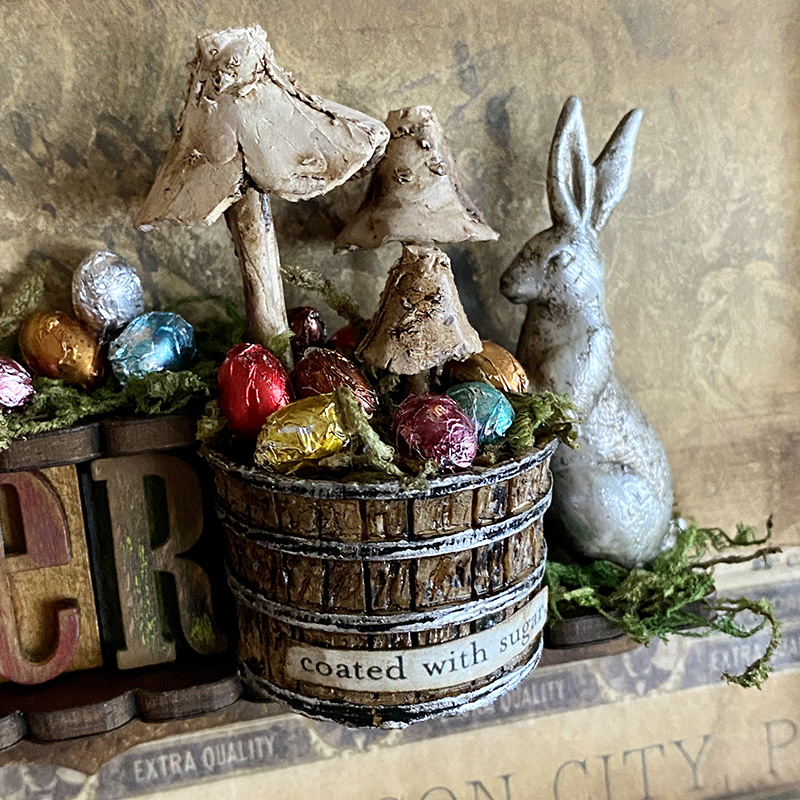
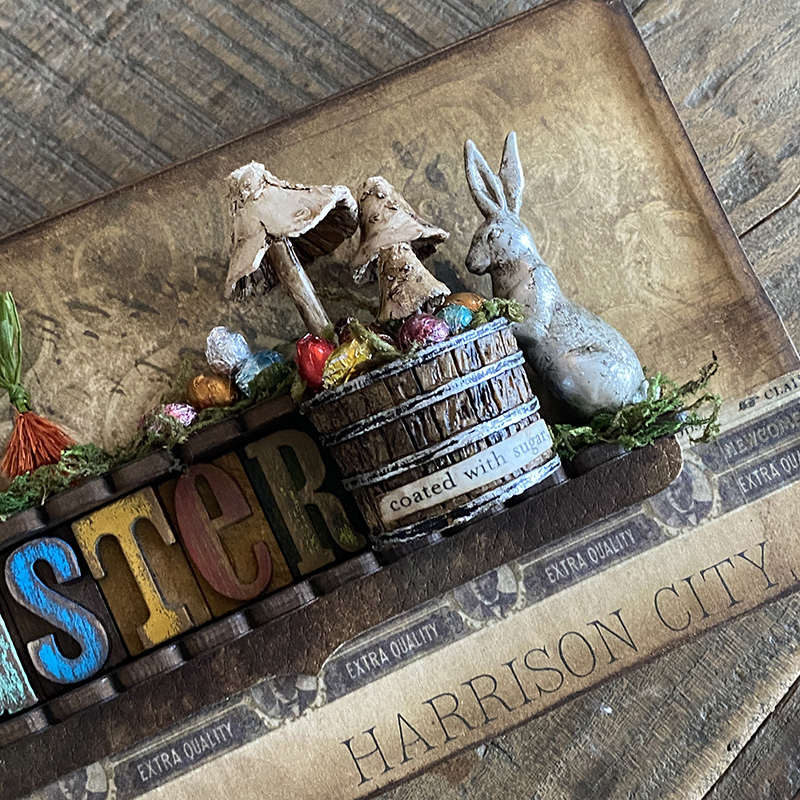
    Look at how much space you get in the new idea-ology reliquary dome!! I trimmed pieces of ephemera from the palette ephemera pack and glued around the cork base. I added quite a few idea-ology toadstools, using my Tim Holtz scissors to cut some of the stems shorter to create the different heights. I used some spare pieces of cork and leftover woodland tree bases to make some of the larger toadstools taller. I used my Dremel tool to make holes in the cork and added a little hot glue and pushed each toadstool in. Adding more hot glue and pushing the moss into and over it. Finally adding a little distress crayon to the toadstool tops.

    I recommend you wear safety glasses when trimming the toadstools and using a Dremel or other power tools.

    igirlzoe: tim holtz idea-ology 2023
    I trimmed one of the beautiful transparencies from the transparent layers pack to fit inside the dome behind the toadstools.

    igirlzoe: tim holtz idea-ology 2023
    Slide the transparency into the back of the dome and carefully slide the glass over the toadstools onto the cork base.

    igirlzoe: tim holtz idea-ology 2023
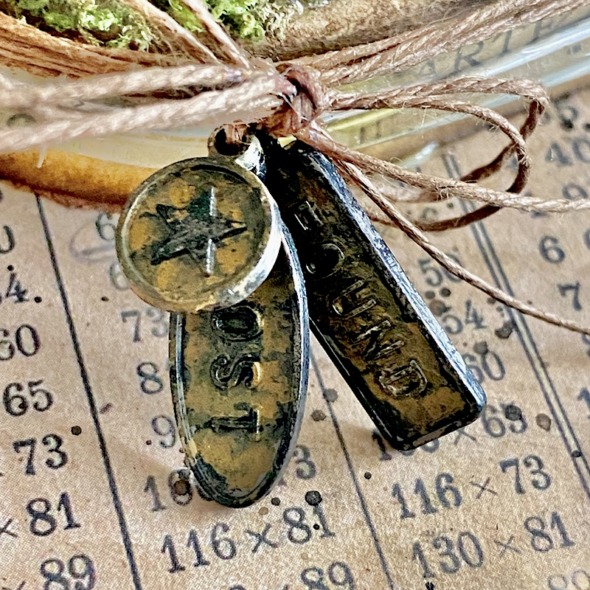
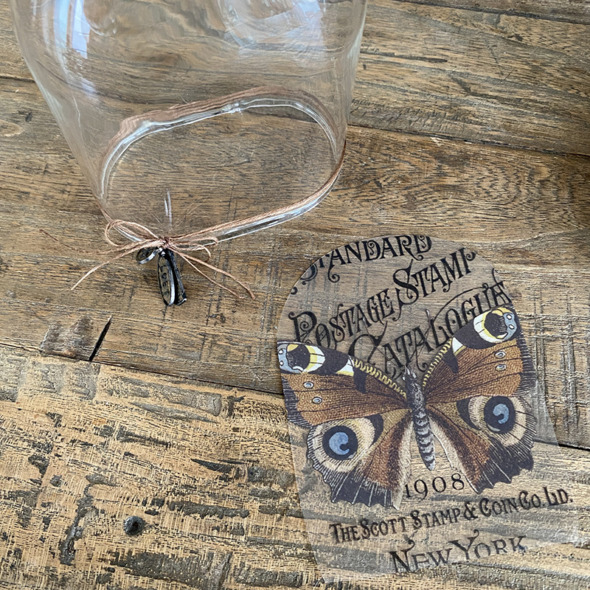
    I added several of the adorable new idea-ology word tags to twine which was wrapped around the base of the reliquary dome glass. Painted with black soot and vintage photo distress paint. They look way more yellow in the photo than they actually are.

    igirlzoe: tim holtz idea-ology 2023
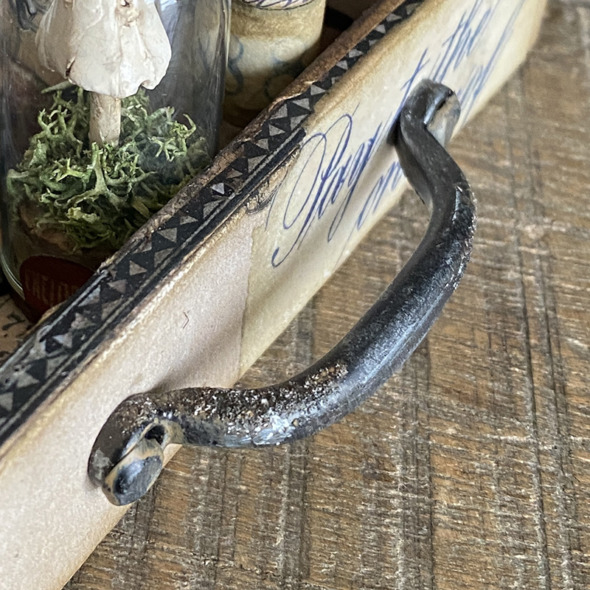
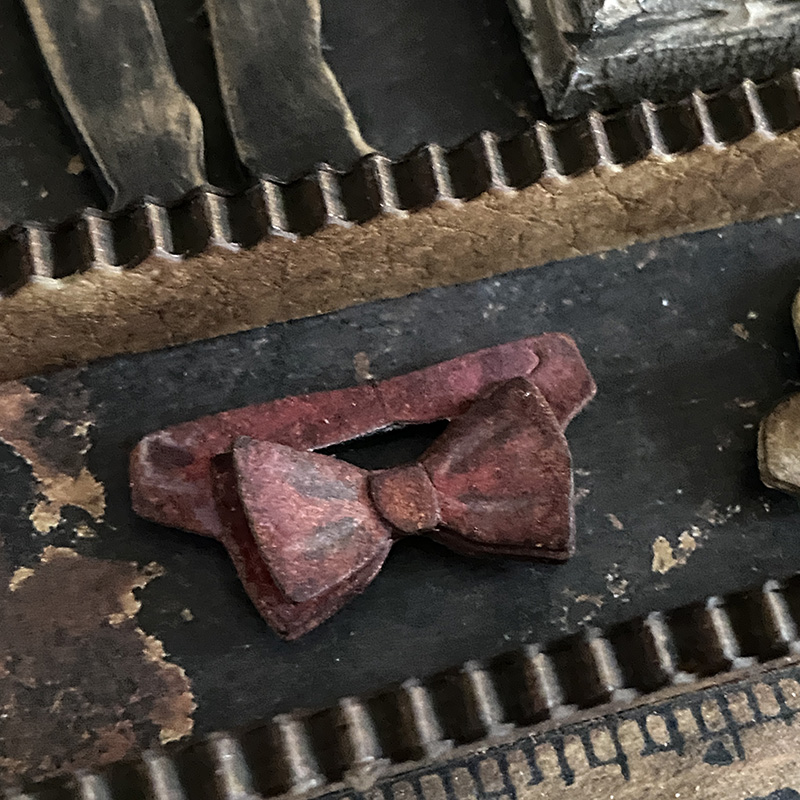
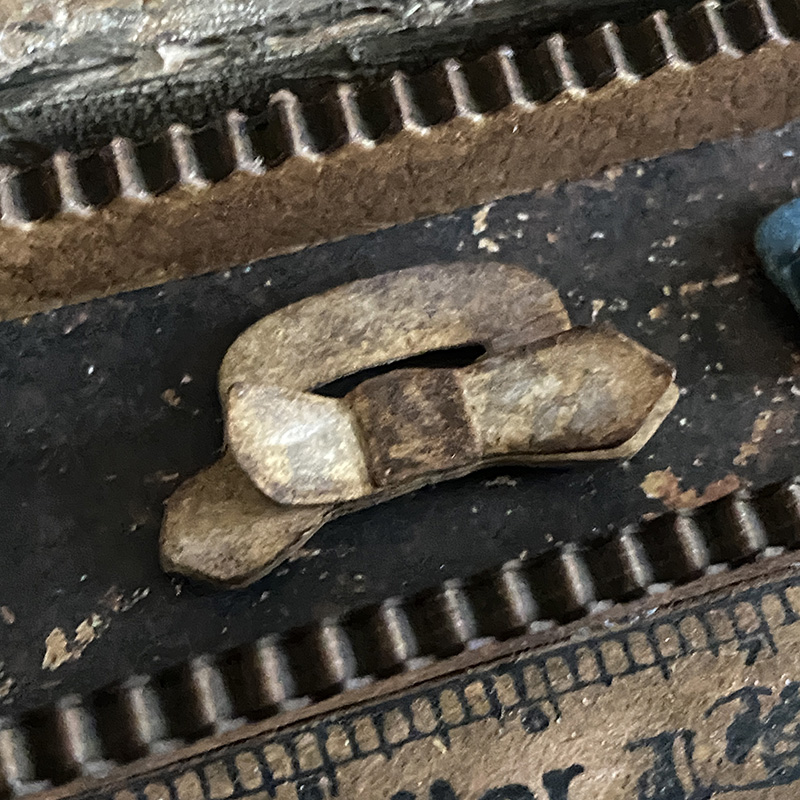
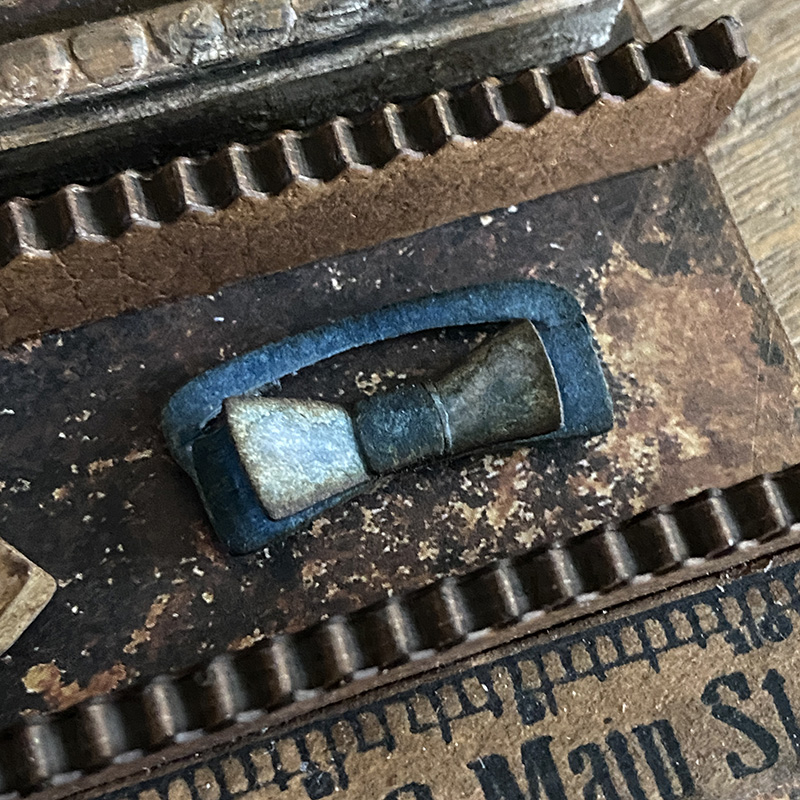
    I added distress grit-paste to the handles and once dry, covered with distress paint. Using the AWESOME new texture hammer to give the new large fasteners a good bash. #MacGyverApproved

    igirlzoe: tim holtz idea-ology 2023
    igirlzoe: tim holtz idea-ology 2023
    A big thank you to Tim, Mario and Paula for their encouragement, creative support and shipping wizardry and to you for the kind comments left for all the makers during the LIVE and on social media.

    Thanks for stopping by and let me know if you have any questions.
    Zoe

    igirlzoe: tim holtz idea-ology 2023
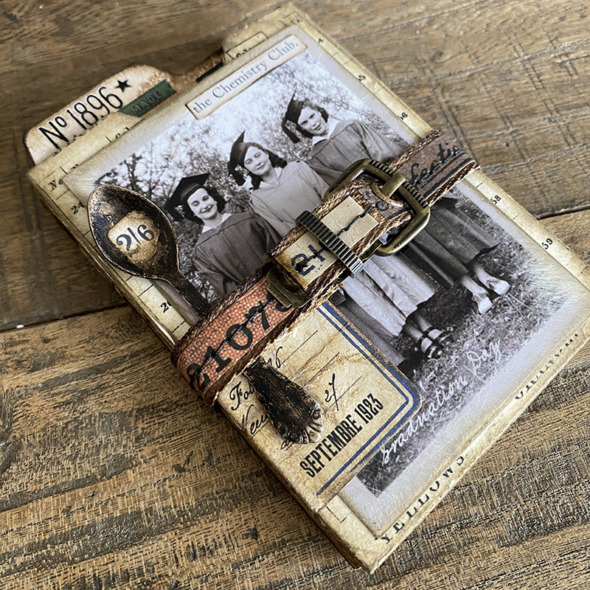
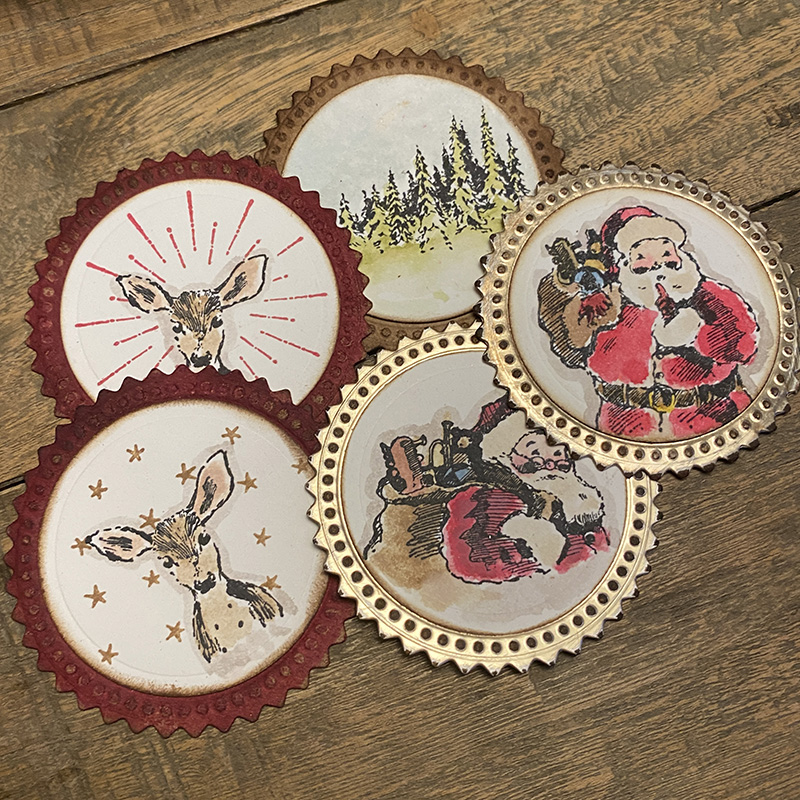
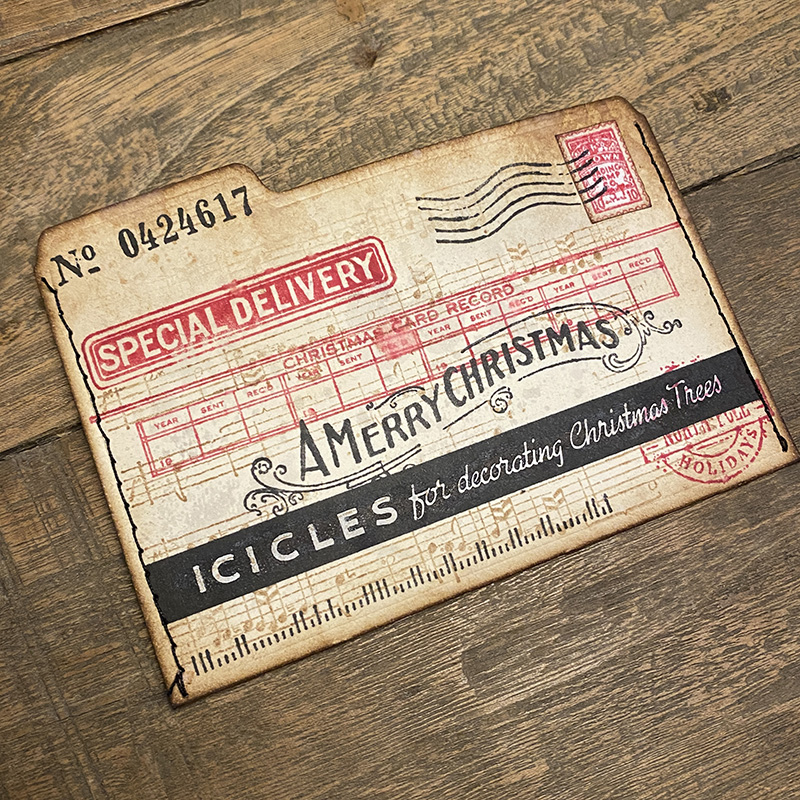
    Join me on my blog tomorrow(ish) to see details of the file cards.


    affiliate links used at no cost to you


  5. Vintage Lost Shadow

    7th February, 2023 by iGirlZoe

    igirlzoe: tim holtz lost shadow distress ranger ink

    Hello friends. Before getting started on my Galentine and Valentine cards, I’m sharing my final make from the Tim Holtz LIVE launch of the gorgeous new member of the Distress family, Lost Shadow!

    igirlzoe: tim holtz lost shadow distress ranger ink
    Naturally I had to make something with a hat and the new Tailored thinlits die set was perfect. I wanted to create a “sampler” to showcase the different mediums of Lost Shadow Distress. Let’s get into the details…

    igirlzoe: tim holtz lost shadow distress ranger ink
    I love the Lost Shadow Distress Paint as a base for idea-ology metal. I added it to an idea-ology vintage clip. You can see underneath the idea-ology adornments star I added, the metal is not shiny but a nice vintage matte gray, which is the Lost Shadow Distress Paint! I added distress opaque grit-paste, and once dry, crackling campfire and ground espresso distress paints to create a rust effect. I used a little walnut stain distress crayon over the top to create extra grunge. YUM!

    igirlzoe: tim holtz lost shadow distress ranger ink
    Use the same products as on the vintage clip and adornments star to distress the idea-ology hardware heads.

    igirlzoe: tim holtz lost shadow distress ranger ink
    Lost Shadow Oxide Spray over distress cracked leather cardstock is a dream! Look how it wicks into the cracked leather and is perfect for embossing, I used the new dotted multi-level embossing folder, which I love!

    igirlzoe: tim holtz lost shadow distress ranger ink
    Lost Shadow Distress Paint works as a great resist. I dipped the hat and coat die cuts from Tailored die set into the paint and dried before blending in walnut stain distress ink. You can see where the paint resisted the ink for a weathered look. The entomology moth was stamped and cut using the entomology stamp set and matching framelits die set, both available and linked below. I used Lost Shadow Distress Re-inker to watercolor the moth. It’s very subtle and pairs beautifully with walnut stain distress.

    igirlzoe: tim holtz lost shadow distress ranger ink
    The ticket booth stamps were die cut using the matching framelits set and sprayed with Lost Shadow Distress Spray Stain. Edged with a little walnut stain distress ink and stamped with black soot distress archival ink. I love that you don’t need many products to create these cool tickets. The wishbone was weathered with a little Lost Shadow Distress Paint.

    igirlzoe: tim holtz lost shadow distress ranger ink
    Using the eye chart stencil and a mini blending tool, I blended Lost Shadow Distress Paint to stencil numbers down the side of the etcetera tag.

    igirlzoe: tim holtz lost shadow distress ranger ink
    Thanks for stopping by and let me know if you have any questions.
    Zoe


    affiliate links used at no cost to you


  6. Lost Shadow Distress

    2nd February, 2023 by iGirlZoe

    igirlzoe: tim holtz lost shadow distress ranger ink

    Welcome to the family Lost Shadow Distress! If you missed the formal introduction, RUN over to Tim’s blog and watch the replay. What a fantastic party with so much inspiration and such a beautiful story about how the name came to be. I love hanging out on a Saturday for the LIVES and the new color reveal always has an extra special buzz about it and for me, this color was one to get really excited about. Here come the NEUTRALS!

    igirlzoe: tim holtz lost shadow distress ranger ink
    Lost Shadow is just my type and definitely one for the “most used box”… Five stars to Tim and the chemists at Ranger Ink for bringing us yet another chameleon distress with truly magical properties! Add frayed burlap spray stain to Lost Shadow oxide spray and see the magic for yourself! That’s where the background for this make began. Let’s get into some of the details…

    igirlzoe: tim holtz lost shadow distress ranger ink
    The mottled magic that happens when Lost Shadow distress oxide spray meets frayed burlap distress spray stain and it turns different colors! I was playing around, adding other browns and loved the end result so I decided to create a larger background and add it to a thickboard etctera tag.

    I’ve had a few questions about Etcetera tags and how to use them so I’m adding an action photo…

    igirlzoe: tim holtz lost shadow distress ranger ink
    Apply a light layer of distress collage medium to the bottom part of the tag. Line up the cardstock over the etcetera tag and press down the glued section. Peel back and begin adding distress collage medium to the tag, pressing down the cardstock as you go.

    igirlzoe: tim holtz lost shadow distress ranger ink
    If you want to stitch the edges, you would do this before gluing the cardstock to the tag. I sanded the edges using the new distress sanding disks on a mini round blending tool. This gets rid of any paper overlap and gives nice worn edges to ink with distress ink (I used walnut stain). You could poke through the hole and add the reinforcer that comes with it, but for this tag I chose not to.

    igirlzoe: tim holtz lost shadow distress ranger ink
    I die cut a piece of distress watercolor cardstock with the mixed media #3 thinlits die set (661186) and sprayed with Lost Shadow distress spray stain. I love the subtle but awesome mottled effect it gives and how it tones down the sharp white. I edged with walnut stain distress ink and added an idea-ology vintage clip to the top of the etcetera tag which was aged by adding Lost Shadow distress paint.

    This die has has been retired but it maybe out there if you search. An alternative would be to use another of Tim’s alphanumeric sets to create a similar background.

    igirlzoe: tim holtz lost shadow distress ranger ink
    I die cut a retro typewriter from the Tim Holtz Bigz die and embossed with the 3D industrious folder. Adding Lost Shadow distress paint as a base coat and then spraying with distress spray stains in various brown tones. Once dry I spritzed Lost Shadow distress oxide spray stain over the top to give some mottled light spots.

    I added a star from the idea-ology stars adornments pack which I covered with Lost Shadow distress paint and once dry, added a little distress opaque grit-paste and ground espresso and crackling campfire distress paints to give a rusty effect. Lost Shadow distress paint as a base for rusting metal idea-ology is AWESOME! I’m going to use this all the time, I ordered another paint so I have a back-up!

    igirlzoe: tim holtz lost shadow distress ranger ink
    I love to use etcetera trims as shelves for my makes. The decorative trims thinlits die set is a game changer and I use it all the time. I used to have to trace around the trim and then sand the trim. The time saved is incredible. I used distress cracked leather cardstock which I dyed with walnut stain distress spray stain and once dry sprayed with Lost Shadow distress oxide spray. I love the way the Lost Shadow oxide wicks into the cracked leather detail of the cardstock. Attach using distress collage medium and trim as required. You can cut through the thickboard with Tim’s scissors.

    igirlzoe: tim holtz lost shadow distress ranger ink
    Assemble your shelves using distress collage medium and add die cut letters, alphanumeric upper case. I used Tim Holtz Squeezers to get the letters lined up and into place without my fingers getting in the way and distress collage medium bottle with the fine tip to add just a tiny amount of glue. You could use adhesive backed sheets or a xyron sticker maker too.

    igirlzoe: tim holtz lost shadow distress ranger ink
    I’m OBSESSED with the new bulletin alphanumeric thinlits dies. When Tim first showed them to the makers I wasn’t sure if I was going to use them much because they’re so big but I couldn’t love them more and can’t stop using them. I die cut from distress watercolor cardstock and tapped the center of the letters into an inky Lost Shadow distress ink wash. For the border of the letters I blended in several layers of the Lost Shadow distress ink and a little walnut stain distress ink to create a darker outline.

    igirlzoe: tim holtz lost shadow distress ranger ink
    I added a piece of flair that is perfect for the typewriter theme and a few idea-ology type chips which I stocked up and have hoarded for years but need to use them, so I went with LOVE because it’s nearly Valentines and because I LOVE Lost Shadow Distress. It really is “just my type”…

    igirlzoe: tim holtz lost shadow distress ranger ink
    Thanks for stopping by and let me know if you have any questions.
    Zoe


    affiliate links used at no cost to you


  7. Tim Holtz Easter Idea-ology

    23rd January, 2023 by iGirlZoe

    igirlzoe: tim holtz idea-ology easter salvaged rabbits tiny eggs

    Happy Monday friends. Hope you had a nice weekend and were inspired to get making after such a fun Saturday with Tim’s Valentine + Easter LIVE demo. If you missed it, Tim showcased the new idea-ology Salvaged Rabbits and Tiny Eggs and shared some great techniques, tips and tricks (and Mario brought the costume fun with his cute bunny glasses). You can catch up with the replay over on Tim’s blog.

    igirlzoe: tim holtz idea-ology easter salvaged rabbits tiny eggs
    I made a sample that Tim shared during the LIVE using the new Salvaged Rabbits, Tiny Eggs and some other pieces from the idea-ology line. I’m so happy that Tim designed some rabbits and eggs for this year and I hope they come back next year, but I stocked up just in case, so grab what you need before they hop away.

    I was inspired by many of the ideas Tim shared during last years Creative Easter Ideas LIVE. So make yourself some snacks and check out the how to’s on Tim’s blog.

    Here are a few more details of my make and the idea-ology products used…

    igirlzoe: tim holtz idea-ology easter salvaged rabbits tiny eggs
    Botanical Test Tube
    idea-ology: Test tube. Bouquet. Snippets Ephemera. Specimen Remnant Rubs.

    igirlzoe: tim holtz idea-ology easter salvaged rabbits tiny eggs
    Buried Carrots (Technique Video HERE)
    idea-ology: woodland tree.

    igirlzoe: tim holtz idea-ology easter salvaged rabbits tiny eggs
    Easter
    idea-ology: Letterpress (retired).

    igirlzoe: tim holtz idea-ology easter salvaged rabbits tiny eggs
    Barrel of Eggs
    idea-ology: Tiny Eggs. Barrels. Toadstools. Salvaged Rabbit. Clippings Stickers.

    igirlzoe: tim holtz idea-ology easter salvaged rabbits tiny eggs
    I made each of the components for my sample and gathered them ready to add to my vignette tray.

    igirlzoe: tim holtz idea-ology easter salvaged rabbits tiny eggs
    Cover a small idea-ology vignette tray with paper from the backdrops paper pack and add design tape for detail.

    igirlzoe: tim holtz idea-ology easter salvaged rabbits tiny eggs
    Paint a test tube with distress collage medium and once dry, add a layer of distress translucent crackle paint and set aside to dry again. Add a little mushroom alcohol ink to age and a label from the idea-ology snippet ephemera set.

    igirlzoe: tim holtz idea-ology easter salvaged rabbits tiny eggs
    Dye idea-ology bouquet flowers with distress spray stains and once dry, paint the center piece with distress paint.

    igirlzoe: tim holtz idea-ology easter salvaged rabbits tiny eggs
    Add moss to the inside of the test tube, make a hole in the top of the cork and push the bouquet flower stems in. Add jute string around the top and hot glue to the vignette tray. I added “No. 57” from the specimen remnant rubs set.

    igirlzoe: tim holtz idea-ology easter salvaged rabbits tiny eggs
    Check out the LIVE replay to see Tim’s egg-citing foil technique. I didn’t make mine smooth as I wanted them a bit crinklier and grungier.

    igirlzoe: tim holtz idea-ology easter salvaged rabbits tiny eggs
    Hot glue idea-ology toadstools into an idea-ology barrel and add moss and the foiled eggs. The “coated with sugar” sticker would be even more perfect for the sugar eggs that Tim shared during the LIVE. They are definitely on my list to make next, so cool!

    igirlzoe: tim holtz idea-ology easter salvaged rabbits tiny eggs
    igirlzoe: tim holtz idea-ology easter salvaged rabbits tiny eggs
    igirlzoe: tim holtz idea-ology easter salvaged rabbits tiny eggs
    Thanks for stopping by and be sure to check out Tim’s LIVE replay. Let me know if you have any questions.
    Zoe


    affiliate links used at no cost to you


  8. Emporium

    20th January, 2023 by iGirlZoe

    igirlzoe: tim holtz sizzix 2023 everyday collection tailored gentlemen emporium

    Hello friends, happy Friday! I can’t believe it’s been almost a week since Tim Holtz launched his incredible 2023 Sizzix Everyday Collection. Where has the week gone?!! To see the LIVE replay and check out all the makes and the brilliant demo at the end, check out Tim’s blog.

    igirlzoe: tim holtz sizzix 2023 everyday collection tailored gentlemen emporium
    I’m sharing my second make from the launch, and of course I had to make something using the Tailored die set! It’s definitely a top hat thing for me, which always has that vintage vibe I love. I love that these dies are 3 dimensional and during our maker zoom call when Tim showed us the turnover collars I nearly feinted! You MUST check out the demo at the end of the LIVE replay where Tim shares a hack on how to use these dies with the distinguished stamps! Oh my word! Let’s get into the details…

    igirlzoe: tim holtz sizzix 2023 everyday collection tailored gentlemen emporium
    I covered a small etcetera tag with paper from Tim’s Halloween backdrops (still available at the time of posting). I love the Halloween backdrops papers because they are so dark and grungy which works perfectly for a more vintage look. I added distress crackle opaque texture paint and distress crayon to a vignette frame and inset a baseboard frame, all from idea-ology.

    igirlzoe: tim holtz sizzix 2023 everyday collection tailored gentlemen emporium
    Using the new Gentlemen die set, I cut idea-ology black kraft stock and mounted onto black foam which I also cut using the die set. Adding a piece of metal foil on the handle and tip of the umbrella. The foil is adhesive backed so cut the handle and tip, trim as needed, peel and stick. This die reminds me of The Greatest Showman and The King’s Man, which was what my make was inspired by.

    igirlzoe: tim holtz sizzix 2023 everyday collection tailored gentlemen emporium
    I added the hat and collar from the Tailored die set. The turned up collar is everything and I love how easy it is to put together, there are crease lines which show you where to fold and the packaging makes it simple to see what goes where. You can glue the collar flat if you prefer but I really love the dimensional look. Make sure you check out Tim’s brilliant demo at the end of the LIVE, as mentioned above.

    igirlzoe: tim holtz sizzix 2023 everyday collection tailored gentlemen emporium
    To create shelves for the bow ties, I added etcetera tag pinked trims with distress watercolor cardstock cut with the decorative trims thinlits dies and embossed using the Cracked 3D folder. These decorative trims dies are unsung heroes of the die cutting world. I use them so often and they make adding any paper to the trims easy peasy! So happy Tim designed them.

    igirlzoe: tim holtz sizzix 2023 everyday collection tailored gentlemen emporium
    The bow ties, also from the Tailored die set are another favorite and I love how all the pieces give them such dimension and really bring them to life. Each die is on it’s own plate with all the pieces so it’s really easy to die cut and assemble. You could of course use just the top piece as a bow tie as I did in a card I made and shared on my instagram here.

    igirlzoe: tim holtz sizzix 2023 everyday collection tailored gentlemen emporium
    igirlzoe: tim holtz sizzix 2023 everyday collection tailored gentlemen emporium
    igirlzoe: tim holtz sizzix 2023 everyday collection tailored gentlemen emporium

    igirlzoe: tim holtz sizzix 2023 everyday collection tailored gentlemen emporium
    I love all of the Alphanumeric dies that Tim designs but of course there are always favorites and the Alphanumeric Emporium die set are on that list. I love the style and that you have options, because options are always a good thing. 😉 I cut 3 sets in black kraft stock, metallic kraft stock (both from idea-ology) and foam to give it some height.

    igirlzoe: tim holtz sizzix 2023 everyday collection tailored gentlemen emporium
    I added the tie from the Tailored die set in place of the letter “i” … seriously though, that alpha is SO GOOD! Tim ROCKED it!!

    igirlzoe: tim holtz sizzix 2023 everyday collection tailored gentlemen emporium
    Thanks for stopping by and let me know if you have any questions.
    Zoe


    affiliate links used at no cost to you


  9. Winter Vacation

    17th January, 2023 by iGirlZoe

    igirlzoe: tim holtz sizzix 2023 everyday collection road trip colorize

    Hello friends and Happy New Year! I hope your New Year is off to a fantastic start. Did you catch the first Tim Holtz LIVE launch of 2023?! Tim showcased his Sizzix 2023 everyday collection, along with all the makes AND a demo at the end! It was an EPIC party! You can catch the replay over on Tim’s blog.

    igirlzoe: tim holtz sizzix 2023 everyday collection road trip colorize
    I fell in love with the Road Trip Colorize die, it reminded me of my childhood watching Saturday morning cartoons. The colorize dies are so detailed and easier than ever to put together.

    igirlzoe: tim holtz sizzix 2023 everyday collection road trip colorize
    Winter road trips with my husband in the Swiss mountains and those beautiful winter backdrops inspired this tag and brought back some truly wonderful memories. Let’s get into the tag details…

    igirlzoe: tim holtz sizzix 2023 everyday collection road trip colorize
    Taking a mini etcetera thickboard tag from Stampers Anonymous, I added a piece of paper from the idea-ology Halloween backdrops paper pack.

    igirlzoe: tim holtz sizzix 2023 everyday collection road trip colorize
    Add the reinforcer that comes with the tag, along with some seam tape dyed with distress spray and secure in place with an idea-ology mini pin.

    igirlzoe: tim holtz sizzix 2023 everyday collection road trip colorize
    I used Alpine mixed with the Funky Nordic and Tall Pine Trees thinlits die sets to create a backdrop for my winter vacation tag. These are older dies from my collection which are still available in short supply (at the time of writing this) and linked below.

    igirlzoe: tim holtz sizzix 2023 everyday collection road trip colorize
    I love this car and of course I had to color mine brown. Cutting the pieces from distress watercolor cardstock and adding distress spray stain to each layer and once dry, assembling with distress collage medium.

    igirlzoe: tim holtz sizzix 2023 everyday collection road trip colorize
    The suitcase attached to the top of the car was such a clever design by Tim. Check out his LIVE replay where Tim shows how to attach the tree to the car roof. I used distress cracked cardstock and idea-ology metallic kraftstock to create my suitcase.

    igirlzoe: tim holtz sizzix 2023 everyday collection road trip colorize
    Another really cool part of this die set is the exhaust smoke. It’s a perfect little puff of smoke. Check out the other makes to see how it was used as clouds! So clever.

    igirlzoe: tim holtz sizzix 2023 everyday collection road trip colorize
    I used the awesome new Bulletin Alphanumeric thinlits dies to create my sentiment, adding vacation from the much older Handwritten Vacation (661286) thinlits die set. These handwritten sets are long retired, however, you may still find them in local craft stores or online marketplaces or even in your stash…

    igirlzoe: tim holtz sizzix 2023 everyday collection road trip colorize
    I think this would be really nice as a journal cover to memory keep my Swiss winter vacations. Memory keeping is something I plan to do more of in 2023.

    igirlzoe: tim holtz sizzix 2023 everyday collection road trip colorize
    Thanks for stopping by and let me know if you have any questions.
    Zoe


    affiliate links used at no cost to you


  10. Tim Holtz Christmas Box

    19th December, 2022 by iGirlZoe

    igirlzoe: tim holtz lumberjack plaid distress ranger ink

    Hello friends, I hope you’re well and enjoying December. I’m sharing a Christmas gift tag box I made for the LIVE launch of the newest member of the Tim Holtz Distress family, Lumberjack Plaid. You can see this Christmas gift tag box and the other new color makes over on Tim’s blog.

    igirlzoe: tim holtz lumberjack plaid distress ranger ink
    I was inspired by Tim’s demo during the LIVE launch of his Christmas stamps and had just enough time to make and ship it for the new distress launch. It’s a simple make that you could complete in an afternoon. You could also do a little compartmental making each evening or when time allows. If Christmas is not your jam, it’s easily adapted to a Halloween, spring or an every day gift tag box. Let’s get into the details…

    igirlzoe: tim holtz lumberjack plaid distress ranger ink
    Using the technique Tim demoed, stamp panels of paper to cover a large vignette box. Add a word plaque from the idea-ology Christmas line with picket fence distress crayon rubbed in and add hardware heads to finish. I used distress collage medium to attach everything.

    igirlzoe: tim holtz lumberjack plaid distress ranger ink
    The inside of the vignette box is sprayed with lumberjack plaid distress ink spray and dried with a heat tool. Add a piece of striped stamped cardstock to the bottom of the vignette box and use the etcetera tag trims and decorative trims dies to create dividers. These are the scalloped edged trims, glued into place with distress collage medium.

    igirlzoe: tim holtz lumberjack plaid distress ranger ink
    Create envelope or gift box seals with the switchlits seal and darling stamp set, watercolored with distress pencils. The seals were cut from distress kraft heavystock and a couple sprayed with lumberjack plaid distress ink spray and the others from idea-ology metallic cardstock. The darling stamps are the perfect size for the seals.

    igirlzoe: tim holtz lumberjack plaid distress ranger ink
    Stamping in lumberjack plaid distress ink, create some tags to add to cards and gifts. The sentiment stamps from the new darling stamp set fit perfectly onto a tag cut from the chapter 3 thinlits collector die set. Grunge up some idea-ology candy canes and tie with string. Stamp and fussy cut to create ephemera, I took stamps from vintage holidays and department store stamp sets. An idea-ology tiny clip will hold them together neatly in the box.

    igirlzoe: tim holtz lumberjack plaid distress ranger ink
    Another technique I took from Tim’s demo to create these card toppers/gift tags using the new vintage label thinlits dies + bold tidings mini and plaid + nordic stamp sets, stamped in lumberjack plaid distress ink of course.

    igirlzoe: tim holtz lumberjack plaid distress ranger ink
    Using the postale thinlits die set from chapter 3 with the darling stamp set and distress watercolor pencils, create some mini cards.

    igirlzoe: tim holtz lumberjack plaid distress ranger ink
    The mini envelopes were created using the postale thinlits set cut from kraft envelopes that you can find here.

    Here’s how you make them…

    igirlzoe: tim holtz lumberjack plaid distress ranger ink
    Take a 5×7 inch kraft envelope and use a letter opener, ruler, palette knife to open the envelope. Trim away the flaps, leaving you with the center of the envelope which perfectly fits the postale envelope die. Run the die through your machine.

    igirlzoe: tim holtz lumberjack plaid distress ranger ink
    If you’re short on time or have no use for spare pieces of kraft paper don’t open the envelope, simply place the postale envelope die over the front of the envelope and die cut through it.

    igirlzoe: tim holtz lumberjack plaid distress ranger ink
    Assemble the envelope, then open the flap and spray one side with lumberjack plaid distress spray and once dry, stamp with the plaid stamp from plaid + nordic stamp set in black soot distress archival ink.

    igirlzoe: tim holtz lumberjack plaid distress ranger ink
    Create a file pocket to store tiny pieces of ephemera and blank notecards. Cut a folder using the specimen thinlits die set and stamp with stamps from vintage holidays stamp set in lumberjack plaid distress ink and black soot and vintage photo distress archival inks. Stitch the sides by hand or with a sewing machine to create the pocket.

    igirlzoe: tim holtz lumberjack plaid distress ranger ink
    Confession time… I repurposed this from my Christmas Charcuterie! I was a little pushed for time and this was perfect for my gift themed box. I think it’s cute to add a little trinket to the box.

    igirlzoe: tim holtz lumberjack plaid distress ranger ink
    I took the “some assembly required” photos for Mario aka MacGyver, who kindly assembles makes which travel better internationally disassembled. If you wanted to make a Christmas box for a gift, you could send it disassembled and wrapped in tissue with an assembly photo.

    igirlzoe: tim holtz lumberjack plaid distress ranger ink
    Thanks for stopping by, I hope this has been helpful and let me know if you have any questions.
    Zoe


    affiliate links used at no cost to you