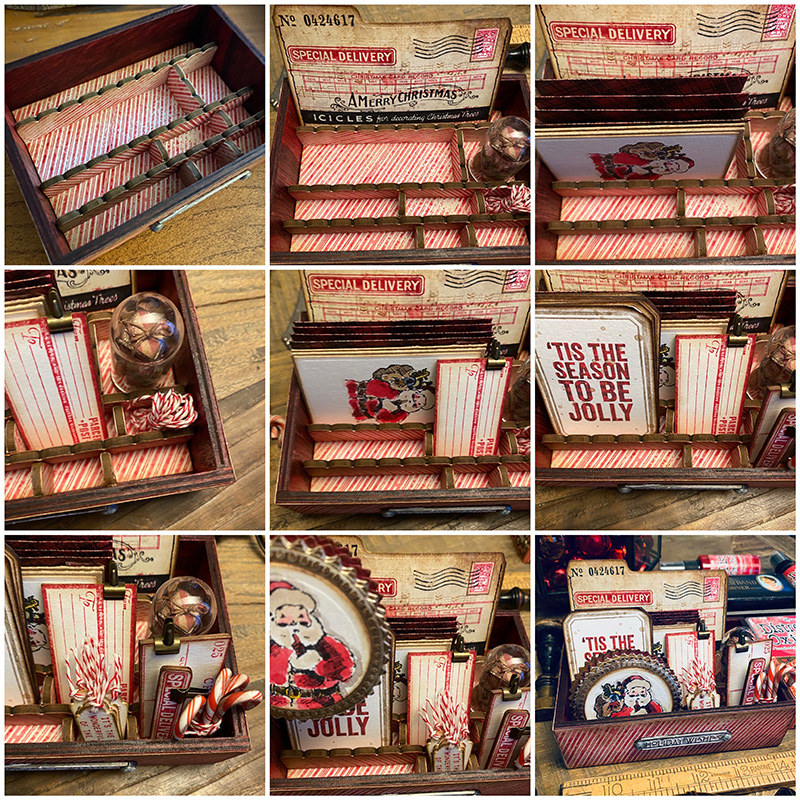
Hello friends, I hope you’re well and enjoying December. I’m sharing a Christmas gift tag box I made for the LIVE launch of the newest member of the Tim Holtz Distress family, Lumberjack Plaid. You can see this Christmas gift tag box and the other new color makes over on Tim’s blog.
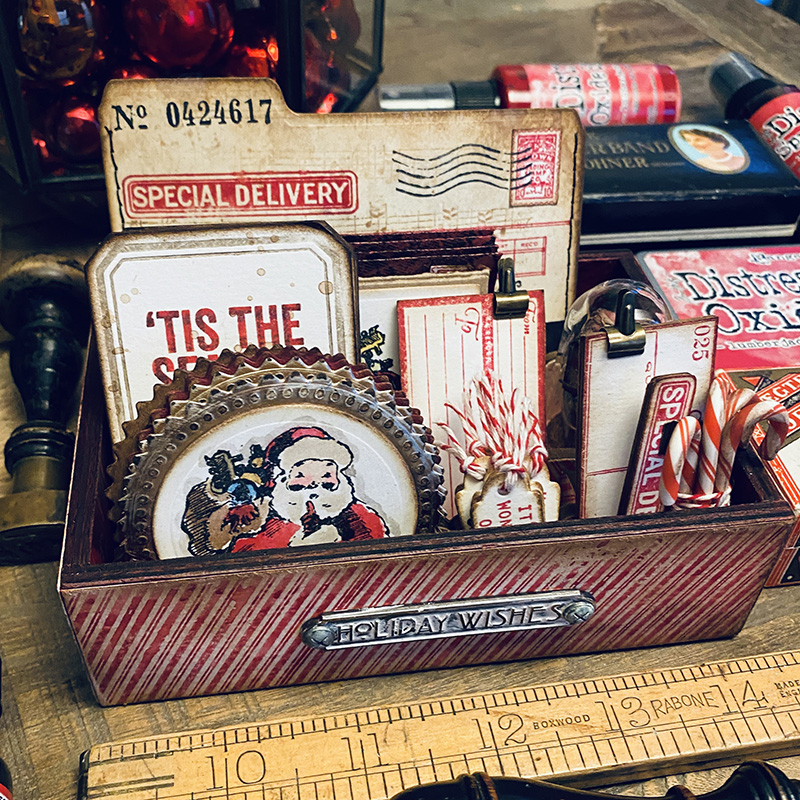
I was inspired by Tim’s demo during the LIVE launch of his Christmas stamps and had just enough time to make and ship it for the new distress launch. It’s a simple make that you could complete in an afternoon. You could also do a little compartmental making each evening or when time allows. If Christmas is not your jam, it’s easily adapted to a Halloween, spring or an every day gift tag box. Let’s get into the details…

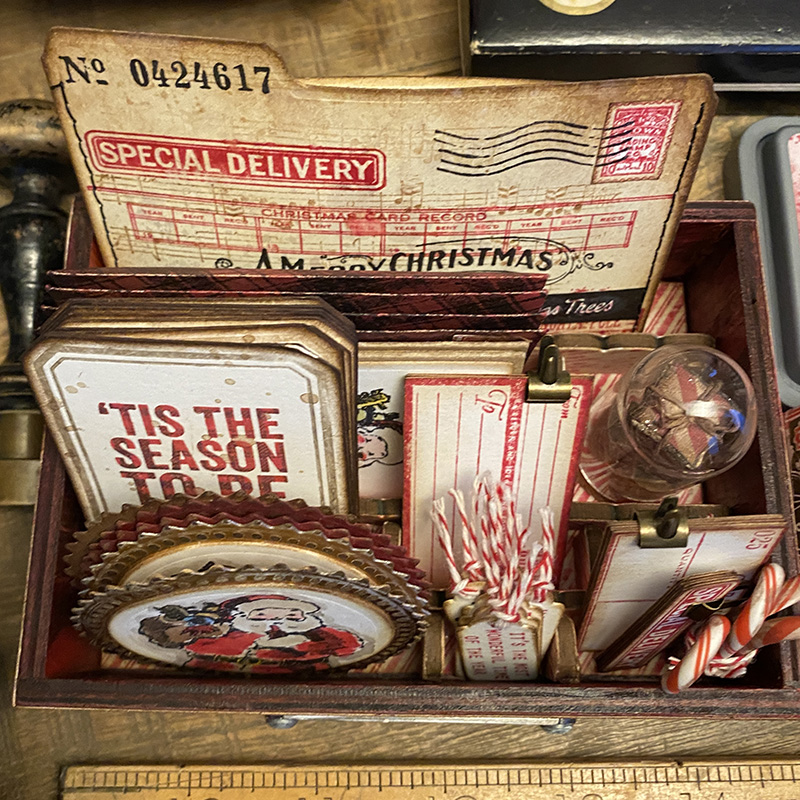
Using the technique Tim demoed, stamp panels of paper to cover a large vignette box. Add a word plaque from the idea-ology Christmas line with picket fence distress crayon rubbed in and add hardware heads to finish. I used distress collage medium to attach everything.
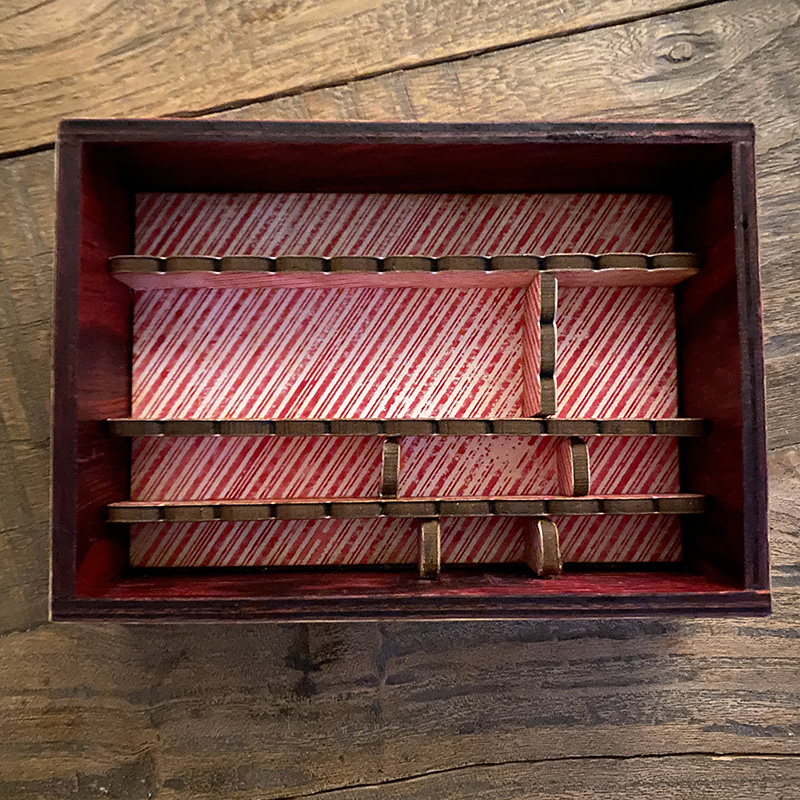
The inside of the vignette box is sprayed with lumberjack plaid distress ink spray and dried with a heat tool. Add a piece of striped stamped cardstock to the bottom of the vignette box and use the etcetera tag trims and decorative trims dies to create dividers. These are the scalloped edged trims, glued into place with distress collage medium.
Create envelope or gift box seals with the switchlits seal and darling stamp set, watercolored with distress pencils. The seals were cut from distress kraft heavystock and a couple sprayed with lumberjack plaid distress ink spray and the others from idea-ology metallic cardstock. The darling stamps are the perfect size for the seals.
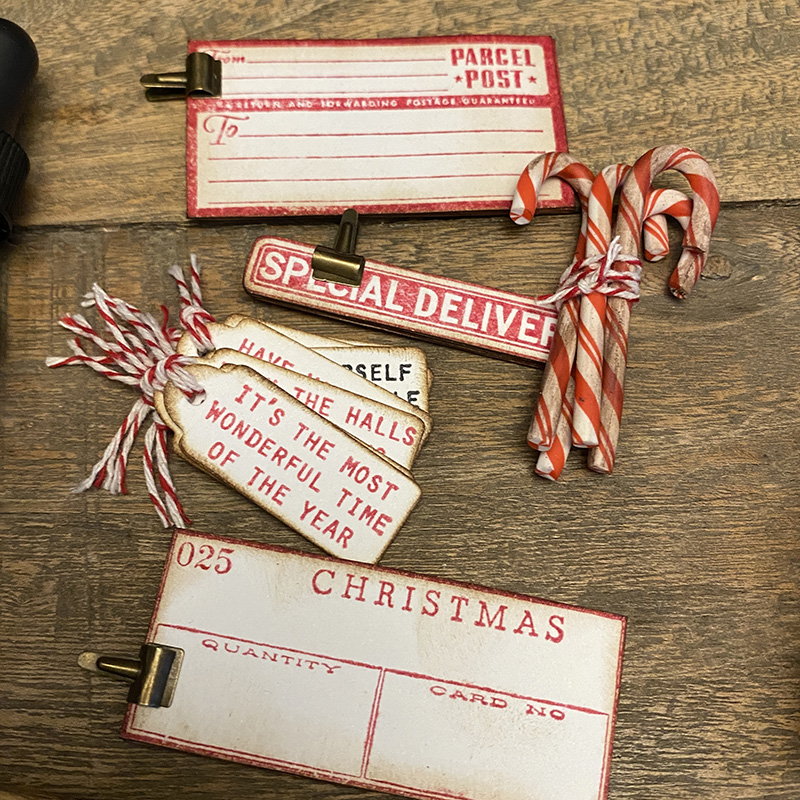
Stamping in lumberjack plaid distress ink, create some tags to add to cards and gifts. The sentiment stamps from the new darling stamp set fit perfectly onto a tag cut from the chapter 3 thinlits collector die set. Grunge up some idea-ology candy canes and tie with string. Stamp and fussy cut to create ephemera, I took stamps from vintage holidays and department store stamp sets. An idea-ology tiny clip will hold them together neatly in the box.
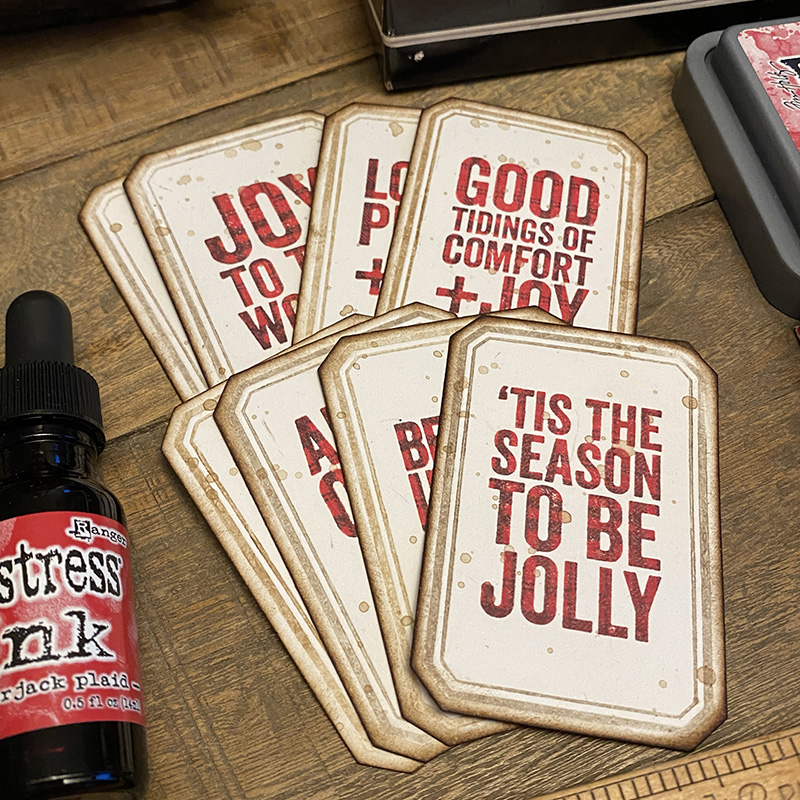
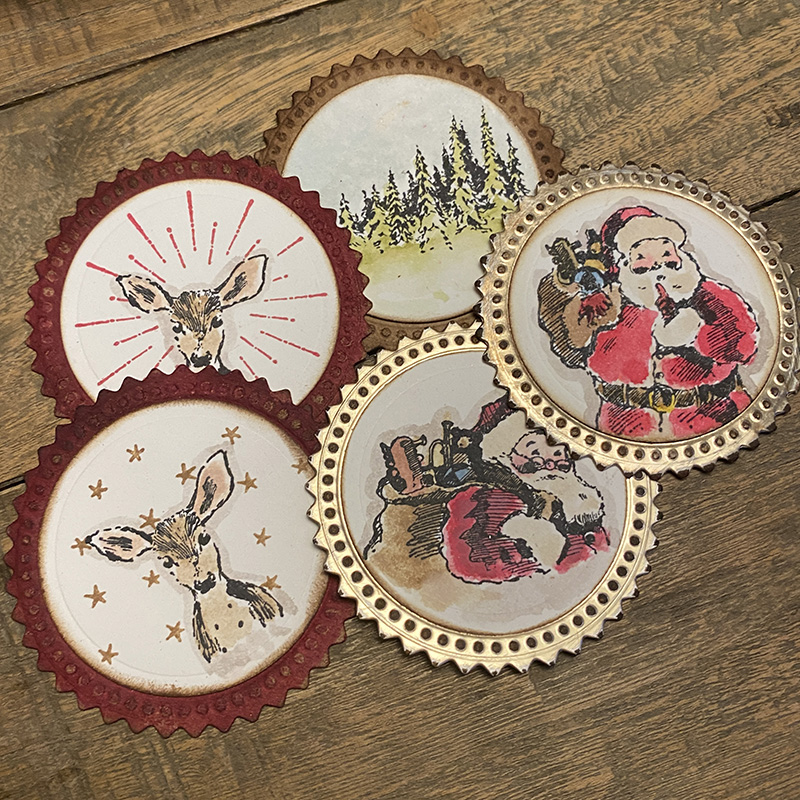
Another technique I took from Tim’s demo to create these card toppers/gift tags using the new vintage label thinlits dies + bold tidings mini and plaid + nordic stamp sets, stamped in lumberjack plaid distress ink of course.
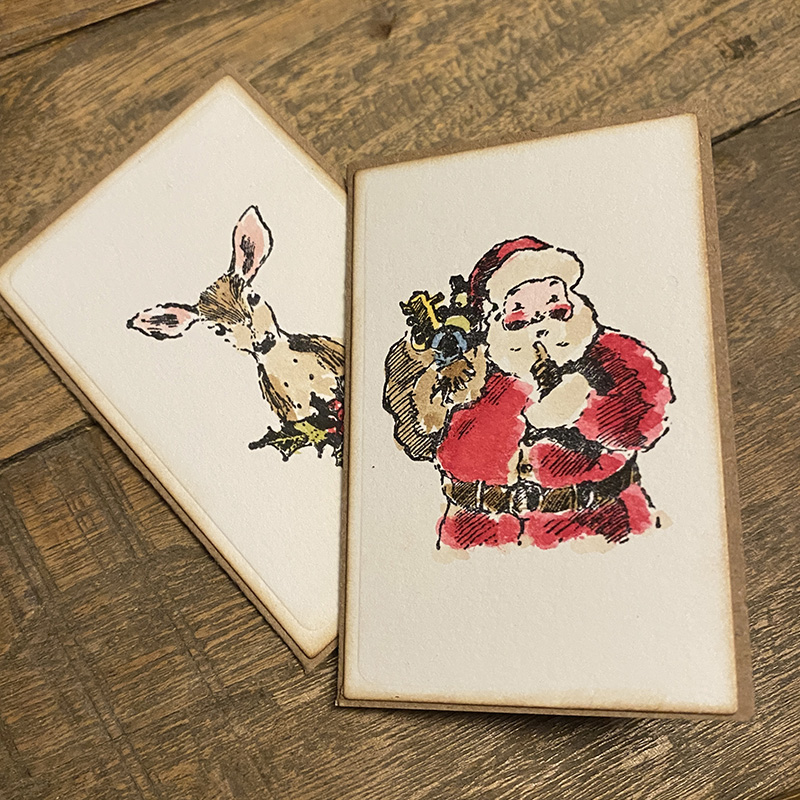
Using the postale thinlits die set from chapter 3 with the darling stamp set and distress watercolor pencils, create some mini cards.
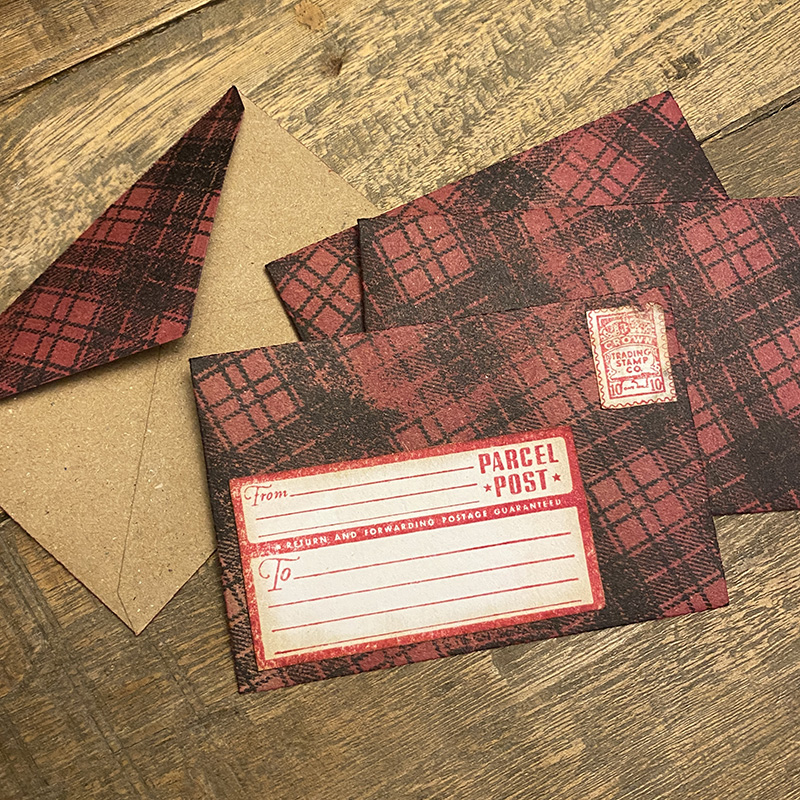
The mini envelopes were created using the postale thinlits set cut from kraft envelopes that you can find here.
Here’s how you make them…
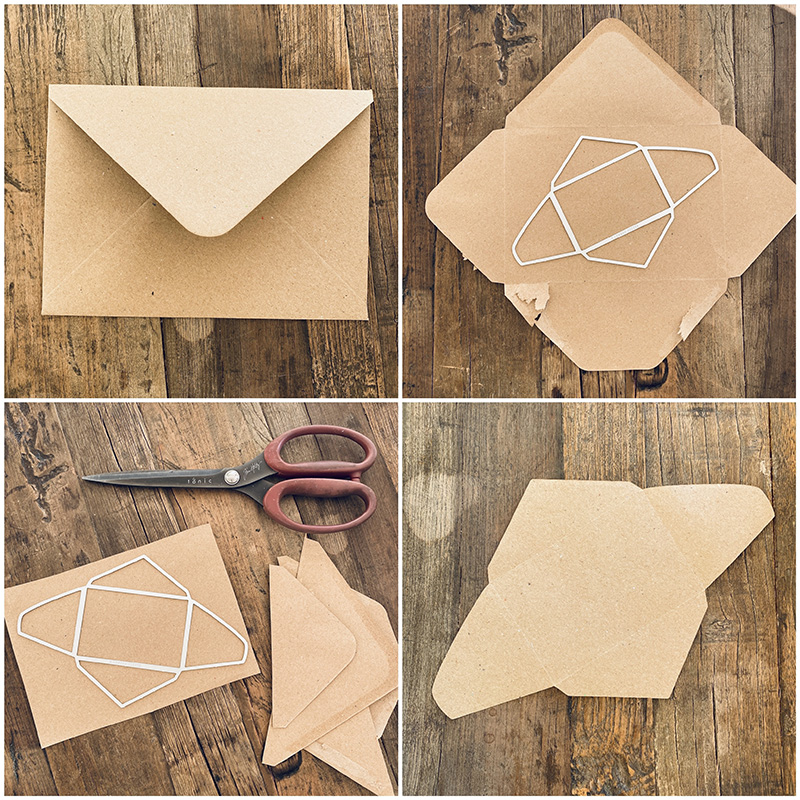
Take a 5×7 inch kraft envelope and use a letter opener, ruler, palette knife to open the envelope. Trim away the flaps, leaving you with the center of the envelope which perfectly fits the postale envelope die. Run the die through your machine.
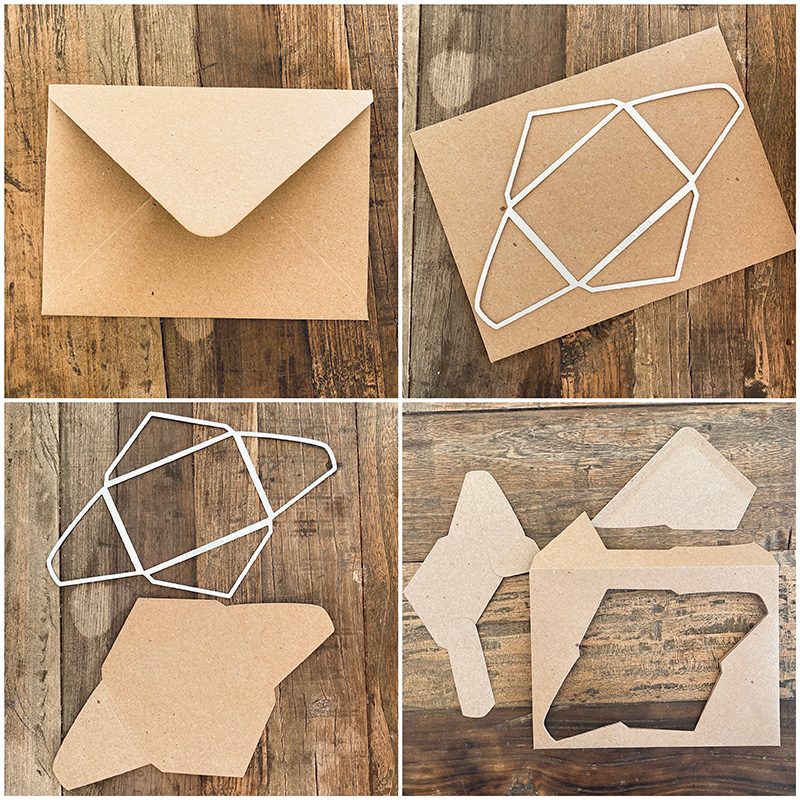
If you’re short on time or have no use for spare pieces of kraft paper don’t open the envelope, simply place the postale envelope die over the front of the envelope and die cut through it.

Assemble the envelope, then open the flap and spray one side with lumberjack plaid distress spray and once dry, stamp with the plaid stamp from plaid + nordic stamp set in black soot distress archival ink.
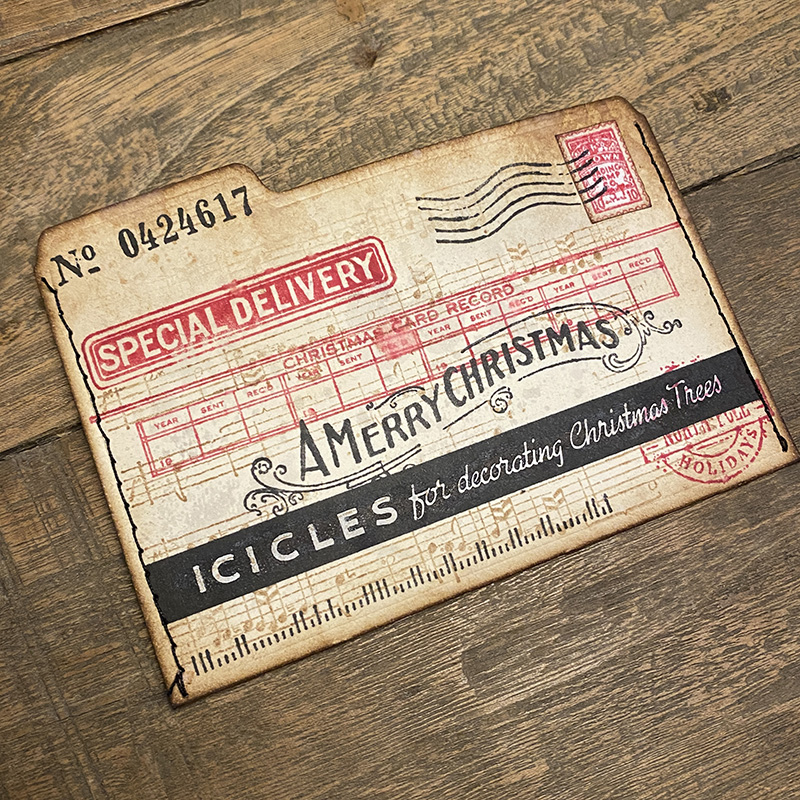
Create a file pocket to store tiny pieces of ephemera and blank notecards. Cut a folder using the specimen thinlits die set and stamp with stamps from vintage holidays stamp set in lumberjack plaid distress ink and black soot and vintage photo distress archival inks. Stitch the sides by hand or with a sewing machine to create the pocket.
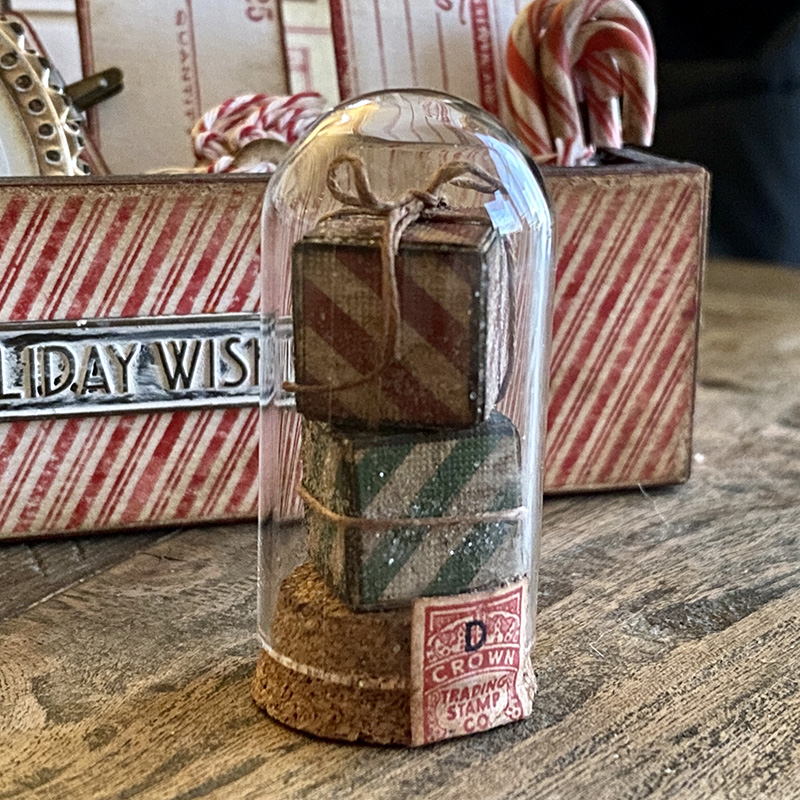
Confession time… I repurposed this from my Christmas Charcuterie! I was a little pushed for time and this was perfect for my gift themed box. I think it’s cute to add a little trinket to the box.
I took the “some assembly required” photos for Mario aka MacGyver, who kindly assembles makes which travel better internationally disassembled. If you wanted to make a Christmas box for a gift, you could send it disassembled and wrapped in tissue with an assembly photo.
Thanks for stopping by, I hope this has been helpful and let me know if you have any questions.
Zoe
…
affiliate links used at no cost to you


Fantastic Zoe! Such a fabulous gift, look forward to making one or more after the holidays for next year!
Zoe..I love so many of the things you create,..very inspiring.
So cute!!!! Love everything you make!
This is so wonderful and I will be making one for decor for next year! I have all the supplies in my studio just waiting to be used! Thanks for sharing your amazing talent!!!
Aw Zoe, this is absolutely adorable!! I need to make one to corral stuff before next year.
Thank you for taking the time to put together a tutorial and sharing you time and expertise!
Have a very Merry Christmas!!
Perfect project Zoe, I love it, as usual, with everything you make. We have a snow day today. We got lots of it here in Victoria BC so papercrafting it is today. 🙂 Happy Christmas Season to you and yours.
Wow!!! Zoe, this is Gorgeous!!! I love it!!!
This is such an amazing project.
Absolutely brilliant Zoe and thank you for such detailed instructions.
I LOVE LOVE LOVE this! Thanks so much for sharing! You have given me a great idea!!!