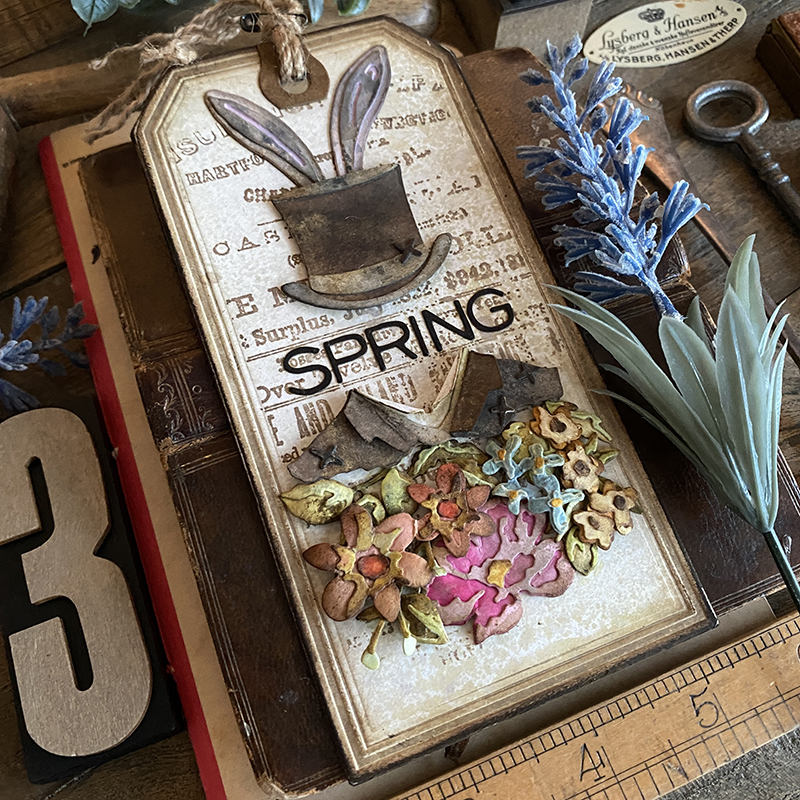
Hello friends, hope you’re doing well. I can’t believe it’s already been 3 months since Tim Holtz released his incredible 2023 Sizzix Everyday Collection, the year is flying past. I’m getting into some more Spring and Easter makes and wanted to share a tag I made using dies from the 2023 collection. You can see the Launch and inspiration makes, plus demo over on Tim’s blog.
I’ve seen quite a few questions in the Tim Holtz Addicts group about the Brushtroke Flowers Mini thinlits dies, mostly how to assemble them. As I was starting to make some for upcoming makes, I thought I would do some assembly step outs in the hopes that it will help. They are really fun to make and really easy once you’ve had a run or 2 at them. Details later in the post…
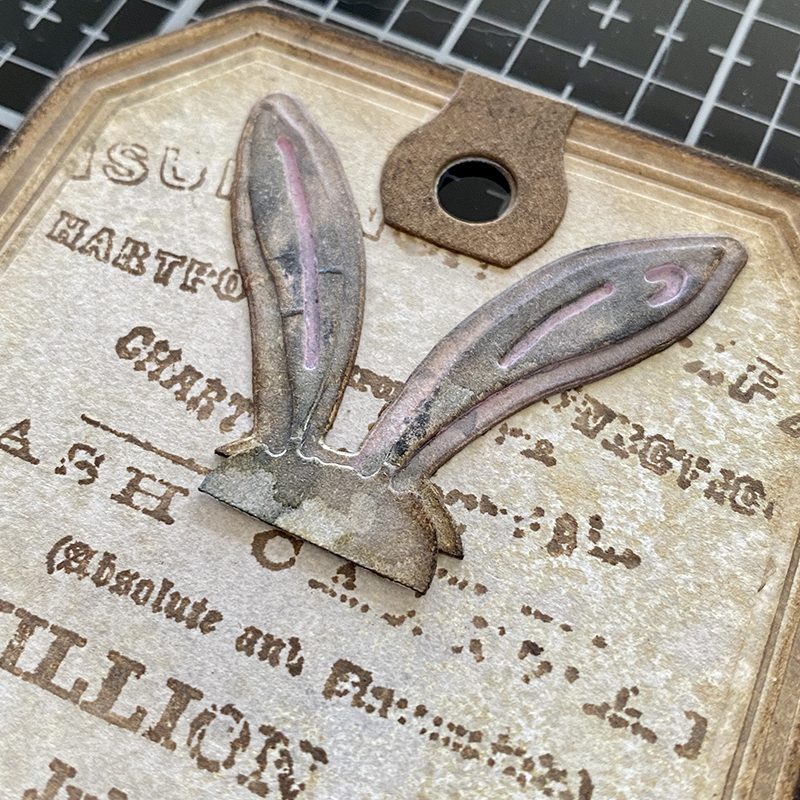
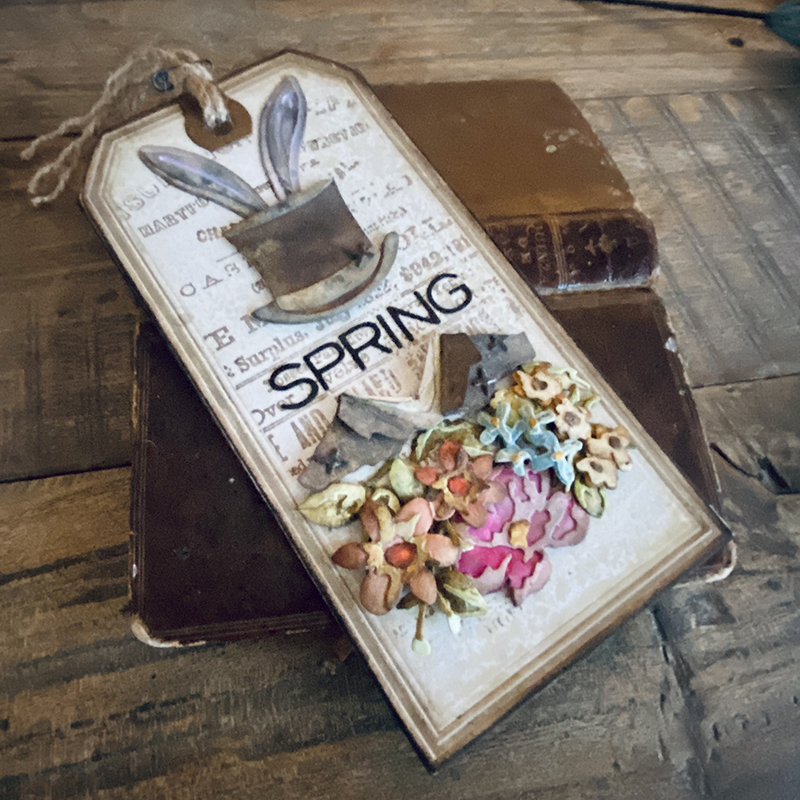
First I wanted to add bunny ears to a hat because Easter wouldn’t be Easter without bunny ears and a top hat! I die cut a bunny from the Bunny Stitch thinlits set and inked with distress and cut down, leaving enough to attach the ears to the hat. I used the Framed Tags thinlits die set to create my tag, stamped with the background from The Professor 2 stamp set, in distress archival ink.
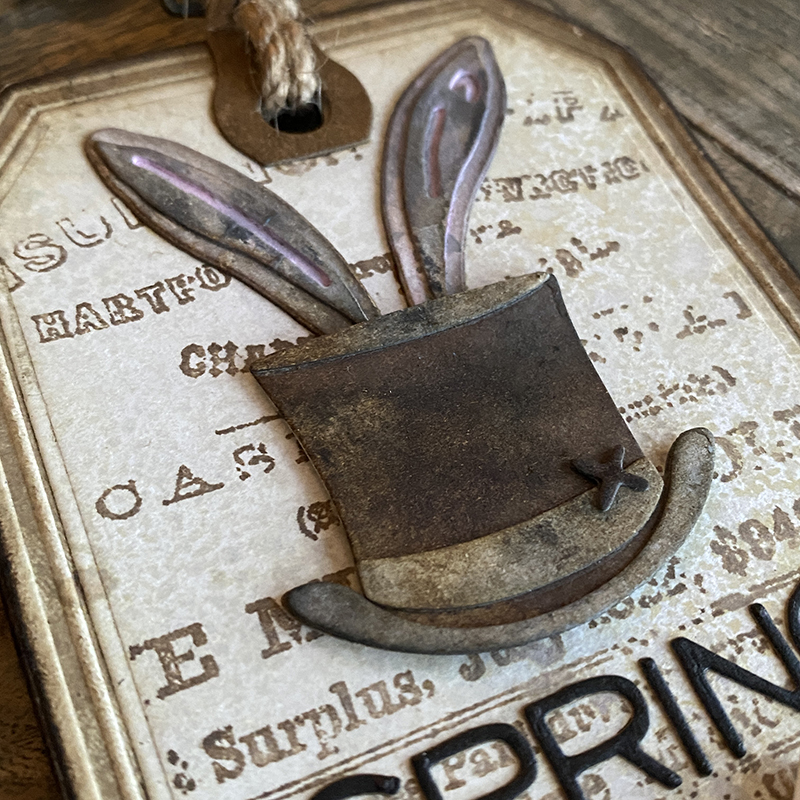
I cut a hat and jacket from the Tailored thinlits die set and inked with distress. I added “x’s” from the Bunny Stitch thinlits die set for a patched up look.

I cut idea-ology black kraftstock with the Alphanumeric Thin thinlits die set and added it to the background using distress collage medium and the squeezers from Tim’s Sizzix Shaping Kit Making Tool set.
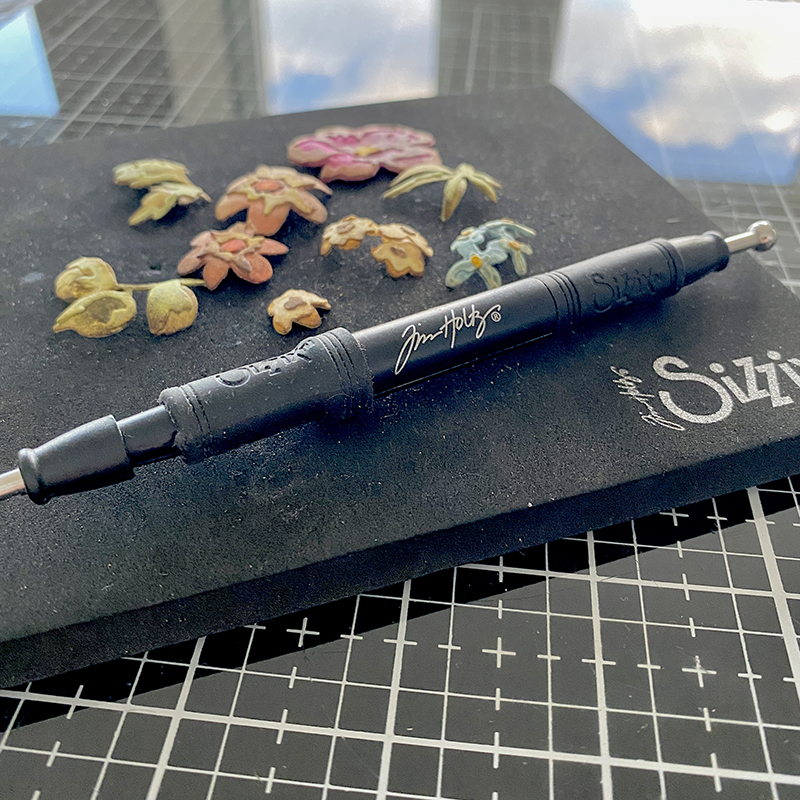
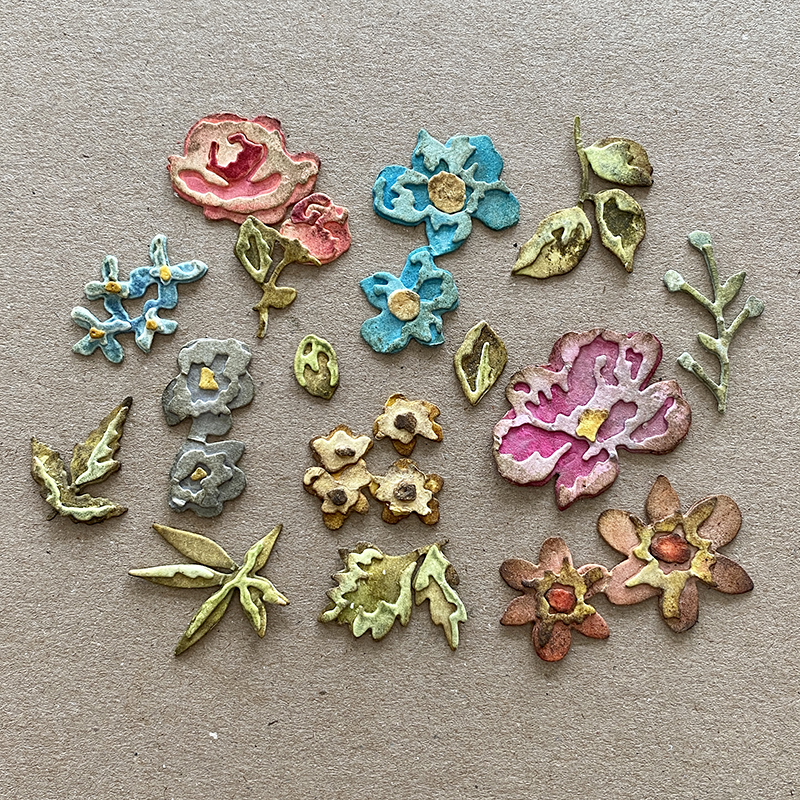
I used the shaping tool from this set to shape the flowers and foliage. I LOVE this shaping tool, it’s so incredibly easy to use and the dimensional effect you get is awesome. Tim has a great demo using it on his blog.
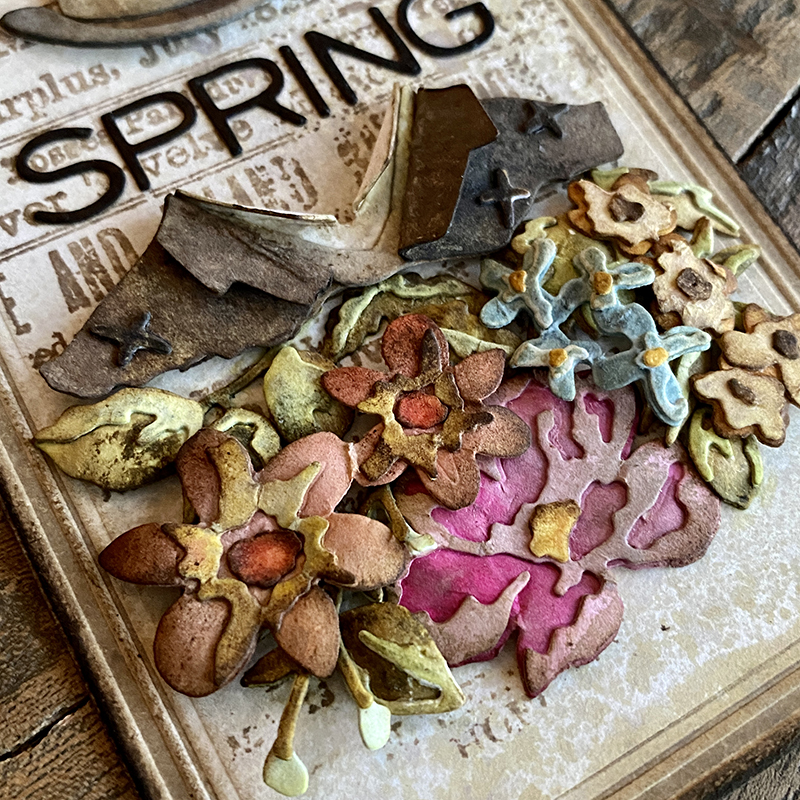
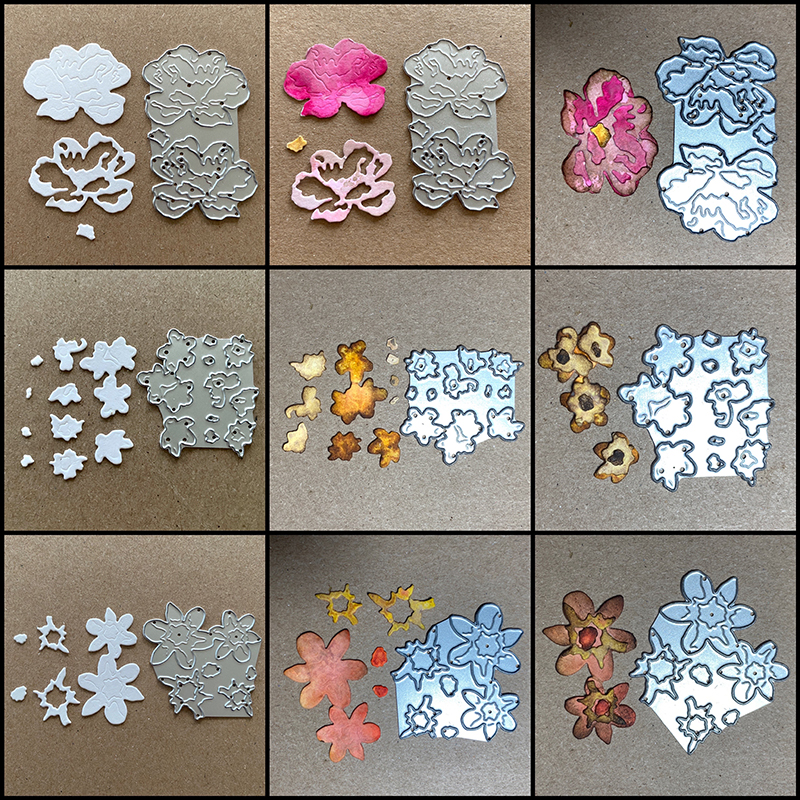
I used the Brushstroke Flowers Mini thinlits to create this gorgeous grungy bouquet. I was sent some 3D foam adhesive squares from Simon Says Stamp to use and I am sold! They come in large and small square foams, in 2 different depths and in black, white or a mixed pack. I used the small less deep squares under my hat and jacket and the deeper small squares under some of the flowers so they retained their shape.
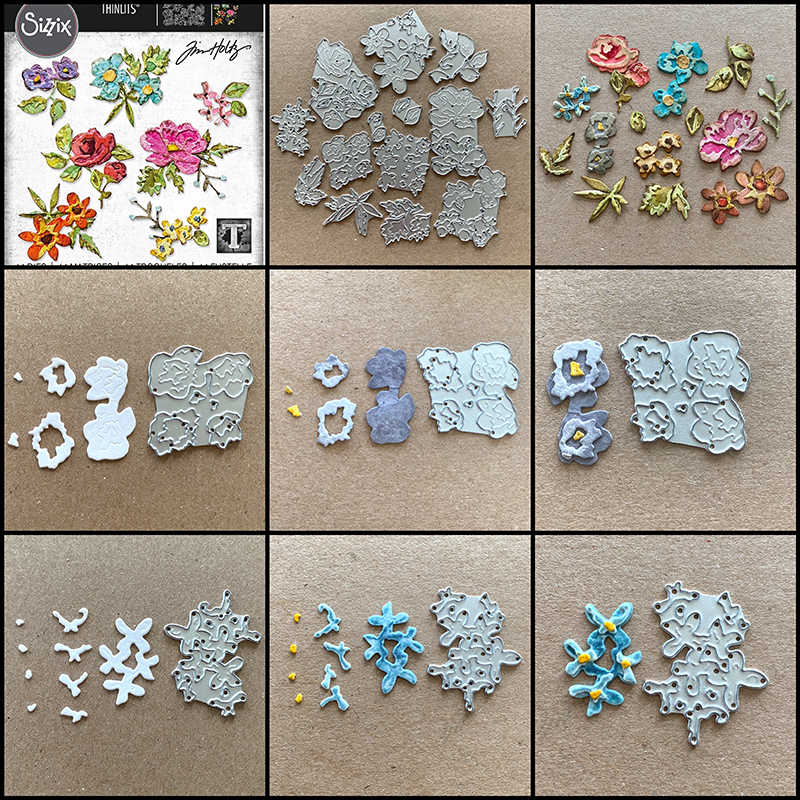
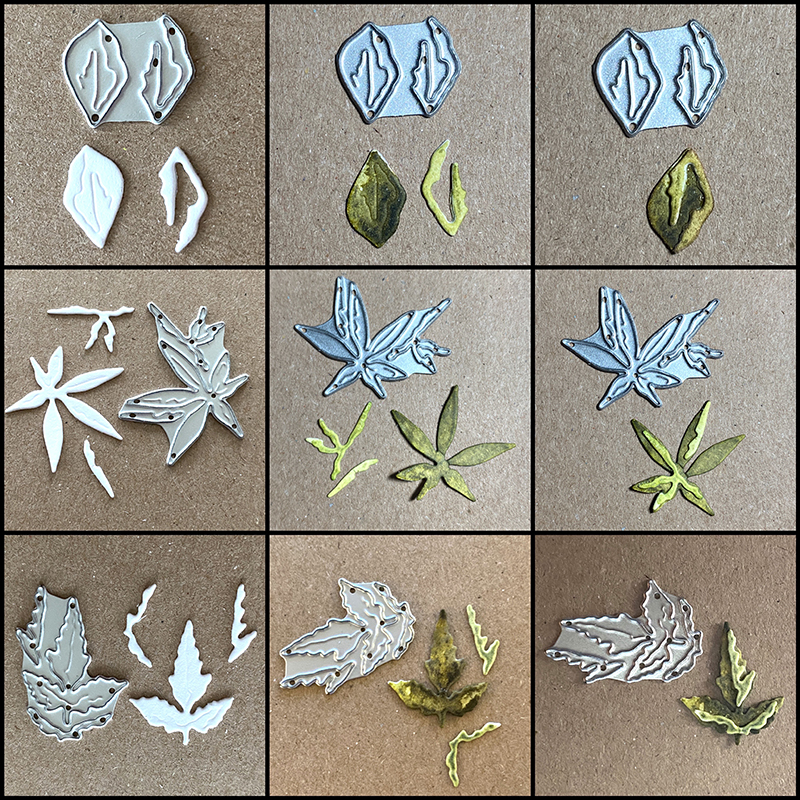
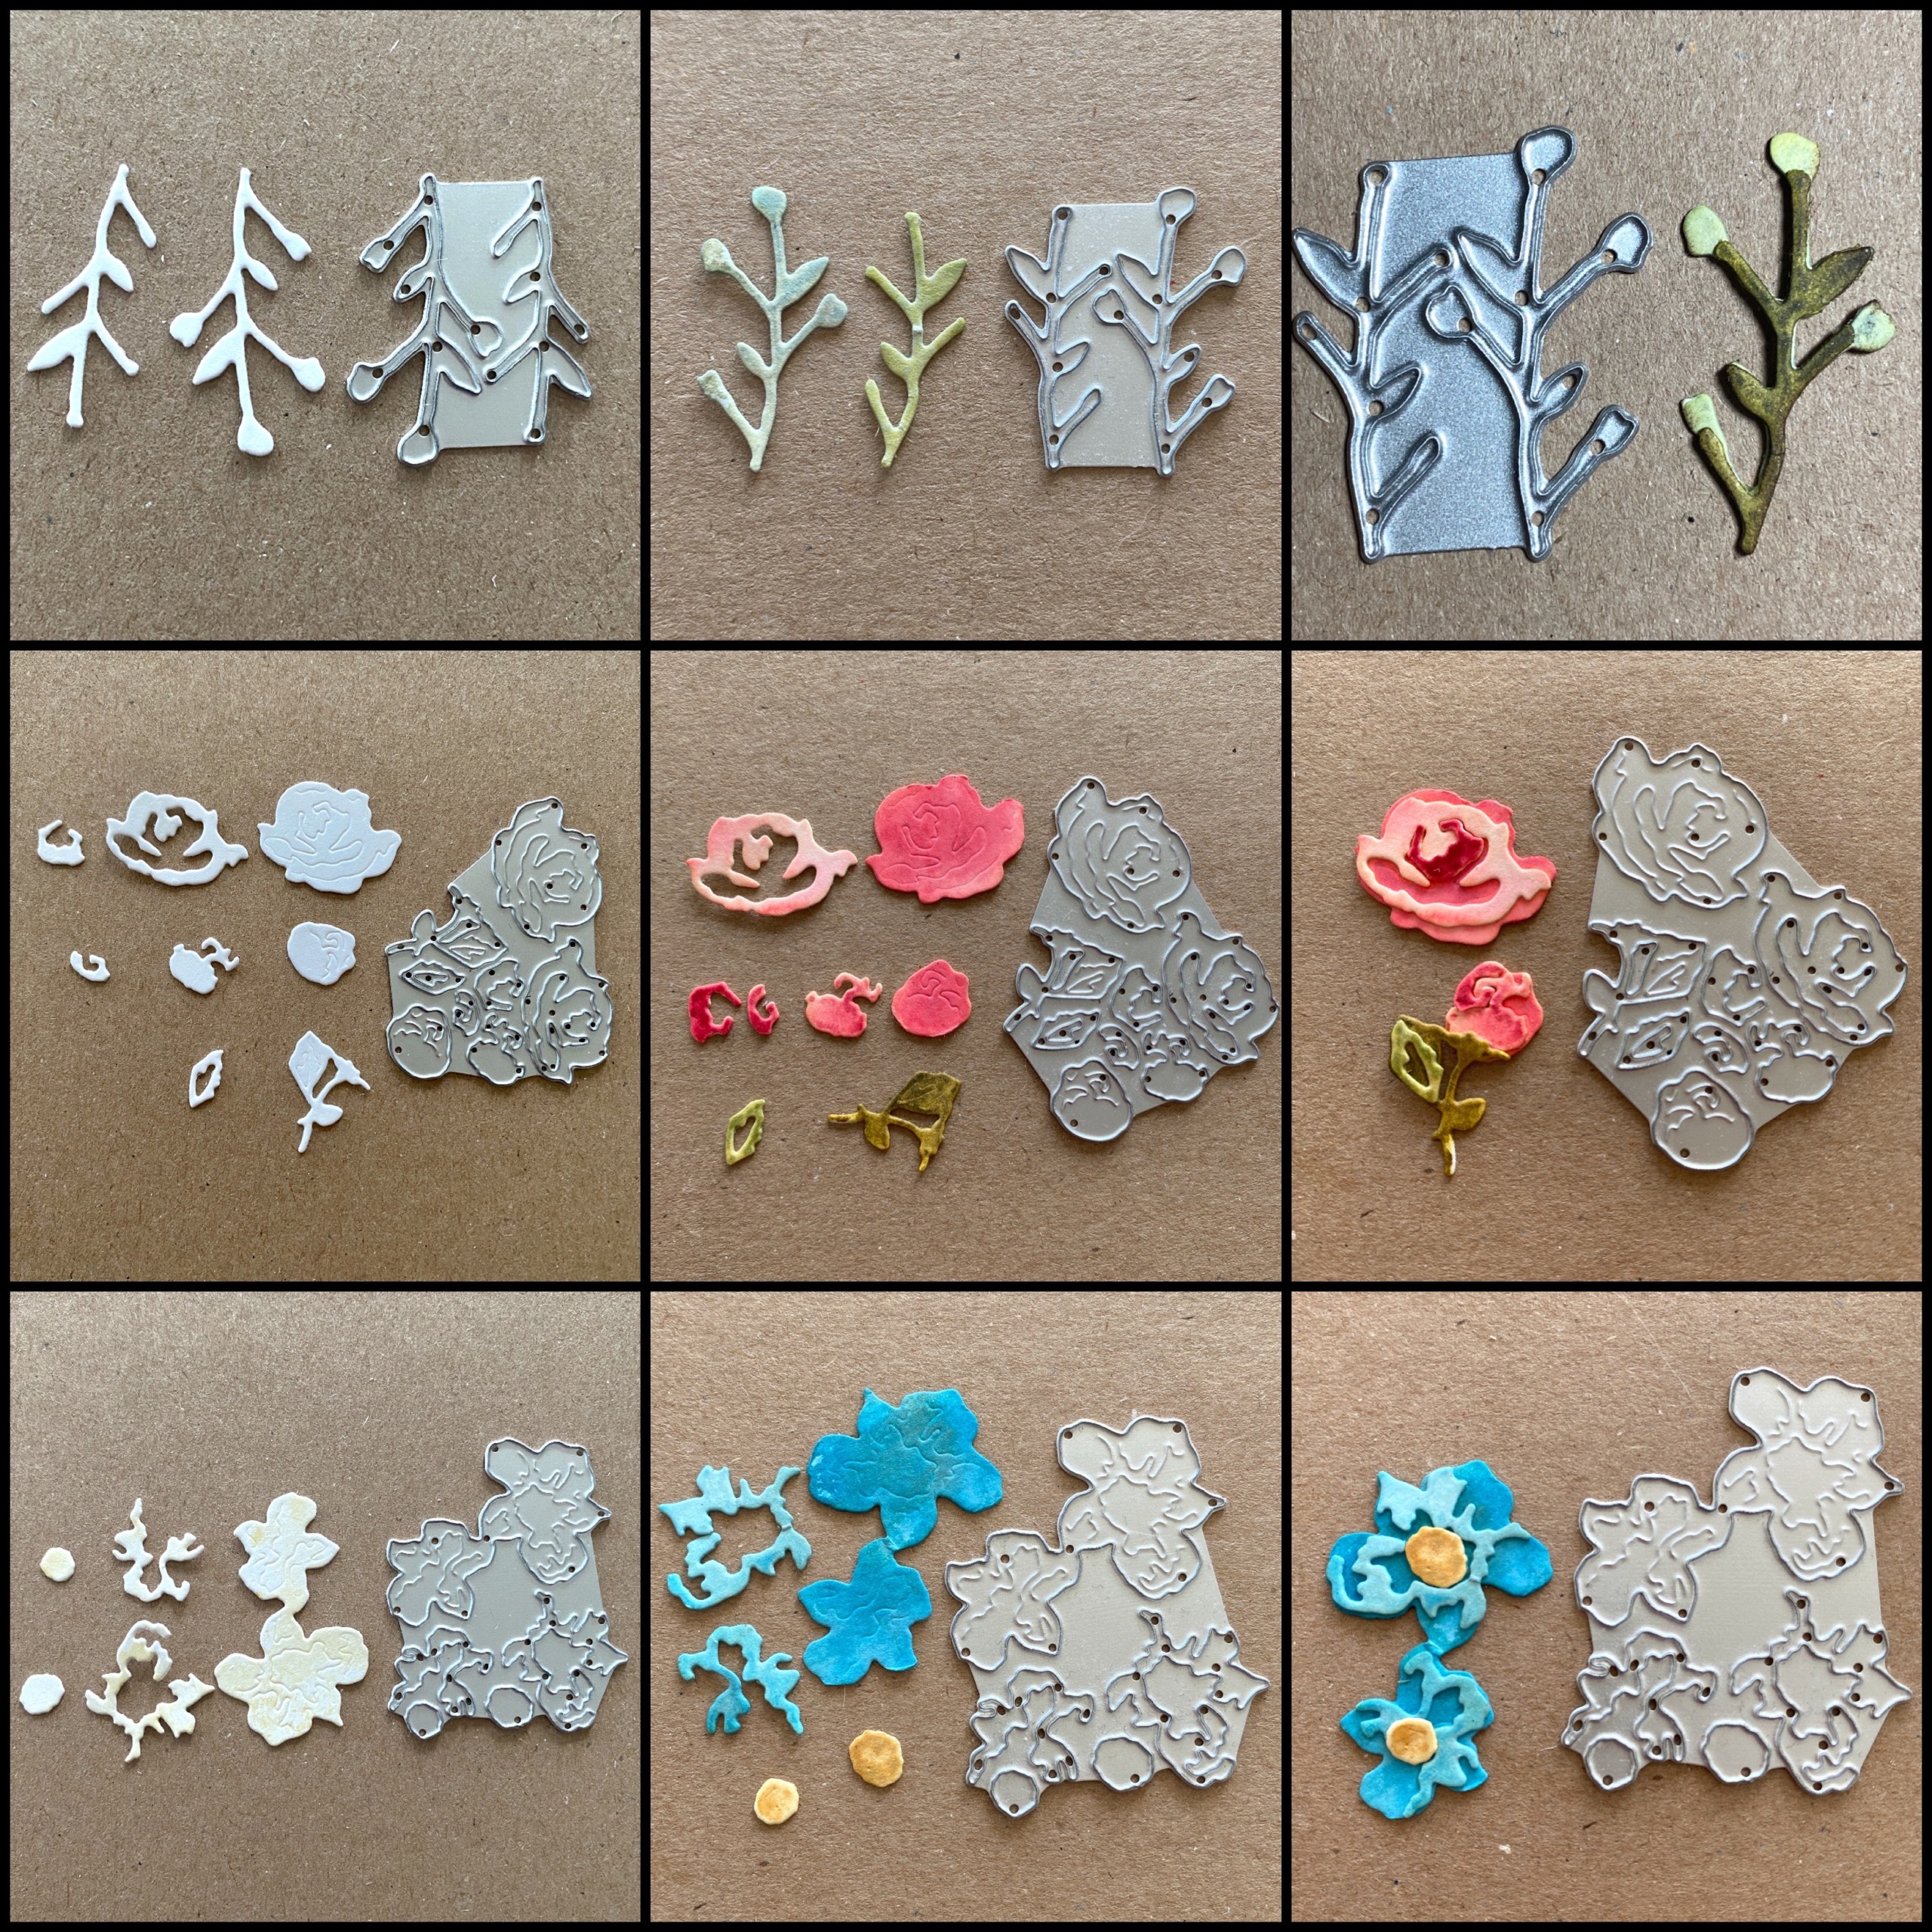
Now for the how to put them together part and it’s as easy as 1, 2, 3! You will see below each die has 3 photos, working from left to right.
Die Cut (1), Ink (2), Assembled (3).

I hope this helps make assembly easy for you and will encourage you to have a go if you haven’t already. And please remember, there are no hard and fast rules, so if you’re left with a piece and don’t care, toss it!
Thanks for stopping by and let me know if you have any questions.
Zoe
…
affiliate links used at no cost to you


This is AWESOME!!! You rocked those flowers, Zoe! Love the little step outs! PERFECTION!!! 🤩
Good Lord!! What just happened!! Absolutely positively astounding!!! Thanks for sharing your incredible art!!!
Thank you for this. I did put these together once. Some went together easily some I had trouble with and got a little frustrated. These pictures are awesome and so I will go back and use them again. It looks like it will make it so much easier.
I agree… Zoe is a Blessing. 🙂
Thank you! This is so helpful!
Thank you for the flower step out! This is a nice clear guide. I know the layers don’t have to be perfect but I like to know the rules then I can bend and break them! 😁
Another fantastic Zoe make!
LOVE… “bend and break them”. Me too!… LOL.
You are a Blessing. I loved this die set from the first time I saw it, but I used it for the first time this week and OMGoodness! I had no idea it what it would entail. I agree with Miriam… I think some are easy to ‘comprehend’ while other are a bit of a ‘huh???’ But they are still really beautiful.
AND THIS CARD… so so nice. I really like it because it’s almost a ‘dirty-grungy’ but pretty, and a touch of cute with the bunny ears hat. The touches of the ‘x’ on the hat and coat lapel are the perfect touch.
A great big THANK YOU again for the die photos.
What a fabulous make my friend! Brilliant to use the ears from the Bunny Stitch die set for this project! Your pictures are fantastic of the mini brush strokes dies! What a useful tool and thank you for taking the time to do this! It’s like the periodical chart for the mini brushstroke dies! So very helpful my sweet friend!
Nice card and thanks so much for the flower chart!
Hey Rocky, watch me pull a rabbit out of this hat (top hat of course)….LOL. I absolutely love this make. Best yet for the top hat. Looking forward to making some of these flowers now that I can see how to assemble them. Definitely need to book mark this post. LOVE, LOVE, LOVE.
Love the entire make, grungy sweet! Like all who have come to visit, I am SO
grateful for your step outs on assembling the flowers. I’ve gotten a few together and then was a bit stumped (my impatience took over) and the rest are set aside waiting for “the right time” and demo to set me back into my desk chair to play with them again! Thanks again 🫶🏼🤗
Once again, thank you so much Zoe for all the explanation
Beautiful work as always! I appreciate you so much! It’s helpful to see how you work when I try to use these tools! Thank you!
Thanks so much for your valuable tutorial here! LOVE your work!
So many tiny pieces to try to figure out. Zoe, this is a godsend. Thank you so much.
Thank you! The first time seems to be the hardest with all the layering dies. With all the parts grouped onto one die, it’s a bit easier.
Thank you so much😘 This was amazing!
What a gorgeous, pretty, grungy tag!! I love it!!! Thanks for the step out photos which will be so helpful when I start making the mini brushstroke flowers next week. ❤️
Beautiful Make! Thanks for this great guide! You are a wonderful teacher. 🤗💕
I have bought the bigger flowers #665208, #665360, #665210 and find them hard to do they never look as neat as the package shows or how neat yours look. Have you done any tutorials on making them? They are very expensive and I hate to stop doing them. Thank you