Welcome to the family Lost Shadow Distress! If you missed the formal introduction, RUN over to Tim’s blog and watch the replay. What a fantastic party with so much inspiration and such a beautiful story about how the name came to be. I love hanging out on a Saturday for the LIVES and the new color reveal always has an extra special buzz about it and for me, this color was one to get really excited about. Here come the NEUTRALS!
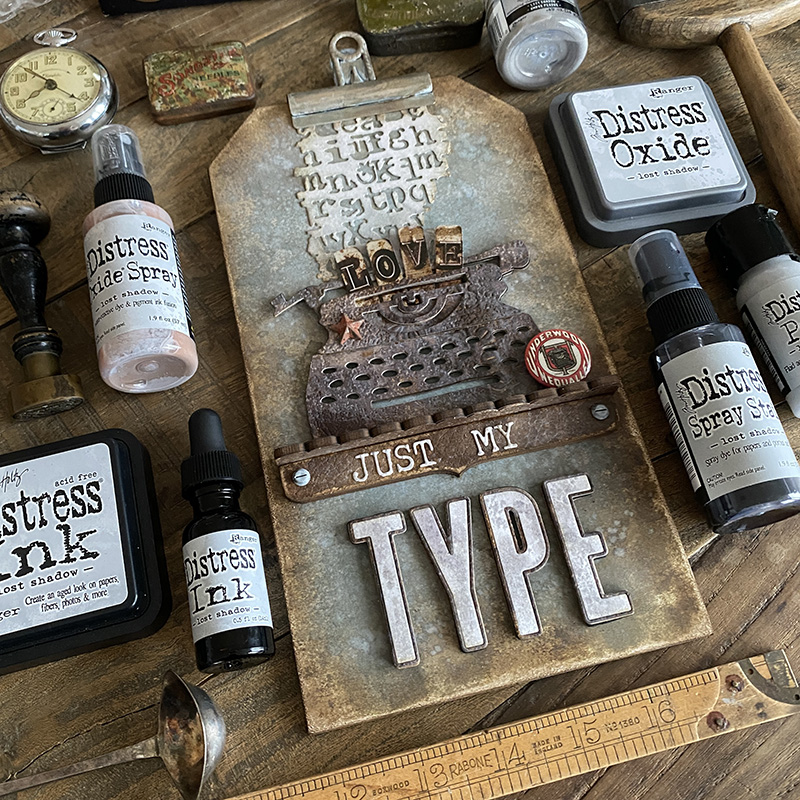
Lost Shadow is just my type and definitely one for the “most used box”… Five stars to Tim and the chemists at Ranger Ink for bringing us yet another chameleon distress with truly magical properties! Add frayed burlap spray stain to Lost Shadow oxide spray and see the magic for yourself! That’s where the background for this make began. Let’s get into some of the details…
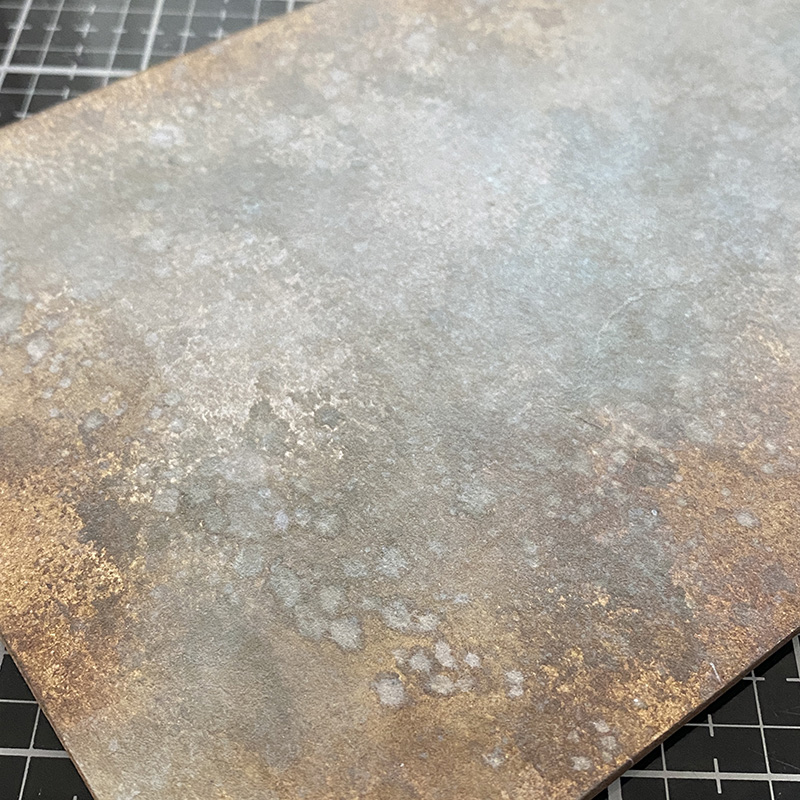
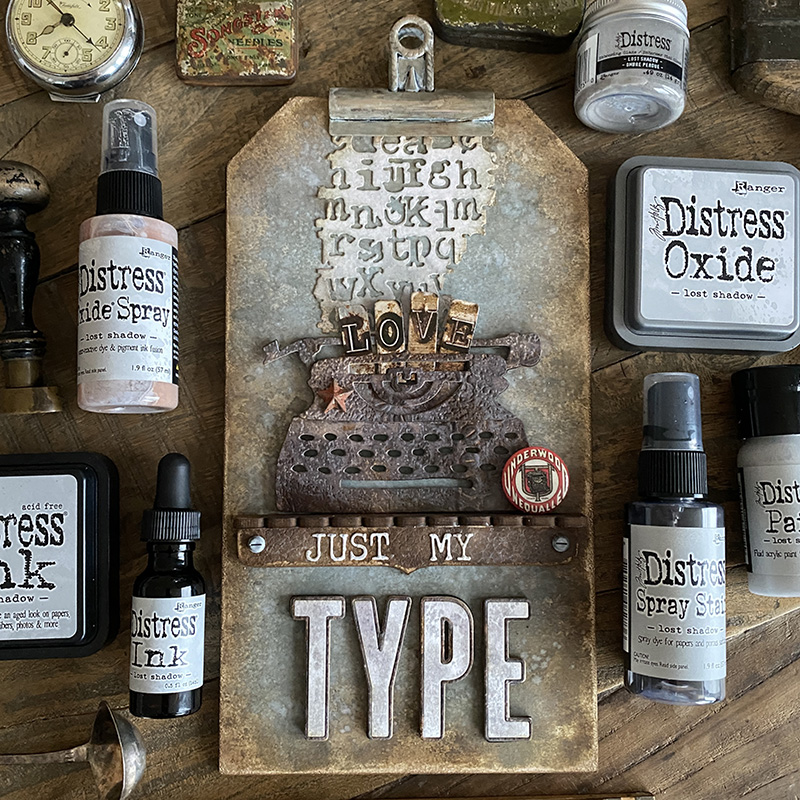
The mottled magic that happens when Lost Shadow distress oxide spray meets frayed burlap distress spray stain and it turns different colors! I was playing around, adding other browns and loved the end result so I decided to create a larger background and add it to a thickboard etctera tag.
I’ve had a few questions about Etcetera tags and how to use them so I’m adding an action photo…
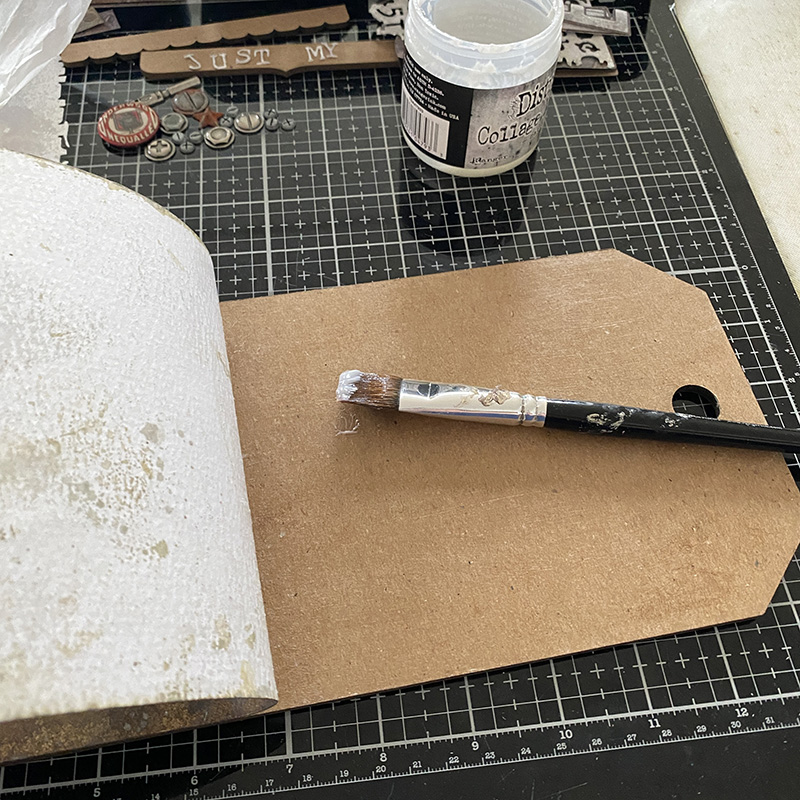
Apply a light layer of distress collage medium to the bottom part of the tag. Line up the cardstock over the etcetera tag and press down the glued section. Peel back and begin adding distress collage medium to the tag, pressing down the cardstock as you go.
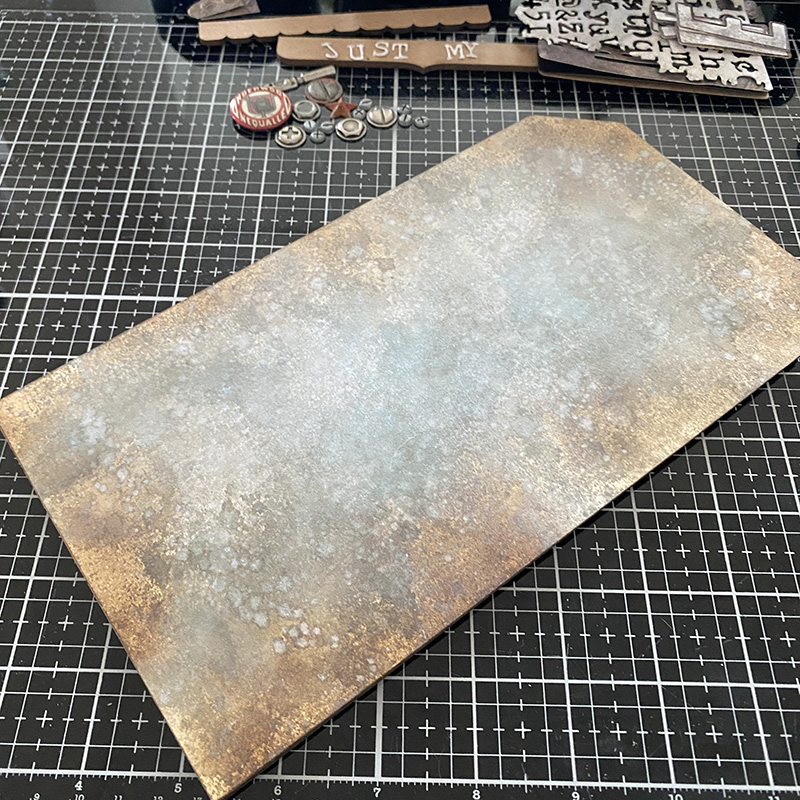
If you want to stitch the edges, you would do this before gluing the cardstock to the tag. I sanded the edges using the new distress sanding disks on a mini round blending tool. This gets rid of any paper overlap and gives nice worn edges to ink with distress ink (I used walnut stain). You could poke through the hole and add the reinforcer that comes with it, but for this tag I chose not to.
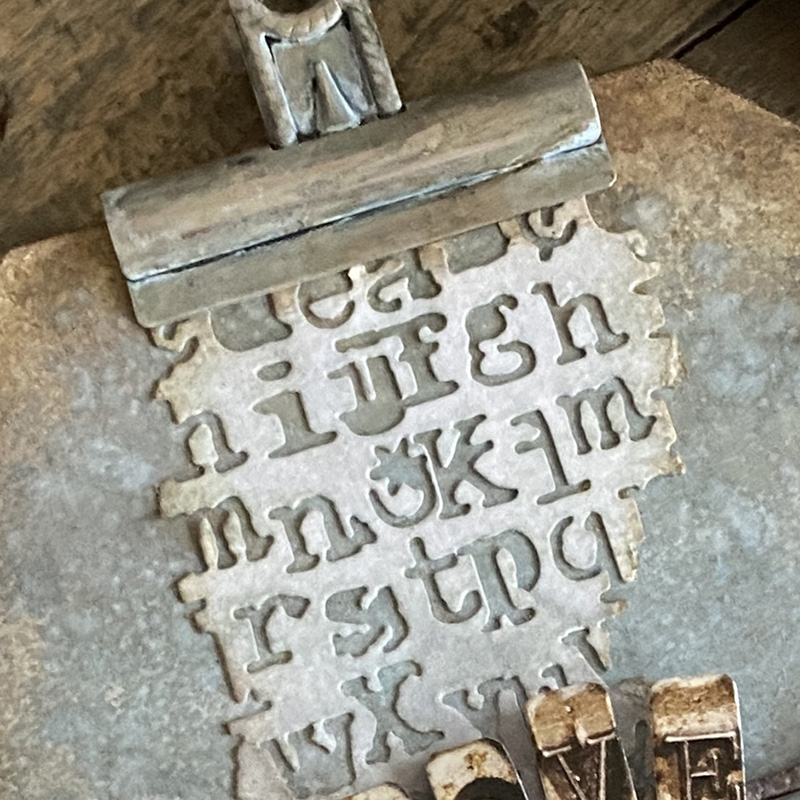
I die cut a piece of distress watercolor cardstock with the mixed media #3 thinlits die set (661186) and sprayed with Lost Shadow distress spray stain. I love the subtle but awesome mottled effect it gives and how it tones down the sharp white. I edged with walnut stain distress ink and added an idea-ology vintage clip to the top of the etcetera tag which was aged by adding Lost Shadow distress paint.
This die has has been retired but it maybe out there if you search. An alternative would be to use another of Tim’s alphanumeric sets to create a similar background.
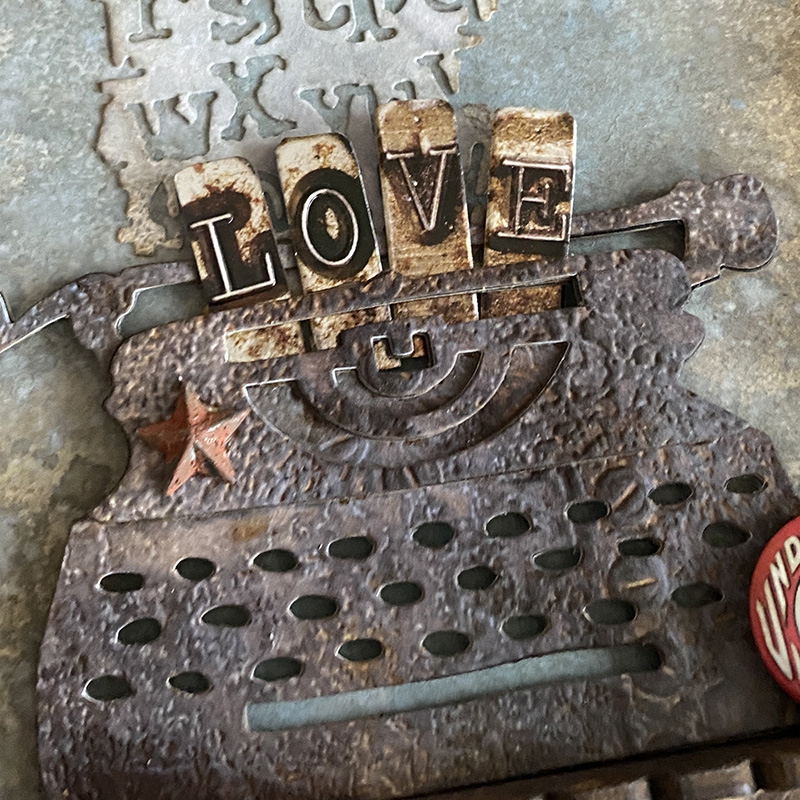
I die cut a retro typewriter from the Tim Holtz Bigz die and embossed with the 3D industrious folder. Adding Lost Shadow distress paint as a base coat and then spraying with distress spray stains in various brown tones. Once dry I spritzed Lost Shadow distress oxide spray stain over the top to give some mottled light spots.
I added a star from the idea-ology stars adornments pack which I covered with Lost Shadow distress paint and once dry, added a little distress opaque grit-paste and ground espresso and crackling campfire distress paints to give a rusty effect. Lost Shadow distress paint as a base for rusting metal idea-ology is AWESOME! I’m going to use this all the time, I ordered another paint so I have a back-up!
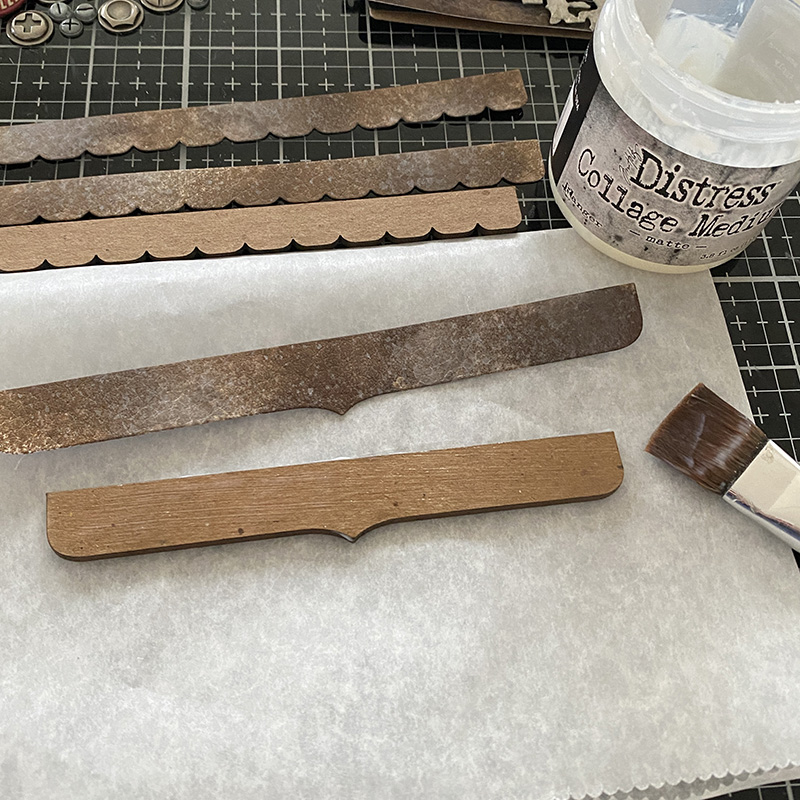
I love to use etcetera trims as shelves for my makes. The decorative trims thinlits die set is a game changer and I use it all the time. I used to have to trace around the trim and then sand the trim. The time saved is incredible. I used distress cracked leather cardstock which I dyed with walnut stain distress spray stain and once dry sprayed with Lost Shadow distress oxide spray. I love the way the Lost Shadow oxide wicks into the cracked leather detail of the cardstock. Attach using distress collage medium and trim as required. You can cut through the thickboard with Tim’s scissors.
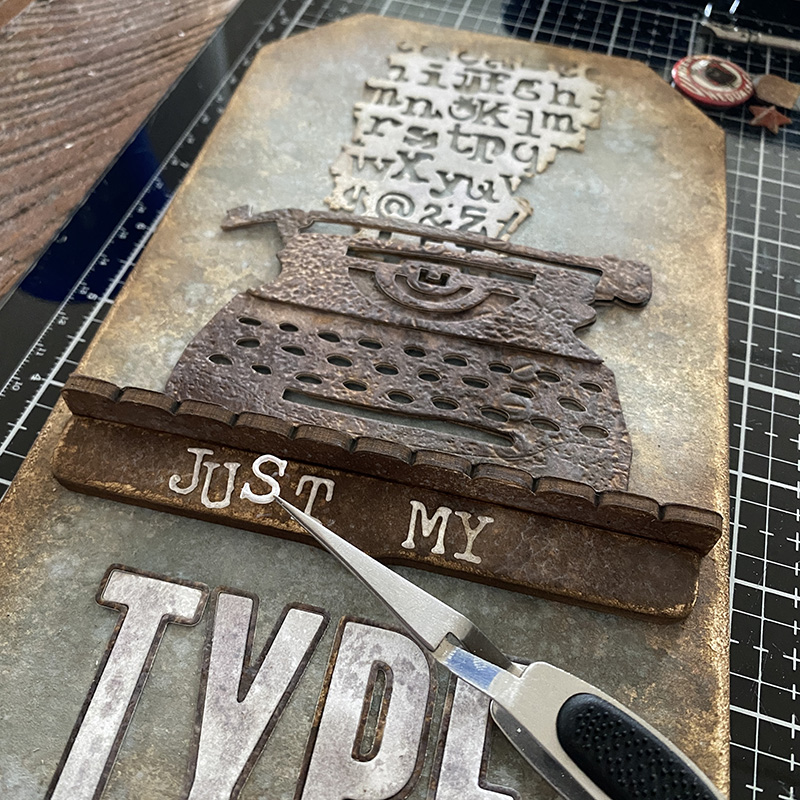
Assemble your shelves using distress collage medium and add die cut letters, alphanumeric upper case. I used Tim Holtz Squeezers to get the letters lined up and into place without my fingers getting in the way and distress collage medium bottle with the fine tip to add just a tiny amount of glue. You could use adhesive backed sheets or a xyron sticker maker too.
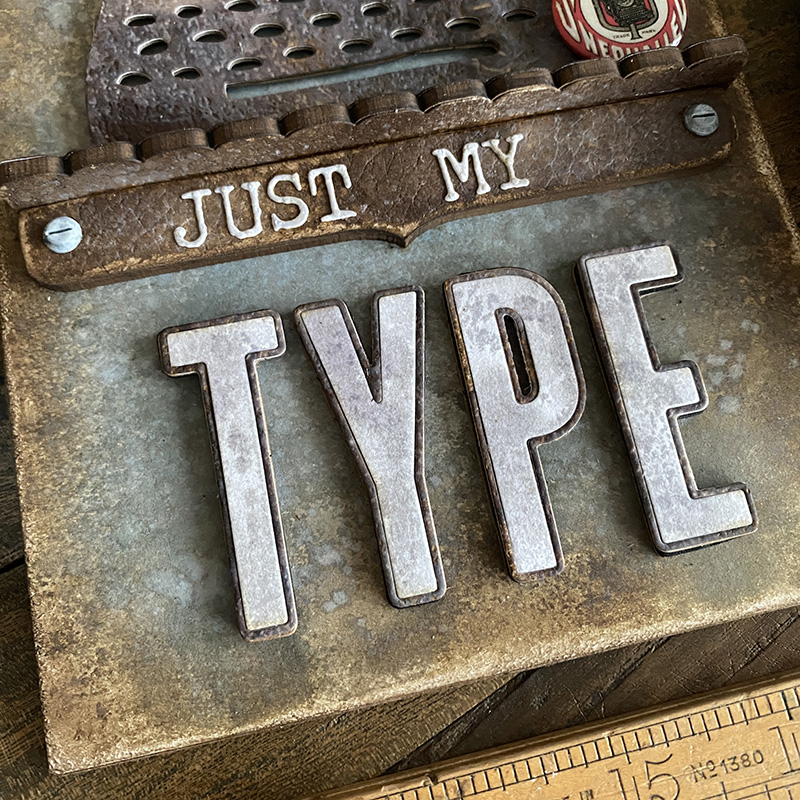
I’m OBSESSED with the new bulletin alphanumeric thinlits dies. When Tim first showed them to the makers I wasn’t sure if I was going to use them much because they’re so big but I couldn’t love them more and can’t stop using them. I die cut from distress watercolor cardstock and tapped the center of the letters into an inky Lost Shadow distress ink wash. For the border of the letters I blended in several layers of the Lost Shadow distress ink and a little walnut stain distress ink to create a darker outline.
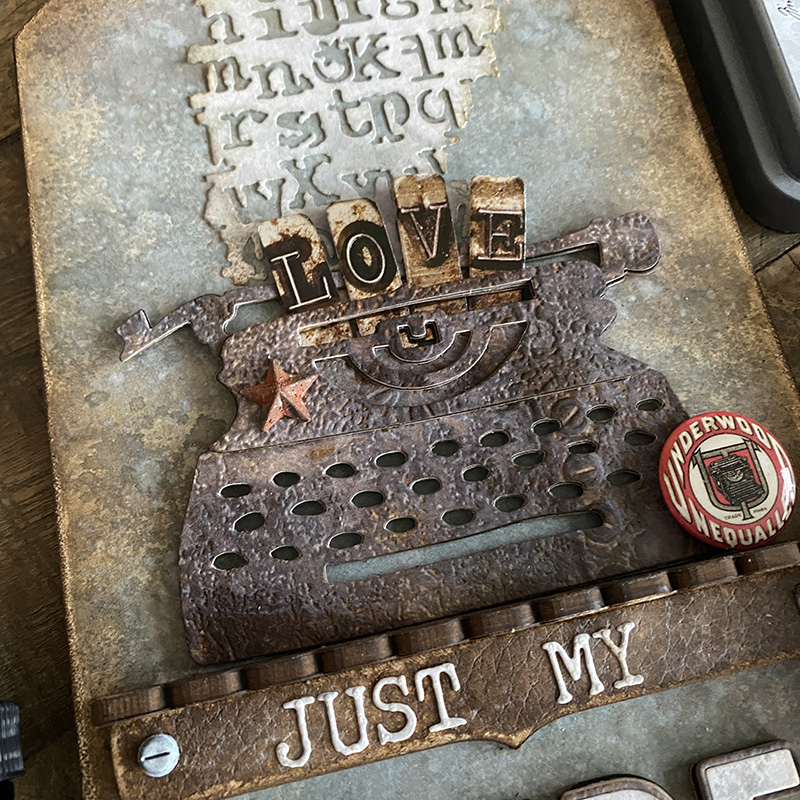
I added a piece of flair that is perfect for the typewriter theme and a few idea-ology type chips which I stocked up and have hoarded for years but need to use them, so I went with LOVE because it’s nearly Valentines and because I LOVE Lost Shadow Distress. It really is “just my type”…
Thanks for stopping by and let me know if you have any questions.
Zoe
…
affiliate links used at no cost to you


AWESOME project. Thanks so much for sharing your process Zoe.
Another awesome make with lost shadow. Great job my friend. Thank you for sharing the details. xxx
Love the project, love the color, saved the best for last…LOL. I am a sucker for a punny line, just one more reason to love this make….#mypile….LOL
Amazing make. You always blow me away.
I love that background!!!! Fabulous make!!!
Love this! You are so amazing.
I really enjoy your process posts – the instructions and photos are very clear. Thanks for all the inspiration!
I just love this! A great make once again. Thanks for all the inspiration!