Hello Friends. What a weekend! Did you join the Tim Holtz Sizzix Chapter 1 launch party? The dies are fantastic and there was so much maker inspiration, Tim joined the maker train and made some gorgeous little bunny cards (yes you read that right but you will get it when you see it); and Mario Rossi brought his FLAMAZING flamingo onesie out for another tour! You can catch up on all of the fun and replay over on Tim’s blog.
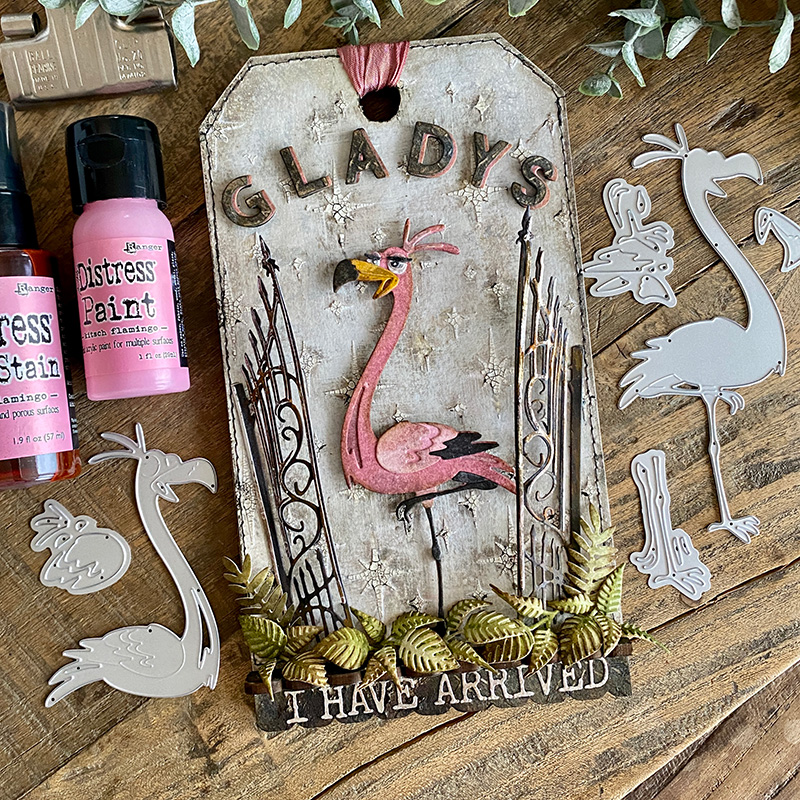
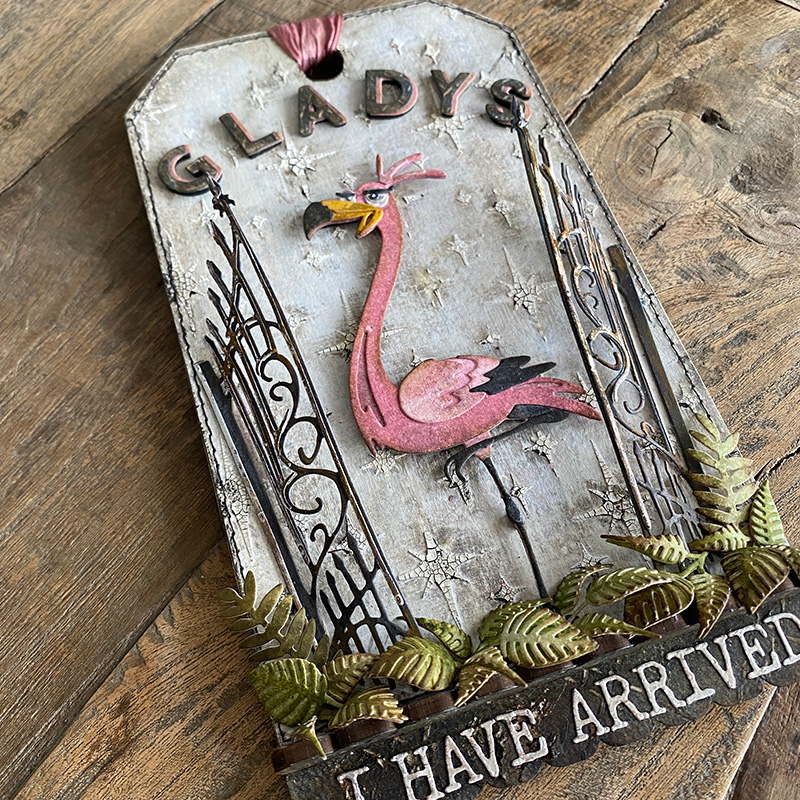
I was delighted to make for this launch and Gladys was top of my pick list for this chapter. She is so sassy and so damn fabulous, she most definitely has arrived!!
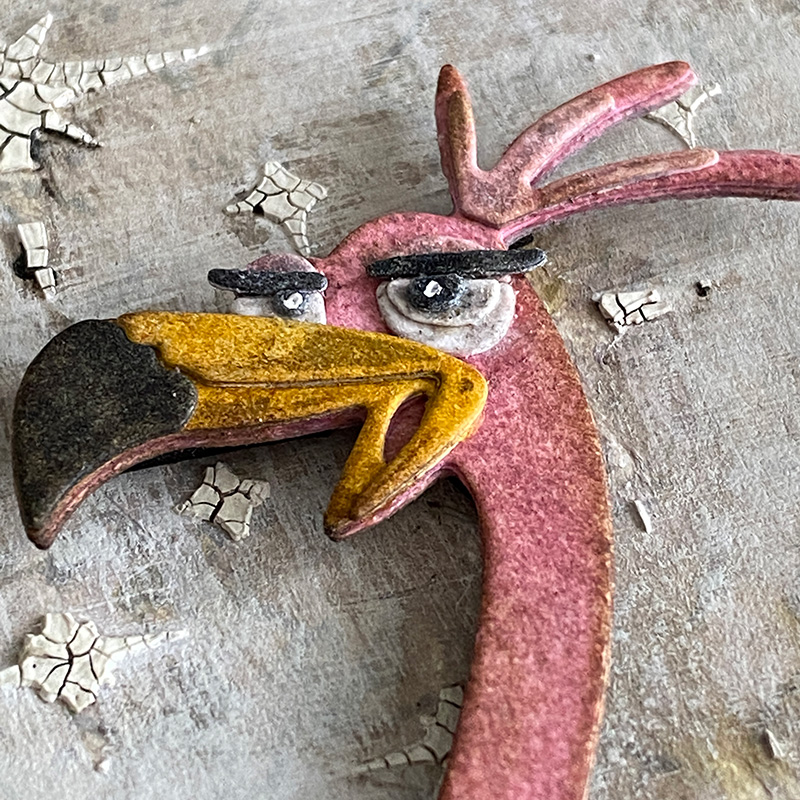
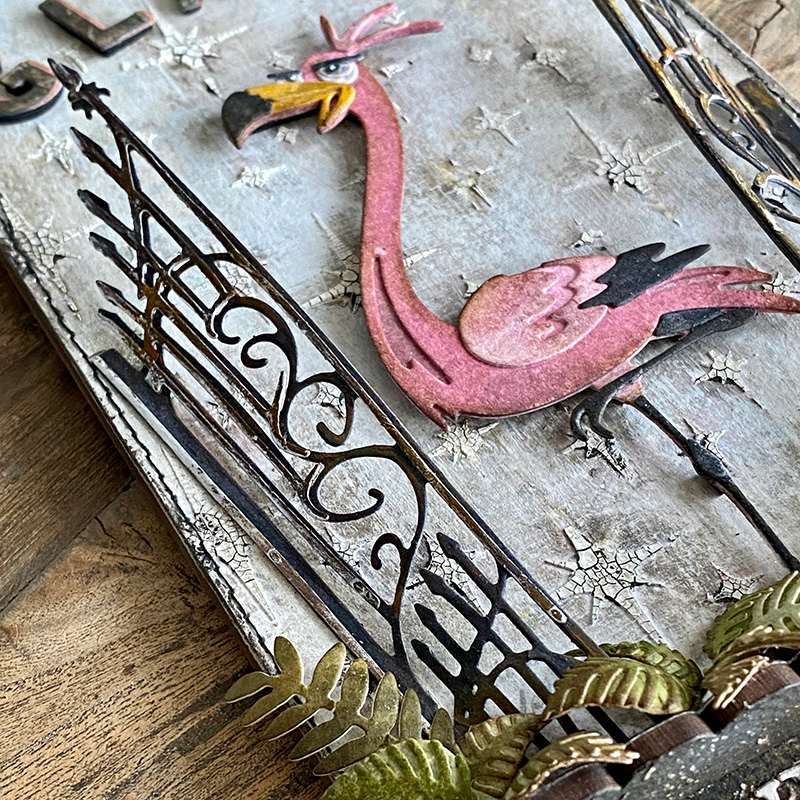
I went grungy with Gladys, she’s “Grunge-Glam!”…it’s a thing!! I wanted to add tiny little diamonties to her eyes but I couldn’t find them so I added a dot of white gel pen instead.
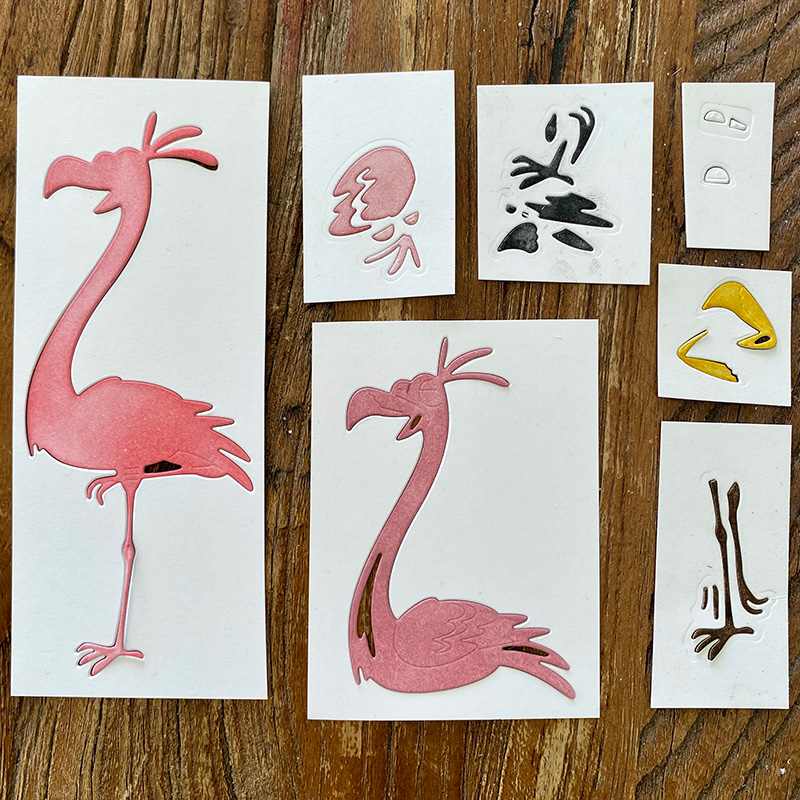
Each of these squares was cut with a different die plate. If you turn your dies over there is a color written on the back which really helped me as a beginner to colorize. You can of course change the color, but it’s helped me get started. See the Sizzix Gladys Colorize video for details on how to assemble Gladys.
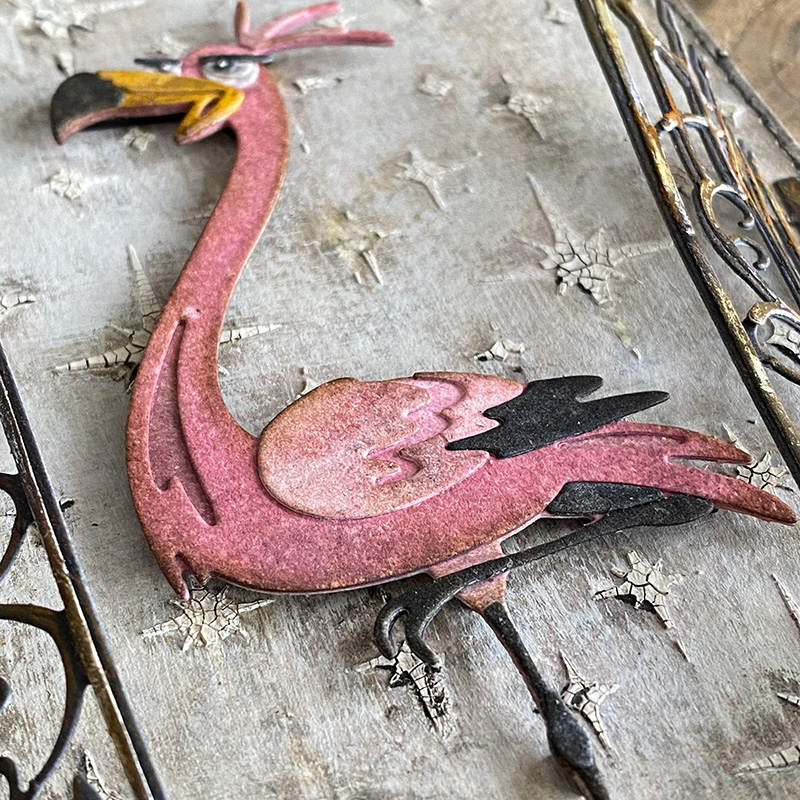
I raised Gladys up with adhesive foam! I love her lifted leg it just makes her so much more sassy! Tim designed such a great die that I pushed through my fear of colorize and I’m so happy I did. As Tim has said many times before, they have learned along the way and colorize is now really simple. Even the eyes, which I sweated about took me minutes the second time I made Gladys. Remember when we make these for the first time, we don’t have any instructions, just a cover photo. I’m telling you this to show that colorize is pretty simple now.
I used a mini thickboard etcetera tag as my surface. I cut a piece of distress watercolor cardstock the same size as the tag, covered with frayed burlap and hickory smoke distress spray. Once dry I spread distress crackle texture paste through the sparkle stencil and set aside to dry. Next I added some watered down white gesso and set aside to dry again. Finally I added walnut stain distress crayon to parts of the background and removed the excess with a damp cloth. I stitched the edges with my sewing machine and glued the background to the etcetera tag.
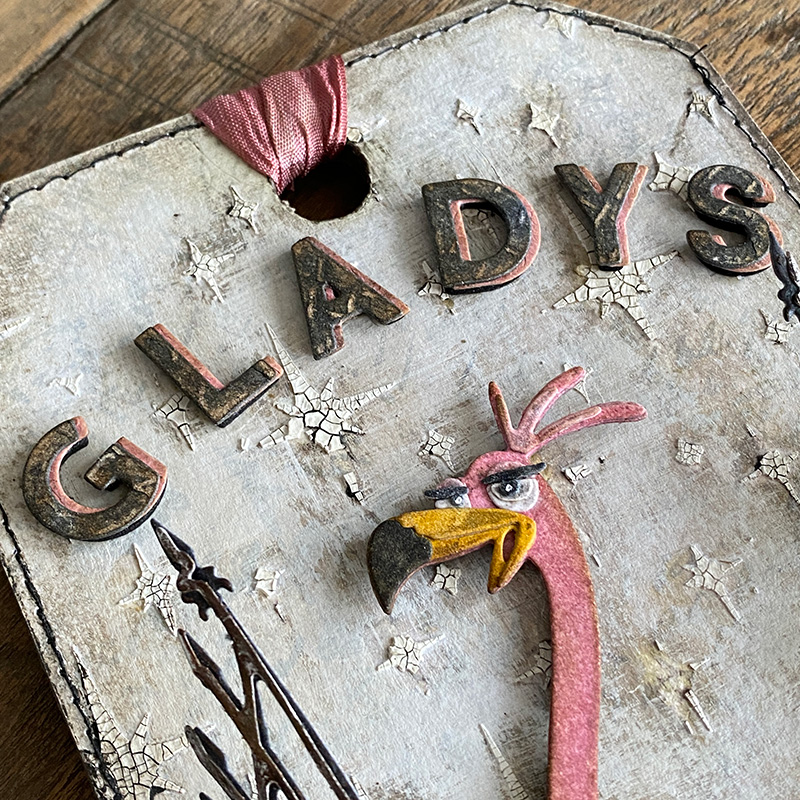
I used the alphanumeric bold thinlits dies to create “GLADYS” at the top of the tag. I cut the letters twice from distress watercolor cardstock and sprayed one set with black soot and the other with kitsch flamingo distress spray. I cut a third set from fun foam to raise the letters off the tag. This is such a cool trick that Tim taught me and I use it all the time, see it here. I put the black letters through my new Big Shot Foldaway inside the quilted 3D embossing folder and then lightly sanded and blended in walnut stain distress ink. I offset the black and pink letters, added the foam to the back and glued to the tag with distress collage medium.
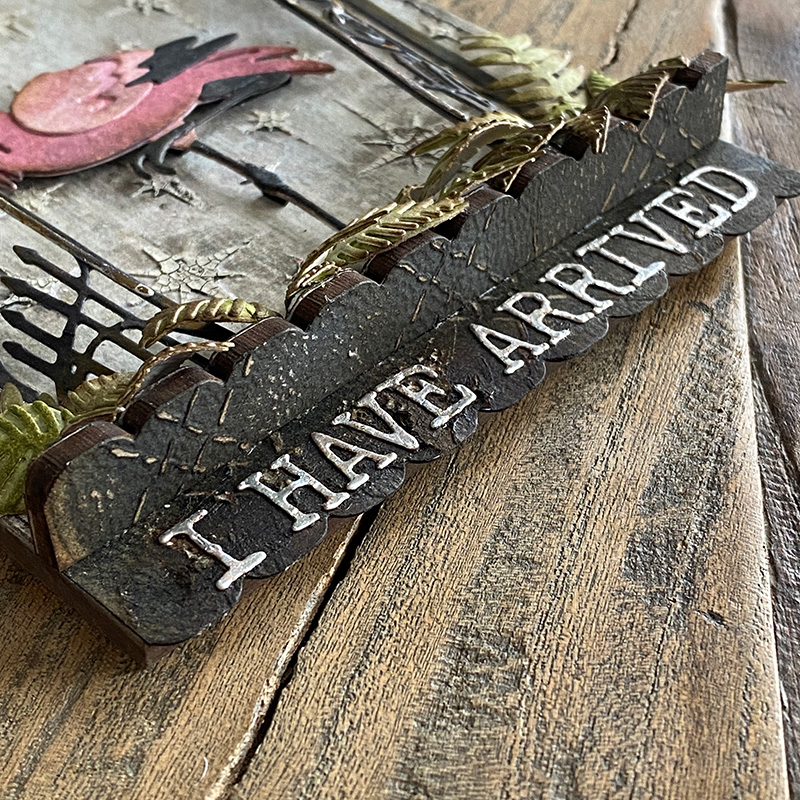
For the base I added a thickboard etcetera scalloped trim. I used the trim thinlits dies to die cut several of the scallop trim strips from distress watercolor cardstock and sprayed with black soot distress spray. Once dry I ran them through my foldaway machine inside the quilted 3D folder. I lightly sanded and blended in walnut stain distress ink. I added the trims to either side of the thickboard trim and one along the base of the etcetera tag. I glued the trim to the tag with a line of distress collage medium. Finally I die cut “I Have Arrived” from idea-ology metallic kraft-stock with the alphanumeric tiny type upper thinlits die set.
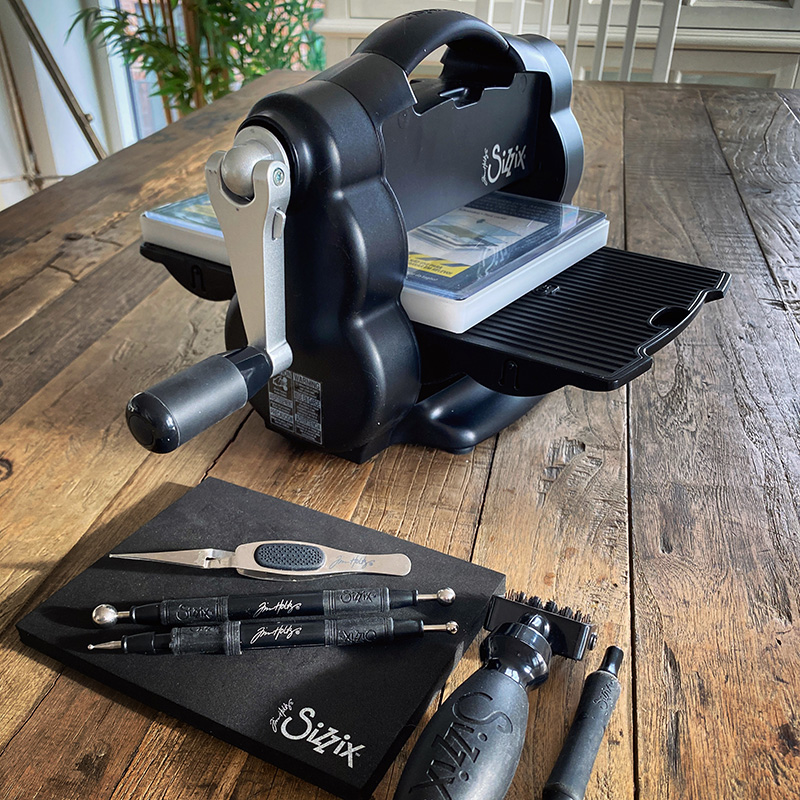
I used the new Tim Holtz Big Shot Foldaway machine. The pressure is so epic that you only need one pass for the 3D folder. Check out Tim demo the foldaway at the end of the Chapter 1 LIVE.
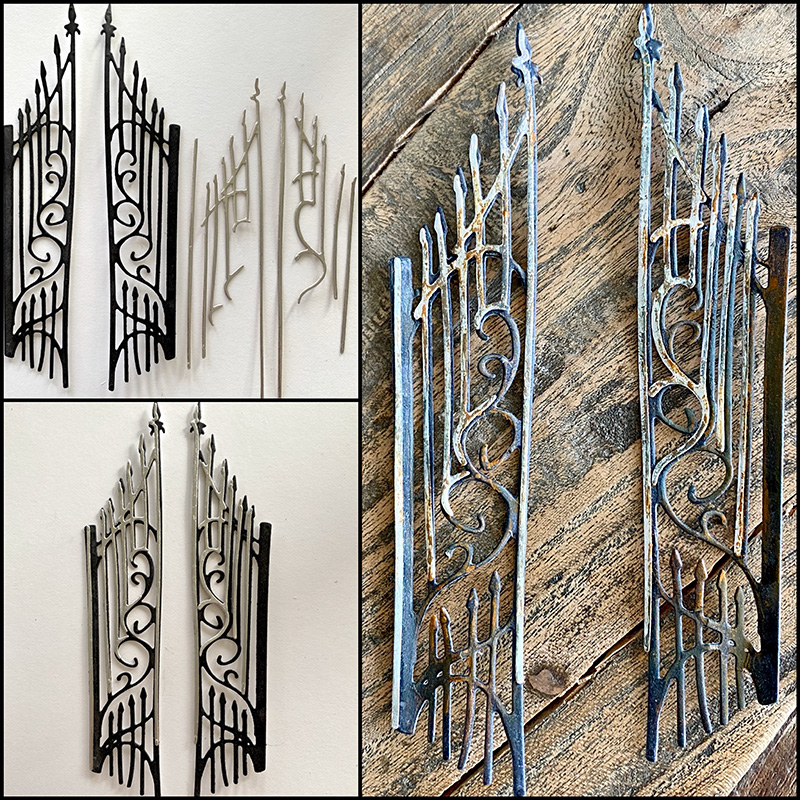
I grunged up a set of gates cut from the gatekeeper thinlits die set. I die cut the base gates from distress watercolor cardstock that I sprayed with black soot distress spray and the highlight pieces from idea-ology metallic kraft-stock. Assembled using distress collage medium and then rubbed some gilders wax over parts of the gates.
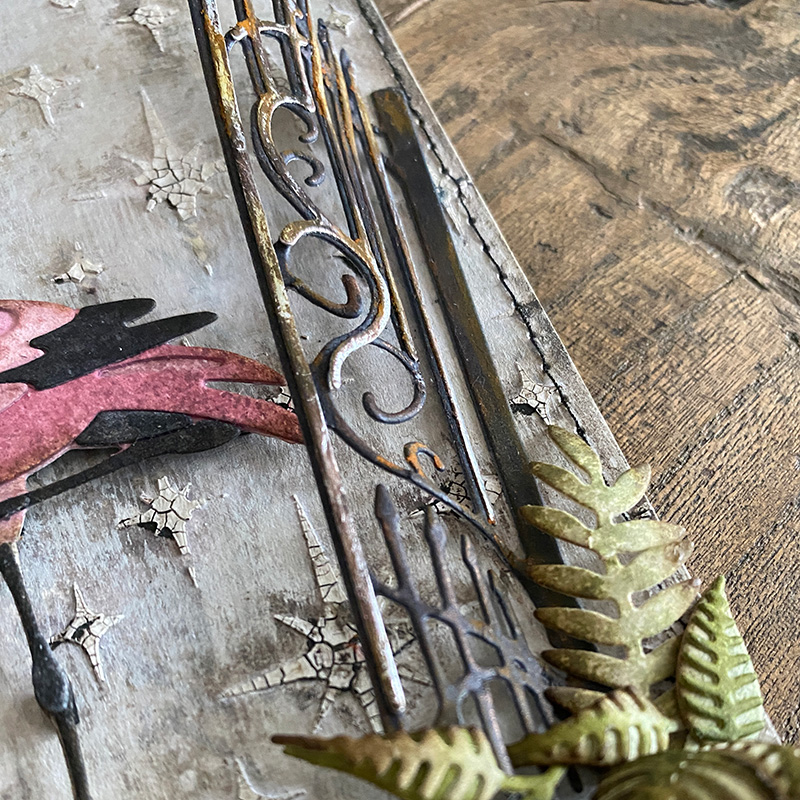
I attached them to the tag by the hinge with distress collage medium and carefully molded the gates with my fingers so they sit open.
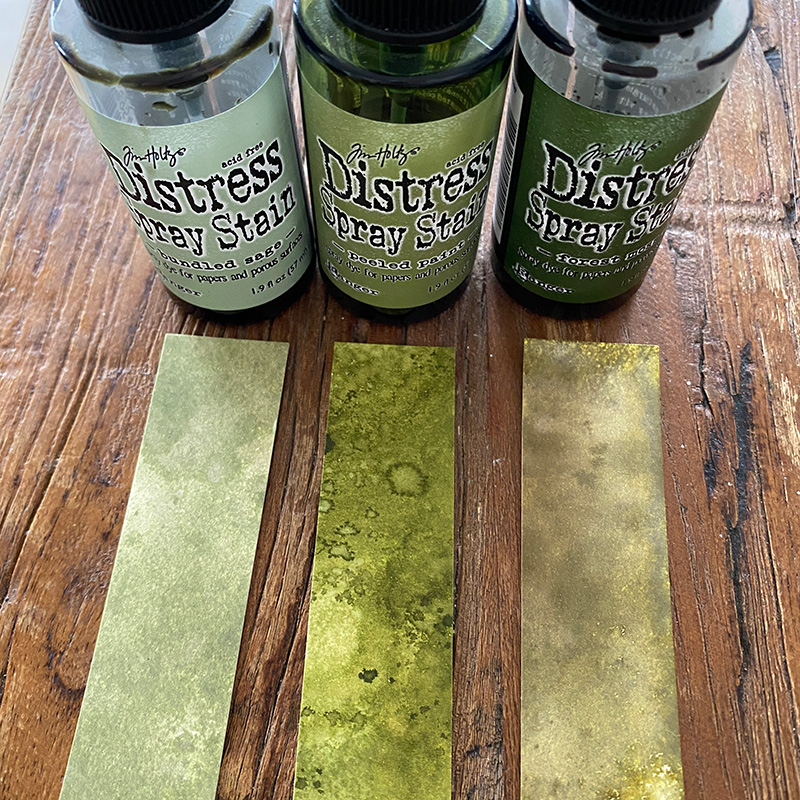
For the greenery I sprayed separate pieces of distress watercolor cardstock with bundled sage, peeled paint and forest moss distress sprays, spritzed with water and dried with a heat tool.
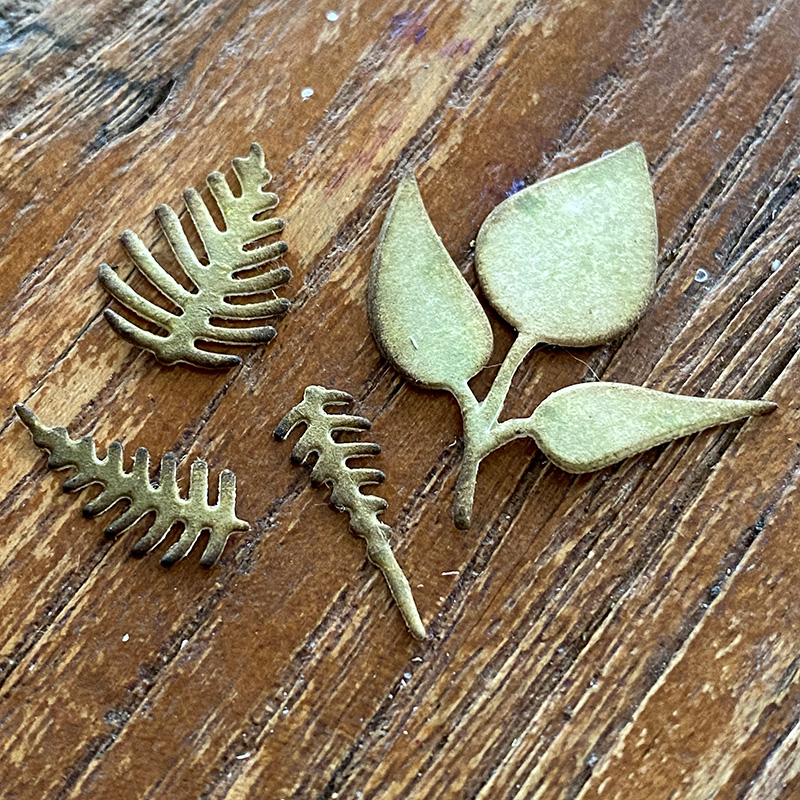
Using a die from the funky florals #3 set I die cut the base leaves from the lighter cardstock and the upper leaves from the darker cardstocks. I blended in walnut stain distress ink with a mini blending tool.
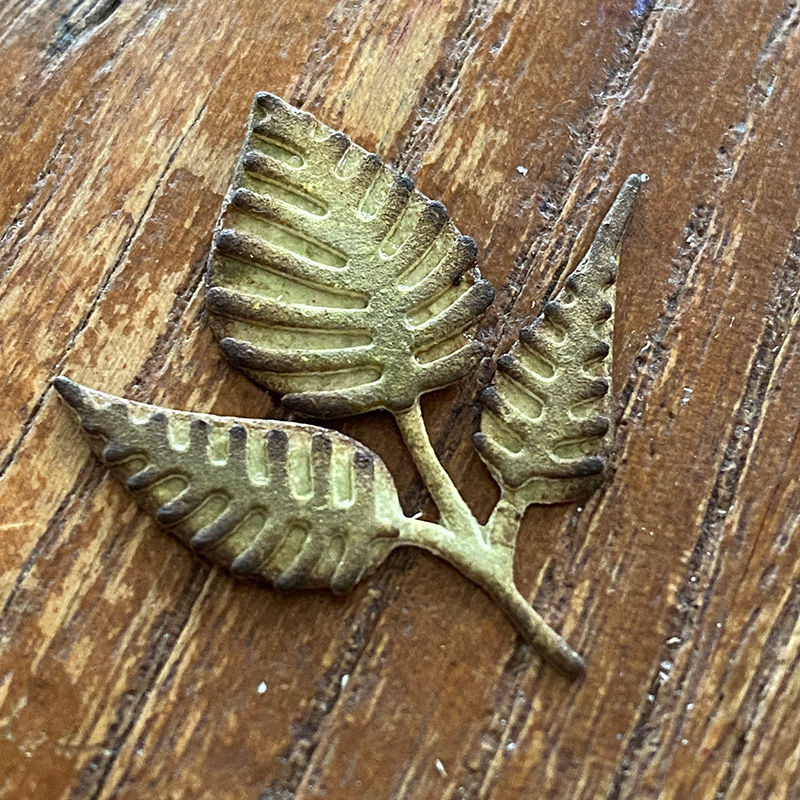
I assembled the leaves using distress collage medium and set aside to dry. The drying time of distress collage medium is ‘now” but I wanted to make sure the leaves were completely dry so that they wouldn’t come apart when I shaped them.

I used the Tim Holtz Sizzix shaping kit to shape my leaves. Tim did a fantastic demo with the shaping kit, you can see that here, it’s really worth watching. The shaping kit is a game changer for me, it takes your die cuts to another level.
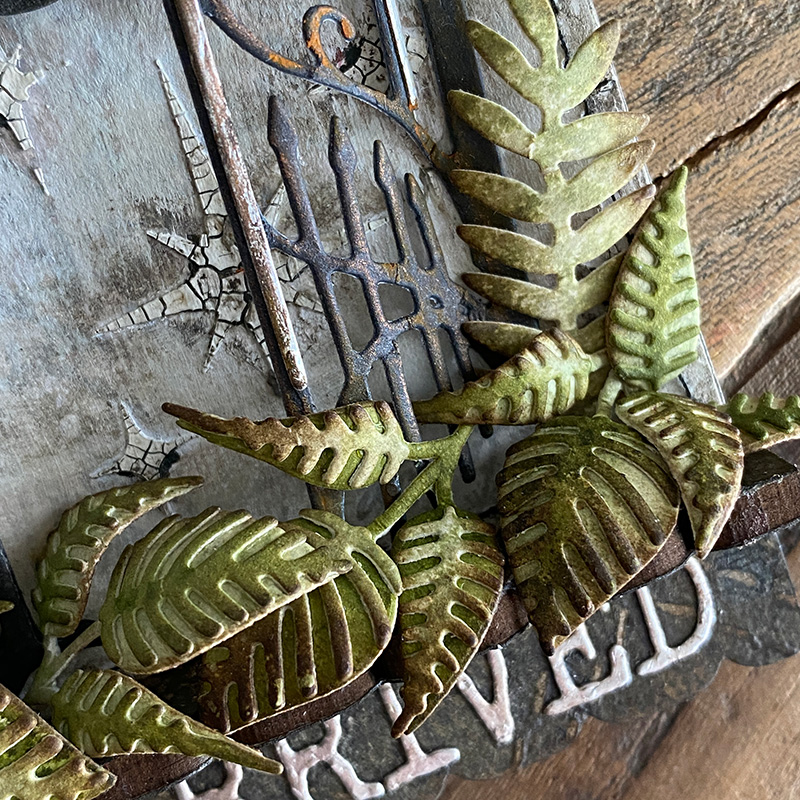
Add the leaves to the trim shelf using distress collage medium. Glue them at the stem only. The shaping kit really does bring the dies to life and it’s so simple.
Thanks for stopping by. I am so excited to see Gladys arrive in your homes and to see all the different and crazy things you make.
Zoe
…
affiliate links used at no cost to you


Thank you for the tutorial! Your work is stunning, as always, and she is fabulous 😍
Thank you for sharing. She is amazing! I actually clapped when Tim showed her during the live. ❤️❤️❤️
She is Fabulous! I really love how you created this project. Gladys is probably my favorite of all of Tim’s designs. Thank you for sharing the tutorial!
Just beautiful thank you for sharing
I love 💕🦩 Gladys MFS …. She is flamazing!
And me jumper is the bomb! 💕🦩💕
Wonderful! All the details you do really make the make pop. I so want to get Gladys – and other dies, of course!! TFS
Thank you, I love Gladys!!!
Love this!! Wow…. amazing. Thank you for walking us through!!
We learn so much from you and really enjoy it. ☺️☺️
OMG! This is so gorgeous Zoe!!!!! I love your creations.
I just absolutely love what you do. I love the Grunge-Glam. It’s fun watching Tim and seeing what you and the other makers do. You are all inspirations.
Dang I love that I Have Arrived and the cool curvy greenery. Such happiness tickles my brain.
Thank you! Gladys is delightful 🥰
Gladys is flamazing! All the details you give are so helpful. She looks pretty good in the gates and she has definitely arrived. thanks as always for sharing.
Gladys just makes me grin, and your fabulous make is so perfect showcasing this spunky lady!
Love this – you’ve certainly brought her to life! Love your work, thanks for sharing the details.
Thanks for the step by step process used to create this very cool tag….felt like I was right there with you all the way. That kind of roadmap is very very useful since, as you noted, there are no instructions! Love your work and clever use of various other TH pieces that I never would’ve thought to use….great work!
Totally love this make Zoe.
Gladys is fabulous.
Thank you so much for the tutorial,
stay safe and see you Saturday on the next Live
with Tim and Mario.
This is Fabulous!!!! I love Gladys!!!!
Gladys is fabulous and all the elements are grungy and good.
I just found this on Pinterest. Thank you for the tutorial. Gladys is fabulous.
Thanks for the instructions. Always fascinated to see how you make things. Tim’s shaping tool kit is going on my wish list..
“Marvelous Darhlink” in my best Billy Crystal voice. Great tutorial, thank you!
Your make is gorgeous! Can’t wait to try duplicating it for my daughter in laws birthday . Could you answer a question for me. I’m wondering if it is necessary to use all distress sprays instead of ink pads? Thank for your tutorial.