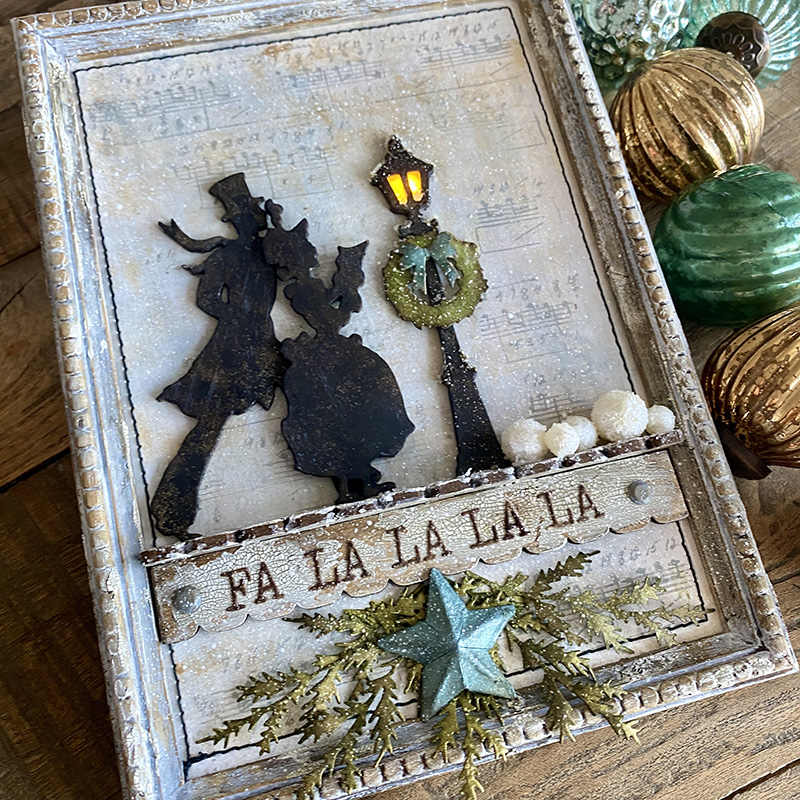
Happy Saturday friends. Day 6 of my week of Chrismas makes and I feel ready to bake some Christmas cookies and put up my Christmas tree. I’m sharing one of my makes from the launch of Tim Holtz Sizzix Christmas die release. You can see the replay and all the inspiration makes over on Tim’s Blog.
I LOVE the vault series. Both the Halloween 2021 set and this Christmas 2021 set. I really hope that Tim and Sizzix release more of these die sets. I love that “new to Tim Holtz” makers can now own these gorgeous dies and the more seasoned Addicts can add them to our collections.
Speaking of collections. I used the older (but still available) alphanumeric tiny upper dies mixed with the new festive bouquet and vault series christmas 2021 dies. I love how my die collection works together and how fun it is to mixy matchy the old and new. Let’s get into the details of this make…
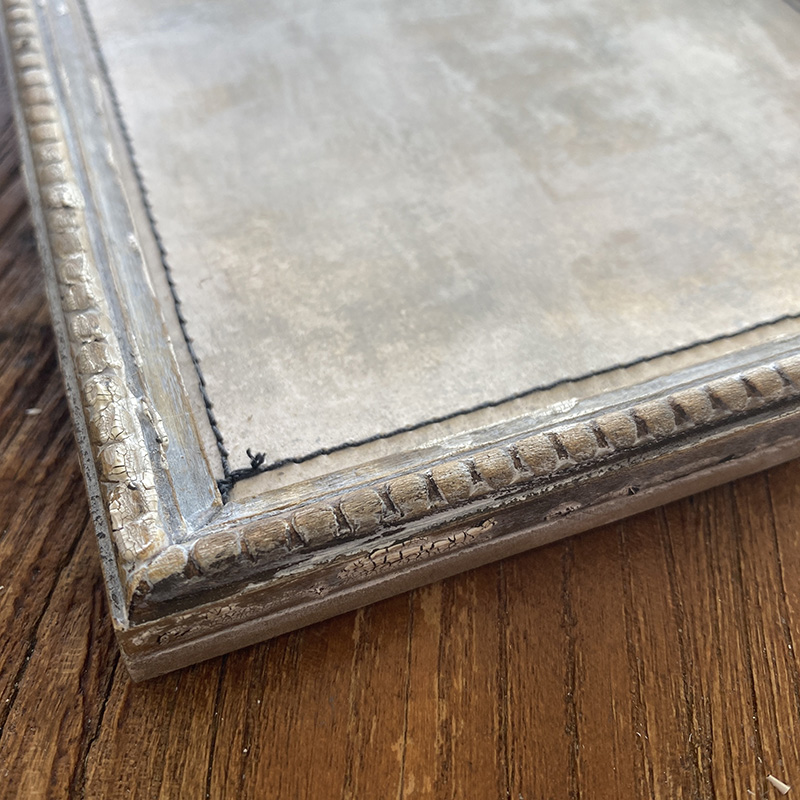
I took an idea-ology framed panel and covered the frame with a layer of white gesso. Once dry, I dry brushed with iced spruce and vintage photo distress paints. Next I added distress crackle texture paste and set aside to air dry and crack. Finally I rubbed distress crayon into the cracks.
I created a background on a piece of distress watercolor cardstock. I painted on layers of gesso and distress paint and stamped with distress archival ink. I stitched a border with my sewing machine before adding to the panel base and mounting the frame over the top.
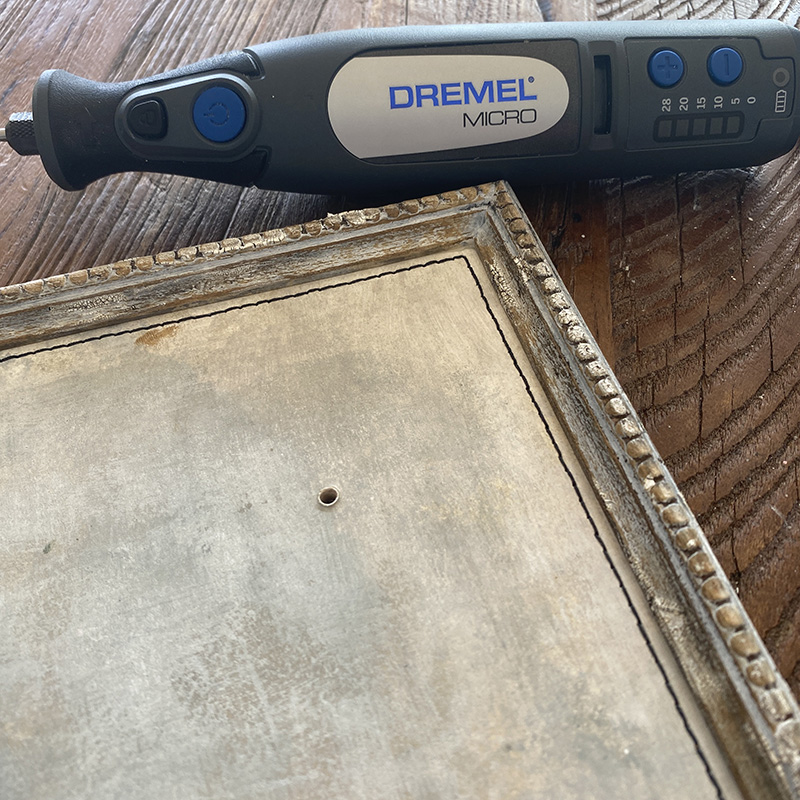
Using my Dremel Micro I drilled a hole where I wanted my light to sit for the street light.
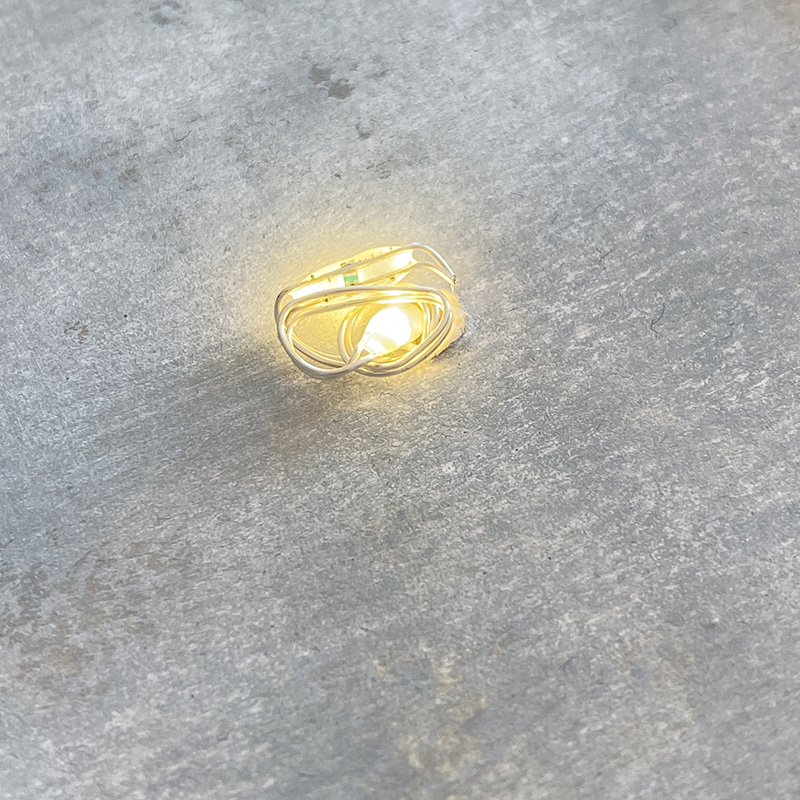
I only wanted 2 lights so I cut and discarded the excess. I love that you can cut the idea-ology tiny lights, just remember to cut the right end! I thread the lights up through from the back and secured the battery pack to the back of the framed panel.
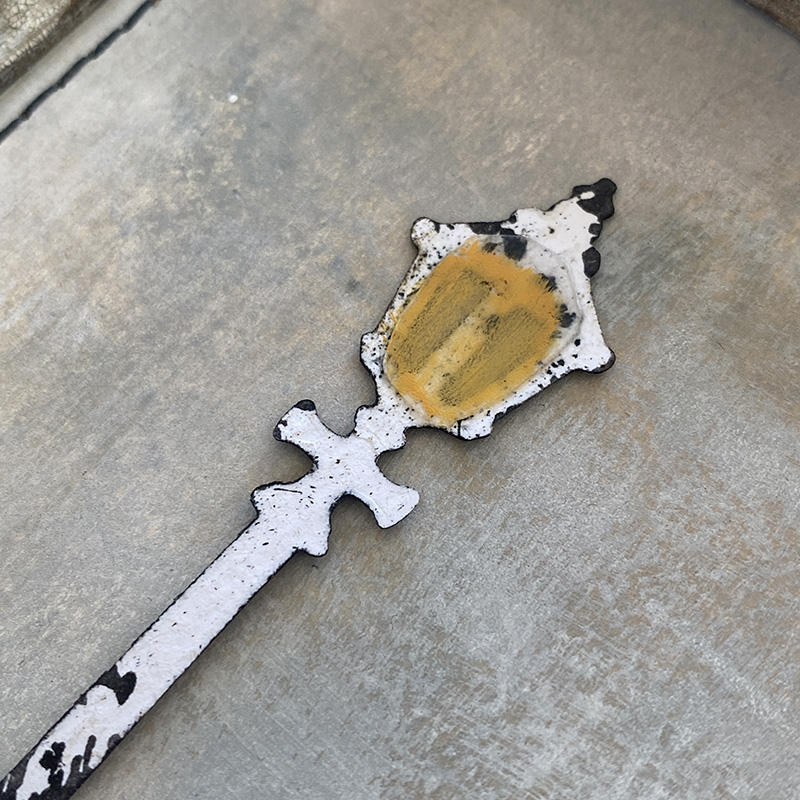
I die cut the street light from the vault series christmas 2021 thinlits die set several times, glued the layers together and sprayed with black soot distress spray. Added a piece of vellum covered with fossilized amber distress paint to the back of the die cut.

Die cut several more street lights, glue together and cut the center bar out and mount underneath the light die cut pictured on the right. There’s an easier way to add layers by using a piece of fun foam! Tim shared this game changing tip with me after I had made this but you can see the how to here.
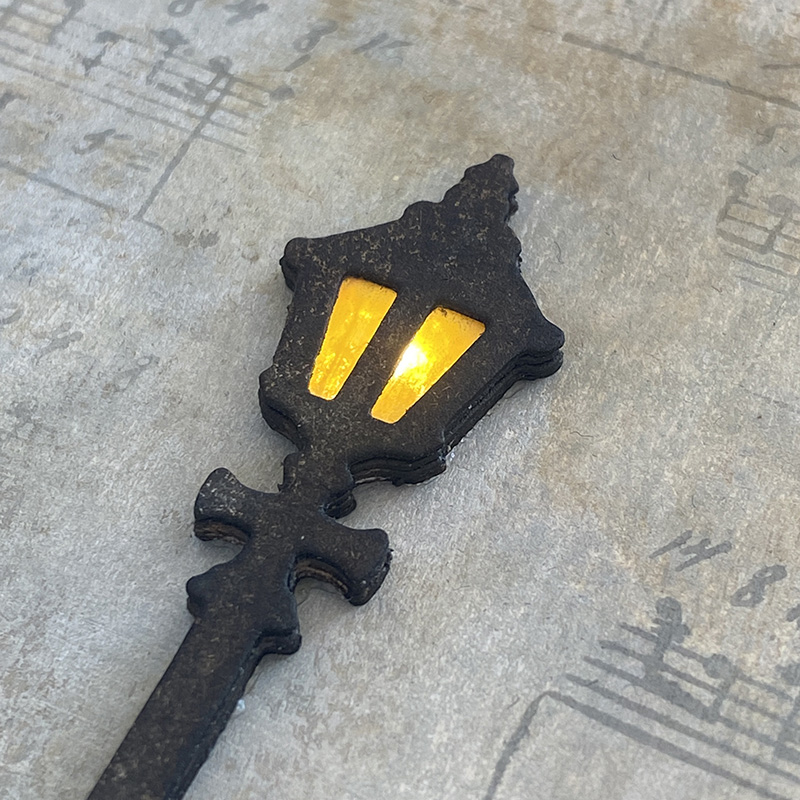
Place the street light over the tiny light and once you’re sure it fits, glue into place with distress collage medium.
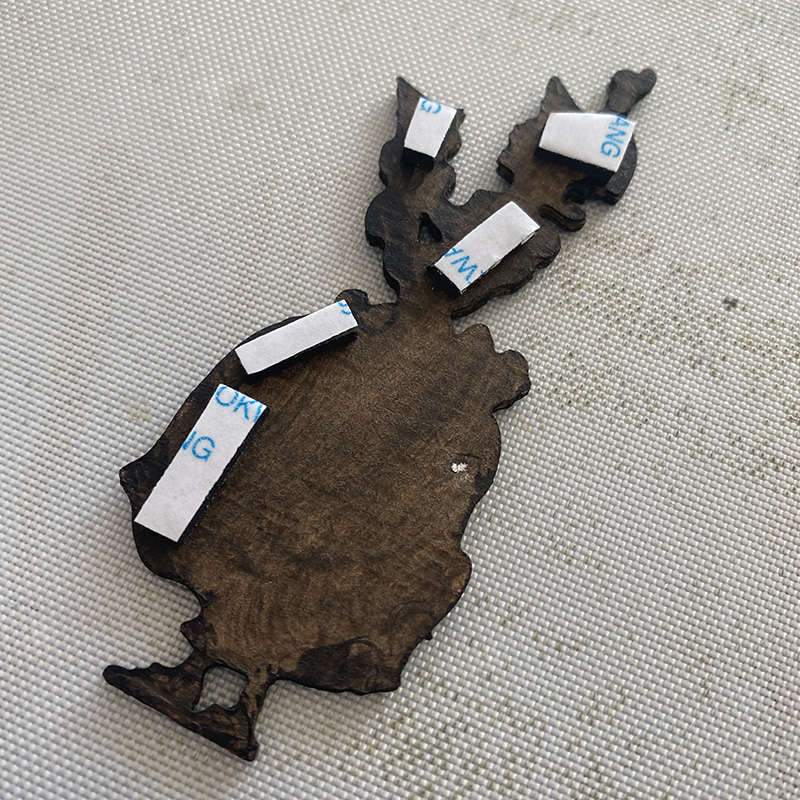
Die cut the carolers, spray with black soot distress spray and add adhesive foam to the back of the die cuts. I left one side without foam as it was sitting it over the top of the other caroler and the foam was under his leg.
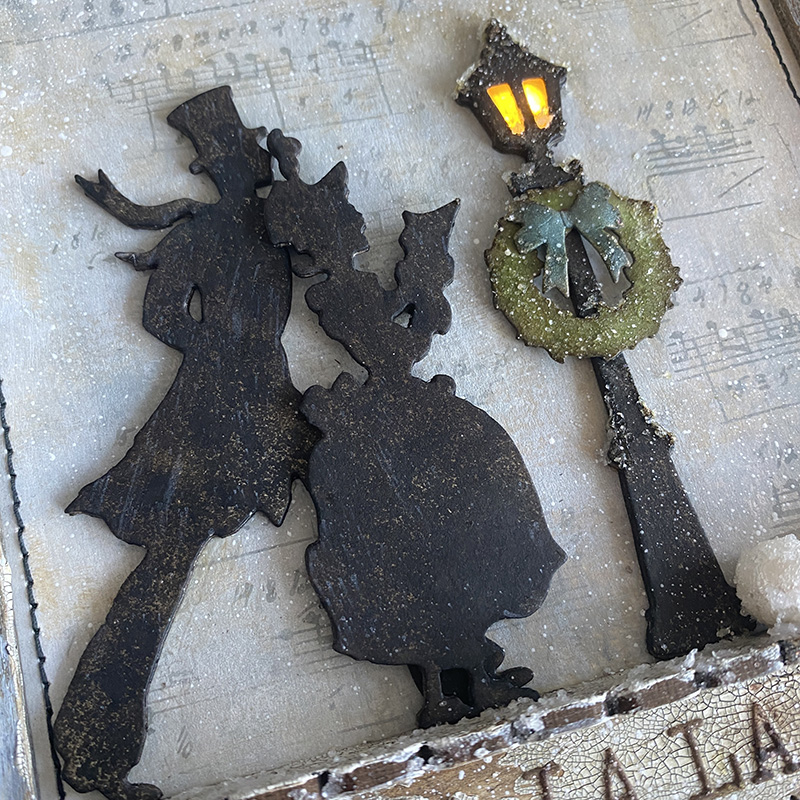
I mounted the carolers in such a way that the guy doesn’t look like he’s running off somewhere by hiding his “running off” leg behind the lady. I added the wreath and bow to the street light, the bow was coloured with seasonal mica spray to match the star. I love that Tim and Ranger released these seasonal mica sprays and crayons. Can’t wait to see what’s to come next year.
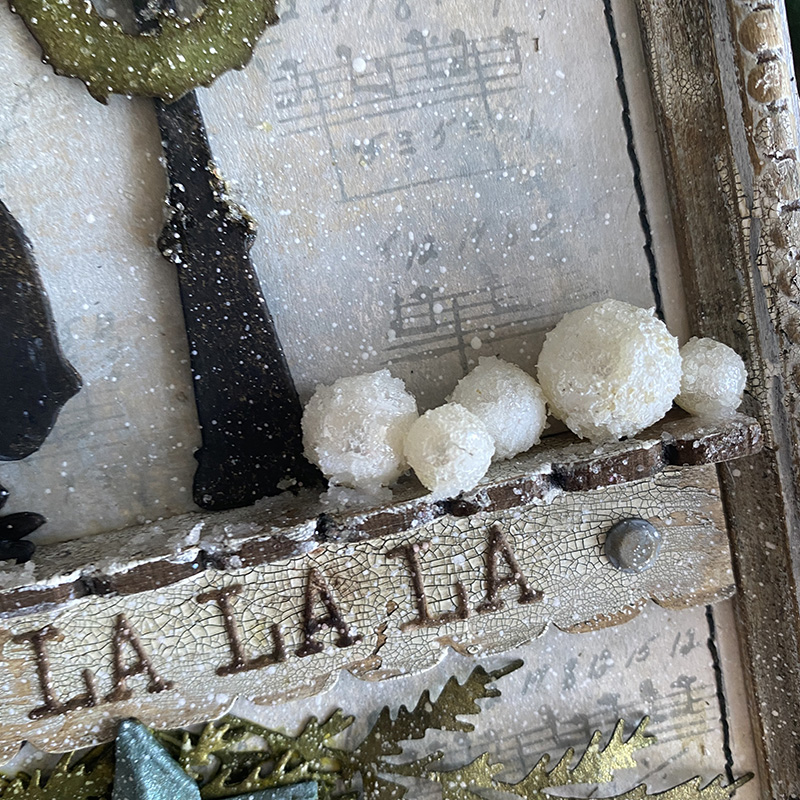
I created some snowballs by adding snowfall grit-paste to idea-ology baubles. Making sure your hands are ink free, put some snowfall on your fingers and roll the bauble between them. Lay on your non stick craft mat to dry. Repeat until you’re happy with the look.
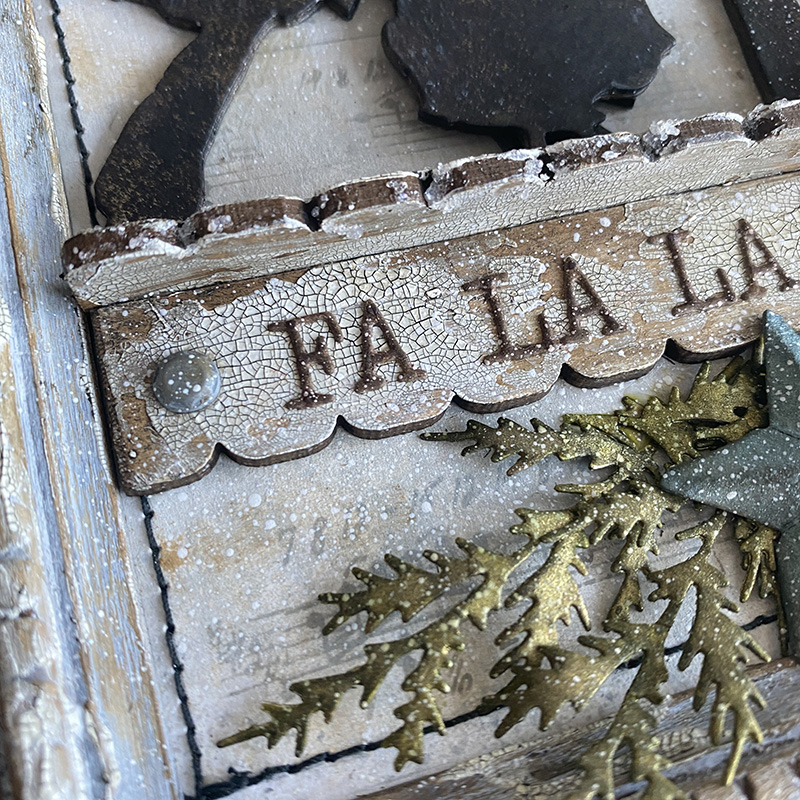
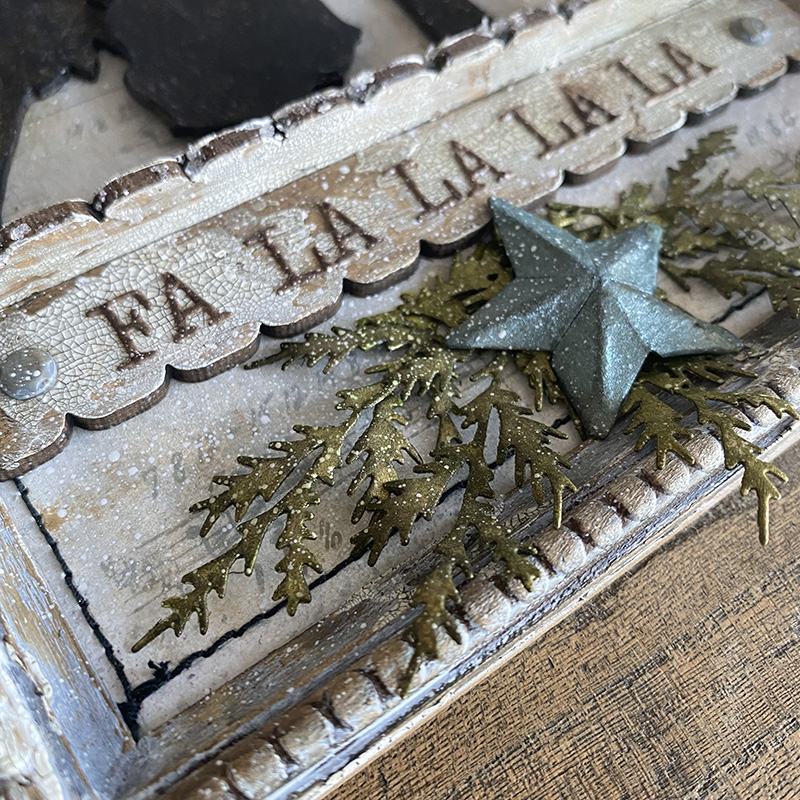
I added scallop thickboard etcetera trims which I treated with the same technique as the framed panel. I glued them with distress collage medium and added idea-ology hardware heads to each end. This created the shelf for the carolers, street light and snowballs to sit on.
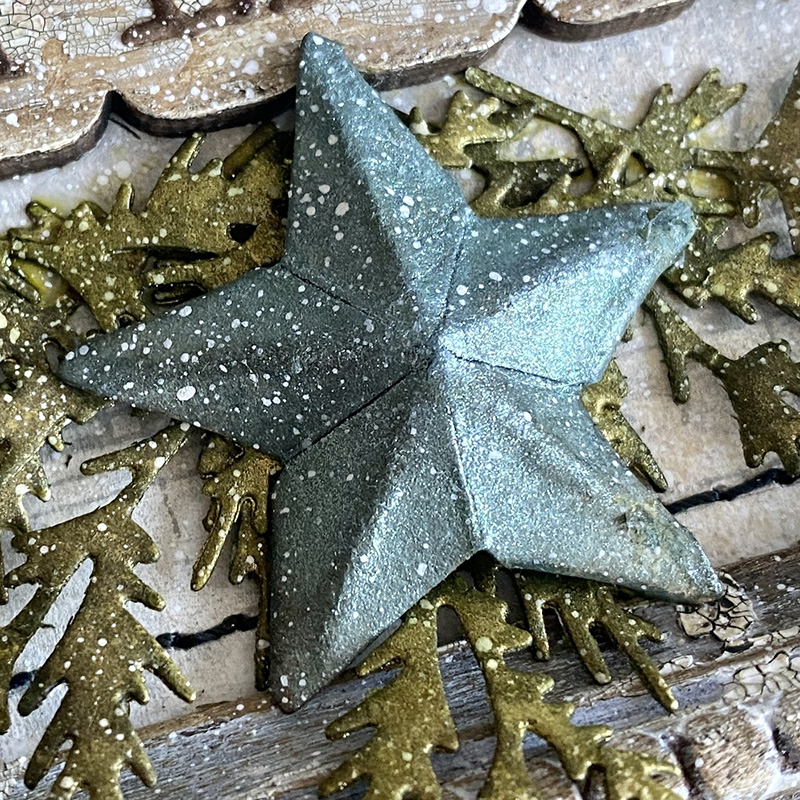
I added a star cut from the vault series christmas 2021 die set and sprayed with seasonal mica spray and splattered with picket fence distress paint.
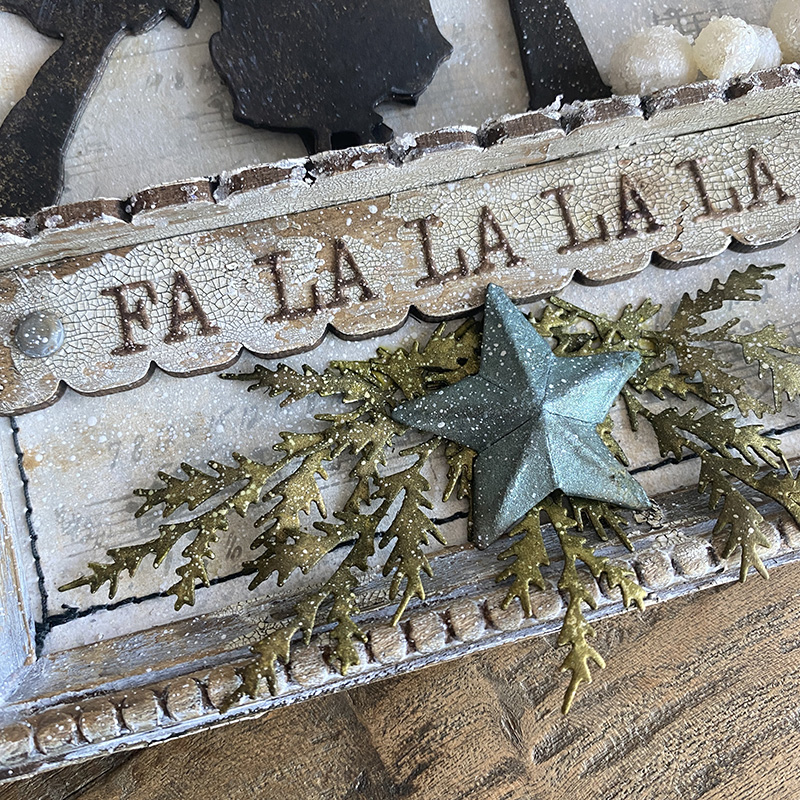
I die cut some foliage from the festive bouquet thinlits die set and sprayed with seasonal mica spray.
Thanks for stopping by.
Zoe
…
affiliate links used at no cost to you


I absolutely love this piece of art!! I really like the use of the new sprays and the baubles for snow balls. Thank you so much for the tutorial
I love the stars from the vault series. Very pretty color of the mica stain on that star. I’ve never seen the Dremel micro before. Looks like a very handy little tool. Thanks for sharing your techniques on this make. Have a wonderful Thanksgiving Zoe!
Love the soft colour tones and fabulous crackle. A wintry treat.
Alison x
I am ever grateful for the Vault series as I missed the man the first time around. The frame is stunning in its simplicity Zoe! Your crackle always impresses me and I love how you placed the man in the scene. The bonus for me is that it lights up and those snowballs are a delight! Another triumph! xx
Love the old vintage vibe you achieved on the framed panel and the background…if only mine would look like that…LOL. I keep trying..Love the addition of the Tiny Lights.
THANK YOU so much for the tutorial Zoe! All of the art you create is simply stunning and it’s so nice to see it broken down.
I greatly appreciate you taking the time to put all these tutorials together to share with everyone!
Have a wonderful Thanksgiving!
So gorgeous Zoe.
Thank you so much for sharing and the tutorial, stay safe
and have a wonderful day.
Very cute! You always please! I am inspired by most everything the designers do. So much to take in but I really would like to do something like this!
Thank you for sharing. I know it’s work to do a blog and explain everything. Your tips and tricks are of great value to me. Great project.
I love the dimensions and colors used. So vintage. Just beautiful.