Welcome to the Creativation 2019 – Tim Holtz Blog Hop and Give Away, and welcome to my blog! I’m delighted to have been invited to join so many talented designers on this exciting blog hop hosted by Richele Christensen. If you’ve just come across from the very cool and brilliant Vicki Evans – [dig] that crazy chick blog, you’re right on track! …if you’re completely blog hopping lost, there is a full list of blog hop participants at the bottom of this post.
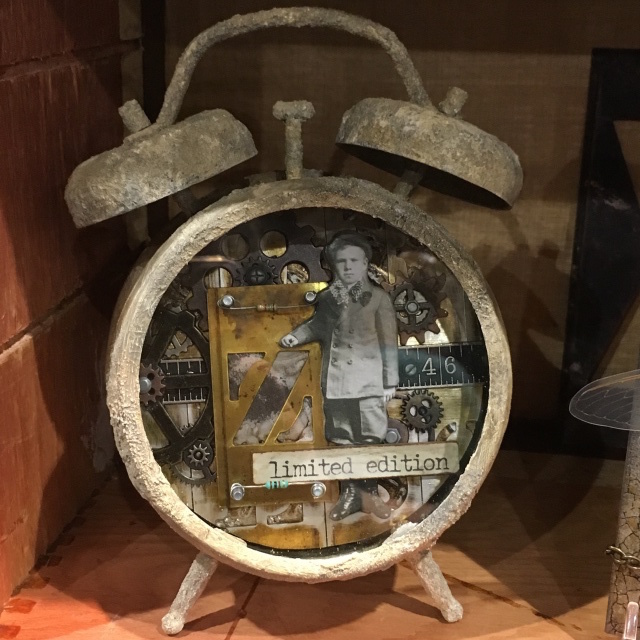
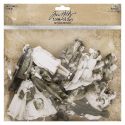
I was lucky enough to make a few samples for the idea-ology booth at this years Creativation with Tim Holtz wonderful new idea-ology pieces. Today I want to share a close-up look at the idea-ology assemblage clock that I altered.
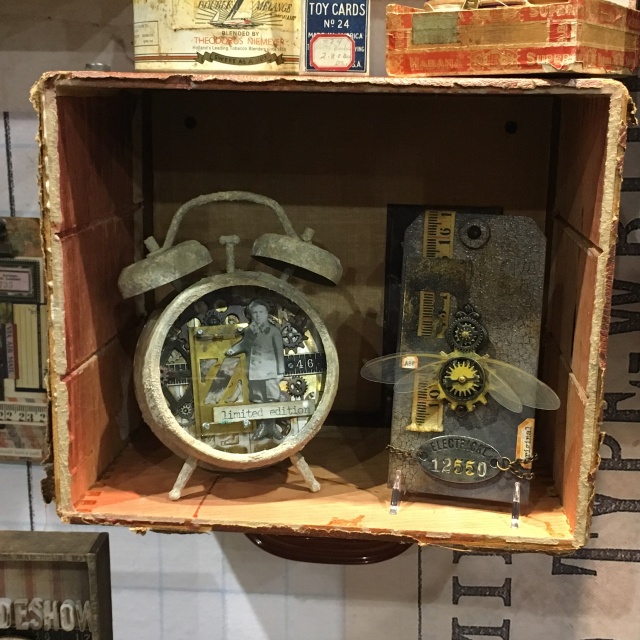
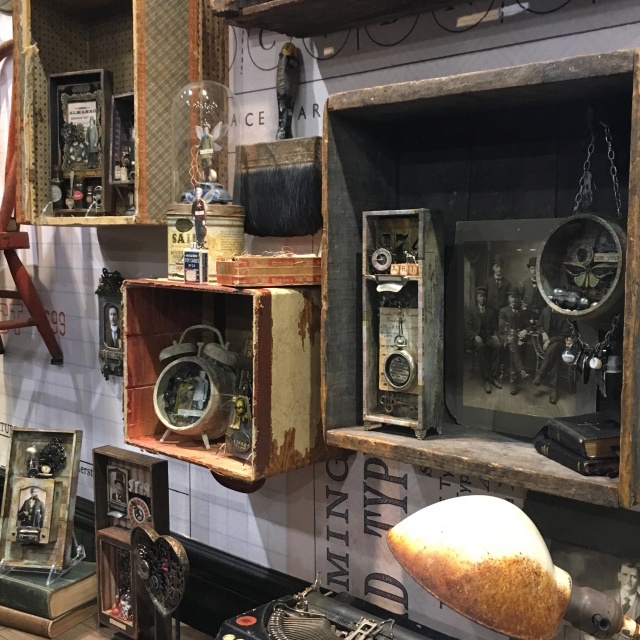
I had a major “pinch me” moment this year when I attended Creativation for the first time, flying all the way from Copenhagen to Phoenix. Not only did I get to share a room with the very cool Vicki, [dig] that crazy chick, but I got to share a display box with her incredible industrial bee tag.
The details…
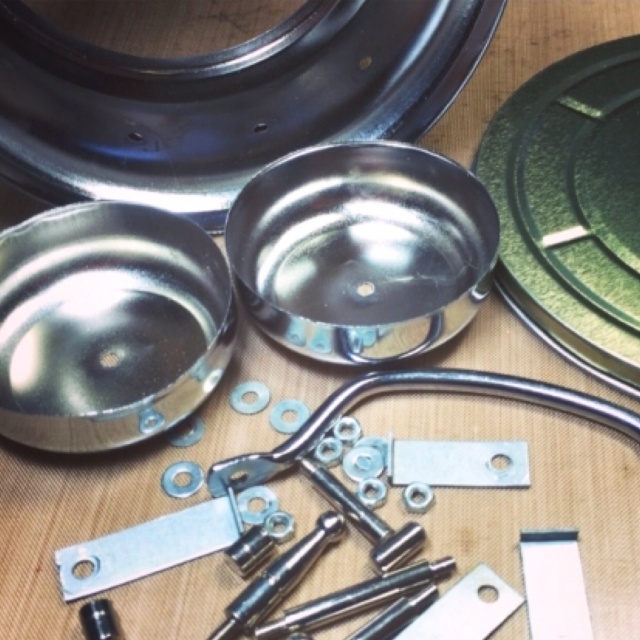
Dissassemble your clock. If it’s the first time, take note of what goes where as you take it apart. I recommend taking photos. The first time I altered an assemblage clock, I had several pieces left over! LOL
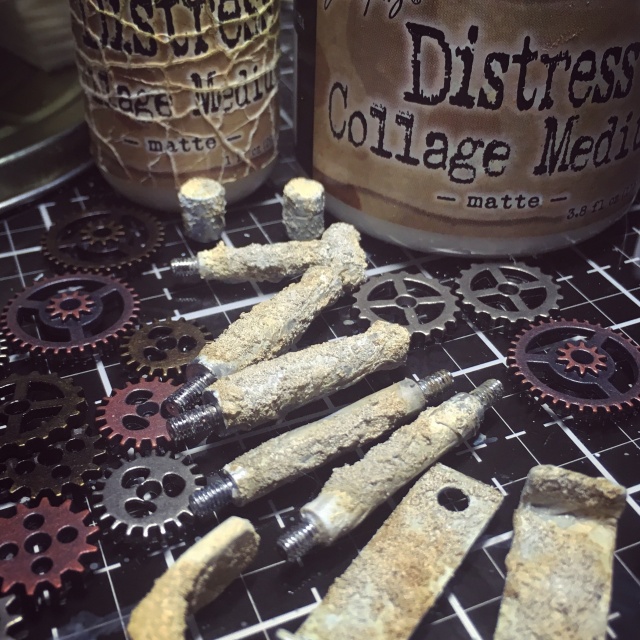
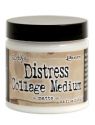
To create this salvaged stone look. Cover all of the pieces with plain collage paper, adhering with distress collage medium. Once dry add distress grit-paste to some areas, leaving some of the collage paper exposed. The areas without grit-paste will still have a textured look because of the collage paper.
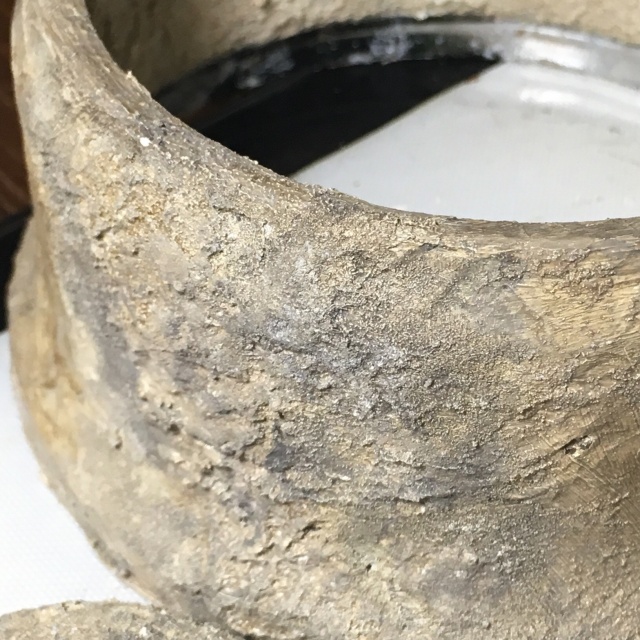
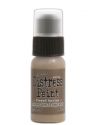
Once completely dry, create a paint wash using frayed burlap distress paint and lots of water. Brush over all the surfaces and allow to dry.
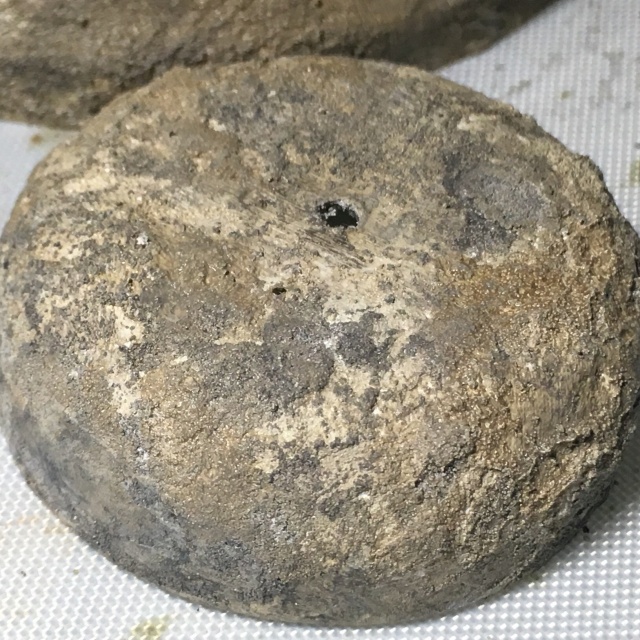
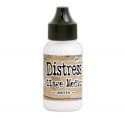
Finally, to add contrast, use pumice stone distress crayon, mixed with water and apply to random areas using a paintbrush.
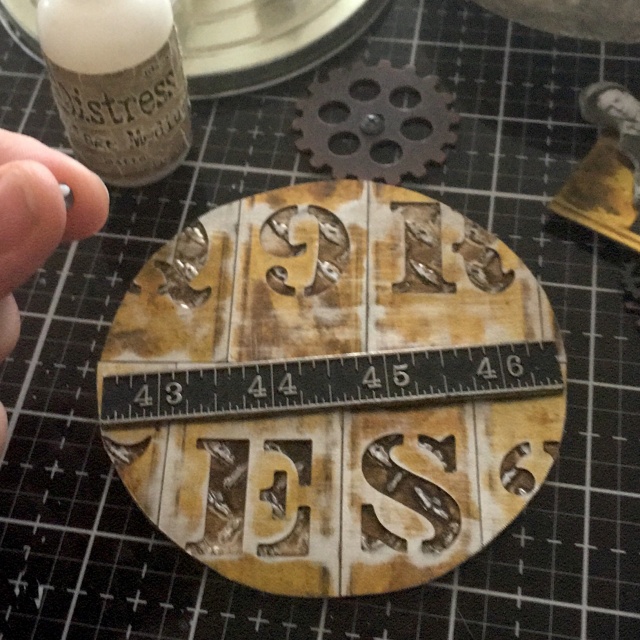
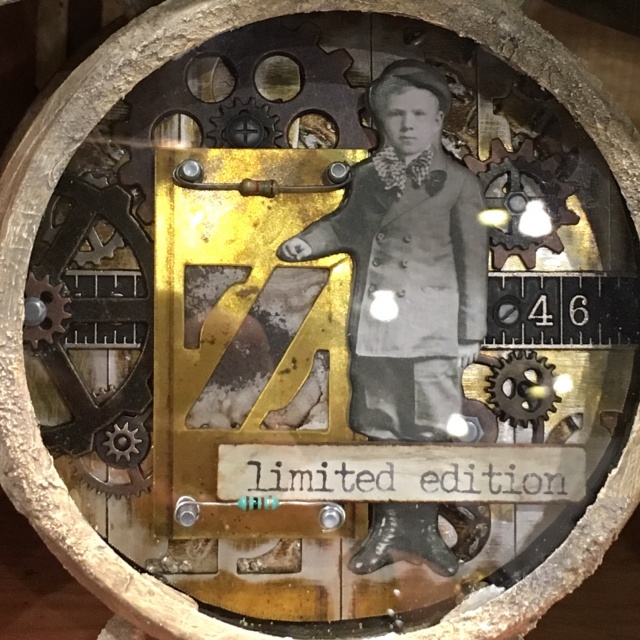
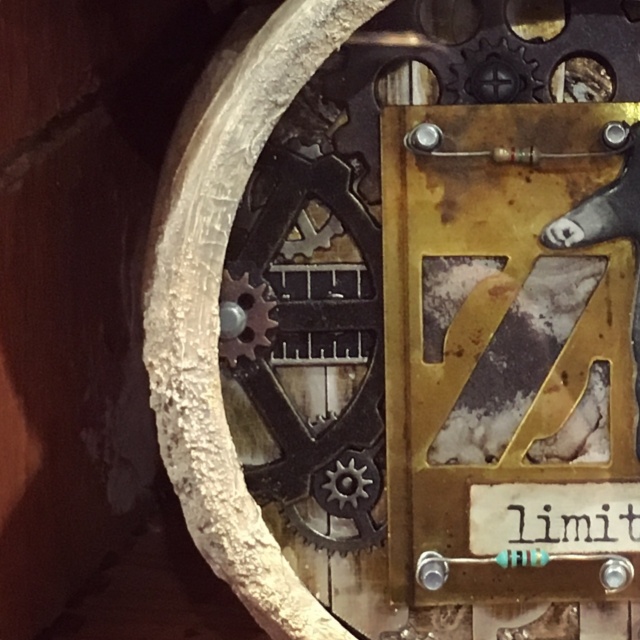
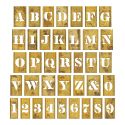
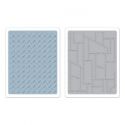
Use the back of the clock as a template and draw around it to create your background. I cut mine inside the lines as I wanted to push the background forward inside the clock. Run idea-ology metallic kraft stock through your die cutting machine with the Tim Holtz diamond plate texture fades folder and lightly sand to expose the kraft layer. Lightly sand the new idea-ology stencil chips and adhere over the top. I LOVE these, they look like metal and when I first received them, I was shocked that they are chipboard. You get a full alphabet and set of numbers in each pack! Cool right?!
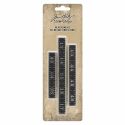
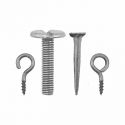
I also added an idea-ology measurements ruler and added the new idea-ology hardware heads to the top. To say I am obsessed with these hardware heads, doesn’t cover it! I won’t tell you how many packs I’ve pre-ordered!
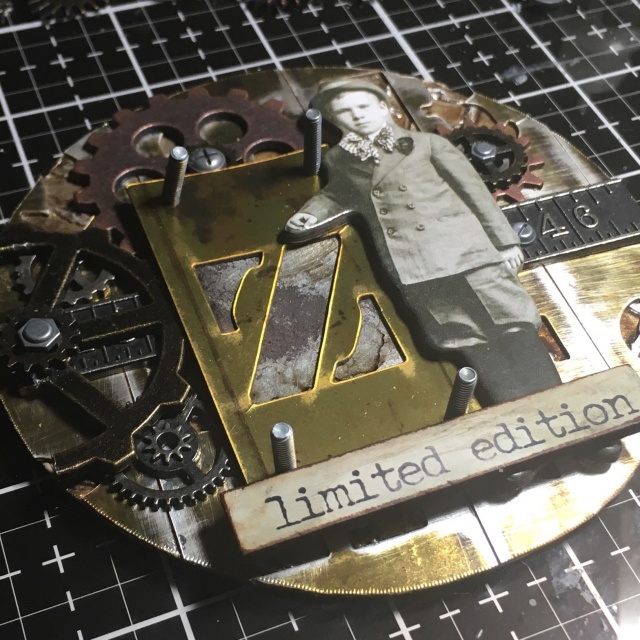
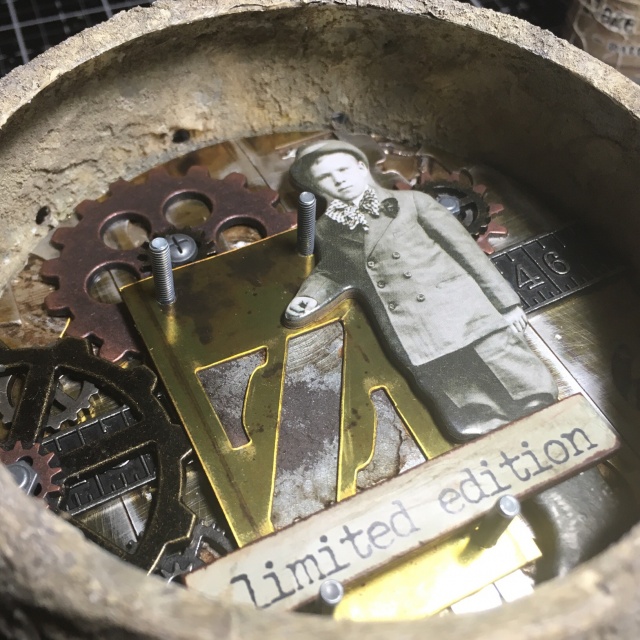
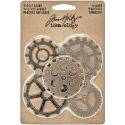
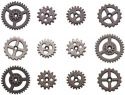
With my base down and glued into place, I started to add gears. I added an assortment from the 3 packs of Tim Holtz idea-ology gears. I cannot get enough of these and probably buy and use more of these than anything in the idea-ology range, (until the hardware heads and date dials were released)! The hardware heads fit with the gears perfectly. I also used the long bolts from the idea-ology vignette hardware findings pack. You’ll see why further down.
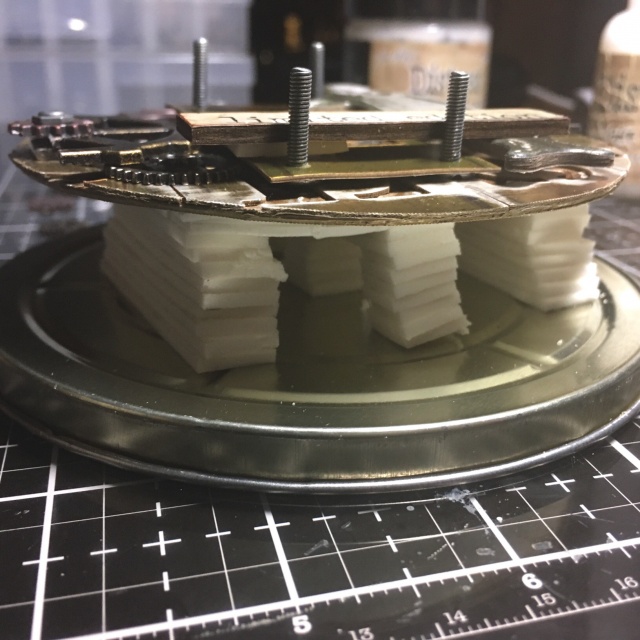
I wanted the background to sit forward and closer to the glass in this clock as the lights at the show can create a shadow. I used layers of foam, adding a layer until I had the perfect height.
Before adding the final touches and the glass, I placed the clock structure over the background to see that it would leave enough room for the internal hardware. The background needs to sit below the holes in the clock casing (as pictured).
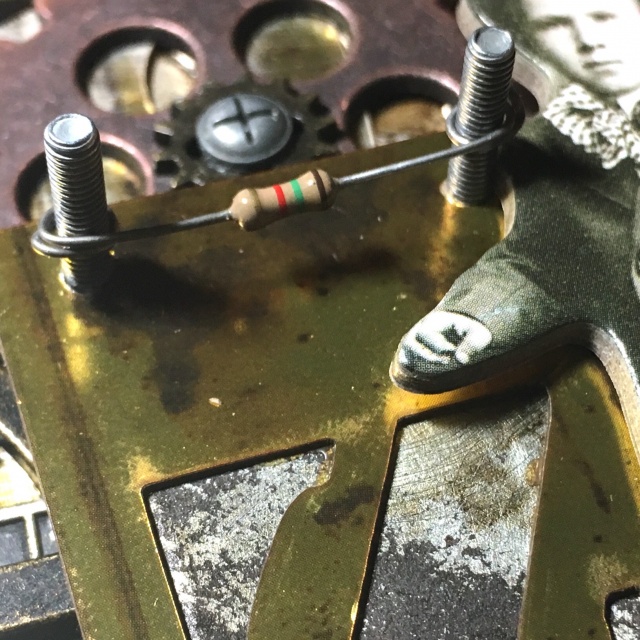
I picked up some fuses from a hardware store and wrapped these around the posts of the upturned bolts from the idea-ology vignette hardware findings pack. Put the glass into place and assembled the clock. Funny story… I carried this in my hand luggage and was mildly concerned that there were going to be some difficult questions about my carrying a clock containing gears and fuses onto an international flight! LOL
Hope you’ve enjoyed this stop on your blog hop. If you haven’t already, check out Tim’s Creativation 2019 recap and booth tours.
Next on this blog hop is the very talented Audrey Pettit.
Zoe x
To be in with a chance of winning a prize. Just leave a comment on all the different blog hop posts for a chance to win! The more blogs you leave comments on, the better your chances of winning.
Comments must be posted before midnight PST on Saturday, February 9th.
Winners will be announced on Sunday, February 10th on Richele’s blog
BLOG HOP PARTICIPANTS…
Audrey Pettit
Bobbi Smith
Cathie Parreco
Cheiron Brandon
Debi Adams
Emma Williams
Jan Hobbins
Jennalee Anderson
Joy Kennedy
Kath Stewart
Mae Nazareth
Mou Saha
Paula Cheney
Richele Christensen
Stacy Hutchinson
Tami Bastiaans
Vicki Evans
Zoe Hillman (you are here)
 |
 |
 |
 |
 |
 |
 |
 |
 |
 |
 |
 |
 |
 |
 |
 |
 |
 |
 |
 |
 |
 |
 |
 |


WOW, WOW and WOW again – I am blown away by this clock project – you are so talented!!!!!
The work of the stone is very successful. This alarm clock really has a lot of decoration possibilities including yours which is very well done.
My mouth is hanging open! It’s beautiful & I am amazed by the finish you created for the clock. Impressive to say the least!
Wow..stunning!
I love how you created that salvaged stone look. What a fantastic piece of art.
Amazing texture, such a cool project!
I love this. The texture on the clock is wonderful. Thank you for posting it so we could get a better look at it.
What a cool way of turning something new into an old piece of art. Thank you for your inspiration.
Love the clock. I have
one of the older versions
and need to get it out
and put to use. thanks
for sharing and giving
me a push.
txmlhl(at)yahoo(dot)com
Wow!! Fabulous clock. Love the texture. Thanks for sharing.
wow a million times over, beautiful details an amazing texture and love what you used to create dimension, hugs kath xxx
I’m a big fan of your projects and just adore your style! Thanks for the inspiration and sharing all the yummy details, can’t wait to try these “new to me” techniques!
Dang girl! This is one amazing clock! My favorite bit is how you’ve used the Stencil Chips on the background and then as a focal point along with the Baseboard Doll. The more I see of these chips, the more I know I will need to hoard several packs. I thought those Hardware Heads had your name written all over them when I first saw them. You left us some, right?? While I’ve been drooling over the interior of the clock, I have to say you have really wowed me with how you made the exterior look like stone. Well done, you! Thank you for the inspiration!
I left you a few hardware heads (but not that many) LOL <3
Love your creation…..this clock is perfection! It is so inspiring and wonderful! Thank you for sharing it!
The stone effect is incredible and it is impossible not to love this project! Thanks for sharing.
Wow, I love all the textures. Great job. Thanks for sharing.
Amazing project. Love the stone look and the stencil chips. Thanks for sharing.
I love the way the project turned out especially the clock and the way you used the wings. It’s all wonderful.
Thanks for the tutorial. Love your project.
All of the work that you’ve put into this project! Love it!!
I love the stone texture you created. Thank you for sharing your techniques!
You did a wonderful job achieving that old decaying stone look!
And I love all the metal work inside.
I love the surface technique you used. Such a great project. love it!
Absolutely fab piece, Zoe. Excellent creativity resulting in a real show stopping time piece . tfs x
what creative layering inside your clock Zoe! love the golden Z, all the gears and the vintage young man – also love the rough rocky look you created on the outside!
You are so creative!!! Wow! Love that clock!!!!
I wondered how you got that look on the clock!! Glad you were able to visit Phoenix!!!
Holy Cow Zoe! If my dad was still alive he would have LOVED this clock. It actually looks like it was buried for YEARS and then dug up!! It’s so fascinating…I may have to make one anyway and take it out to the cemetery for a bit. Thank you for sharing some of the details for this work of art.
The faux stone is awesome!
Love the texture you created on the clock! Thanks for sharing!
Thank you for the tutorial! Great technique and would have never guessed. Love that clock….just might have to try this to add to my collection of antique clocks.
I’ve never attempted a project like this; thank you for the inspiration as I may have to give it a try.
Love the stone look, so much work.
Wow! This is incredible. 🙂
Awesome clock. Love all the details. I’m not sure that I could put it back together.
Thanks so much for sharing your wonderful creativity…
Such a creative piece. I love all the little details. How DID you get all those things in there….? Just great.
I adhered them to a base which was placed on top of foam pieces attached to the clock back plate and then placed the clock structure with the glass over the top.
I’ve never seen the clock piece so well aged and hacked….clever project.
Love the texture you did, awesome clock!
Thank you for your great idea cant wait to try
I love, love, love that stone texture and those stencil chips are a must have…awesome project Zoe!!!
Love the stone finish. Thanks so much for sharing with us how to achieve it. You are amazing. This assemblage reminds me of something one would find in a 1800’s dig in an old western town! It looks so authentic!
Your creativity for the Stone look is incredible. It gave me an idea for a new texture on. Some polymer clay earrings that I am making, so thank you!
Zoe, you continue to amaze!
I’m amazed how you come up with the idea for this beautiful art.
Oh, that salvaged stone look is amazing! Great tip taking a picture of the pieces! 🙂 The layers are amazing… cool gear pieces!
The clock looks like it was pulled out of the sea! Awesome project. Thanks for sharing!
This is such a cool piece and I love that you were able to see it in the booth, what a thrill!
All of your work is beautiful
Fabulous project, Zoe! The combination of the gears and fuses with the stencil chips is brilliant.
Awesome assemblage clock!