31st January, 2014 by iGirlZoe
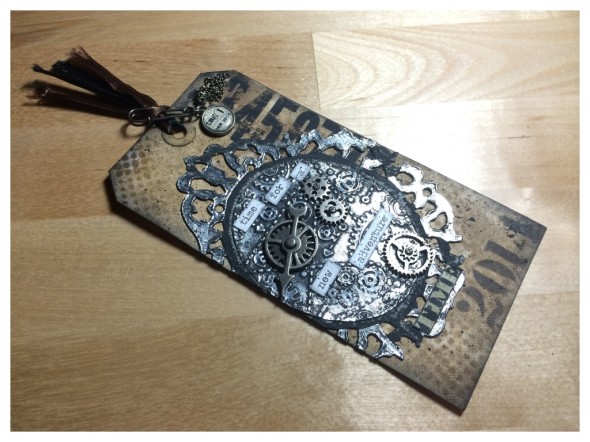
Tim Holtz 12 Tags is back for 2014. I hesitate to state my intention to complete all 12 tags this year, but I have to at least put it out there! 😉
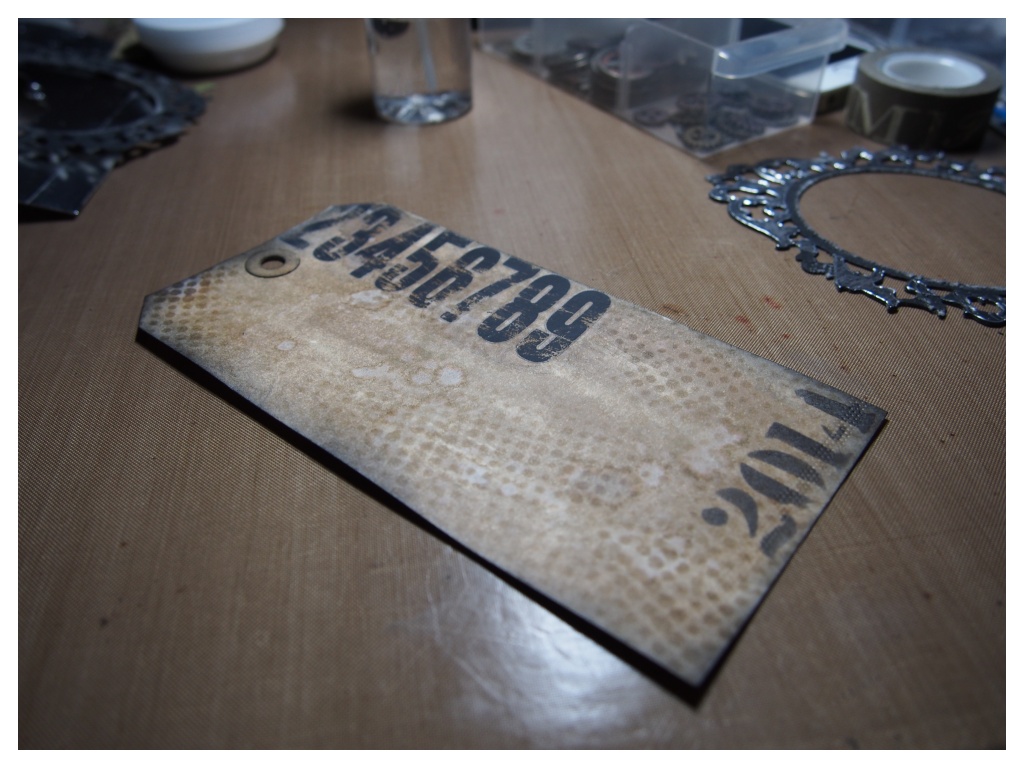
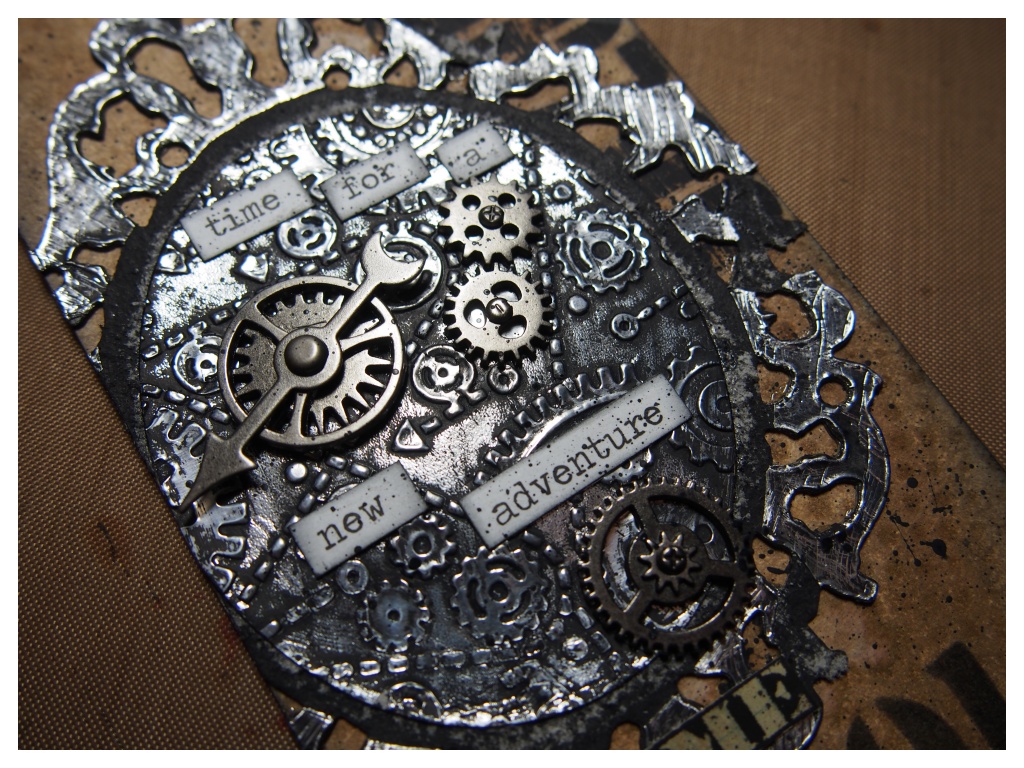
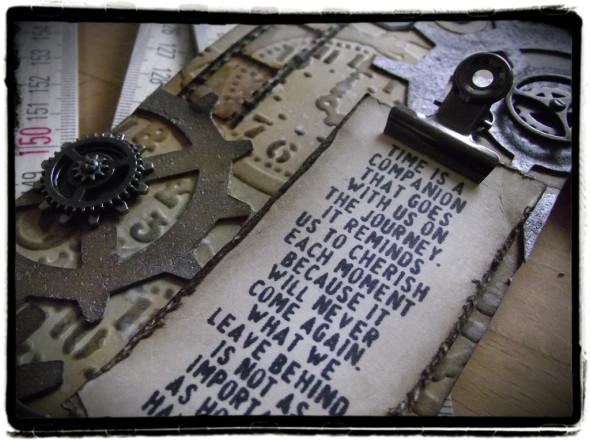
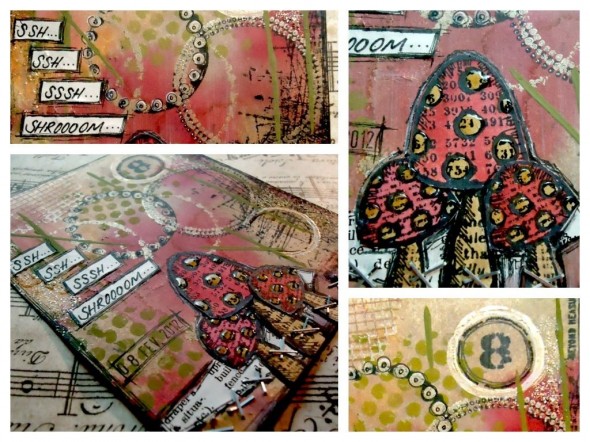
I absolutely adore this month’s tag and it’s reminded me how much I love metal foil embossing. Here is my take on January’s tag, using the techniques Tim demonstrates.
Probably the less said about my stencil addiction the better!

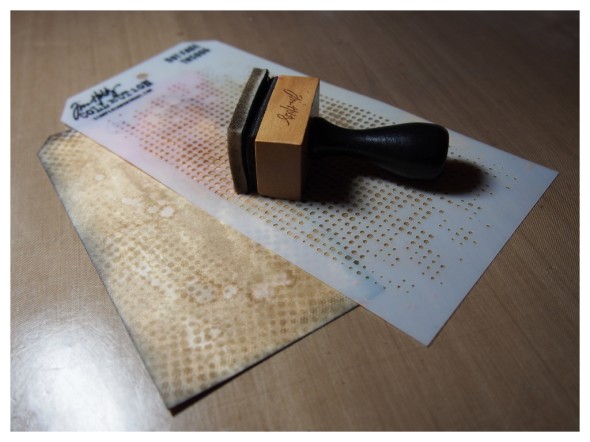
I hadn’t tried sanding the rub-ons before, but it’s such a great distressed effect and the rub-ons are such a pleasure to use.
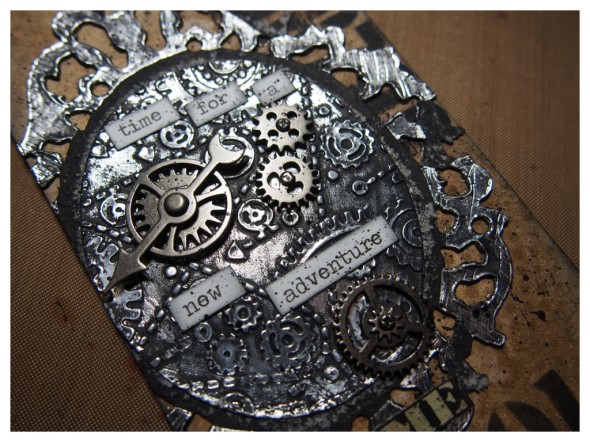
I got the ornate frame die for Christmas and have been waiting to use it. This seemed like a perfect substitute for the large pocket watch die, which I don’t have, (yet)!
True to form this is very last minute, but the benefit is I don’t have to wait long for the next one…
~
supplies: tim holtz; metal foil/grungepaper/manilla tag/distress block/gears texture fades embossing folder/ornate frame die/distress paint (black soot)/distress stain (frayed burlap)/distress inks (frayed burlap, black soot)/remnant rubs (numbers, words)/assorted idea-ology/layering stencils (cargo, dot fade); liquitex splatter brush
Category Craft, Craft Challenges, Craft Creations, Craft Techniques | Tags: | 3 Comments | Views: 1,529
21st January, 2014 by iGirlZoe

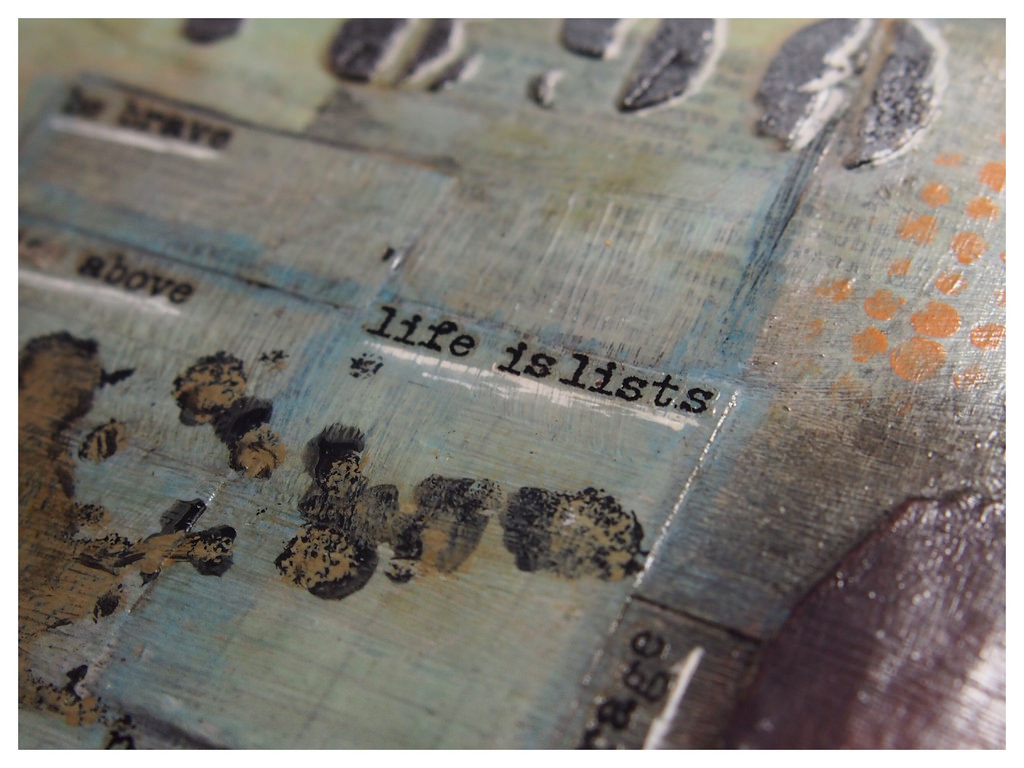
I had no idea where I was going with this when I started. I knew I wanted to create some texture and had seen a fabulous art journal video posted by Vicky Papaioannou. I used her background technique, cutting scrap paper into random sized squares and then sticking down with Studio Medium.

I was particularly keen to try this background technique as it goes against my need for the ‘laws of straightness’. This year I’m keen to try out new techniques and use the products I have in different ways.
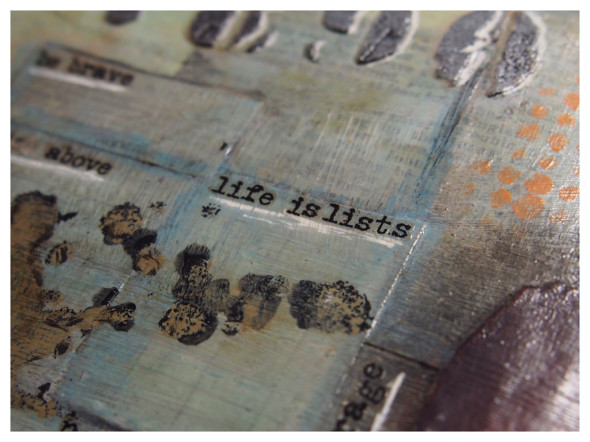
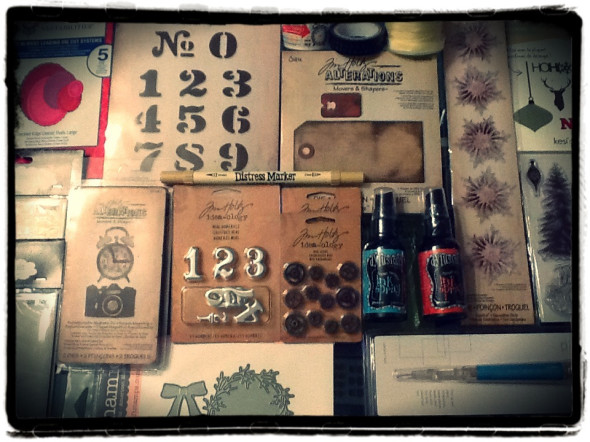
I used the Tim Holtz Remnant Rubs to create some keys phrases to inspire me throughout the year. You will see I mixed up some of the RR’s, I assure you that Tim hasn’t produced an RR saying “life is lists!” 😉
~
supplies: tim holtz; distress paints (frayed burlap, weathered wood, bundled sage, wild honey, black soot, aged mahongany)/distress markers (vintage photo)/remnant rubs (elements, numbers, words)/layering stencils (cargo, dot fade, splatters); claudine hellmuth studio multi-medium (matte)/faber-castell artist pens (black)/uni-ball signo gel pen (white)/liquitex modelling paste.
Category Craft, Craft Creations, Craft Supplies, Craft Techniques | Tags: | 2 Comments | Views: 2,165
1st November, 2013 by iGirlZoe

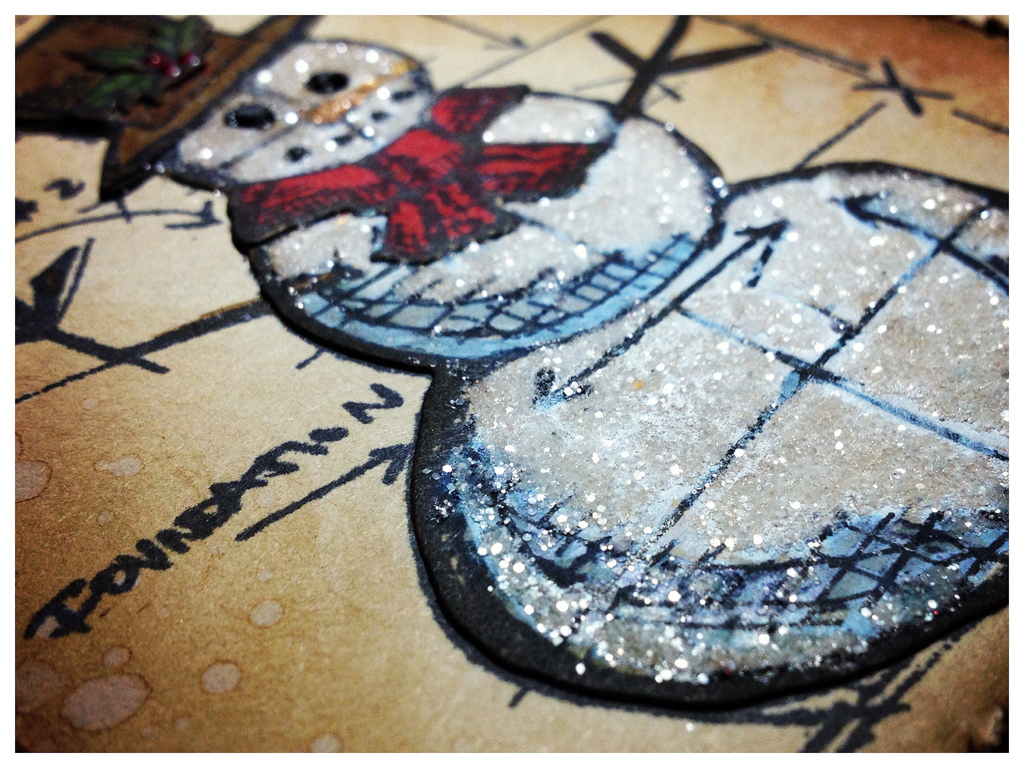
I was delighted to be asked by my friend and owner of Scrapdeco to do a Christmas card tutorial for the blog.
Naturally my card is made almost exclusively with Tim Holtz products. I absolutely love the new Snowman Blueprints Stamp and Framelits Die Set and the new Sizzix Magnetic Platform for Wafer Thin Dies is a total game changer!
Please visit SCRAPDECO to see my tutorial, written in no less than two languages, (thanks to Genevieve for translating into French).
Category Blogging, Craft, Craft Challenges, Craft Creations, Craft Techniques | Tags: | 7 Comments | Views: 7,743
15th July, 2013 by iGirlZoe

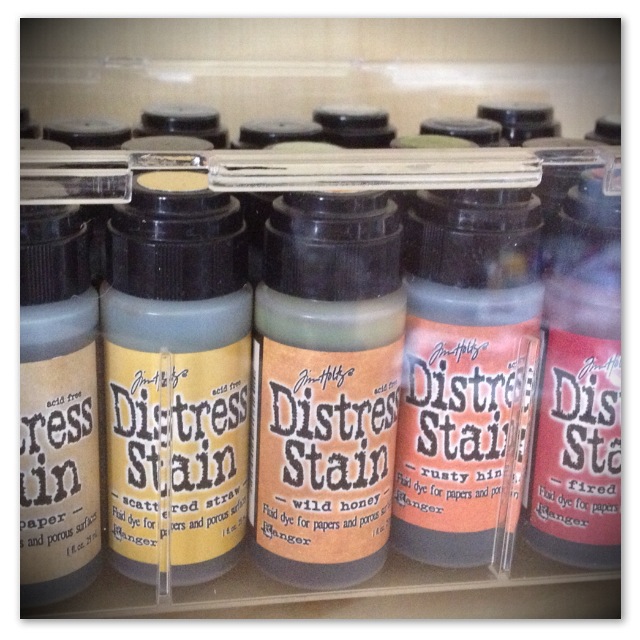
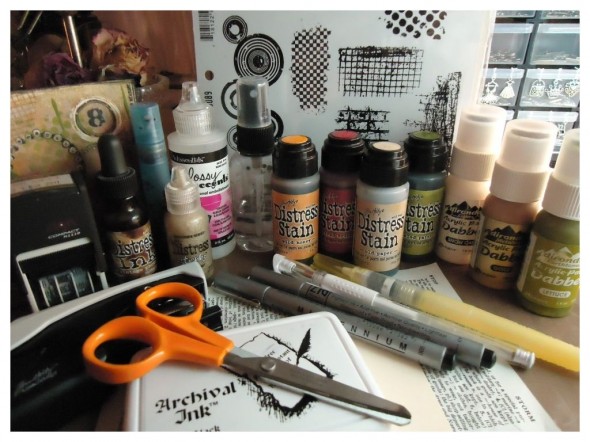
Recently I’ve been experimenting with watercolor techniques using different Distress products. I’d only used my Distress Stains to swipe across a tag or stain ribbon, so was thrilled to discover how incredible they are to watercolor with. They are now part of my staple craft supplies and I hope to add more colours to my collection.
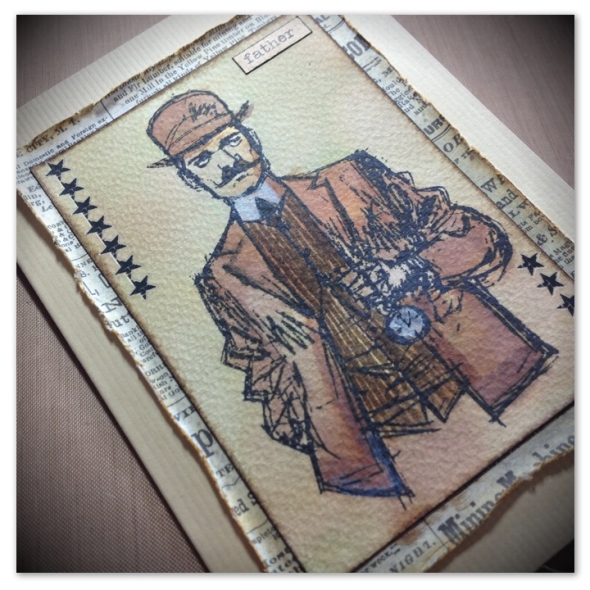
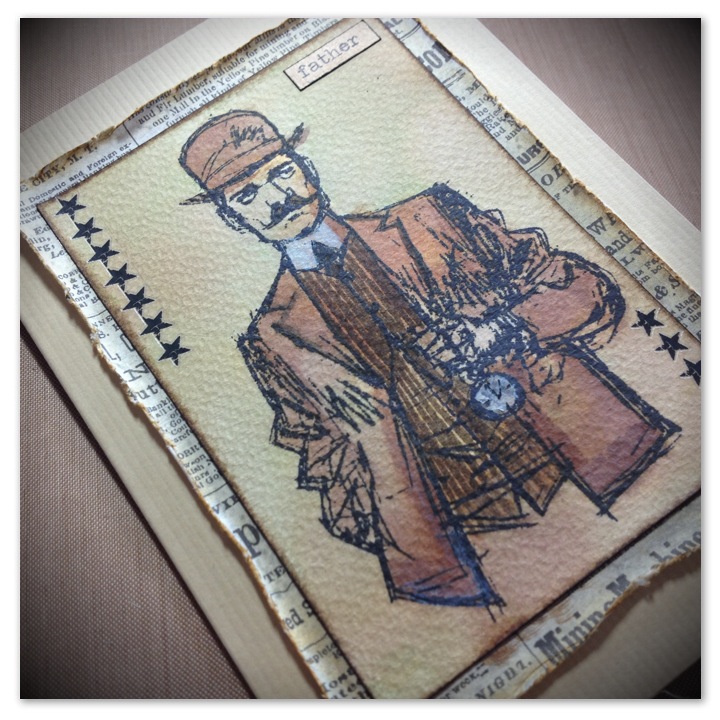
I created this card for my Father-in-law’s birthday using Distress Stains, a water-brush and a stamp from the Tim Holtz Time Travelers set. I followed Brett Weldele’s tutorial on monochromatic coloring.

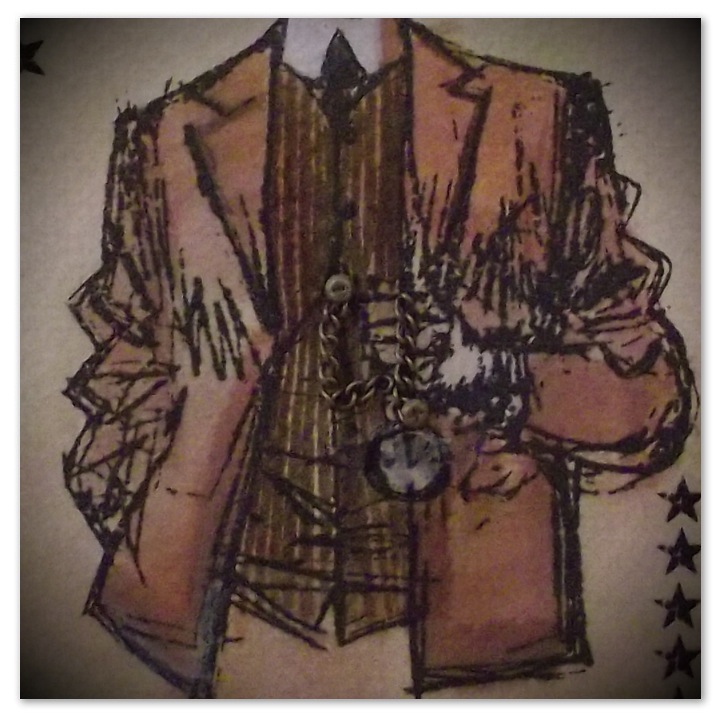
When I had assembled the card I felt as if it needed a little extra something to make it pop, so I added some idea-ology lace chain and secured using mini fasteners to simulate the pocket watch chain.

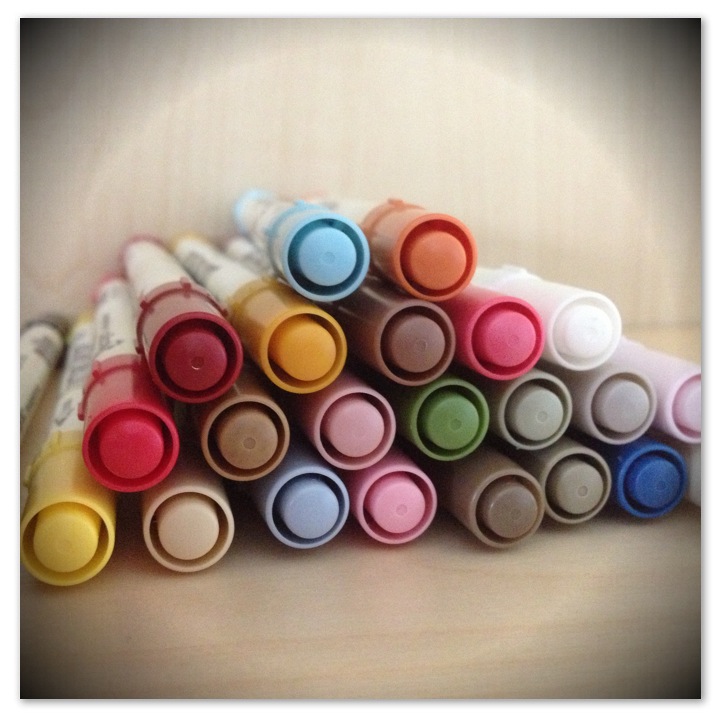
I’ve also been experimenting with Distress Markers which I got for my birthday. Initially I was skeptical as I wasn’t convinced a marker could watercolor that well. How wrong was I?! So it’s great news that Tim Holtz has just announced the release of 12 new colours of Distress Markers, in the first of his CHA Summer 2013 Sneak Peeks. I’m especially excited about having a new surface to distress, with the launch of Distress Watercolor Cardstock. AVAILABLE IMMEDIATELY! WOO HOO!
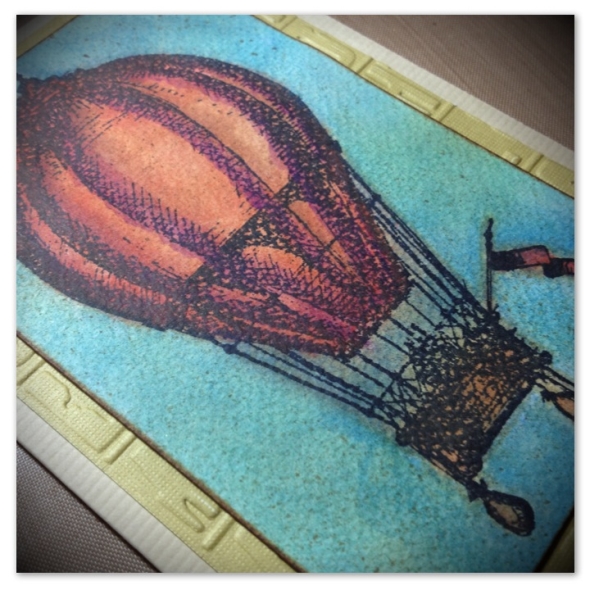
This card I created with Distress Markers, a water-brush and a stamp from the Tim Holtz Remnants set. I used Distress Stains for the background and a little Distress ink around the edges to age it.
Category Craft, Craft Creations, Craft Storage, Craft Supplies | Tags: | 2 Comments | Views: 4,714
22nd March, 2013 by iGirlZoe
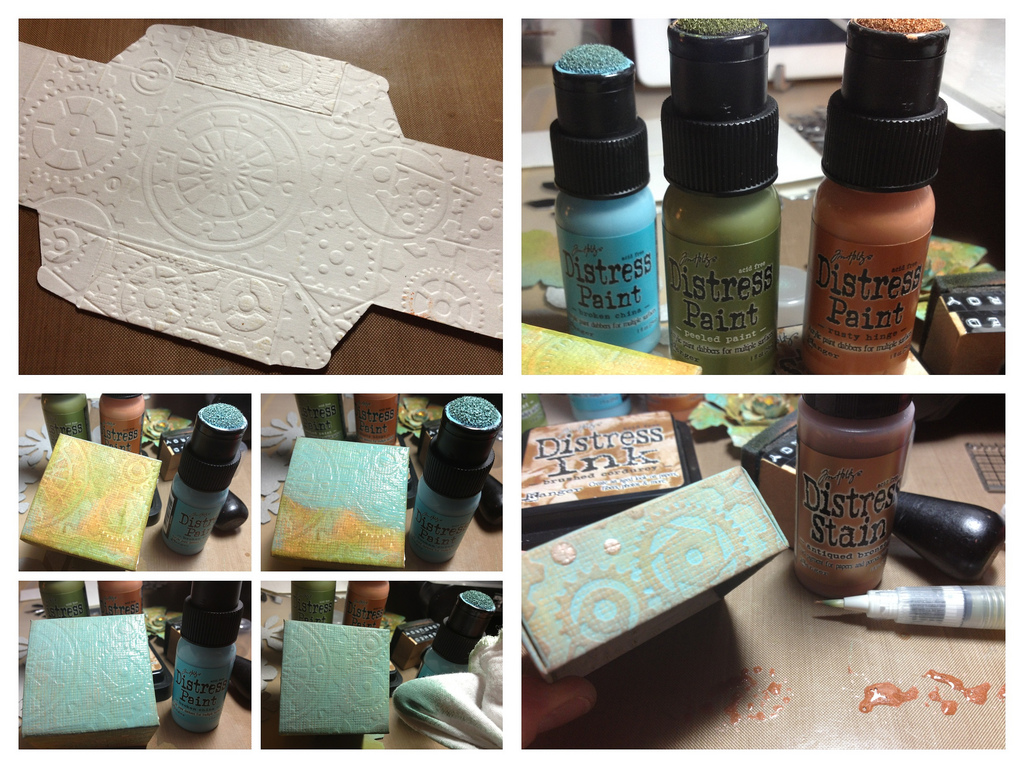
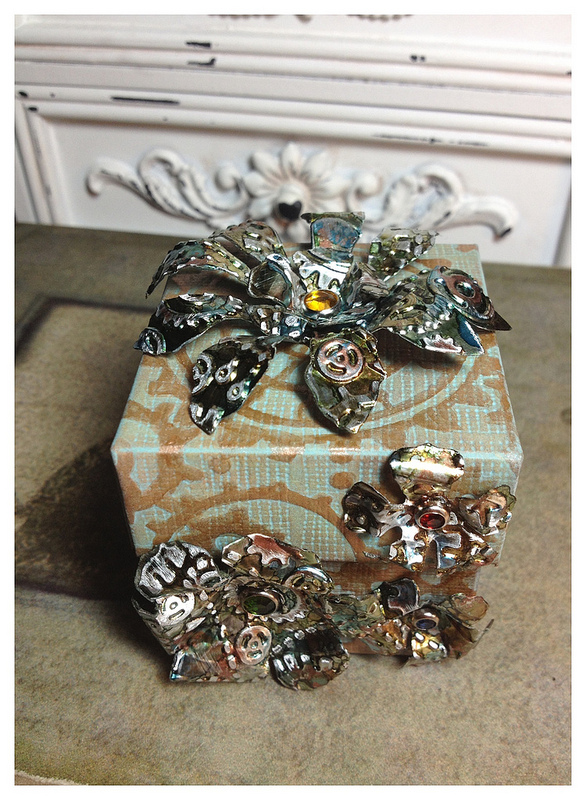
When Tim Holtz challenged us to his Tattered Floral Challenge, the Tattered Florals Die was one of my least used, mainly because it was too, well, floral!
After several attempts I hadn’t created anything that I felt worthy of this challenge. Then it occurred to me that what these flowers were missing was some much needed grunge! I grabbed the new Tim Holtz Sizzix Texture Fades Gears Folder and came up with this!
This is how I made it…
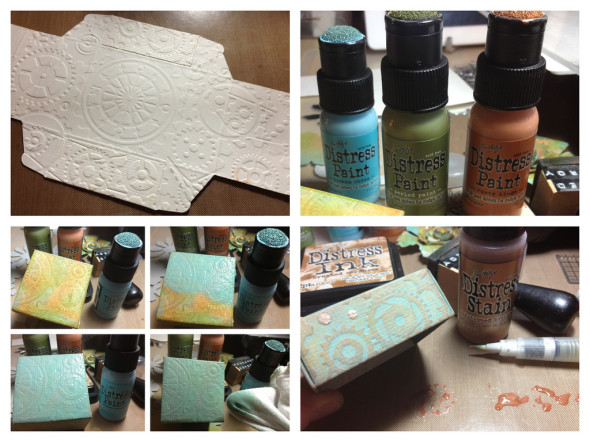
I embossed a box lid and base and covered with distress paint. Once dry, I added a layer of broken china distress paint and then quickly removed the excess with a dry cloth. I swiped a blending tool with brushed corduroy distress ink over the raised embossed detail. Finally, I used an empty water brush to hightlight the raised areas with antique bronze distress stain.
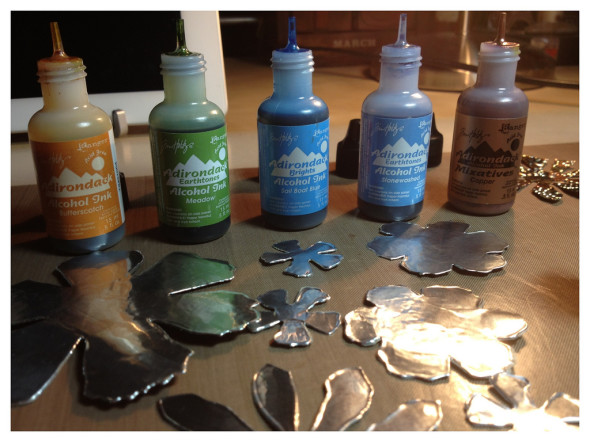
Next I die cut Rangers Metal Foil Tape with the Tattered Florals Die and covered with Adirondack alcohol inks and set aside to dry.
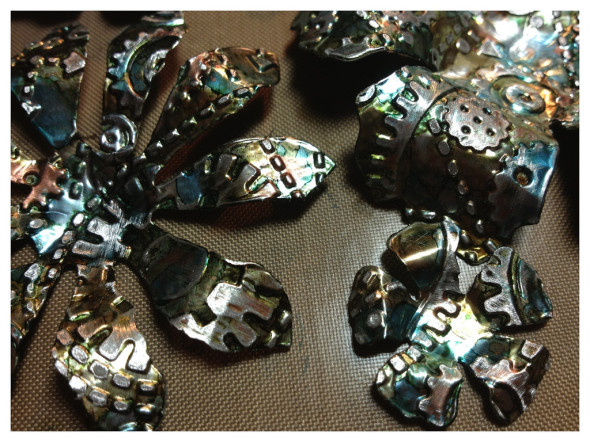
Once dry, I embossed with the Tim Holtz Sizzix Texture Fades Gears Folder and then used a sanding block to take the dried alcohol ink off the raised embossed areas.

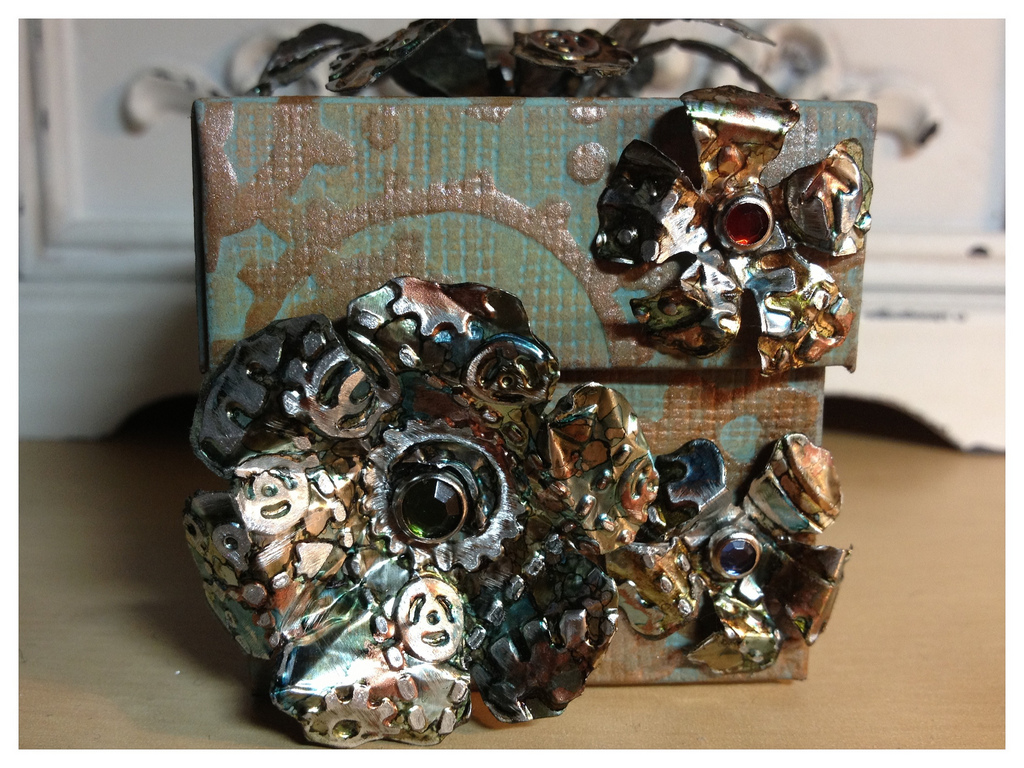
I attached the flowers with gem brads and curled the leaves to give them a more dimensional look.
Thanks to Tim’s challenge, I have a renewed love for my tattered florals die and look forward to experimenting more with my alcohol inks and metal foil.
Category Craft, Craft Challenges, Craft Creations, Craft Techniques, Miscellaneous | Tags: | 3 Comments | Views: 9,320
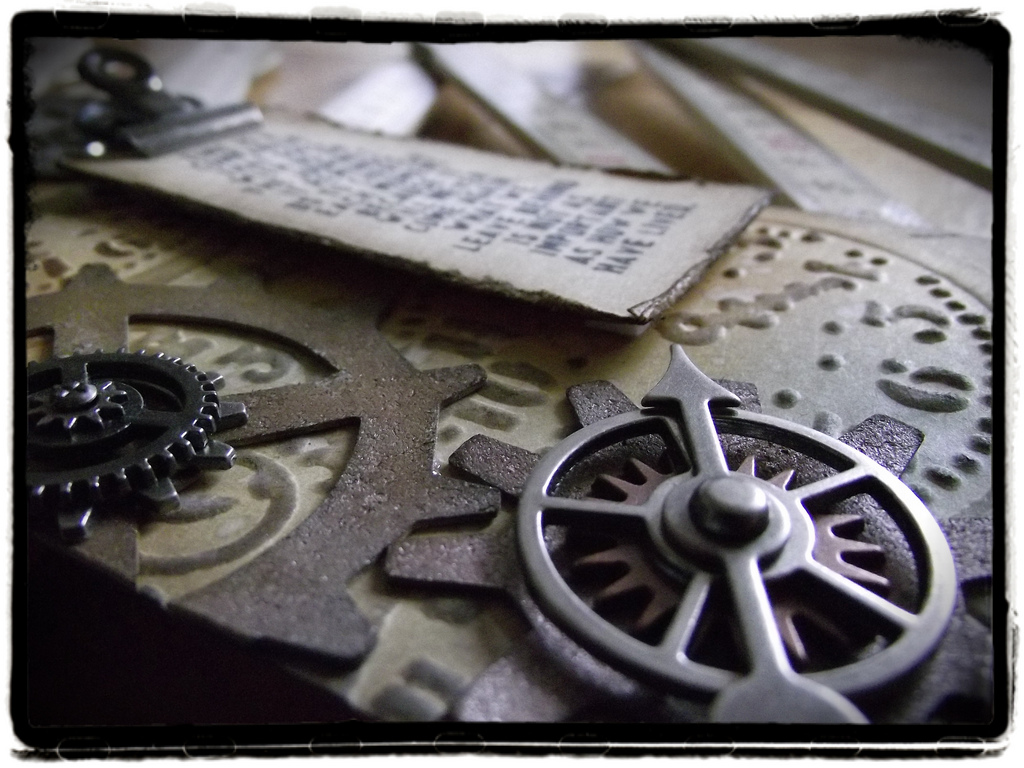
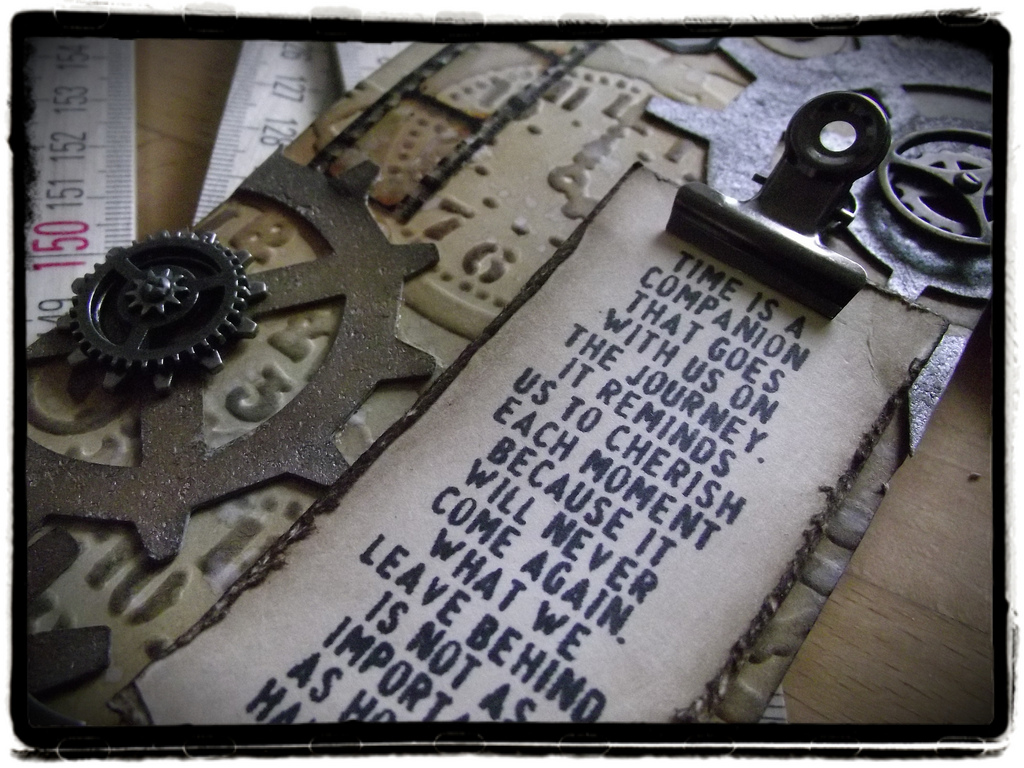
31st January, 2013 by iGirlZoe
YAAAAY! Tim Holtz 12 Tags of 2013 is back for another year!
This time I wasn’t terrified of slicing into my Texture Fades embossing folders because I had already taken the plunge, as seen in my Altered Texture Fades blog post.

I had just about all the ingredients for January’s Tag, so decided to try and “colour inside the lines” and not deviate from the original. However, since making this tag, I have used several of the techniques to make other things.
I found that following Tim’s techniques got me thinking more creatively about other things I wanted to make. I often suffer terrible crafters block and now follow one of Tim’s techniques until the creative inspiration hits me.

I can’t get enough of the Idea-ology Mini Gears and have a packet a month habit. I recently saw The Artful Maven had used them as the center of a fabric flower, I love the diverse ways in which you can use them.
The Idea-ology Hinge clip on paper has inspired me to try and create a miniature clip board with grungepaper and distress ink on another project.
I had so much fun making this month’s tag, looking forward to February’s.
Category Craft, Craft Challenges, Craft Creations | Tags: | No Comments | Views: 6,953
30th January, 2013 by iGirlZoe

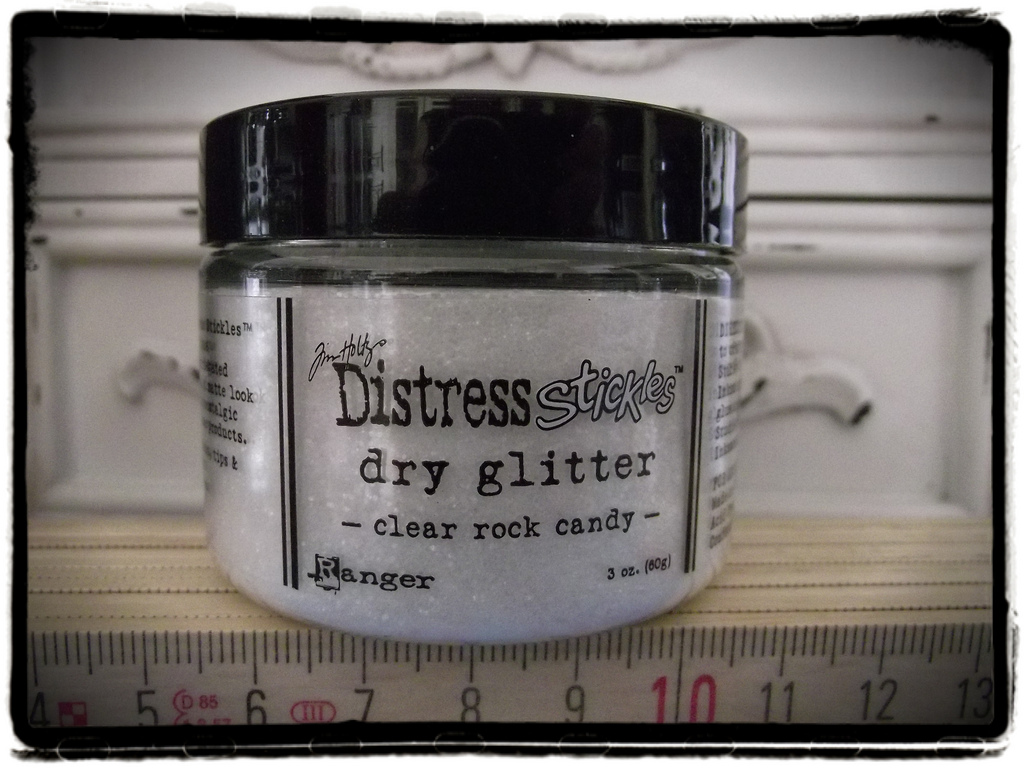
You’re probably on your second or third pot of Distress Stickles Dry Glitter Clear Rock Candy by now, but I’ve just discovered it and it’s better than calorie free chocolate! I am utterly addicted and find myself eying up everyday items in my apartment and wondering if I could “DSDG” it!
I went to my local craft store, Scrapdeco, at the weekend as my Christmas gift certificates were burning a hole in my pocket. I picked up the fabulous Tim Holtz Movers & Shapers Cargo Stencil Number die set. I couldn’t wait to get home to play with my new goodies and make some tags.
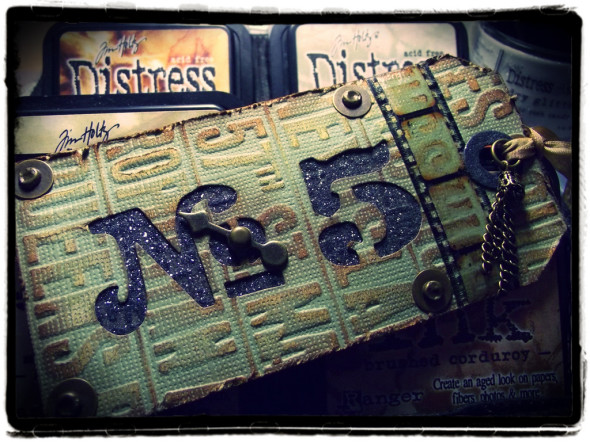
I used black card covered in DSDG to back the cargo numbers. On black card, DSDG looks like gravel and I love that it doubles as pretty Christmas AND grungy gravelly glitter. It works especially well with the new Rangers Sticky Embossing Powder, which I’m going to try gold leafing with this week. I used the Tim Holtz Sizzix Texture Fades Subway Folder to emboss Core’dinations Kraft Core, which I covered in a variety of distress inks. I finished the tag off by distressing the edges with the Tim Holtz Paper Distresser and embellished with an assortment of Tim Holtz Idea-ology.

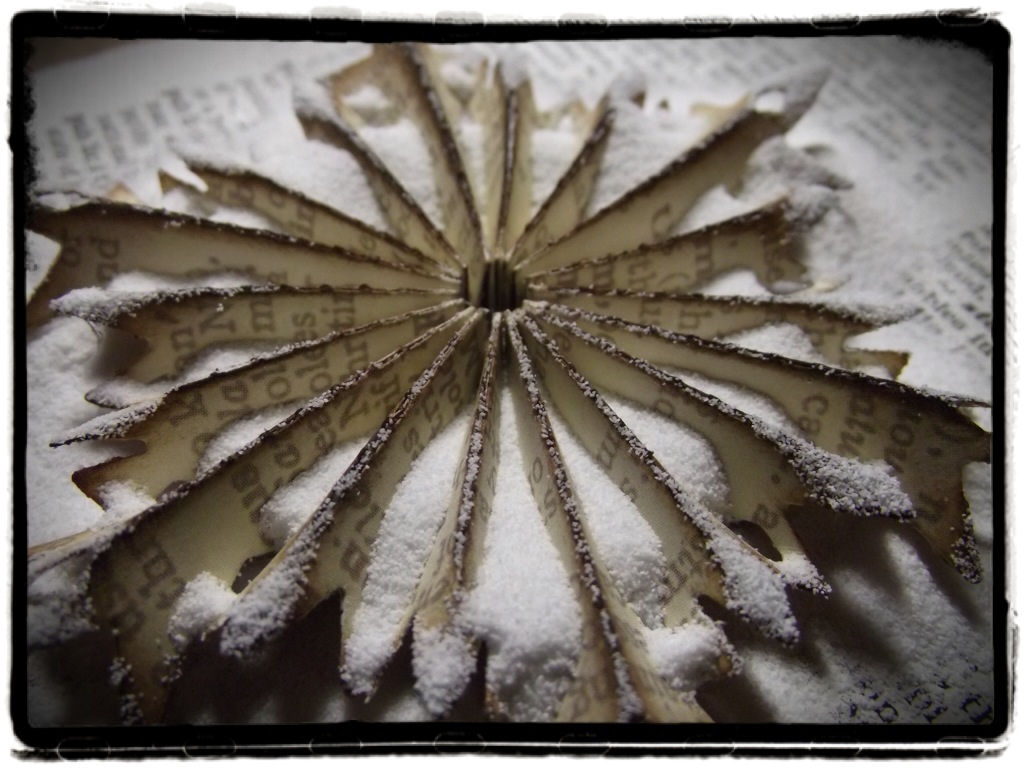
In an attempt to deny that Christmas is over for another year, (and to use MORE DSDG), I dropped back into the festive bubble and made this snowflake using the Tim Holtz Decorative Strip Snowflake Rosette die.
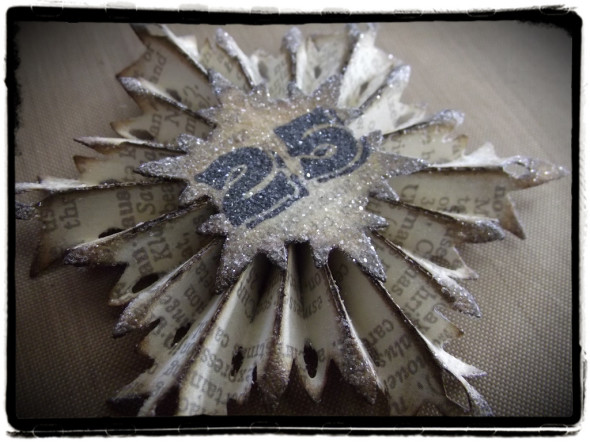
I saw a great tip on Tim Holtz Blog to use a strip of Tissue Tape on the back of the die cut before folding. It prevents tearing and keeps the rosette together, whilst providing a cool background for the reverse. I didn’t have my glue gun with me so used a squirt of Glossy Accents, (one of my dessert island supplies), it’s strong stuff.
Category Craft, Craft Creations, Craft Supplies, Craft Techniques | Tags: | No Comments | Views: 5,003
31st October, 2012 by iGirlZoe
Happy Halloween! I wanted to share a few of the creepy creations that I recently made for some of my swappy pals in the Tim Holtz Addicts group.
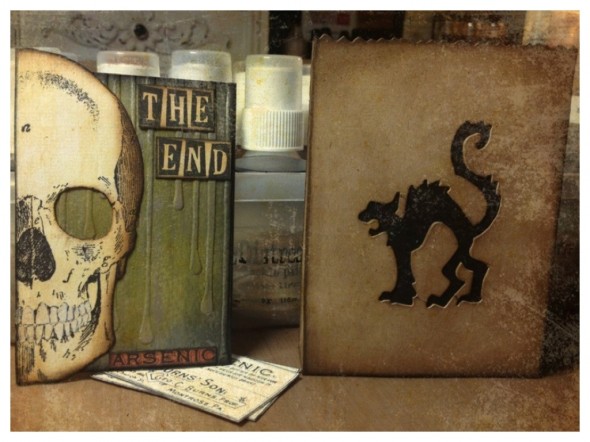
I love the new Tim Holtz Sizzix In The Bag Die, which I used with the Tim Holtz Sizzix Mini Cat & Raven Movers & Shapers Dies. They remind me of ‘Trick or Treat’ bags and are the perfect size for ATC’s.
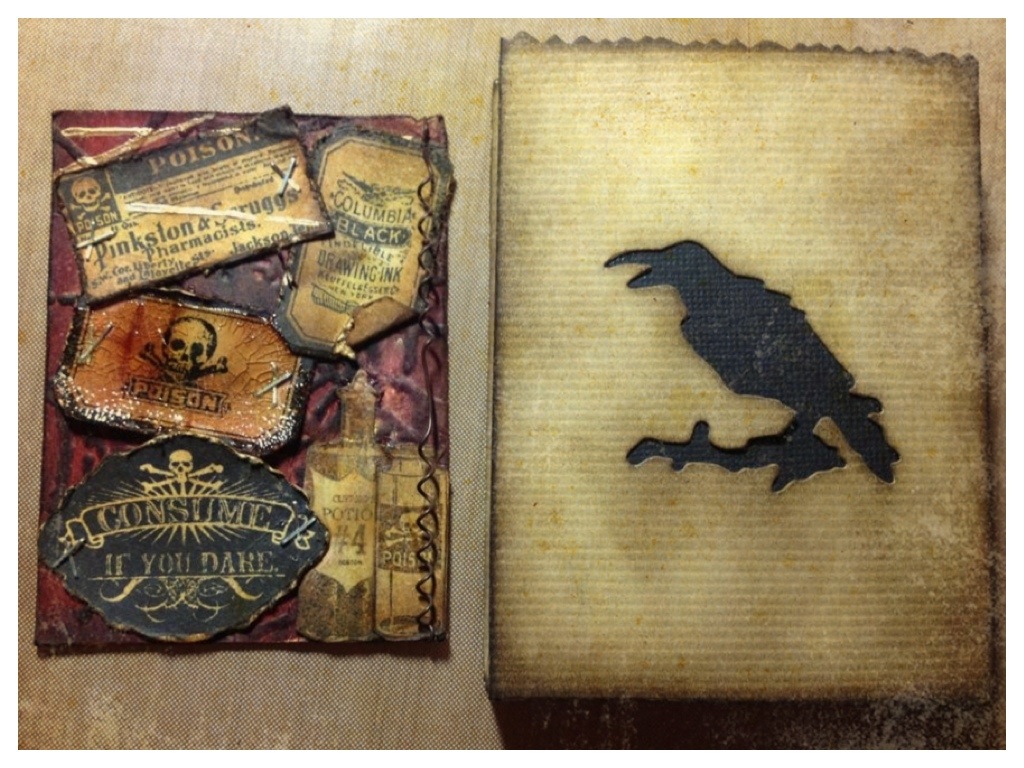
I have been really looking forward to using the new Tim Holtz Apothecary Stamp Set which I used to make the skull ATC. I stamped ‘The End’ using a wood backed stamp that my lovely friend Rhea sent me. Check out her blog, Starrgazer Creates.

I made the potion labels ATC using stamps by Tim Holtz, Pink Paislee and My Mind’s Eye, as well as a little crackle glaze and the obligatory Distress Inks.
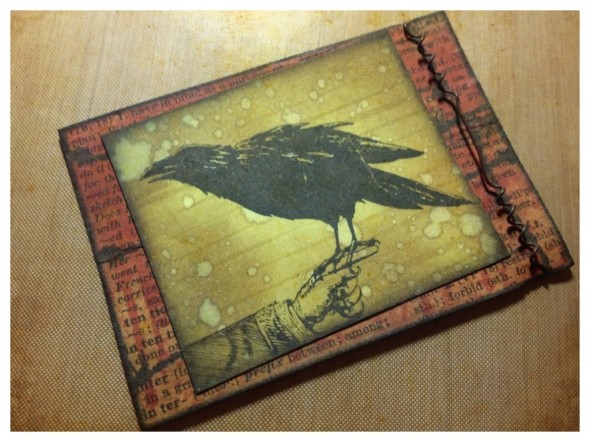
The crow ATC was a bit of a mini triumph for me as I hand drew the sleeve attached to the stamped hand, (normally I can’t draw for toffee)! I also managed to stamp the crow so it was perched on the finger first time. It was one of those moments where you sit back and think, “YES!”
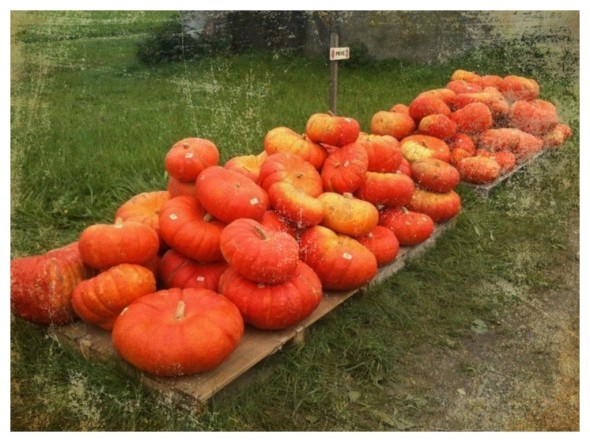
I’m off to carve me a pumpkin. Hope you have a Spooktastic Halloween!
Category Craft Creations | Tags: | 5 Comments | Views: 2,849
14th February, 2012 by iGirlZoe

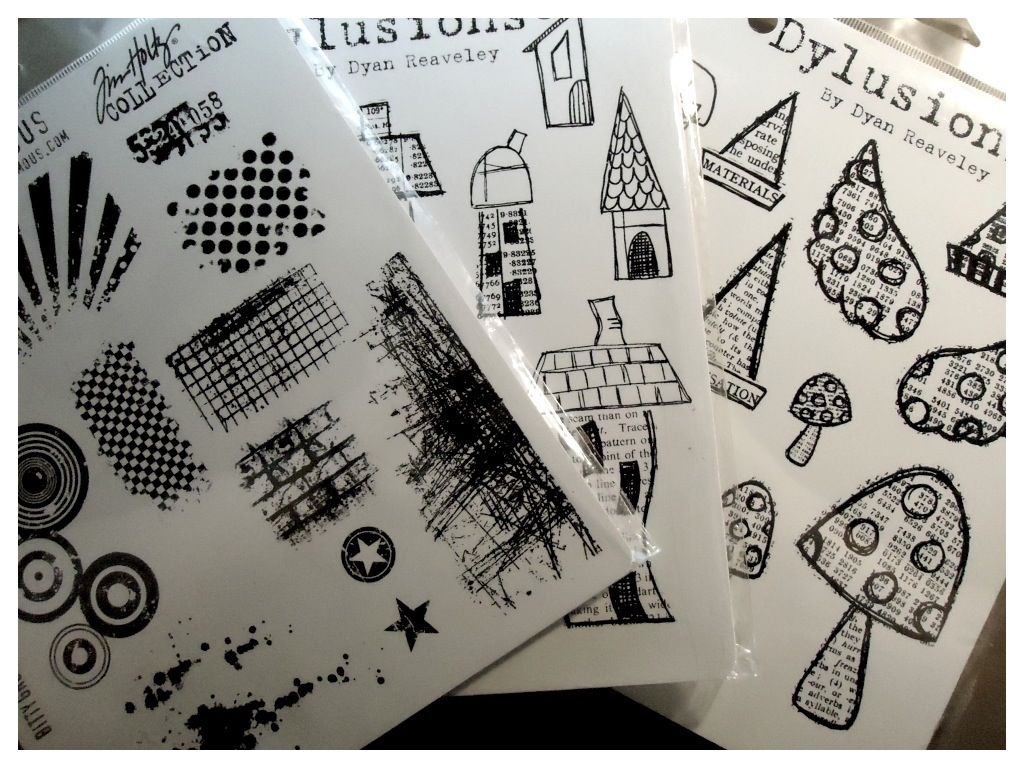
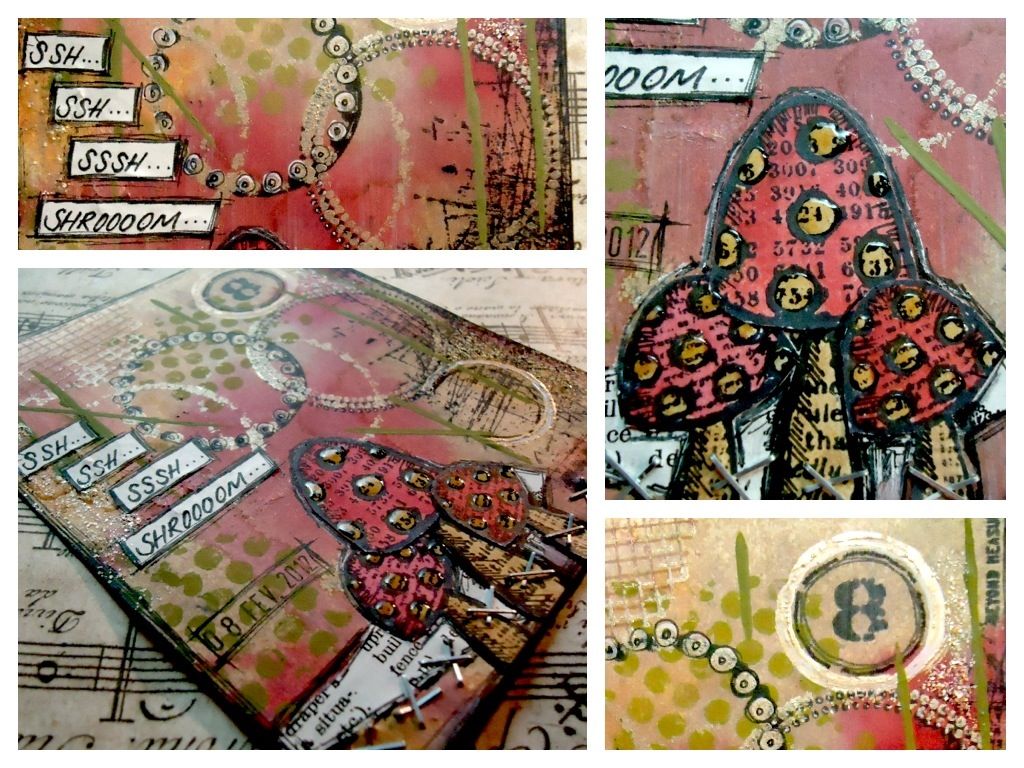
My ongoing craft de-stash is proving very fruitful. I found some Dylusions by Dyan Reaveley stamp sets at the back of an over stuffed basket and felt a sudden surge of creativity.
In the spirit of change, I stepped outside of my vintage brown comfort zone and dabbled with a little more colour. I used Tim Holtz Bitty Grunge stamps (one of my favourite sets), to keep it grungy.
My Mum bought me some Dylusions Mica Ink Sprays which I absolutely love! I’ve become an overnight ink spraying maniac, frantically filling Mini Misters with ink ready to spray anything that moves!
Finding all these long forgotten craft supplies has given me a renewed sense of creative excitement. BUT, the naughty shopaholic inside of me is whispering suggestively about all of the delicious crafty delights I could fill the space that I am fast clearing with.
Category Craft Creations, Craft Storage | Tags: | 15 Comments | Views: 6,874