‘Craft Creations’ Category

  1. 12 Tags of 2014 – November

    4th November, 2014 by iGirlZoe

    Tim Holtz 12 Tags of 2014 November
    My take on November’s 12 Tags of 2014 is less warm hues and more icy blues, but I used all the techniques Tim shared. I love love loved using the corrugated cardboard, it will be such a great way to use up Christmas delivery boxes.

    Tim Holtz 12 Tags of 2014 November
    I can’t properly convey in words my love for the holiday word script dies. They’re connected really sensibly and actually take quite a lot of altering punishment.

    Tim Holtz 12 Tags of 2014 November
    I am going to make some more of these in a Christmas card format. I’m keeping the cardboard snowflakes to decorate and use separately in a home decor project.
    It’s the most wonderful time of the year… πŸ™‚

    Thanks for taking a look at my tag and take time to hop over to Tim’s blog to see this month’s tag and techniques. If you would like to see the post in French, hop over to Scrapdeco’s blog.

    ~

    supplies: tim holtz; manilla tag/corrugated cardboard/distress glitter (clear rock candy)/distress ink (tumbled glass, walnut stain)/distress paint (picket fence, tumbled glass, stormy sky, weathered wood, salty ocean, faded jeans, iced spruce)/distress stains (tumbled glass, stormy sky, brushed pewter)/idea-ology (crinkle ribbon, tinsel twine silver, snowflake adornments)/dies (layered snowflake, holiday word script)/tools(sanding block, mini blending tool)
    other: embossing ink/glossy accents/glue n seal/sticky powder/heat tool


  2. Matchbox Halloween Collage

    31st October, 2014 by iGirlZoe

    Tim Holtz Matchbox Halloween Collage
    Paula Cheney created a wonderful Matchbox Halloween Collage using the Tim Holtz Sizzix matchbox die and posted a really detailed tutorial. I decided to try making one of my own with splashes of rusty hinge to compliment the oranges and browns in my autumnal home decor.

    Tim Holtz Matchbox Halloween Collage
    I accidentally broke one of the miniature terracotta pots so used my texture hammer to finish the job and break it into pieces small enough to slip into one of the bottles. The other I filled with a little rusty hinge distress glitter and the middle bottle was crackled glazed and inked.

    Tim Holtz Matchbox Halloween Collage
    I tried to incorporate orange into each section to get the cohesion through colour that Paula mentions in her tutorial. This is a great project to get your seasonal dies out and stretch their legs.

    Tim Holtz Matchbox Halloween Collage
    I made these miniature potted skulls in real terracotta plant pots and photographed a step by step to show how.

    Tim Holtz Matchbox Halloween Collage
    1. supplies used: texture paste & tool /distress paints/snips scissors/flower soft/wood skewers/miniature terracotta pots/miniature skulls (repurposed from a halloween bracelet).
    2. mix a little texture paste and distress paint on your craft mat and scrape into the terracotta pot using a spatula or lollypop stick. set aside to start drying.
    3. paint the pointed ends of 4x wood skewers with peeled paint distress paint and then dab the darker forest moss over the top to give a mottled effect. set aside to dry for a few minutes.
    4. before the texture paste dries completely, trim 2x wood skewers to different lengths and gently push into the centre of the pots.
    5. once the texture paste is completely dry, cover the top of the top with glossy accents and apply flower soft or faux/real moss. set aside to dry.
    6. sit and watch your pots drying while resisting the urge to touch them. πŸ˜‰
    7. cut the remaining 2x wood skewers and push into/glue onto the top of the skull.
    8. very very carefully push/glue the skull into/onto the stick in the pot.
    9. glue the pots onto the bottom of a matchbox and sprinkle flower soft or moss onto any glue that squeezes out from underneath them to give it an organic look.

    Tim Holtz Matchbox Halloween Collage
    Thanks for taking time to look at my Matchbox Halloween Collage and be sure to check out Paula’s tutorial posted on Tim’s Blog. I plan to make a Christmas themed one next, but for now, I hope you have a Happy Halloween.

    Before the clock strikes pumpkin hour, I am entering a couple of online challenges:

    Simon Says Stamp Wednesday Challenge – Anything Goes
    Inspiration Emporium Monday Challenge – In Disguise (matchboxes)
    Sizzix – Halloween Challenge

    (Sizzix Dies Used)
    Tim Holtz Matchbox Bigz
    Tim Holtz Spring Greenery Decorative Strip
    Tim Holtz Mini Spider & 31 Movers & Shapers
    Tim Holtz Cobwebs Decorative Strip
    Tim Holtz Ornate Frame Bigz
    Tim Holtz Graveyard On The Edge
    (there’s a theme here) πŸ˜‰

    ~

    Supplies: tim holtz; dies (matchbox, ornate frame, mini spider & 31, graveyard, cobwebs, spring greenery)/surfaces (cardboard, grungeboard, manilla cardstock, mirror card, shrink plastic, sticky back canvas)/distress inks (antique linen, rusty hinge, vintage photo, walnut stain, black soot)/distress stains (rusty hinge, black soot)/distress paints (rusty hinge, peeled paint, forest moss, walnut stain, black soot)/distress glitters (antique linen/rusty hinge/black soot)/distress crackle glaze/layering stencil (#26 gothic)/idea-ology (jump rings, screw eyes, wishbones, corked vials, fractured dolls, crossbones, corners, crinkle ribbon, adornment, apothecary remnant rubs, laboratorie tissue tape, menagerie paper stash)/stamps (#140 mini halloween 3, #198 mini halloween 4).
    other; glossy accents/archival ink (jet black)/archival ink re-inker (potting soil)/sewing machine/heat tool.


  3. Card Making Monday : Layered Leaf

    16th October, 2014 by iGirlZoe

    resize_13383340_1024px
    My local craft store, Scrapdeco, has a Card Making Monday blog challenge. The challenge is to make a card suitable for any occasion, that can be altered in a few minutes by adding a greeting when required.

    Tim Holtz Layered Leaf
    I have been dying to try out the new Tim Holtz Sizzix alterations layered leaf die and was really inspired by Richele Christensen’s Autumn Wreath tutorial.

    Tim Holtz Layered Leaf
    I went with quite a muted background to allow the colours on the leaf to really pop. I used lots of texture to compliment the lovely embossed feature of the leaf. I layered a piece of the Tim Holtz Eclectic Elements fabric and paper from the 8×8 menagerie paper stash onto burlap and put them through my sewing machine. It’s hard to believe that at the beginning of this year I was sewing machine phobic!

    Tim Holtz Layered Leaf
    I added a bit of gold leaf… just because why not. πŸ˜‰

    Thanks for taking time to check out my card and I hope you’re having a nice Autumn wherever you are.

    ~

    supplies: tim holtz; manilla cardstock/die (layered leaf)/distress ink (gathered twigs)/distress marker (gathered twigs)/distress marker spritzer tool/distress stains (scattered straw, wild honey, aged mahogany, peeled paint, antique bronze, tarnished brass)/idea-ology (menagerie paper stash)/eclectic elements fabric
    other: burlap, sewing machine, kraft cardstock, gold leaf


  4. 12 Tags of 2014 – October

    13th October, 2014 by iGirlZoe

    Tim Holtz 12 Tags of 2014 October
    I love this time of year and was inspired by the gothic #26 layering stencil to create a witches boudoir for my October 12 Tags of 2014. The gothic stencil reminds me of wallpaper and it seemed fitting for the background of somewhere a witch could hang up her broomstick and hat. πŸ˜‰

    Tim Holtz 12 Tags of 2014 October
    Tim’s wood planks texture fades folder is perfect for creating some faux wood shelves.

    Tim Holtz 12 Tags of 2014 October
    I colour tinted one of Tim’s found relative cards with distress marker to create the photo for a boudoir wall hanging.

    Tim Holtz 12 Tags of 2014 October
    I attached some fine twigs to give a wild and withered look to the tag. This was so fiddly, but the glossy accents held them in place, I LOVE this adhesive, it’s one of my most used products.

    Tim Holtz 12 Tags of 2014 October
    I used ivy from the spring greenery decorative strip die, intertwined with the twigs and using the leaves to cover the blobs of glossy accents I had used to secure the twigs.

    Tim Holtz 12 Tags of 2014 October
    I tried out Tammy Tutterow’s felty witchy hat using felt and phoomph for fabric. Be sure to check out her awesome tutorial.

    Tim Holtz 12 Tags of 2014 October
    I picked up this miniature broomstick and witchy shoes from a tiny shop in Gruyere, Switzerland selling all things miniature. You could easily make this broomstick with a BBQ skewer, some fine twigs and a hot glue gun.

    Tim Holtz 12 Tags of 2014 October
    This place is amazing for all things miniature. I sent my friend, Sue, a few bits I picked up for her here and she made the most creative Basket Gnome Garden.

    Tim Holtz 12 Tags of 2014 October
    Thanks for taking a look at my “Witches Boudoir” tag and take time to hop over to Tim’s blog to see this month’s tag and techniques. If you would like to see the post in French, hop over to Scrapdeco’s blog.

    ~

    supplies: tim holtz; manilla tag/core’dinations kraft core/layering stencil (gothic #26)/distress ink (walnut stain)/distress paint (brushed pewter)/distress marker (peeled paint)/distress sprays (wild honey, rusty hinge, dusty concord, peeled paint)/idea-ology (crinkle ribbon, mini fasteners, found relative cards)/dies (spring greenery decorative strip, wood planks texture fades folder)/cling stamps (mini halloween 3 #140, mini blueprints 7 #203)/mini blending tool/grid blocks
    other: texture paste/clear embossing powder/archival ink (jet black)/glossy accents/sticky back canvas/felt/phoomph for fabric/twigs


  5. 12 Tags of 2014 – August

    31st August, 2014 by iGirlZoe

    Tim Holtz 12 Tags of 2014 August
    As pumpkins begin to line the streets here in Switzerland, August’s 12 Tags of 2014 had to be Halloween themed.

    Tim Holtz 12 Tags of 2014 August
    I grabbed a few of my Tim Holtz products, including the new gothic layering stencil which I LOVE LOVE LOVE! I can’t wait to get my hands on the newly released Halloween stamps next weekend.

    Tim Holtz 12 Tags of 2014 August
    I really like the tissue tape resist technique (see Tim’s blog). I laid down my tissue tape, added remnant rubs from the Halloween set and stamped my chosen images with black archival ink.

    Tim Holtz 12 Tags of 2014 August
    My favourite part of the tag, adding texture paste through the gothic stencil. Lifting the stencil afterwards just fills me with glee! LOL

    Tim Holtz 12 Tags of 2014 August
    I swiped the tag through distress stain, the remnant rubs resist the stain really well. A portion of the skull looked too dark once stained, so I stamped a skull onto another piece of tissue tape, cut out and stuck over the top.

    Tim Holtz 12 Tags of 2014 August
    The wishbone seemed very fitting and I added patina to the word band to give it an aged look. I also rubbed antique gold distress paint over the top of texture paste to add highlights. Naturally I stitched everything in site. I only discovered the joys of sewing machines this year. Does the “stitch everything in site” ever pass?

    Tim Holtz 12 Tags of 2014 August
    This tag was crying out for a “paula bow“. I stained crinkle ribbon with distress stain and stamped with the background script stamp that I used on the tag. I have to make them in secret as one of our kittens loves them (see June’s tag).

    Tim Holtz 12 Tags of 2014 August
    I finished the tag with peeled paint distress embossing powder on the edges which grunged it right up.

    Thanks for taking a look at my tag and take time to hop over to Tim’s blog to see this month’s tag and techniques. If you would like to see the post in French, hop over to Scrapdeco’s blog.

    ~

    supplies: tim holtz; manilla tag/texture paste/layering stencil (gothic #26)/distress embossing powder (peeled paint)/mini distress inks (vintage photo)/distress paint (evergreen bough, antique gold)/distress stain (bundled sage, brushed corduroy, peeled paint, forest moss, pumice stone)/idea-ology (tissue tape, filmstrip ribbon, industrious stickers, vial labels, apothecary remnant rubs, crossbone adornments, wishbone, observation word bands, crinkle ribbon)/cling stamps (apothecary #138, poisonous #171)/blending tool/paper distresser/tiny attacher/grid blocks
    other: patina, archival ink (jet black)/glossy accents/mister bottle/heat tool/sewing machine


  6. Compendium of Curiosities 3 Challenge 7

    1st August, 2014 by iGirlZoe

    Compendium of Curiosities 3 Challenge 7
    The 7th challenge of the new Compendium of Curiosities 3 is up. If you haven’t already, you can order a signed copy directly from Tim Holtz. As if the book, the challenge and getting inky wasn’t fun enough, Inspiration Emporium, The Funkie Junkie Boutique and Tim and Mario have very generously donated prizes! Linda Ledbetter has also put together the Curiosity Crew, a talented group of ladies who will be inspiring us each challenge with their creations from the book.

    Compendium of Curiosities 3 Challenge 7
    Challenge 7 is the Painted Industrial technique, (see the book for technique instructions).

    Compendium of Curiosities 3 Challenge 7
    I created a background using distress paint, stain and inks. Once dry, I stamped with the map stamp from the warehouse set.

    Compendium of Curiosities 3 Challenge 7
    Using an oval movers and shapers die, I die cut a hole in the tag and mounted the map background to the back.

    Compendium of Curiosities 3 Challenge 7
    Using a technique Tim shared with us from July’s tag, I cut another oval, this time from shrink plastic. I embossed the oval using a cloud embossing folder and then painted the clouds on the underside using picket fence distress paint.

    Compendium of Curiosities 3 Challenge 7
    Once dry I mounted the oval into the space, attached with a tiny attacher and stuck the stamped plane over the top to hide the staples.

    Compendium of Curiosities 3 Challenge 7
    I used the new Framelits Here and There set to stamp and die cut the arrow and put remnant rubs over the top.

    I cut gears from grungeboard using an on the edge die. I sanded and inked the gears, covered with a little distress embossing powder and dried before attaching to the side of the tag.

    Thanks for taking time to look at my tag and don’t forget to hop over to Studio L3 to check out challenge 7, which Inspiration Emporium are generously sponsoring with a $50 gift certificate to the lucky winner! So what are you waiting for!

    ~

    supplies: tim holtz; grungeboard/manilla cardstock/shrink plastic/metal foil/distress paints (picket fence, evergreen bough, salty ocean, walnut stain, tumbled glass, stormy sky, faded jeans, pitch black)/distress markers (walnut stain, black soot)/distress stain (weathered wood, frayed burlap)/distress crackle paint (rock candy)/distress mini inks (walnut stain, vintage photo, gathered twigs, broken china, peacock feathers)/distress embossing powder (vintage photo)/texture fades (travel signs)/dies (movers & shapers oval, on the edge steampunk, framelits here and there)/idea-ology (remnant rubs, game spinner, linen ribbon)/cling stamps (warehouse)/distress tool/blending tool/tiny attacher/sanding block/marker spritzer tool/grid blocks/scissors/scor-tape
    other: archival ink (jet black)/glossy accents/mister bottle/heat tool


  7. 12 Tags of 2014 – July

    31st July, 2014 by iGirlZoe

    Tim Holtz 12 Tags of 2014 July
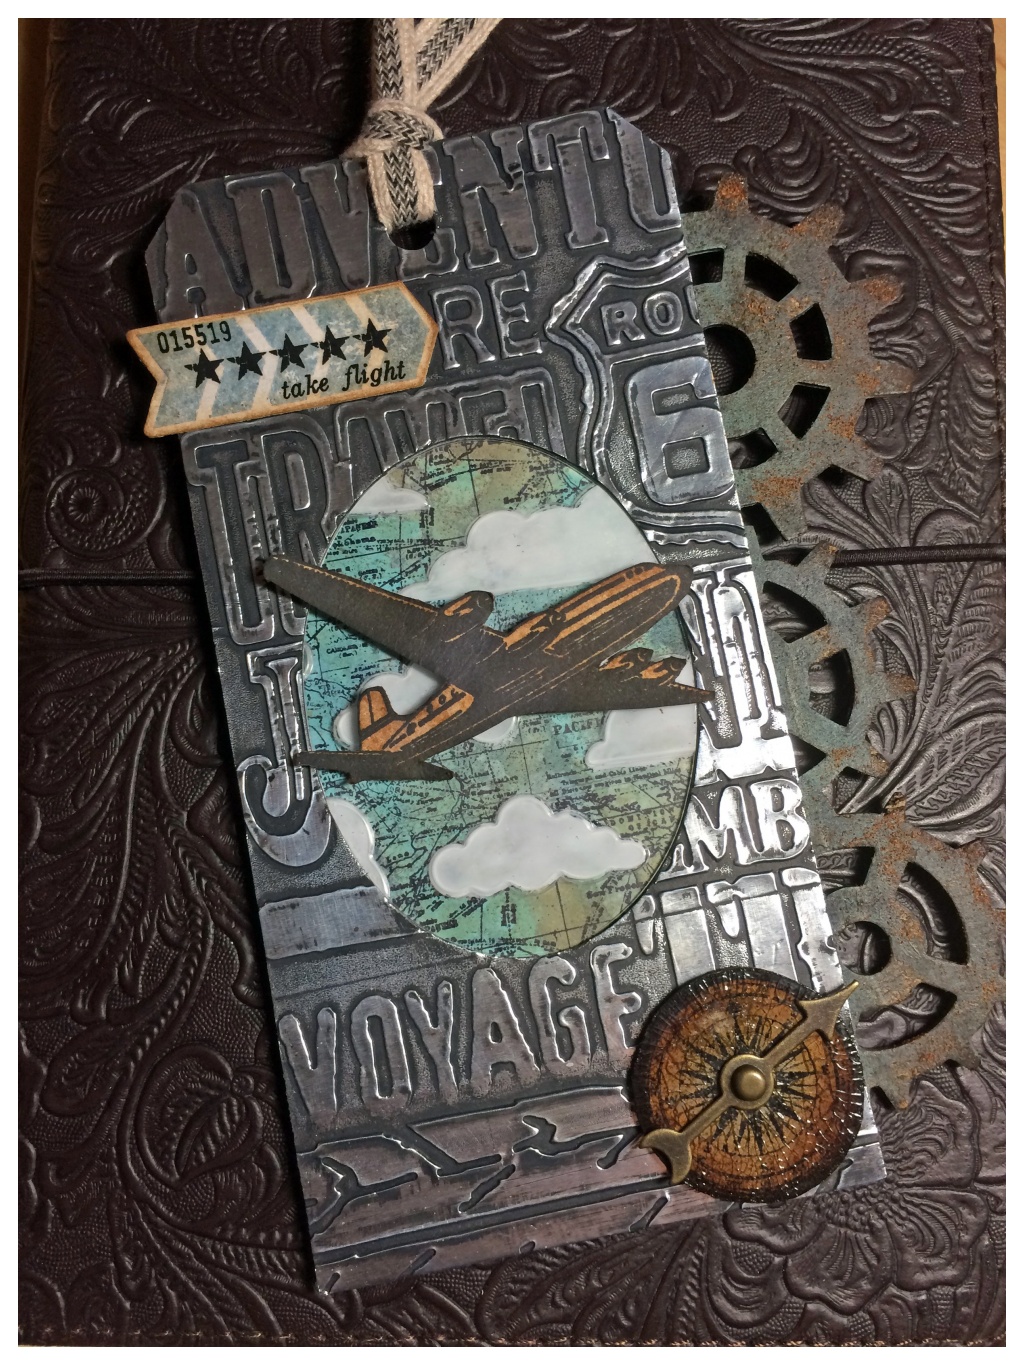
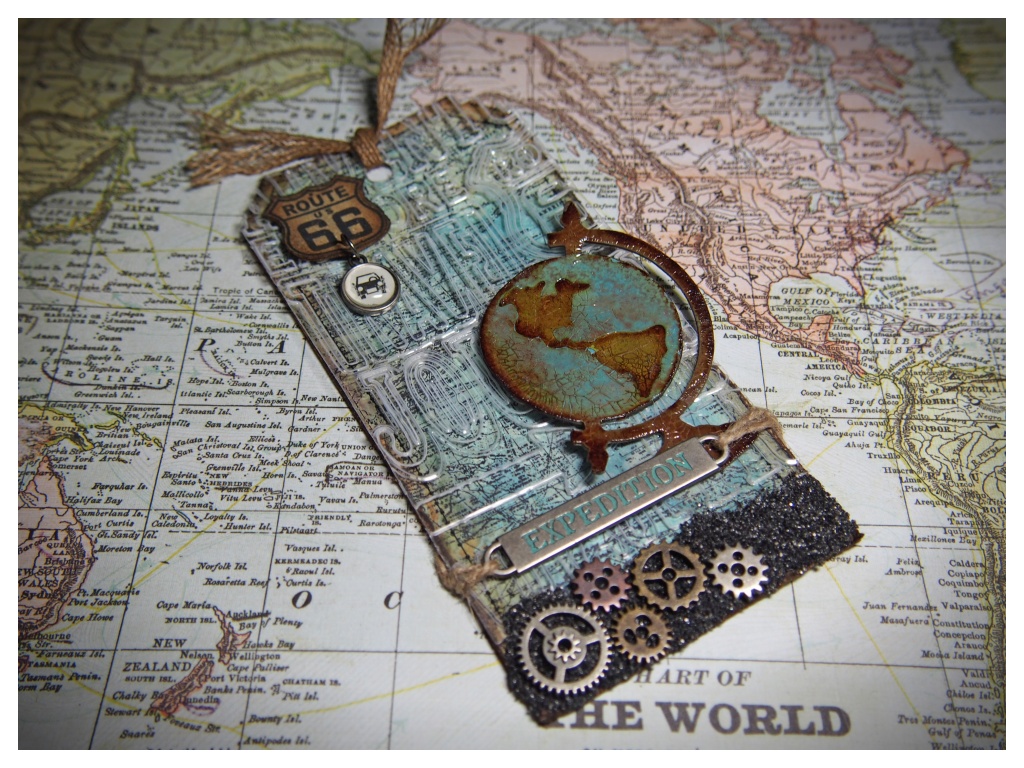
    July’s 12 Tags of 2014 is inspired by summertime and vacations, (or holidays as we Brits like to call them). I decided to use my own summer holiday as the inspiration for my tag, whilst following Tim’s techniques.

    European Road Trip
    I absolutely love the seasisde themed tag Tim made, but the closest I got to the beach this year was the French and English Ferry ports. My Husband and I took a road trip from Switzerland, through France to England to visit friends and family, (and shop)!

    Tim Holtz 12 Tags of 2014 July
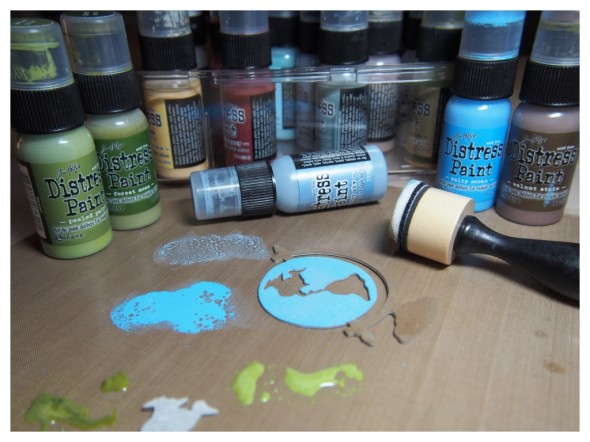
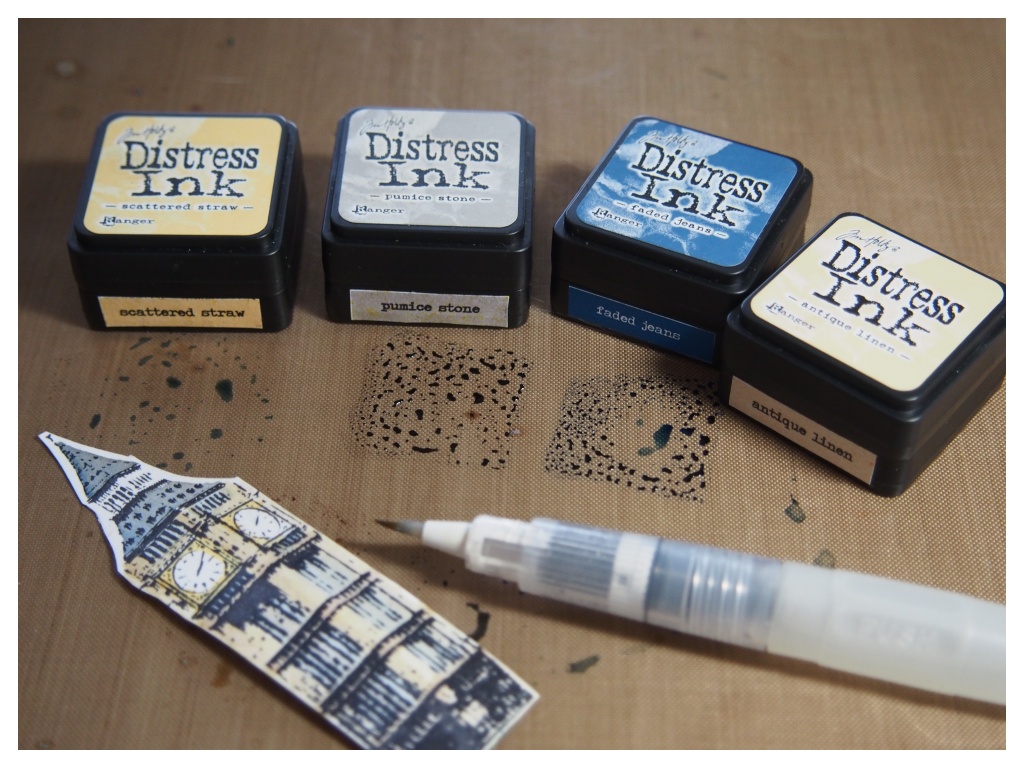
    I replaced the sea themed elements with travel ones. The mini blending tool is perfect for applying distress paints to small areas with accuracy.

    Tim Holtz 12 Tags of 2014 July
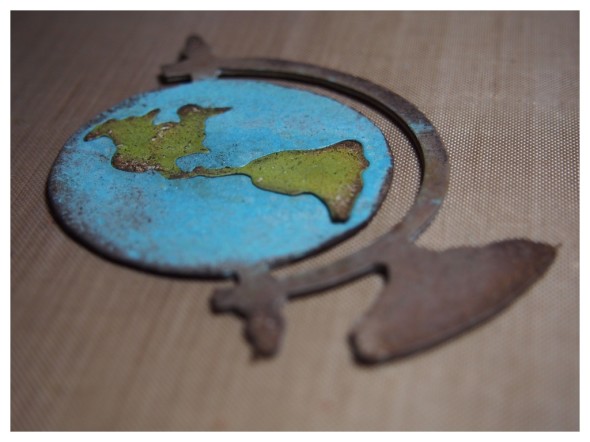
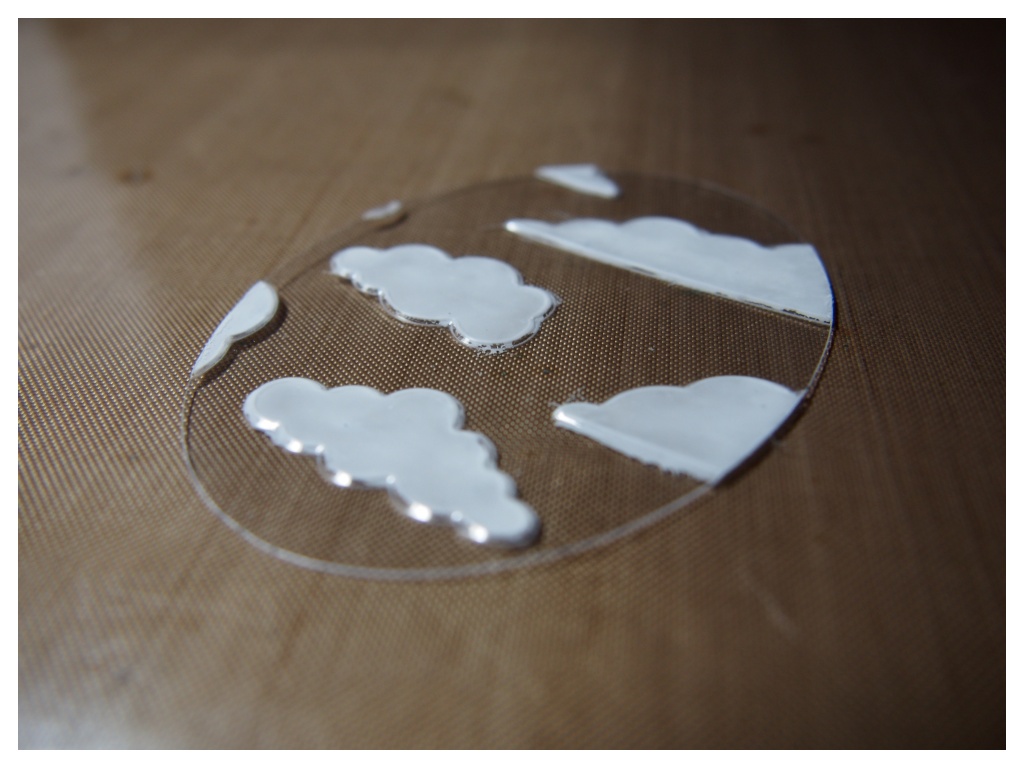
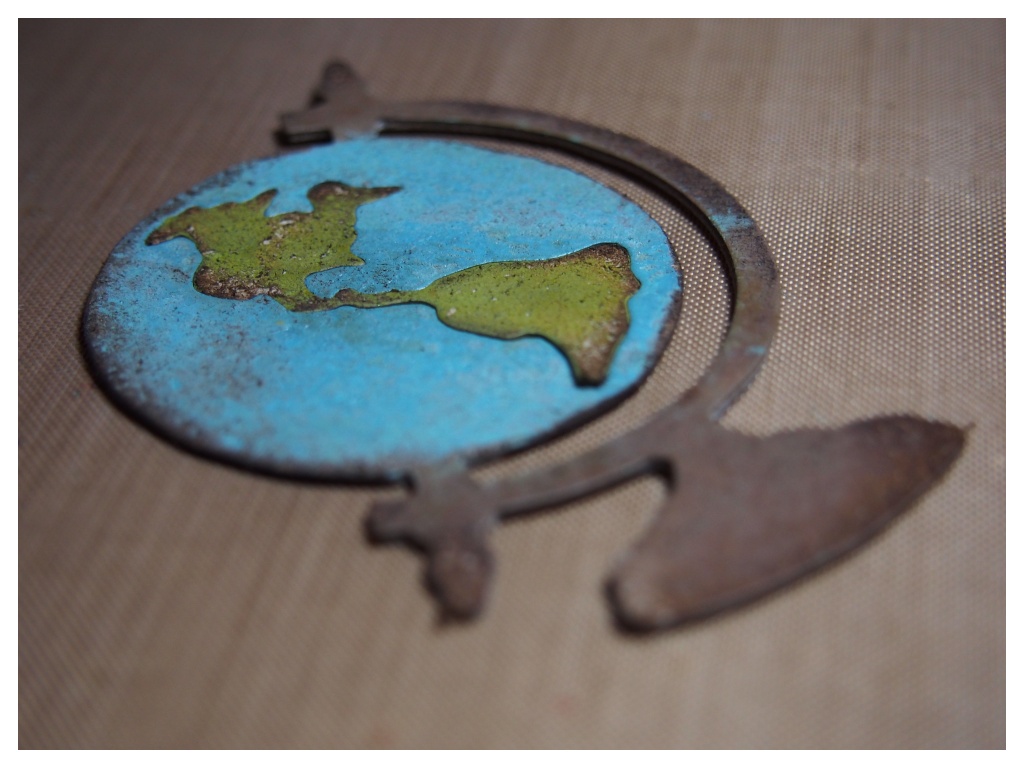
    I am just nuts about the globe die. I used the movers and shapers one and I’m going to treat myself to the large one later this month.

    Tim Holtz 12 Tags of 2014 July
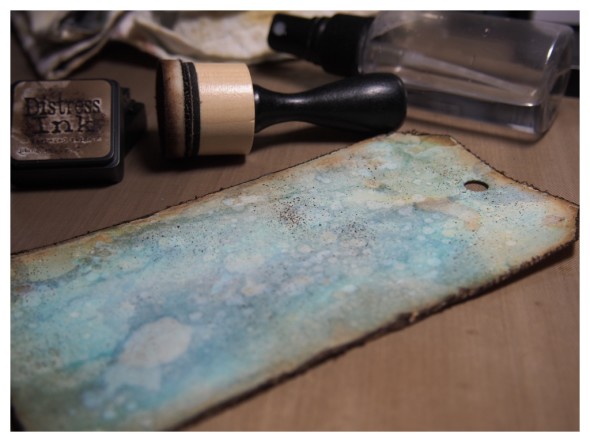
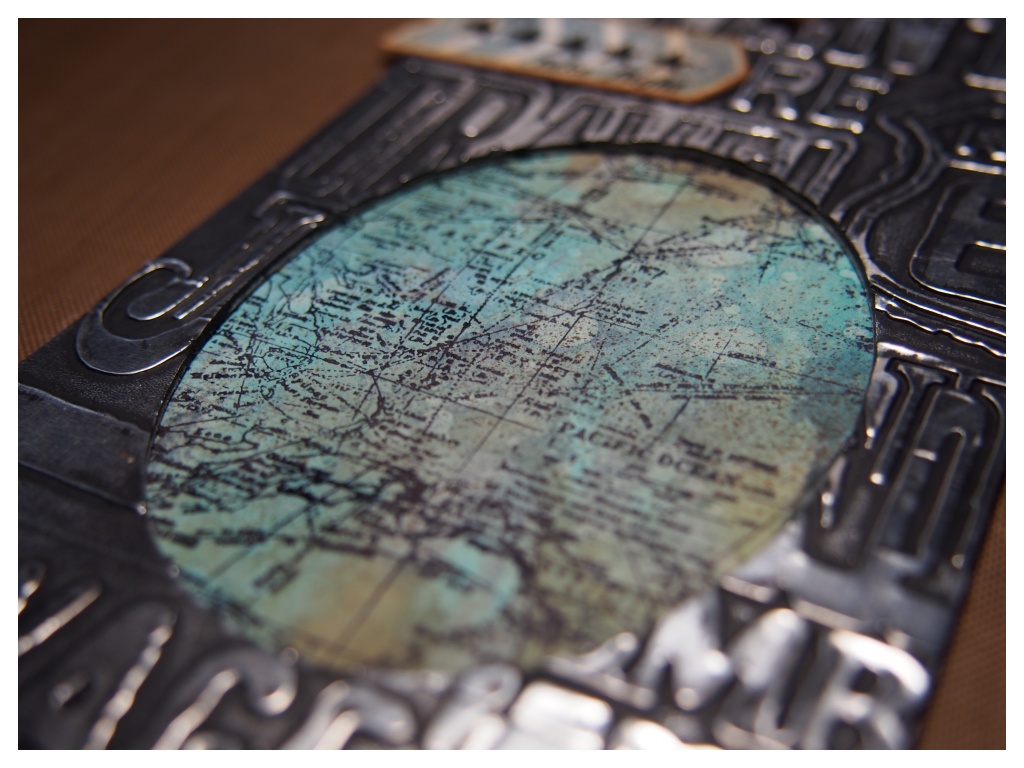
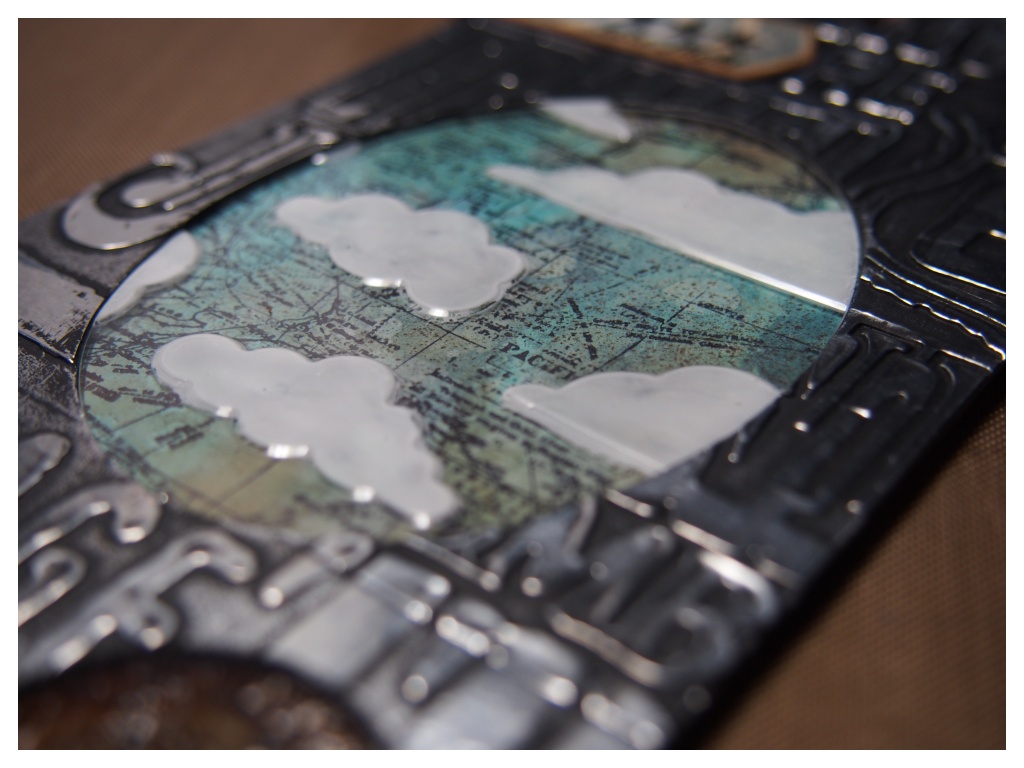
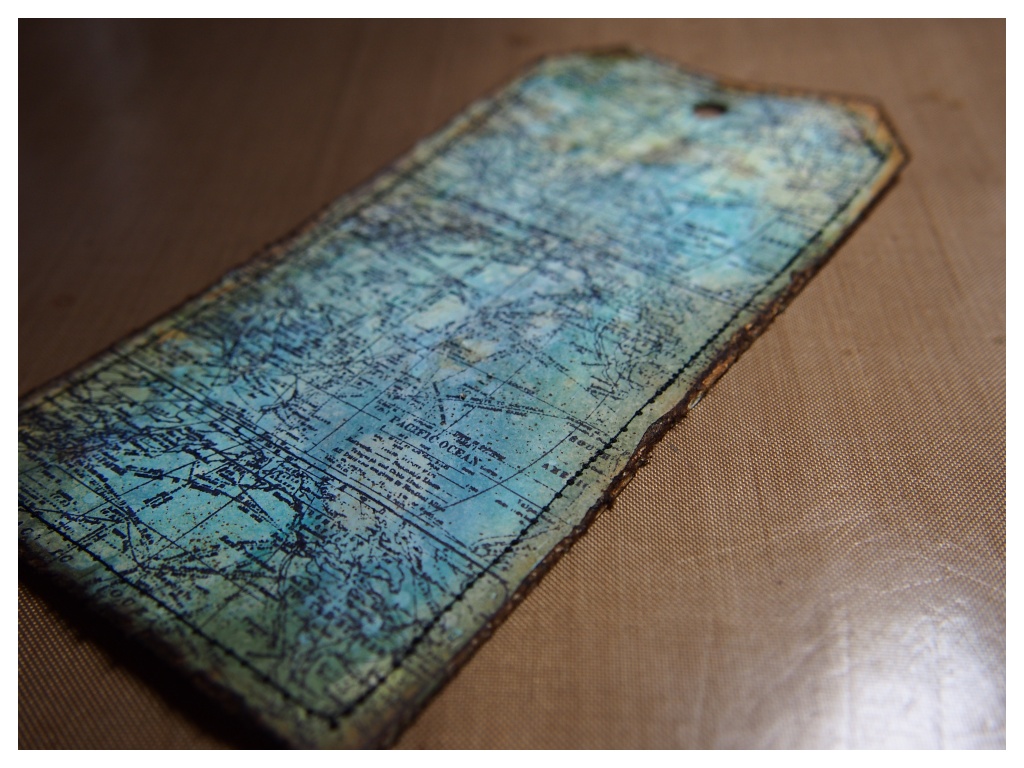
    I finished the background for my tag, but felt it still needed something to make the text on the overlay “pop”…

    Tim Holtz 12 Tags of 2014 July
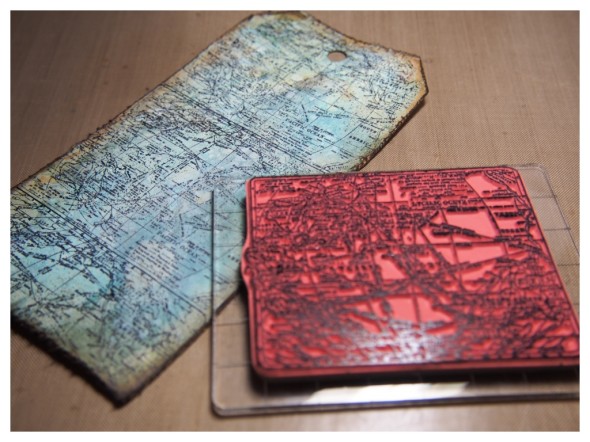
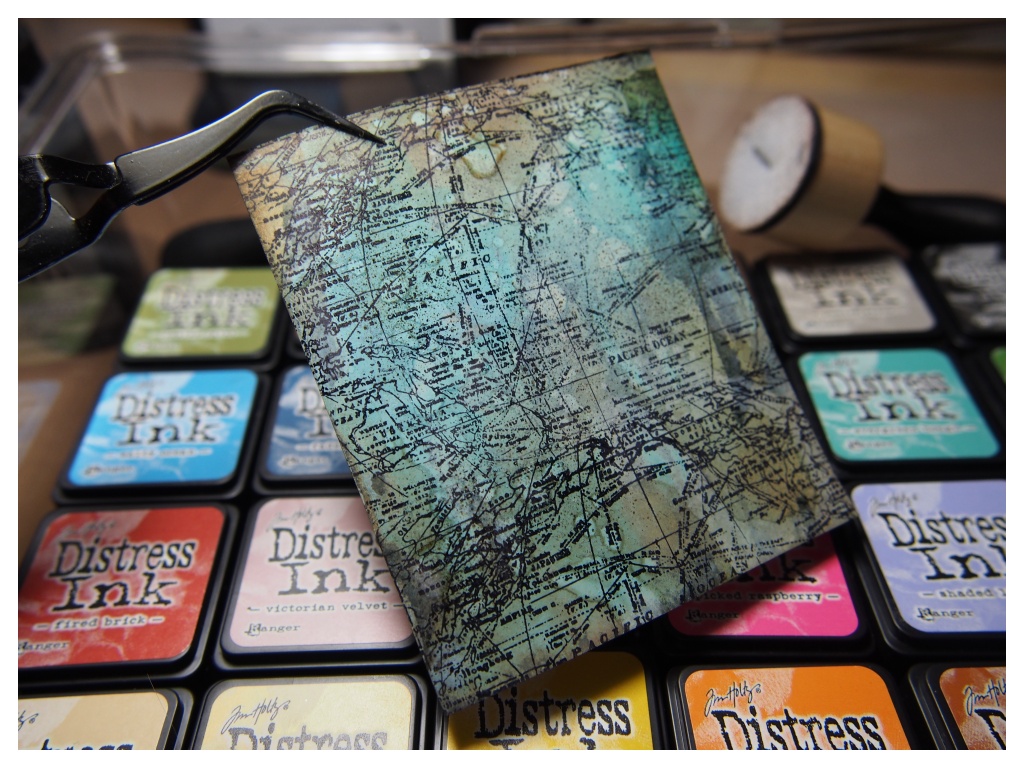
    …so I used the map stamp from the warehouse stamp set. I noticed that the marker spritzer tool gives an aged look under the map stamp, which I liked.

    Tim Holtz 12 Tags of 2014 July
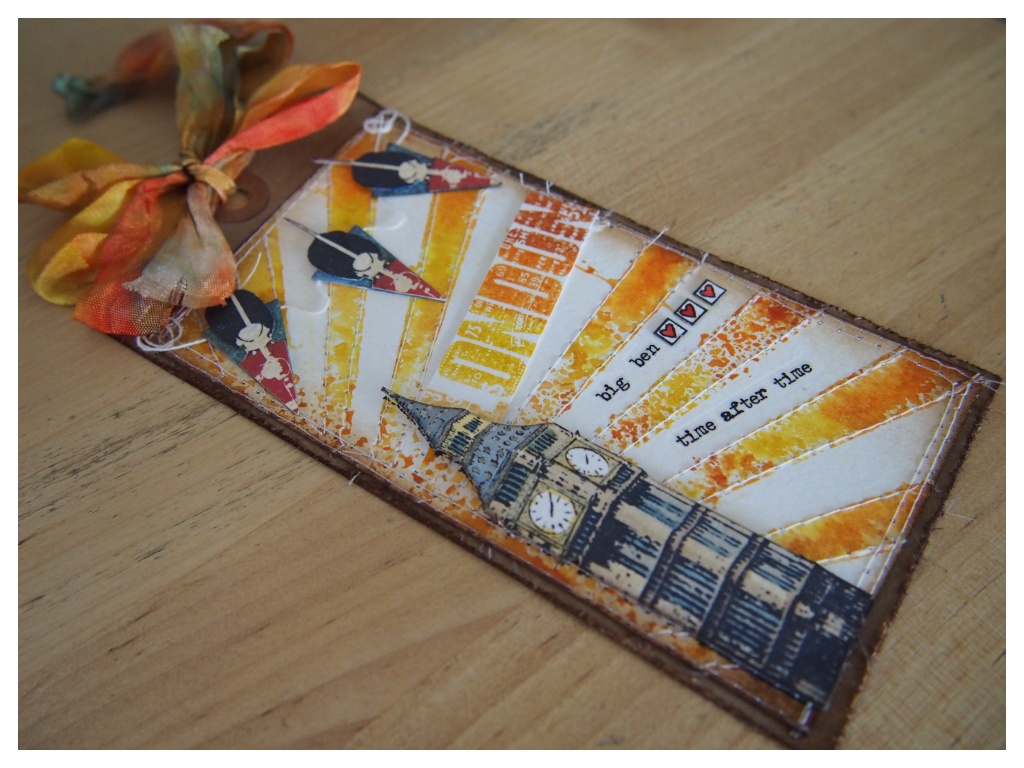
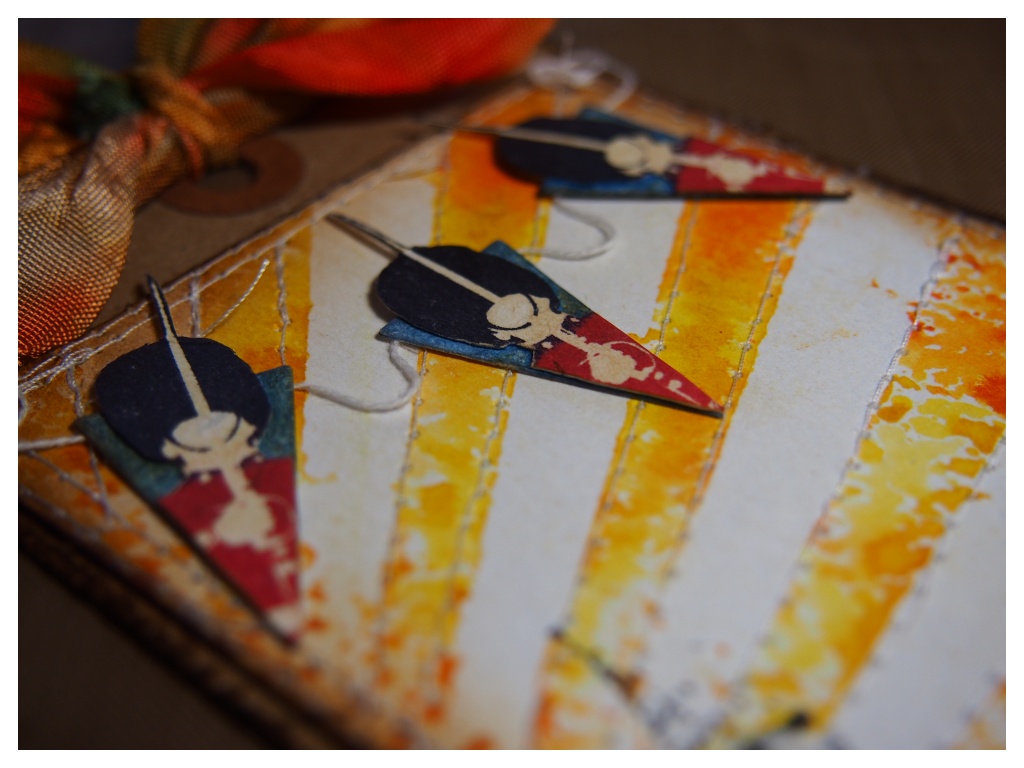
    Then of course I had to get back onto my sewing machine. It felt really good to be stitching after almost a month. I’m not sure how our downstairs neighbours felt about me sewing at 2am… I put the machine on a stack of towels to dampen any noise! Should have taken a photo.

    Tim Holtz 12 Tags of 2014 July
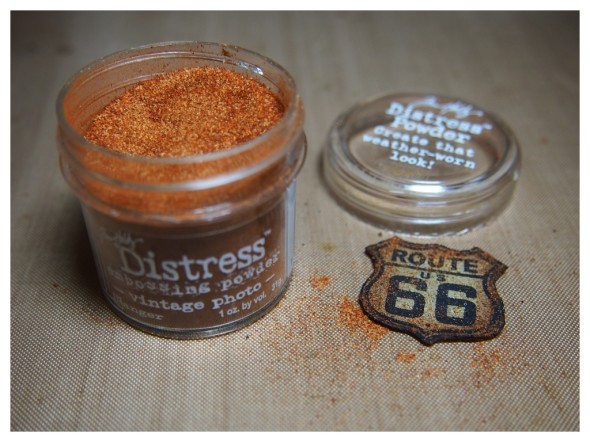
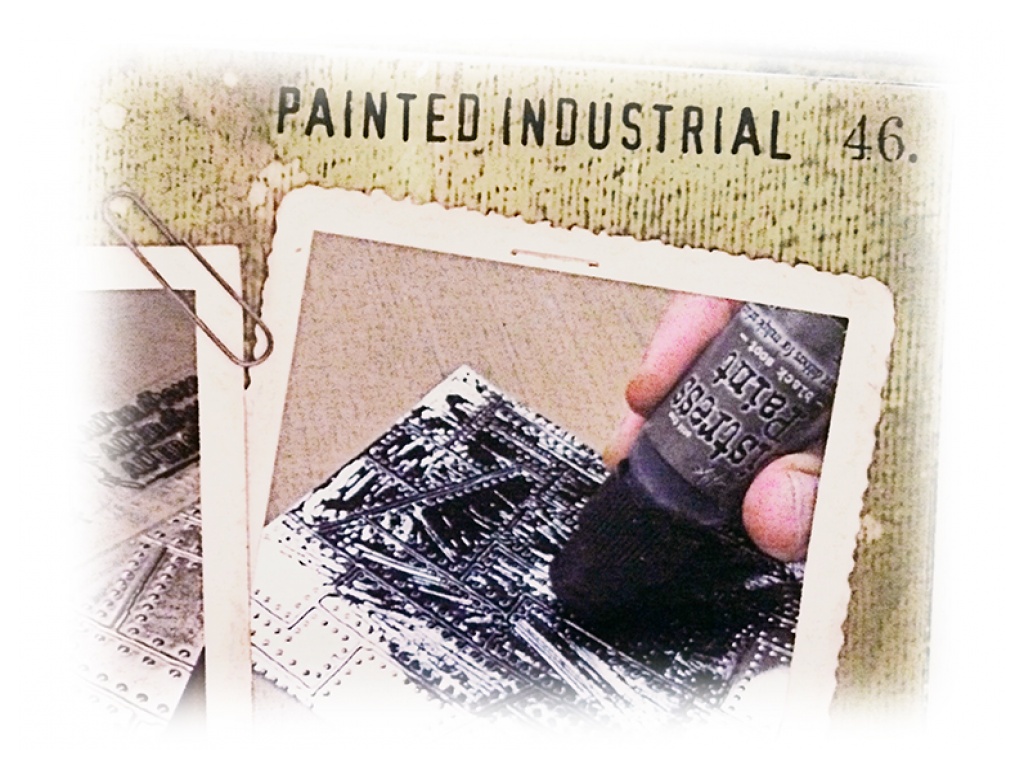
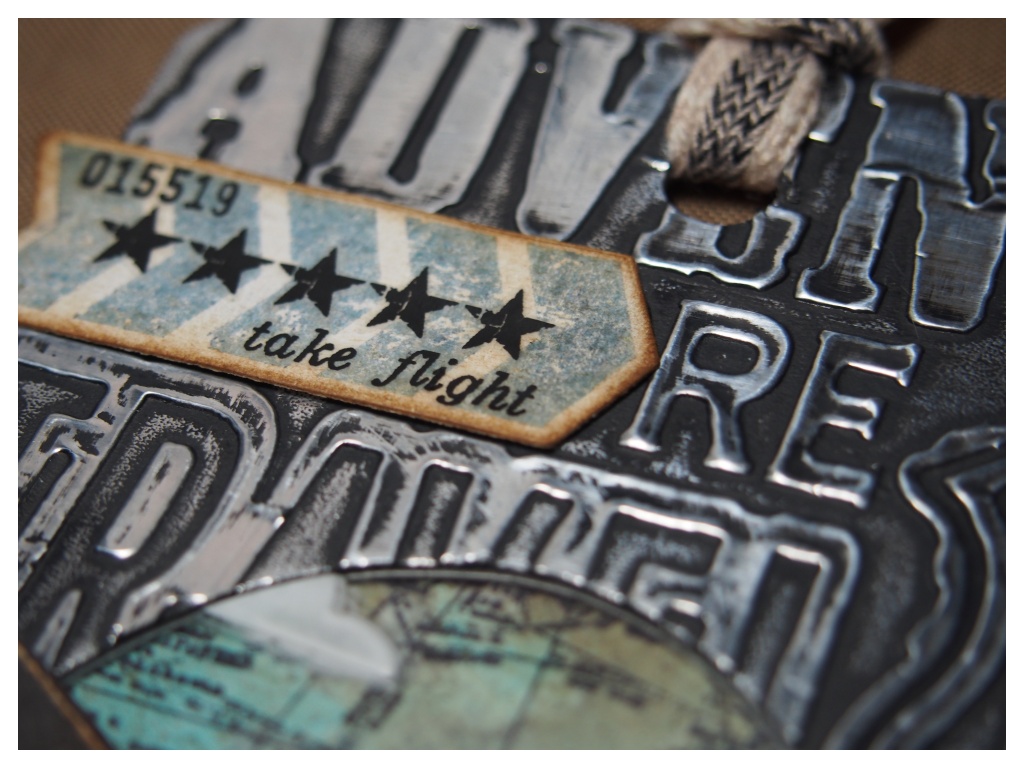
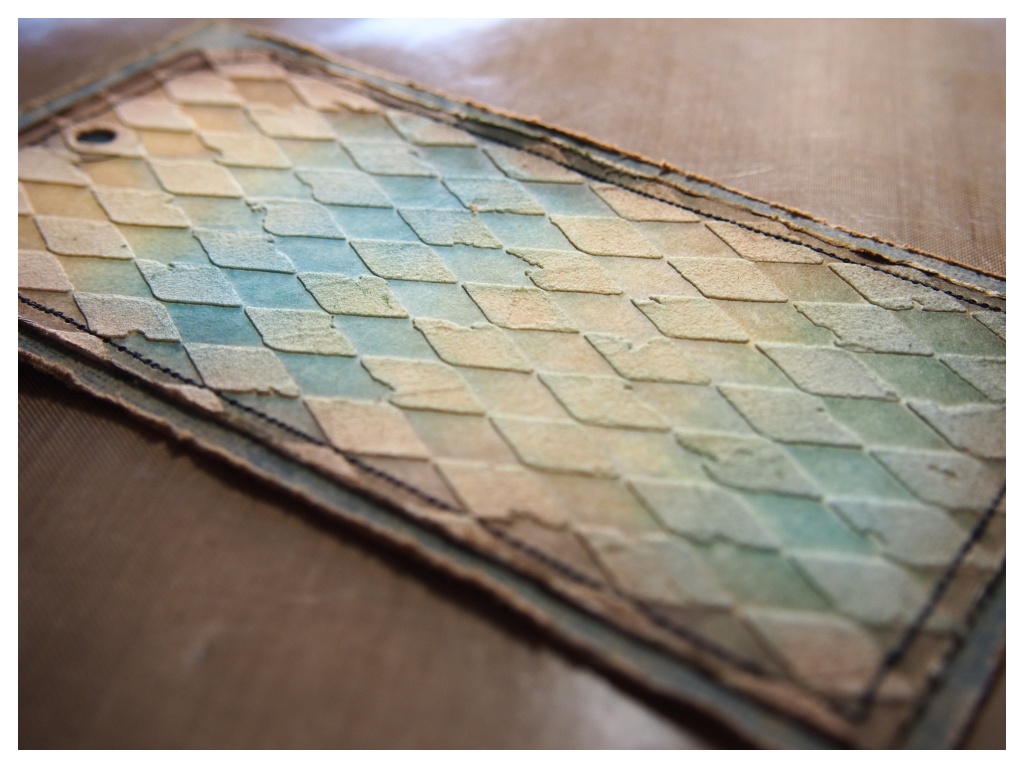
    I sprinkled some vintage photo distress embossing powder onto a road sign from the mini travel stamp set that I stamped onto grungeboard. It gives it a great worn look.

    Tim Holtz 12 Tags of 2014 July
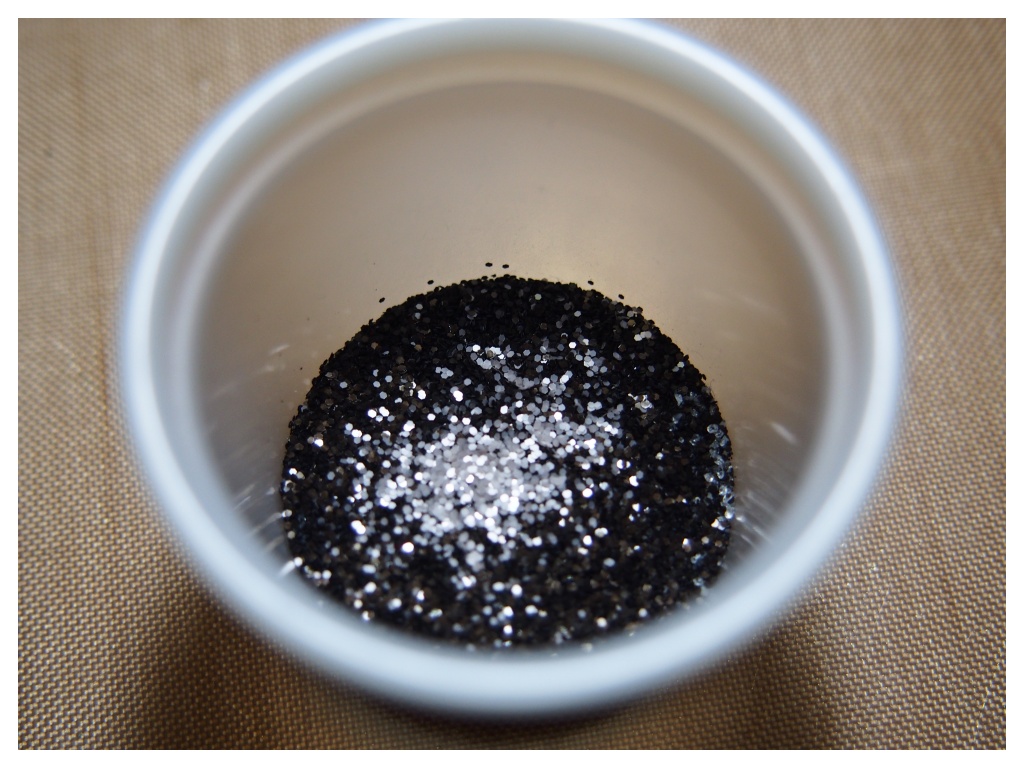
    Instead of making that wonderful sand, (see Tim’s technique), I opted for alternative colours to try and make a type of gravel that reminded me of the road during our road trip. The black soot distress glitter gives it that rich black and sparkle that roads have, but the distress embossing powder takes the glitz of the glitter down to make it more gravelly. Admittedly, I just sat and gazed into the pot for a while before adding the glossy accents… it’s soooo sparkly. πŸ™‚

    Tim Holtz 12 Tags of 2014 July
    Getting back to my desk this month has been a struggle. I got a little homesick when I got back from England and it kind of killed my creativity. Determined to complete all 12 tags got me inky again and I’m so glad, because it has cheered me up no end and I feel my creativity returning. It’s one of the many reasons I love this monthly tag challenge, it certainly helps me when I need a creative push.

    Thanks for taking a look at my tag and take time to hop over to Tim’s blog to see this month’s, (and nearly next month’s), tag and techniques. If you would like to see the post in French, hop over to Scrapdeco’s blog.

    (It’s funny to think that while I’m uploading July’s tag, Mario is posting BTS of Tim creating August’s tag! Not long to wait for me…) πŸ˜‰

    ~

    supplies: tim holtz; manilla tag/distress crackle paint (rock candy)/distress glitter (black soot, pumice stone)/distress embossing powder (black soot, vintage photo)/mini distress inks (gathered twigs, vintage photo, broken china, salty ocean,)/distress paint (walnut stain, stormy sky, salty ocean, tumbled glass, peeled paint, forest moss/evergreen bough)/distress marker (walnut stain)/distress stain (frayed burlap, weathered wood)/texture fades (travel signs)/dies (movers & shapers vintage globe, tag)/idea-ology (grungeboard, word bands, mini gears sprockets, type charm keys, jute string, linen ribbon)/cling stamps (warehouse, travel ways)/distress tool/blending tool/paper distresser/tiny attacher/sanding block/marker spritzer tool/grid blocks
    other: archival ink (jet black)/UTEE (clear)/shrink plastic/glossy accents/mister bottle/heat tool/sewing machine


  8. 12 Tags of 2014 – June

    18th June, 2014 by iGirlZoe

    Tim Holtz 12 Tags of 2014 June
    DO NOT adjust your screen… I have used some colour in June’s 12 Tags of 2014!
    I LOVE THIS TECHNIQUE. I am usually a total colour avoider and so imagine my surprise when this technique had me reaching for oranges and yellows!

    Tim Holtz 12 Tags of 2014 June
    My upcoming road trip to the UK made the theme for this month’s tag easy. I was probably being optimistic choosing the rays layering stencil to represent an English summer, but Tim hasn’t released a cloud layering stencil yet. πŸ˜‰

    My sewing machine addiction continues… so this tag got the needle too!

    Tim Holtz 12 Tags of 2014 June
    I love the distress watercolour cardstock, one side has the traditional dimple and the other side is smooth, perfect for stamped images. You can watercolour directly from the distress ink pads, but I prefer to use my craft sheet as a paint palette. (LOVE the mini distress inks!)

    Tim Holtz 12 Tags of 2014 June
    Whenever I think of England, I imagine streets lined with bunting, so I had to add some to my tag. I stamped the Beefeater guard from the paris to london stamp set and cut down to fit the mini bunting triangles.

    Tim Holtz 12 Tags of 2014 June
    I love and use crinkle ribbon a lot, but I’ve totally fallen for the “paula bow”. It’s an awesome technique, thanks Tim (and Paula).

    Tim Holtz 12 Tags of 2014 June
    As I finished photographing my tag, one of my kittens decided that she likes the “paula bow” too and did a snatch and grab! LOL πŸ˜€

    Thanks for taking a look at my tag and take time to hop over to Tim’s blog to see this month’s tag and techniques. If you would like to see the post in French, hop over to Scrapdeco’s blog.

    ~

    supplies: tim holtz; kraft tag/distress watercolour cardstock/mini distress inks (scattered straw, mustard seed, spiced marmalade, rusty hinge, faded jeans, vintage photo, walnut stain )/layering stencil (rays)/idea-ology (remnant rubs, crinkle ribbon)/cling stamps (paris to london)/distress tool/blending tool
    other: archival ink (jet black, red geranium)/cotton/adhesive/mister bottle/heat tool/sewing machine


  9. Compendium of Curiosities 3 Challenge 4

    12th June, 2014 by iGirlZoe

    Compendium of Curiosities 3 Challenge 4
    The 4th challenge of the new Compendium of Curiosities 3 is up. If you haven’t already, you can order a signed copy directly from Tim Holtz. As if the book, the challenge and getting inky wasn’t fun enough, Inspiration Emporium, The Funkie Junkie Boutique and Tim and Mario have very generously donated prizes! Linda Ledbetter has also put together the Curiosity Crew, a talented group of ladies who will be inspiring us each challenge with their creations from the book.

    Compendium of Curiosities 3 Challenge 4
    Challenge 4 is the Layering Stencil: Texture Paste technique, (see the book for technique instructions).

    Compendium of Curiosities 3 Challenge 4
    I wanted to make a Father’s Day Card and opted for the harlequin layering stencil as I think it looks quite masculine. I stitched the tag to kraft core and used my distress tool to distress the edges. I learned to use a sewing machine this year and now I’m hooked! I’m working my way up to repairing an old patchwork quilt with the fantasmic eclectic elements fabrics by Tim Holtz, (but I digress). πŸ˜‰

    Compendium of Curiosities 3 Challenge 4
    I used the new mini shield die, cut from grungeboard and covered in distress paint, (evergreen bough distress paint gives a fantastic patina look). I added the number “1” with the numbered layering stencil, using this challenge technique. The foliage from the regal crest die was perfect because it looks like the logo on the Fred Perry polo shirts that my Dad wears.

    Compendium of Curiosities 3 Challenge 4
    I cut a “b” from grungeboard using the wordplay die and reversed it as I wanted a wider “d”! I used an embossing folder to give a faux leather look and mounted onto a tattered banner, which I shortened.

    Thanks for taking time to look at my card and don’t forget to hop over to Studio L3 to check out challenge 4, which The Funkie Junkie Boutique are generously sponsoring with a $25 gift certificate to the lucky winner! So what are you waiting for!

    ~

    supplies: tim holtz; manila tag/distress paint (evergreen bough, walnut stain, wild honey)/mini distress inks (scattered straw, broken china, vintage photo, walnut stain)/distress crackle paint (clear rock candy)/layering stencil (harlequin, numbered)/dies (mini shield, regal crest, wordplay, tattered banners)/idea-ology (grungeboard, core’dinations kraft core)/glossy accents/sanding grip block/distress tool/mister bottle/mini blending tool;
    other: wendy vecchi embossing paste/heat tool/scissors/sewing machine


  10. Steampunk Mini Book

    7th May, 2014 by iGirlZoe

    Steampunk Mini Book
    I made this for a friend a while ago using a mini book technique video by Tim Holtz. It’s cool that you only need a sheet of 12×12 paper, a little bit of tissue tape, glue and whatever you want to embellish it.

    I made the book strap out of grungeboard using the hardware findings die. I cut a larger hole at the end so I could slide it over a hitch fastener, (so glad they brought these back)! I reinforced the spine with sticky back canvas and hung a corked vial filled with watch parts from a swivel clasp. I used assorted stamps by Oxford Impressions.

    Steampunk Mini Book
    You can leave some of the tops and sides open to tuck a message into. I tucked in some tickets that I die cut with Tim Holtz ticket strip die and stamped with his odds and ends stamp set. I used some idea-ology tiny fasteners, (I love these tiny little fasteners, they look like teeny tiny screws). The stamps are from a set by Creative Expressions.

    Steampunk Mini Book
    To give this page a steampunk twist, I attached the vintage lady to the bulbs with black wire that I twisted and stuck down in sections with glossy accents. It was so fiddly and required way more patience than I can usually find.

    Steampunk Mini Book
    I went old school and made a small pocket without a die! I used my scoreboard, trimmed the folds and made a half circle with a punch. I attached to the page and tucked in tickets stamped with the Tim Holtz odds and ends stamp set.

    As the books are so small, they’re great to take with you traveling to make notes about your journey and store ephemera in the open slots. I’m going to make one for my road trip from Switzerland to the UK in July, I’m SO excited. πŸ™‚

    ~

    supplies: tim holtz; distress inks (scattered straw, bundled sage, vintage photo, walnut stain)/glossy accents/idea-ology (hitch fastener, mini fasteners, corked vial, screw eye, swivel clasp, mini gears, tissue tape, grungeboard, french industrial paper stash)/dies (hardware findings, ticket strip)/texture fades (blueprint and gears)/cling stamps (odds and ends).
    other; Stamps (Artistic Outpost, Creative Expressions, Oxford Impressions)/stencil/score-board/watch parts/wire