Hello friends. I’m back today sharing something I made for the Tim Holtz Sizzix Halloween LIVE launch. I love this years Halloween die and folder release. I’m sure I say that each year, but this year is no exception! Make sure you check out the replay and the maker inspiration over on Tim’s blog.
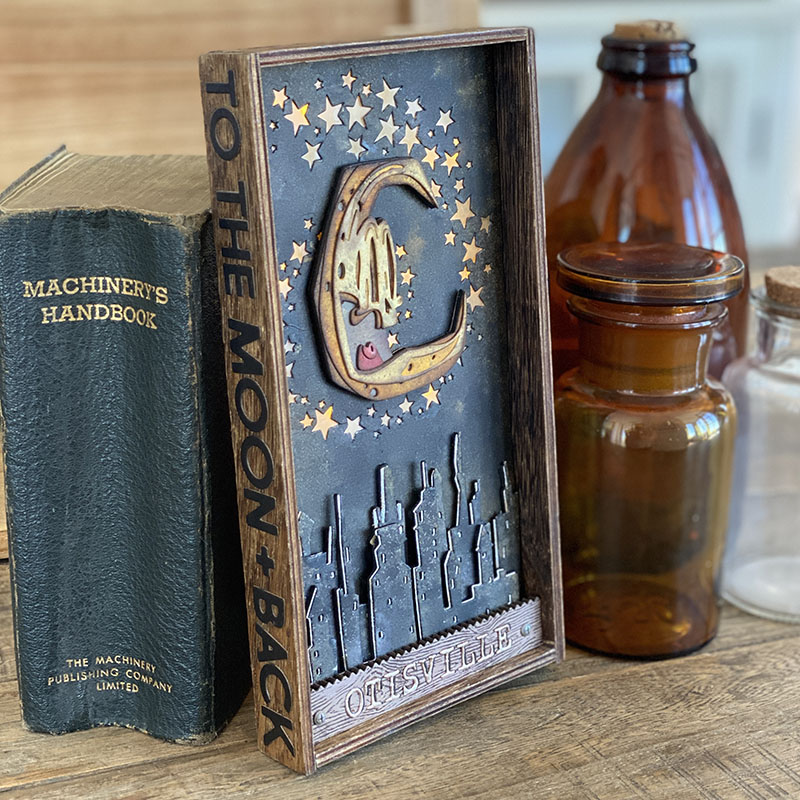
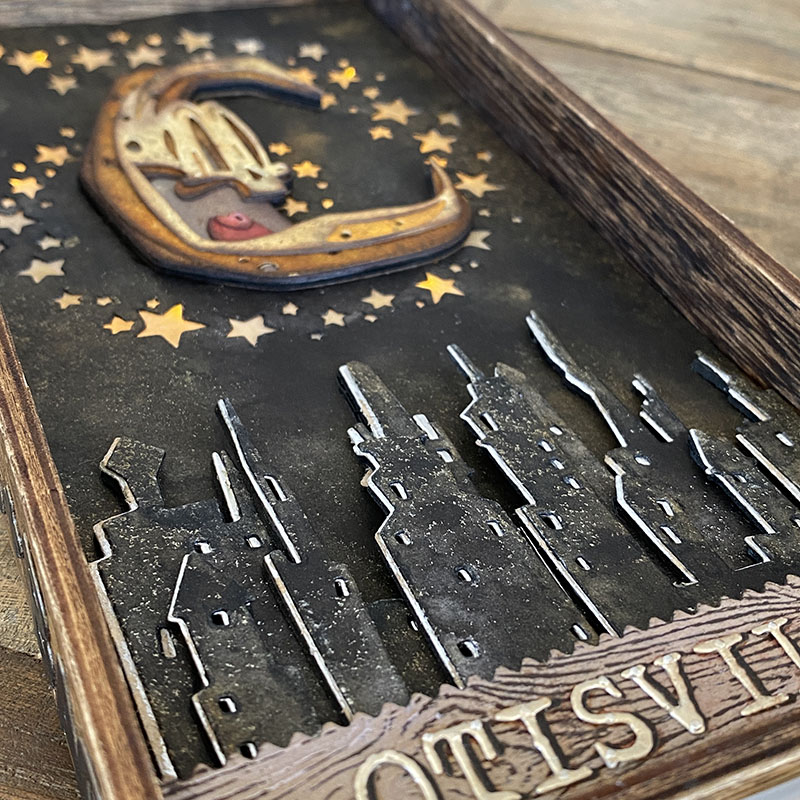
Welcome to Otisville, population NONE! This creepy abandoned city was inspired by the AMAZING new Otis, Colorize die from the crazy brilliant mind of Tim Holtz! It’s not often that I imagine a project from start to finish before making it, but this was one! Otis had to have his own ville, of course he did. Let’s get into some of the details…
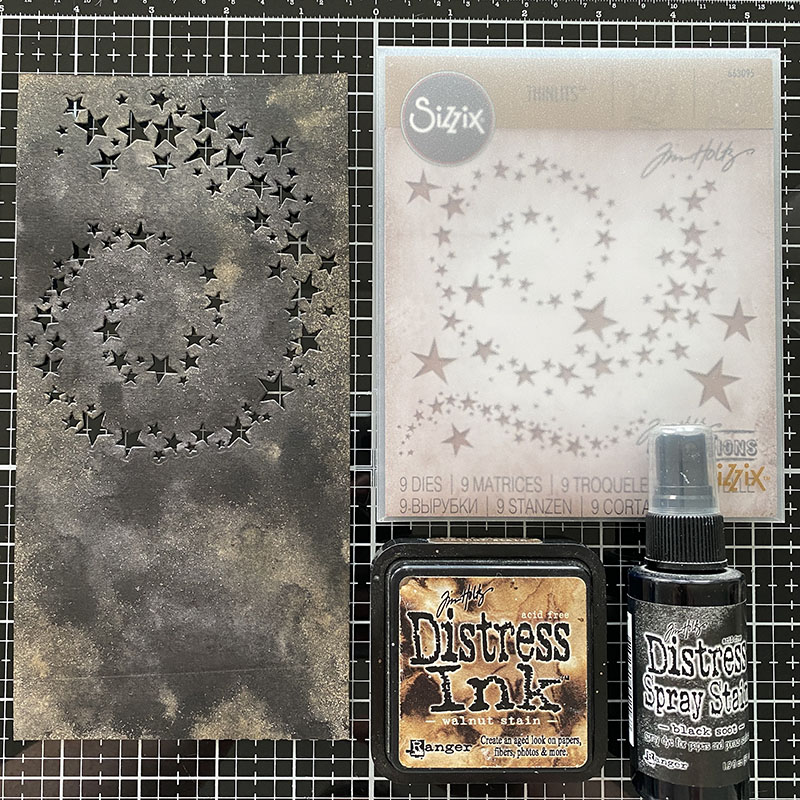
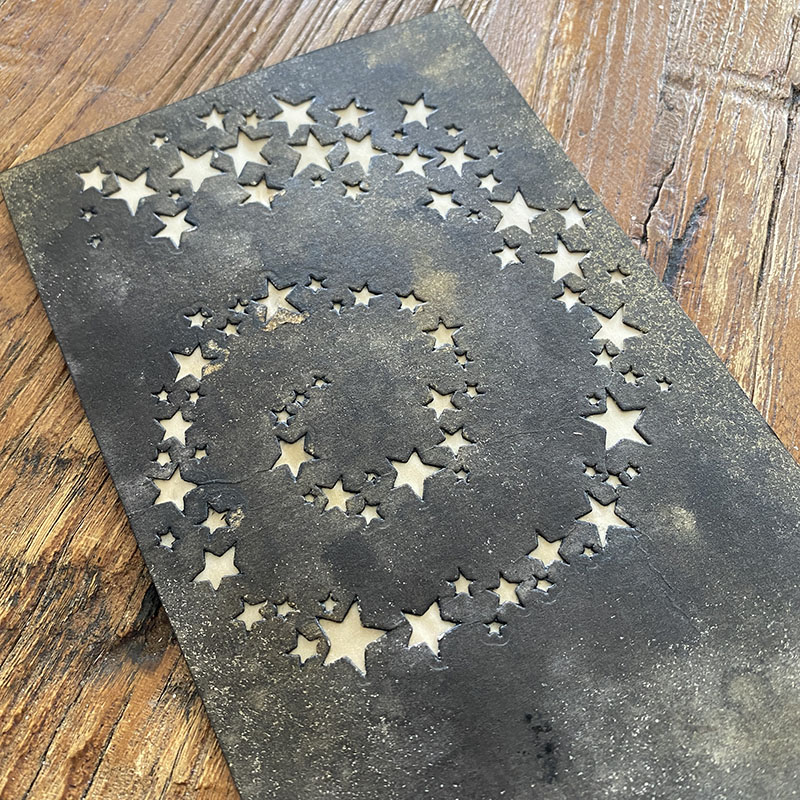
I cut a piece of distress watercolor cardstock to fit the inside of an idea-ology vignette tray and die cut with the swirling stars thinlits dies. I sprayed with black soot distress spray and once dry, blended in walnut stain distress ink.
I also cut a sheet from copy paper making sure it lined up with the first sheet. This is to be used later for light placement.
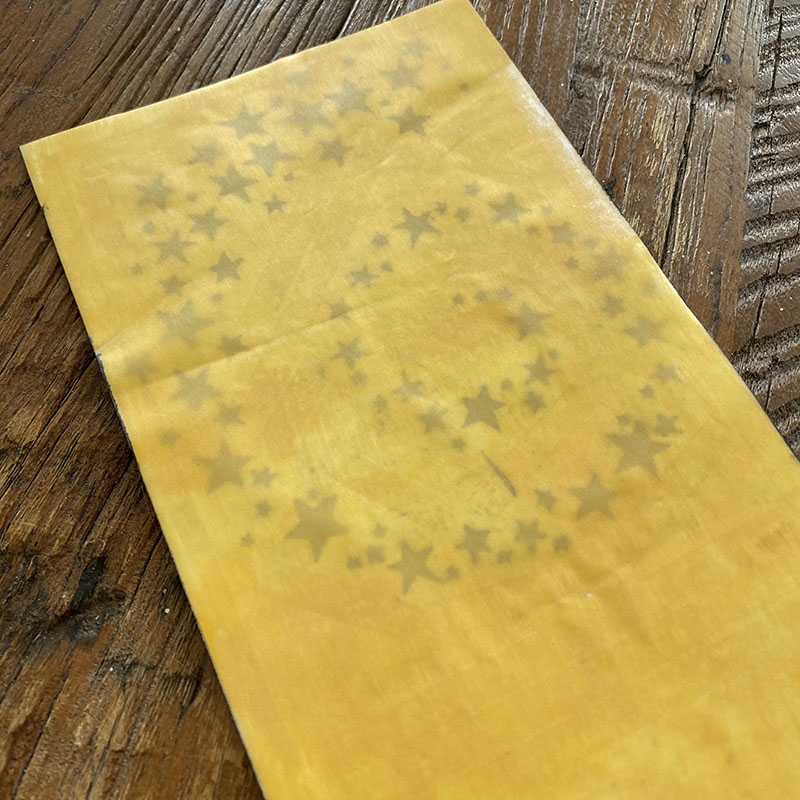
I covered a piece of vellum with fossilized amber distress paint and adhered to the back of the watercolor distress background.
Ready to add to the vignette tray and be backlit by tiny lights later.
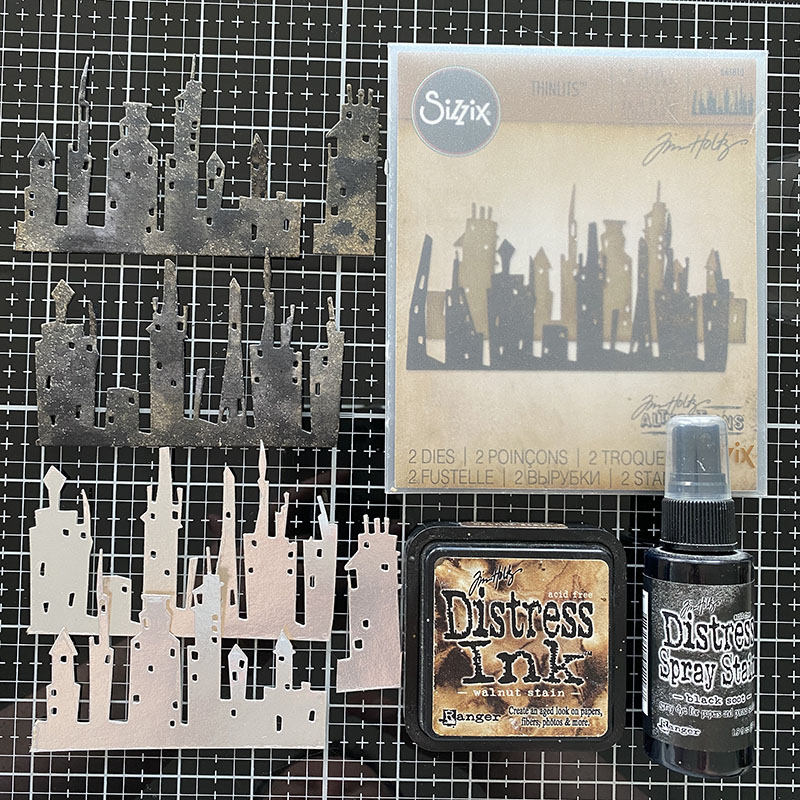
Die cut cityscape buildings from distress watercolor cardstock, sprayed with black soot distress spray and once dry, blended in walnut stain ink.
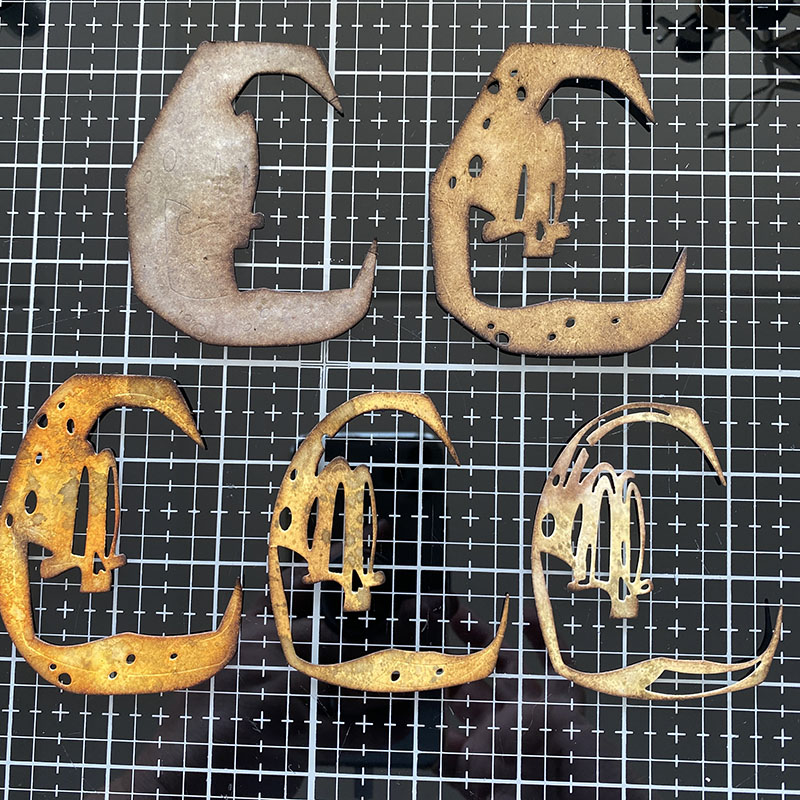
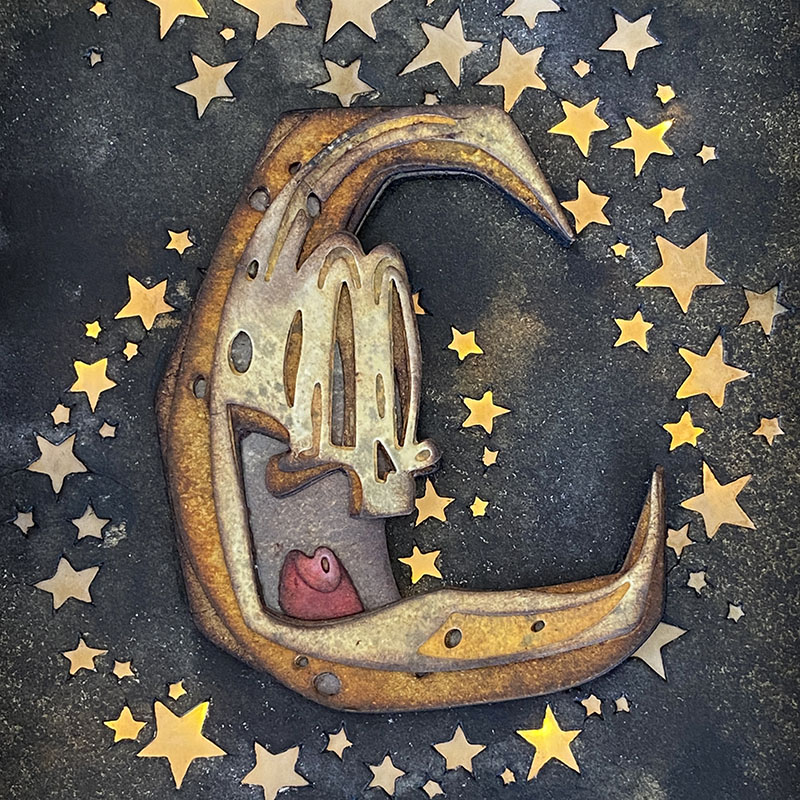
I die cut Otis from distress watercolor cardstock and covered with frayed burlap distress spray. I blended in different distress inks for each layer and once dry, assembled.
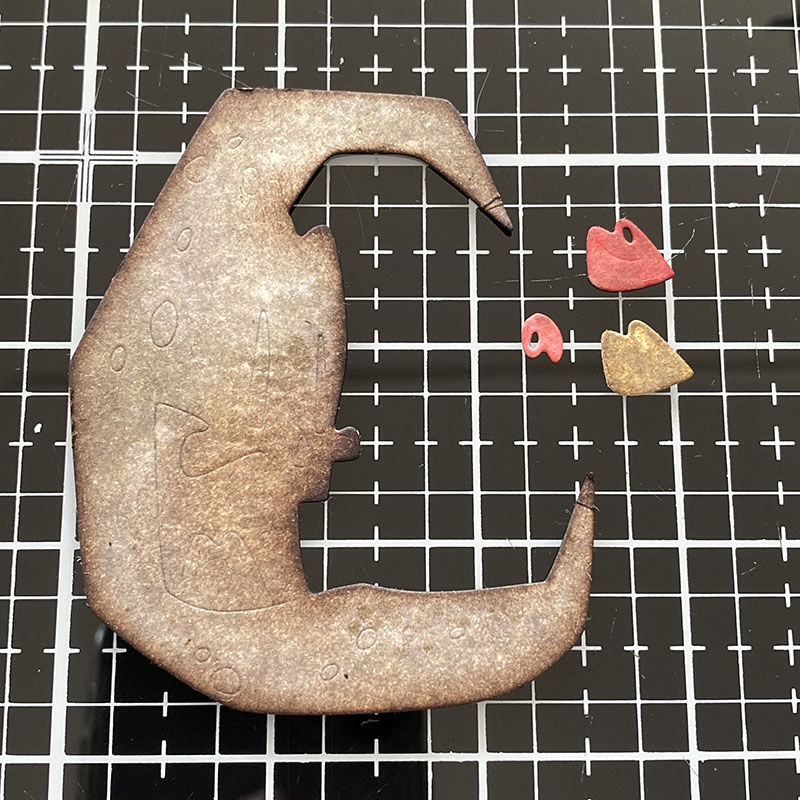
You can see from the base piece the embossed detail that shows you where to place the next layer. Colorize really is easy peasy now.
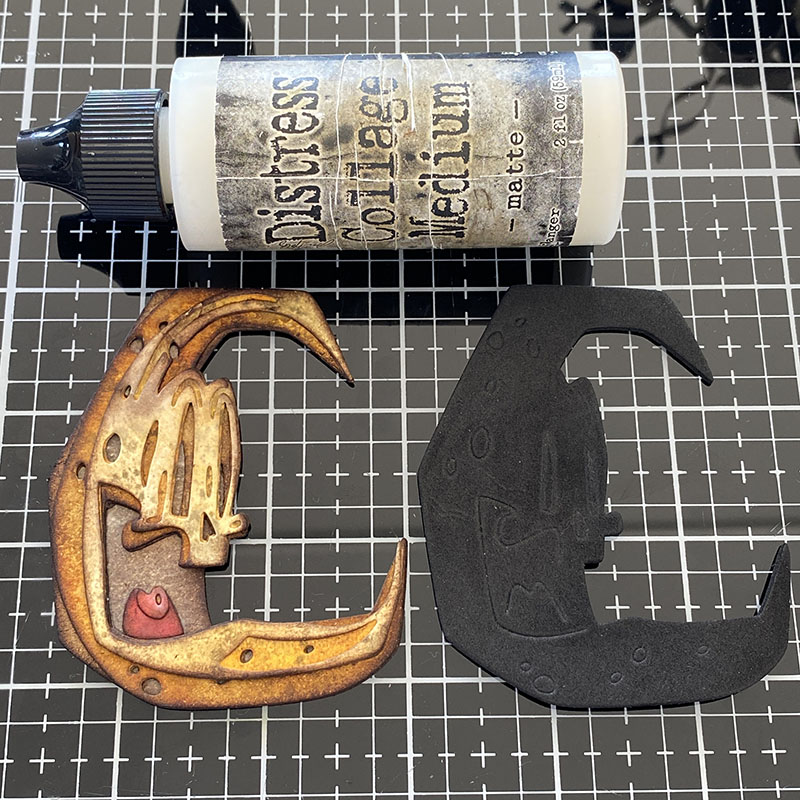
I die cut the base a second time from fun foam to give Otis a little lift from the background.
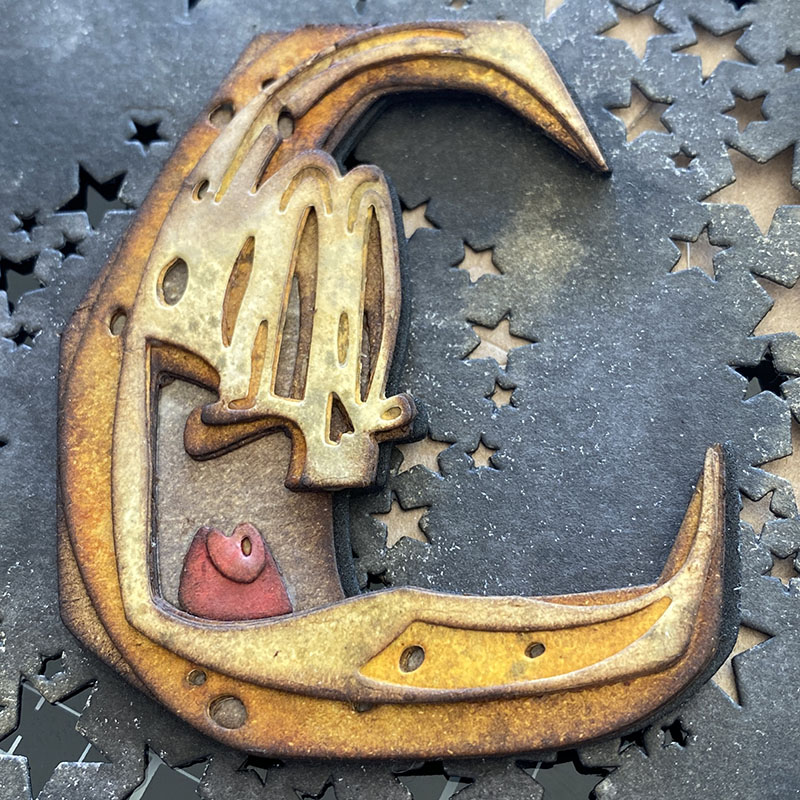
I LOVE him grunged up!
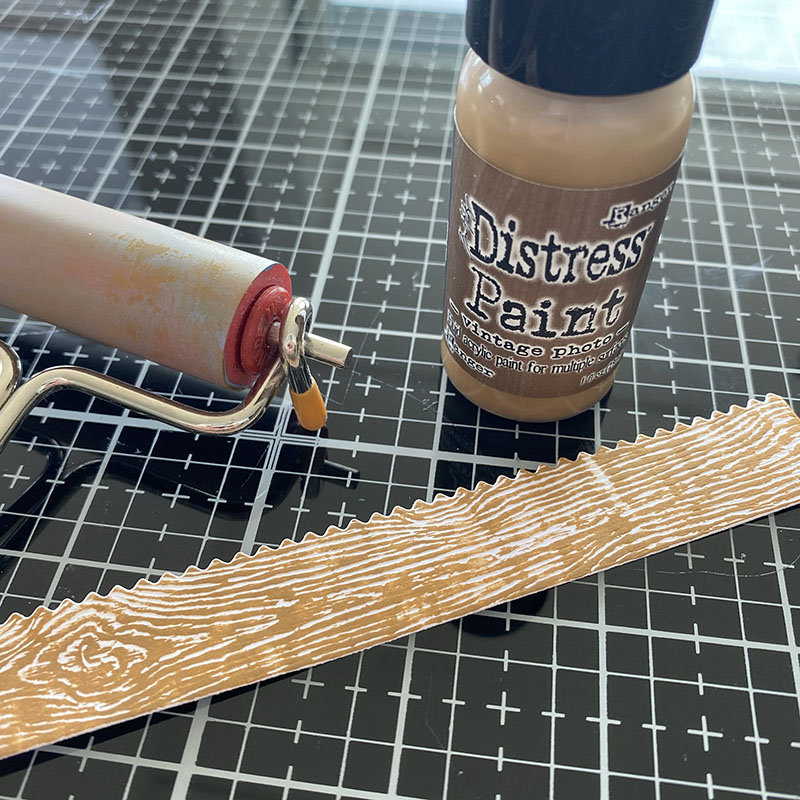
I cut a piece of woodgrain cardstock using the decorative trims thinlits die and brayered on vintage photo distress paint and once dry, glued it onto an etcetera trim.
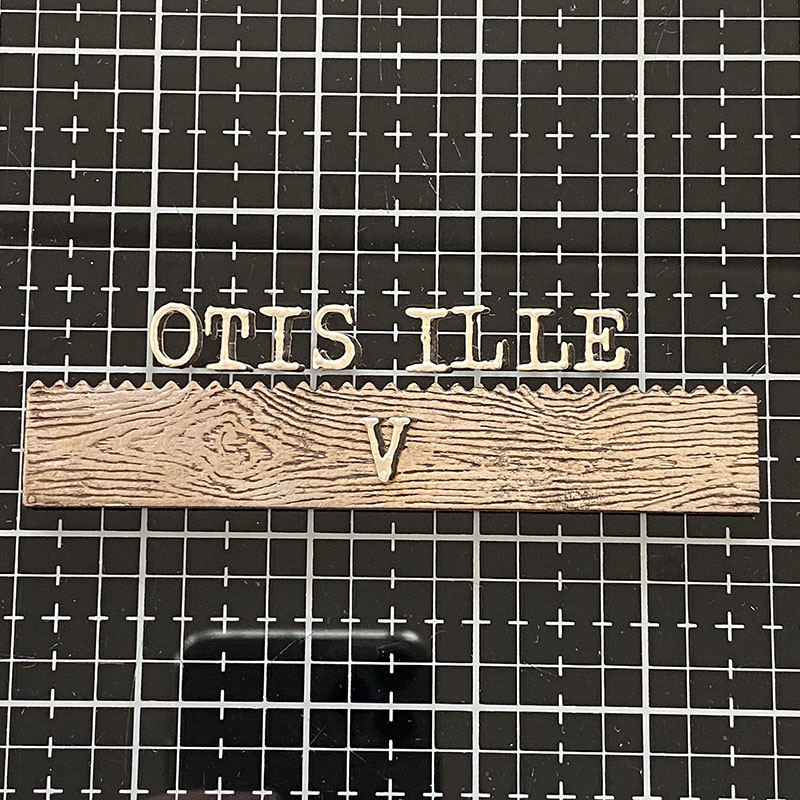
I die cut alphanumeric tiny type upper thinlits from idea-ology metallic kraftstock and black kraftstock and layered, offsetting slightly.
BEGINNER TIP: I measure the trim, find the middle and then glue the middle letter. I continue to add letters working outwards from either side.
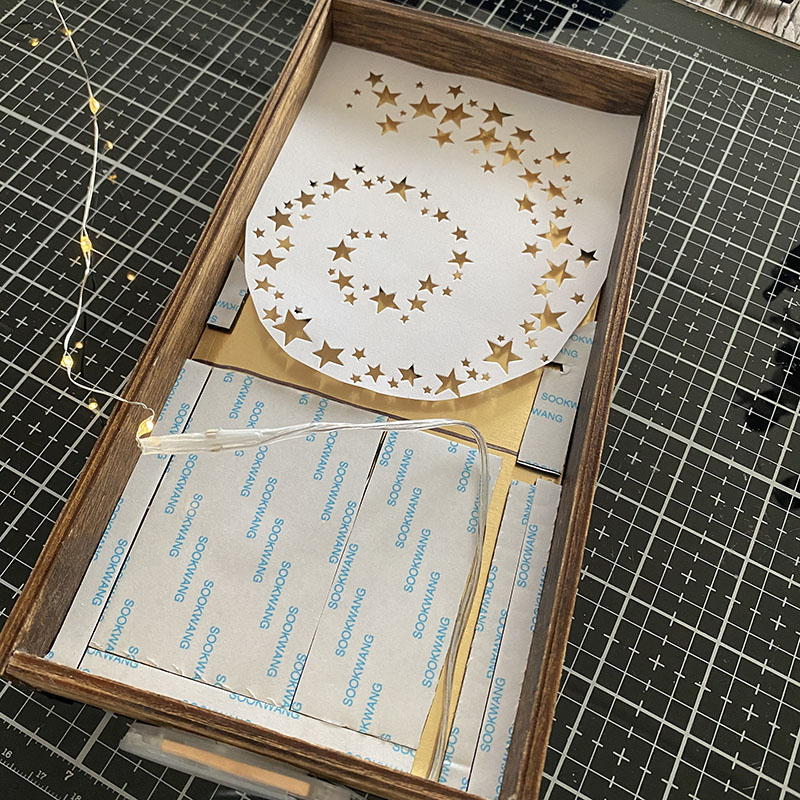
I used a piece of copy paper (cut at the same time as the background), as a template to see where the tiny lights should go and where to place my adhesive foam.
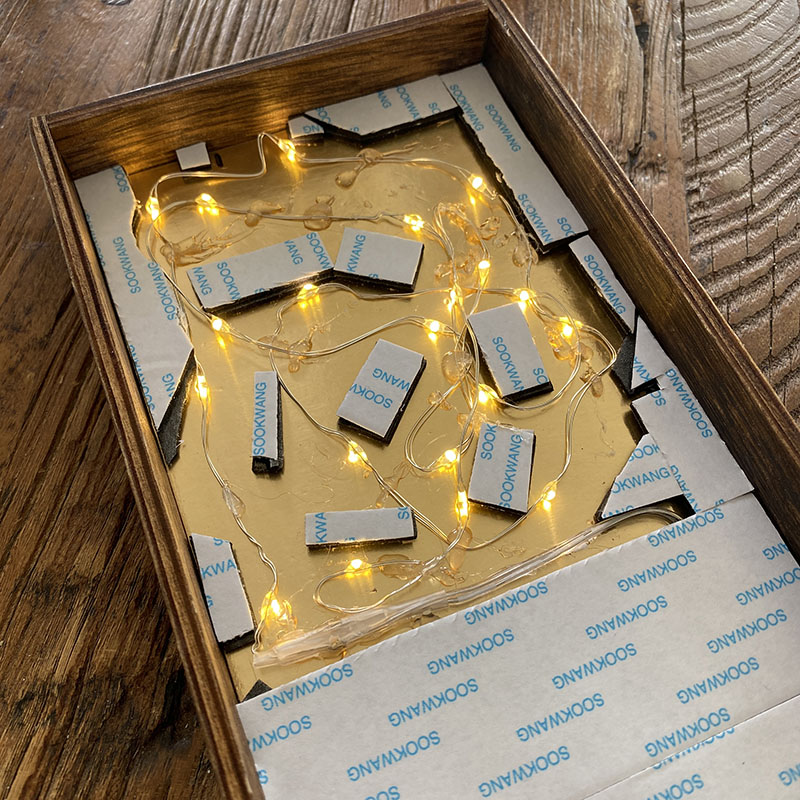
I added a piece of idea-ology metallic kraftstock to the back of the vignette tray. I do this because everything sticks better to the cardstock than the wood and the metallic surface better reflects the tiny lights.

Once the tiny lights and foam is in place, I removed the backing sheet and pushed the background into place.

Everything is better with lights!
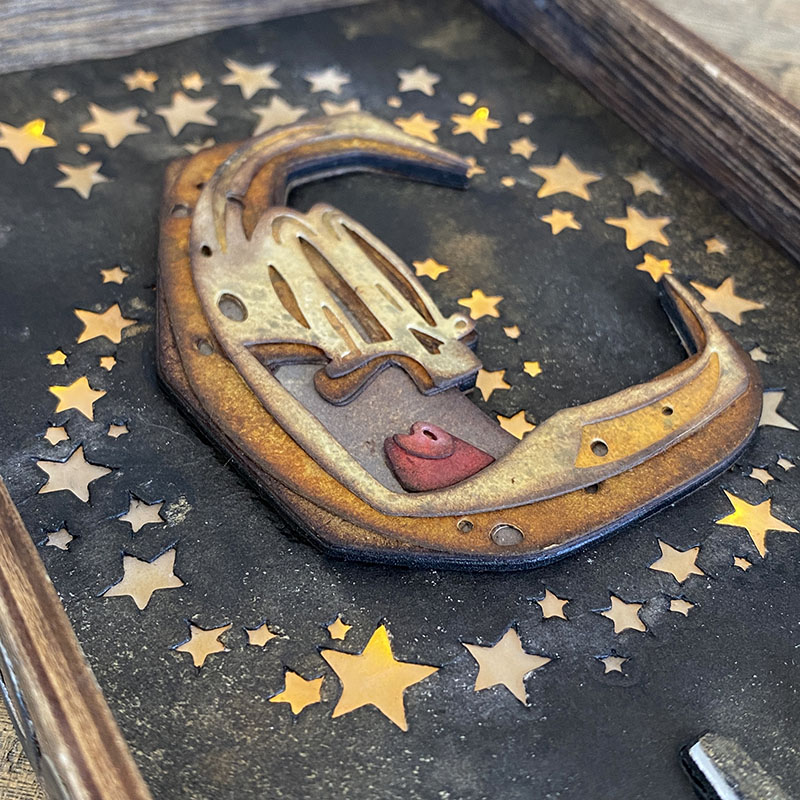
I added the assembled Otis to the center of the swirling stars
BEGINNER TIP: Work with the lights on so you can better see where they are and when using hot glue, DO NOT get it on the actual light bulb as it can short the lights.
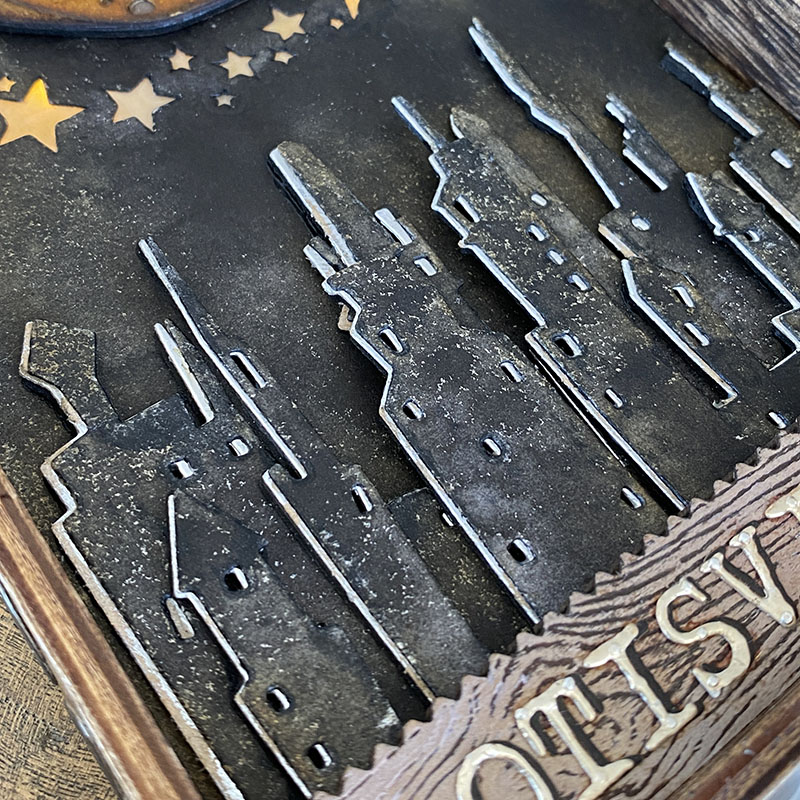
Next I added the cityscape buildings in 2 rows slightly offset and mounted onto idea-ology metallic kraftstock.
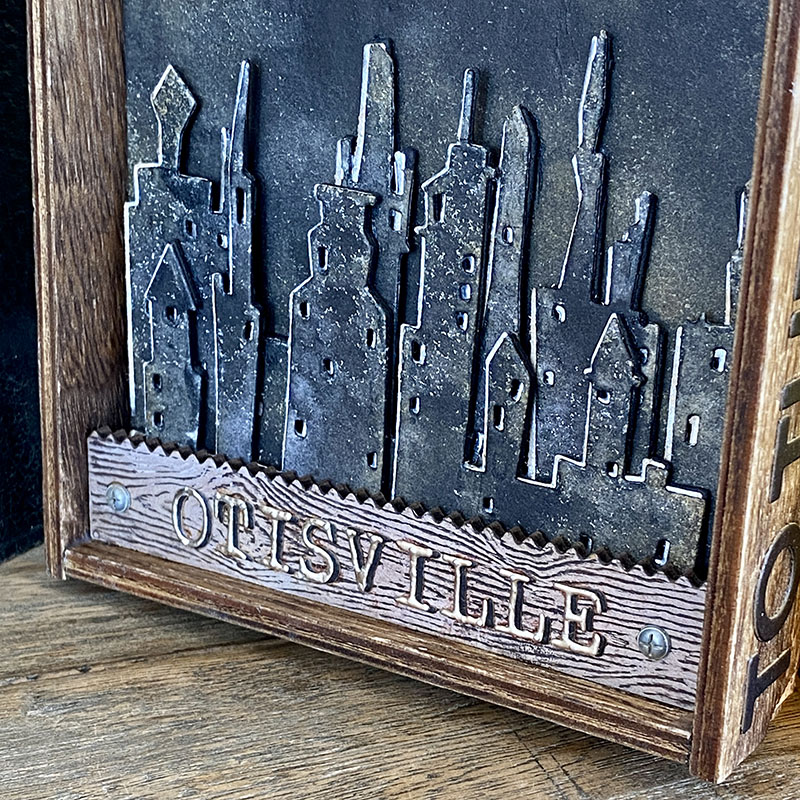
I added the trim in front of the base of the cityscape, adding a couple of idea-ology hardware heads.
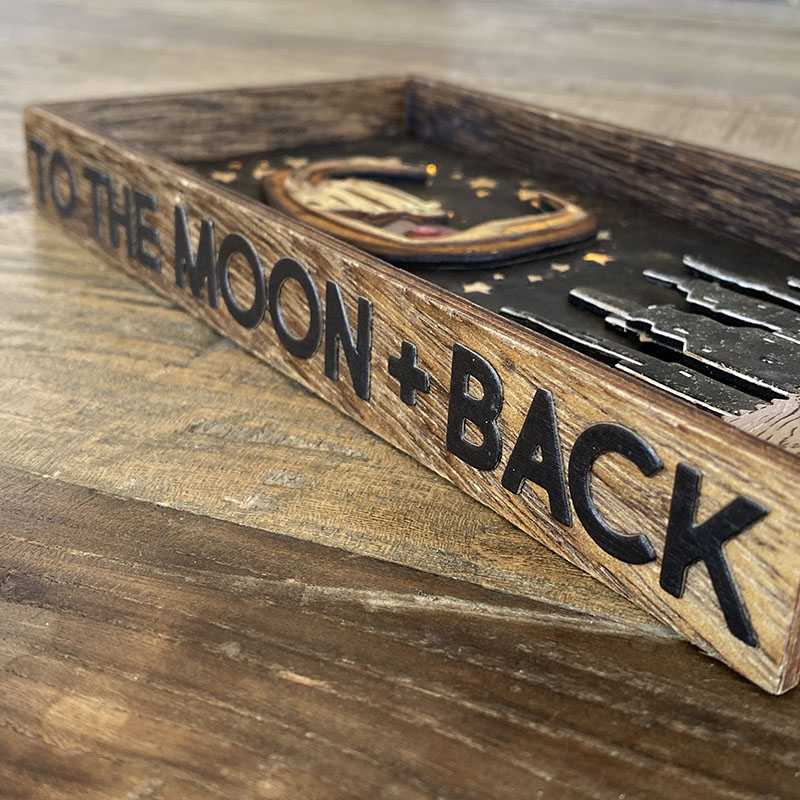
I used the bold text 2 thinlits dies, cut from idea-ology black kraftstock to add “To The Moon + Back” on both sides of the vignette tray. I painted over the top with a layer of distress collage medium.
Thanks for stopping by and let me know if you have any questions.
Zoe
…
affiliate links used at no cost to you


I love Ottis’ ville…great tip using the metallic card adhered to the back to glue the tiny lights to…Ottis looks great all grunged up….Tiny lights for the win!!!
I too love this piece and was ohhing and awwing when I saw it on the live! I never thought about painting velum either, duh, of course! Thanks for sharing this Otis project, truly grungy! Love it
This is another “WOW” creation. Love this and all the instructions. You are so amazing to share with us!!!!
WOW Zoe!!! Super fun project! Love it!!
Your colours are amazing, I need to get cityscapes. Love that die!
Thanks, you are always inspiring!
Looks awesome! Thank you for the tutorial.
C’est vraiment magnifique, j’aime beaucoup vos créations.
Biz
Astrid from France
I love this – as with all of your work. Thank you for sharing and for the tutorial – it’s great to see how projects come together.
Love this! Thank you for sharing the step by step process I just purchased the tiny lights so will try them for the first time. I have Otis and he’s so darn cute! Thanks again Zoe
Awesome! I just love Otis he’s so darn cute Thank you for your step by step process Will definitely help when I try my first tiny lights Thanks again Zoe
WOW! WOW! WOW! So cute. This setting is so perfect for Otis! I love your detailed instructions as well. Thank you for your inspiration and DIY tips. Cheers, Makira
Absolutely Amazing!!!!!