Hello friends. Hope your November is off to a great start! Before I get to my Christmas makes, I’m going to skip back to the Tim Holtz Sizzix Chapter 3 launch. You can see the Chapter 3 replay and all the makes on Tim’s blog.

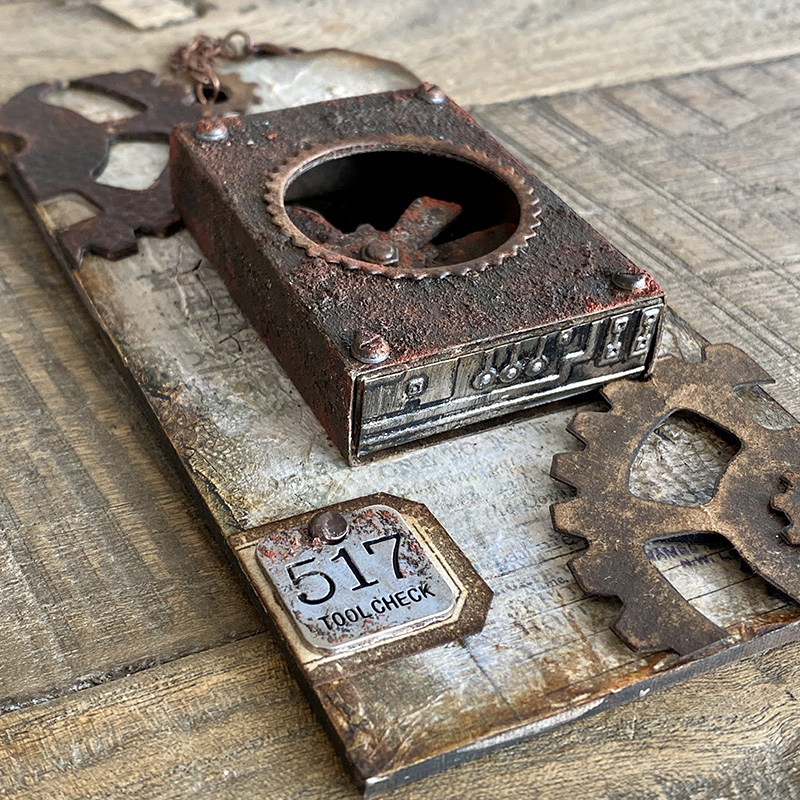
I have to tell you that I love the new matchbox bigz die. It comes with a thinlits set so you can cut a circle into the matchbox sleeve and it perfectly fits the dome complete with a circle trim which I’ve used in lots of other makes on it’s own.

I started out by die cutting a matchbox using the new matchbox from distress kraft heavystock. Painted the inside with black soot distress paint and added a piece of alcohol ink foil tape embossed with the circuit 3D embossing folder to the back. Also adding a piece of this to each end of the matchbox.
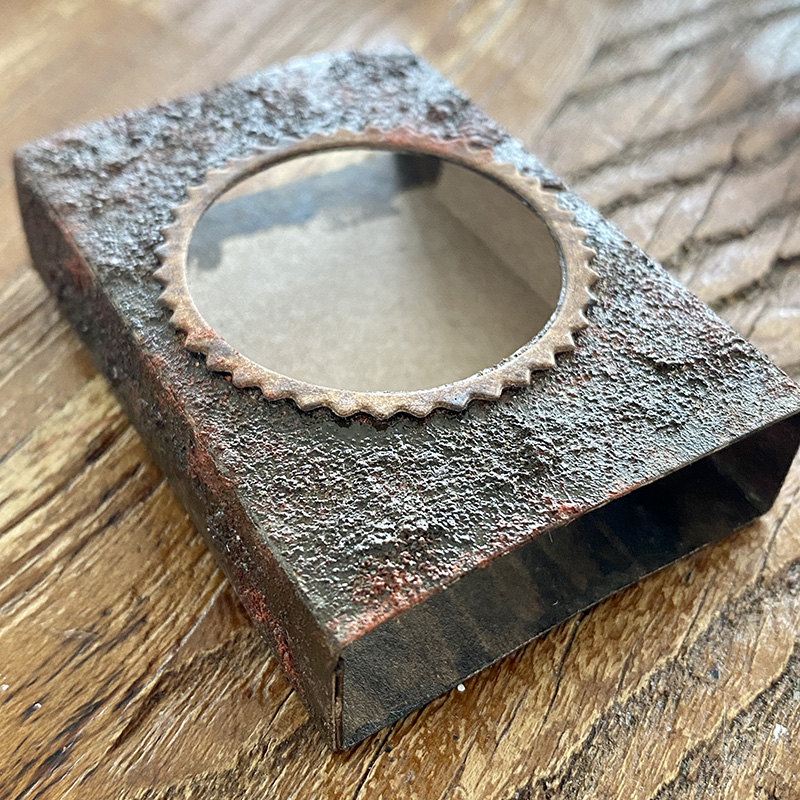
The top of the matchbox was cut with the the thinlits set that I mentioned earlier. I LOVE the surround trim die, it finishes off the open circle perfectly. I covered the matchbox in opaque grit-paste and once dry, covered with a layer of ground espresso distress paint and set aside to dry. Finally dry brush crackling campfire mixed with candied apple distress paint to the edges to give a rusted effect.
There are domes that fit the matchbox that I used in another make I will be sharing soon, but you don’t need to use one and for this I wanted it to remain open, although now I’m writing this I wish I had added one and smashed it open… one for the “another time” books…
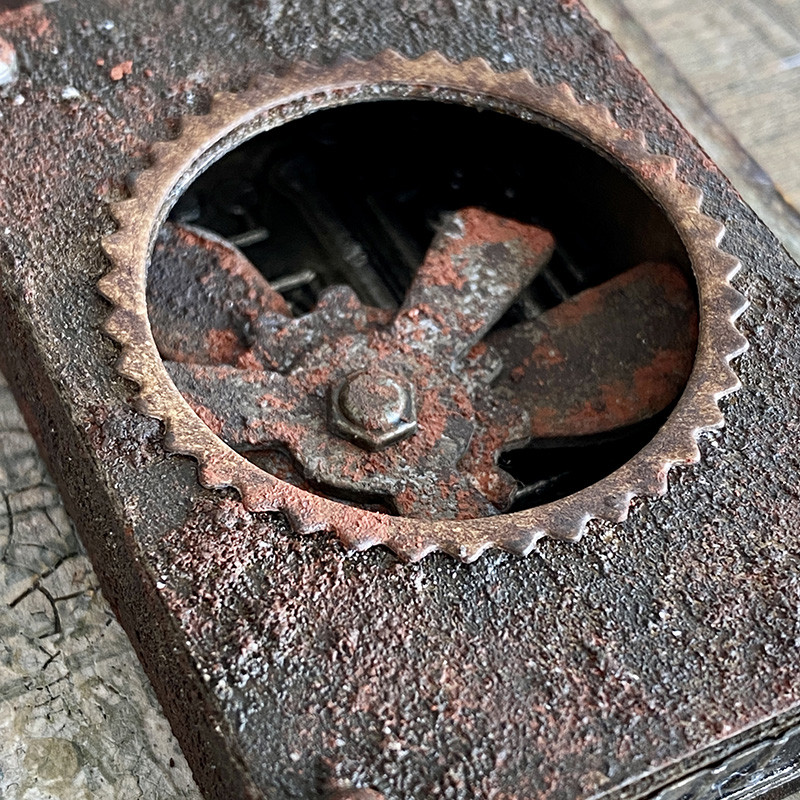
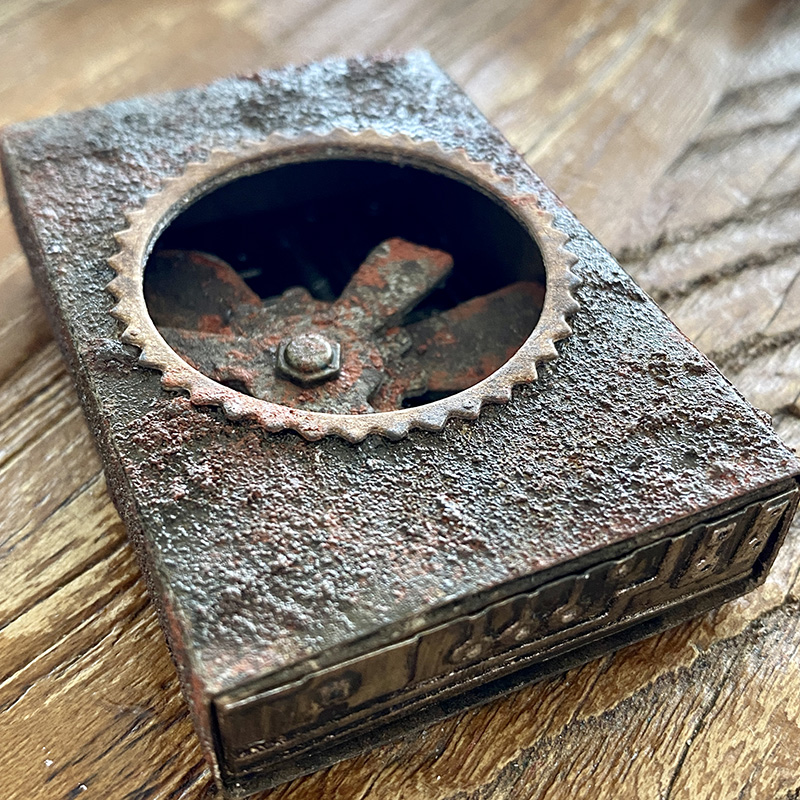
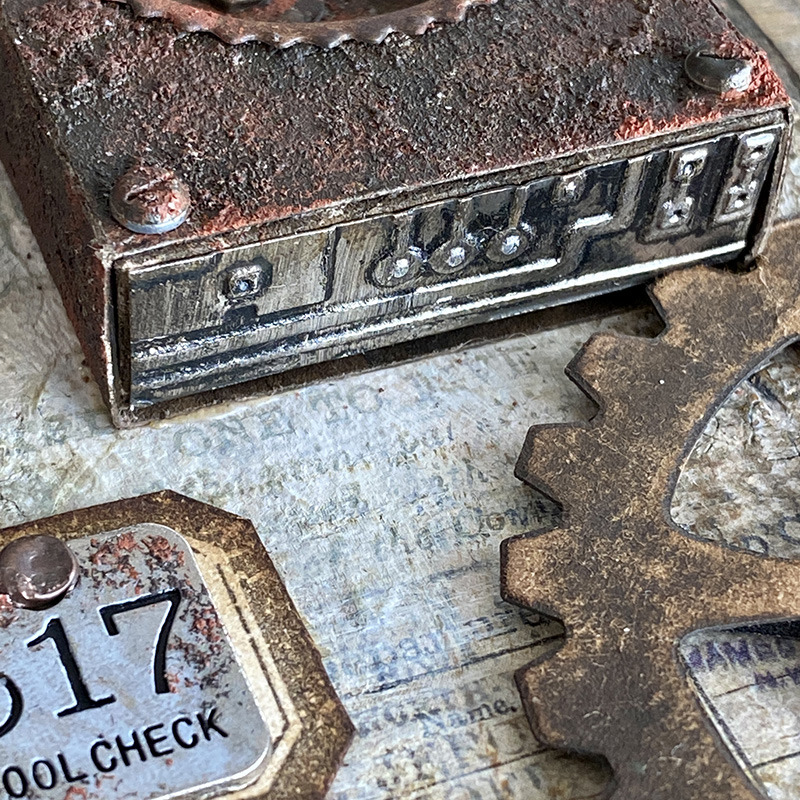
I used die cuts from the mechanical gears bigz die, stacked on top of each other and secured in place with a hex fastener.
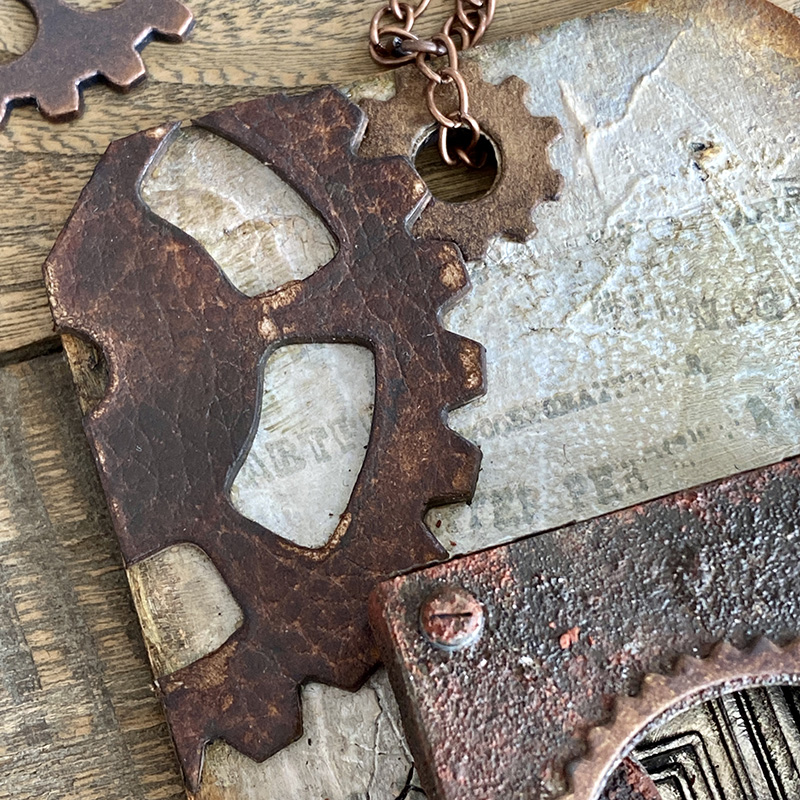
The background tag is a #8 thickboard etcetera tag. I love these tags when I need a more substantial base. I added some more die cuts from the mechanical gears bigz die, cut from distress cracked cardstock backed with distress kraft heavystock and blended in ground espresso distress ink. I used a small gear as the hole reinforcer.
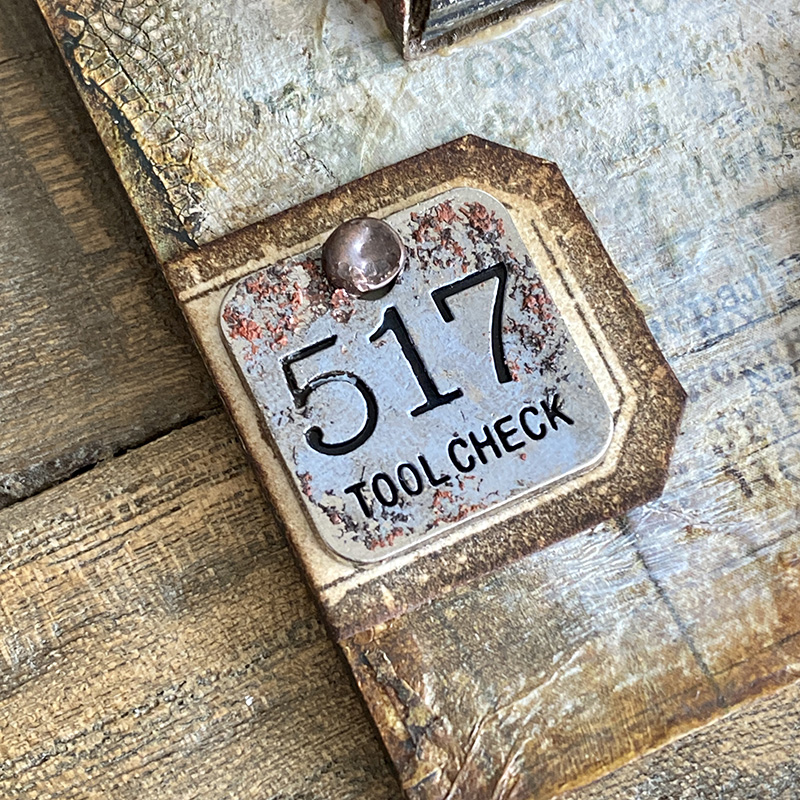
I added an idea-ology foundry adornment piece with a long fastener that I hit with a texture hammer. I love the look of the dented metal. This was mounted over a label stamped from the field notes CMS396 stamp set with distress archival ink and fussy cut.
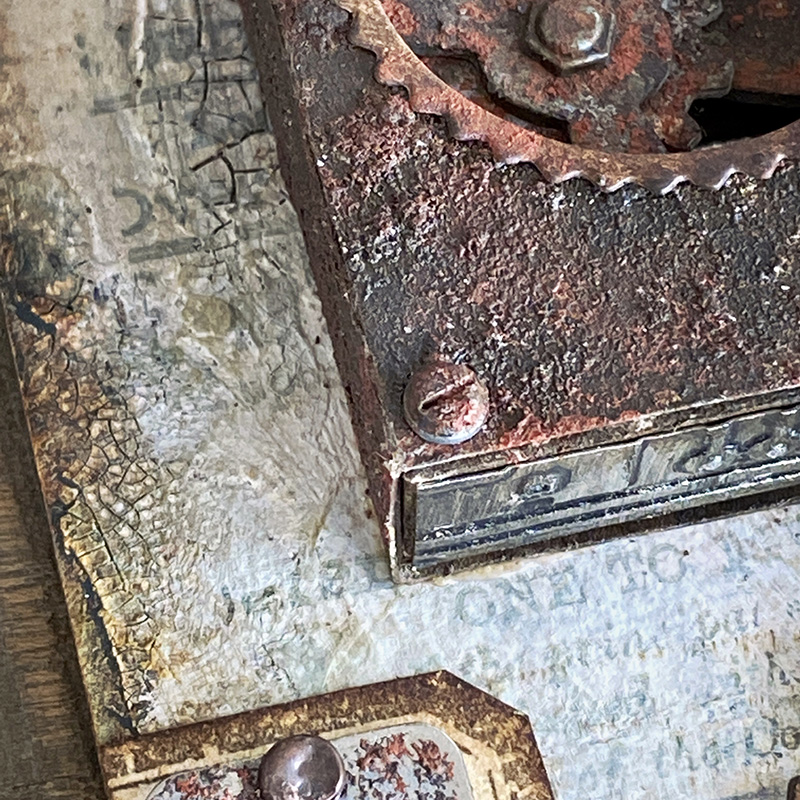
It’s no secret that the idea-ology hardware heads are one of my fave products in the range. I added one to each corner of the matchbox.
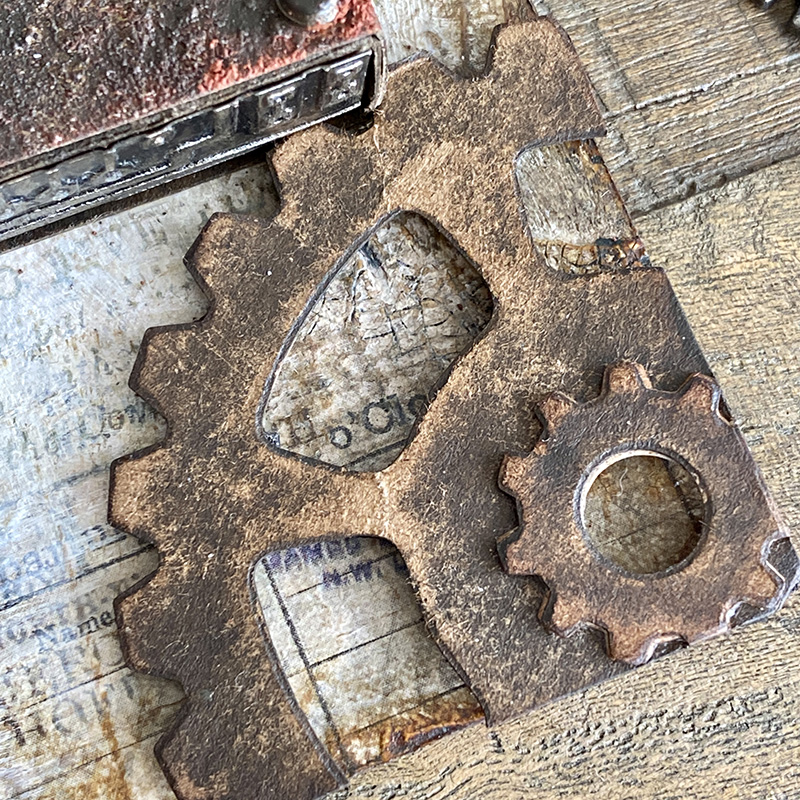
I die cut more gears from the mechanical bigz die set from distress kraft heavystock and sanded and inked with distress.
I added a strip of foil tape that I embossed with the circuit 3D folder to each end of the matchbox base.
Thanks for stopping by.
Zoe
…
affiliate links used at no cost to you


I am a fan of the Matchbox as well…have made many a project so far…and they keep stacking up…get it!…stacking my matchboxes…LOL…LOVE THE BIG gears as well…I think the broken dome is a fabulous idea….
Oh yes! Add one and then smash it, that would have looked amazing but it looks pretty amazing already, especially with the grit paste and a little rusting. I so want to make one now and rust it up too! Thanks so much, as always, for the inspiration my lovely friend xxx
This is a stunning industrial piece Zoe, totally love it!
I admire your skills to let the parts look if they were made of real metal.
Thank you so much for sharing and for the tutorial.
Stay safe and have a wonderful day.
Love love love how you get your things to look rusty, I have not mastered that, you are such an inspiration Zoe and thank you for sharing your process with us. Love this project!
Thank you so much for the inspiration! I so appreciate and enjoy all of your awesome makes!!
This is too amazing for words. Every day you post a new project. And every day they just get better and better!!!!
Thank you for sharing.
Thank you Zoe! Another fab grungy project.
Love all of the layers of grunge in this piece, truly a work of art 👌