Hello friends. Hope you’re having a great week so far. It’s going to be a busy few weeks making for some very exciting LIVE launches coming up. Speaking of LIVE launches, did you meet the newest member of the distress family? Tim Holtz welcomed Prize Ribbon during Saturday’s LIVE launch party. If you still need to catch up or want to relive the fun all over again, it’s over on Tim’s blog.
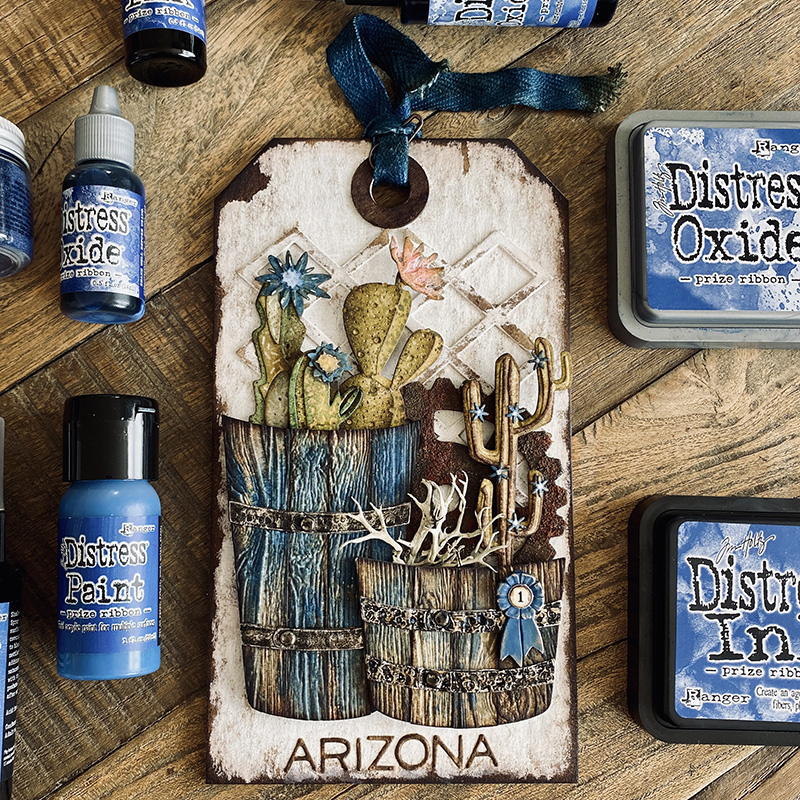
I had the great pleasure of creating for the LIVE launch of the stunning new Prize Ribbon. This tag was inspired by a trip to Arizona and I’m most definitely blue that I haven’t been back for a while. Let’s get into a few of the how’s…
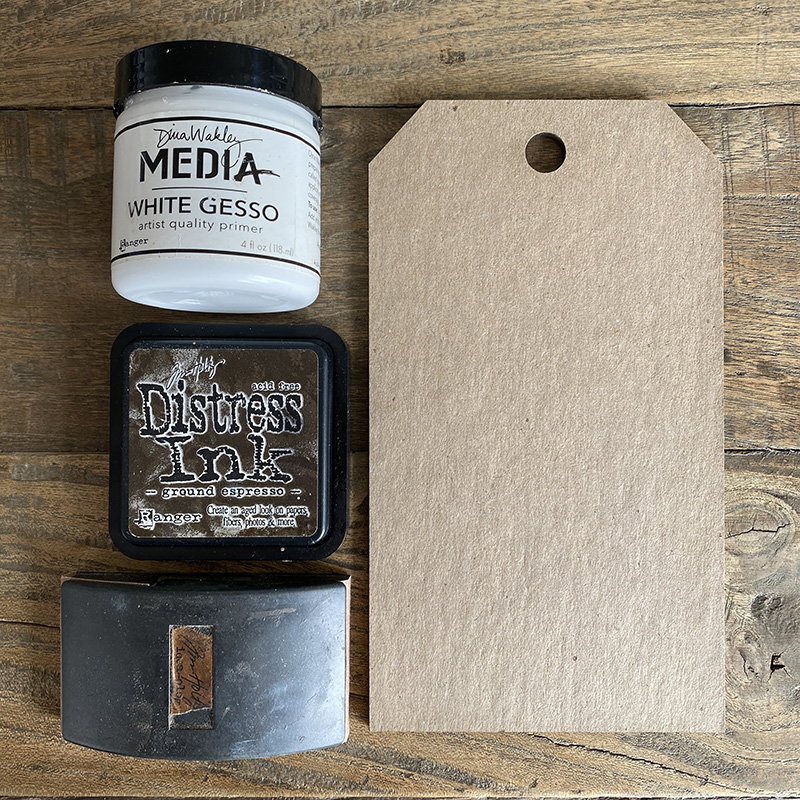
Take a mini etcetera thickboard tag and paint on a thin layer of slightly watered down white gesso.
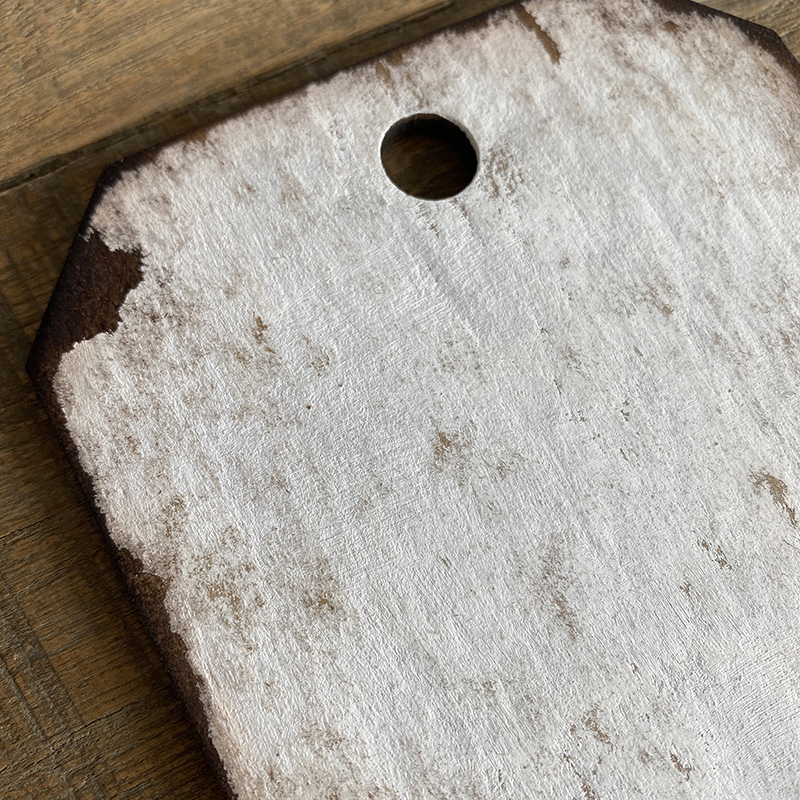
Once dry, sand the edges and blend in ground espresso distress ink.
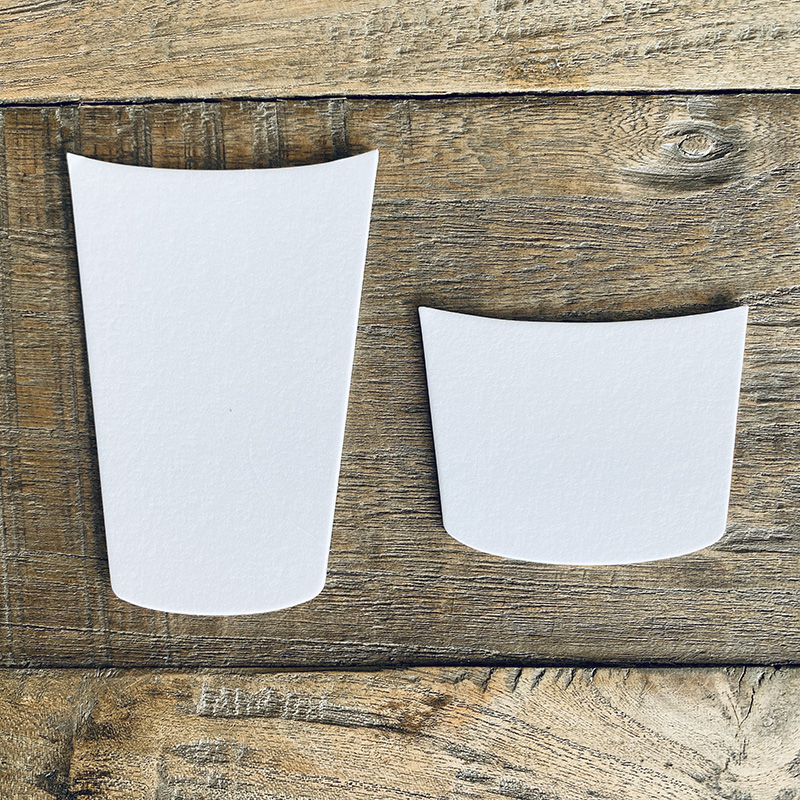
Cut the barrels using potted and potted 2 bigz dies from Sizzix mixed media board. These are going to form your barrel bases.
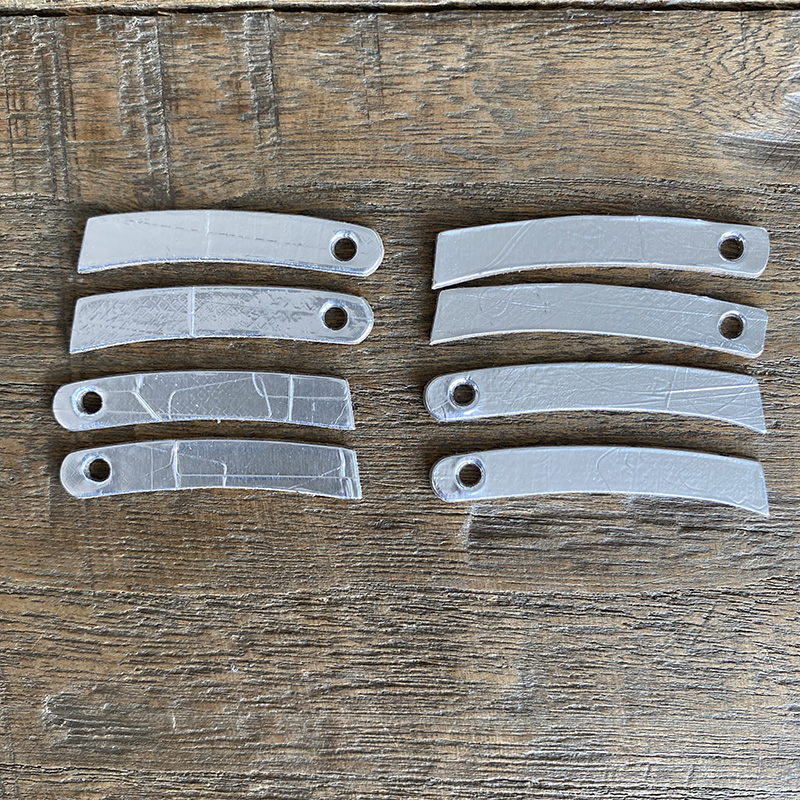
At the same time, cut the barrel trims from cardstocked backed alcohol ink foil.
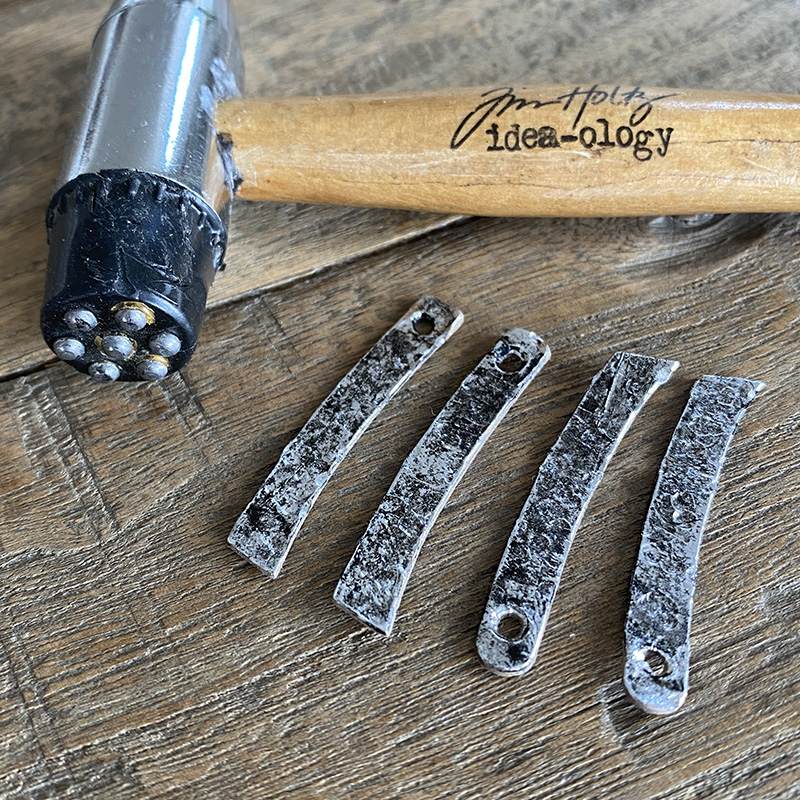
Cover in black soot distress paint and then wipe away once almost dry. Using the nobbly end of a texture hammer to bash the trims.
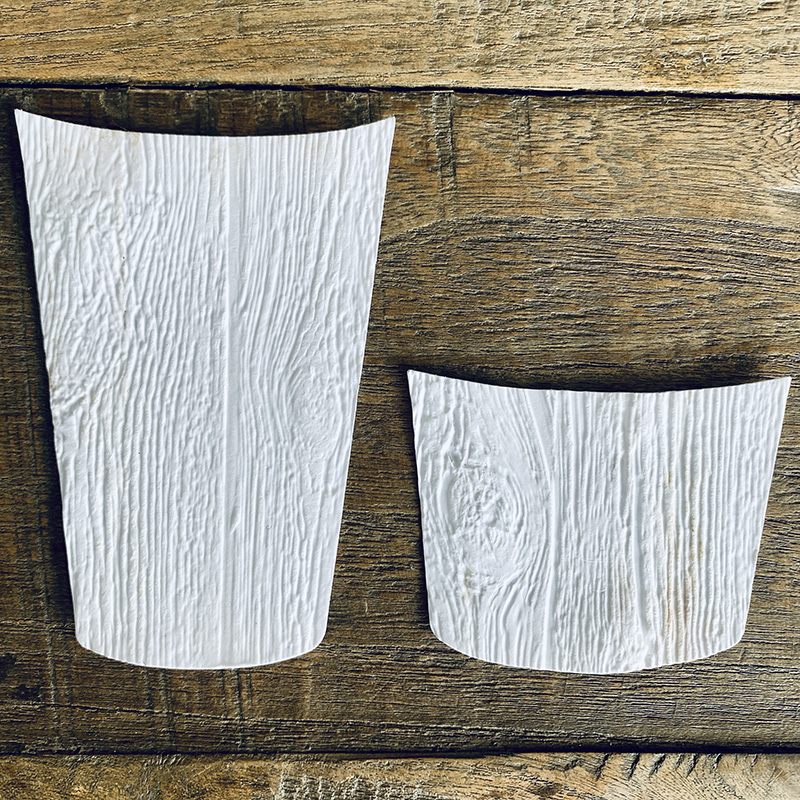
Again using the potted and potted 2 bigz dies, cut distress watercolor cardstock and emboss using the 3D lumber embossing folder.
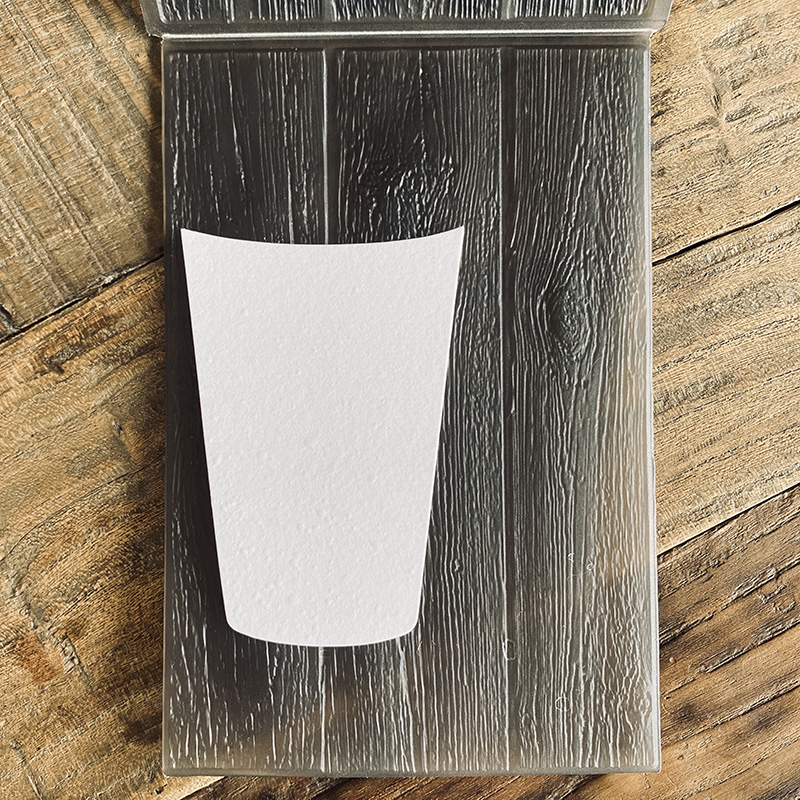
You will cut the barrels into strips later so here’s something I do… when embossing with the 3D folder, I line the center of the barrels up along one of the straight lines in the folder. You can use this later as a guide to cutting the barrel.
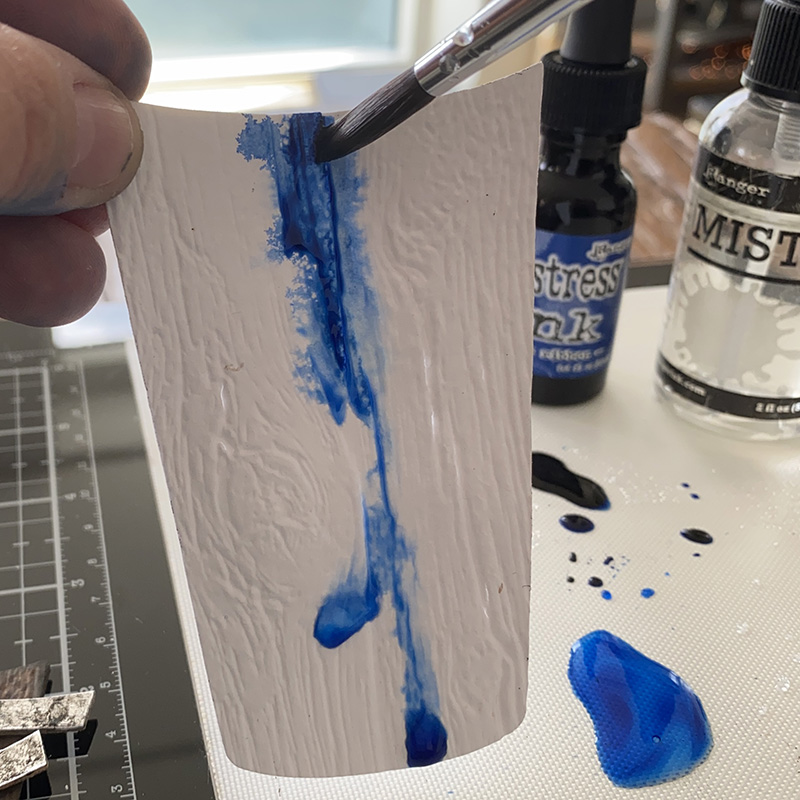
To add the beautiful prize ribbon distress ink. I added a drop of prize ribbon distress reinker to my glass media mat and added plenty of water to my paint brush. Spritz the barrel with water and use the paintbrush to drip the ink down the barrel. It gives the kind of streaks of oxidation you find on weathered barrels.
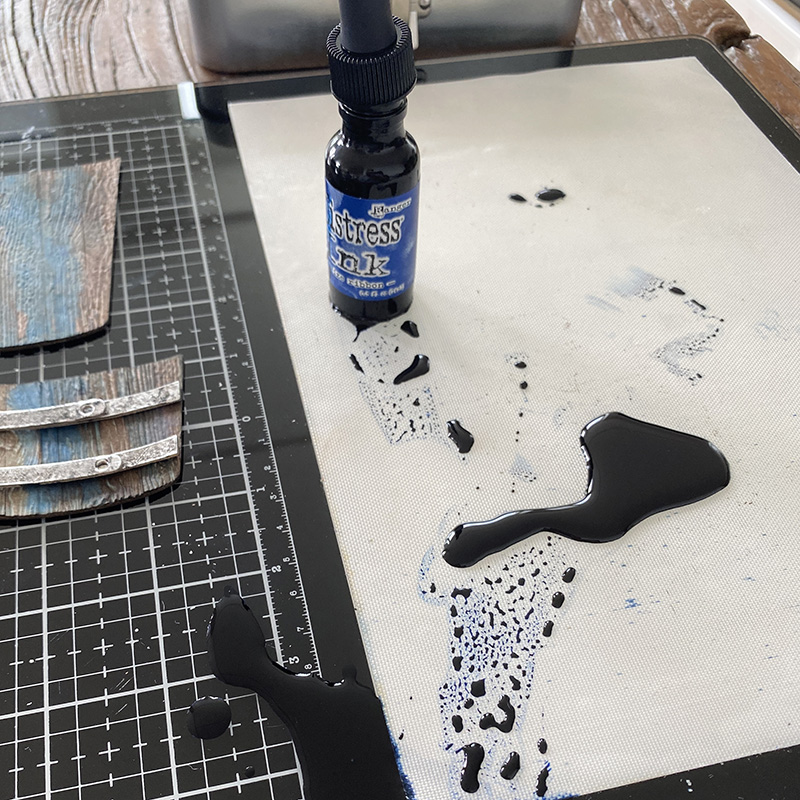
I had an accident and knocked over my re-inker. I managed to cover both hands and my shirt cleaning it up! I looked like a smurf!
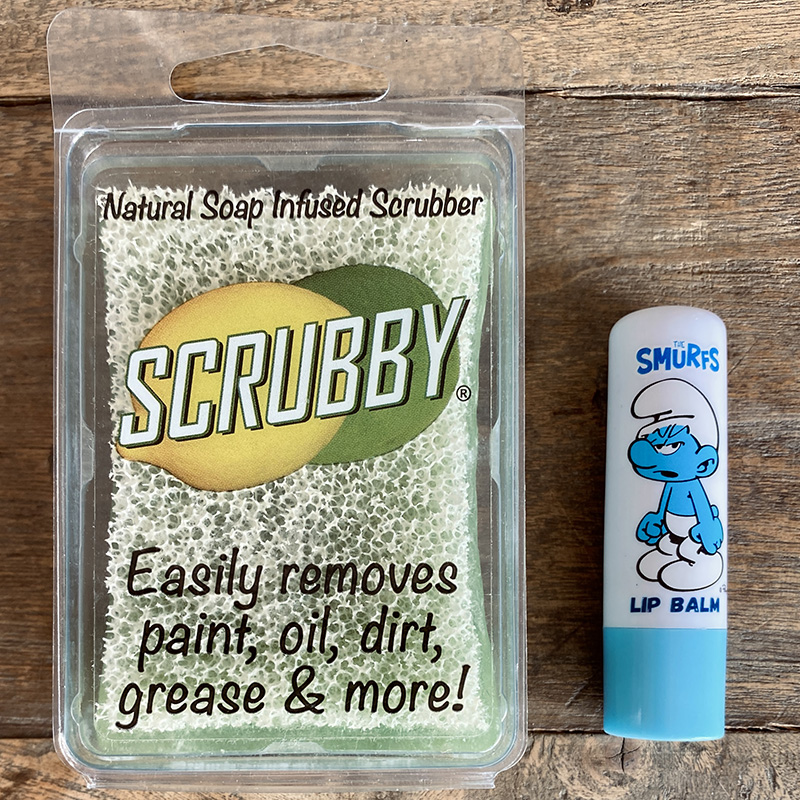
I used scrubby soap to clean my hands, it’s amazing soap and has a scrubby top. It comes in lemon and orange, but my favourite is the lime, it smells divine. Be careful out there crafters! LOL
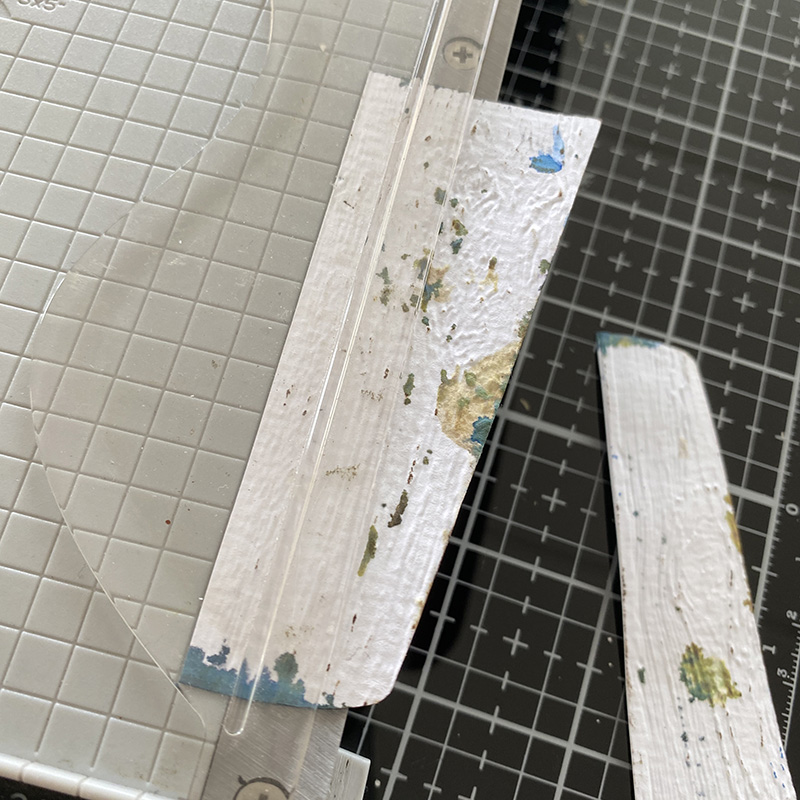
Using the line from the embossing folder as a guide, trim into 4 strips with your trimmer.
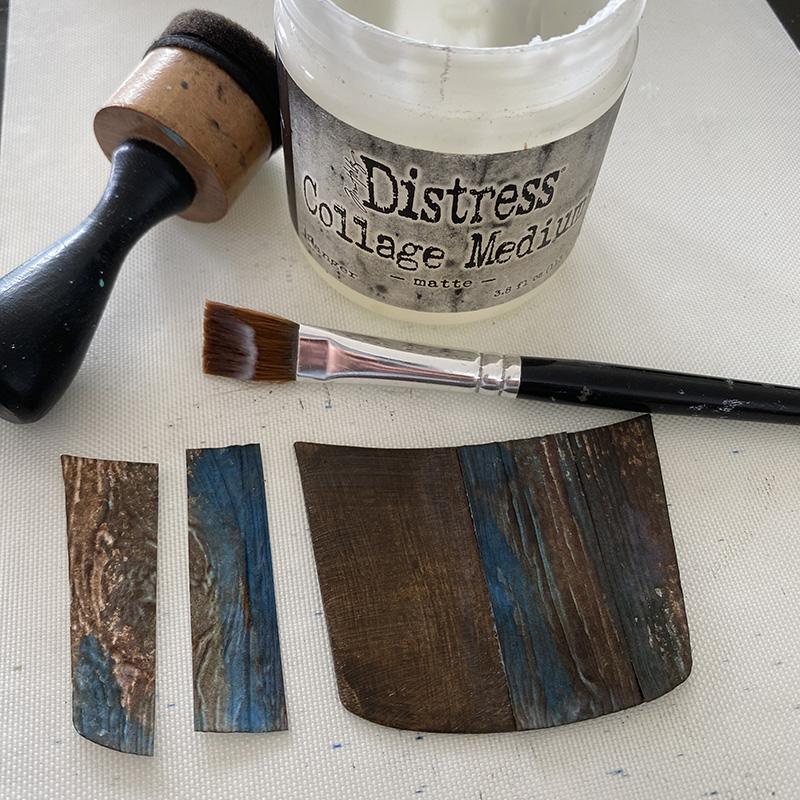
Cover the base barrel in a layer of ground espresso distress paint and set aside to dry. Ink the strips of woodgrain cut barrel with frayed burlap distress ink and add to the base with distress collage medium. Please note that in the above photo I used ground espresso distress paint when doing step outs.
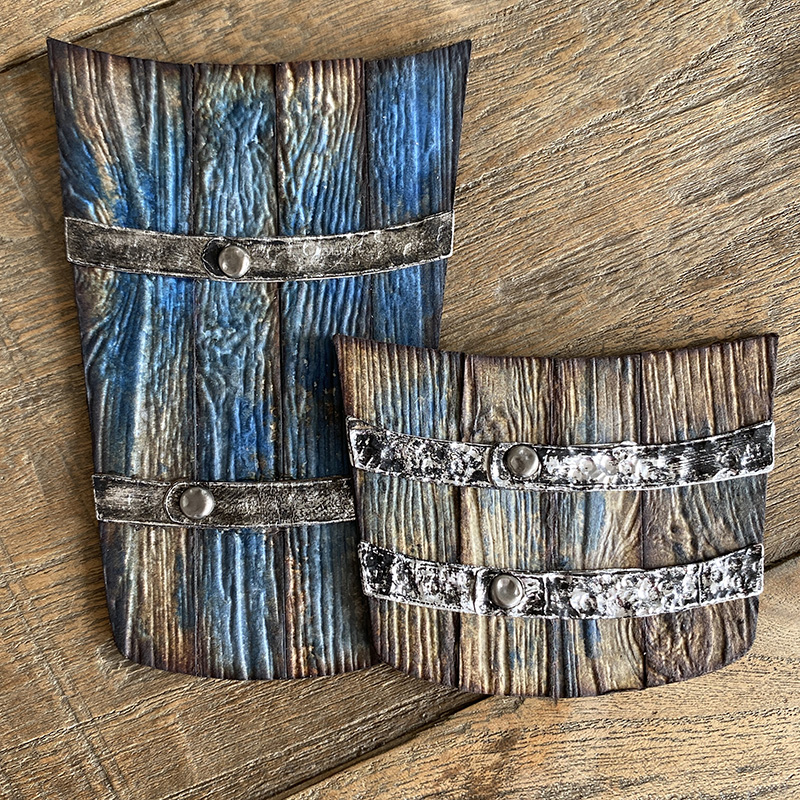
Finally add the metal straps with distress collage medium and add idea-ology long fasteners to finish.
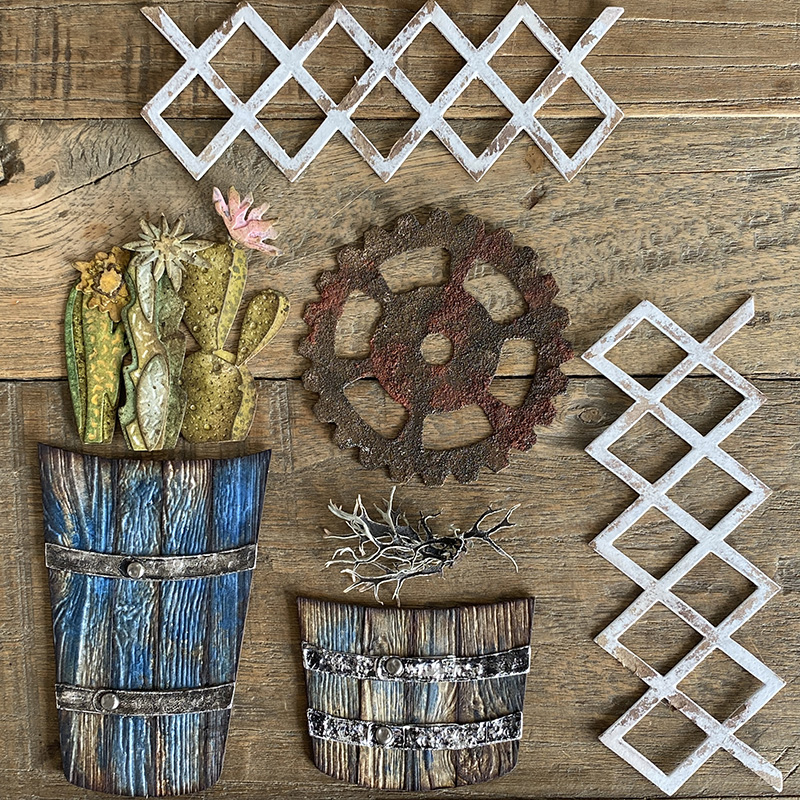
Here are the pieces ready to be added to the tag. I had already cut the lattice for another project that never got made and the gear I had leftover from one of my rust makeathons. The cactus were from the samples I made for Chapter 2. The point is, make a little extra when you make and add it to your bitbox for later.
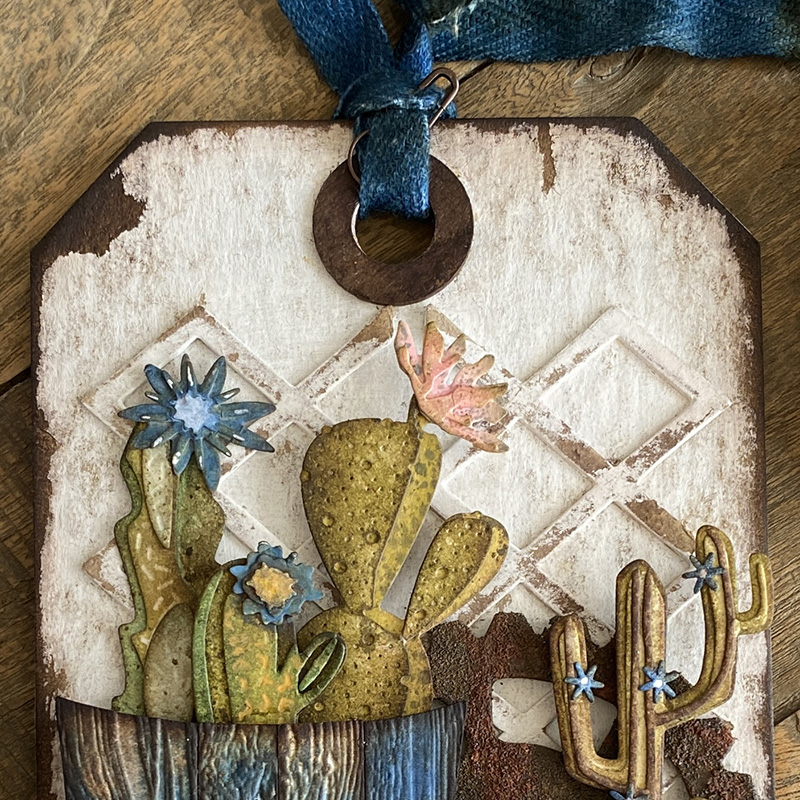
I added the lattice die cut to the back of the tag. I also added a tag reinforcer and some trim that I dyed with prize ribbon distress spray stain. I secured it in place with an idea-ology loop pin. This is a trick Tim I picked up from Tim. Add a loop pin, or fastener or mini pin to secure your ribbon and stop it slipping.
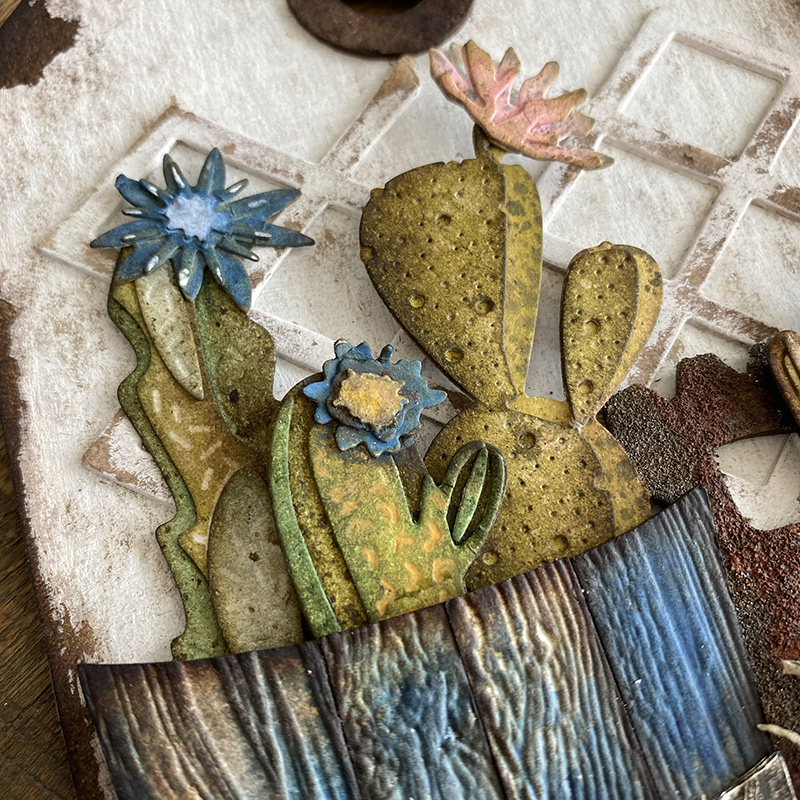
I added the cactus to the tag and placed the barrel over the top with adhesive foam. Don’t put any foam at the top where it sits over the cactus.
The gear is die cut from the new mechanicals bigz die that was released in Chapter 1 this year. I covered with distress grit-paste and once dry covered in ground espresso distress paint and added crackling campfire distress paint to small parts of the gear. I added flowers to the cactus inked with prize ribbon distress oxide ink pad.
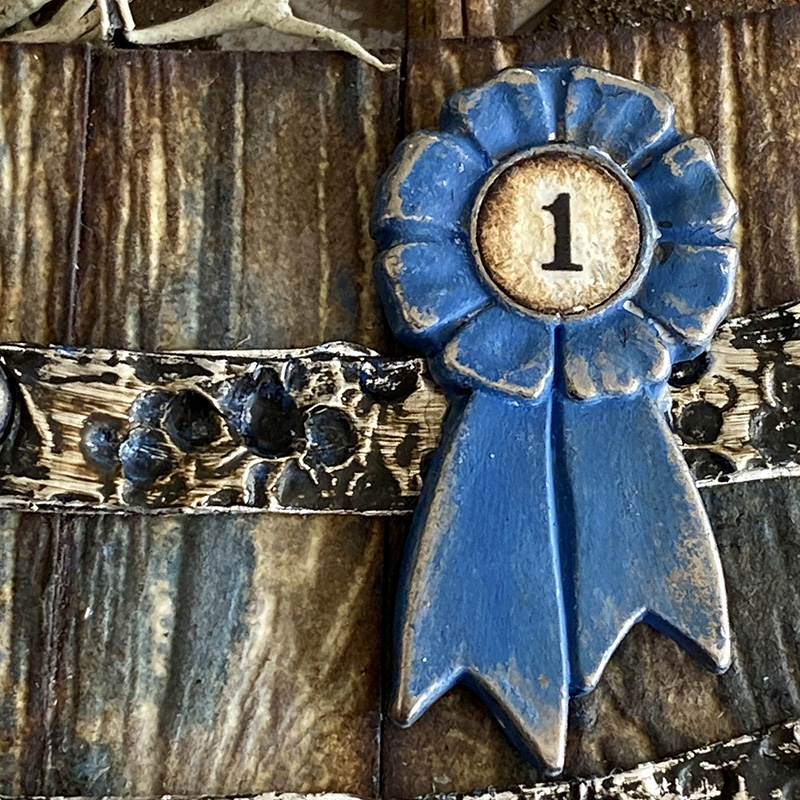
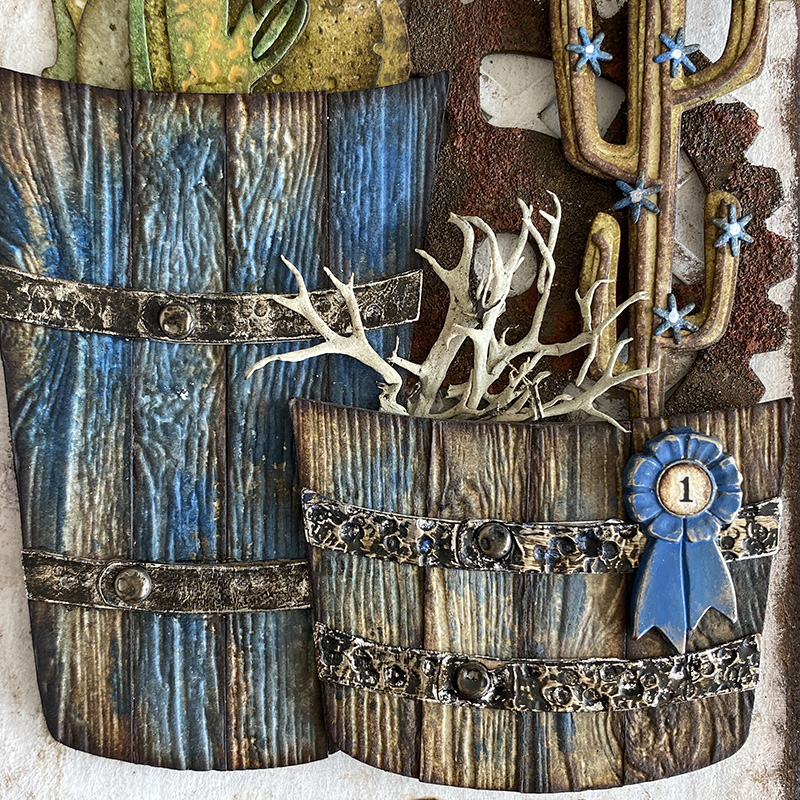
I added a prize ribbon from the idea-ology adornments set with prize ribbon distress paint added to the metal and once almost dry, I rubbed the edges with my finger. I blended in a little ground espresso distress ink with my blending tool and added a tiny circle with a number 1 from the idea-ology specimen remnant rubs set. You could add glossy accents, a clear dome sticker or a punched circle of mica.
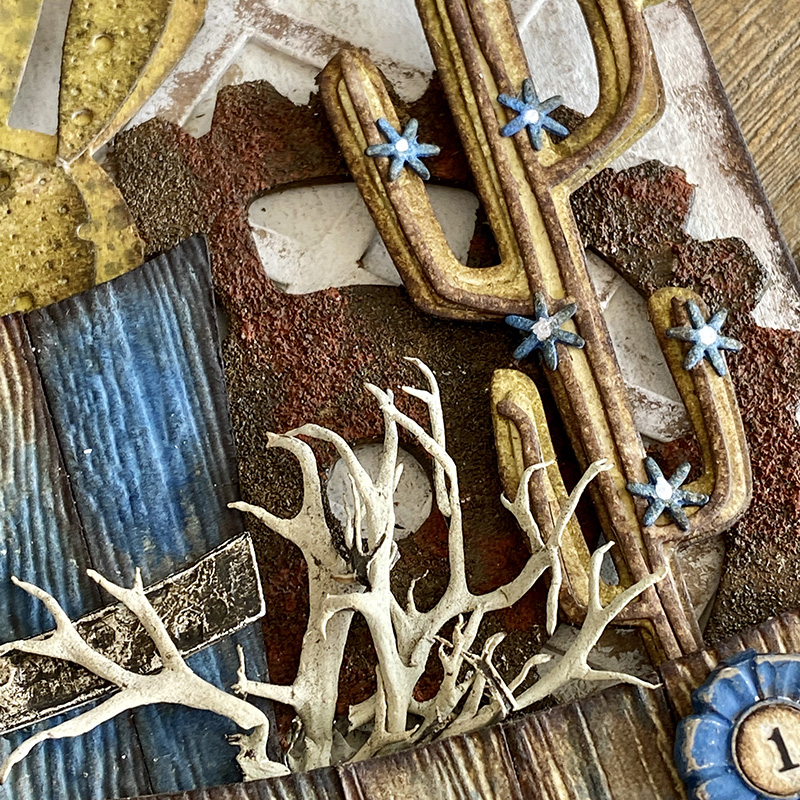
I bought this “creepy grass” when I was in Arizona, so it’s kind of cool that it went back there. I tucked it into the top of the barrel with a tiny dot of hot glue.
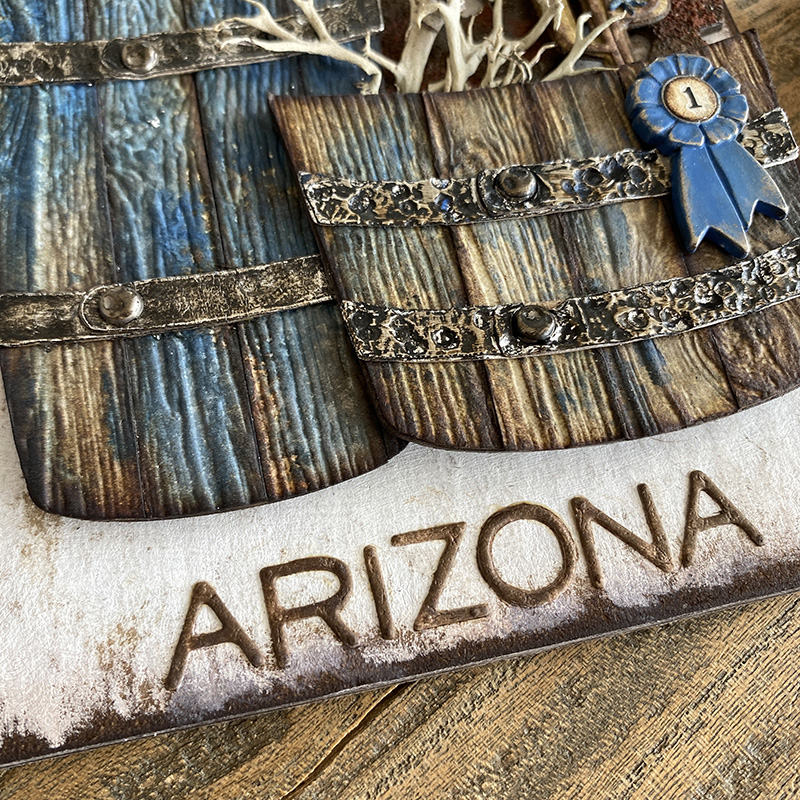
Using the alphanumeric thin die set, I die cut Arizona from distress watercolor cardstock, blended in some ground espresso distress ink and added to the bottom of the tag with distress collage medium precision bottle. I really love the browns and prize ribbon together. It truly is my favourite blue.

Thanks for stopping by. I hope you have found the walk through useful and it inspires you to make something. As always, any questions, let me know and I’ll try my best to help.
Zoe
…
affiliate links used at no cost to you


Love every details! Need to try the barrels, they look so cool! Thanks for sharing!
This is really lovely Zoe – thanks for sharing 🙂
So beautiful and detailed. I love love love this. Thank you for showing the steps.
This is fantastic, Zoe! Thanks for sharing! I love the way you distressed the tag, too!
Wonderful make with so many awesome details! So glad you shared a tutorial on this one. I love the addition of Prize Ribbon on the pots. They look amazing. I’m super messy and can’t do without my Scrubbie soap. It really is a miracle bar, and I love gifting it to fellow crafters. Lime is also my fave:)
Zoe, a fantastic tutorial, you cover every step with excellent photos. This is a prize winning art piece! I think I need the Scrubbie soap as I too have knocked over many a bottle of stuff! Blue smurf……you had me laughing out loud!
Completely scrumptious!
Alison x
I’m totally in love with this tag Zoe, so stunning!
Those barrels are so fabulous they look so real, as if you uded real old wood pieces for them.
Thank you so much for sharing your inspiration, stay safe and have a wonderful day.
ps I would have loved to see you as smurf LOL,(sorry, I couldn’t resist to say)
Zoe, your tutorials are phenomenal!!!!! So detailed and incredibly helpful for those of us who love to learn. You are the best.
Wow! Thanks for the great tutorial. Love this tag!
So much imagination to put this project together. I am eager to try some of your techniques. They are lovely.
I love all of this. Your very creative. I love that hammer. Where can I get it?
Much appreciated
Beautiful make and I can so relate to the ink incident.
So glad I started following your blog such wonderful info.
I also use the scrubby soap. It’s amazing
the barrels are seriously amazing with the blue streaks. Great project and one of my favorite from the Live!
I love this tag Zoe. Thanks for all of the details in your photos and explanations. I can really tell that you love what you do by the language you use – it sounds like you are smiling 🙂