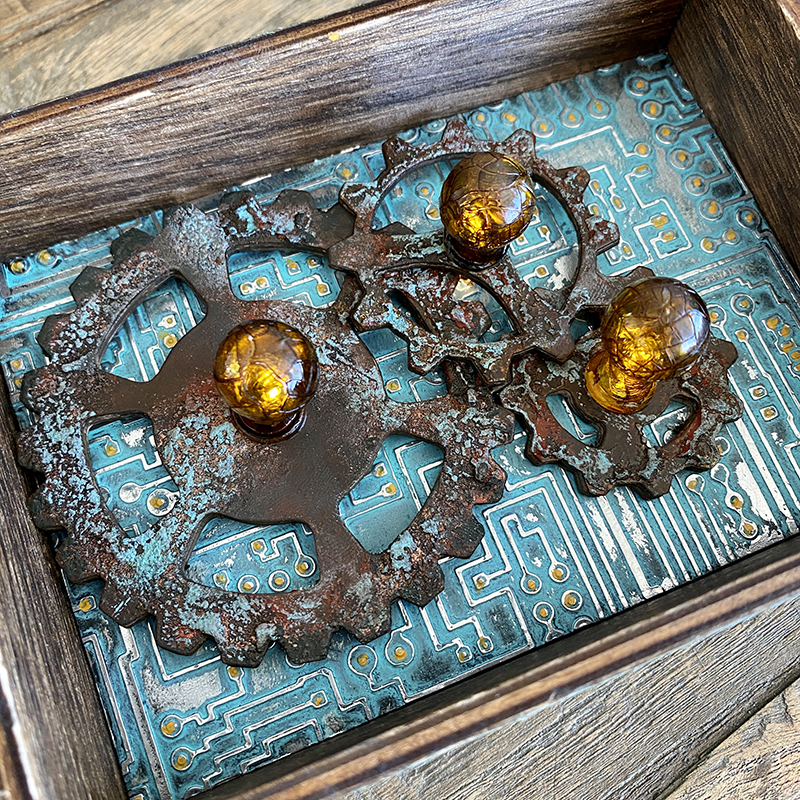
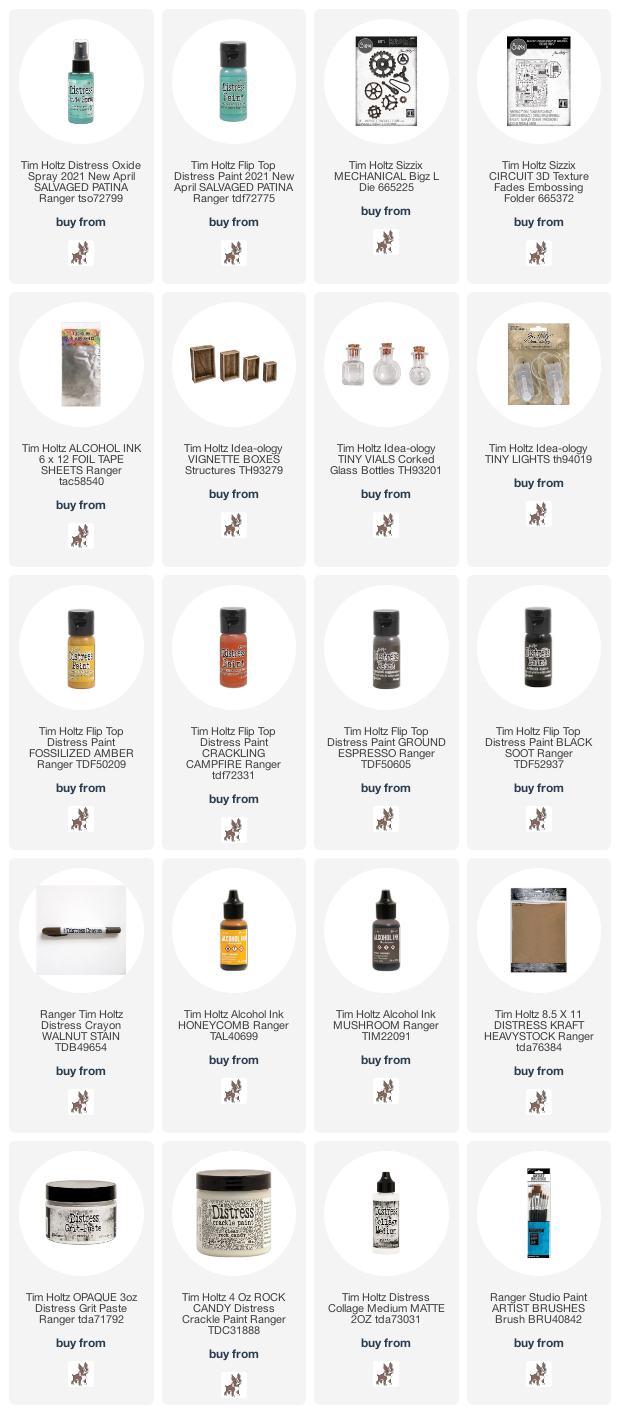
Hello friends. Hope you’re having a great week so far. I’m finally catching up on my blogging, just in time to get making again which is the part I love most. Today I’m sharing a “sample vignette” that I made for the LIVE launch of the new distress, Salvaged Patina! If you missed the launch, you can catch up over on Tim’s blog.
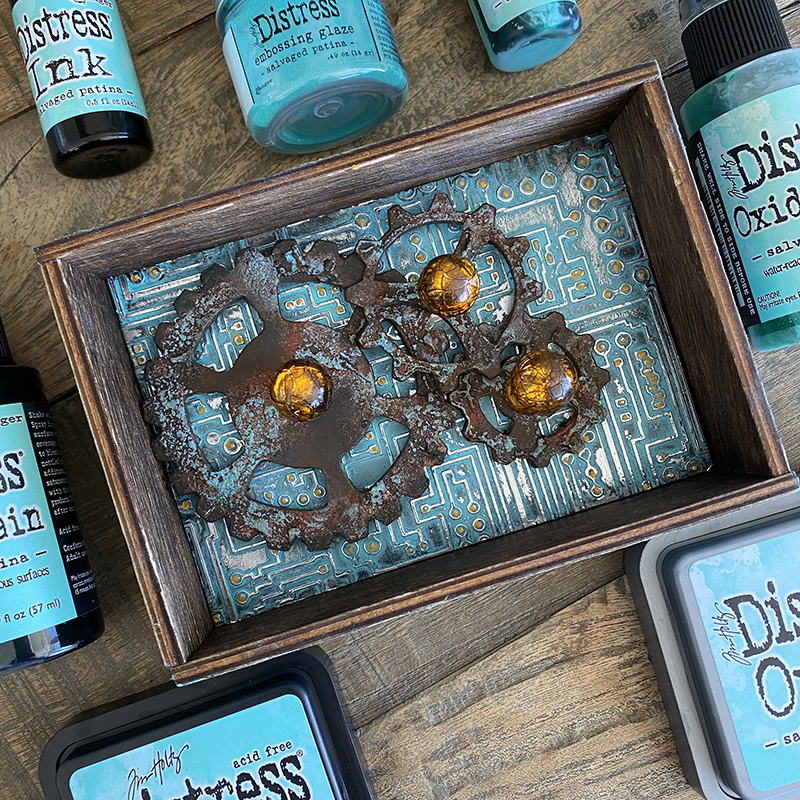
I use the term “sample vignette” because this is like a sampler for things that I wanted to try the salvaged patina distress paint on. I wanted to see how it would look as a “patina” on surfaces such as foil and over distress grit-paste and it did not disappoint!
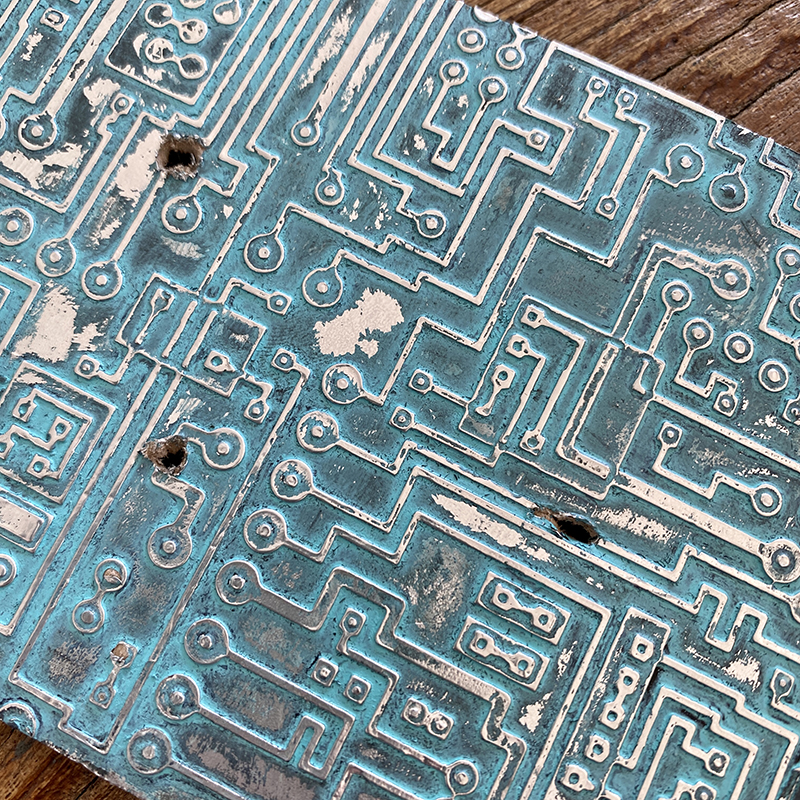
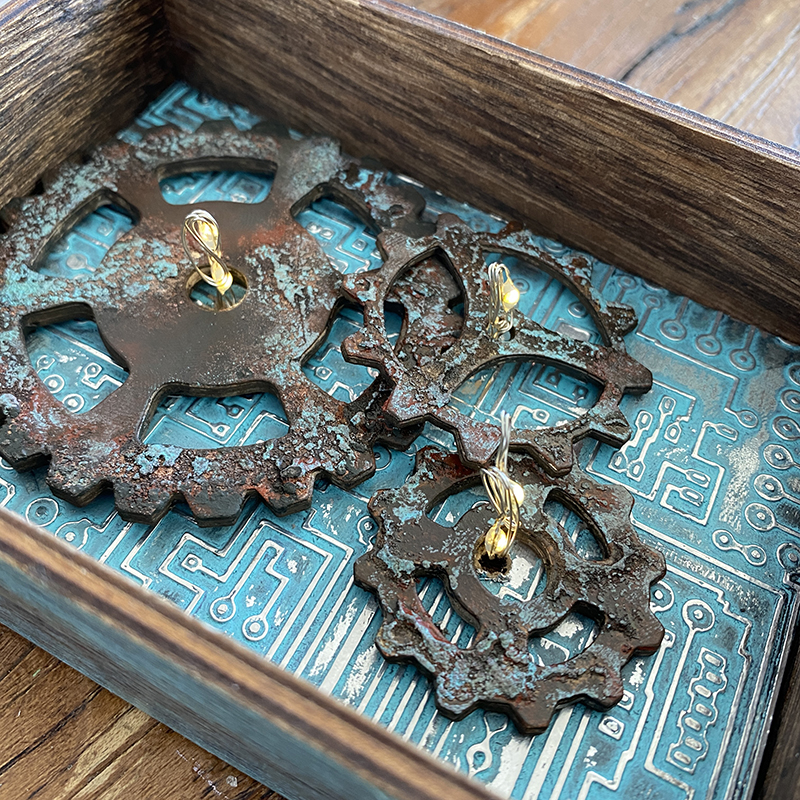
I tried out the salvaged patina distress paint on alcohol ink foil tape adhered over distress kraft heavystock, embossed with the new circuit 3D embossing folder. This backdrop worked perfectly well with the mechanical gears and was a chance to see salvaged patina in my natural environment. 😉
(salvaged patina distress paint + walnut stain distress crayon)
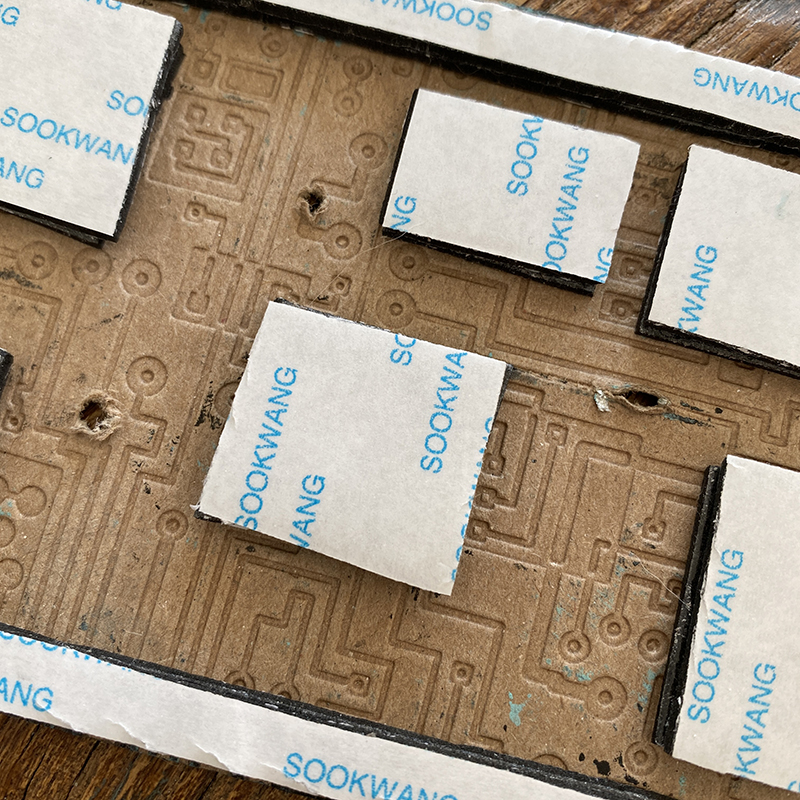
I marked where the tiny lights were going and poked holes through the background. I used adhesive backed foam to create lift to make room for the lights.
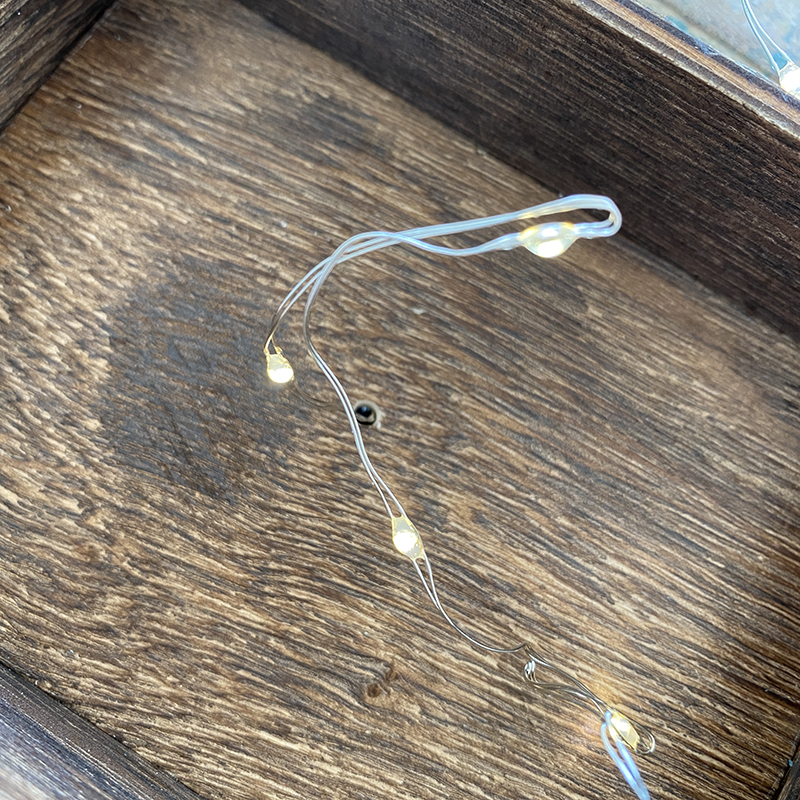
Using my dremel micro with the drill attachment, I drilled a hole in the back of the vignette box and thread the tiny lights through the back of the box and up through background.
Mount the background to the back of the vignette box with adhesive backed foam and add gears die cut from the mechanical bigz die and kraft heavystock over the tiny lights.
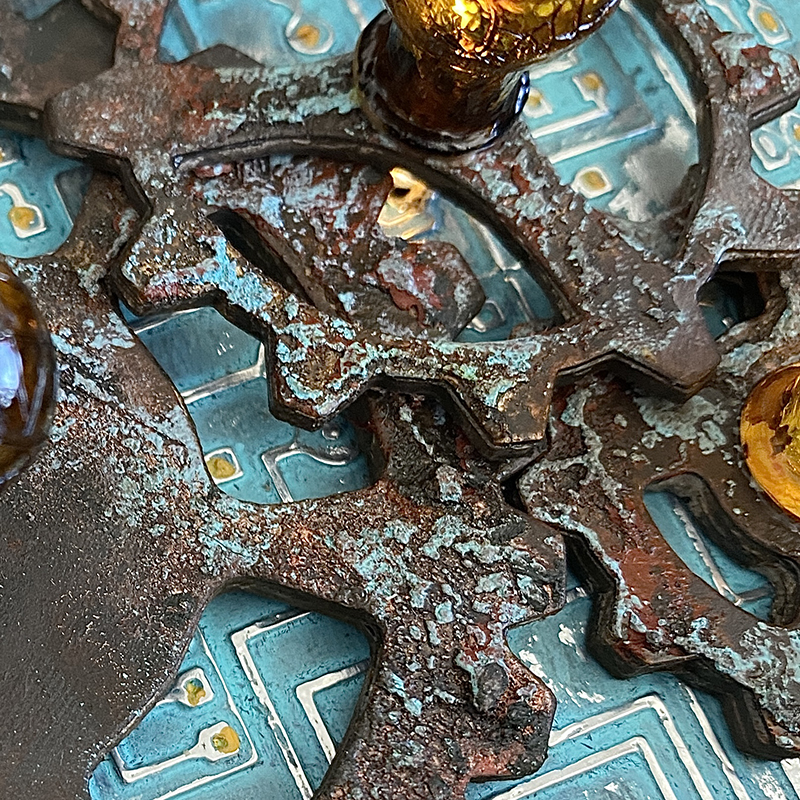
To grunge the gears up I added opaque distress grit-paste and set aside to air dry. Once dry, I painted the gears with ground espresso and black soot distress paint and again set aside to dry. Finally I rubbed crackling campfire and salvaged patina distress paint over the dried grit-paste with my finger.
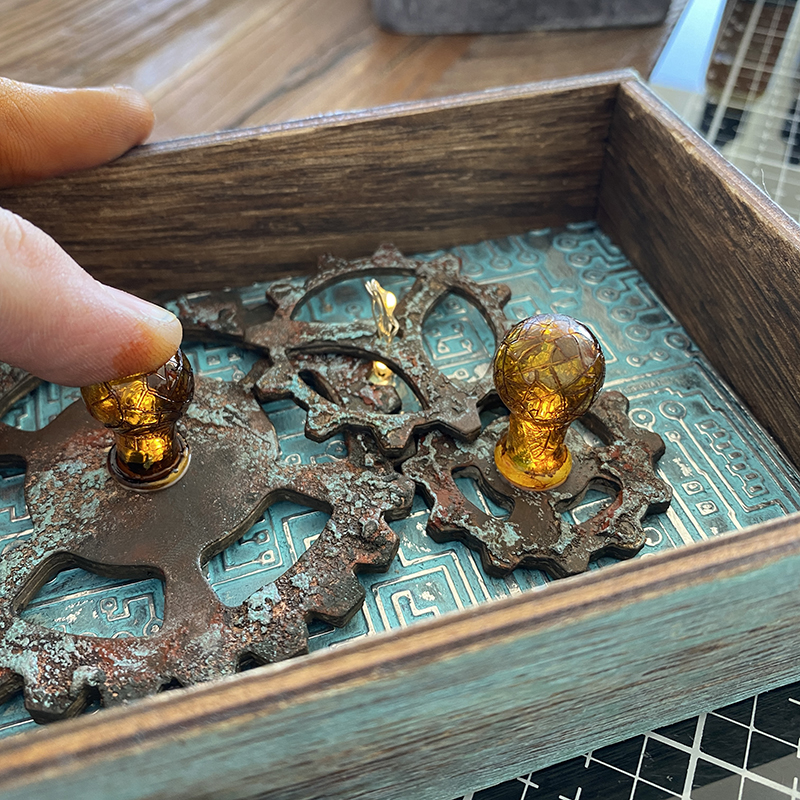
Using a similar technique to the one I just shared on my blog. You will need idea-ology corked tiny vials and will cover in 3 layers allowing to air dry between each. The layers are as follows:
1. distress collage medium matte – paint on a thin layer with a paintbrush
2. distress crackle paint clear rock candy – dip the tiny vial into the pot of distress crackle paint or paint on a thick layer with a paintbrush
3. honeycomb alcohol ink – drip the ink over the tiny vial until completely covered
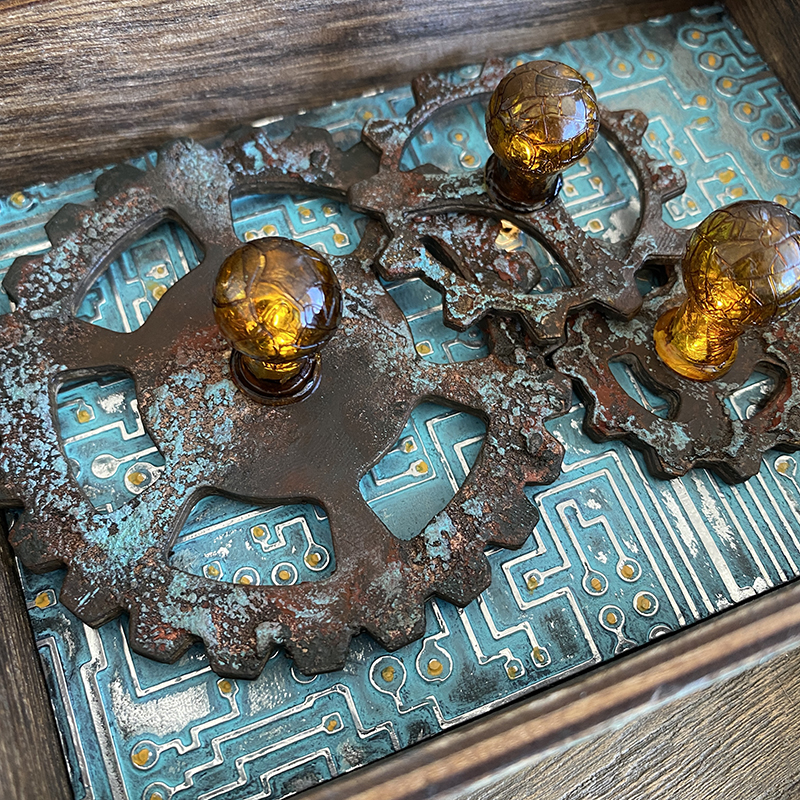
I added dots of fossilized amber distress paint onto the circuit 3D embossed background with a paintbrush.
Thanks for stopping by and let me know if you have any questions.
Zoe


Yay! You never disappoint! Thank you so much for sharing your makes. You are so inspiring and your work shows great attention to detail and precision. AWESOME!
Wow Zoe- this was such a cool make! I love the use of the foil tape over metallic card stock. The Salvaged Patina really pairs wells with it and of course Walnut Stain Crayon! Girlie, you are turning into an electrician with all the tiny lights and bulbs! I LOVE iT!!! Thanks for inspiring us all!!!!
I love that you take the time to share your process, which gives me “ah-ha” moments and helps me familiarize myself with some of the products. I confuse myself all the time with what product gives specific results. I’m getting there though. 🙂
The use of those vials really surprised me. How clever!
THANK YOU!
Thank you for sharing. I love seeing your creations.
I am really enjoying your process. I am learning so much. I just started in the field of making cards and I have so much to learn. Thank you for sharing and I can’t wait for the next one.
Rhonda
Amazing! Anyone looking at this would swear that these are metal gears. Love all of Tim Holtz products but sure am extremely thankful for all of your outstanding projects to show us what you can actually do with these products. Loving all of them! And thanks very much for all the inspirations as they truly make a HUGE difference.
My oh my, Zoe your work is always outstanding!
My hubby was just watching over my shoulder when I was reading the part how you made the gears, he wouldn’t believe that they were a die cut. I showed him several other makes from you and said you where a awesome maker!
Thank you so much for sharing, for the tutorial, stay safe and have a wonderful weekend.
Wow!
(There are just too many words to try to describe how amazingly creatively artistical you are, also I don’t know if artistical is a word so we’ll just keep it at….WOW!)