Hello everyone. Happy whatever day it is… 😉
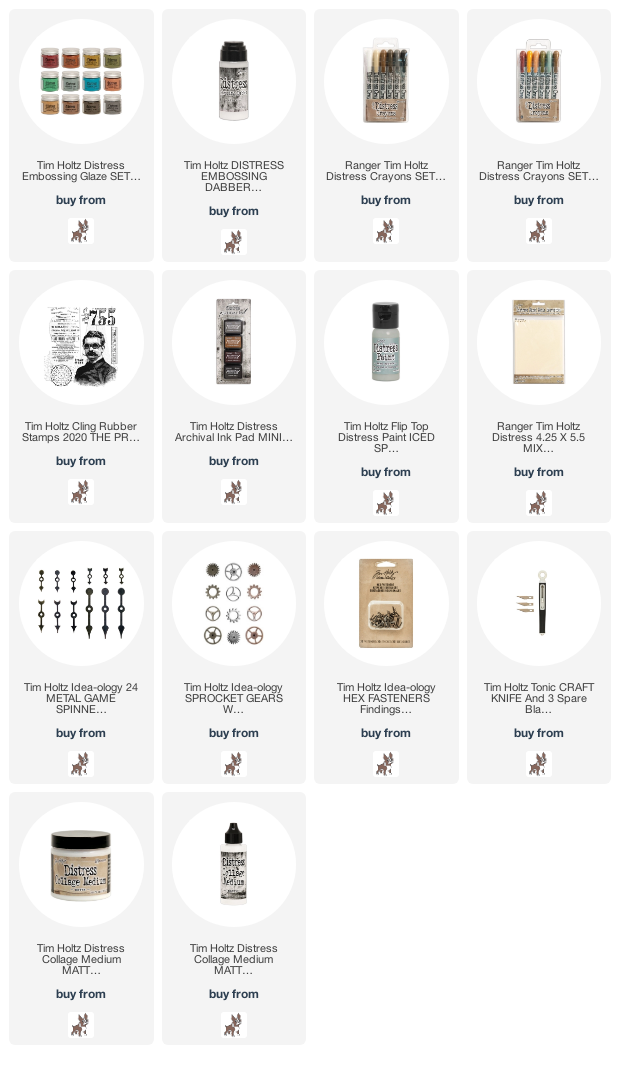
I know I’m not alone in my obsession with the new Tim Holtz distress embossing glazes. The only problem is trying to decide which colour to use. I created a swatch spinner, because it’s nice to have some of life’s difficult decisions made for you! 😉
Tim demoed a distress crayon and distress embossing glaze technique a few Saturdays ago and it blew my socks off. If you missed it, you can see it on Tim Holtz blog. This was the initial inspiration for my swatch spinner.
If you’d like to make one, they are super easy and take no time at all, so gather your supplies and let’s begin…
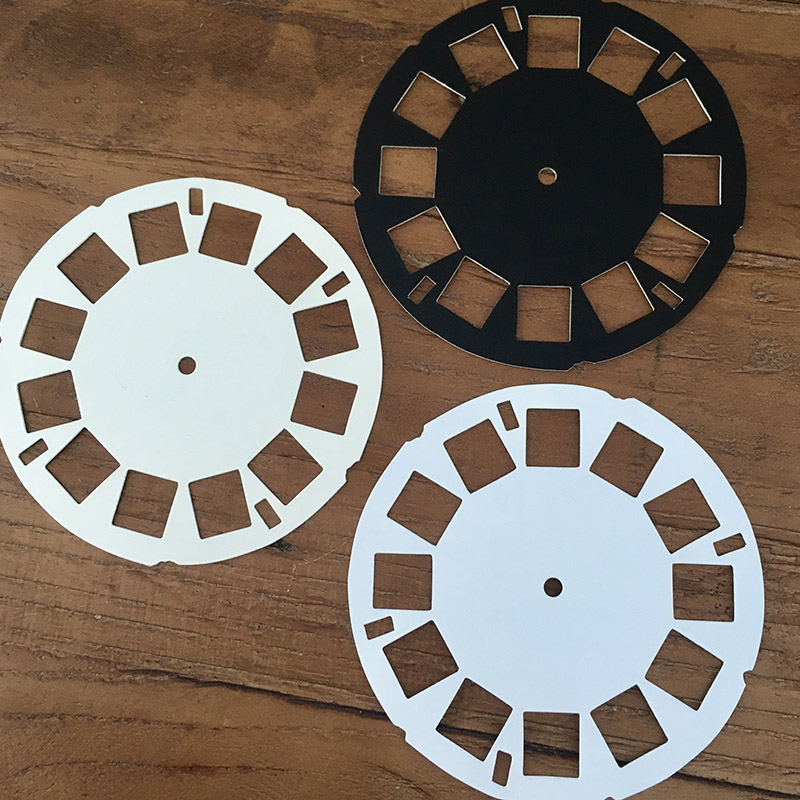
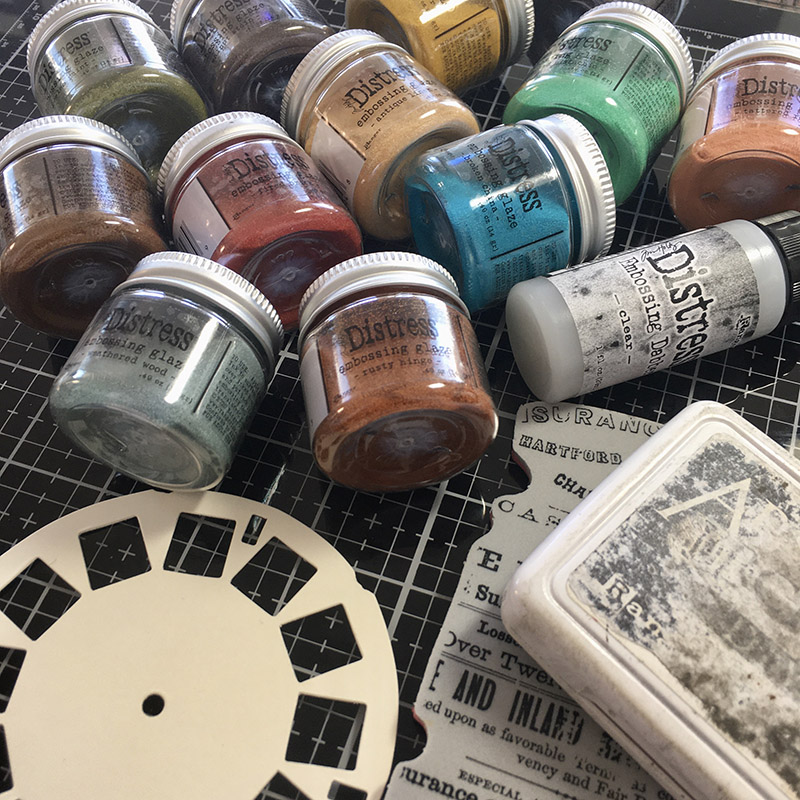
Die cut 3 picture wheels using the bigz picture wheel die. Cut one from distress mixed media heavystock, one from copier paper – this will be a disposable stencil and needs to be thin, and one from chipboard – this will be the base so you want it to be sturdy.

Taking the heavystock picture wheel die cut, stamp a background image in distress archival ink and once dry, use the distress crayon and distress embossing glaze technique shown by Tim. You will need to choose a glaze, but this will be the last time you’ll have to make this difficult decision. 😉
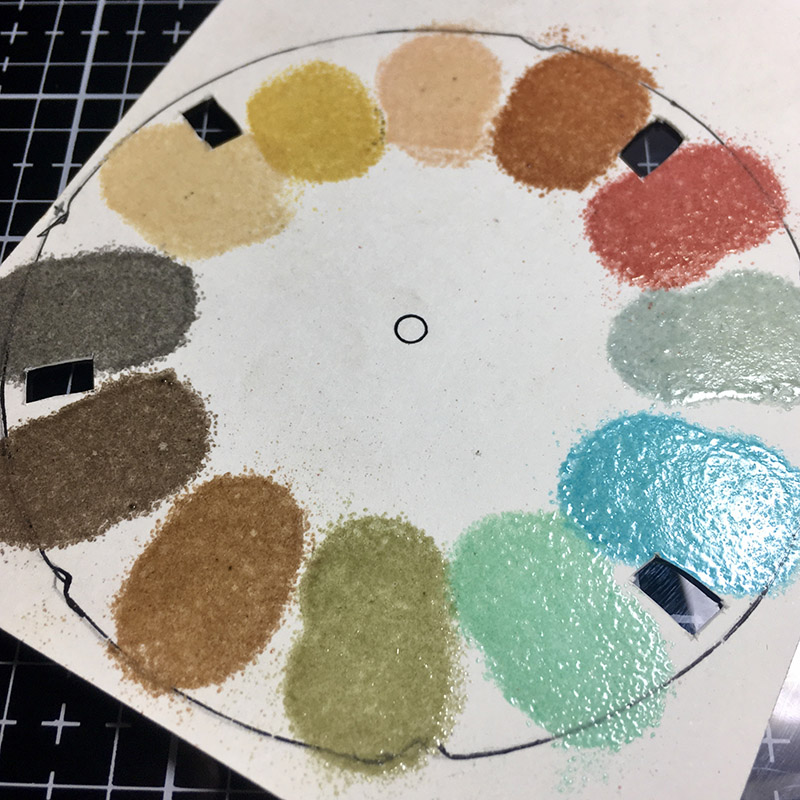
Take a piece of heavystock and trace around the outer edge of the picture wheel. Lay the stencil (thin paper picture wheel) over the top of the heavystock and using a distress embossing dabber, dab embossing ink through the first picture wheel square. Remove the picture wheel stencil and set it aside, add a little more embossing ink to the square to make sure you have good glaze coverage under each square. Next sprinkle the embossing inked area with distress embossing glaze and heat set. Place the template back over the top and repeat for all 12 squares, making sure to heat set one at a time so the glazes don’t mix. Using the new tonic craft knife, I cut away the tiny rectangles that wouldn’t be glazed and cut around the outline.
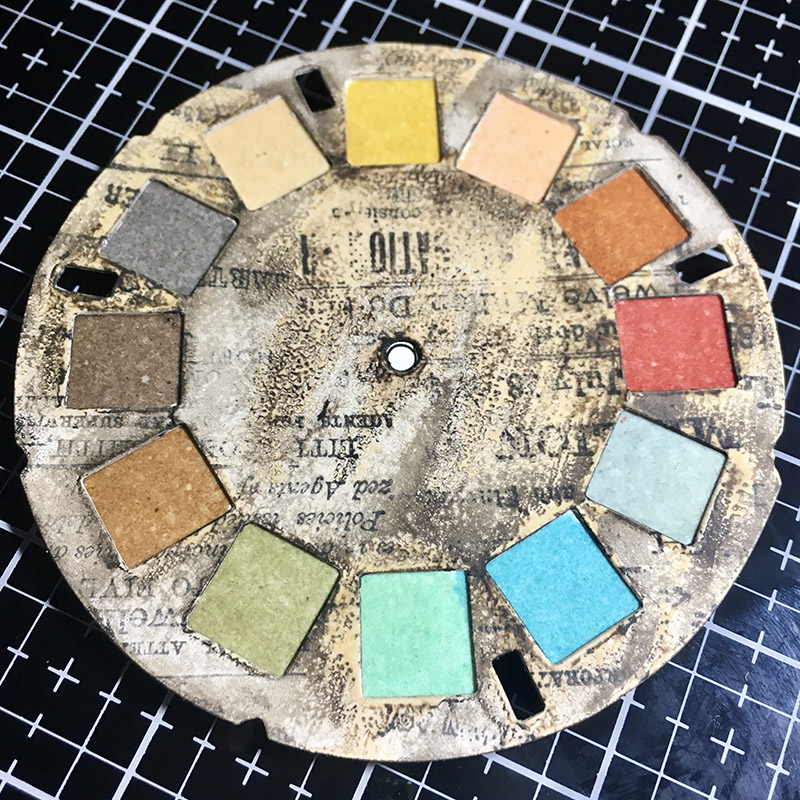
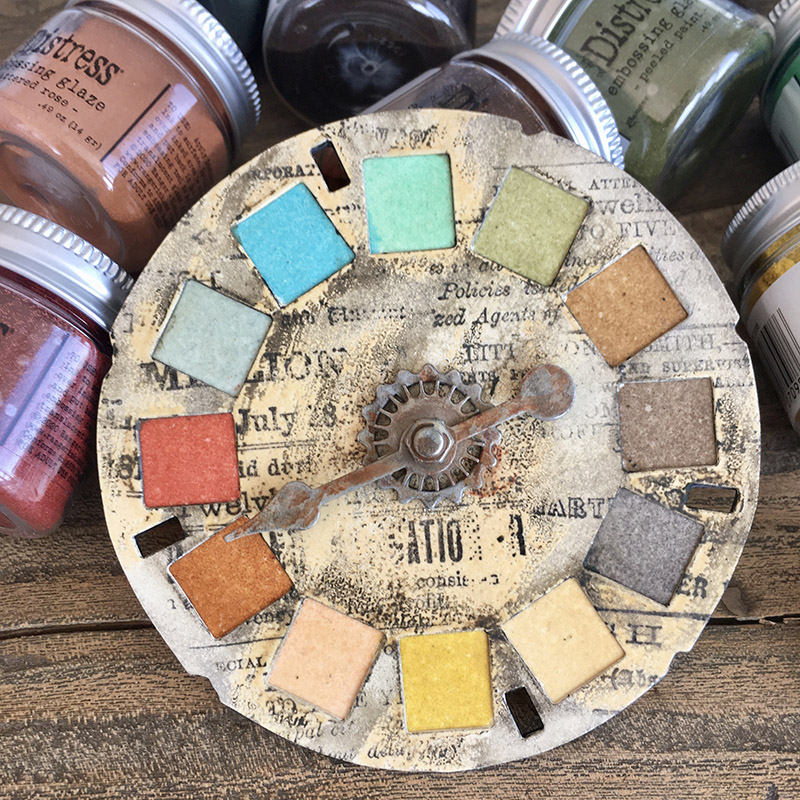
Once you have completed your base, mount the stamped picture wheel over the top and secure using distress collage medium. Next mount both on to the thick picture wheel to make it nice and sturdy. Poke a hole in the middle ready to add the spinner.

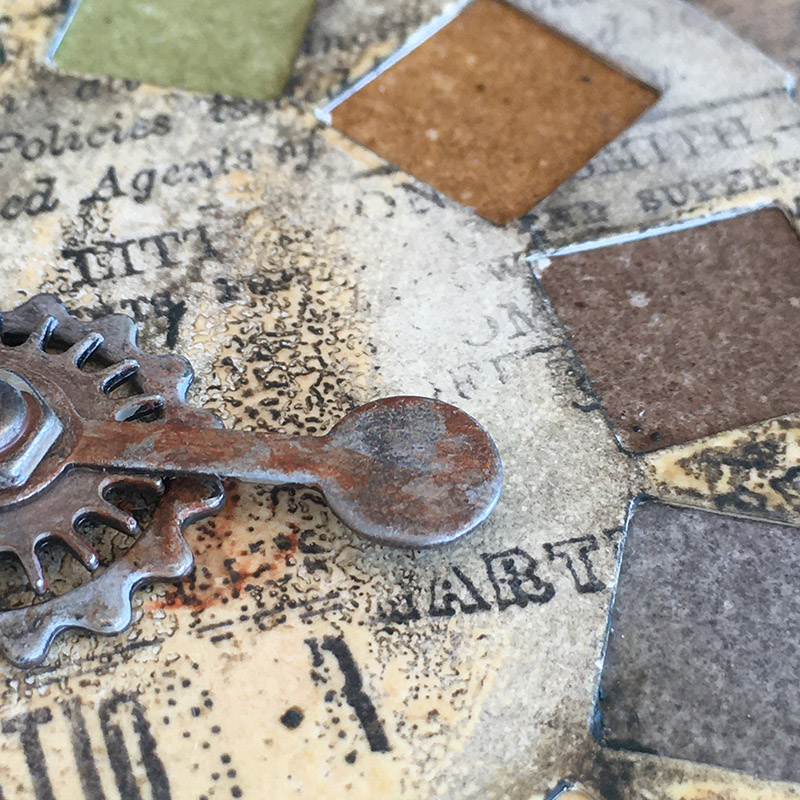
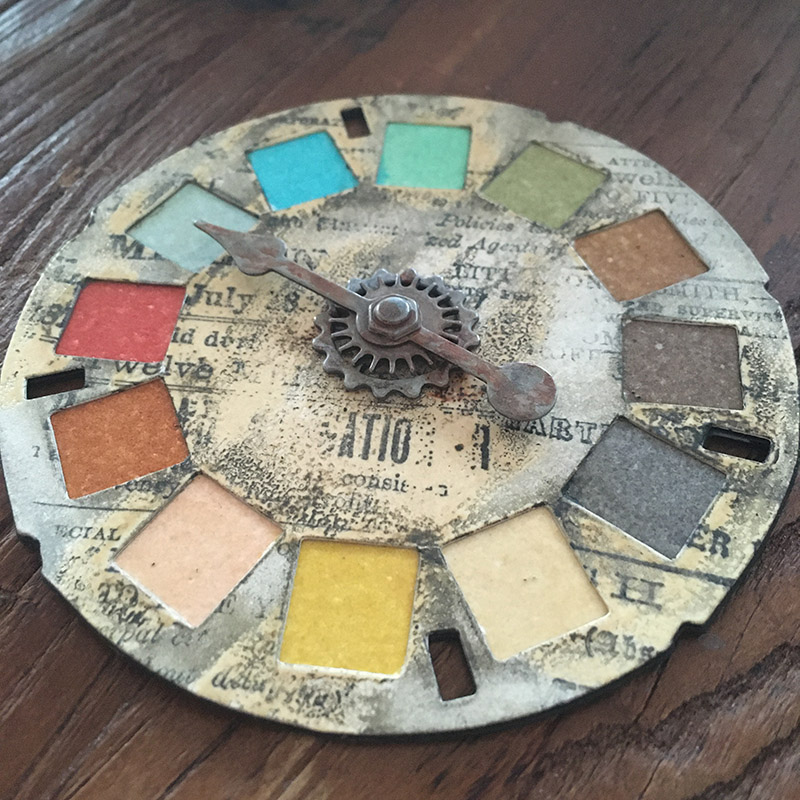
I added a couple of gears from the Tim Holtz Assemblage range. They give height to the game spinner, allowing it to spin freely. Add iced spruce distress paint to the gears and once dry add rusty hinge and walnut stain distress crayons with a little water and a paintbrush. Once dry, add to the center of the wheel with distress collage medium.
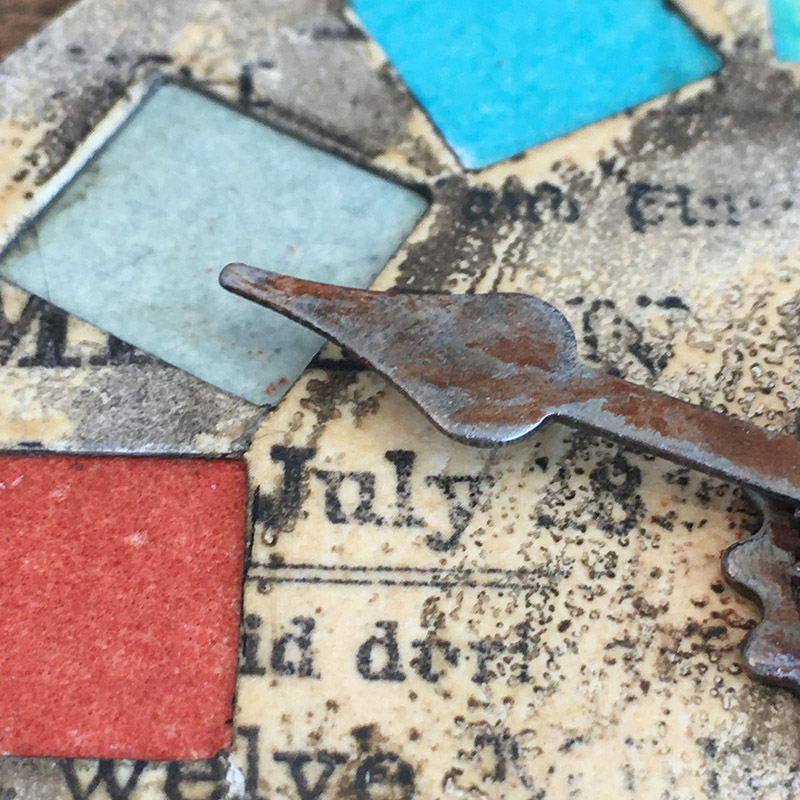
Finally, add an the idea-ology game spinner with a fastener, (I used a hex fastener).
Check out that grungy goodness the distress crayon and distress embossing glaze technique creates. It’s just so yummy. I love this technique so much. Thanks Tim!
I hope you’ll make one of these swatch spinners for yourself. You could make one for your other favourite distress products or with your kids to decide on indoor activities or snacks. I could definitely use one to decide which Easter candy to eat next! I need an Easter candy intervention!! 😉
Thanks for stopping by and please take care and stay well.
Zoe


Brilliant!!!! Omg! I seriously love it! Gonna have to make one of my own…thanks so much for always inspiring, Zoe! ♥️♥️♥️♥️
Wow. What a great idea. Thanks for sharing!
super fun Zoe! Love the wheel of color!
Love this idea Zoe! Thanks so much for sharing.
LOL…Love it, very cool idea, will be easy from now on, one less decision to have to make…LOL.
When I saw your post title I thought what a good idea. But I was thinking that you used a piece of acetate and embossed each glaze so you could see what each one looked like. Yours is more fun. I love your idea.
WOW, I love it!!!