‘Christmas’ Category

  1. Mountain Pass

    17th November, 2021 by iGirlZoe

    igirlzoe: tim holtz sizzix mountain top tall pines paper village 2 thinlits dies

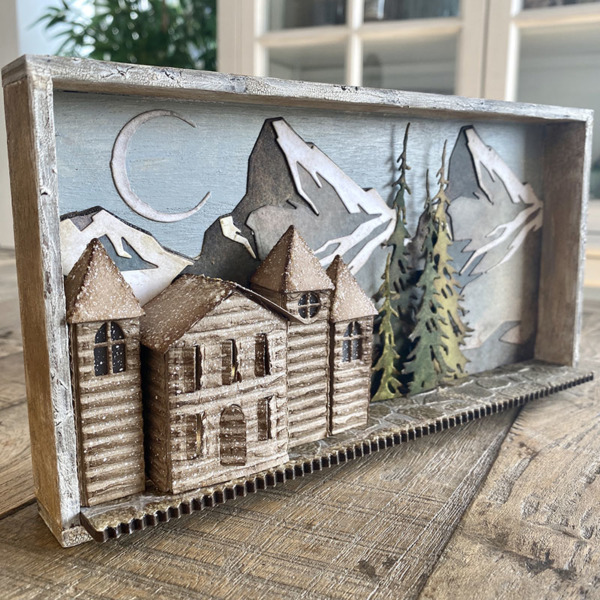
    Hello friends and welcome to Day 3 of my week of Christmas makes. Today we are up in the mountains with the tall pine trees and charming chalets with the help of these amazing dies that Tim Holtz designed for his Sizzix holiday release. You can see the launch replay and all of the inspiration makes over on Tim’s blog.
    igirlzoe: tim holtz sizzix mountain top tall pines paper village 2 thinlits dies
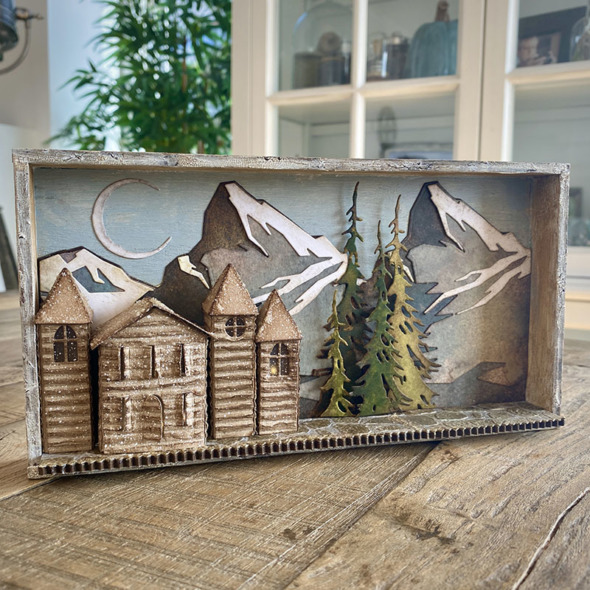
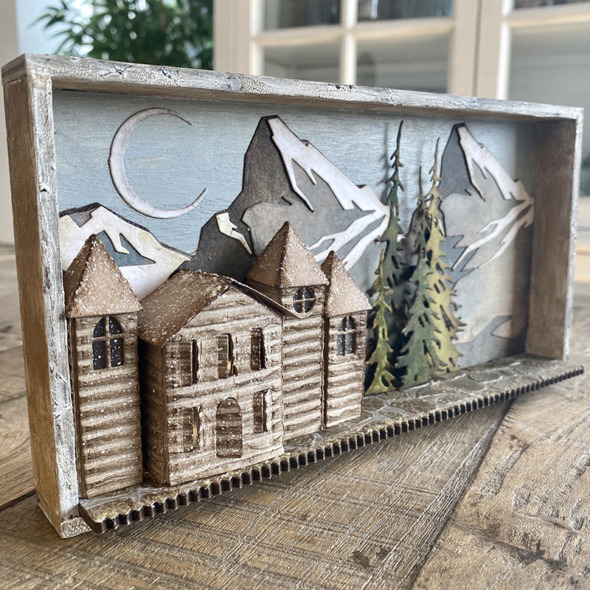
    The mountain top and tall pines dies made me think of winters spent in the snow capped Swiss mountains. We would drive up nearly every weekend and had the most incredible views. I decided to create a scene inspired by those memories. I really loved making this piece, here’s how…
    igirlzoe: tim holtz sizzix mountain top tall pines paper village 2 thinlits dies
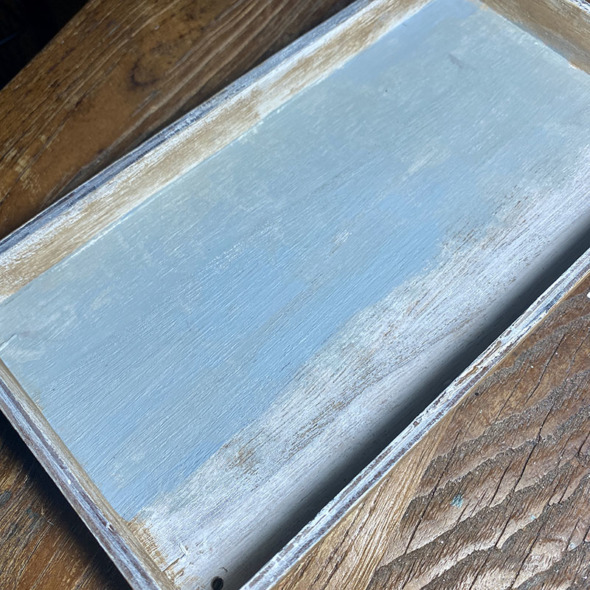
    I took a small idea-ology vignette tray and covered it with a thin layer of gesso. Once dry I covered the inside back panel with speckled egg distress paint. I dry brushed the sides, inside and out with vintage photo distress paint. I covered the outside and front edges with distress crackle texture paste and once dry, rubbed distress crayon into the cracks.
    igirlzoe: tim holtz sizzix mountain top tall pines paper village 2 thinlits dies
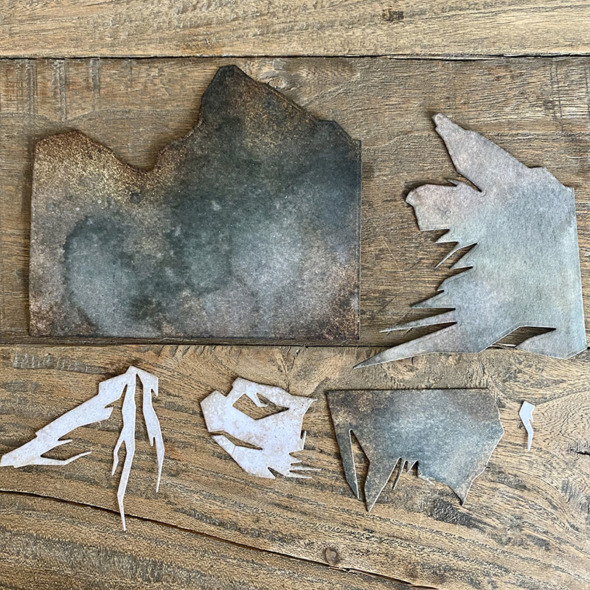
    I die cut the pieces from the mountain top thinlits die set from distress watercolor cardstock. I sprayed the pieces with hickory smoke and frayed burlap distress spray and blended walnut stain distress ink into the edges and then assembled using distress collage medium.
    igirlzoe: tim holtz sizzix mountain top tall pines paper village 2 thinlits dies
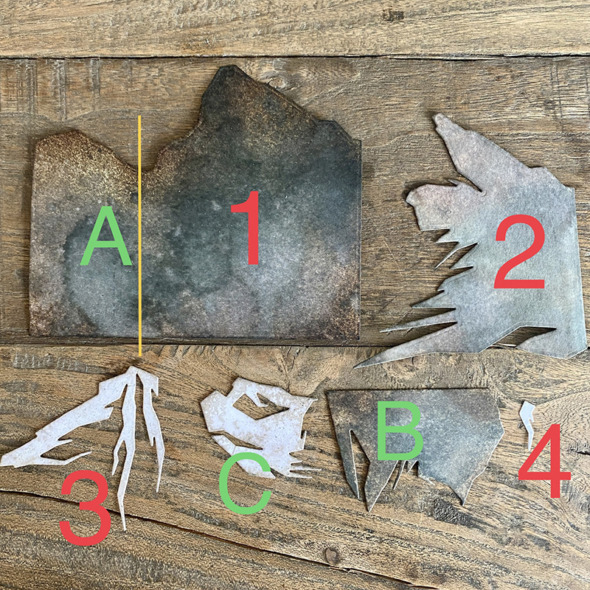
    I posted this in the Tim Holtz Addicts group to help a couple of Addicts with their first time builds. In case it helps you… Working up from the base A and 1.
    igirlzoe: tim holtz sizzix mountain top tall pines paper village 2 thinlits dies
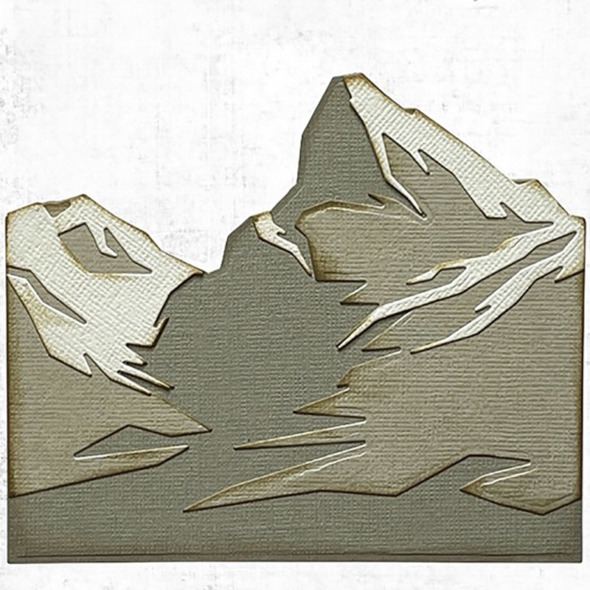
    This is the finished puzzle taken from the packaging because I didn’t have a photo of the assembled piece!
    igirlzoe: tim holtz sizzix mountain top tall pines paper village 2 thinlits dies
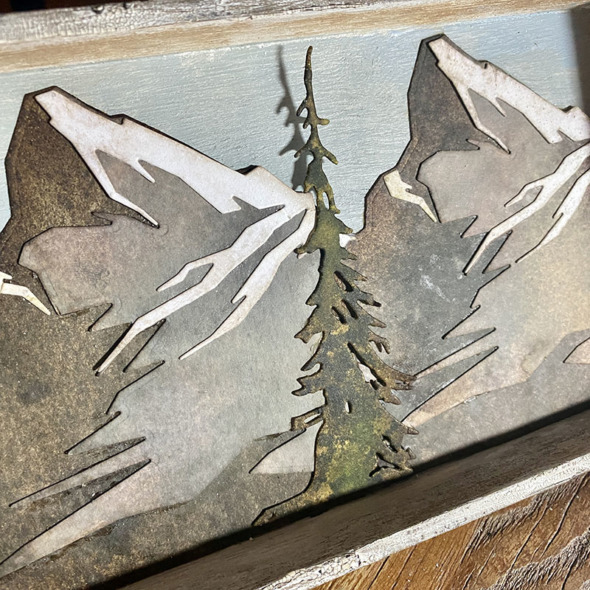
    Once you have assembled your mountains, add to the back of the vignette tray with distress collage medium.
    igirlzoe: tim holtz sizzix mountain top tall pines paper village 2 thinlits dies
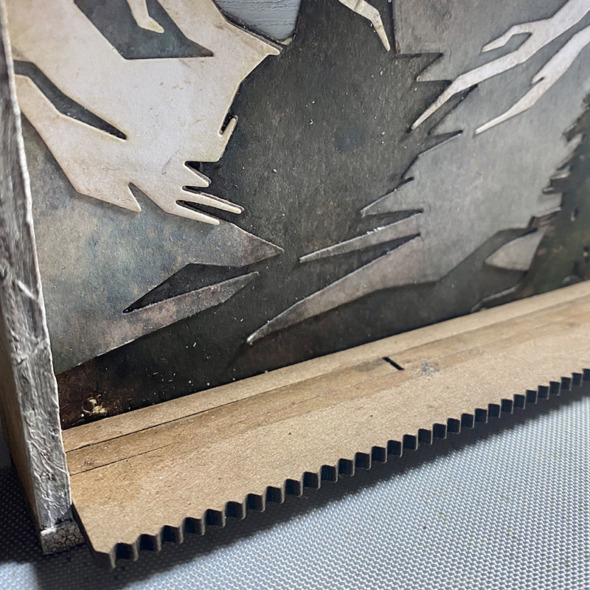
    To extend the base of the vignette tray I added thickboard etcetera trims. I used the thin trims from the bat web trims set and a wider trim at the front from the pinking trims set. Using distress collage medium to attach them. It doesn’t have to be pretty, you’re going to cover them.
    igirlzoe: tim holtz sizzix mountain top tall pines paper village 2 thinlits dies
    I used the new decorative trims dies to cut pieces of distress watercolor cardstock. In order to get the correct depth I hung the decorative die straight cutting edge over the edge of my cutting plates so that it wouldn’t cut and then used my paper trimmer to cut that edge to fit the vignette tray. This is a hack and probably not advised by Sizzix… but look at me going all rogue! LOL

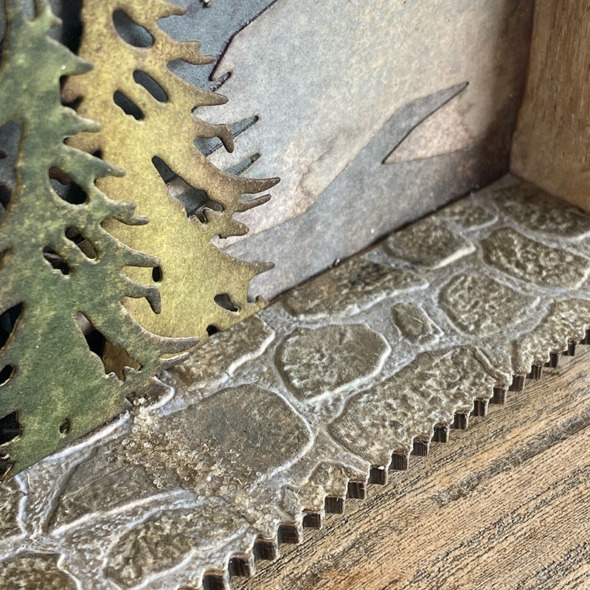
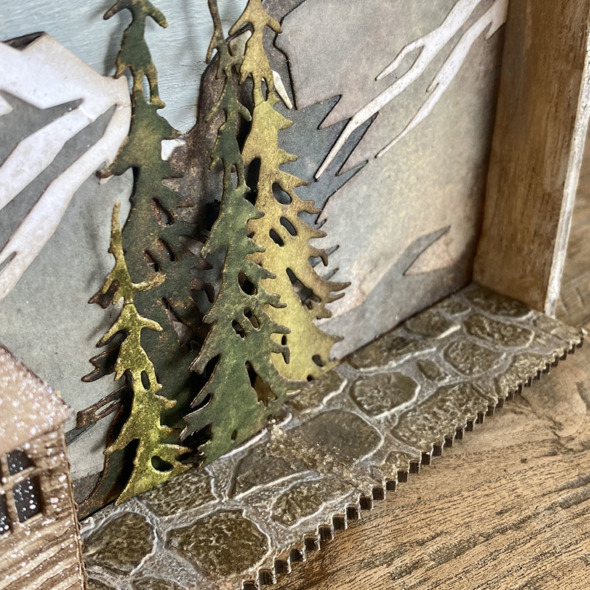
    I ran the strip through the mini 3D cobblestone embossing folder. I had to do one end at a time but it worked. I lined the stones up the best I could. You can see the join line just in front of the pine tree.
    igirlzoe: tim holtz sizzix mountain top tall pines paper village 2 thinlits dies
    I meant to hide the join underneath the paper village buildings! I realised after I had glued the first strip down so I used a little snowfall grit-paste to cover the join and rubbed in a little distress crayon to blend. It worked pretty well but if I had to do it again, I would put the join under the buildings! Also, look at the detail of that cobblestone embossing folder! It’s AMAZING!!
    igirlzoe: tim holtz sizzix mountain top tall pines paper village 2 thinlits dies
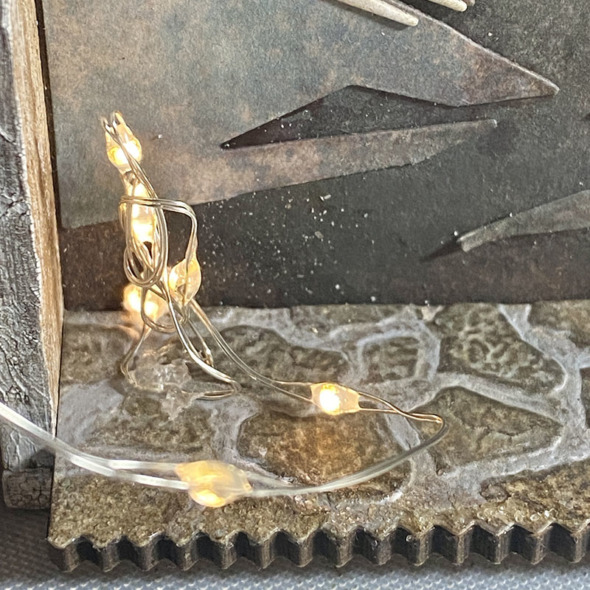
    I drilled a hole in one end of the vignette tray trim to thread tiny lights through, securing the battery pack at the back of the tray. I gathered the lights up into a strip (as pictured) and then ran them under where the next building would be and made another one. This helps to light up each structure.

    I love the decorative trim dies because you get such a perfect clean edge when mounting die cut paper over the thickboard etcetera trims.Total game changer as I used to trace around them, fussy cut, mount and then sand between each point! THANK YOU TIM!!
    igirlzoe: tim holtz sizzix mountain top tall pines paper village 2 thinlits dies
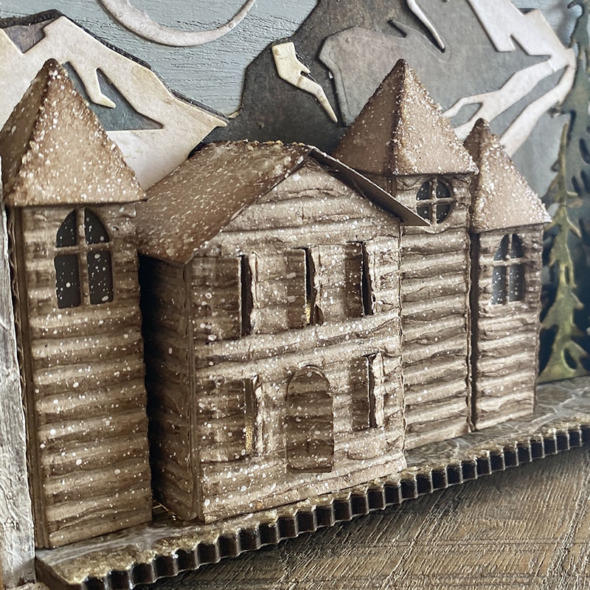
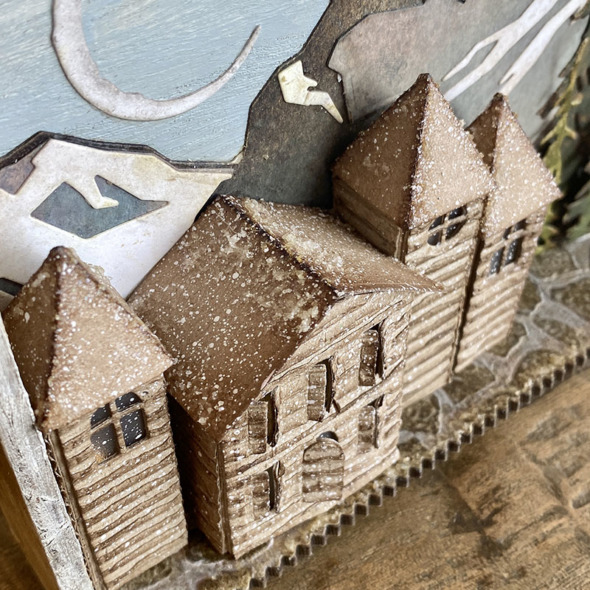
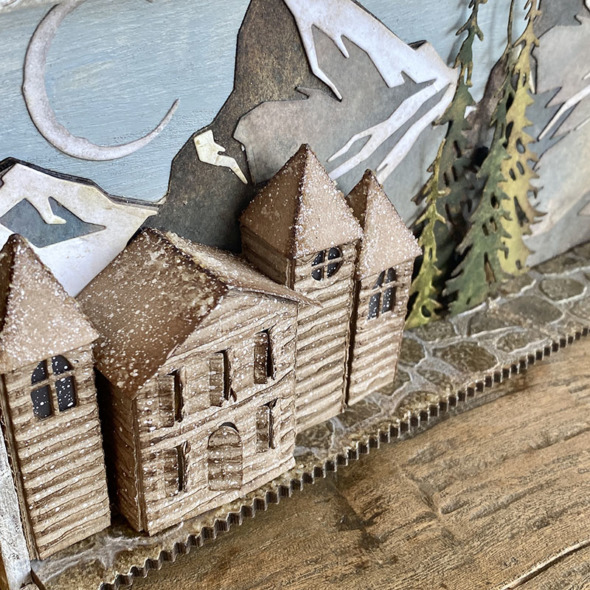
    I used the paper village #2 thinlits die set to create these little faux Swiss chalets. I built each structure out of distress kraft heavystock and then used corrugated cardstock for the sidings. Oh my gosh these windows that open slightly are the cutest! They really look like the shutters on Swiss chalets. LOVE LOVE LOVE.
    igirlzoe: tim holtz sizzix mountain top tall pines paper village 2 thinlits dies
    I added a little snowfall grit-paste to the roofs and splatted with white gesso using a splatter brush.
    igirlzoe: tim holtz sizzix mountain top tall pines paper village 2 thinlits dies
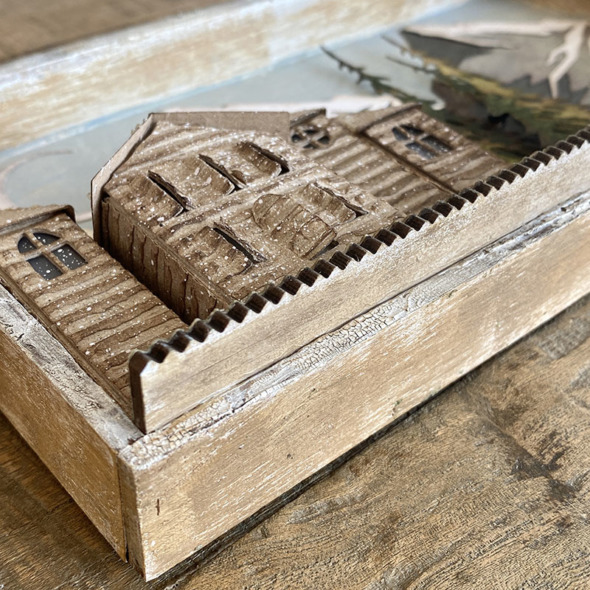
    This is what the underside of the vignette tray looks like with the extended trim platform. You can see the crackle texture paste that I added to the front trim of the vignette tray. You can decorate the underside of the trim, but I didn’t for this.
    igirlzoe: tim holtz sizzix mountain top tall pines paper village 2 thinlits dies
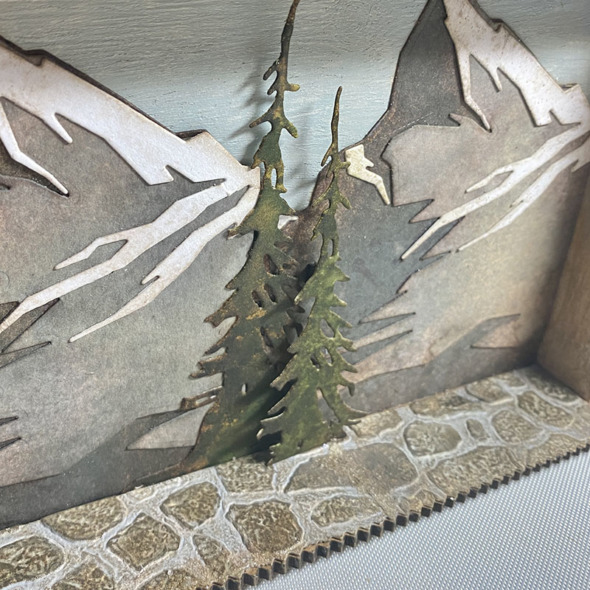
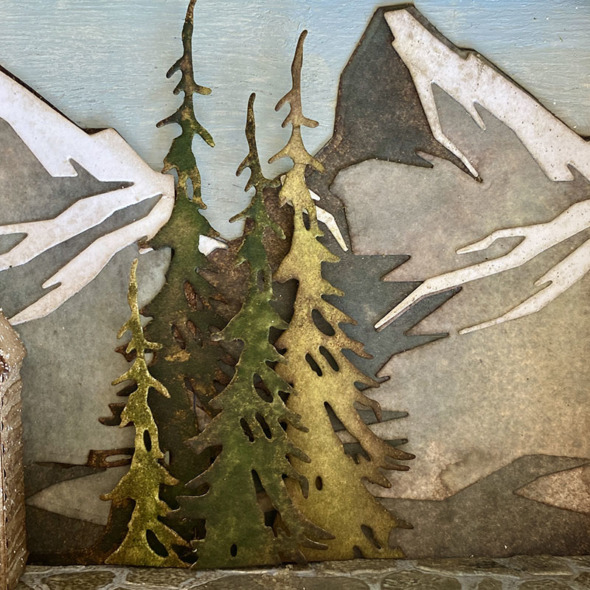
    I die cut trees with the tall pines thinlits die set and sprayed with peeled paint and rustic wilderness distress spray. I used adhesive foam to mount the trees.
    igirlzoe: tim holtz sizzix mountain top tall pines paper village 2 thinlits dies
    This conveniently hides the mountain join and gives some perspective by mounting the smaller trees at the front.
    igirlzoe: tim holtz sizzix mountain top tall pines paper village 2 thinlits dies
    I added the moon from the vault series halloween 2021 thinlits die set. I LOVE this moon and it was perfectly sized for this scene.

    igirlzoe: tim holtz sizzix mountain top tall pines paper village 2 thinlits dies
    igirlzoe: tim holtz sizzix mountain top tall pines paper village 2 thinlits dies
    Thanks for stopping by.

    Zoe


    affiliate links used at no cost to you


  2. Oh Christmas Tree… Stand!

    16th November, 2021 by iGirlZoe

    igirlzoe: tim holtz idea-ology christmas 2021 trees stand

    Hello friends! Welcome to Day 2 of my week of Christmas makes. If you read yesterdays blog post (thank you) and you’ll see there’s a slight change of plans. The cute snowman will be back later in the week because I want to add a little something something before posting. So today it’s all about Christmas trees. I was so excited when Tim shared the new idea-ology tree stands. The entire product range this year is incredible, but the tree stands stole my Christmas tree loving heart. You can catch up on all the details of the Christmas idea-ology product launch and inspiration makes over on Tim’s blog.

    igirlzoe: tim holtz idea-ology christmas 2021 trees stand
    I love Christmas trees and have some wonderful, fond and fun memories of them. Baling my first real tree when I moved to Switzerland and strapping it to the top of our car and driving up the snowy mountain while playing driving home for Christmas. Sitting in front of the tree with a big cup of hot cocoa looking at all the ornaments and lights. I just love the precious memories that Tim’s idea-ology envokes and the new idea-ology tree stands just stole the show for me and it was top of my list to make with, here’s what I did…

    igirlzoe: tim holtz idea-ology christmas 2021 trees stand
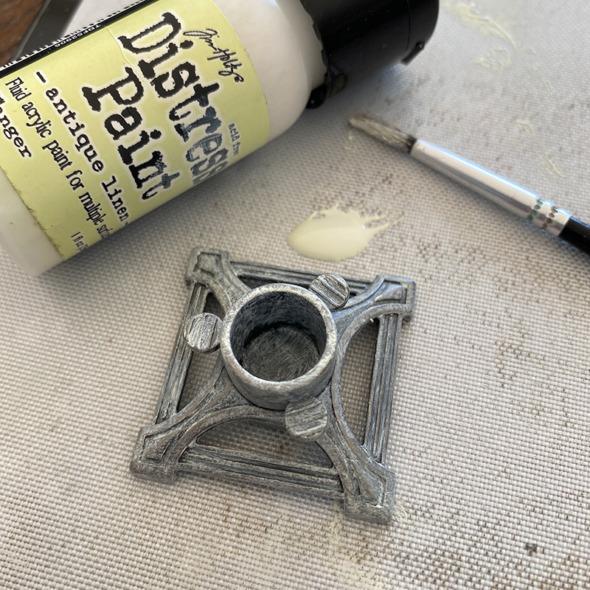
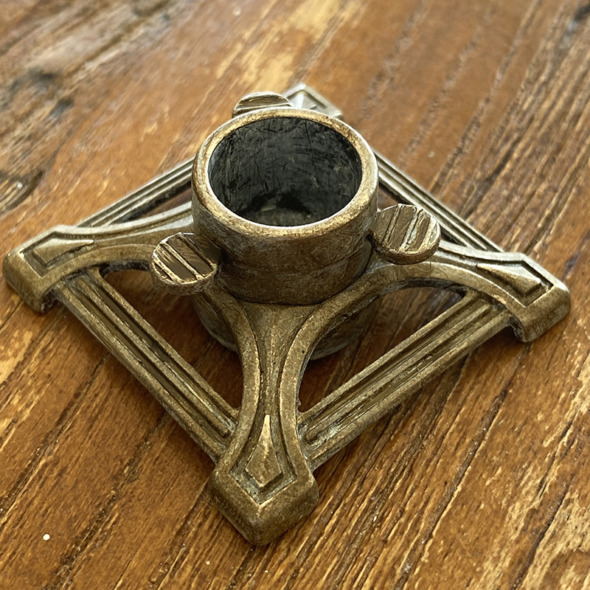
    Using a paintbrush, I picked up antique linen distress paint from the non stick mat portion of my glass media mat and brushed onto the idea-0logy tree stand.

    Please don’t get excited about my craft mat, I love it, use it and it’s stained. Relax, you’ll be just fine and there’s a replacement mat for your glass media mat linked at the end of the post! 😉

    igirlzoe: tim holtz idea-ology christmas 2021 trees stand
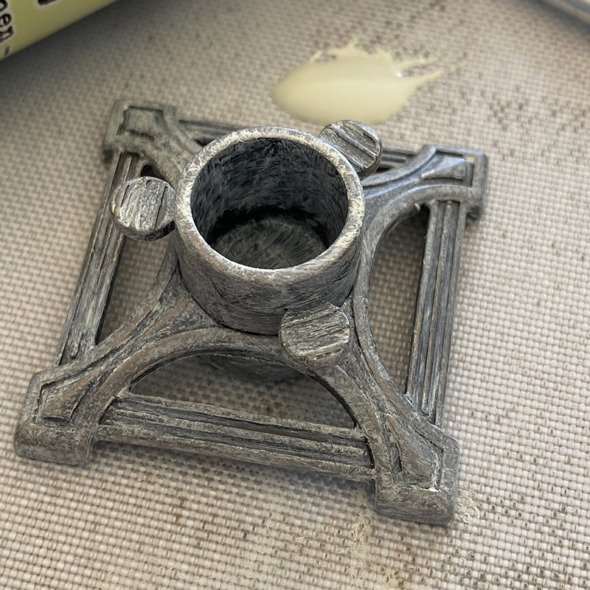
    Anyway… you should be looking at the AWESOME idea-ology tree stand. It even has the little tension screws the real stands have! Tim’s just rocks the details when he designs, it blows me away!

    igirlzoe: tim holtz idea-ology christmas 2021 trees stand
    Once the distress paint was dry, I rubbed in walnut stain distress crayon with my finger. When I was ready to put the woodland tree into the stand, I removed the wood stand the tree comes in, added hot glue to the center of the tree stand and placed the tree wire in and held in place until it cooled, it doesn’t take long.

    igirlzoe: tim holtz idea-ology christmas 2021 trees stand
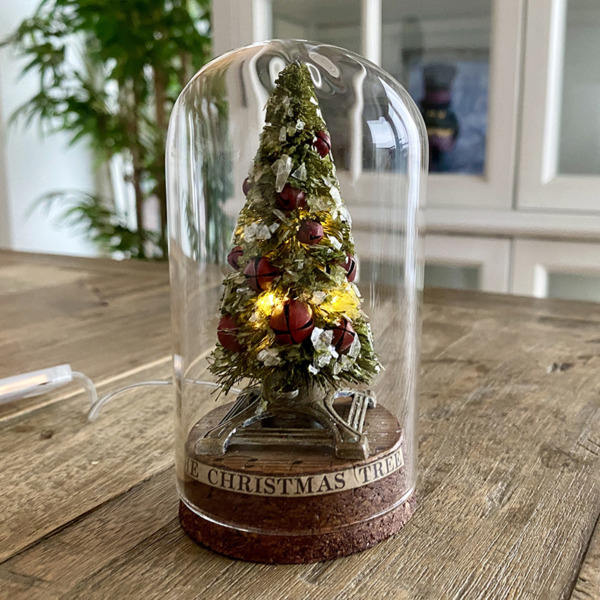
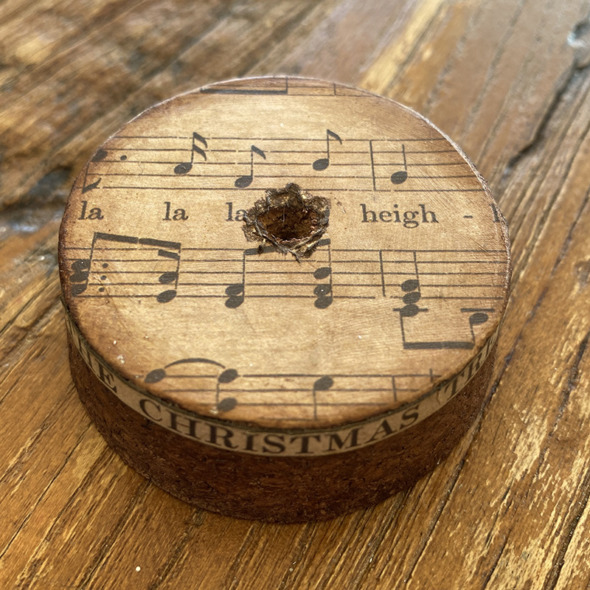
    I covered the cork base of an idea-ology display dome with paper from the christmas backdrops. Covered with distress collage medium and once dry, rubbed in walnut stain distress crayon. I used my Dremel micro tool to put a hole in the middle of the cork base.

    igirlzoe: tim holtz idea-ology christmas 2021 trees stand
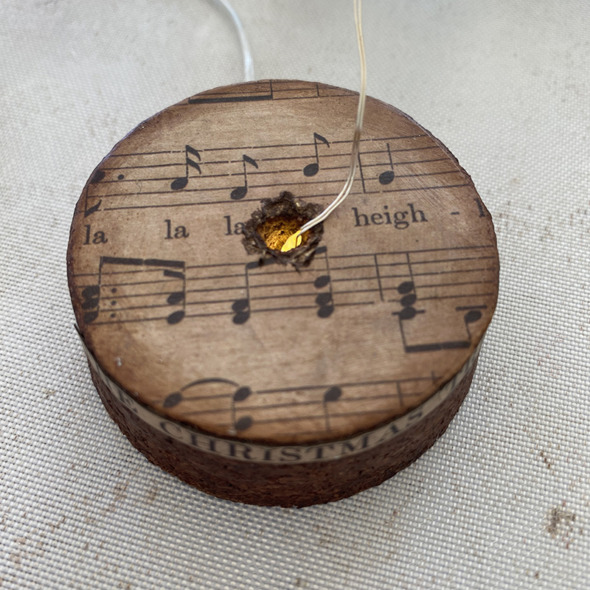
    I thread idea-ology tiny lights up through the hole and created a channel in the underside of the cork base for the wire so it sits flat.

    igirlzoe: tim holtz idea-ology christmas 2021 trees stand
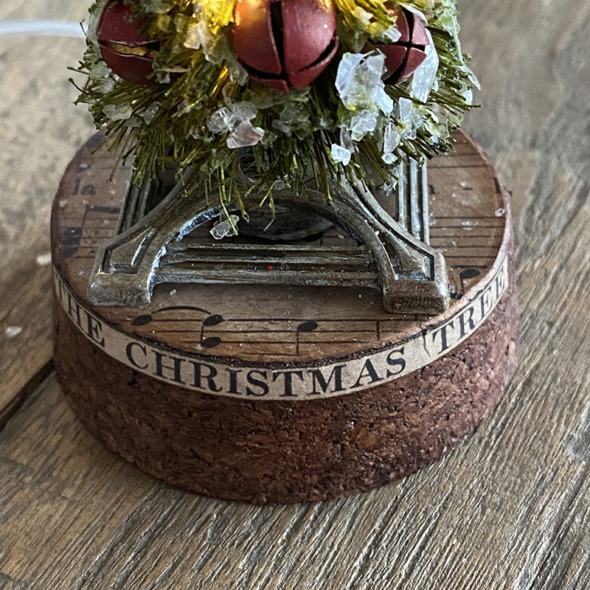
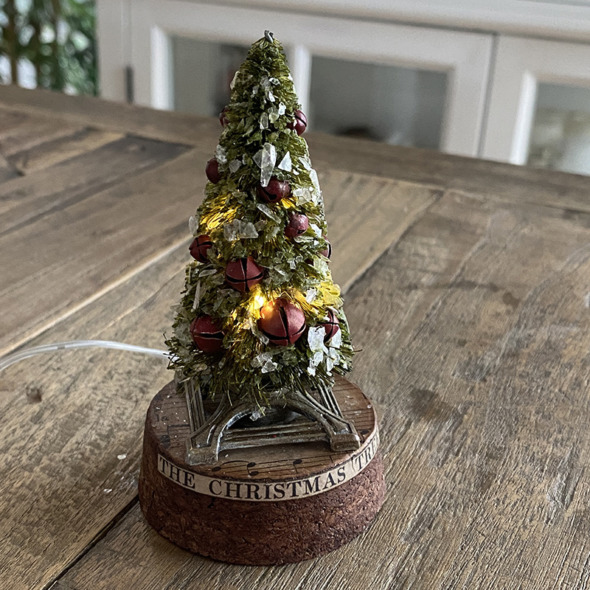
    I trimmed a piece of text from the music sheet of the idea-ology christmas backdrops and glued it around the top of the cork.

    igirlzoe: tim holtz idea-ology christmas 2021 trees stand
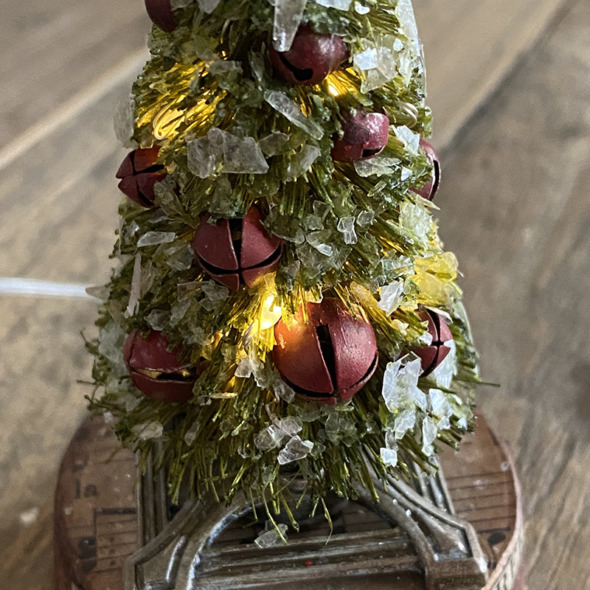
    I covered bells from the idea-ology tiny bells pack with candied apple distress paint, mixed together with a tiny bit of ground espresso distress paint. I sprayed a woodland tree with peeled paint distress spray and once dry, rubbed with distress collage medium and dipped in distress mica flakes. I pushed the bells into the tree with a dab of hot glue to hold in place.

    igirlzoe: tim holtz idea-ology christmas 2021 trees stand
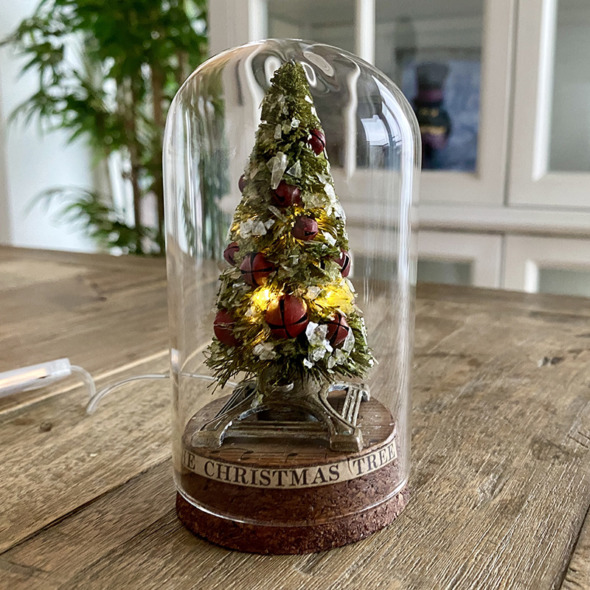
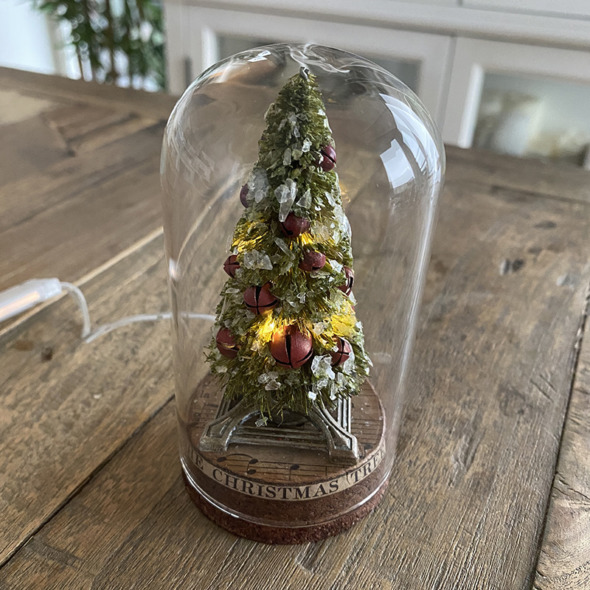
    I tucked tiny lights into the tree and glued the tree stand to the cork dome base with distress collage medium.

    igirlzoe: tim holtz idea-ology christmas 2021 trees stand
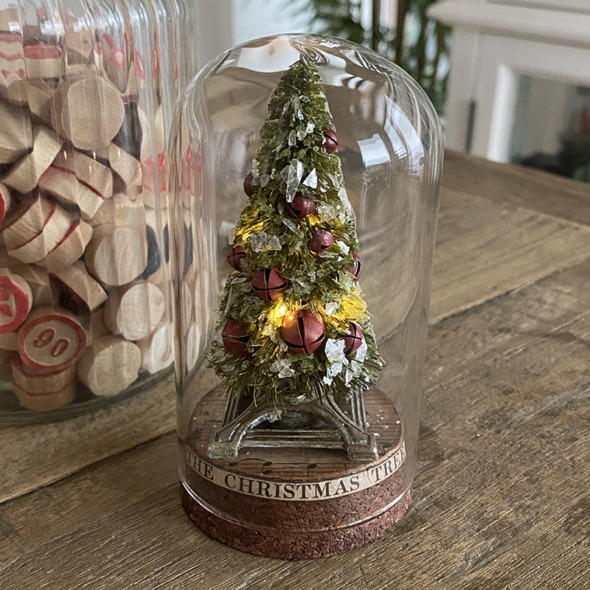
    Give the glass dome a little polish inside and out with a cloth (because dusting matters), put the glass dome on and it’s ready to display.

    igirlzoe: tim holtz idea-ology christmas 2021 trees stand
    Thanks for stopping by. I’m definitely in the mood for trees and snowy mountains now, so I’ll be back tomorrow with a little mountain magic.

    Zoe


    affiliate links used at no cost to you



  3. Cozy Christmas

    15th November, 2021 by iGirlZoe

    igirlzoe: tim holtz stampers anonymous cozy christmas

    Hello friends. The weather outside is frightful here today, which is perfect to get cozy inside and start sharing my Christmas makes. I made quite a few cards with the new Christmas stamps that Tim Holtz released a few months ago. You can see the launch replay and all the inspiration makes on Tim’s blog.

    igirlzoe: tim holtz stampers anonymous cozy christmas
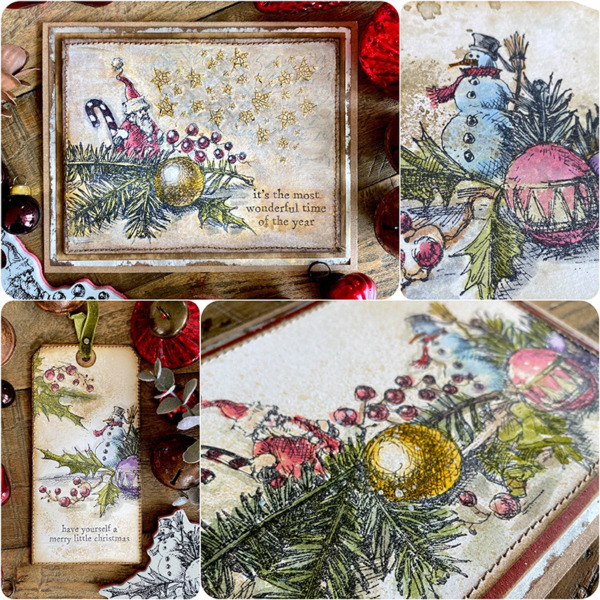
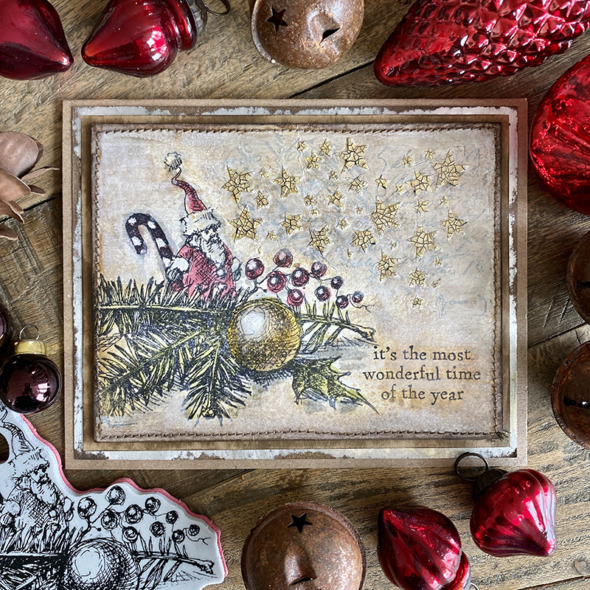
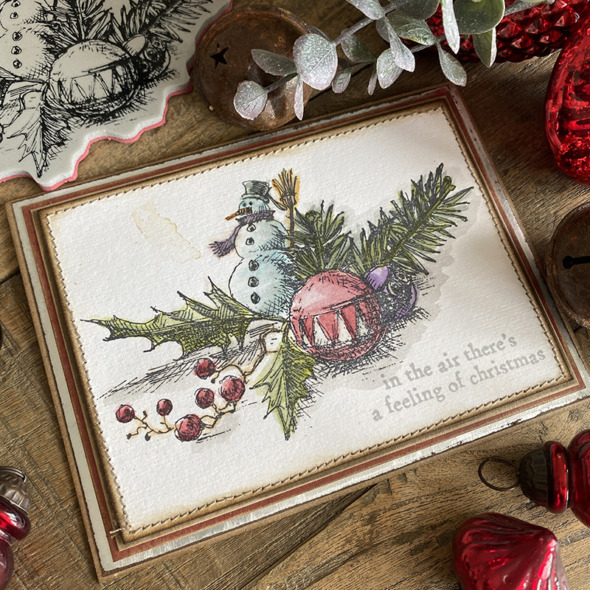
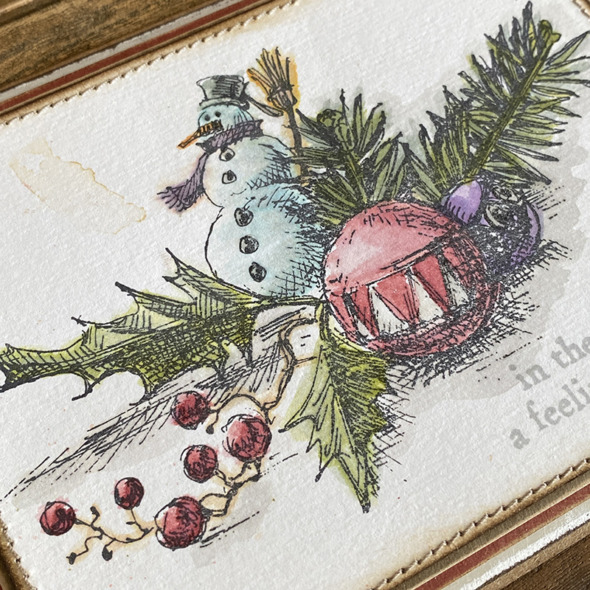
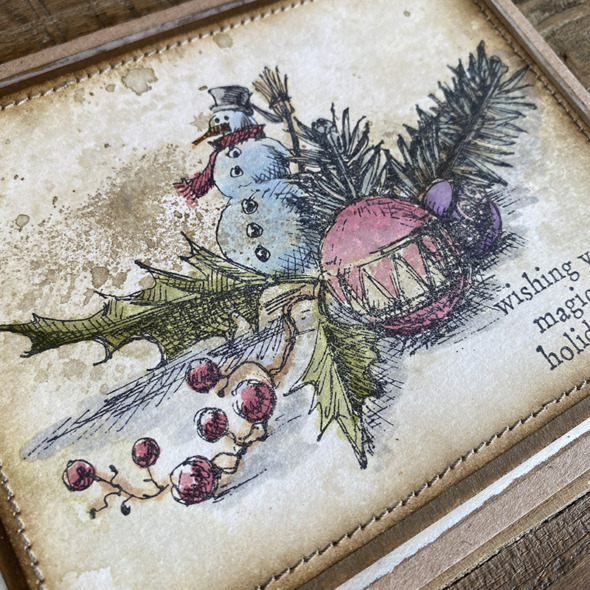
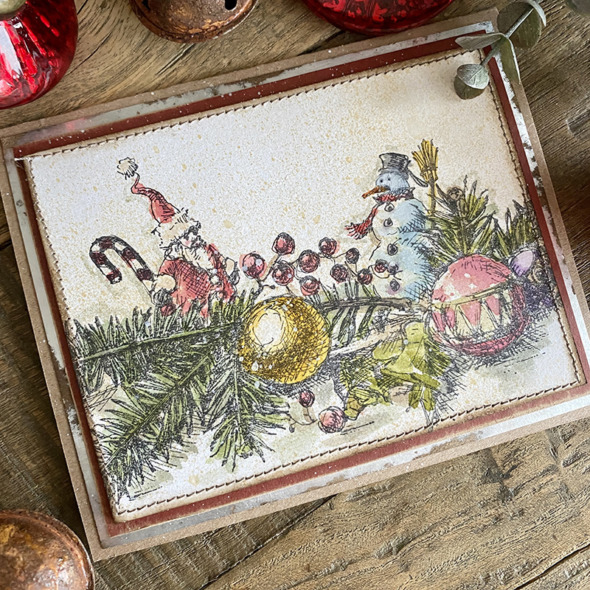
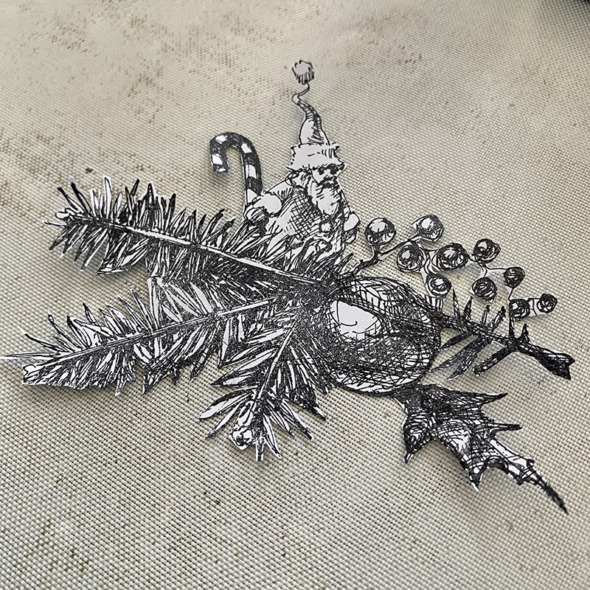
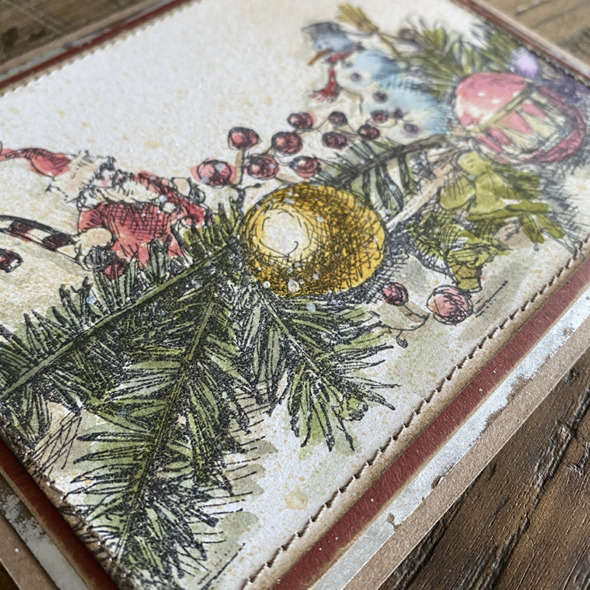
    I was very taken with the Cozy Christmas CMS444 stamp set and couldn’t stop making with it. It really tapped into my love of coloring. I stamped onto distress watercolor cardstock with distress archival ink and used distress re-inkers and a water brush to watercolor. Each of the cards is mounted with the following layers: idea-ology kraft stock + idea-ology metallic kraft stock + distress kraft heavystock.

    igirlzoe: tim holtz stampers anonymous cozy christmas
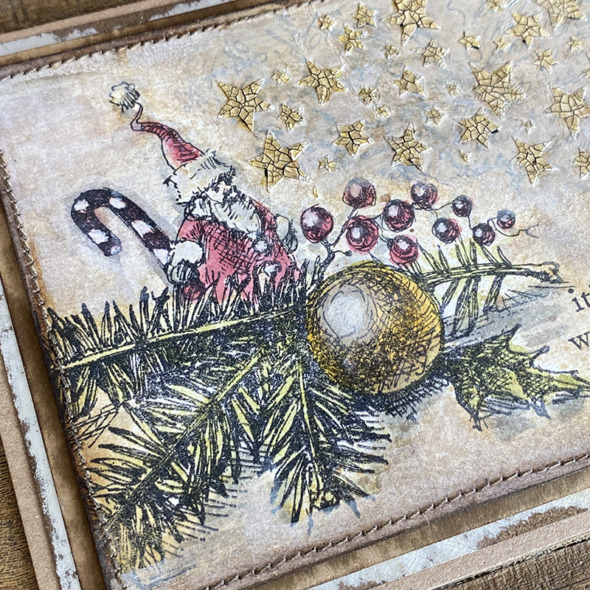
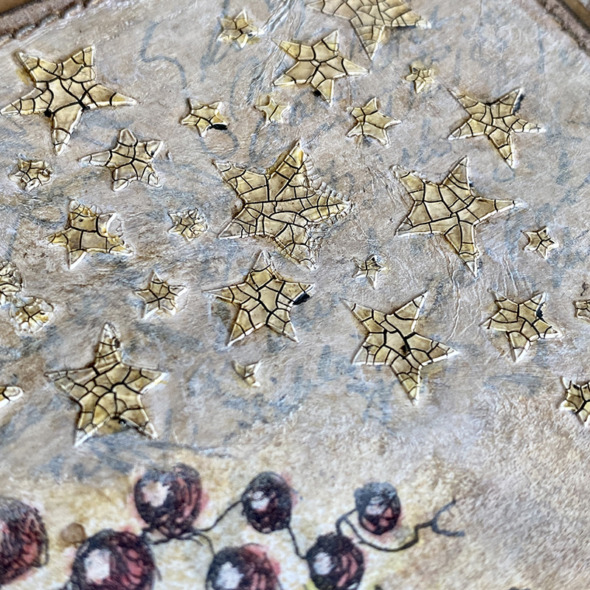
    If you look closely you will see there is text underneath the stars and the paper looks wrinkled. I stamped onto the background and then regretted it as it was way too bold and overpowering. So I went about fixing it! I added a piece of torn plain collage paper over the stamped text with collage medium.

    igirlzoe: tim holtz stampers anonymous cozy christmas
    Once dry I covered with a white gesso wash and then dried and stenciled distress crackle texture paste through the falling stars stencil. Finally, I added vintage collage medium and once dry, rubbed walnut stain distress crayon into the cracks.

    igirlzoe: tim holtz stampers anonymous cozy christmas
    This card was also not as planned but the happy accident worked…

    igirlzoe: tim holtz stampers anonymous cozy christmas
    The brown mark was the happy accident. I had turned the card over to mount it onto the card and there was a a little wet distress ink on my media mat. I dried it with a heat tool and liked the look so went with it. The one time I tried to make a “clean” card though hey! The universe was trying to tell me something!

    igirlzoe: tim holtz stampers anonymous cozy christmas
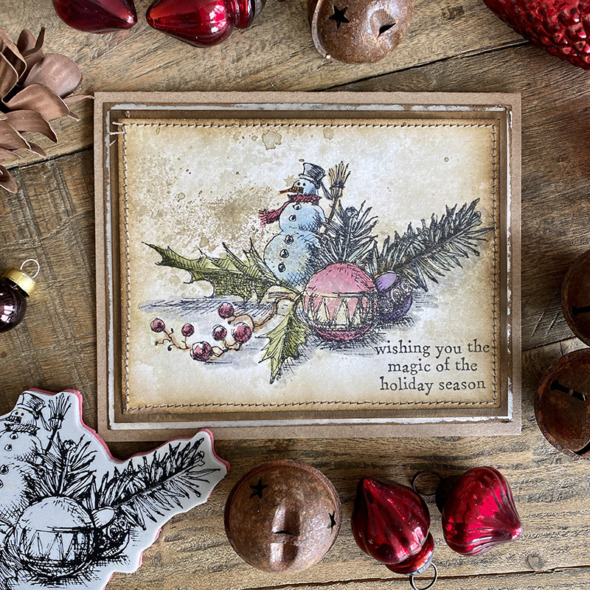
    By just adding a little brown distress ink you can grunge the same card right up!

    igirlzoe: tim holtz stampers anonymous cozy christmas
    These stamps are so wonderful to watercolor. I used distress reinkers and dried with a heat tool and then picked up some frayed burlap distress spray drips from the non stick mat portion of my glass media mat.

    igirlzoe: tim holtz stampers anonymous cozy christmas
    For this card I used both the stamps and a little masking magic.

    igirlzoe: tim holtz stampers anonymous cozy christmas
    I stamped onto a piece of copy paper and fussy cut. It takes a minute but I enjoy fussy cutting, it relaxes me. The reason I use copy paper is that it’s thin and so you don’t get that ridge when you mask and stamp over the top.

    igirlzoe: tim holtz stampers anonymous cozy christmasigirlzoe: tim holtz stampers anonymous cozy christmas
    I flicked with a little white gesso.

    igirlzoe: tim holtz stampers anonymous cozy christmas
    Something else I love about the cozy christmas stamps is how well they work in parts and pieces.

    igirlzoe: tim holtz stampers anonymous cozy christmas
    I turned the stamp upside down and stamped a portion at the top of a #8 heavystock tag.

    igirlzoe: tim holtz stampers anonymous cozy christmas
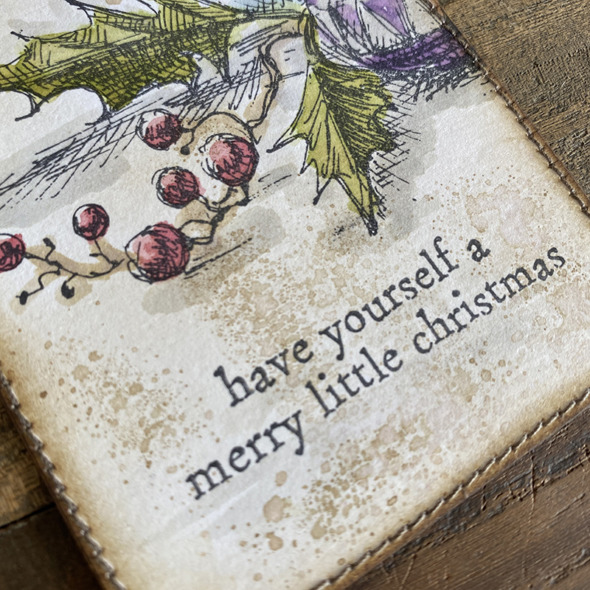
    I stamped one of the sentiments from the set in hickory smoke distress archival ink. I love the sentiments in this set and plan to use them for my December Daily this year.

    igirlzoe: tim holtz stampers anonymous cozy christmas
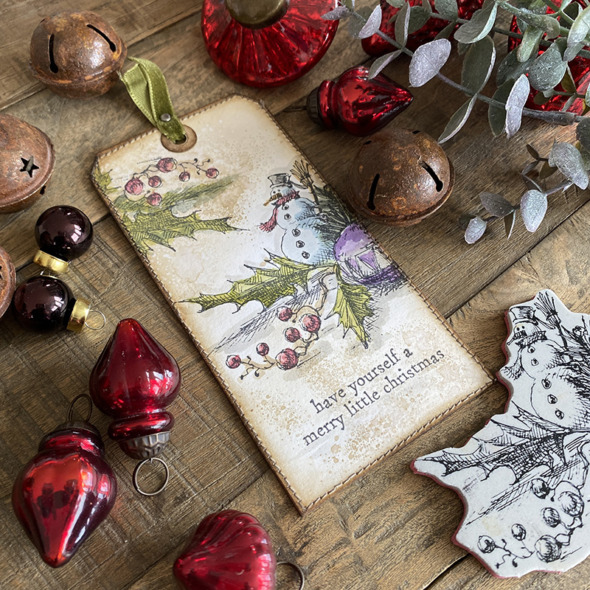
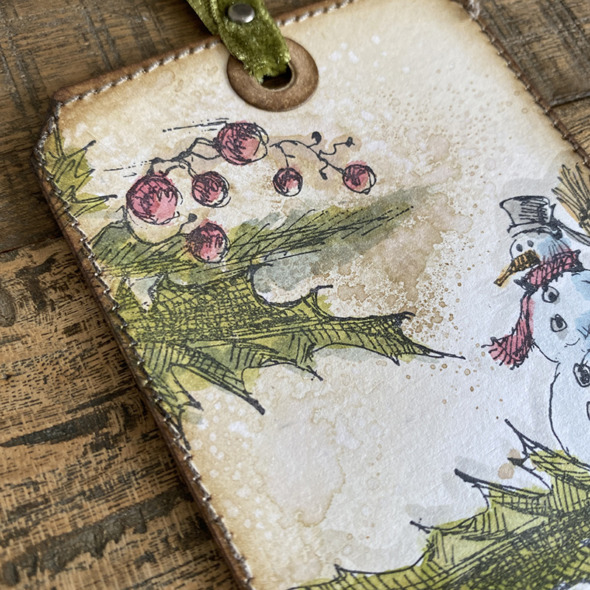
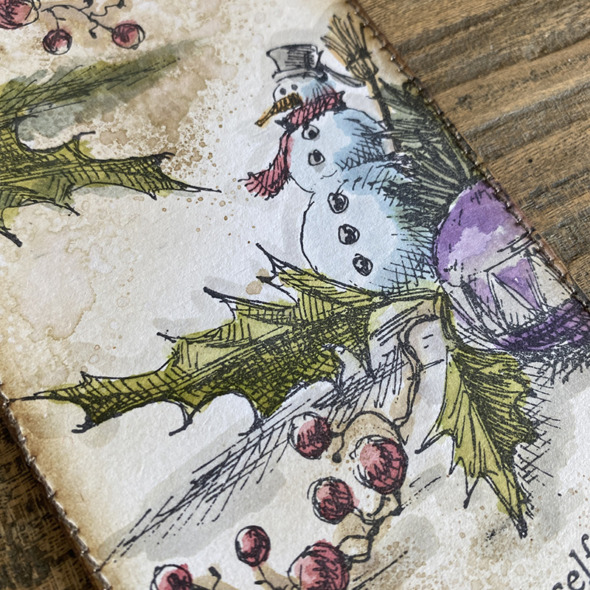
    I LOVE this snowman with a pot for a hat. I’ll be back tomorrow with another make featuring that cute snowman. Change of plans… that cute snowman will be back later this week.

    Thanks for stopping by.

    Zoe


    affiliate links used at no cost to you


  4. Christmastime

    16th December, 2020 by iGirlZoe

    igirlzoe: tim holtz sizzix christmastime thinlits die

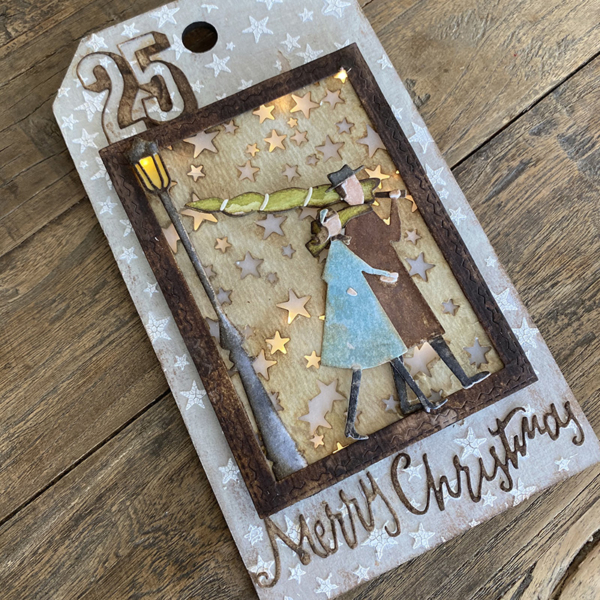
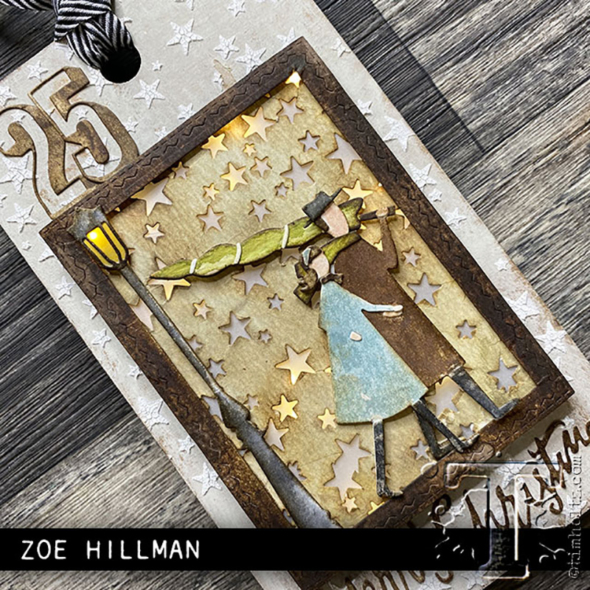
    Hello there! I’m back today sharing this festive tag I made for the Tim Holtz Sizzix Chapter 3 release. You can see details of the release on Tim’s blog.

    igirlzoe: tim holtz sizzix christmastime thinlits die
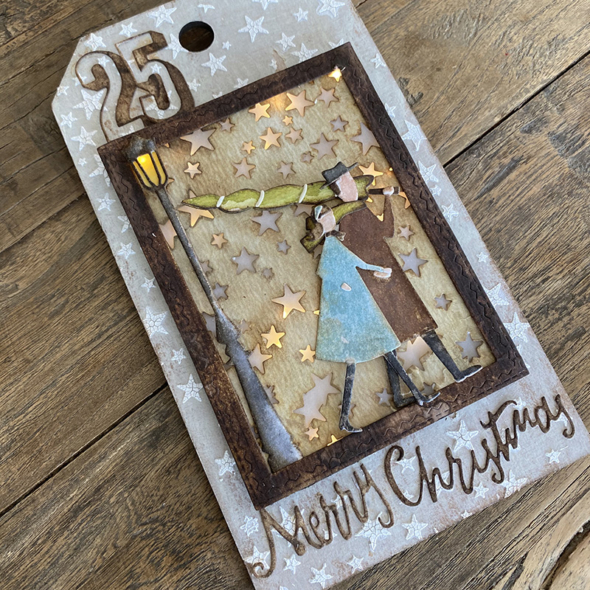
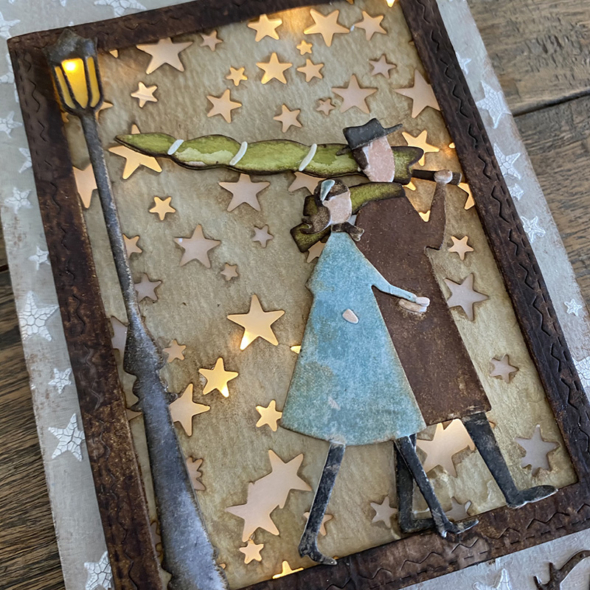
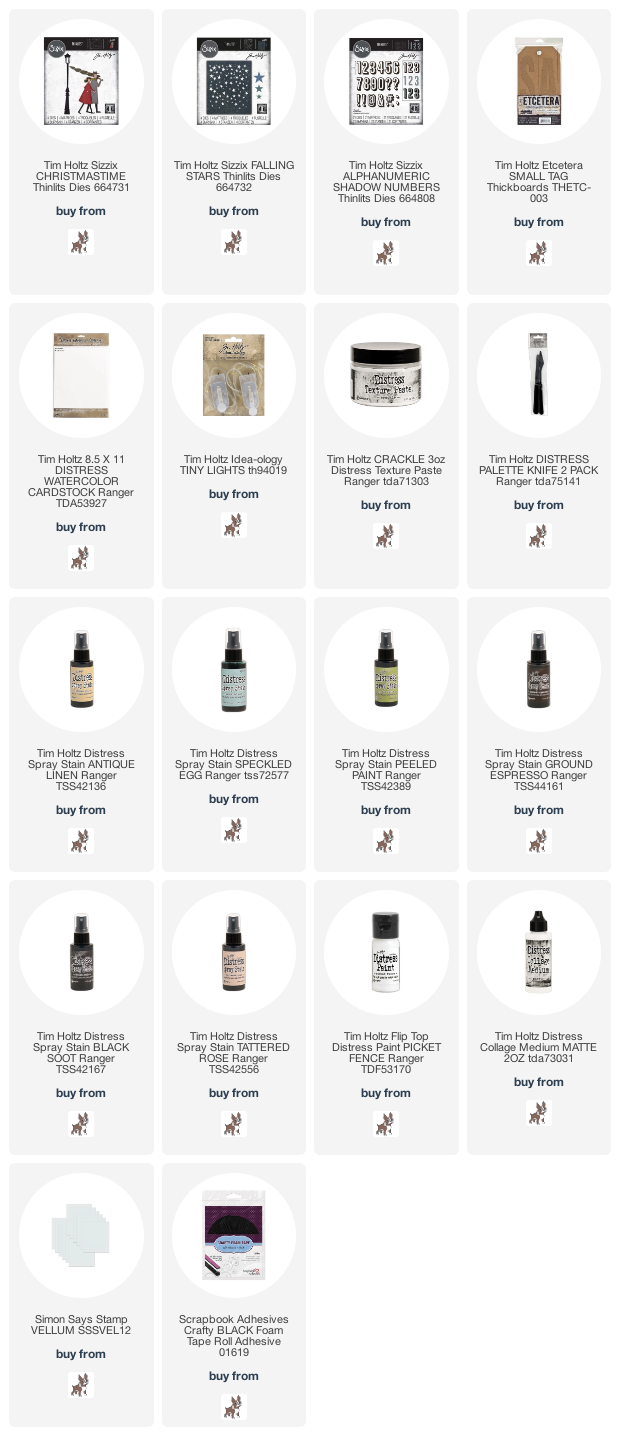
    Christmastime (664731) thinlits die set was one of my favourites from the release. It’s incredibly easy to assemble and you can change it up to suit your style. Let’s get into it…

    igirlzoe: tim holtz sizzix christmastime thinlits die
    I created a frame with the stitched rectangles (661189) thinlits die set cut from distress watercolor cardstock.

    igirlzoe: tim holtz sizzix christmastime thinlits die
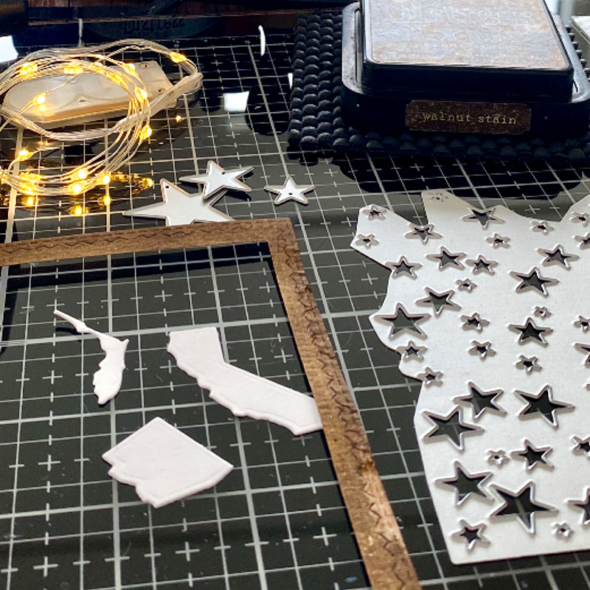
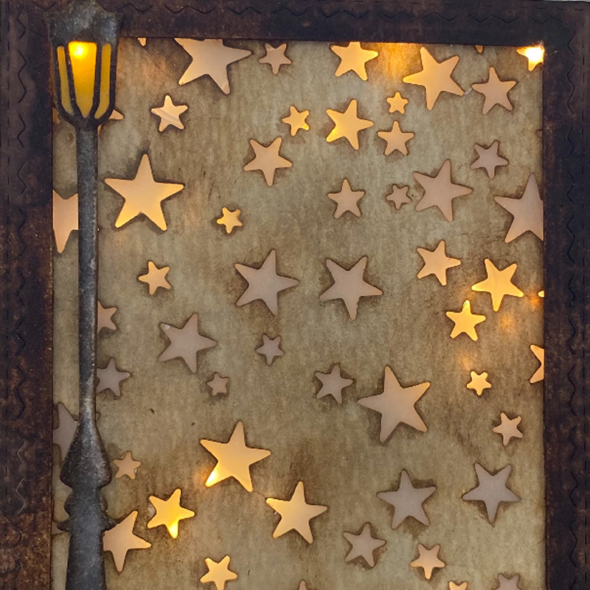
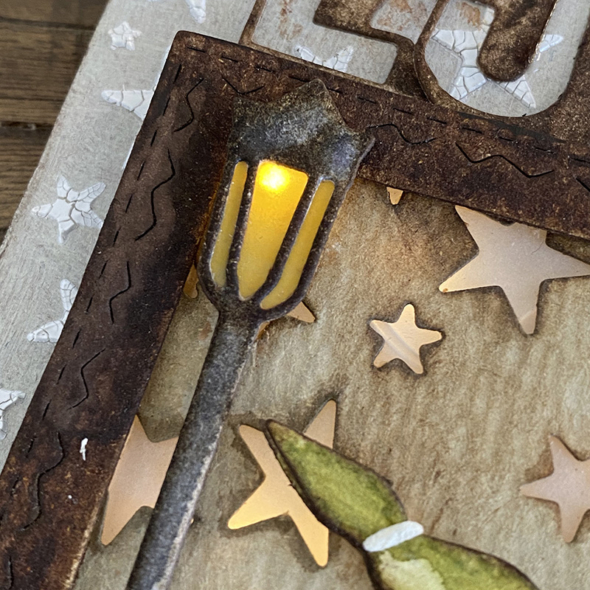
    I used the new falling stars (663732) thinlits die to cut the background, I moved it down and cut again to add more stars. I added vellum underneath the distress watercolor cardstock.

    igirlzoe: tim holtz sizzix christmastime thinlits die
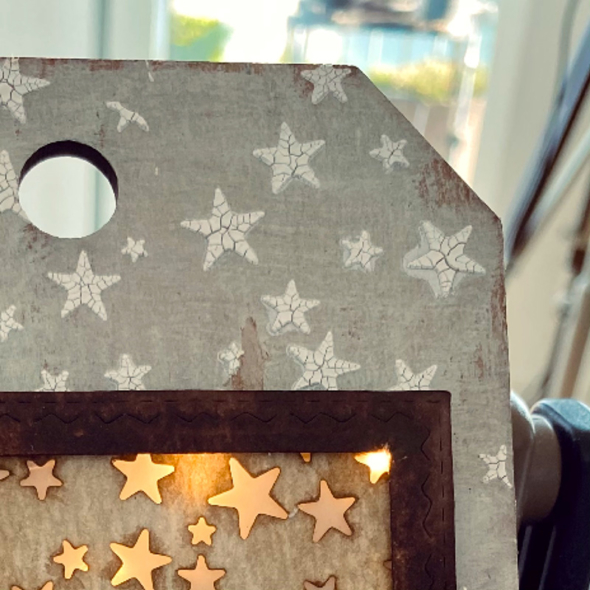
    Running adhesive foam to the edges of the frame to create a box, I added tiny lights behind the vellum and thread one light through to sit under the street light. I used vellum underneath the lamp die cut.

    igirlzoe: tim holtz sizzix christmastime thinlits die
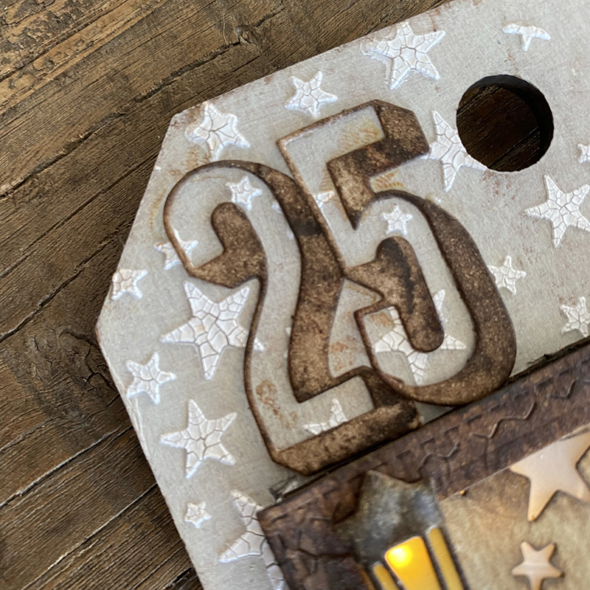
    I painted a small etcetera thickboard tag with picket fence distress paint and created a stencil from the falling stars (664732) thinlits die. Using a palette knife, I spread distress crackled texture paste through the stencil and set aside to dry and work its crackly magic.

    igirlzoe: tim holtz sizzix christmastime thinlits die
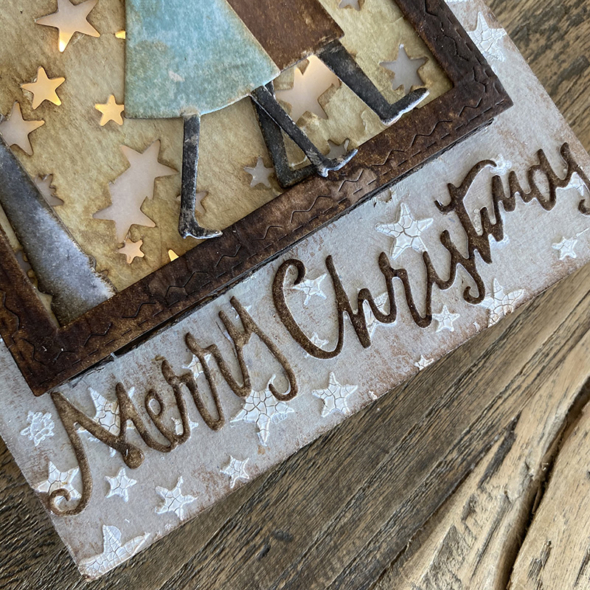
    The alphanumeric shadow numbers (664808) thinlits dies were the perfect accent for the top of this tag and I love that you can still see the crackle star detail through the cut out.

    igirlzoe: tim holtz sizzix christmastime thinlits die
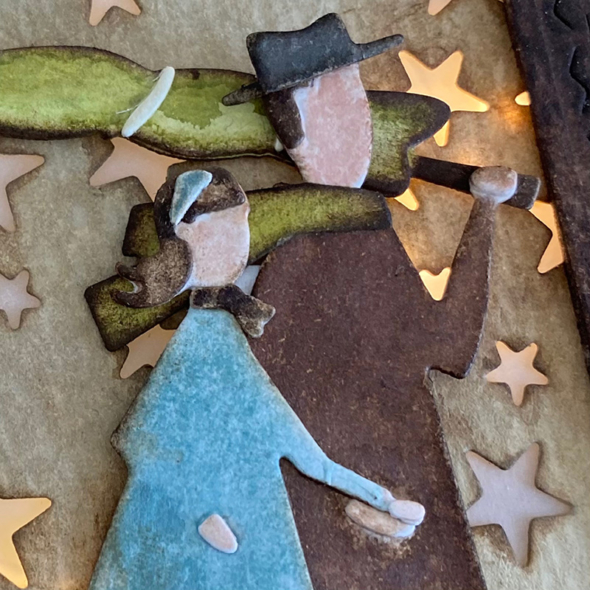
    I used distress spray ink to create washes to drag the die cuts through and then dried with a heat tool. There isn’t many pieces so assembly is very simple.

    igirlzoe: tim holtz sizzix christmastime thinlits die
    The merry christmas sentiment is die cut from an older thinlits die set, Home for the Holidays (662419) and spritzed with ground espresso distress ink spray.

    igirlzoe: tim holtz sizzix christmastime thinlits die
    This reminds me of the first time that my husband and I went to get a real Christmas tree 12 years ago in Switzerland. We took it home on the bus and carried it the rest of the way. It is such a sweet memory.

    igirlzoe: tim holtz sizzix christmastime thinlits die
    Thanks for stopping by and check out Tim’s blog to see the other makers samples.

    Zoe


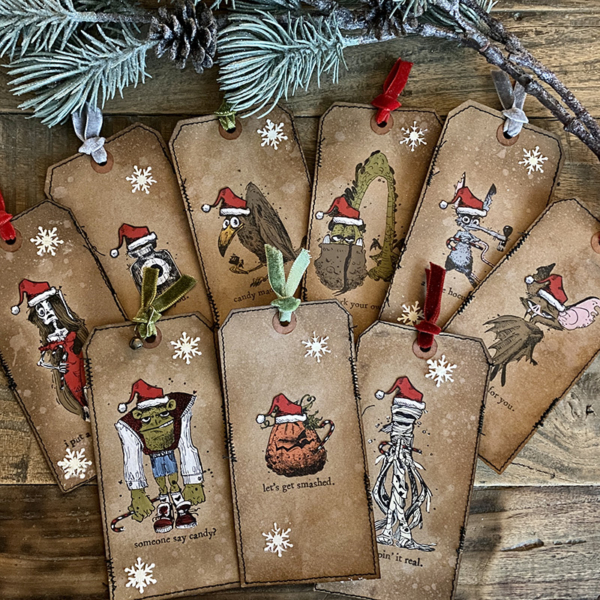
  5. Monsters Reunion Christmas Edition

    3rd December, 2020 by iGirlZoe

    Hello friends. It’s December and I finally have to let go of Halloween, but maybe just one last nod in that direction as I move into my merry makes! Did you catch the Tim Holtz facebook LIVE on Saturday? It was the final part of the four part Christmas LIVE demos. You can catch up on all the fun on Tim’s blog.


    It’s been a monster of a year (see what I did there) and Saturday’s with Tim and Mario have been a bright light. I am so very grateful for all the work they have dedicated to bring us hours and hours of creative inspiration and much needed escapism. The 4 part Christmas demos have definitely charged my Christmas making batteries.

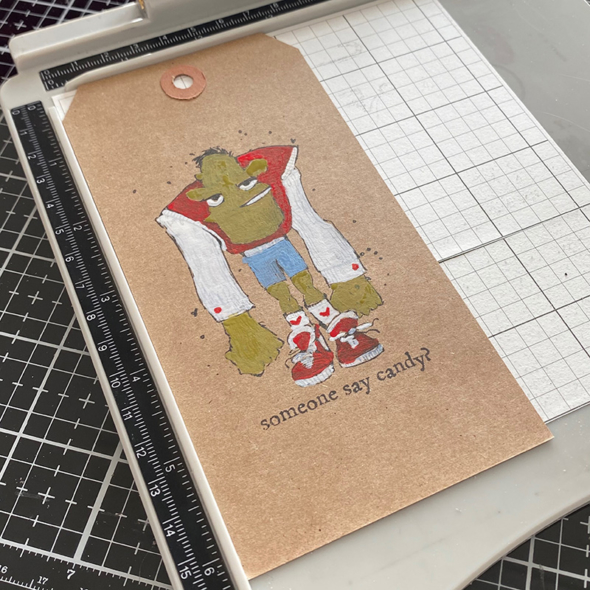
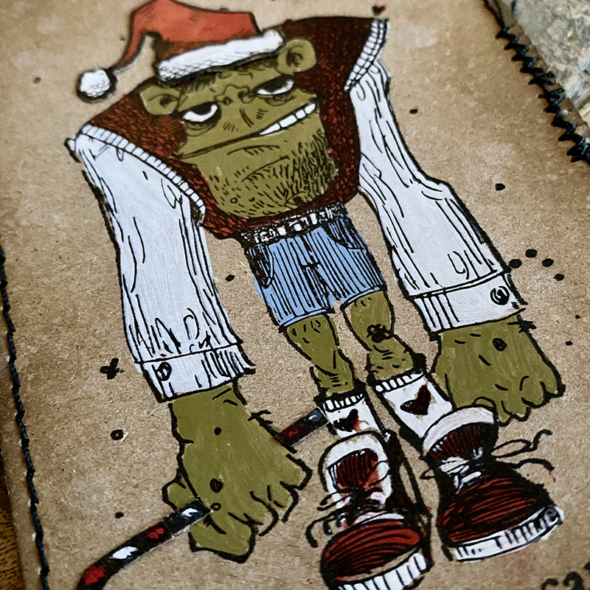
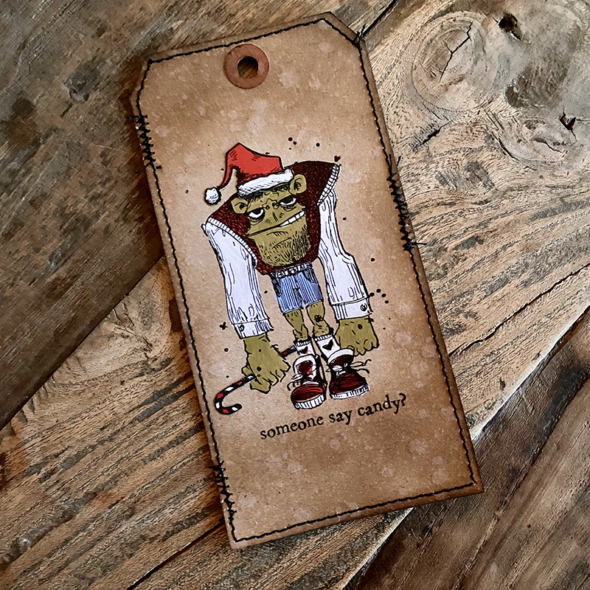
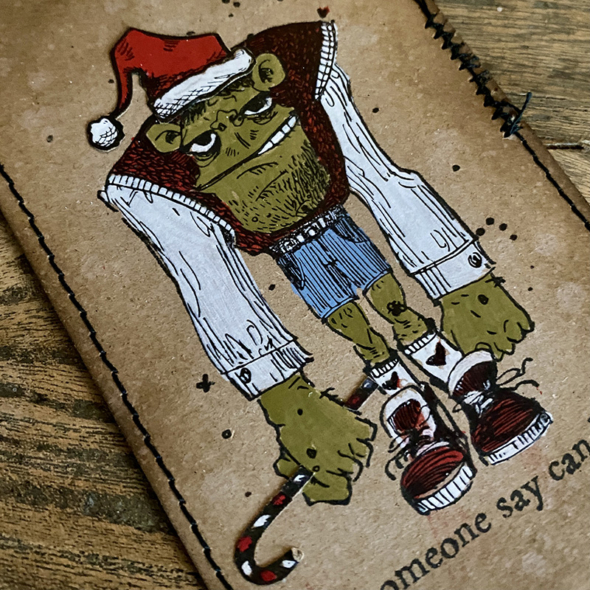
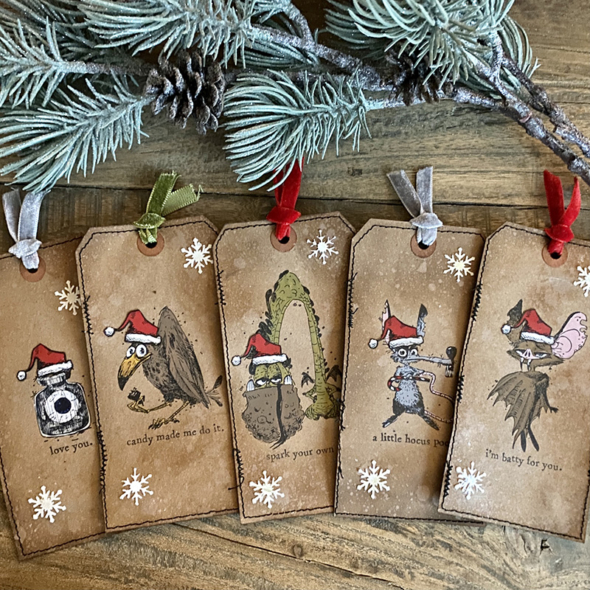
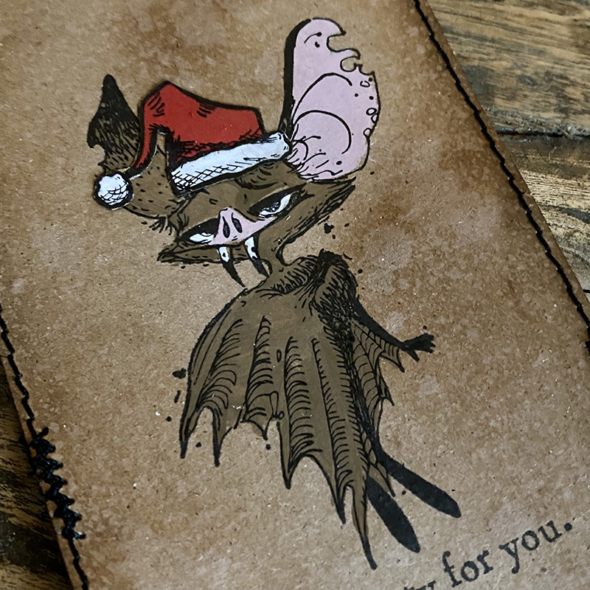
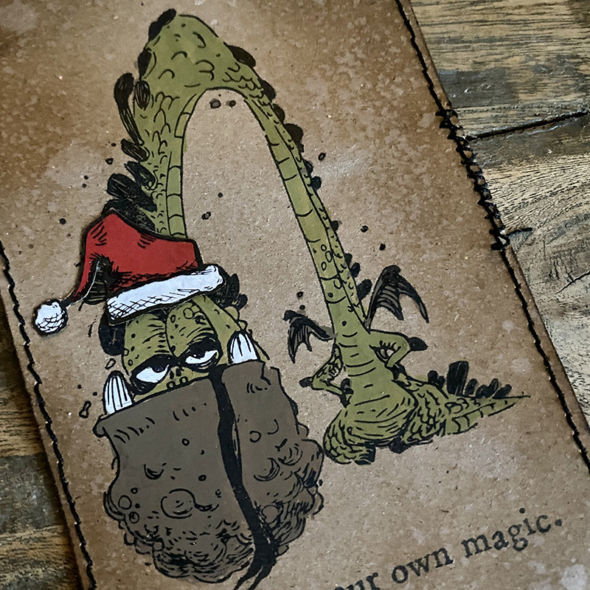
    During Saturday’s LIVE Tim showed this cool paint and stamp technique. It’s such a quick, easy and fun technique and looks incredible on kraft! I highly recommend that you watch the video demo but here’s a quick run down…


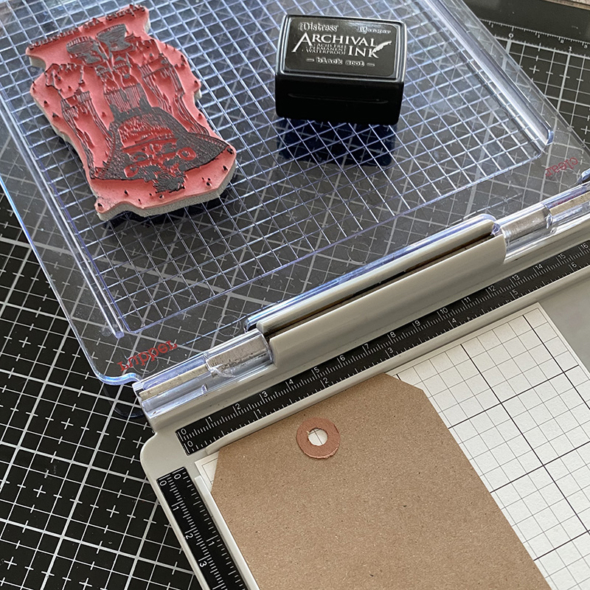
    Using sticky grid to hold it in place, I put a #8 size tag, (best cut from kraft heavystock with tag dies), onto my travel stamp platform. I placed the stamp onto the tag and when I was happy with it’s placement, I closed the lid and pushed down to make sure the stamp was attached to the lid. I inked up the stamp with distress archival ink and stamped once.


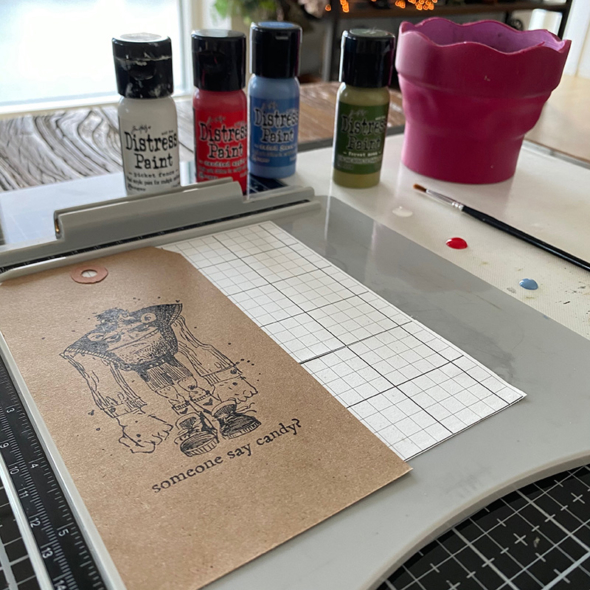
    I left my tag in place to paint as I was only doing one of each and removed the lid of the platform while I painted. If you are doing multiple tags you would just make sure they were positioned in the same place when you stamped the second time.


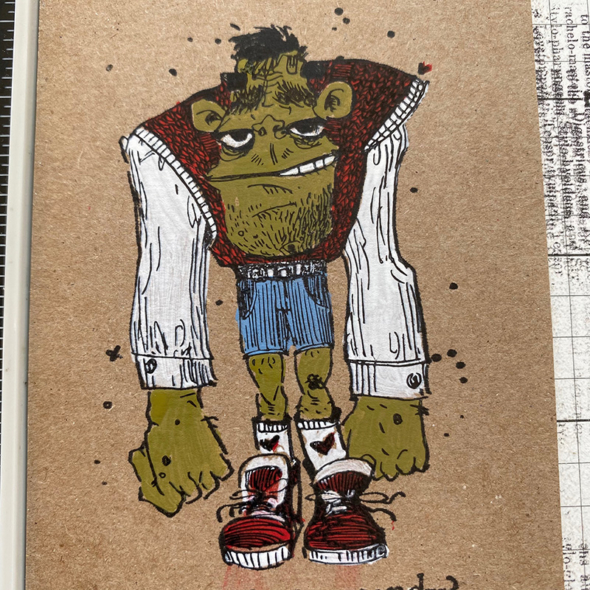
    I used distress paint to paint over the stamped image, not worrying about covering the detailed lines. I know it looks like a hot mess here, but wait for it…


    Once the paint was dry, I inked up the stamp again with distress archival ink and stamped over the top.


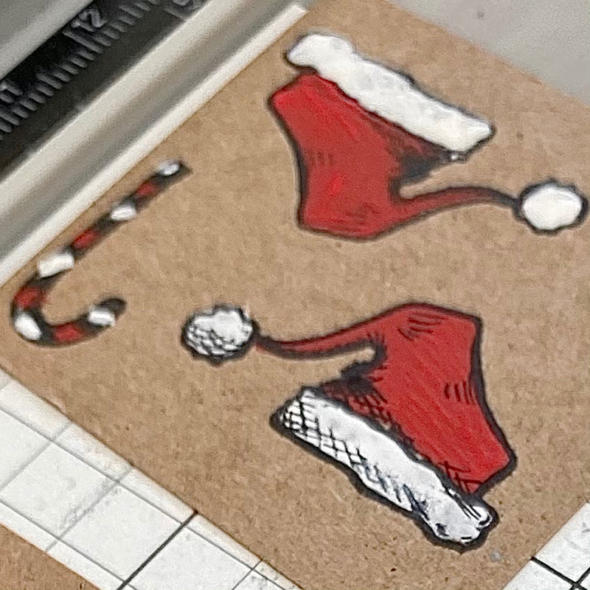
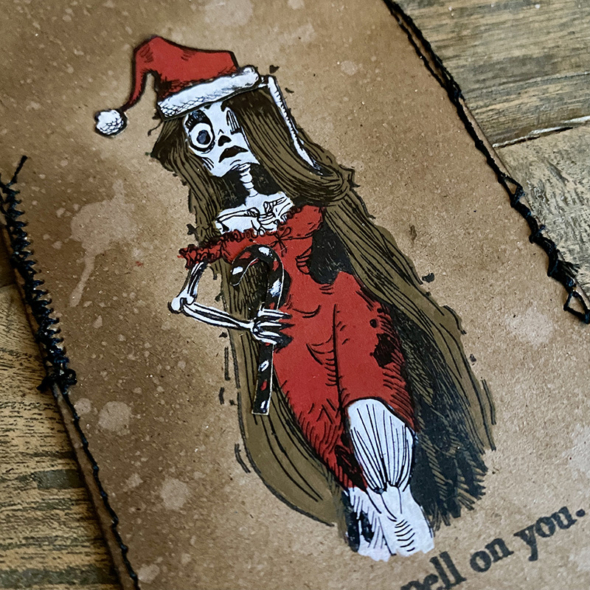
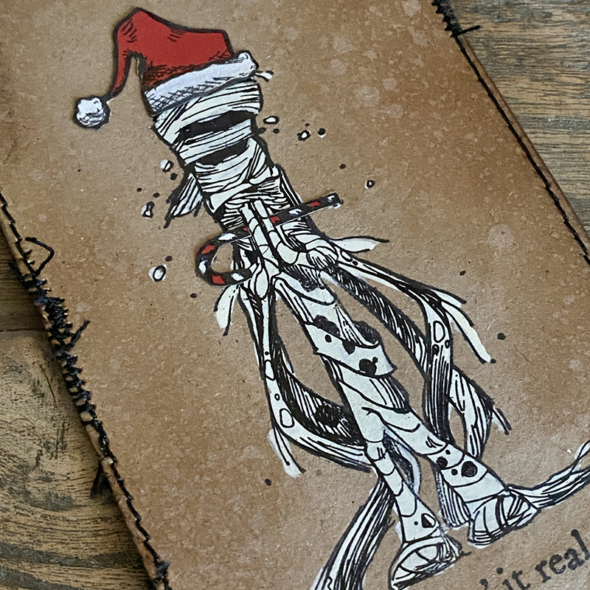
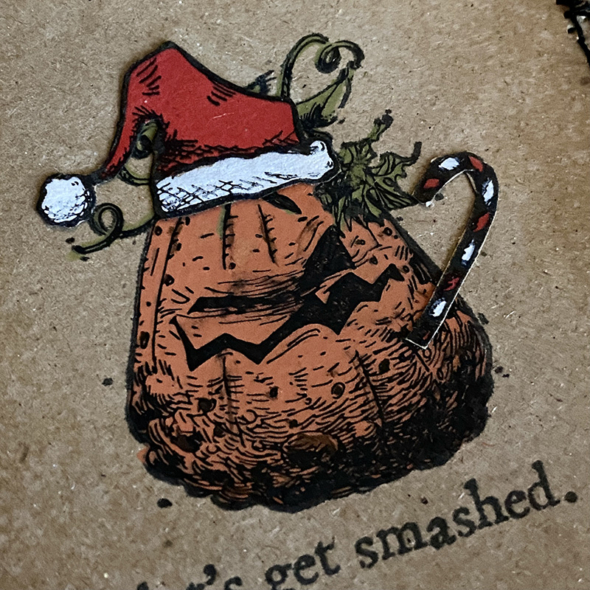
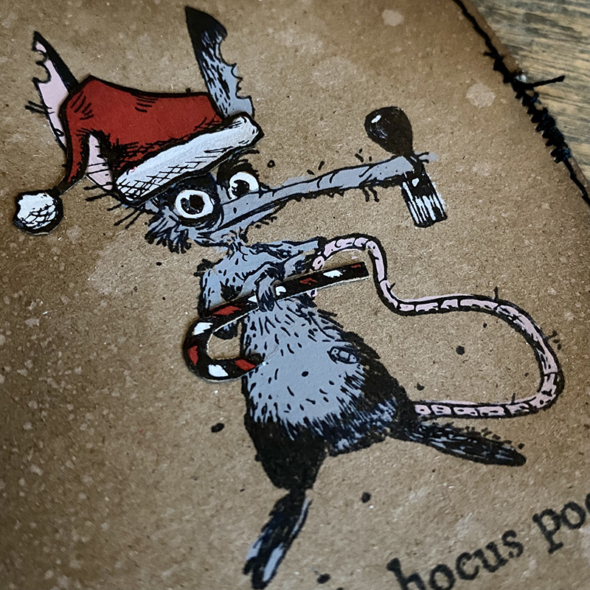
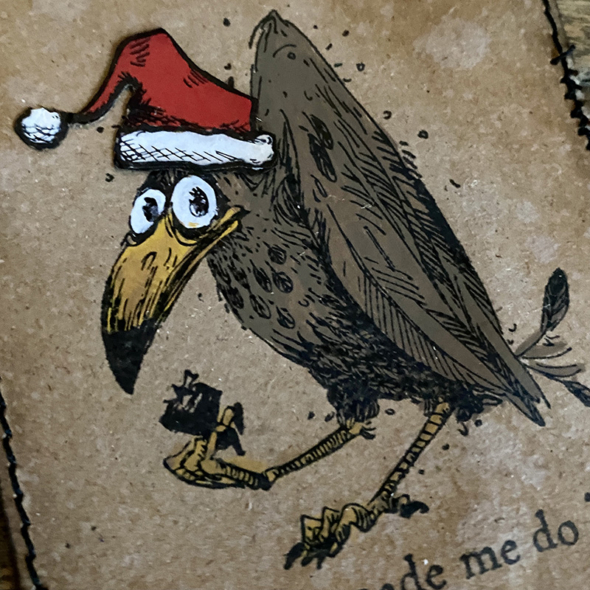
    I stamped santa hats and candy canes from the mini crazy bird and things CMS250 stamps. I would have die cut them with my matching framelits dies using the great hack from Joy Kennedy that Tim showed in a previous Saturday demo, but I couldn’t put my hands on them so I fussy cut.


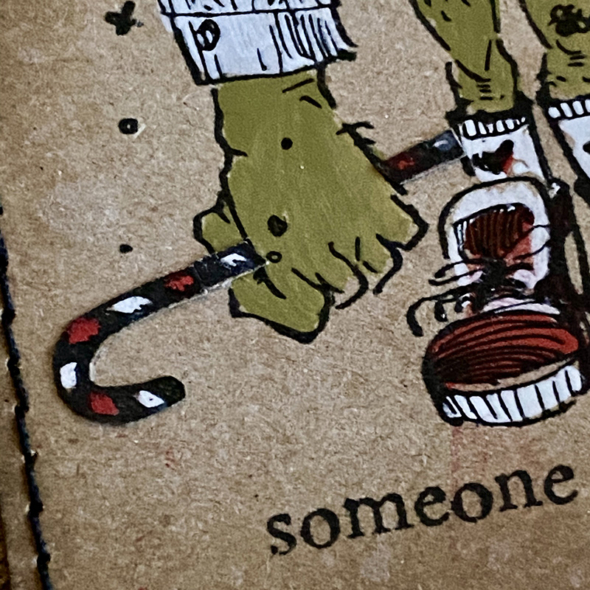
    I cut the candy cane in half and added a piece to each side of his hand to look as those he was clutching it.


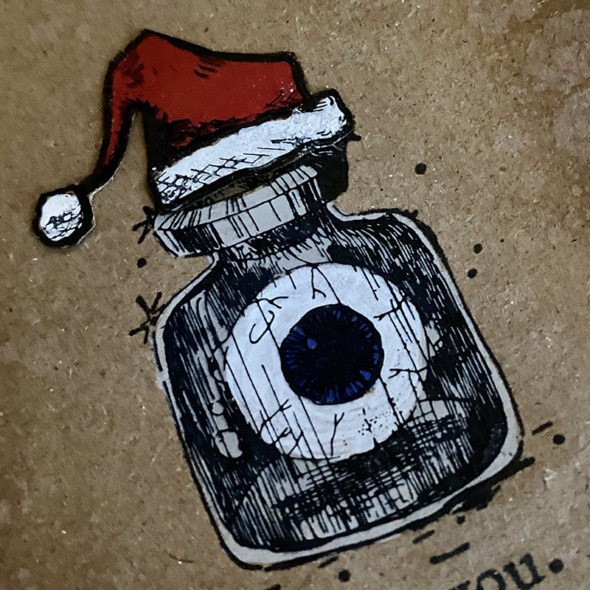
    I added a hat and instantly these stamps became “Christmas Edition” 😉


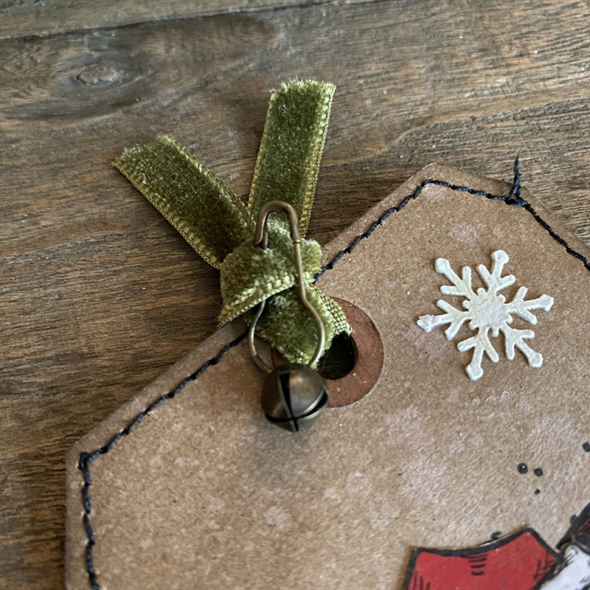
    I blended distress ink into the tag and used the distress sprayer to add water droplets. Using a palette knife I spread distress texture paste through the flurries THS151 stencil and set aside to dry. Finally I stitched around the edges of the tag with my sewing machine and added a little of the idea-ology velvet trim, which is DIVINE! I’m pretty sure it’s sold out everywhere and I’m not surprised. If anyone sees any… let me know! 😉


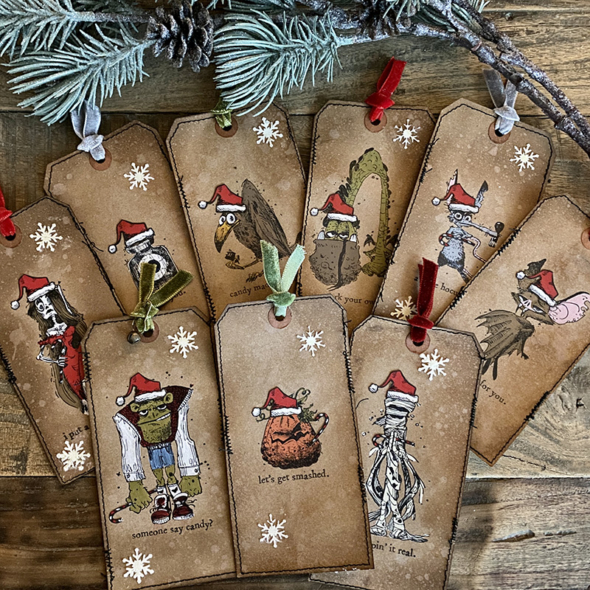
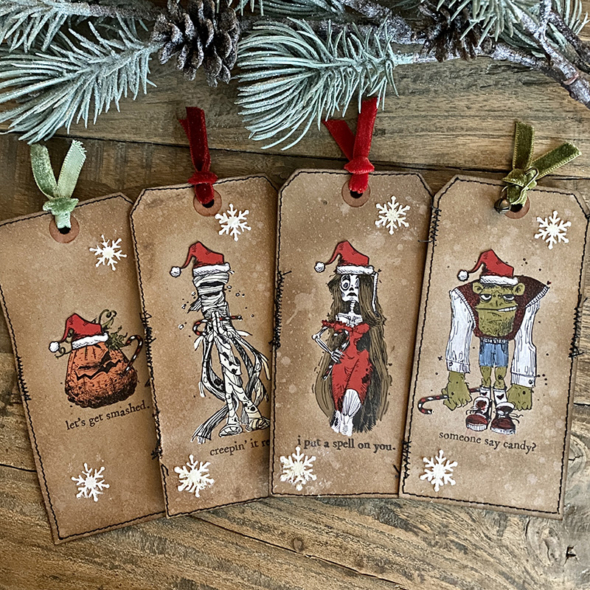
    Thank you Tim for inspiring me to make these. I was asking for Monsters Reunion Christmas edition stamps and Tim told me to stick a Santa hat on the ones I had! LOL So I did and then I couldn’t stop! This is what happened… 😉


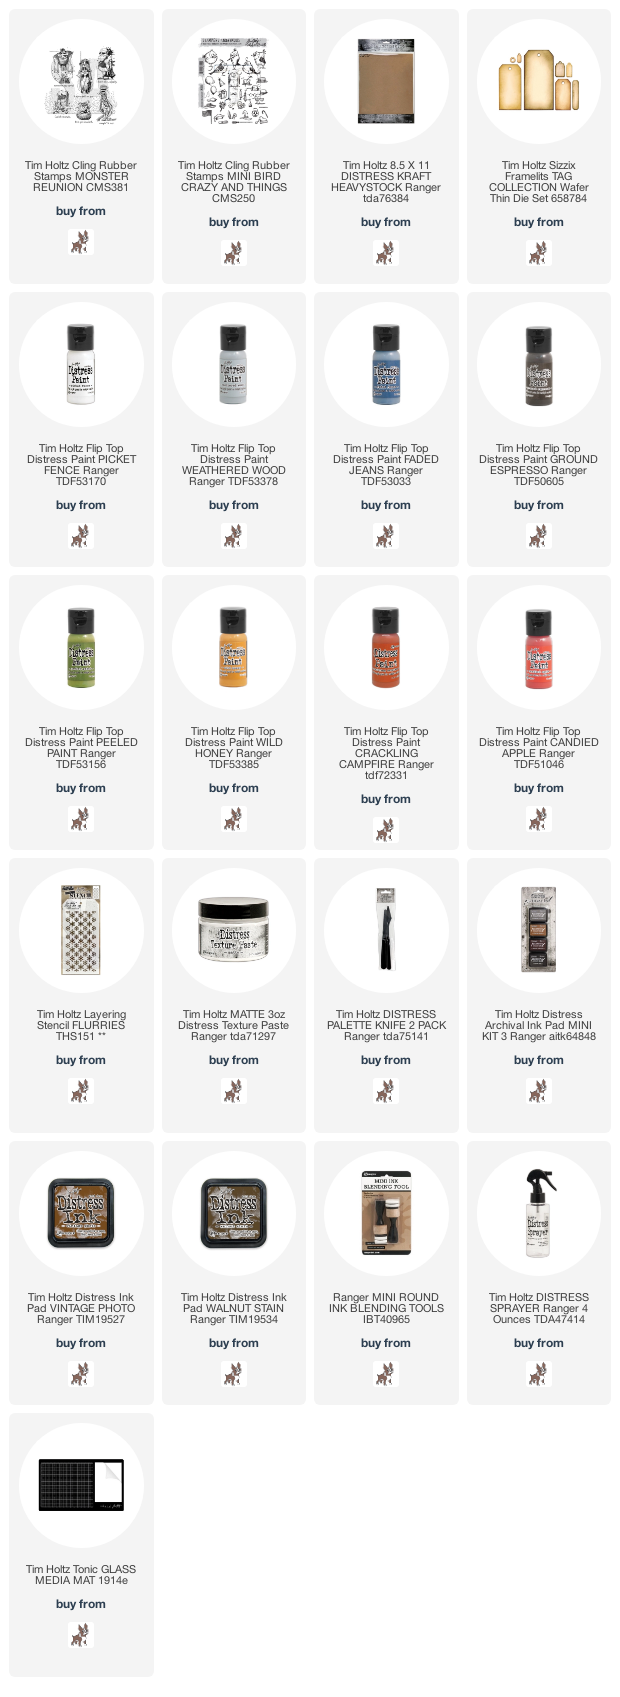
    Monsters Reunion CMS381 Stamps + Mini Bird Crazy and Things CMS250 Stamps


    I was going to stop there but why stop when I had last years STAMPtember set to play with too.


    Tim Holtz STAMPtember 2019 Stamps (not available) + Mini Bird Crazy and Things CMS250 Stamps


    Thanks for stopping by and for hopefully smiling at the silliness. Adding a candy cane and a santa hat can make everything Christmassy.

    Zoe


  6. The Holly and The Professor

    15th November, 2019 by iGirlZoe

    iGirlZoe: Tim Holtz stampers anonymous holiday stamps yuletide gatherings the professor music and advert

    Hello Friends! I’m back with the 5th and final of the cards I made with this years Tim Holtz Stampers Anonymous Christmas stamps. If you missed the launch party, you can catch up on all the fun on Tim’s blog!

    iGirlZoe: Tim Holtz stampers anonymous holiday stamps yuletide gatherings the professor music and advert
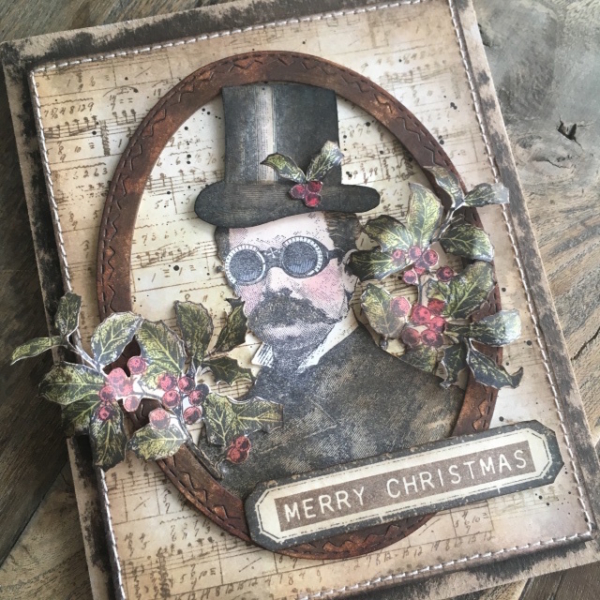
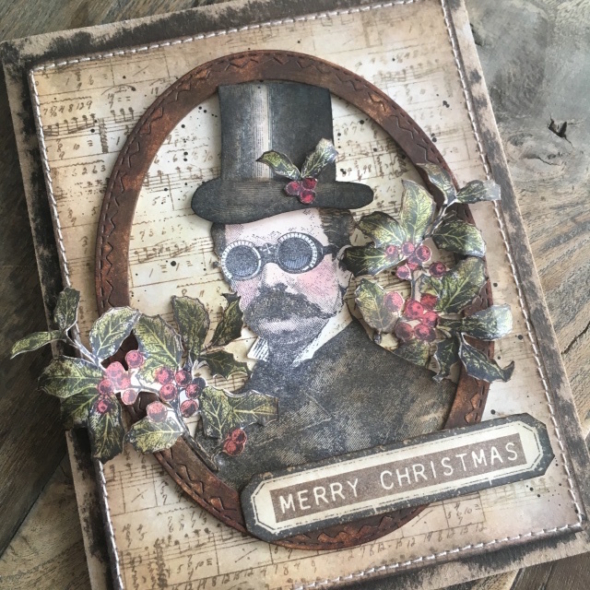
    I love mixing and matching stamp sets, especially the seasonal with the non seasonal. Just a few sprigs of holly from the new yuletide gathering (CMS390) stamp set and the professor (CMS373) was ready for Christmas. I used a background stamp from last years music and advert (CMS358) stamp set, stamped with ground espresso distress archival ink. Stampers Anonymous never retire their stamps and stock the entire stamp catalogue, so you can always add to your collection.
    iGirlZoe: Tim Holtz stampers anonymous holiday stamps yuletide gatherings the professor music and advert
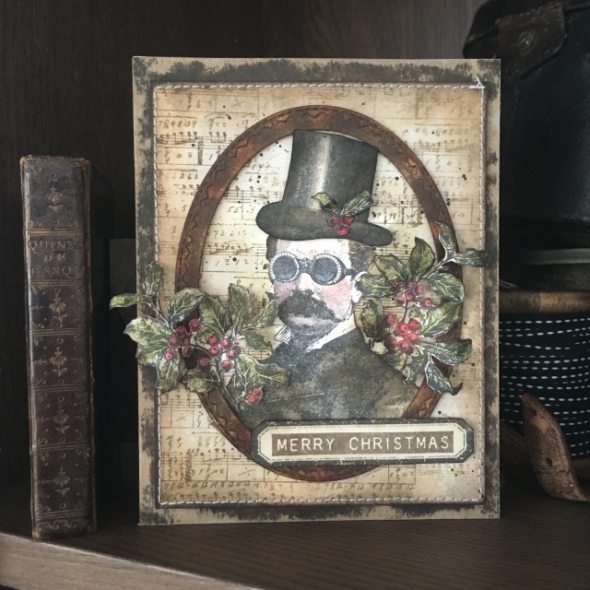
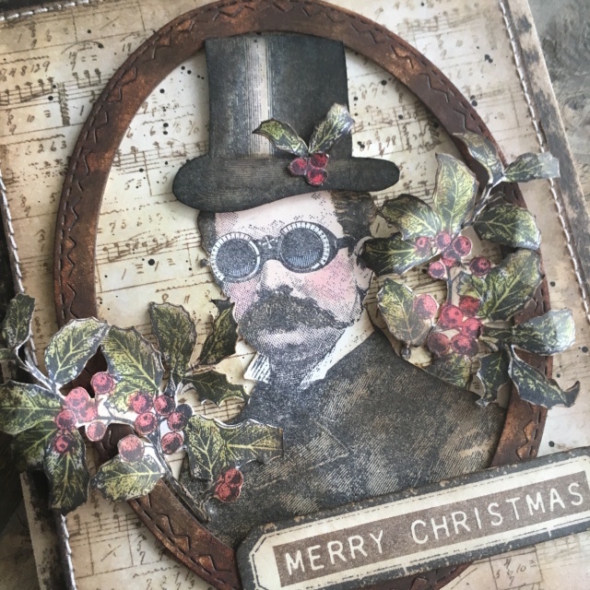
    I stamped the professor (CMS373) stamp set and his very dapper hat onto distress watercolor cardstock and watercolored with distress re-inkers. I fussy cut and mounted inside a stitched ovals die cut, blended with distress ink and mounted onto foam. Of course he had to have a sprig of holly added to his top hat.

    iGirlZoe: Tim Holtz stampers anonymous holiday stamps yuletide gatherings the professor music and advert
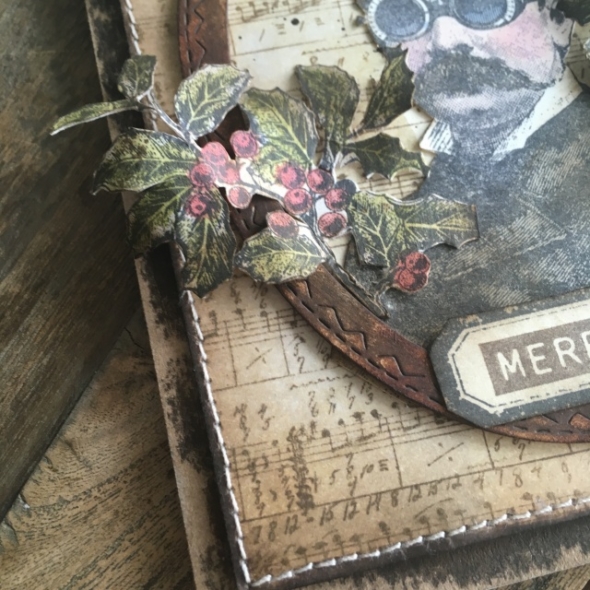
    If fussy cutting isn’t for you, you may want to look away now… I stamped holly from the yuletide gathering (CMS390) stamp set, watercolored with re-inkers and fussy cut. I curled the leaves to give dimension and adhered just at the stem.
    iGirlZoe: Tim Holtz stampers anonymous holiday stamps yuletide gatherings the professor music and advert
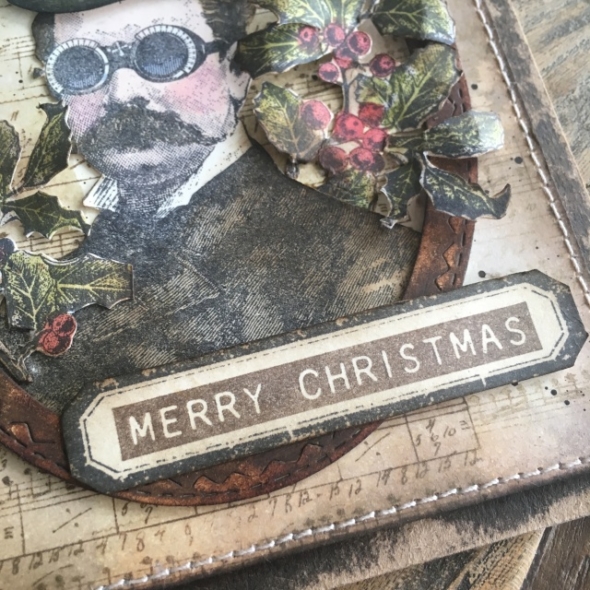
    I tiptoed back to the modern christmas (CMS388) stamps for a moment to use the “Merry Christmas” sentiment which I added to a label stamp from another set, I’m not sure which set it’s from as it lives permanently on my desk. I’d love a stamp set with assorted smaller labels… *cough cough* #badzoe

    iGirlZoe: Tim Holtz stampers anonymous holiday stamps yuletide gatherings the professor music and advert
    Thanks for stopping by and a big thanks to everyone who left kind comments here and on social media, I really appreciate the encouragement. A big thank you to Tim Holtz, Mario Rossi and Paula Cheney who work really hard to bring these products to market for us all to play with and help to support the makers while we create samples and Stampers Anonymous for bringing us awesome red rubber stamps.
    As always, if you have any questions please ask and I will do my best to help you.
    Have a great weekend and I hope that you have been inspired to get making.
    Zoe


  7. Yuletide Gatherings

    13th November, 2019 by iGirlZoe

    iGirlZoe: Tim Holtz stampers anonymous holiday stamps yuletide gatherings christmastime 2

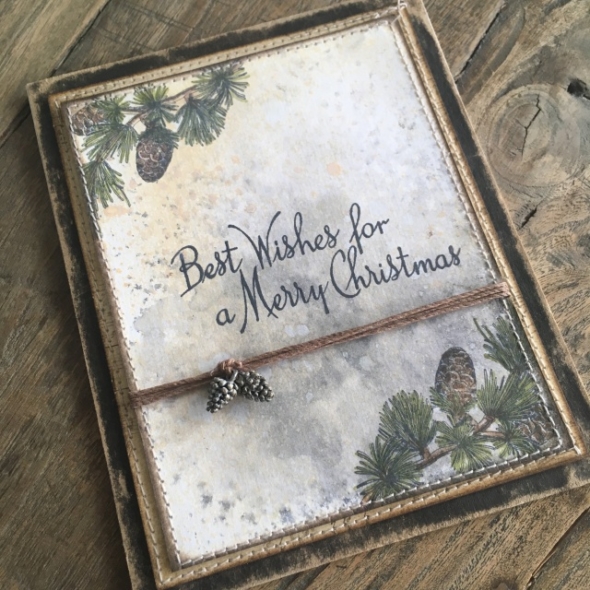
    Hello Friends! Today I’m sharing a super simple card that I made with the new Tim Holtz Stampers Anonymous Christmas stamps. If you missed the facebook LIVE you can catch up with all of the fun on Tim’s blog!

    iGirlZoe: Tim Holtz stampers anonymous holiday stamps yuletide gatherings christmastime 2
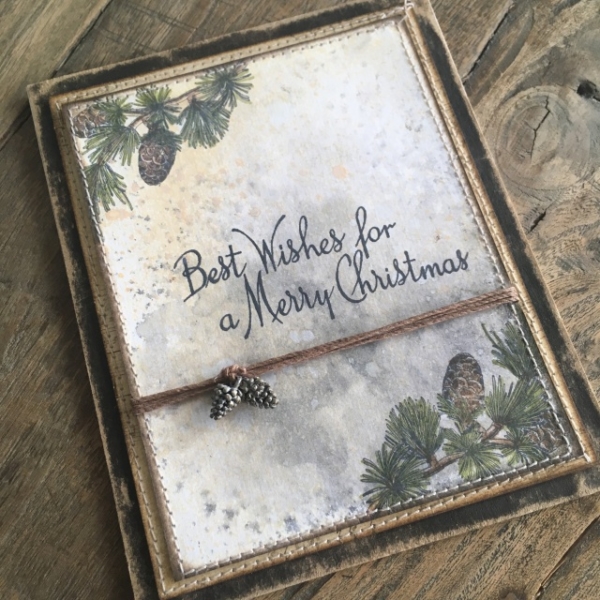
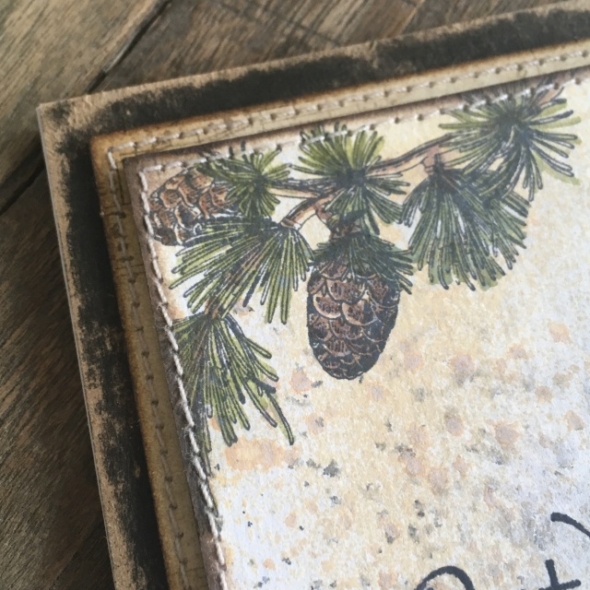
    I finally managed to put down the modern christmas stamp set for a second and used the yuletide gathering (CMS390) and christmastime 2 (CMS389) stamp sets. To begin I created a background with black soot distress spray and antique linen oxide spray onto distress watercolor cardstock and dried with a heat tool.

    iGirlZoe: Tim Holtz stampers anonymous holiday stamps yuletide gatherings christmastime 2
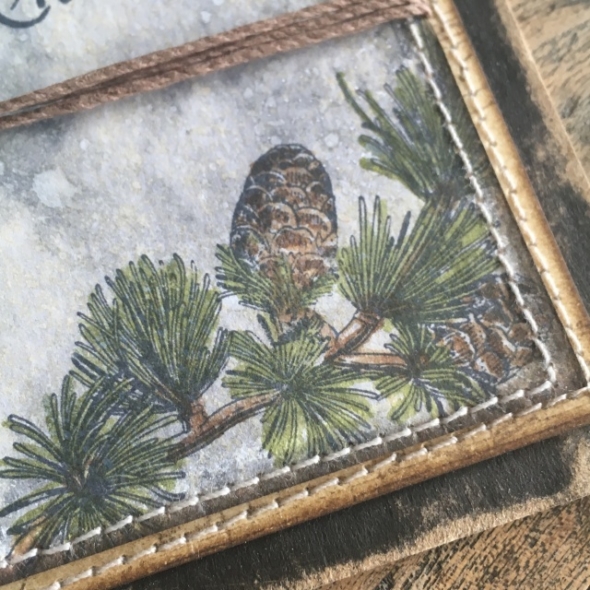
    Using a stamp from the yuletide gathering (CMS390) stamp set, stamp with distress archival ink and watercolor with distress re-inkers. I used peeled paint and gathered twigs.

    iGirlZoe: Tim Holtz stampers anonymous holiday stamps yuletide gatherings christmastime 2
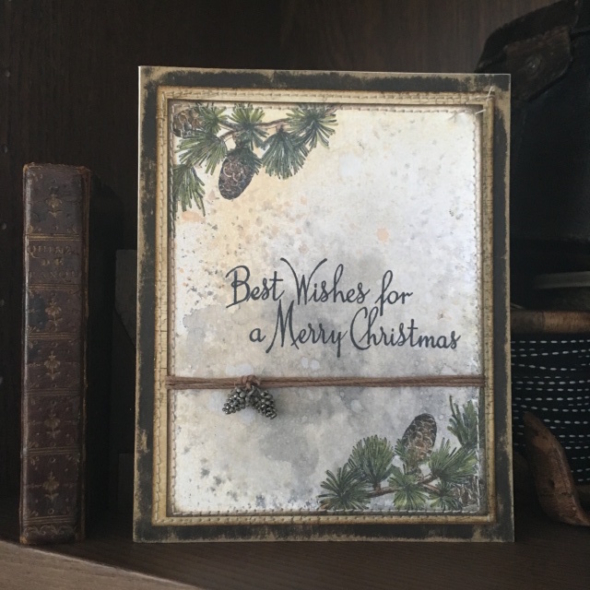
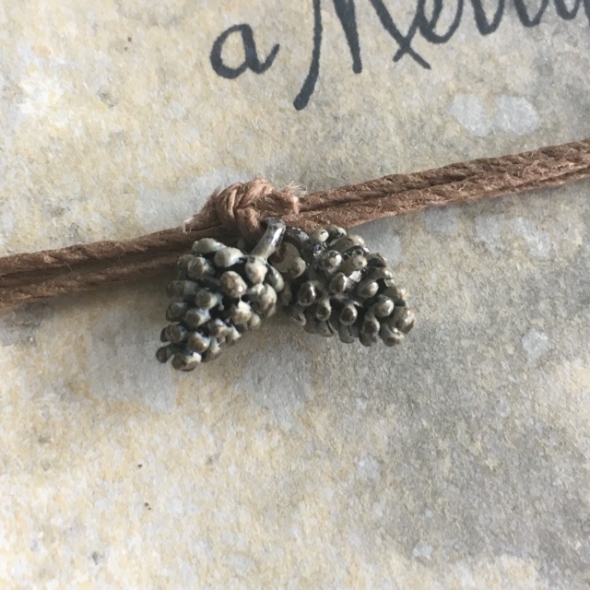
    I added 2 pinecones from the idea-ology festive adornment set which I added picket fence distress paint and mushroom alcohol ink to and tied them to the twine wrapped around the card.

    iGirlZoe: Tim Holtz stampers anonymous holiday stamps yuletide gatherings christmastime 2
    I edged the card with walnut stain and stitched with my sewing machine, I use a Singer heavy duty machine. I painted the edges of a piece of kraft stock with ground espresso distress paint and sanded.

    iGirlZoe: Tim Holtz stampers anonymous holiday stamps yuletide gatherings christmastime 2
    I used a sentiment from the christmastime 2 (CMS389) stamp set. This card is so quick and easy to make, which is helpful if you have a lot of cards to make this year and like me, haven’t really started yet!

    Thanks for stopping by, I will be back again tomorrow and there’s going to be a hat…

    Zoe


  8. not a modern christmas

    12th November, 2019 by iGirlZoe

    iGirlZoe: Tim Holtz stampers anonymous holiday stamps modern christmas deer

    Hello friends! I’m back with another card that I made with the new Tim Holtz Stampers Anonymous Christmas stamps. Catch up on all the fun on Tim’s blog.

    iGirlZoe: Tim Holtz stampers anonymous holiday stamps modern christmas deer
    I reached for the modern christmas (CMS388) stamp set again and set out to make another vintage card.

    iGirlZoe: Tim Holtz stampers anonymous holiday stamps modern christmas deer
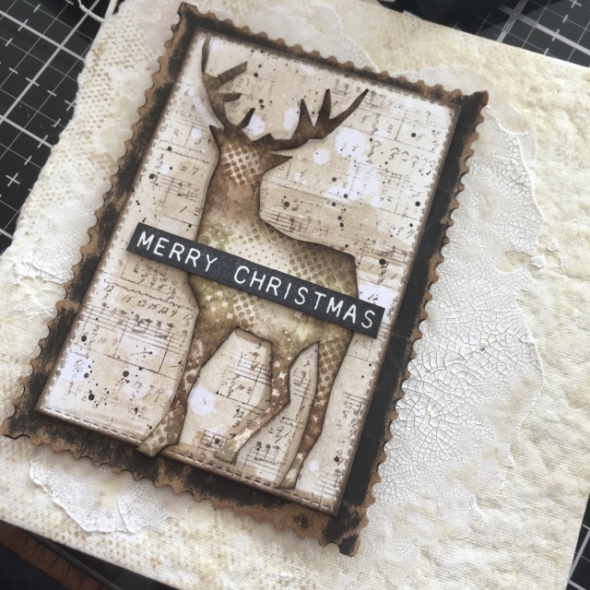
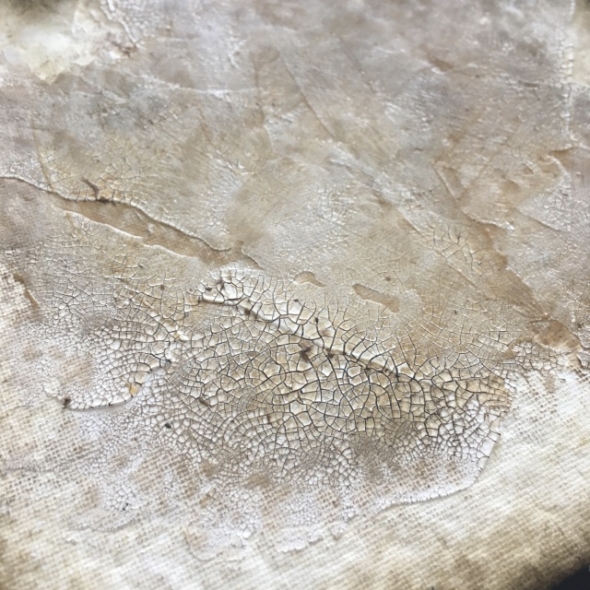
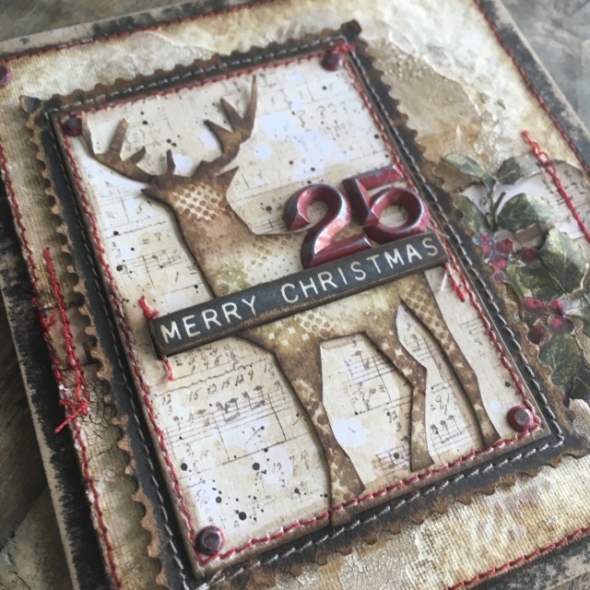
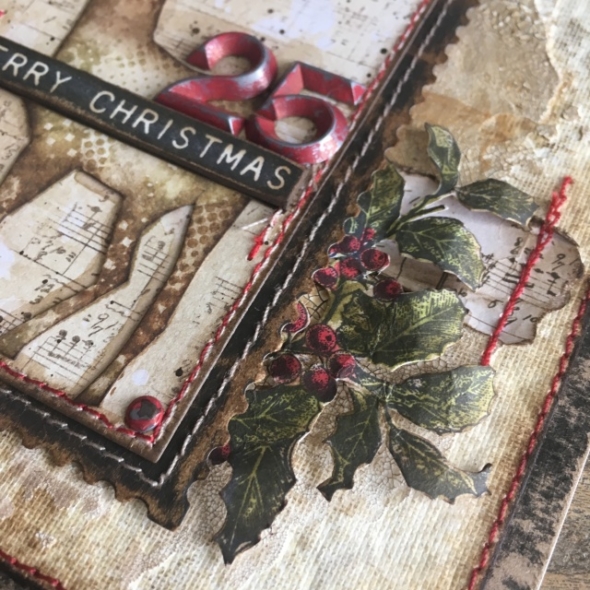
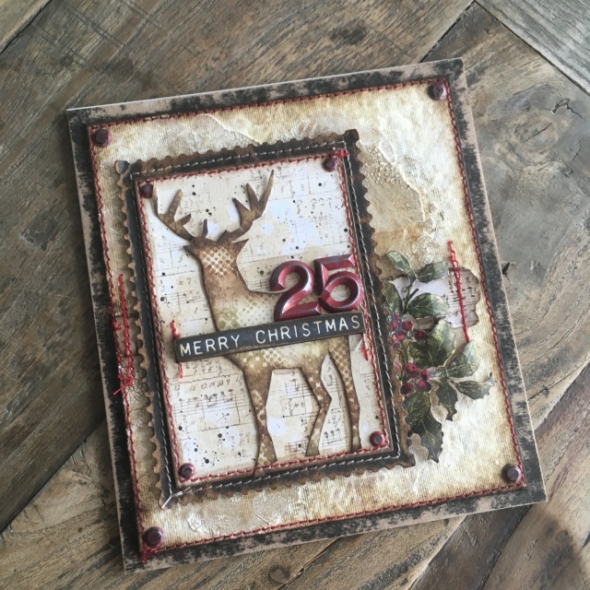
    I used a sheet of Dina Wakleys cotton watercolor paper and applied opaque crackle texture paste with a palette knife and set aside to dry. Next I sprayed the background with antique linen distress spray and used one of my favourite background stamps from slight alterations (CMS060) stamp set with frayed burlap distress ink using the spritz and stamp technique from yesterdays card. I used the same technique again to stamp the deer, which I fussy cut.

    iGirlZoe: Tim Holtz stampers anonymous holiday stamps modern christmas deer
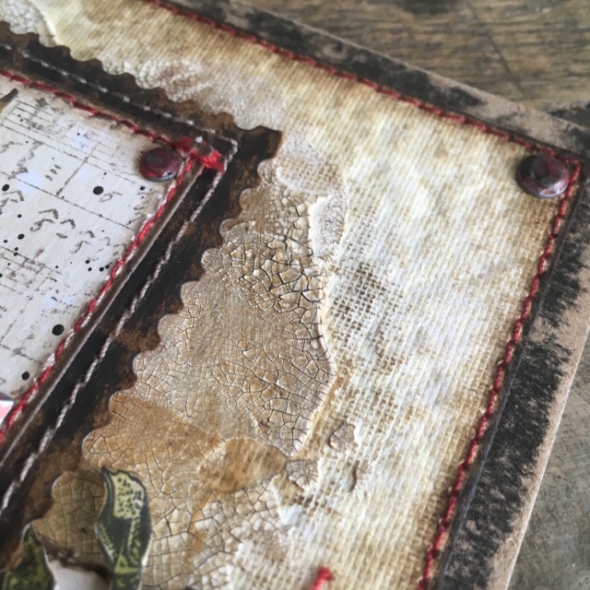
    I covered the crackle paste with vintage collage medium and once dry, rubbed distress crayons into the cracks and edged with walnut stain distress ink.

    iGirlZoe: Tim Holtz stampers anonymous holiday stamps modern christmas deer
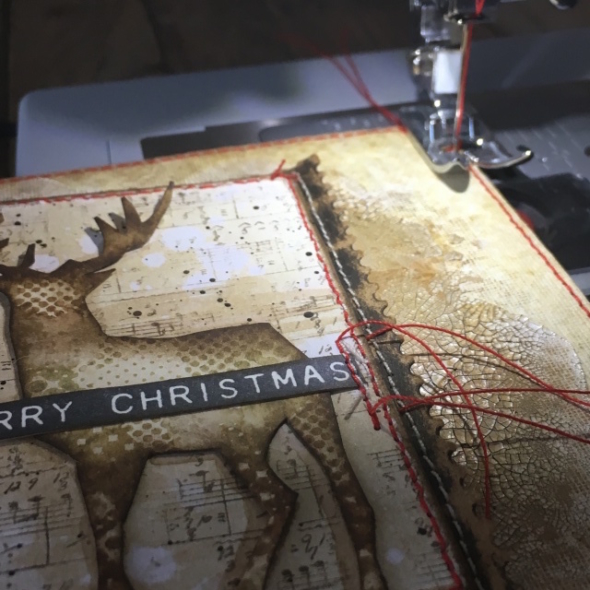
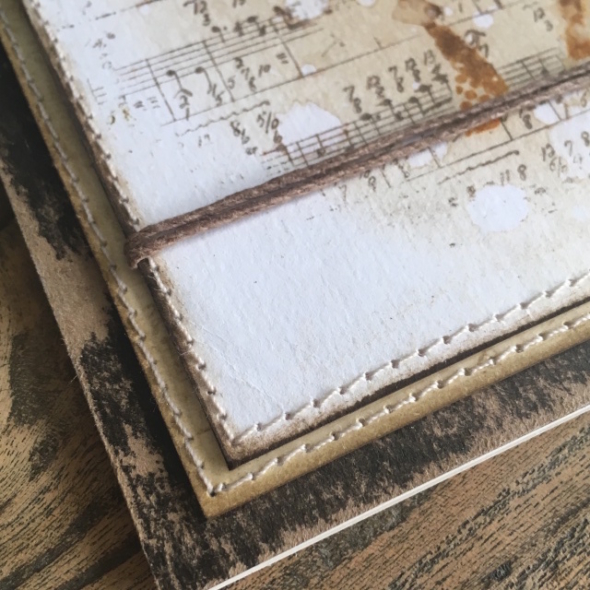
    I added red stitching with my sewing machine, I use a Singer heavy duty machine and whatever thread I have to hand. Tim asked me if I stitch and then trim the cardstock, which is actually a really good idea and would probably be far easier, but I use the sewing machine foot thingy (very technical over here) to run the edge of my cardstock and it gives me a stitched line right next to the edge. I was hopeless at sewing a couple of years ago and had a hate hate relationship with my machine, but with practice, some good advice from Paula Cheney (always try on a piece of scrap first) and you all cheering me on, I’m doing better and don’t hate it anymore! So thanks!

    iGirlZoe: Tim Holtz stampers anonymous holiday stamps modern christmas deer
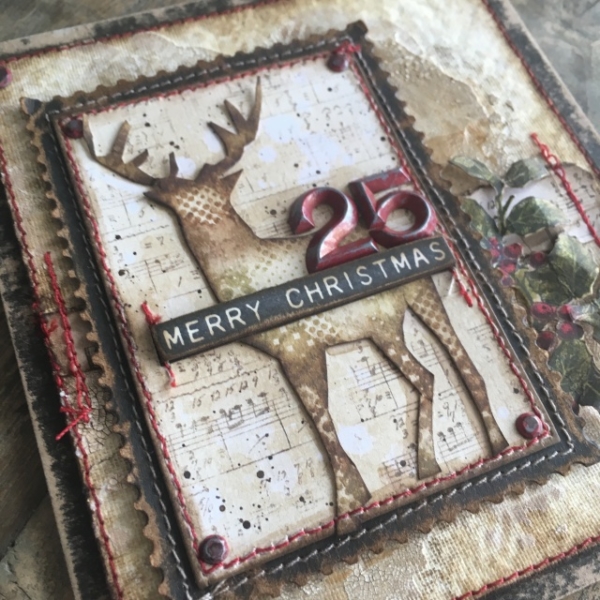
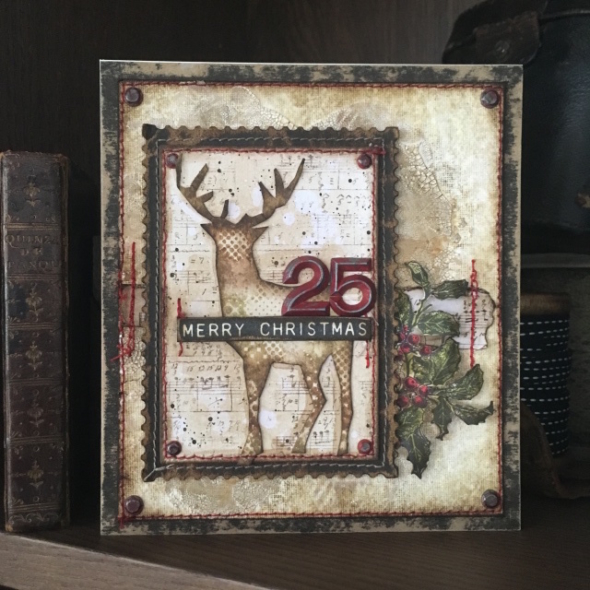
    I cut a mount using the Tim Holtz stacked postage thinlits die with blackout kraft-stock and stitched rectangles thinlits die with distress watercolor cardstock.  I added idea-ology hardware heads which I painted with candied apple distress paint and rubbed off to give a chippy paint look.

    iGirlZoe: Tim Holtz stampers anonymous holiday stamps modern christmas deer
    I did the same with the numbers from the idea-ology numeric set and added a merry christmas stamped from the modern christmas stamp set. I used the music and advert (CMS358) stamp set, stamped in ground espresso archival ink to create a background. I sprayed antique linen distress spray over the top and spritzed with water droplets for the bleached effect.

    iGirlZoe: Tim Holtz stampers anonymous holiday stamps modern christmas deer
    Using the yuletide gathering (CMS390) stamp set, I stamped holly, watercoloured with distress re-inkers and fussy cut. I adhered just at the base and used a paintbrush handle to curl the holly slightly to lift from the card for dimension. I also added a little piece of torn paper stamped with the music under the holly and stitched.

    iGirlZoe: Tim Holtz stampers anonymous holiday stamps modern christmas deer
    Thanks for stopping by, let me know if you have any questions and I will be back tomorrow with another card.

    Zoe


  9. A Vintage Modern Christmas

    11th November, 2019 by iGirlZoe

    iGirlZoe: Tim Holtz stampers anonymous holiday stamps modern christmas deer

    Hello friends! It’s that time of year again… red cups at Starbucks, cinnamon candles, chestnuts roasting on an open fire and Tim Holtz Christmas stamps! I hope you managed to catch the Tim Holtz facebook LIVE showcasing the new Stampers Anonymous Christmas stamps. You can catch up on all the fun on Tim Holtz blog.

    iGirlZoe: Tim Holtz stampers anonymous holiday stamps modern christmas deer
    If you know me or know of my love for all things vintage, you can probably guess the “what am I going to do with these” look on my face when I saw the modern christmas (CMS388) stamp set. I love a creative challenge and decided to make it my own…

    iGirlZoe: Tim Holtz stampers anonymous holiday stamps modern christmas deer
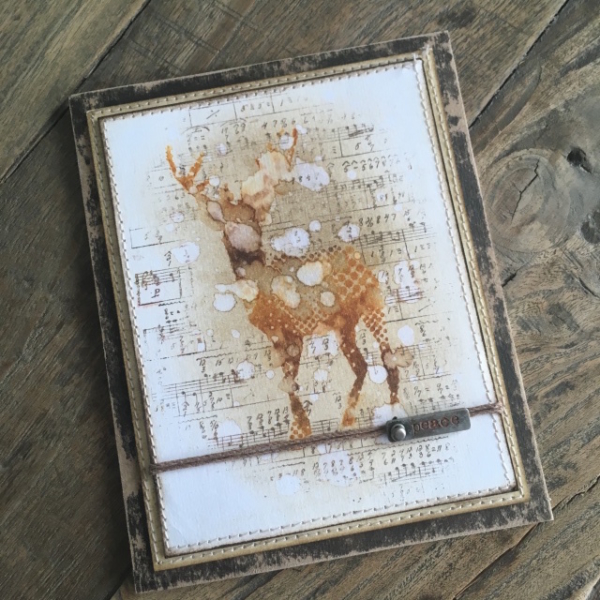
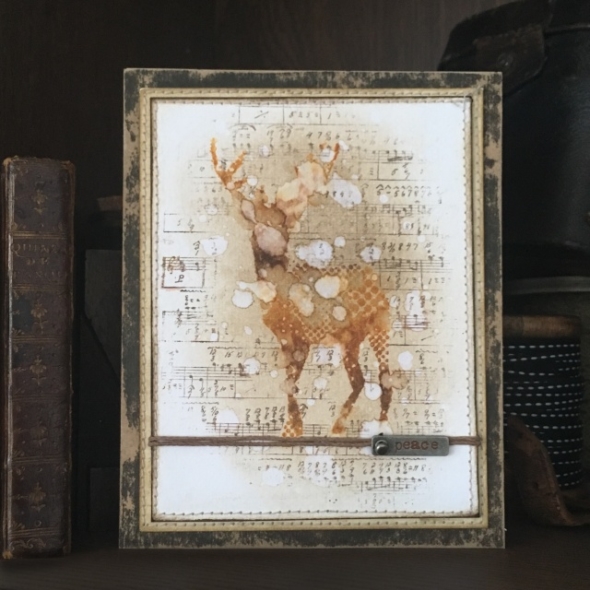
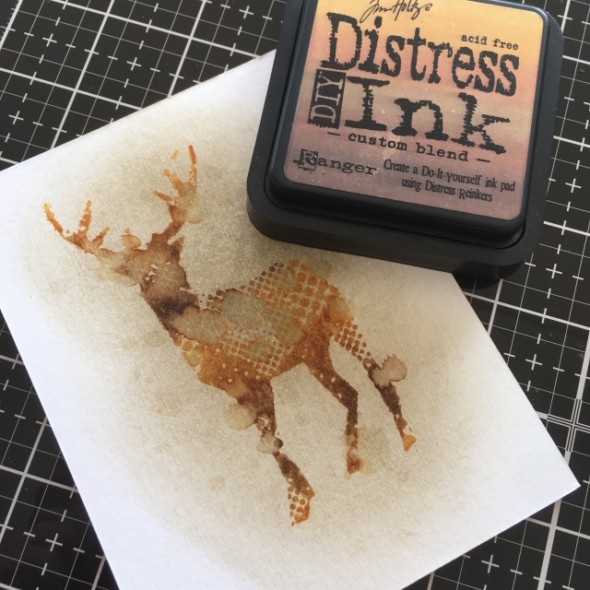
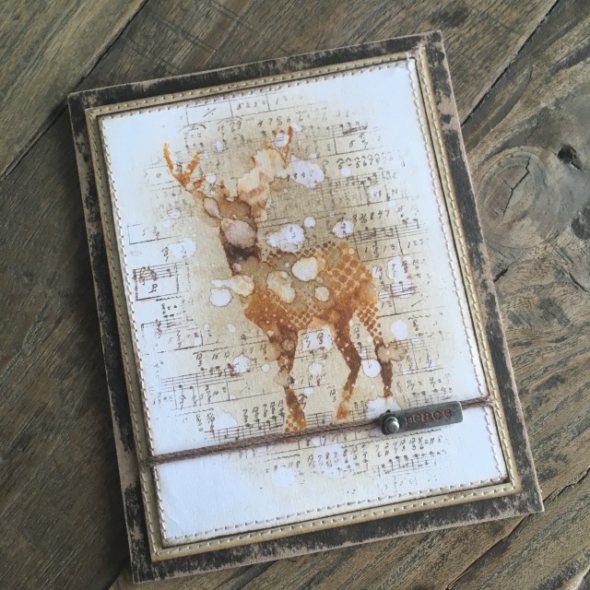
    Using a custom blend distress ink pad (wild honey, rusty hinge, brushed corduroy, vintage photo, ground espresso), I inked the deer stamp from the set and spritzed the stamp with water before stamping onto distress watercolor cardstock using the travel stamp platform and drying with a heat tool. Once completely dry, I blended in frayed burlap distress ink over the center of the card and masked off the deer ready for the next step.

    *Beginner Tip: To create a stamp mask, simply stamp the image onto inexpensive copier paper and fussy cut. Place this over the original stamped image to protect during background stamping. It’s best to use thin paper for the mask, otherwise you create a step for the background stamp and you won’t get nice and close to the image.

    Click HERE to see how to create a custom blend distress ink pad.

    iGirlZoe: Tim Holtz stampers anonymous holiday stamps modern christmas deer
    One of the many things that I love about Stampers Anonymous, is they never retire any of the Tim Holtz stamp sets. I used a stamp from last years seasonal release stamp set, music and advert (CMS358). I inked up with ground espresso distress archival ink and stamped without a grid block or stamping platform to get an inconsistent and weathered look. I spritzed with water and used a clean cloth to pick up the water droplets, it lifts the ink and creates the cool bleached effect. I got a lucky drip right on his nose which was perfect.

    iGirlZoe: Tim Holtz stampers anonymous holiday stamps modern christmas deer
    I wrapped twine around the card and stitched the edges with my sewing machine, I use a Singer heavy duty machine. I painted the edges of kraft card stock with ground espresso distress paint and sanded back to reveal the kraft.

    iGirlZoe: Tim Holtz stampers anonymous holiday stamps modern christmas deer
    I love that this card is so quick and easy to make. Perfect if you want to keep it simple or are sending out lots of holiday or winter cards this year. I added a story stick with rusty hinge distress crayon, but you can add any sentiment to make it a winter themed birthday or notecard, lots of versatility.

    I’ll be back tomorrow with another Christmas card. Thanks for stopping by.

    Zoe


  10. It’s a wonderful life!

    12th December, 2018 by iGirlZoe

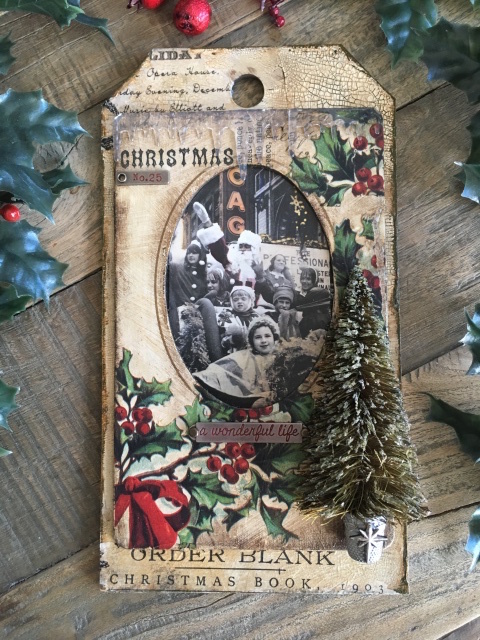
    Hello friends. I am looking forward to a Christmas party on Friday night with some craft friends and we are each taking a handmade secret santa gift.

    iGirlZoe: Tim Holtz, idea-ology, collage frames, etcetera tag, woodlands trees, found relatives, collage paper, crackle, christmas, holiday home decor.
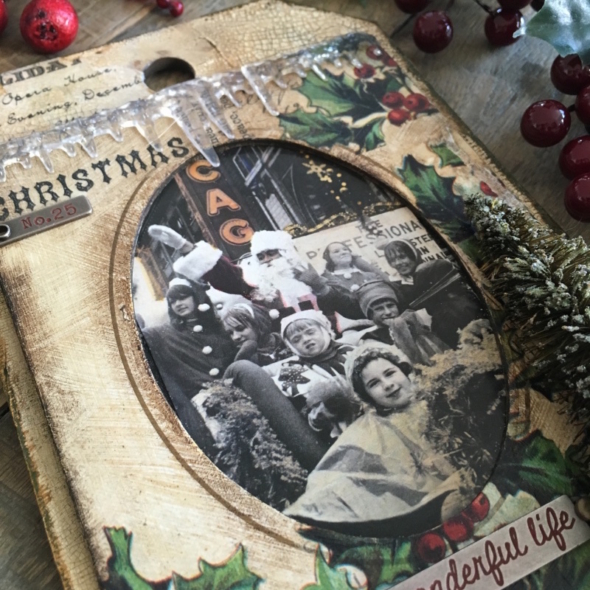
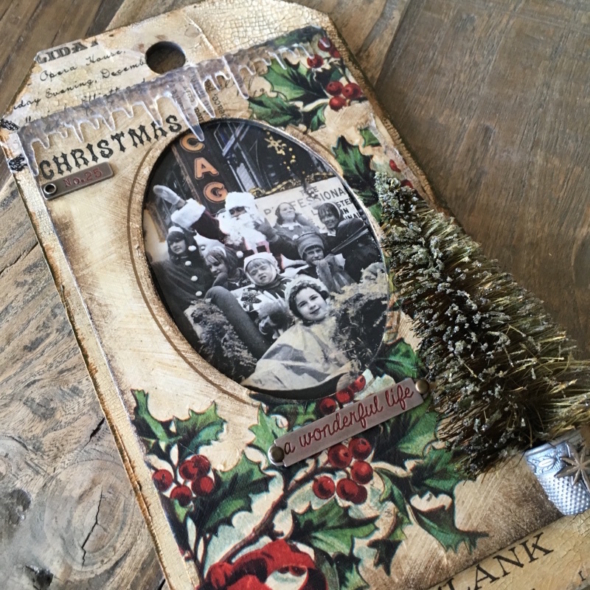
    I used some of the Tim Holtz idea-ology holiday products to create this home decor piece.

    iGirlZoe: Tim Holtz, idea-ology, collage frames, etcetera tag, woodlands trees, found relatives, collage paper, crackle, christmas, holiday home decor.
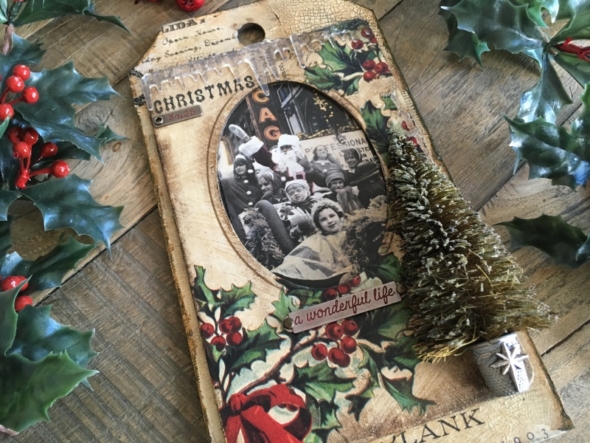
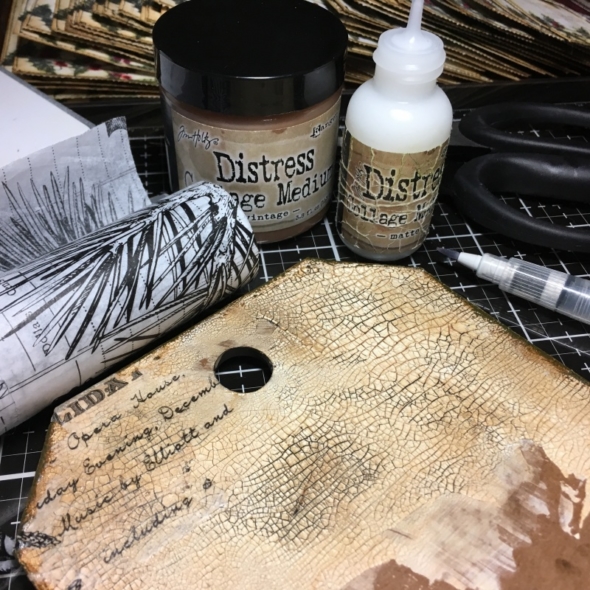
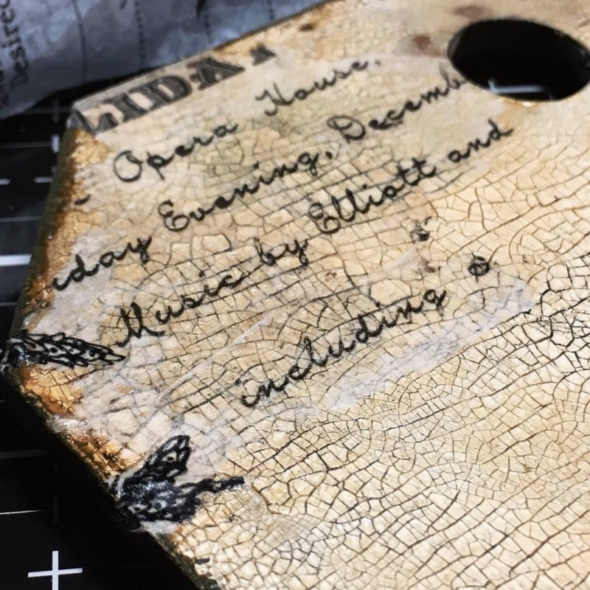
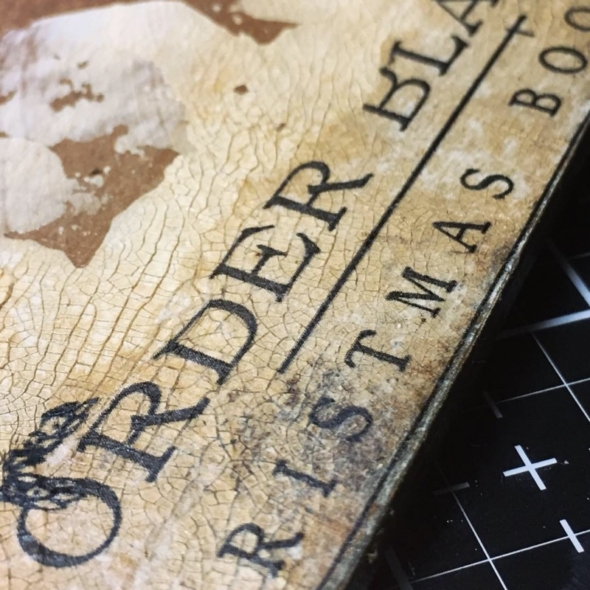
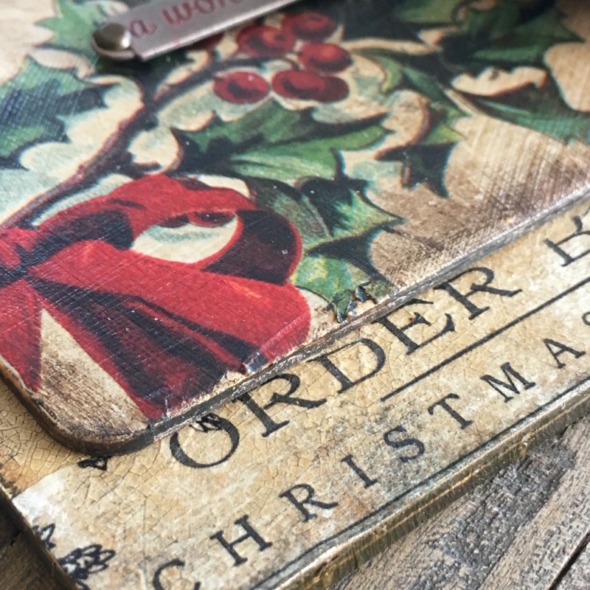
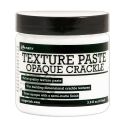
    I smeared opaque crackle texture paste over an etcetera tag using a palette knife and set aside to air dry, before covering with a layer of vintage distress collage medium.

    iGirlZoe: Tim Holtz, idea-ology, collage frames, etcetera tag, woodlands trees, found relatives, collage paper, crackle, christmas, holiday home decor.
    Once dry, rub distress crayons into the cracks with your finger and wipe away excess with a damp cloth.

    iGirlZoe: Tim Holtz, idea-ology, collage frames, etcetera tag, woodlands trees, found relatives, collage paper, crackle, christmas, holiday home decor.
    Add strips of forest collage paper using distress collage medium. The collage paper becomes transparent, so the crackle effect shows through. So cool!

    iGirlZoe: Tim Holtz, idea-ology, collage frames, etcetera tag, woodlands trees, found relatives, collage paper, crackle, christmas, holiday home decor.
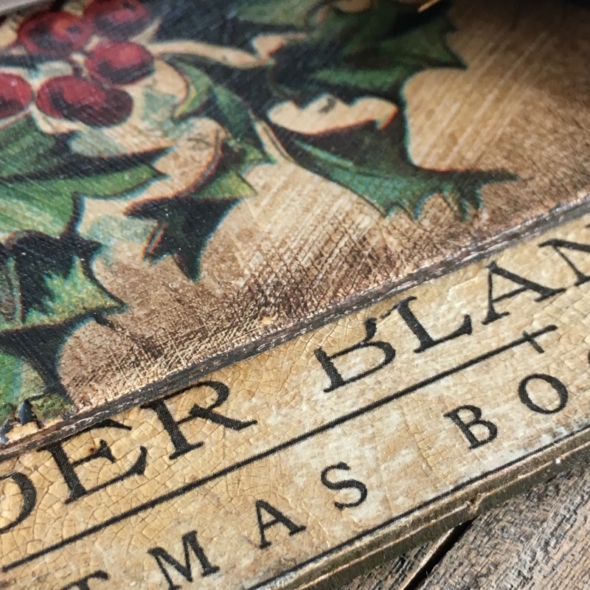
    Cover an idea-ology collage frame with holly collage paper. Use a water brush to trace around the holly leaves and gently pull away leaving no hard edge. This was such a great tip from Tim Holtz in his recent facebook live. Add to the collage frame using vintage distress collage medium applied with a distress brush. Blend in distress crayons, which will show up the brush strokes left by the distress brush. I love these brush marks as they add texture, but if you don’t want them, add with your finger or a soft bristled brush.

    iGirlZoe: Tim Holtz, idea-ology, collage frames, etcetera tag, woodlands trees, found relatives, collage paper, crackle, christmas, holiday home decor.
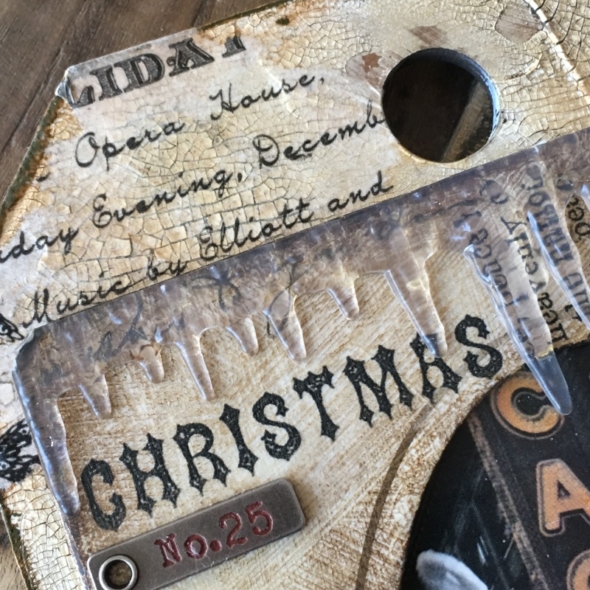
    Add the cool new idea-ology icicles to the top, trimming the corners and add a story stick, colouring with distress crayon. The “Christmas” is collage paper, cool right?!

    iGirlZoe: Tim Holtz, idea-ology, collage frames, etcetera tag, woodlands trees, found relatives, collage paper, crackle, christmas, holiday home decor.
    Mount the collage frame over a found relative card from the occasions set. Colour using distress markers.

    iGirlZoe: Tim Holtz, idea-ology, collage frames, etcetera tag, woodlands trees, found relatives, collage paper, crackle, christmas, holiday home decor.

    iGirlZoe: Tim Holtz, idea-ology, collage frames, etcetera tag, woodlands trees, found relatives, collage paper, crackle, christmas, holiday home decor.
    Add an idea-ology Christmas word band and a half woodlands tree, sprayed with distress spray, rubbed with collage medium and dusted with glitter using the glitter duster. These half trees are flat at the back and I am personally so grateful for this product. It’s such a time saver not having to trim them yourself to use on a flat surface.

    iGirlZoe: Tim Holtz, idea-ology, collage frames, etcetera tag, woodlands trees, found relatives, collage paper, crackle, christmas, holiday home decor.
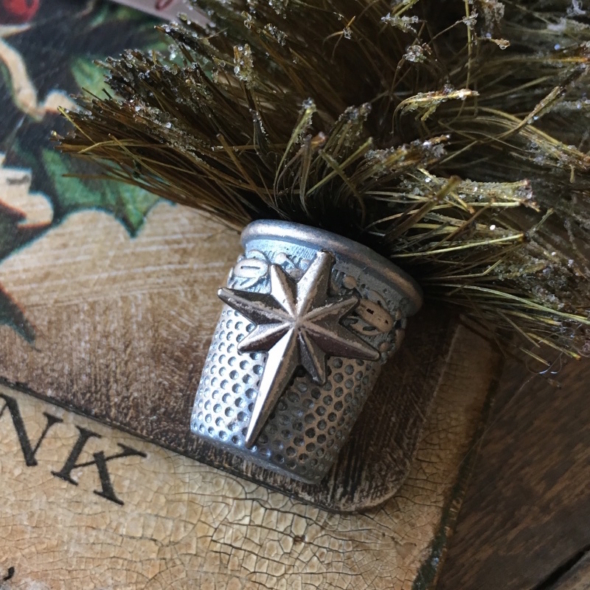
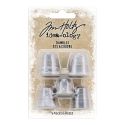
    I am quite obsessed with the new idea-ology thimbles. They have a flat base so you can stand them, but I added it to the collage frame with collage medium. I used the a star from the Christmas tokens set, cutting the loop off the top and rubbing a little gilding wax over the top.
    iGirlZoe: Tim Holtz, idea-ology, collage frames, etcetera tag, woodlands trees, found relatives, collage paper, crackle, christmas, holiday home decor.
    Thanks for stopping by and I hope that this has inspired you to make something for the holidays. You can see all of Tim Holtz holiday idea-ology products on Tim’s blog.
    Zoe