Hello everyone. I am guest blogging over at A Vintage Journey today where Julia set an awesome theme, “Through the looking Glass!” You can see the finished project over there and the step-by-step below.
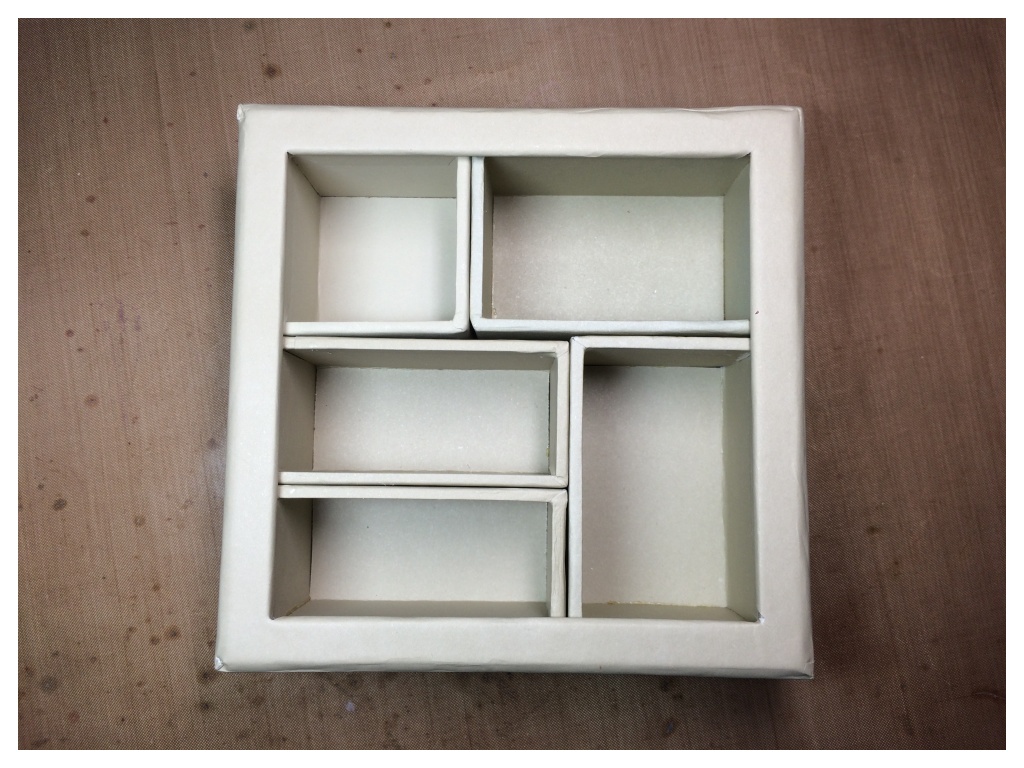
Take Tim Holtz’s square 5.75″ x 5.75″ idea-ology configuration box. This one was very kindly gifted to me by my good friend Genevieve, (thank you <3)!
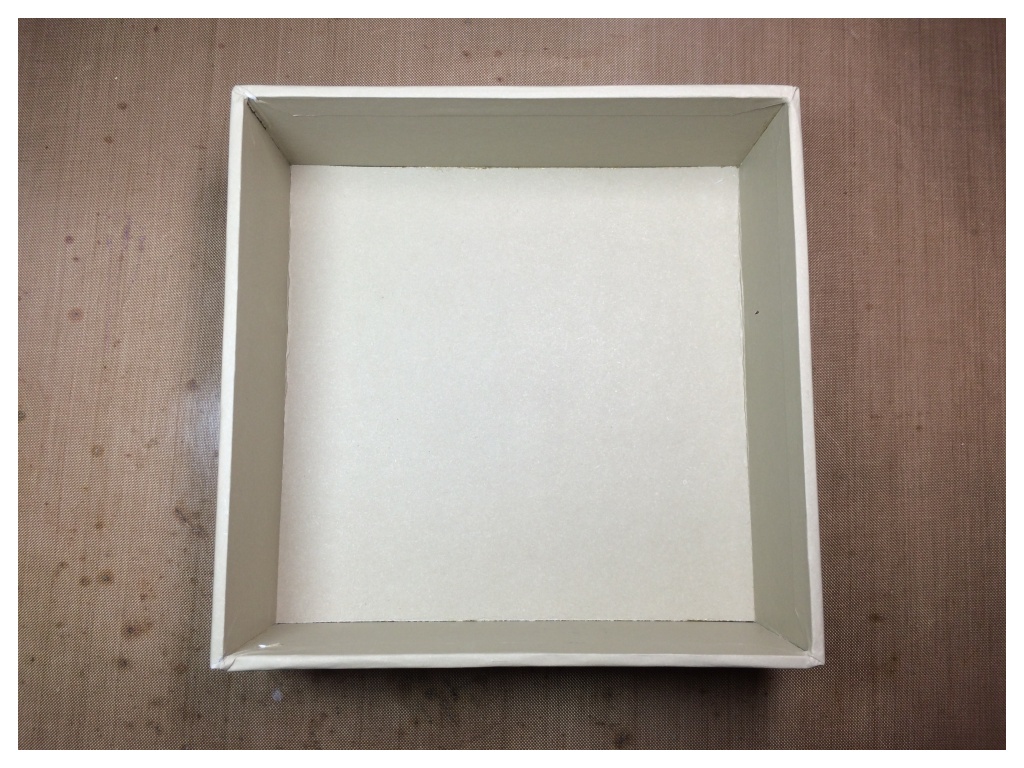
Put aside the lid and insert boxes to use another day.
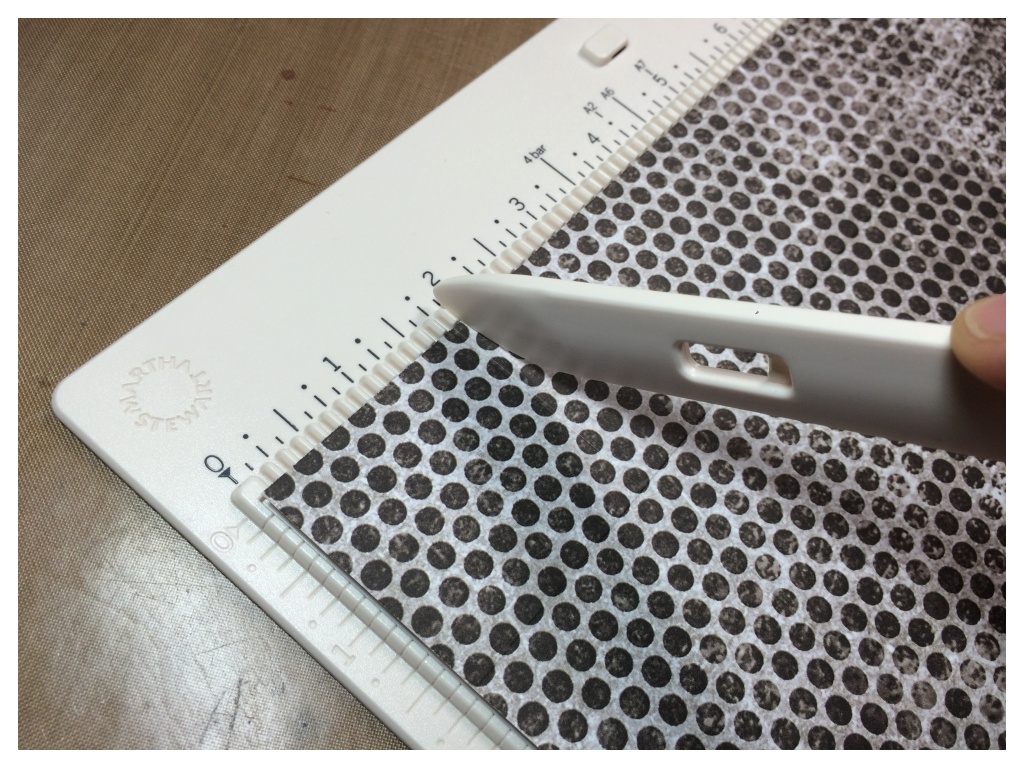
Cut a sheet of paper (7.5″ x 9.25″). Score across the top of the longest edge (1.75″), then turn the paper 180 degrees and score left to right (1.75″ & 7.5″).
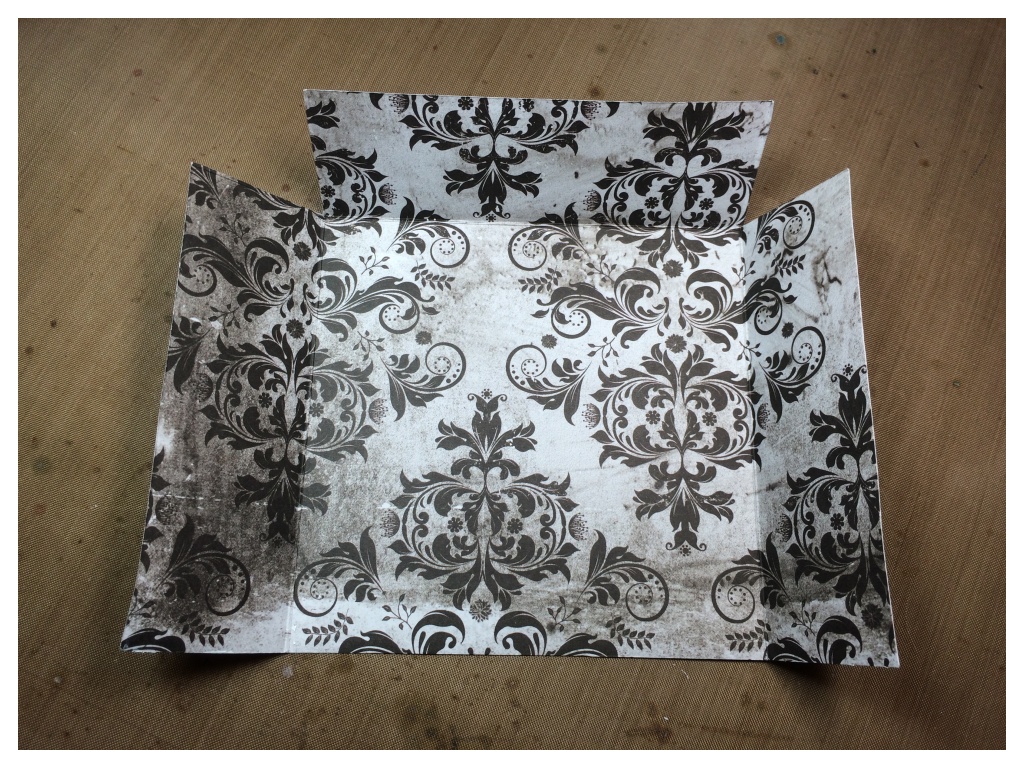
Trim the excess square out of each top corner and cover the reverse in glue n seal.
*TIP: work quickly, glue n seal waits for no one. 😉
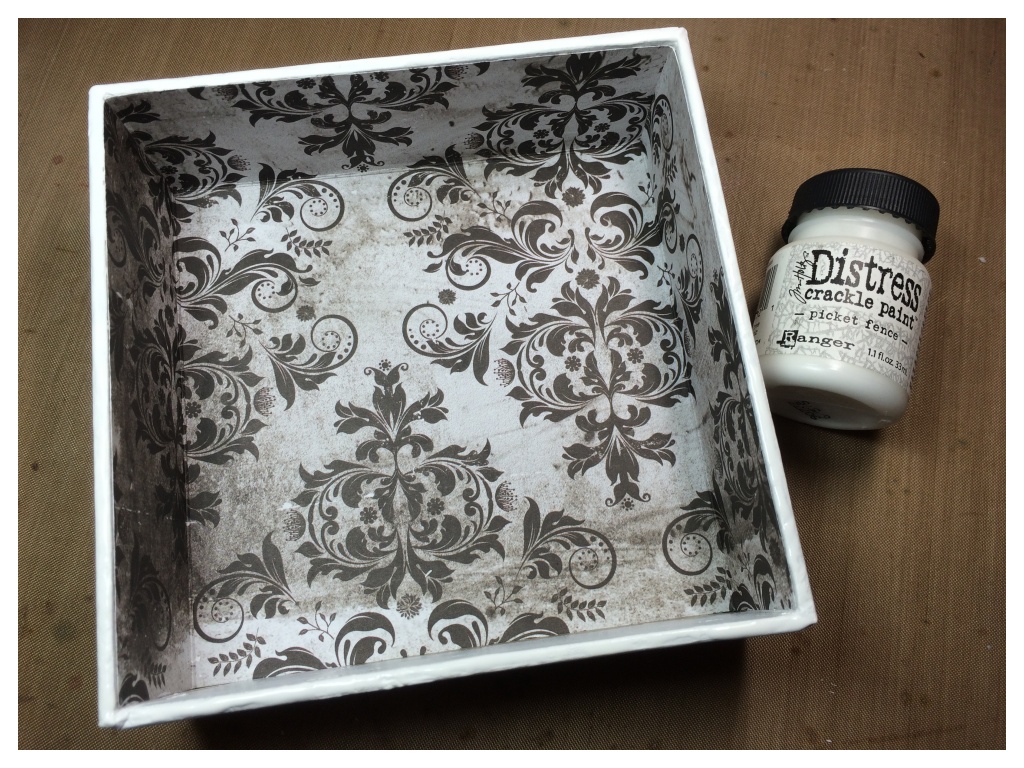
Line the configuration box and paint the edges with distress crackle paint and set aside to dry.
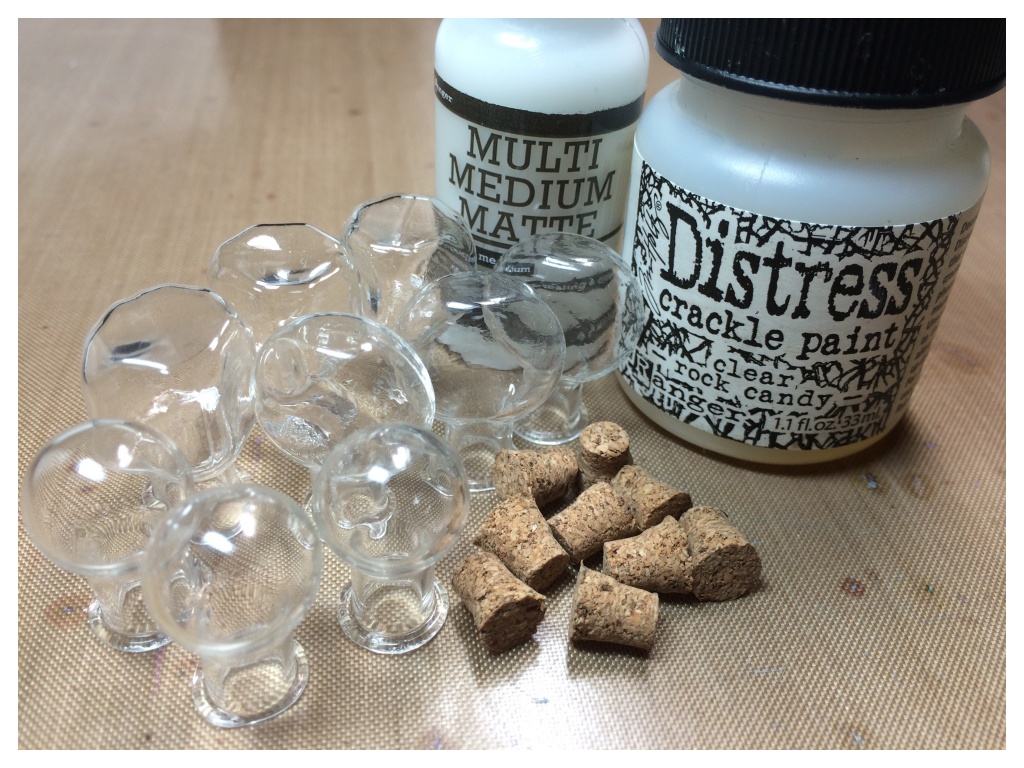
Cover Tim Holtz idea-ology tiny vials and light bulbs with multi medium matte and set aside to dry.
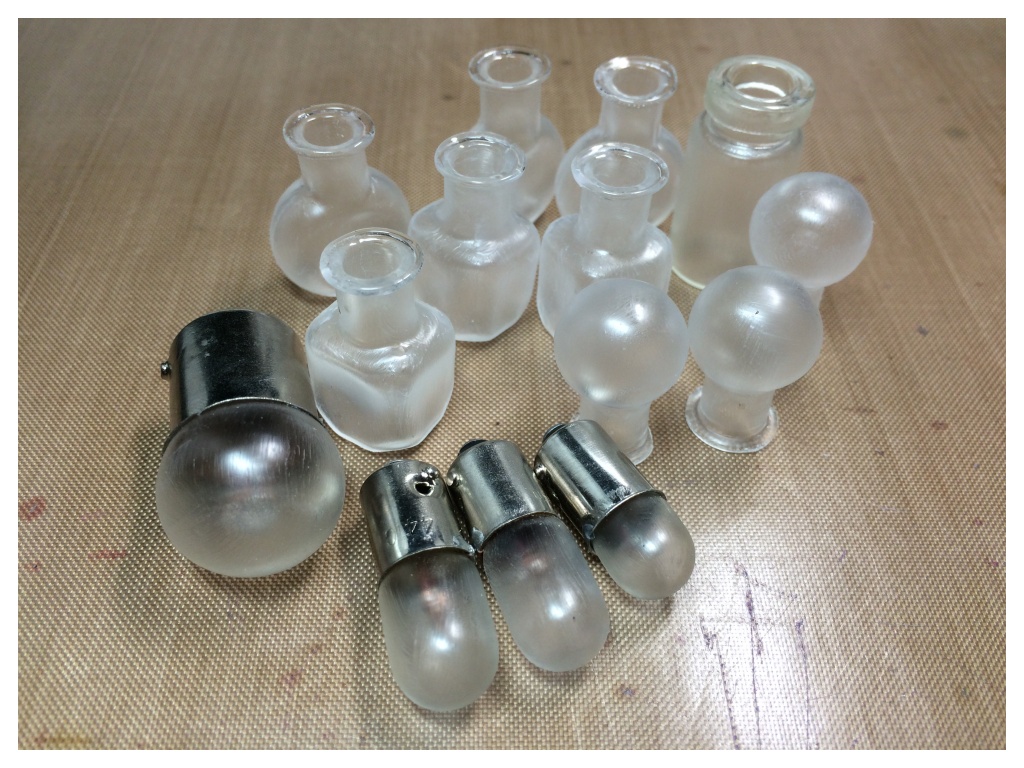
Cover each with a good layer of distress crackle glaze and set aside to dry.
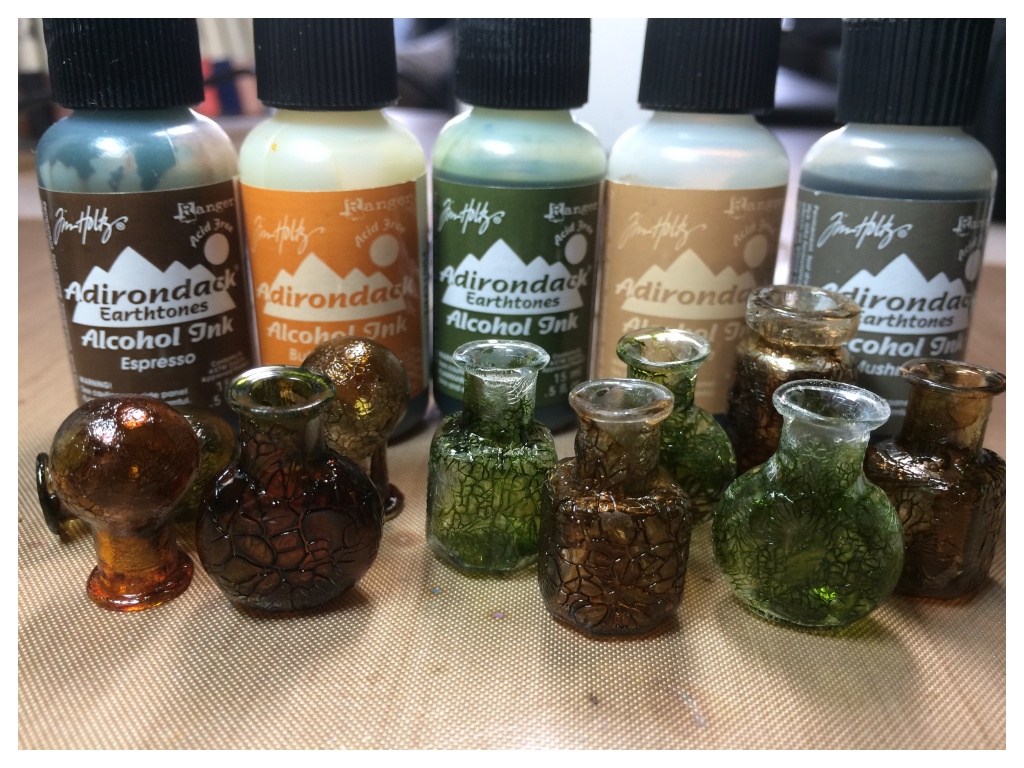
Once completely dry, drop alcohol ink on each bottle and set aside to air dry.
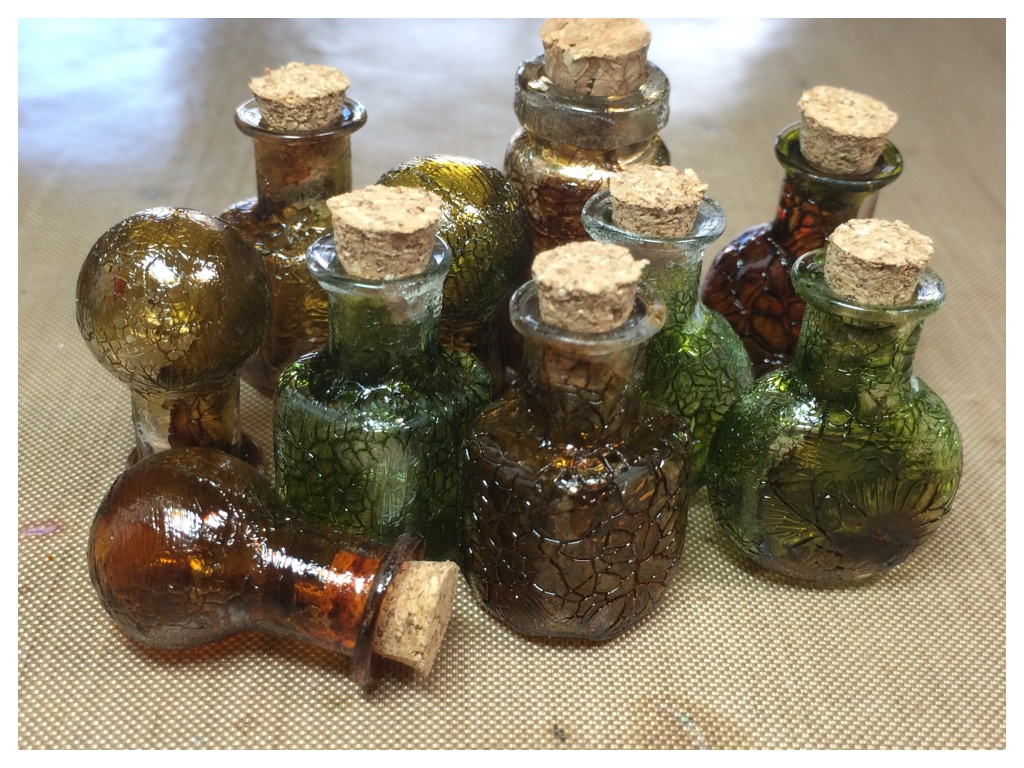
Put the corks back into the vials and make tiny labels to attach to the vials with string.
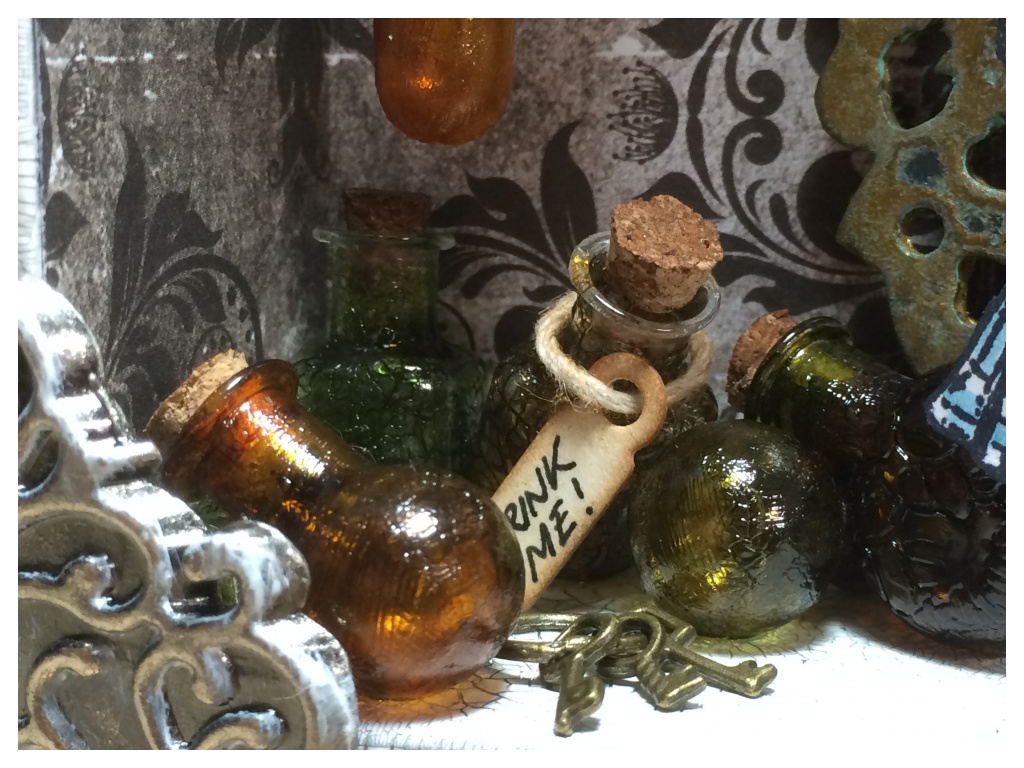
Arrange vials into your configuration box and then glue into place with glossy accents.
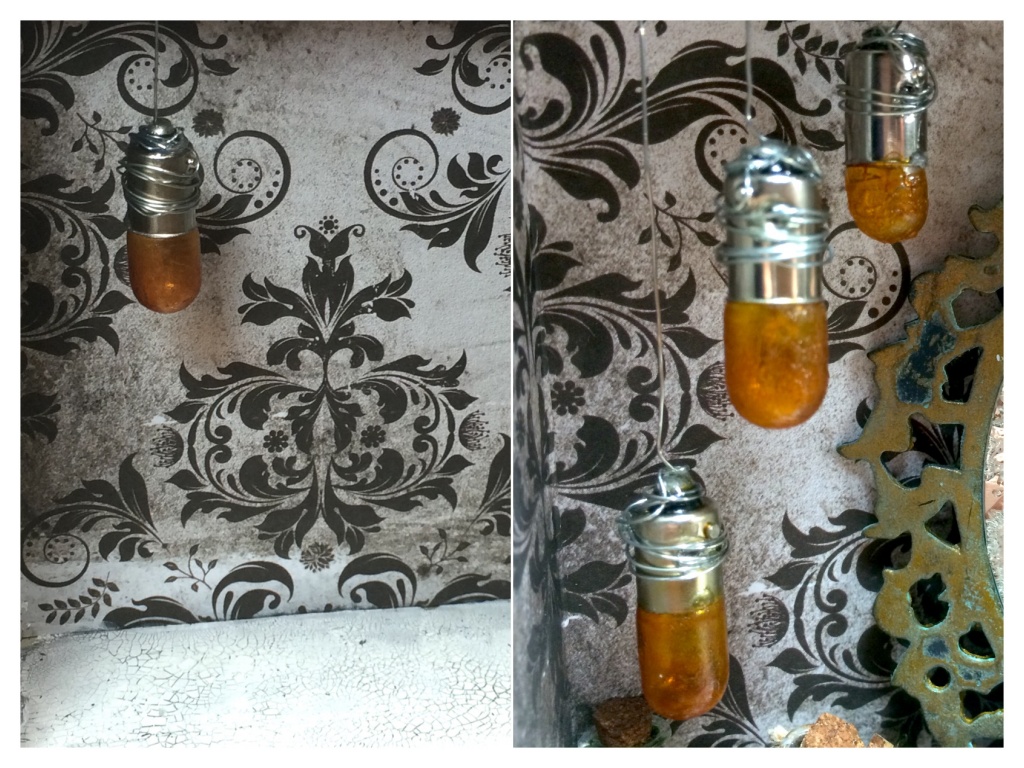
These hanging bulb lights were inspired by the AWESOME lights from this years Tim Holtz CHA idea-ology booth!
Crackle glaze the bulbs, (same method as before), wrap wire around the top, secure in place with glossy accents and set aside. While waiting for the glossy accents to dry, poke 3 holes into the top of the configuration box. Once the glossy accents are dry, poke the wire underside through the top and secure with tape, (which will be covered next).
Cover the outer top and side of the configuration box with picket fence distress paint and once dry, cover in a layer of distress crackle paint. Allow the box to dry completely and then rub walnut stain distress ink into the cracks and remove excess with kitchen roll (paper towel).
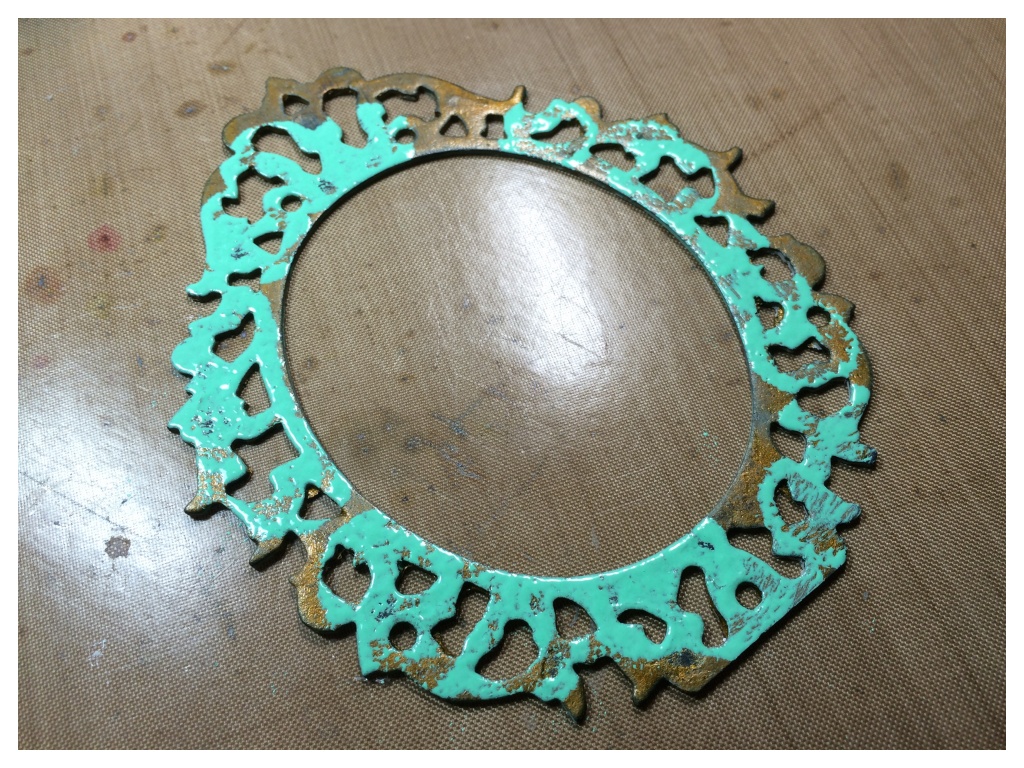
Next prepare the mirror frame. Die cut a Tim Holtz ornate frame from grungeboard and cover with tarnished brass distress paint and set aside to air dry. Once thoroughly dry, sand portions of the frame and cover in cracked pistachio distress paint and allow to almost dry. Wipe away paint with kitchen roll (paper towel), the cracked pistachio distress paint will come away easily from the painted surfaces and cling to the edges of the sanded areas giving a faux aged patina look.
In order to hide the reverse side of my stamped fussy cut Alice image, I added distress crackle paint to idea-ology mirror. It also gives a cool shattered effect.

Finally, assemble your confirguration box adding several of the bottles to the top and adding some idea-ology hardware.
I die cut “WONDERLAND” from Tim Holtz holiday words script thinlit die set. This fits in perfectly with the theme and helps me to continue my challenge to use my festive dies for other things throughout the year.
Hope you’re still with me! To see the finished project, stop by A Vintage Journey and enter the “Through the Looking Glass” challenge.
Thanks for stopping by and for your comments, I really appreciate them.
Have a great weekend.


Absolutely LOVE this Zoe! The little bottles just crack me up – they are SO adorable with their crackle and cute little tags! I am so honored that you were inspired to create for my AVJ challenge – Through the Looking Glass!! and thanks SO much for Guest Designing for us!
It was my absolute pleasure Julia. Thank you for inviting me and setting such a cool challenge that totally inspired me. 🙂
Zoe, I love this. This piece relays the magic of a wonder-filled story. I’m working on some wonderland-esque things myself and this is fabulous inspiration.
Well done My friend! Like always i loooove the attention you put in every details. The crackle floor is just one of your brillant ideas
Your project is so amazing Zoe!! It’s great to see your process, I was wondering how you did that frame!! Well done and congrats on your guest designer spot! hugs 🙂
Stunning Zoe – thank you so much for joining as at A Vintage Journey – been following you for a while and just love your work! Those bottles are sensational. Nikki xx
Great to stop by and see how this wonderful project all came together.
Have a great weekend, Julie x
Zoe, your ‘Through the Looking Glass’ Alice themed project is absolutely stunning, I love every single little detail of it! Congratulations on your guest appearance at Ranger too, your work is always beautiful and inspiring. It was so lovely to have you as a Guest Designer at A Vintage Journey. Anne x
Oh my goodness Zoe, this is STUNNING!!! You have so many fabulous details in this and I love every one of them! Great tutorial too, I just love your work! 😉 Bobbi xx
Zoe you have created the most amazing project for us at AVJ and it’s a real pleasure having you as a guest. Thanks for all the hard work you put into this fabulous ‘through the looking glass’ box with the gorgeous bottle and lights, they are so inspirational.
Enjoy the weekend.
hugs Brenda xxx
This is amazing! I have an empty congfigurations box and you have inspired me!
What an amazing project Zoe, love those little vials and your looking glass is just fabulous! Congratulations on your AVJ guest designer post!
Hi Zoe! These glass vials are just gorgeous! I love the look and am wondering if you can tell me if this could be done to embellish a glass candle jar? Would they withstand the heat? If not, do you know of Tim Holtz products that would? Thank you!