1. 21st March, 2023

    idea-ology File Cards

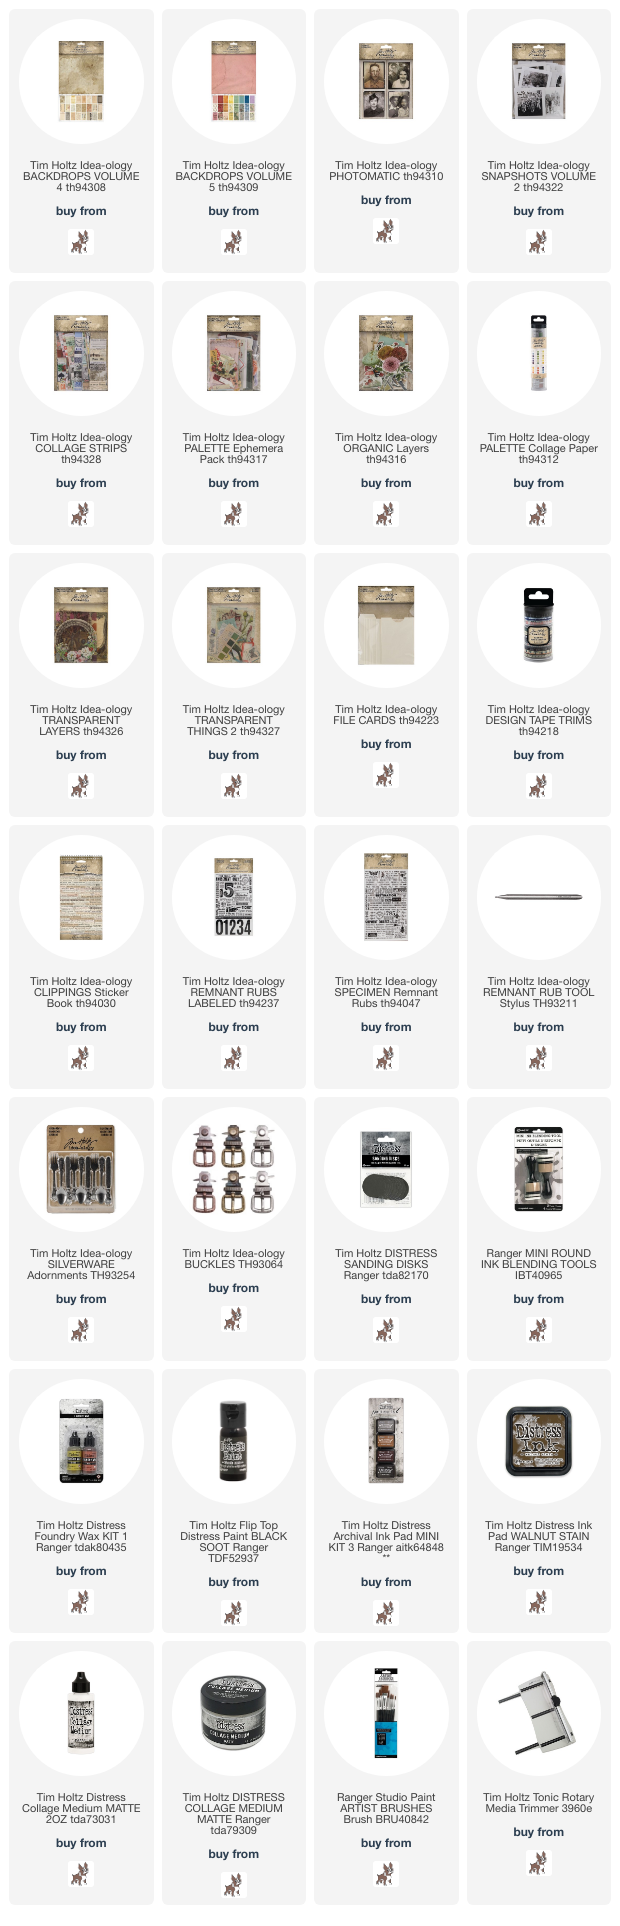
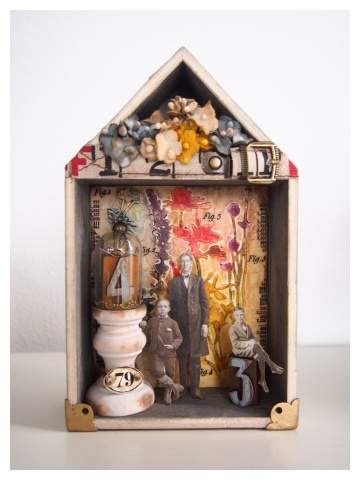
    Hello friends, hope your week is off to a great start. In my last post I shared my science experiment tray and today I’m sharing the idea-ology file cards that were part of that make. You can see the idea-ology 2023 products, LIVE replay and inspiration makes over on Tim Holtz blog.

    igirlzoe: tim holtz idea-ology 2023
    I was inspired by all the incredible paper and ephemera that is part of this new idea-ology 2023 line and wanted to add a paper element to my science experiment tray.

    igirlzoe: tim holtz idea-ology 2023
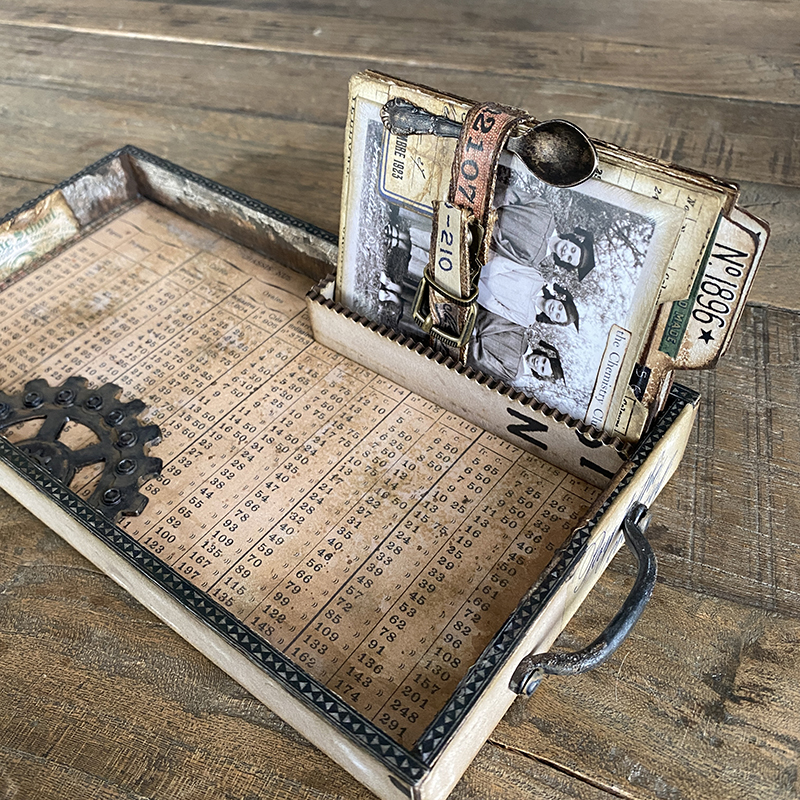
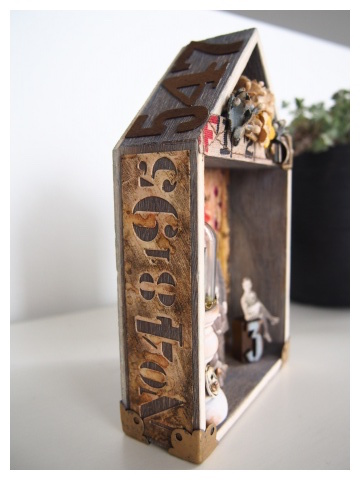
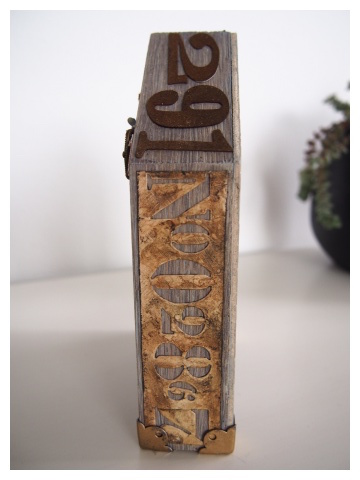
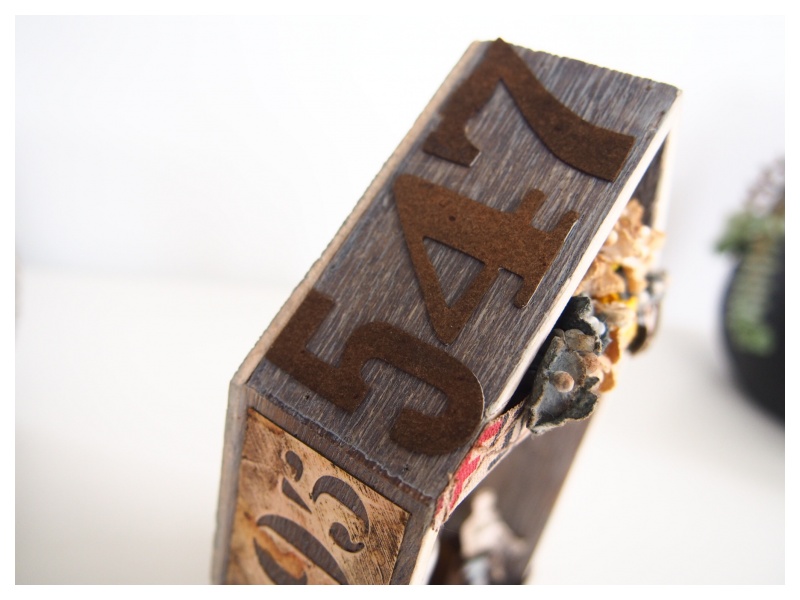
    I created a compartment at the back of the vignette tray out of etcetera thickboard trims covered with backdrops volumes 4 and 5 papers for the file cards to sit in. You can see all the details of the science experiment tray on my other post.

    igirlzoe: tim holtz idea-ology 2023
    I love that idea-ology helps you tell a story and this was the perfect way to continue mine. Let’s get into details…

    igirlzoe: tim holtz idea-ology 2023
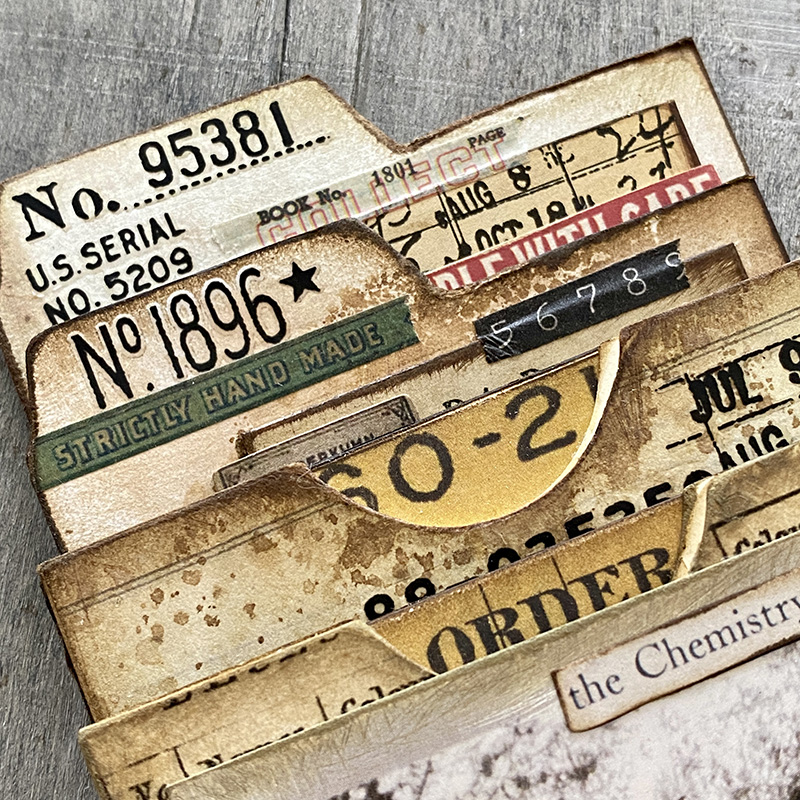
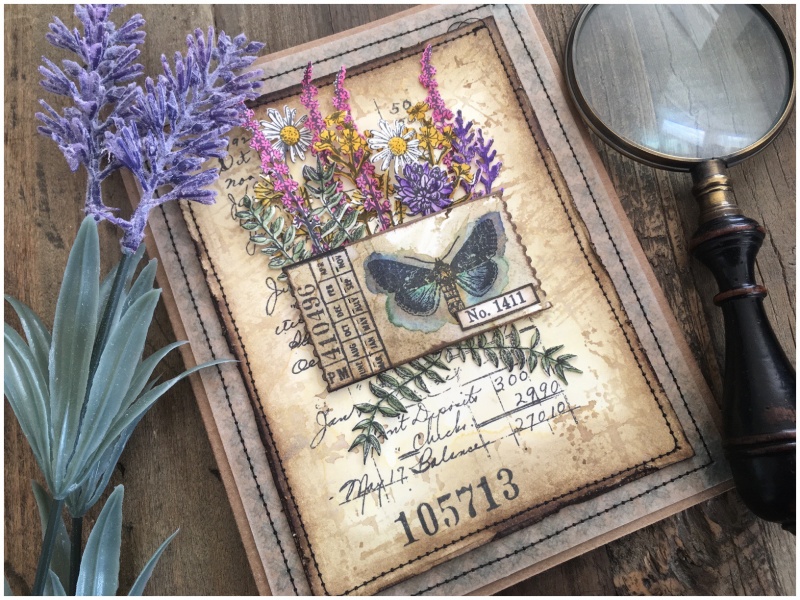
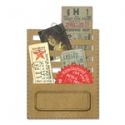
    Using idea-ology file cards I created scientist identification cards and experiment notes. I trimmed the index cards slightly to fit inside the pockets. The folded card in this pack perfectly fit onto the back of the pocket and I added some ephemera inside the pocket for visual interest when the index cards are out.

    igirlzoe: tim holtz idea-ology 2023
    Side view: pocket on top, folded card behind, index card inside the pocket with tab showing (all from idea-ology file cards pack).

    igirlzoe: tim holtz idea-ology 2023
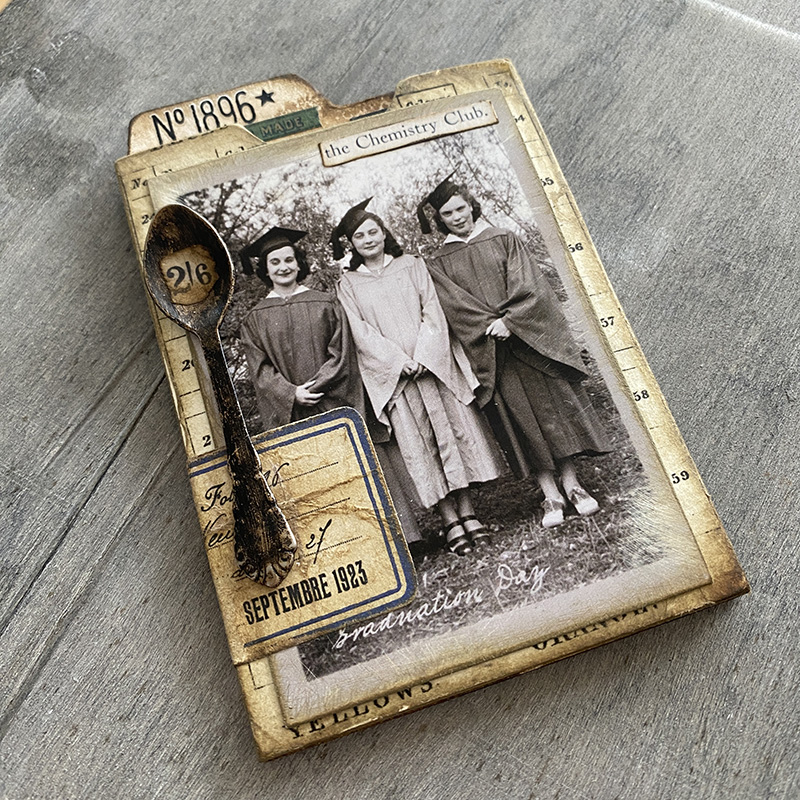
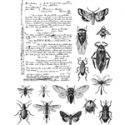
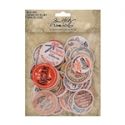
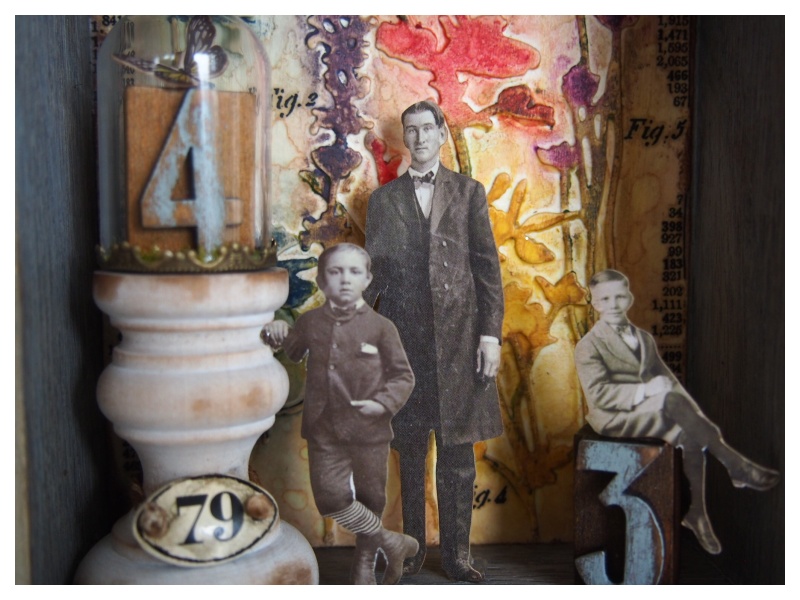
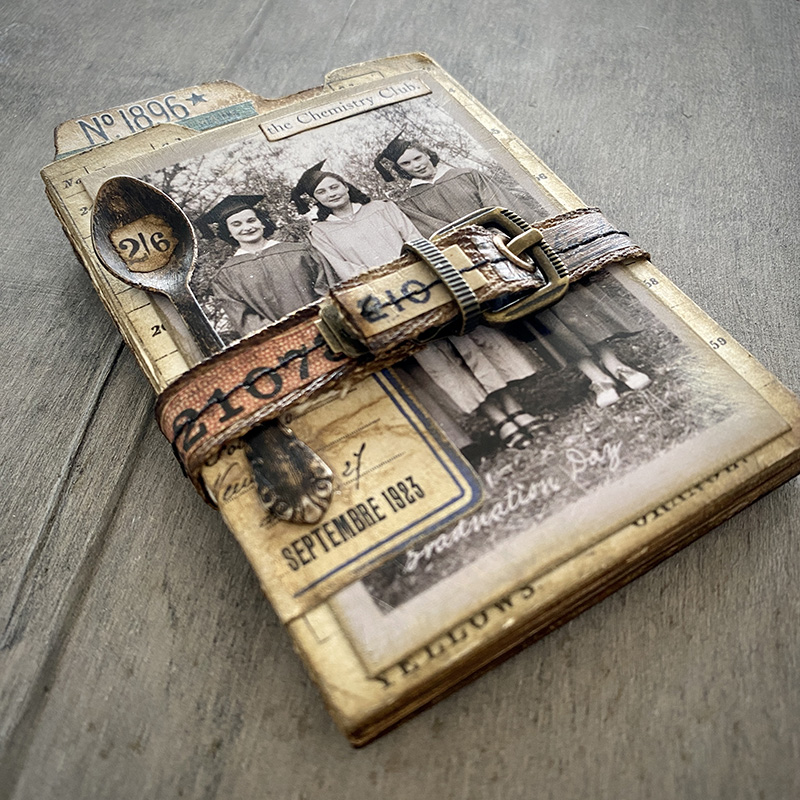
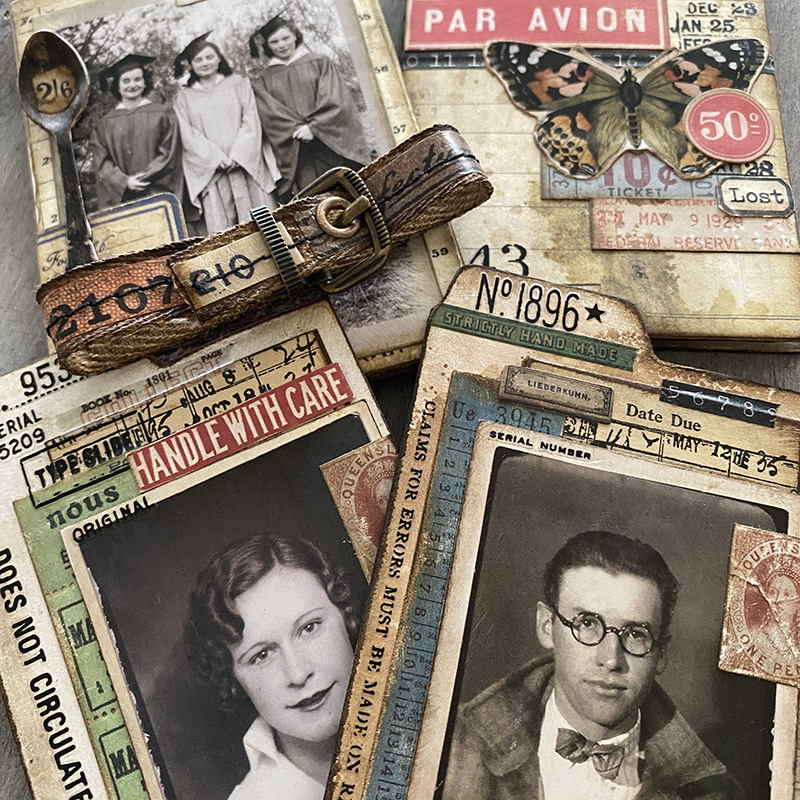
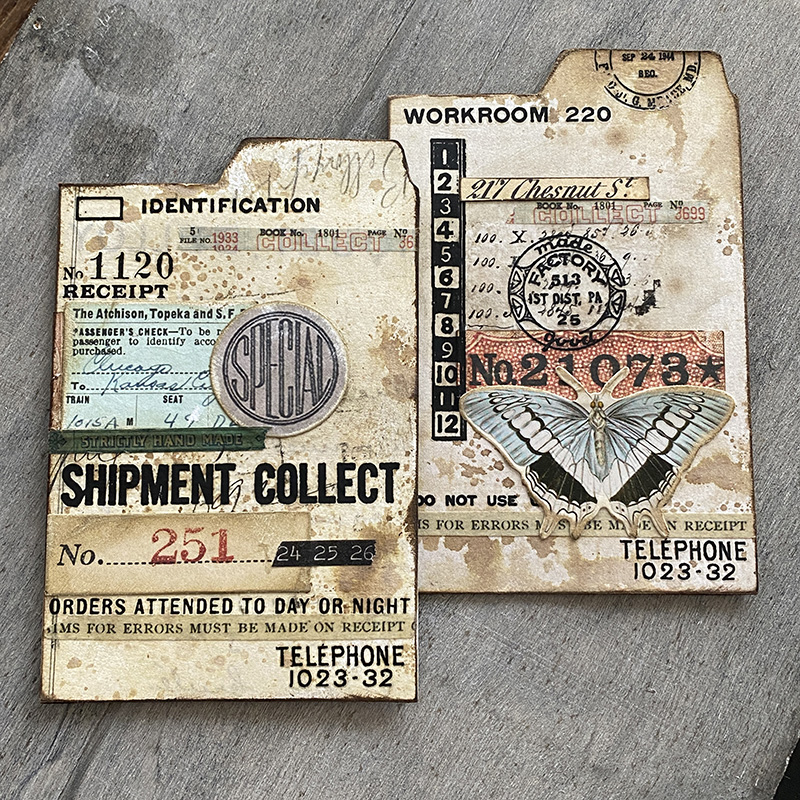
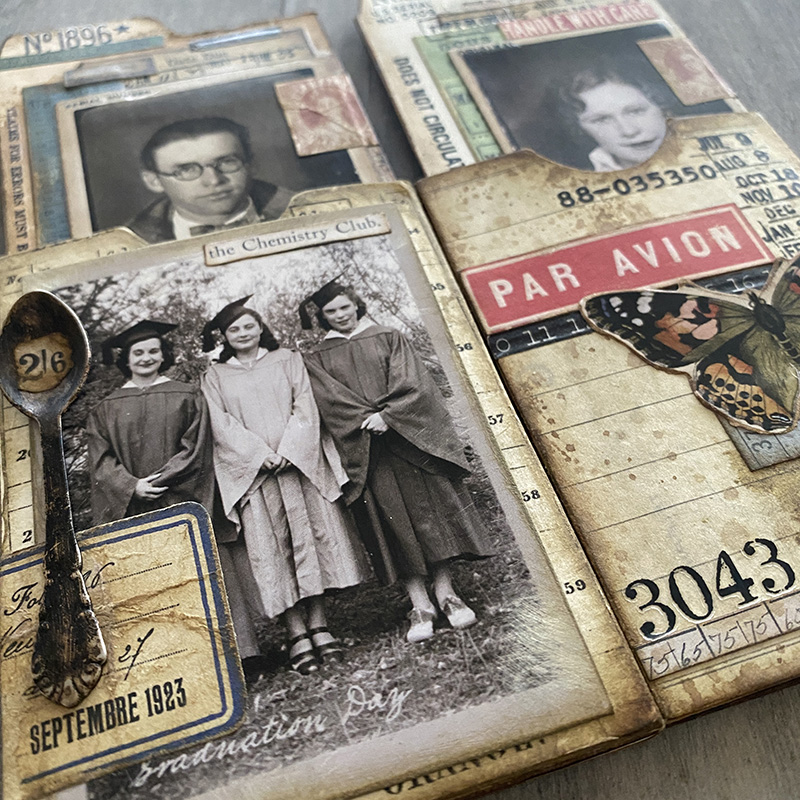
    This is one of my favorite photos from the idea-ology snapshots volume 2 pack. I had already seen the “The Chemistry Club” sticker from the clippings stickers and this photo just perfectly matched the story. I covered a pocket from the file cards pack with palette collage paper. The photo covers the blocks of color on the collage paper but I love that you can see the numbers and writing peeking out around the edges. I wrapped a label from the ephemera set around the front with some remnant rubs added.

    igirlzoe: tim holtz idea-ology 2023
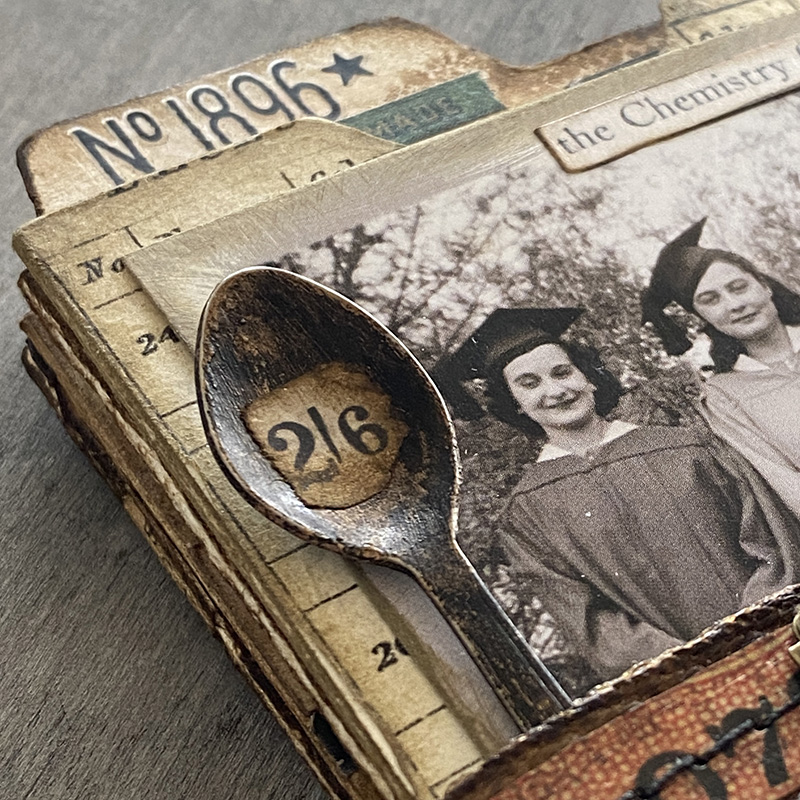
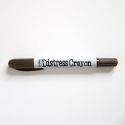
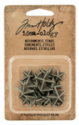
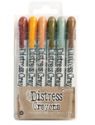
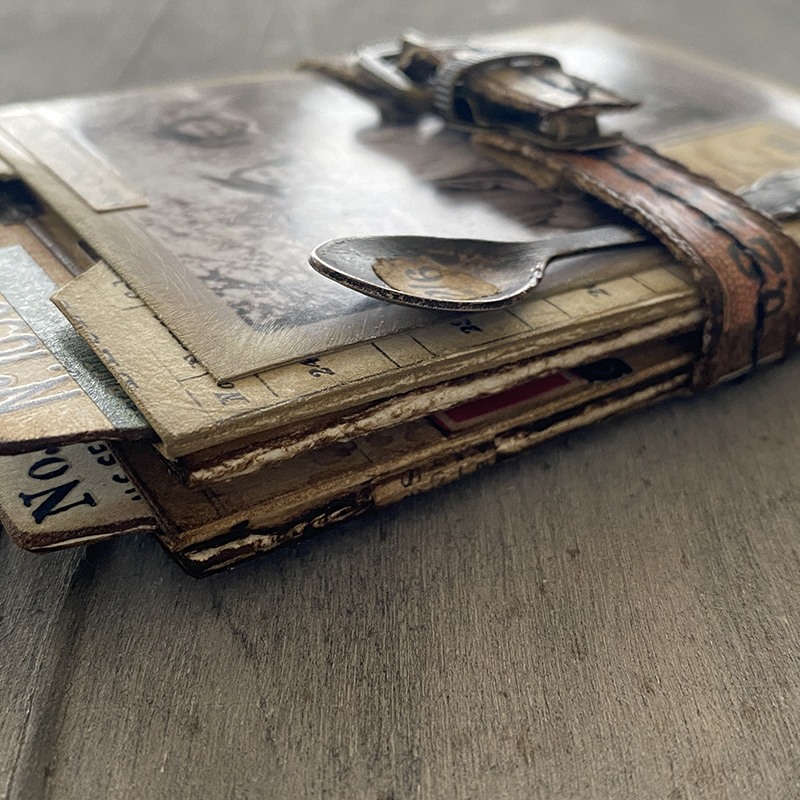
    I added a spoon from the idea-ology silverware pack to the front of the file cards. Covered it in foundry wax and once heated and COOLED, I rubbed distress crayon over the top and then dry brushed black soot paint over the top of that. I added a piece of ephemera and a little more distress crayon. I was really pleased with how this turned out.

    igirlzoe: tim holtz idea-ology 2023
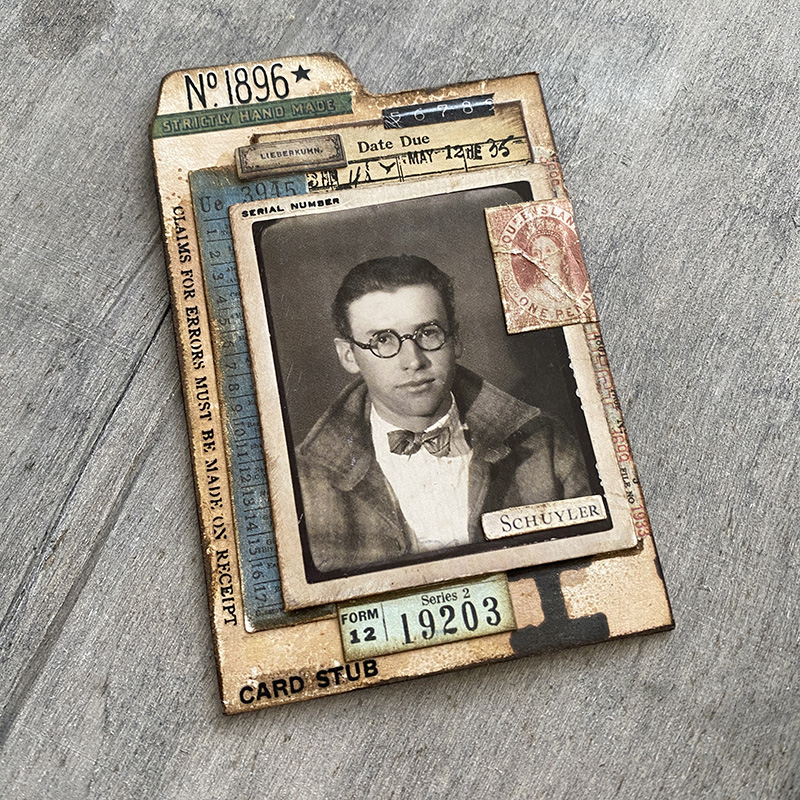
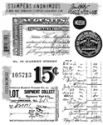
    I absolutely love idea-ology photomatics and they were perfect for my scientist identification cards. I used the index cards from the idea-ology file cards pack, adding ephemera, design tape trims, remnant rubs and clippings stickers to tell the story of scientist Dr Schuyler.

    igirlzoe: tim holtz idea-ology 2023
    I used one of the cards from the idea-ology file cards pack to create the scientists notes. Gluing paper from the backdrops volume 4 paper pack and scored the center to break the paper so the booklet closed easily. I added pieces from the layers, transparencies and ephemera packs. I also added some more remnant rubs, design tape trims and clippings stickers.

    igirlzoe: tim holtz idea-ology 2023
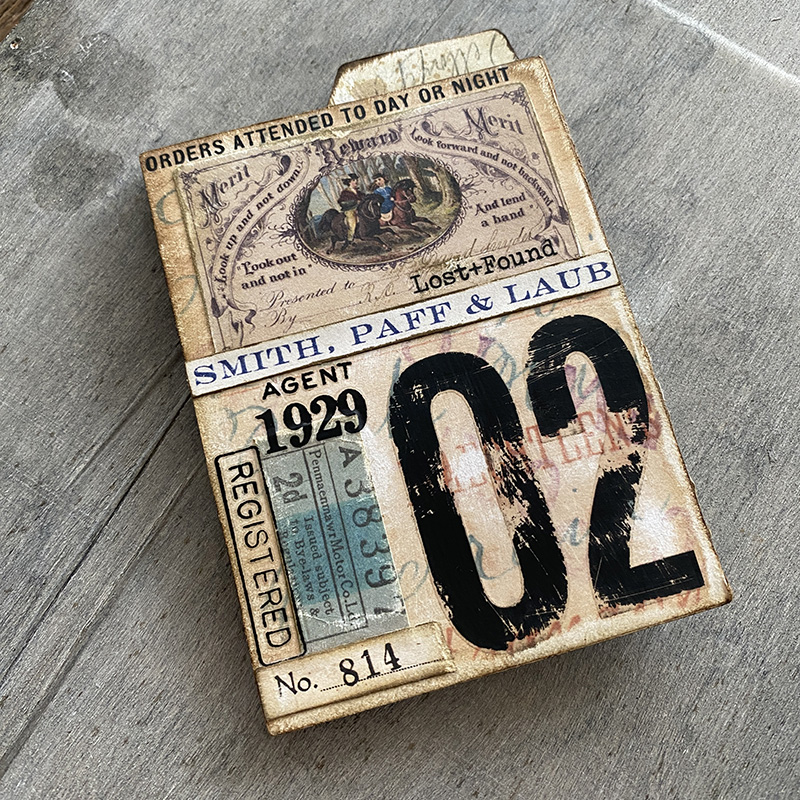
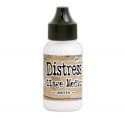
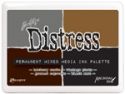
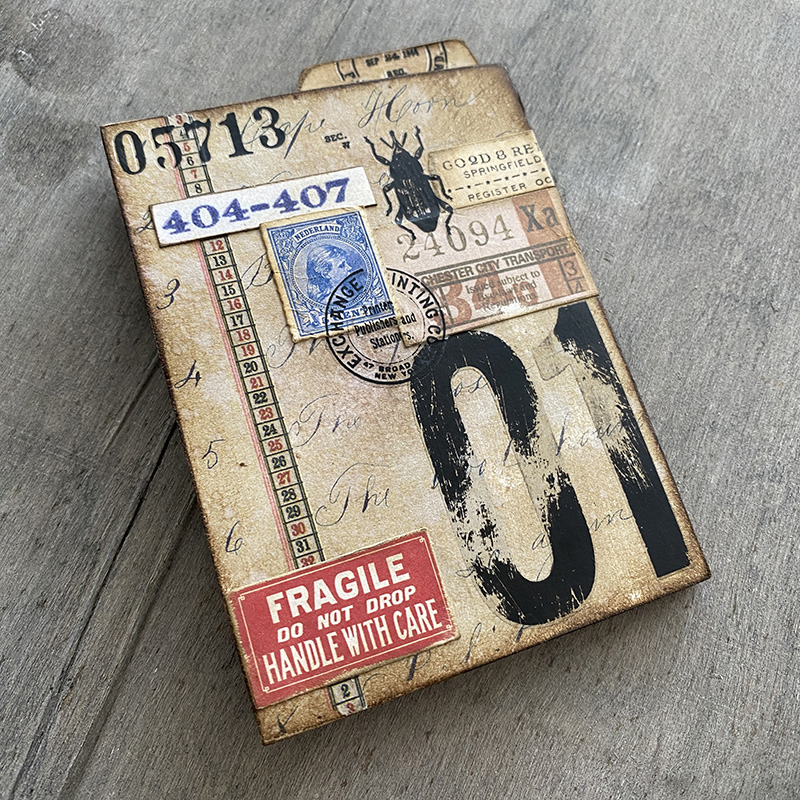
    I glued scientists notes card to the back of the pocket and then decorated the back of the card with paper, ephemera and remnant rubs. I used the new distress sanding disks and mini round blending tool to sand the large numbers. I then used the blending tool with blending foam to blend in a little distress ink over the scuffed sections.

    igirlzoe: tim holtz idea-ology 2023
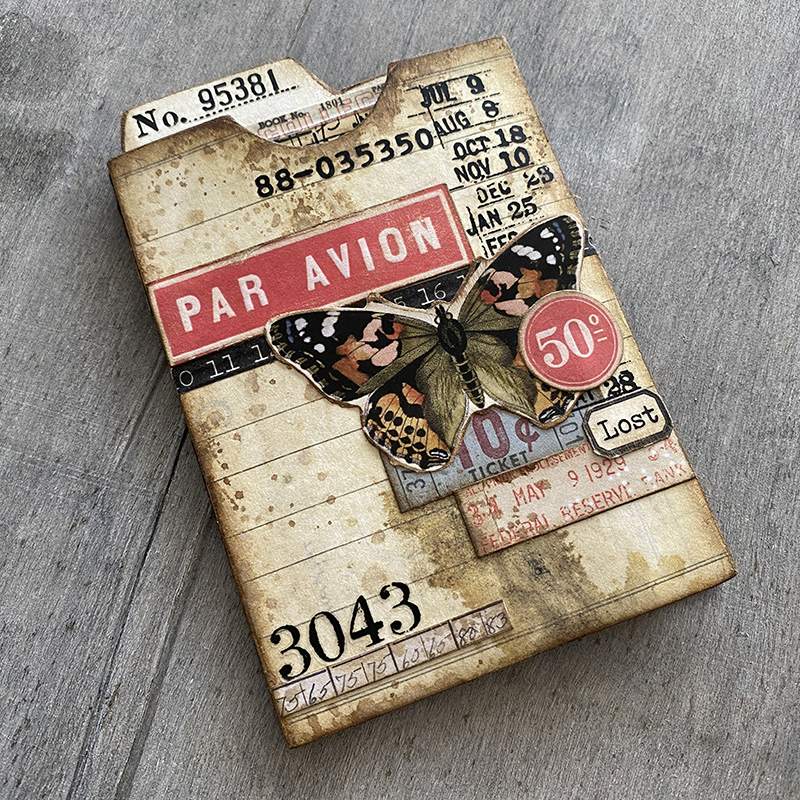
    I decorated the front of the second pocket. That gorgeous grunge is part of the backdrops volume 4 paper pack that I used to cover the front of the pocket. I love using ephemera to tell a story.

    igirlzoe: tim holtz idea-ology 2023
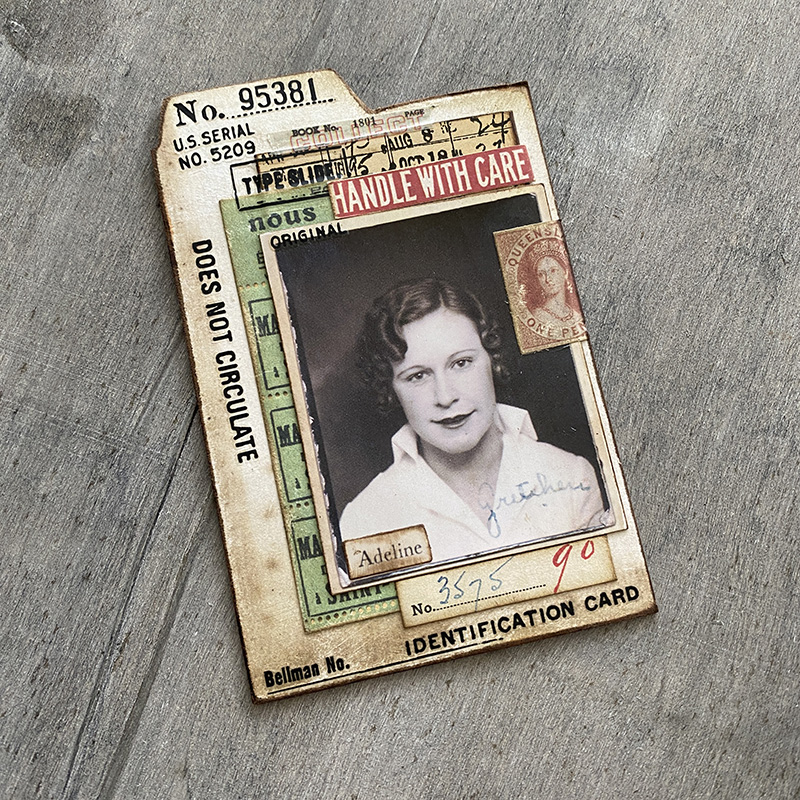
    I used the clippings stickers to name my scientists and the remnant rubs to continue the story. The tickets and postal stamps give an element of travel to the cards. Meet Dr Adeline, she is a founding member of The Chemistry Club.

    igirlzoe: tim holtz idea-ology 2023
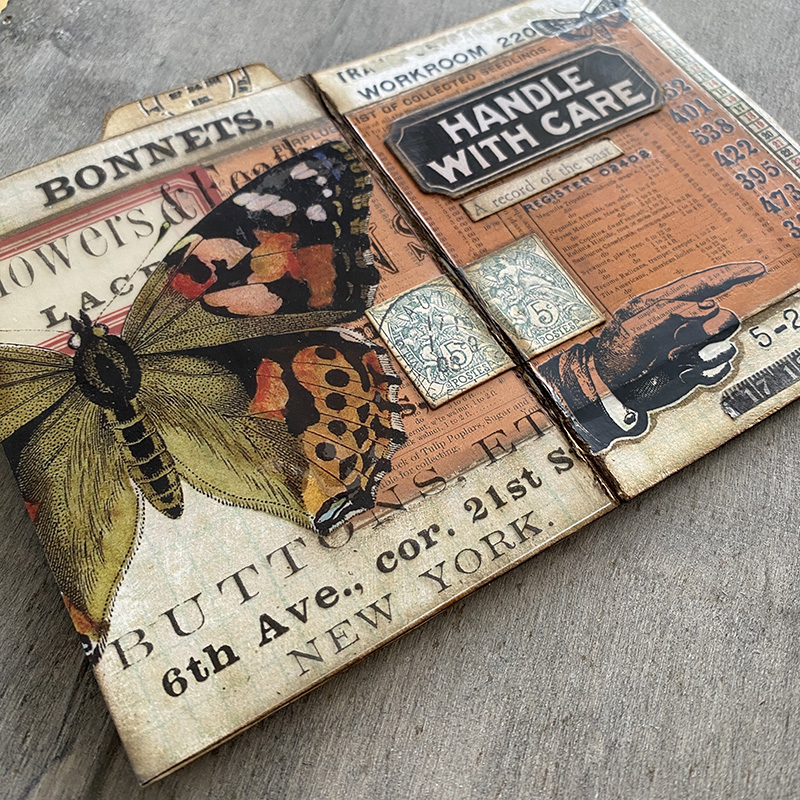
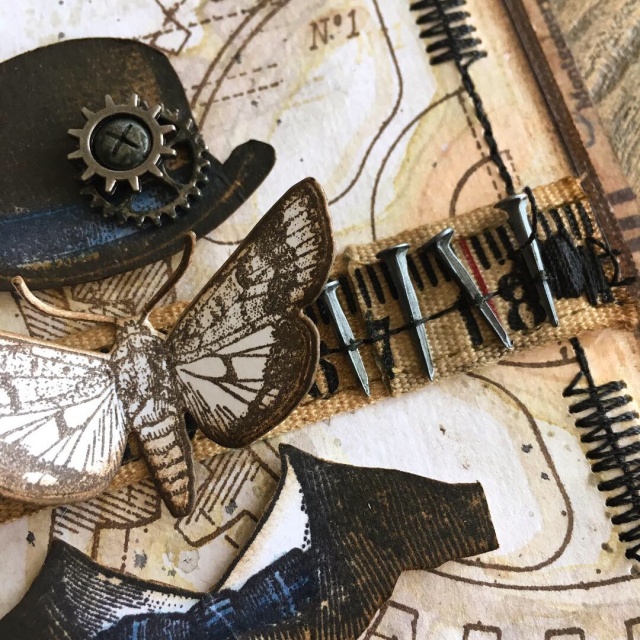
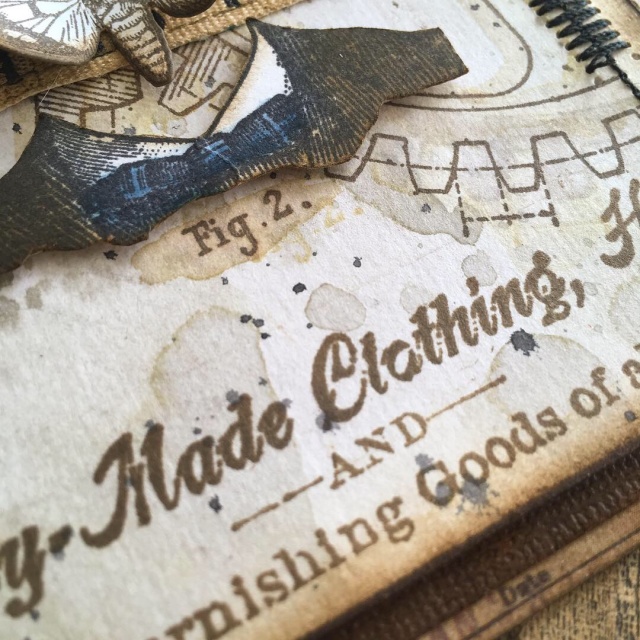
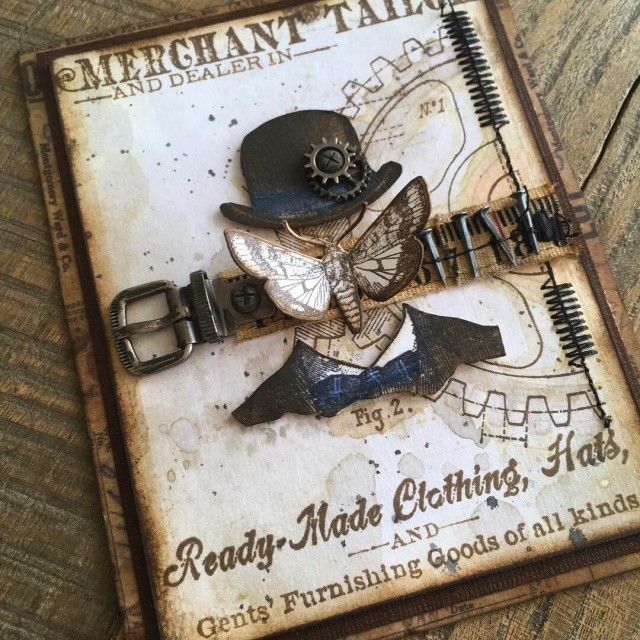
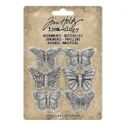
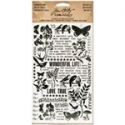
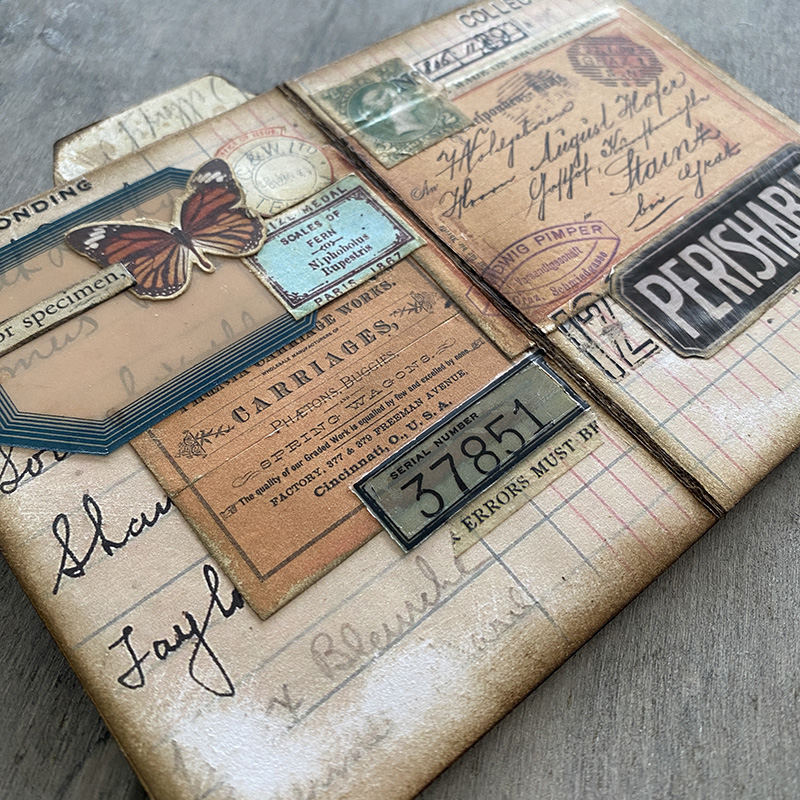
    This was my favorite spread from my file cards. I love that pop of orange from the piece from the layers ephemera and that gorgeous transparency. I used distress collage medium underneath the butterfly to attach the transparency without the glue showing. I added remnant rubs, design tape trims and ephemera to build the story.

    igirlzoe: tim holtz idea-ology 2023
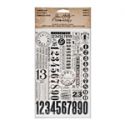
    I love this paper from the backdrops paper pack. I used tape from the trims design tape up the side which perfectly matched and some more ephemera and remnant rubs. I really love those larger number rubs and it’s worth picking up an idea-ology remnant rub tool, and some extra remnant rubs.

    igirlzoe: tim holtz idea-ology 2023
    On the back of the index cards I added paper from the backdrops volume 4 and 5 paper packs, ephemera, layers, design tape trims and remnant rubs over the top. I love the collage strips because you can trim them into individual strips and they make fantastic ephemera pieces and I love adding he remnant rubs last to bring it all together.

    igirlzoe: tim holtz idea-ology 2023
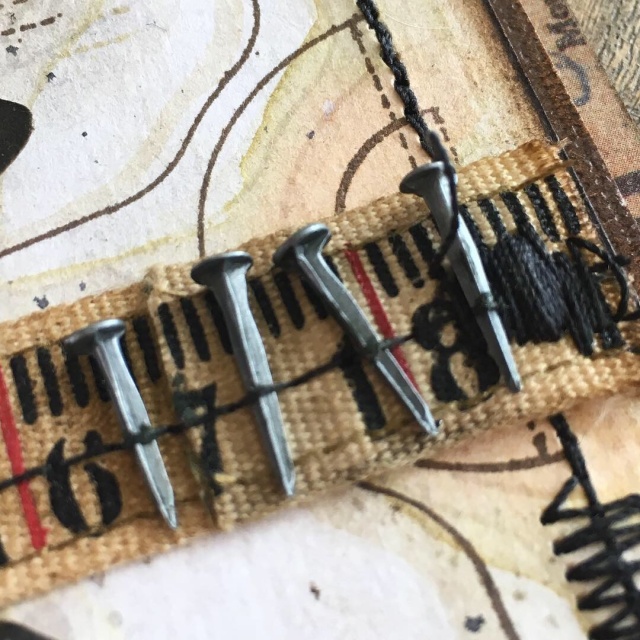
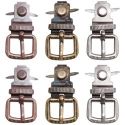
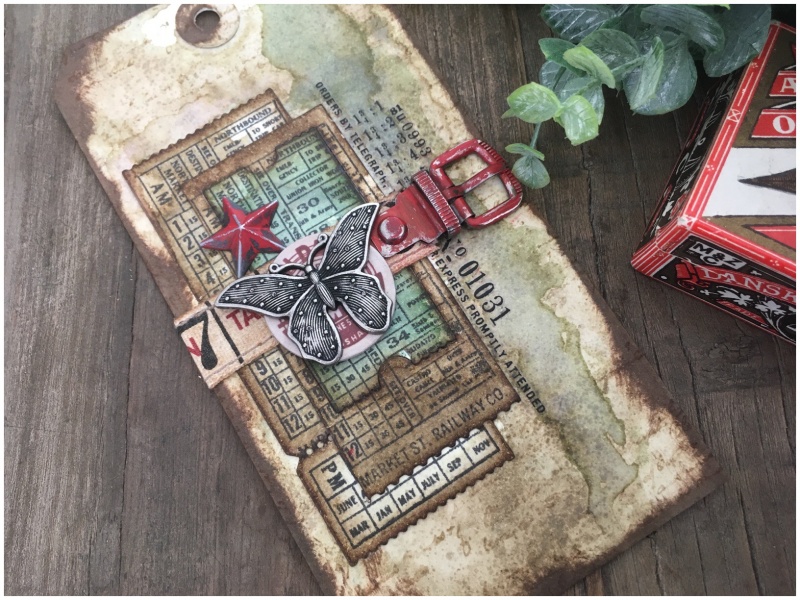
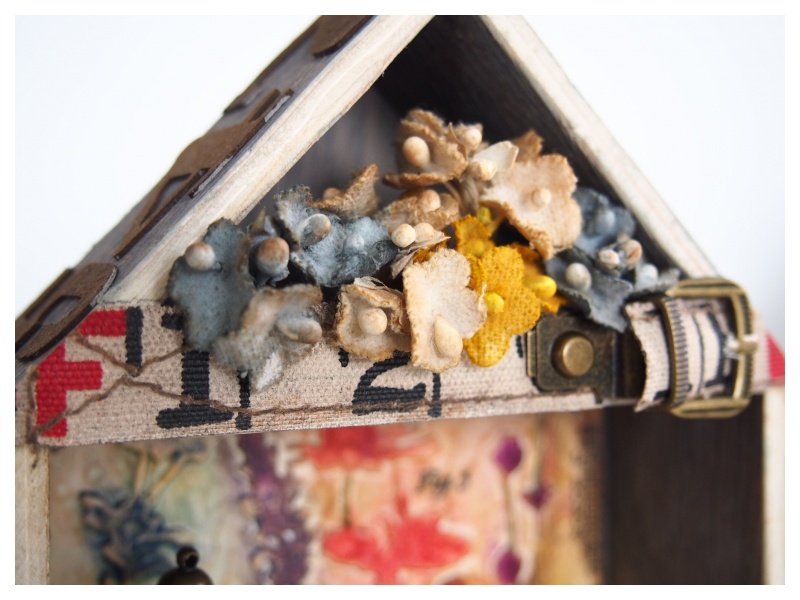
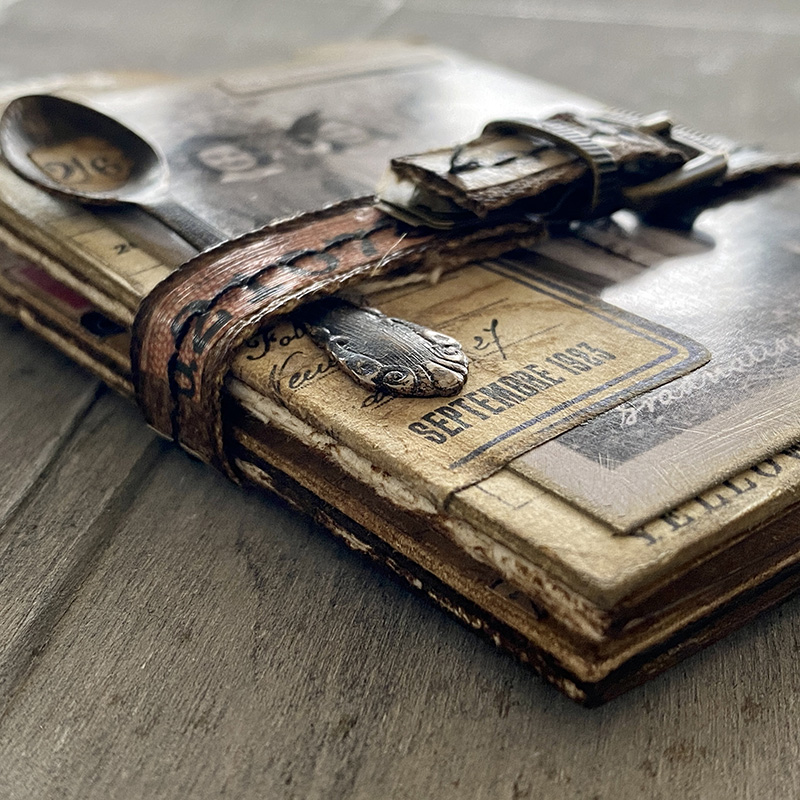
    The scientist identification cards, pockets and experiment notes were ready to be pulled together into a collection and that’s when I had an idea to make a strap. This was inspired by the very first ever craft class that I took in Coventry with Tim Holtz. We made an awesome tag booklet and were given these cool buckles and some measurement tape to make a strap and I wanted to recreate the look using ephemera.

    igirlzoe: tim holtz idea-ology 2023
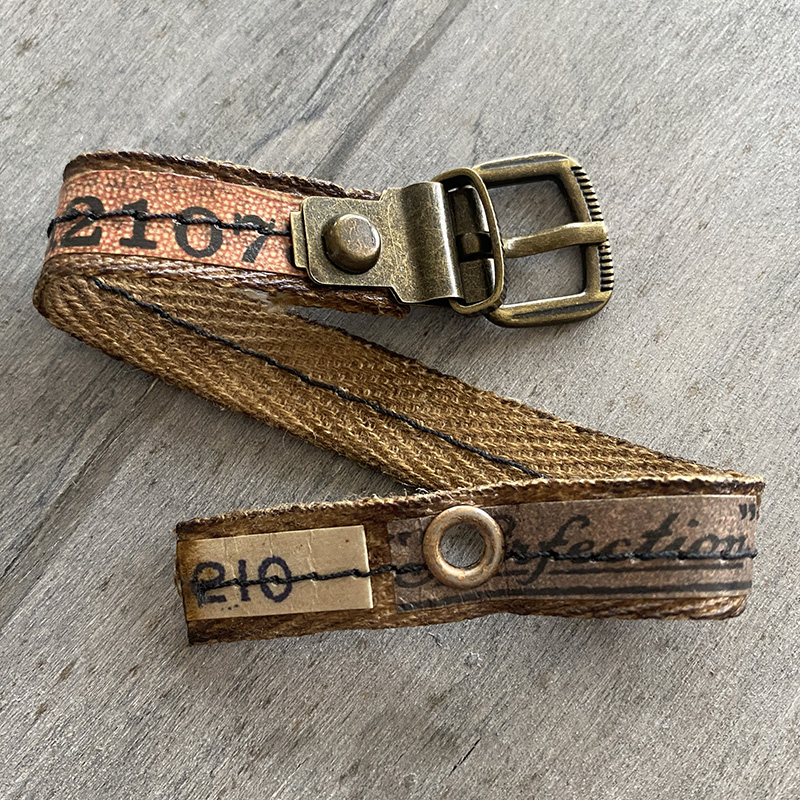
    I glued on pieces of ephemera from the collage strips pack onto seam ribbon and added a good layer of distress collage medium over the entire strap, setting aside to dry overnight. I then stitched along the center of the strap and added an idea-ology buckle onto the end. These buckles were retired some time ago but are still available from retailers if you look for them.

    igirlzoe: tim holtz idea-ology 2023
    Thanks for stopping by and let me know if you have any questions.
    Zoe


    affiliate links used at no cost to you


  2. 9th November, 2022

    Don’t Rain On My Plaid

    Hello friends, hope your week is going well. I’m sharing another of my makes shown during the Tim Holtz LIVE launch of his New Distress, Lumberjack Plaid. You can see the replay and makes over on Tim’s blog. Make sure you watch to the end! 😉

    igirlzoe: tim holtz lumberjack plaid distress ranger ink
    I was inspired by my good friend Vicki Evans clever alteration of the Woodland Santa into a Lumberjack on it’s release and she graciously allowed me to use her idea and didn’t ask any questions. You can see her awesome make on instagram. I started with an idea-ology vignette tray and added strips of distress watercolor cardstock, embossed with the Lumber 3D folder and blended with walnut stain and ground espresso distress ink.

    igirlzoe: tim holtz lumberjack plaid distress ranger ink
    Ok so a funny story about this umbrella… I’ve been mis-pronouncing “plaid” for a while now and when I began making this I was going to add some words above the “PLAID” that I made with the Alphanumeric Varsity dies.

    “Don’t rain on my PLAID”… my sweet husband (trying not to laugh when I told him my plan) said “it’s not pronounced “PLAYED” it’s pronounced “PLAD” … “Don’t rain on my PLAD” didn’t quite work as well! After some choice words that rhyme with “LUCK” I decided to just go with it and omit the “don’t rain on my…”

    igirlzoe: tim holtz lumberjack plaid distress ranger ink
    Without my mistake, I wouldn’t have used the umbrella which I love. It’s from The Gent thinlits die set. I blended in Lumberjack Plaid distress ink and stamped with black soot distress archival ink using a stamp from the Plaid and Nordic (CMS243) Stamp set. I overlaid the umbrella outline which was stained with ground espresso distress ink.

    I used adhesive foam under the center of the umbrella and distress collage medium at the very edges to make the umbrella curved.

    igirlzoe: tim holtz lumberjack plaid distress ranger ink
    To decorate the outside of the vignette tray, I added strips of distress watercolor cardstock with Lumberjack Plaid distress ink blended in and stamped with the same plaid stamps as on the umbrella. I sanded lightly to give a distressed look.

    igirlzoe: tim holtz lumberjack plaid distress ranger ink
    I altered the Woodland Santa die into a lumberjack stamping his shirt with the plaid stamp and adding Lumberjack Plaid distress ink to his shirt and hat. The rest of him was colored using distress inks in faded jeans, ground espresso, walnut stain and black soot. The buckle and shirt buttons were cut from idea-ology metallic kraftstock. Thanks again to Vicki Evans for her cool inspiration and willingness to share.

    igirlzoe: tim holtz lumberjack plaid distress ranger ink
    I added Lumberjack Plaid distress paint to an idea-ology lantern. I’m not going to lie, it was pretty bright so I dry brushed ground espresso distress paint over the top to tone it down and make it dirty. When almost dry, I rubbed with my finger to remove parts of the paint. I thread a set of idea-ology tiny lights through the back of the idea-0logy vignette tray and up through the wood slice into the lantern. I cut all but 3 lights off the tiny lights set and twisted them to fit inside the lantern. The lantern sits perfectly on the idea-ology wood slices.

    igirlzoe: tim holtz lumberjack plaid distress ranger ink
    Thanks for stopping by and let me know if you have any questions.

    Zoe


    affiliate links used at no cost to you


  3. 16th March, 2019

    Indistinguishably Dapper

    Hello friends. I’ve been in a little bit of trouble this morning over a small issue of sewing through nails without safety glasses! Moving swiftly on… I am sharing a card I made using the Dapper (CMS267) and Distinguished (CMS371) stamp sets. Until Distinguished was released in January, Dapper was my favourite and most used set. The hat and coat are just my jam. Distinguished has been such a happy surprise and I have loved playing with the new wardrobe, but I had to go back and grab the background stamps from the Dapper set.

    iGirlZoe: Tim Holtz, stampers anonymous, distinguished stamps, ideaology, entomology, dapper, stamps, mixed media, card
    The background is distress watercolor cardstock dragged through hickory smoke and frayed burlap distress spray and dried with a heat tool. Then tapped through the droplets a second time and dried again. Using black soot distress ink and a waterbrush flick watered down ink at the card to give some darker specs. Blend in a little frayed burlap distress ink and edge with double espresso distress archival ink. The mini ink pads are perfect for edging cards as their size makes them easy to handle and you don’t fumble the ink pad across the front of your card. Hands up who’s done that?!

    iGirlZoe: Tim Holtz, stampers anonymous, distinguished stamps, ideaology, entomology, dapper, stamps, mixed media, card
    The hat and coat were stamped from the Distinguished (CMS371) stamp set and the moth from the Entomology (CMS328) stamp set and die cut with the matching thinlits die set. I have noticed that die cutting them makes them much stronger versus fussy cutting them. I added gears from the assemblage range to the hat and slipped a hardware head in, it fit perfectly. All grunged with little swipe from walnut stain distress crayon. The hat and coat were coloured with faded jeans and frayed burlap distress marker and ink.

    iGirlZoe: Tim Holtz, stampers anonymous, distinguished stamps, ideaology, entomology, dapper, stamps, mixed media, card
    Okay so this next bit is what got me into a little bit of hot water this morning thanks to my instagram post. I decided at 4am that I was going to sew nails to ruler ribbon on my singer heavy duty sewing machine! I’m still slightly dumbstruck that it worked! Sewing level up for me! I now need more idea-ology ruler ribbon and vignette hardware, because those nails are awesome!!

    iGirlZoe: Tim Holtz, stampers anonymous, distinguished stamps, ideaology, entomology, dapper, stamps, mixed media, card
    The gears from the Dapper (CMS267) set I stamped twice using the brushless watercolor technique from Tim Holtz’s Creative Chemistry online classes. I love referring back to techniques from it. Lifetime access, check it out. The advert stamp I made work for me by using the travel stamp platform and inking individual lines of text and stamping. I’m a bit of a straight lines freak so the stamp platform has been a total game changer for me. I used vintage photo distress archival ink and stamped twice for a bolder image on some lines, another reason to love the stamp platform.

    iGirlZoe: Tim Holtz, stampers anonymous, distinguished stamps, ideaology, entomology, dapper, stamps, mixed media, card
    The base layer is scrap card edged with design tape. It’s such a great way to create a layer and the design tapes go a long way.

    Thanks for stopping by. Enjoy your weekend.

    Zoe


  4. 26th May, 2018

    Tim Holtz Ticket Booth

    Hello friends. I hope you’re enjoying your weekend, (a nice long one for many of you), and finding some time to create. I’ve got a SATURDAY SHOWCASE over at Frilly and Funky, showcasing the Tim Holtz Ticket Booth Stamps and accompanying Framelits dies.

    iGirlZoe: Tim Holtz Ticket Booth
    iGirlZoe: Tim Holtz Ticket Booth
    iGirlZoe: Tim Holtz Ticket Booth
    If you would like to see more, pop over to Frilly & Funkie.

    Have a great weekend.
    Zoe


  5. 5th April, 2017

    Frilly & Funkie: Count Me In!

    It’s Wednesday and time for the funkie side of the design team to share our projects for the current challenge over at the Frilly and Funkie Challenge Blog!

    The current challenge is hosted by Jenny (Pushing the Right Buttons), who has chosen the theme COUNT ME IN! …Jenny says, “Numbers are a huge part of our everyday lives so it is no surprise they are also often included in our creative ones too. For this challenge you need to use your choice of numbers to add that special ‘sum-thing’ to your vintage or shabby chic project. Make them count as part of the design, not just a last minute addition!

    iGirlZoe : Count Me InI admit that when I saw this challenge I was delighted, as I love numbers. I wanted to create a Spring home decor piece to hang on the wall.

    I started by painting a vignette house with iced spruce distress paint, with water added to dilute and create a wash and set aside to dry.

    iGirlZoe : Count Me In
    The background was created with a piece of manila heavystock, cut to fit the vignette house. I die cut wildflowers from heavystock and adhered them to the background with matte collage medium. Then painted another layer of collage medium over the top. Once dry, I began adding distress crayons to the flowers, working in small areas and blending with my finger.

    iGirlZoe : Count Me In
    I sanded the edges, blended in a little vintage photo distress ink and added water droplets using a distress spray bottle. To continue with the challenge theme, I added remnant rub numbers. Then adhered the panel into the vignette house with matte collage medium.

    iGirlZoe : Count Me InI used the stencil numbers thinlits die set to create side panels for the vignette house from heavystock. Once die cut, I covered with a layer of matte collage medium. Once dry, I blended in distress crayons.

    iGirlZoe : Count Me InUsing a cotton bud with a tiny mist of water, I removed some of the crayon to create highlights. I then adhere to the side panels of the vignette house.

    iGirlZoe : Count Me InI painted a vignette finial with picket fence distress paint and then added vintage photo distress ink to areas to age. I added a mini plaquette with twine, a decorative dome with a letterpress block inside which was painted with weathered wood distress paint and sanded when dry. I adhered a butterfly to the top of the letterpress and a little moss to the bottom of the dome.

    iGirlZoe : Count Me InFinally I added another letterpress, which I had painted the same way as before and added some of the new paper dolls. These things are selling like hotcakes and I can see why!

    iGirlZoe : Count Me In
    For the roof I added numbers cut from grunge paper using the wordplay die. I confess to hoarding grunge paper and grunge board since it was discontinued. I used walnut stain distress stain to colour the numbers. I find the stains work really well with wood and grunge board/paper.

    iGirlZoe : Count Me In
    I decorated the top of the vignette with some bouqet findings, which I coloured with distress sprays. I added a ruler ribbon which I added a belt buckle to and adhered with glossy accents.

    iGirlZoe : Count Me InI added corners which I rubbed gold wax onto. Just add a wall hanger to the back it’s ready to hang up for Spring.

    iGirlZoe : Count Me In
    I hope you will find time to join in the challenge and pop over to Frilly and Funkie challenge blog to see the rest of the DT’s projects. All the products I used are available from The Funkie Junkie Boutique.

    Thanks for stopping by.
    Zoe


    Save

    Save

    Save